Every purchase made through our Amazon Affiliate Page helps support this site

Jamie
-
Posts
1,467 -
Joined
-
Last visited
-
Days Won
54
Content Type
Profiles
Forums
Downloads
Gallery
Events
Store
Articles
Blogs
Everything posted by Jamie
-
I didn’t know you can put it out with the trash. I’m gonna have to keep that in mind. I really like the curve in the top rail, that little detail really adds to the look. Excited to see the fronts on this. Great work!
-
That is a lot of dust chips! How big of barrel do you have? What do you do with your dust?
-
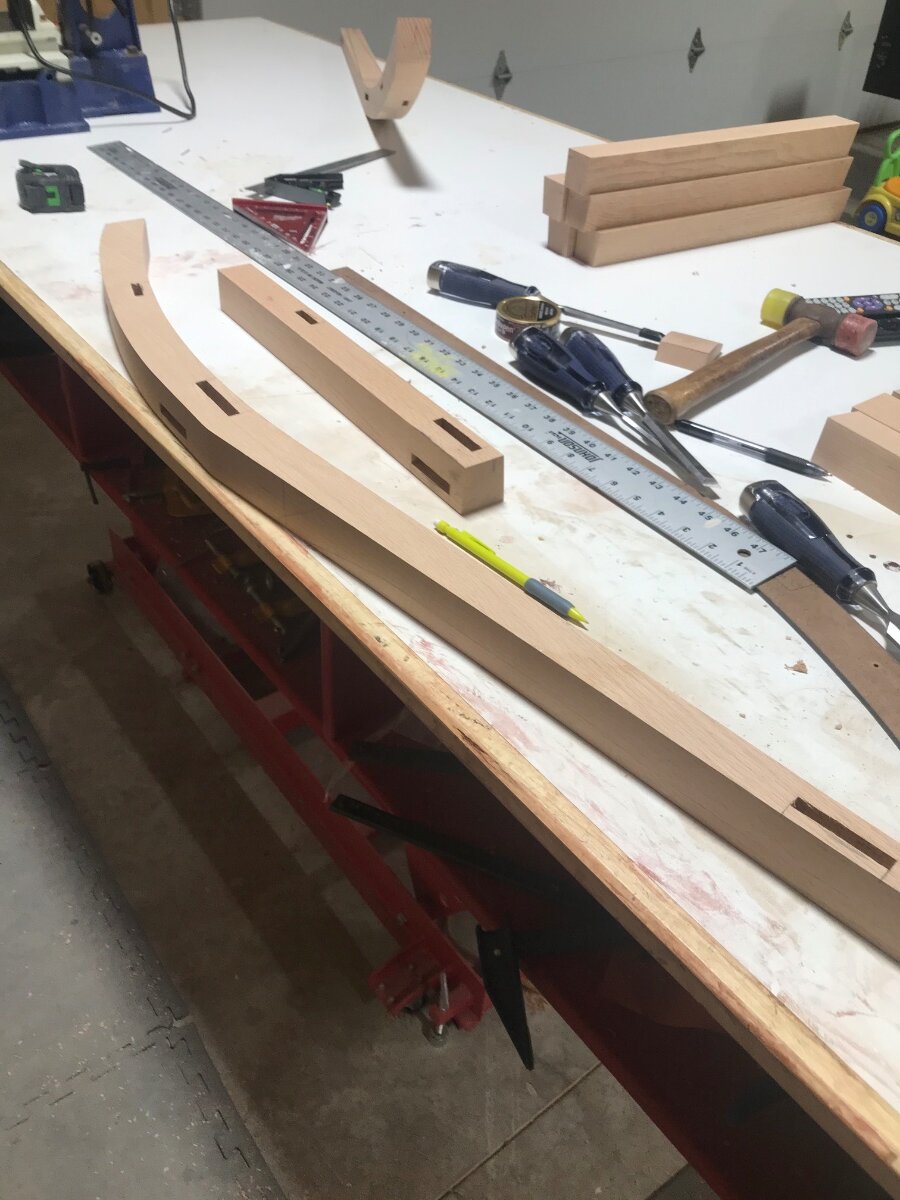
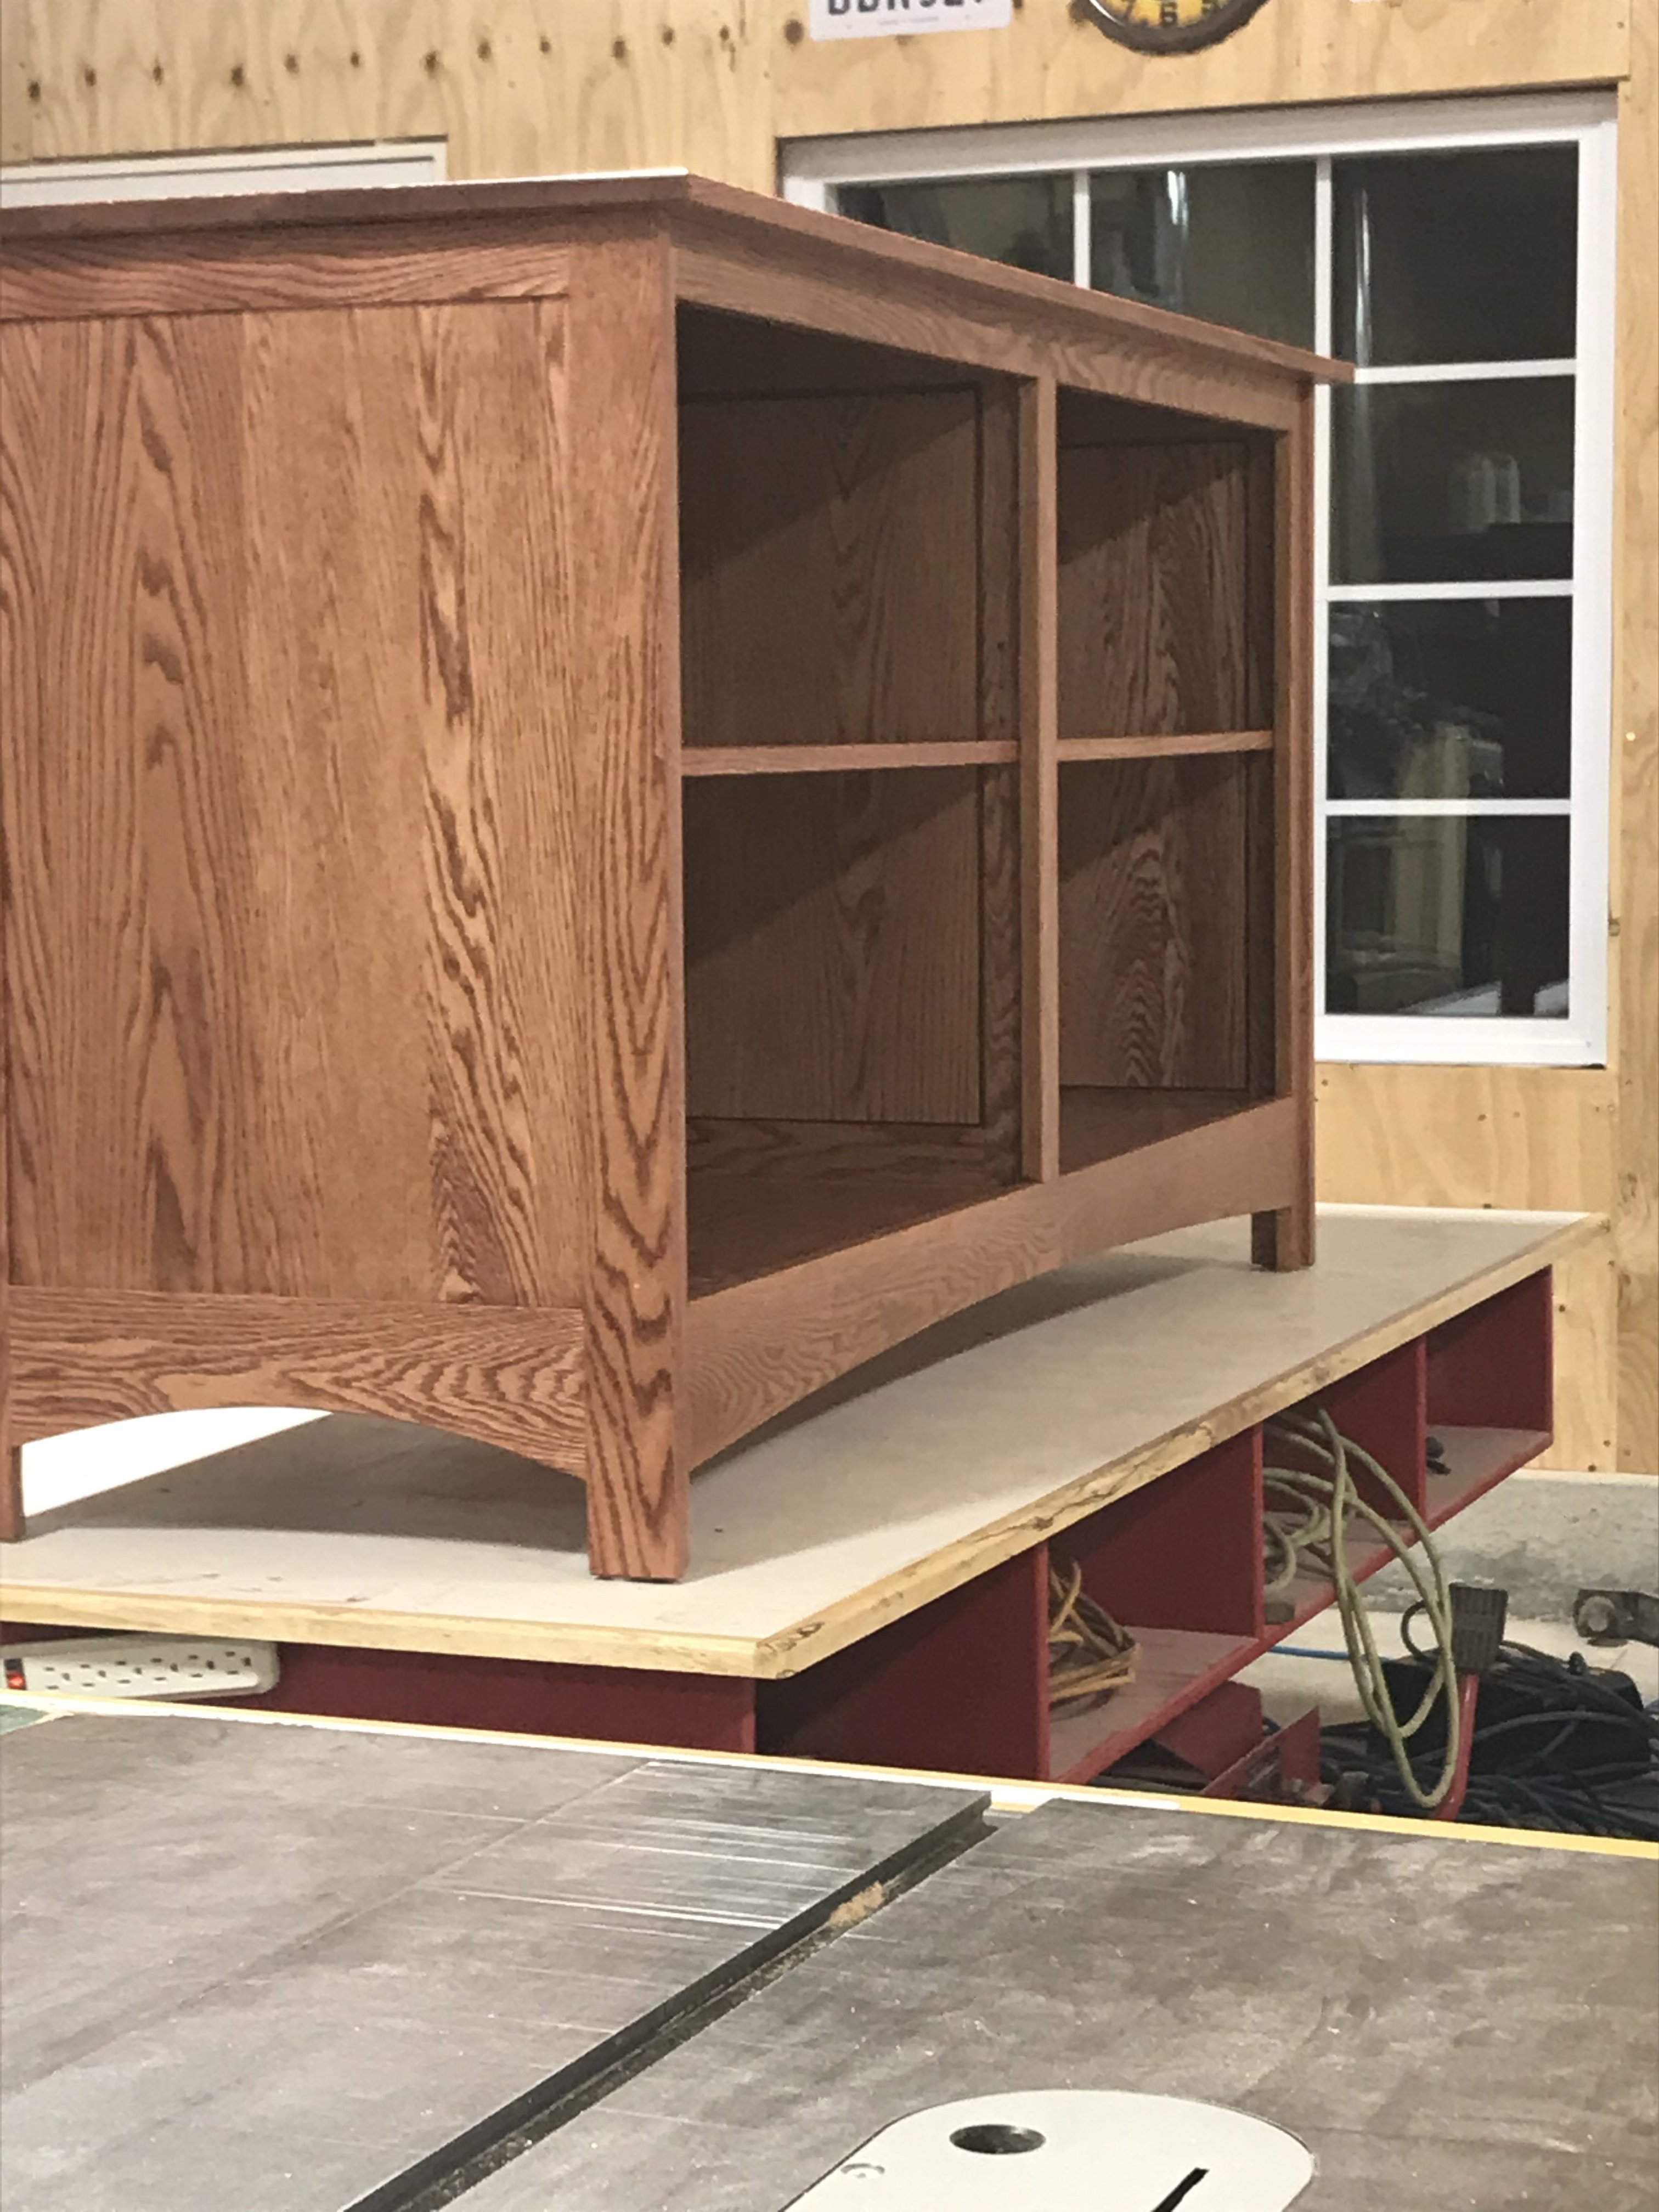
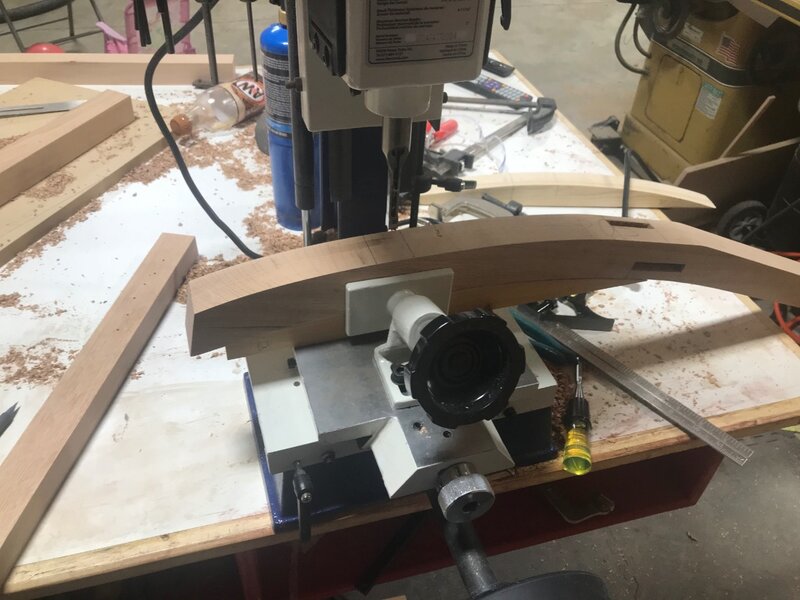
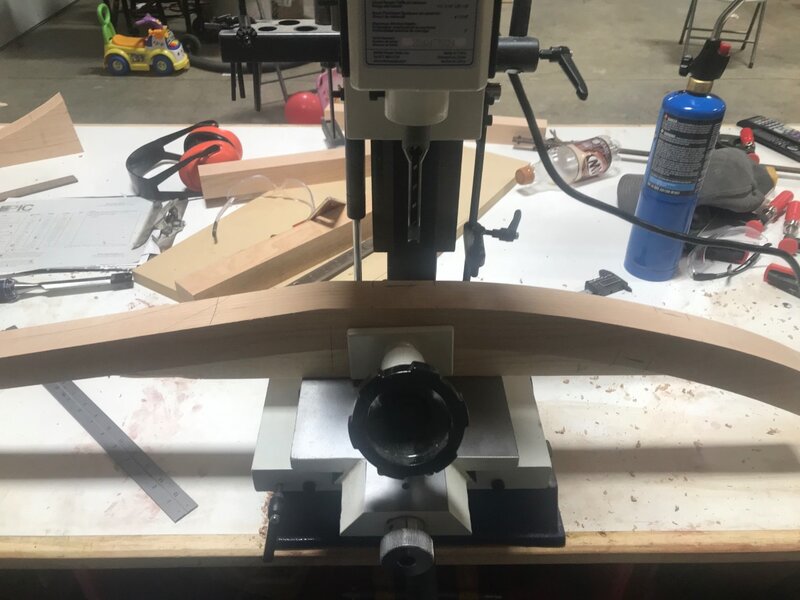
More mortise cutting went on all week. Would get around a hour of shop time after work. Used a few blocks cut to match the back legs to hold them in position. There are a couple flat spots on the legs to make the alignment go the mortises fairly nice. The mortises on the bottom of the leg took moving the hcm to each end of the bench to make it possible. The angle of the leg would cause the top section of the leg to hit the bench top. I did end up getting them all cut. Here I am doing a little clean up on them. Just cleaning out some of the corners and sides of the mortise walls. Cut a taper on one set of the legs to see how they would look. Used the bandsaw to cut it with the jointer to clean it up.


-
Did you get the Blum drill jigs?
-
Like the look of the dowels! How do you like working with the under mount slides? Any challenges with them versus side mount?
-
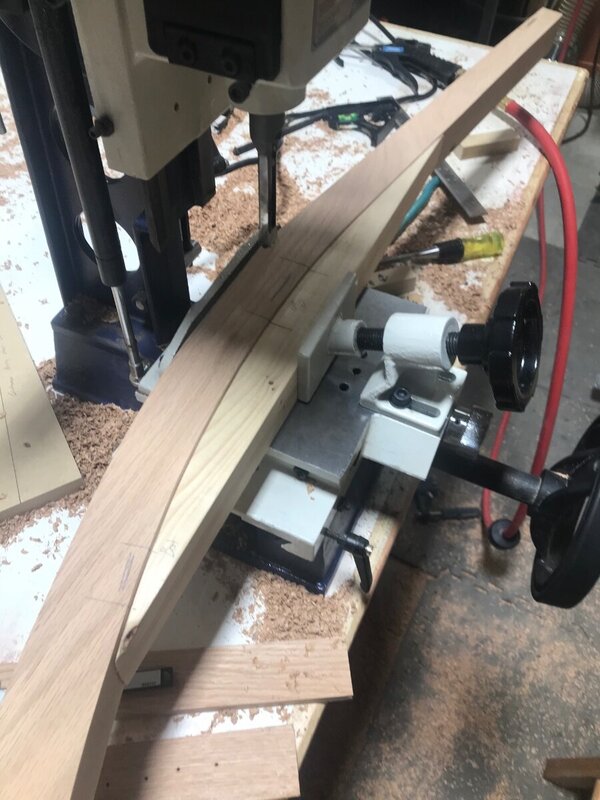
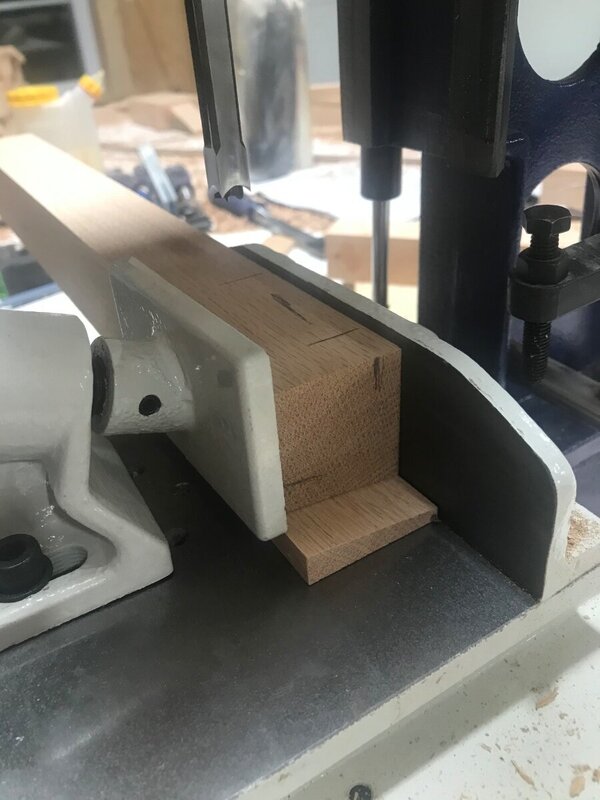
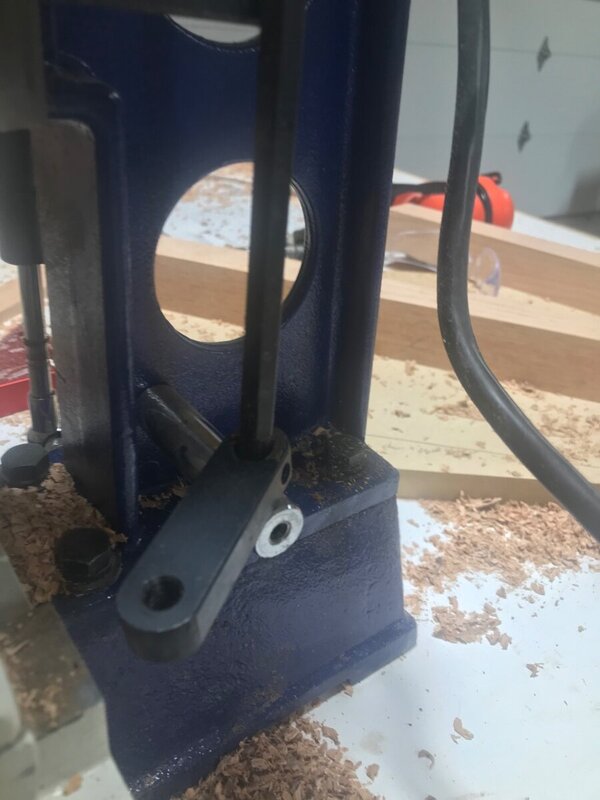
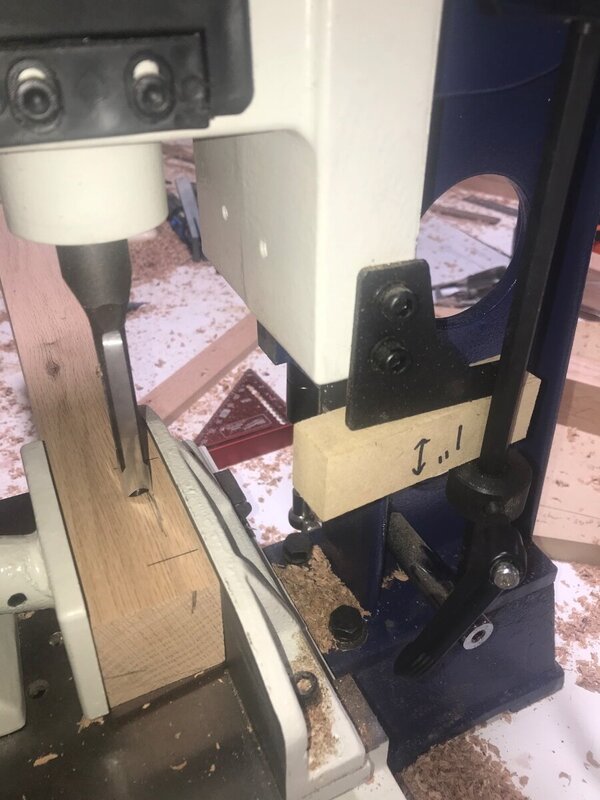
Got to work tonight cutting the mortises. Started with the mortise on the back leg that attaches the side seat rail. Had to make a template to support the back leg. Template has a couple marks on it to line it up with the cress rail mortise which made for a pretty easy process. Just had to carry the line around the template to work for both the left and right legs. To mortise the front legs which have a bevel cut, I made a wedge to bring the face square to the chisel. All hell broke free about half way through the front legs. The depth stop on the rikon was moving a little on me which wasn’t a big deal till I tried to snug it up some. Ended up stripping out the screw. Thought I was done till I got parts to fix it but got looking at it and took the stop off of the side movement stops. Was the same size rod so fit perfectly. The smaller stop actually works better than the factory depth stop. Does not move at all. The factory one with its long arm seemed to have quite a bit of flex in it. The whole that goes on the rod is to big for the rod along with a small set screw holding it gave it some slop. One tip I learned from epic woodworking is to cut a spacer to set the depth of the mortise machine. Just set the bit and chisels down on your piece before cutting and then use the spacer to set the depth. Works like a charm. I even cut a few other spacers to set the distance of the chisel to the fence. With the way the clamp is on this mortiser it’s hard to get a measurement.

-
Nicely done! Know that process and the struggle that goes with it. You feel like Clark Griswald putting up Christmas lights on the ladder. Not sure what hole to put your arm through!
-
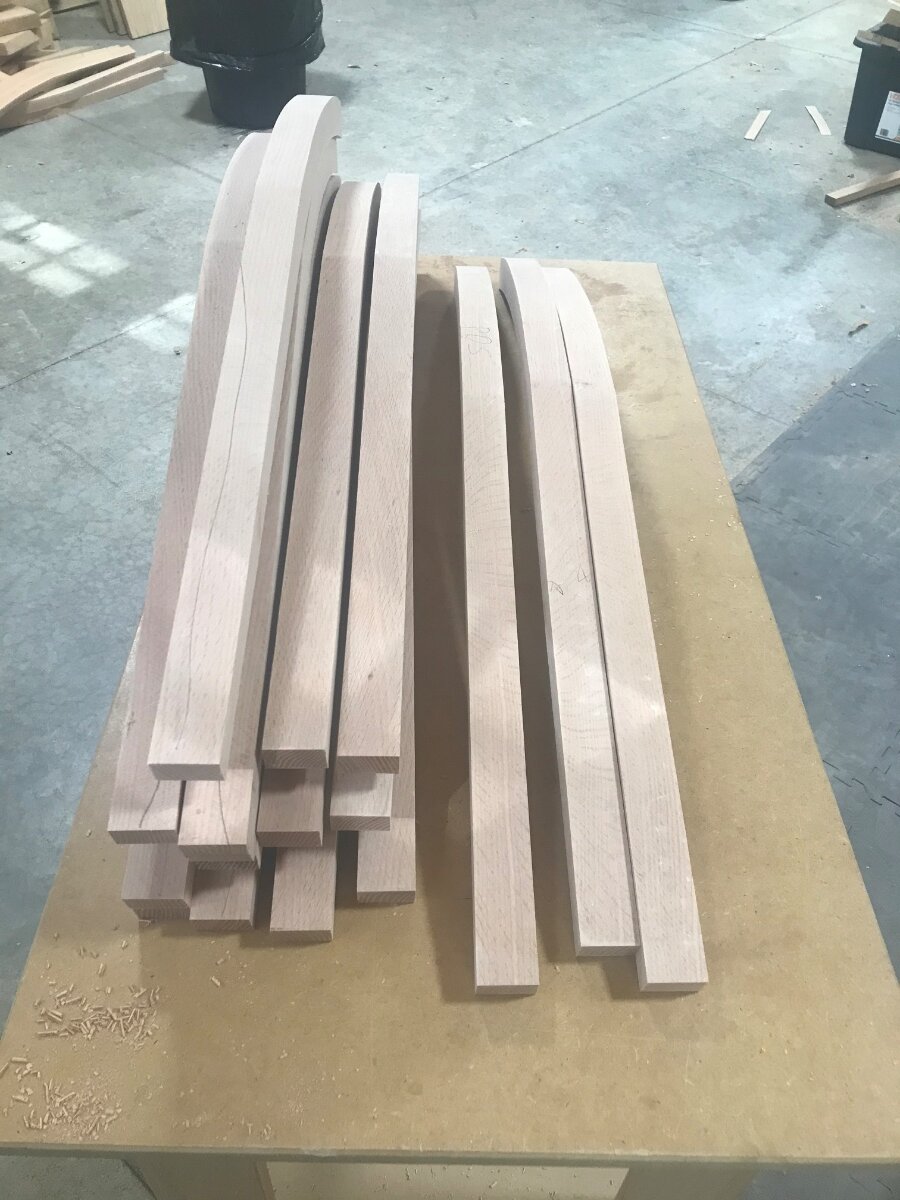
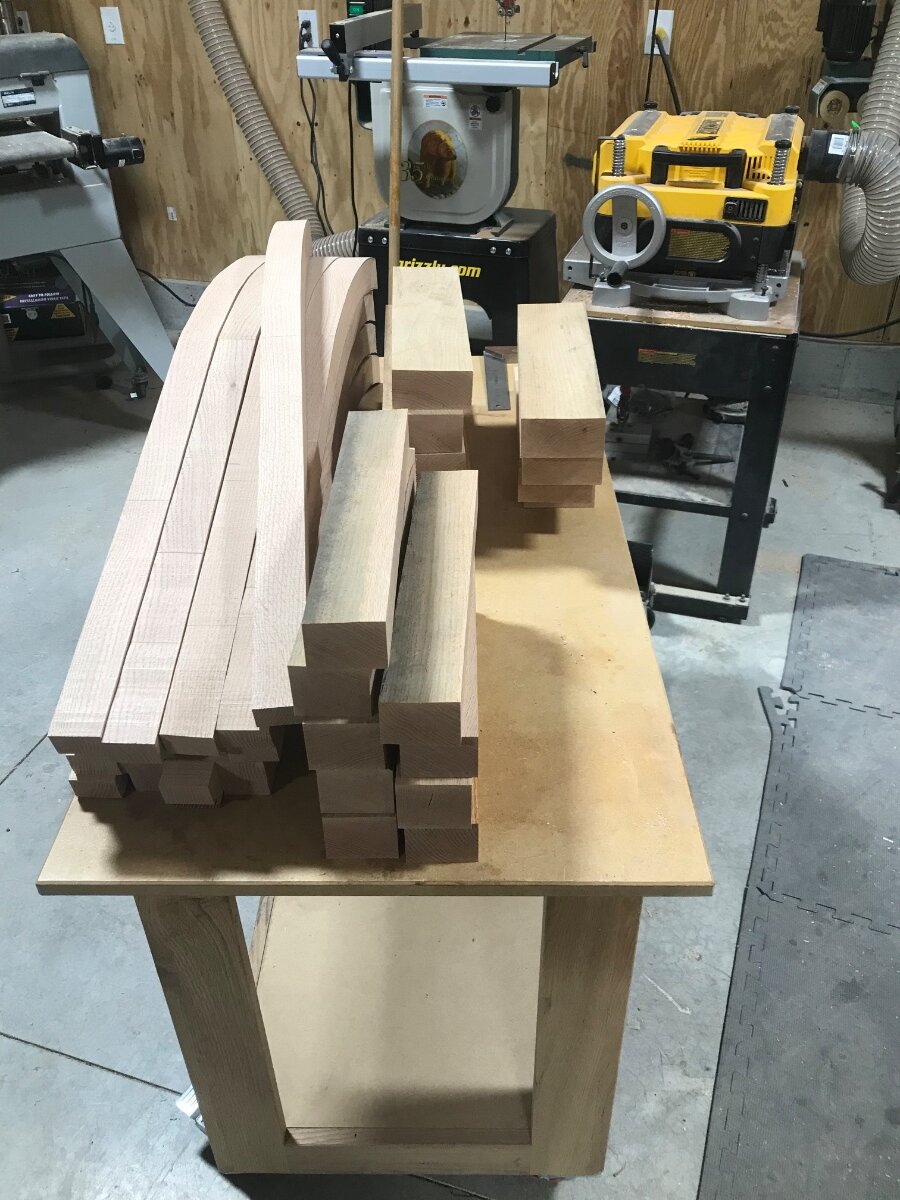
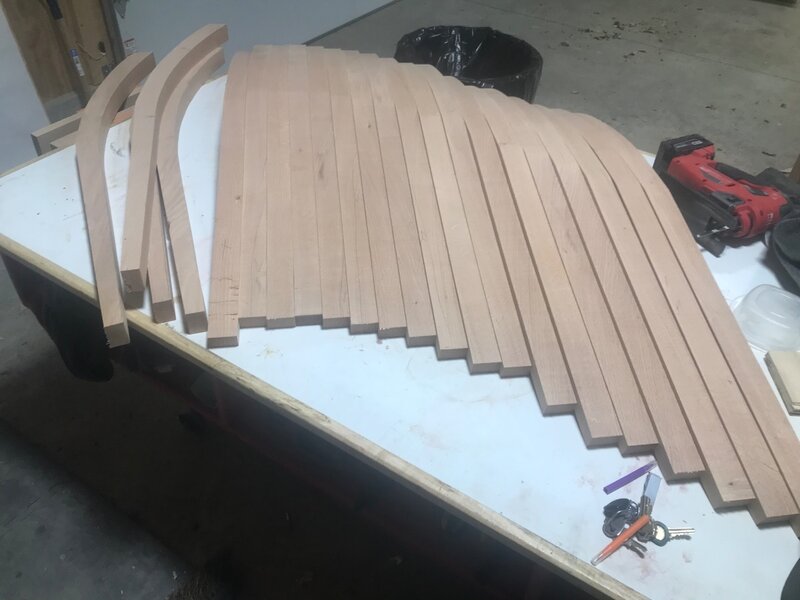
Got to play quite a bit in the shop today. Started off by sanding the faces of the legs that had some router marks in them. Also ca glued the shake cracks. Overall I made 23 leg blanks to get the final 16. The legs sanded up After the sanding I had to clean the shop up some. Had a full dust barrel and cleaned the filters. I think that is the worst job in the shop! Moved on to matching the sets of legs up and marked out the mortises. Used the template that I made to lay them all out Also matched the legs to the front legs. Need to cut a bevel on the front legs yet and lay out the mortises on them. Looking forward to using the rikon to cut all these.


-
That is some good looking ash!
-
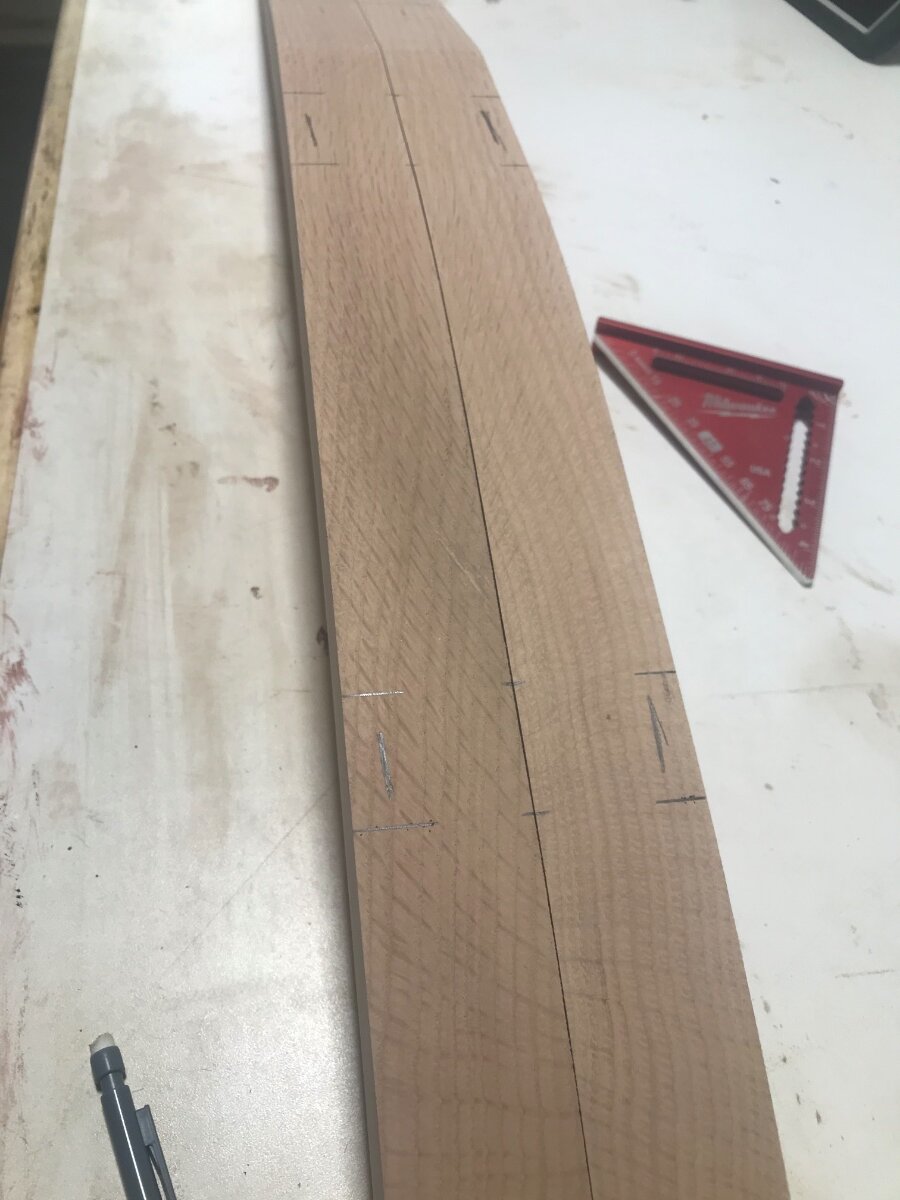
Yeah that definitely makes a difference. I didn’t cut real close when initially cutting them out as I didn’t feel my blanks were flat. The boards I had were to wide to face joint so ran each part after roughing them out. I was anywhere from 1/16 to an 1/8 over on the first cut. Maybe a little more at times. Am learning quite a bit in this whole process.
-
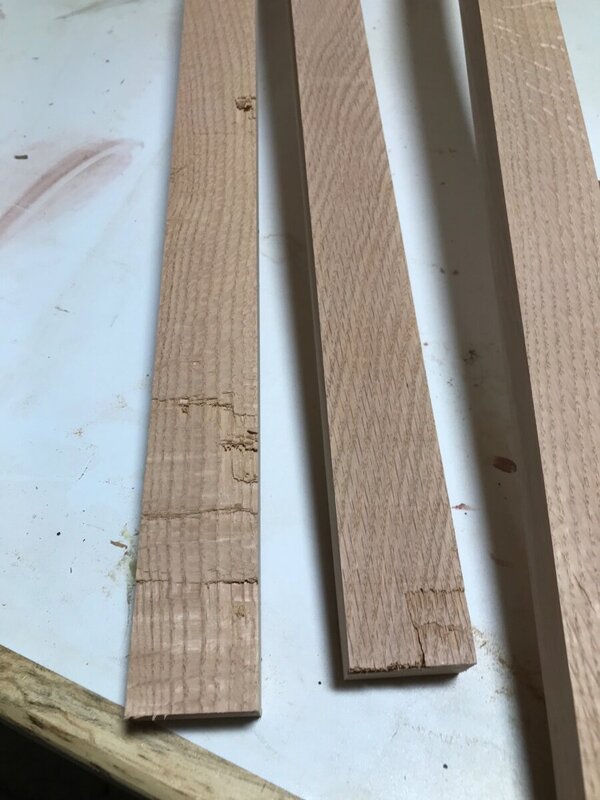
Quite a bit of work has gotten done since my last update. Have the back and front legs all milled along with the crest rail and shoe. Quite a few parts to joint, plane and sand. Had Emmi who is 7 catching out of the drum sander for me. Was amazed how well she followed directions and paid attention to the process. After she went to be I had Courtney help, she danced around and was looking at her phone the whole time. She is 32. ? The router template jig took a little figuring out on my end. The first couple legs I ran basically blew up in my hands. I scratched my head a bit and played around with the destroyed legs and approached it differently. I took the roughed out blanks and re traced the template on them. Went back to the bandsaw, sander and jointer to remove quite a bit of the material. What I found with the router template that removing 1/32-1/16 of a inch it worked pretty well. I made my way through the rest of the legs without much issue. The main issue that I am having with this whole project is the lumber. It has shake in it that doesn’t seem to show up till you really cut into it. The only tear out that I ended up getting on the back legs was from the shake parts of the lumber. I ended up making about 6 extra back legs. I’m pretty sure I’m going to struggle to find 16 good legs in the pile. Problem is all my 8/4 stock is used up except for 2 boards that are mostly quarter sawn. I called around and would have to go over an hour to get some 8/4 or wait about a week to have some ordered in. Sorry didn’t grab many photos, will get some more tomorrow
-
Could oversize the template and use toggle clamps as well.
-
Thanks! Lol i do like the classic rock from time to time. Usually have on the 90's alternative rock going in the shop tho.
-
That is awesome! I’ll send you some plane irons and chisels to try it out with?
-
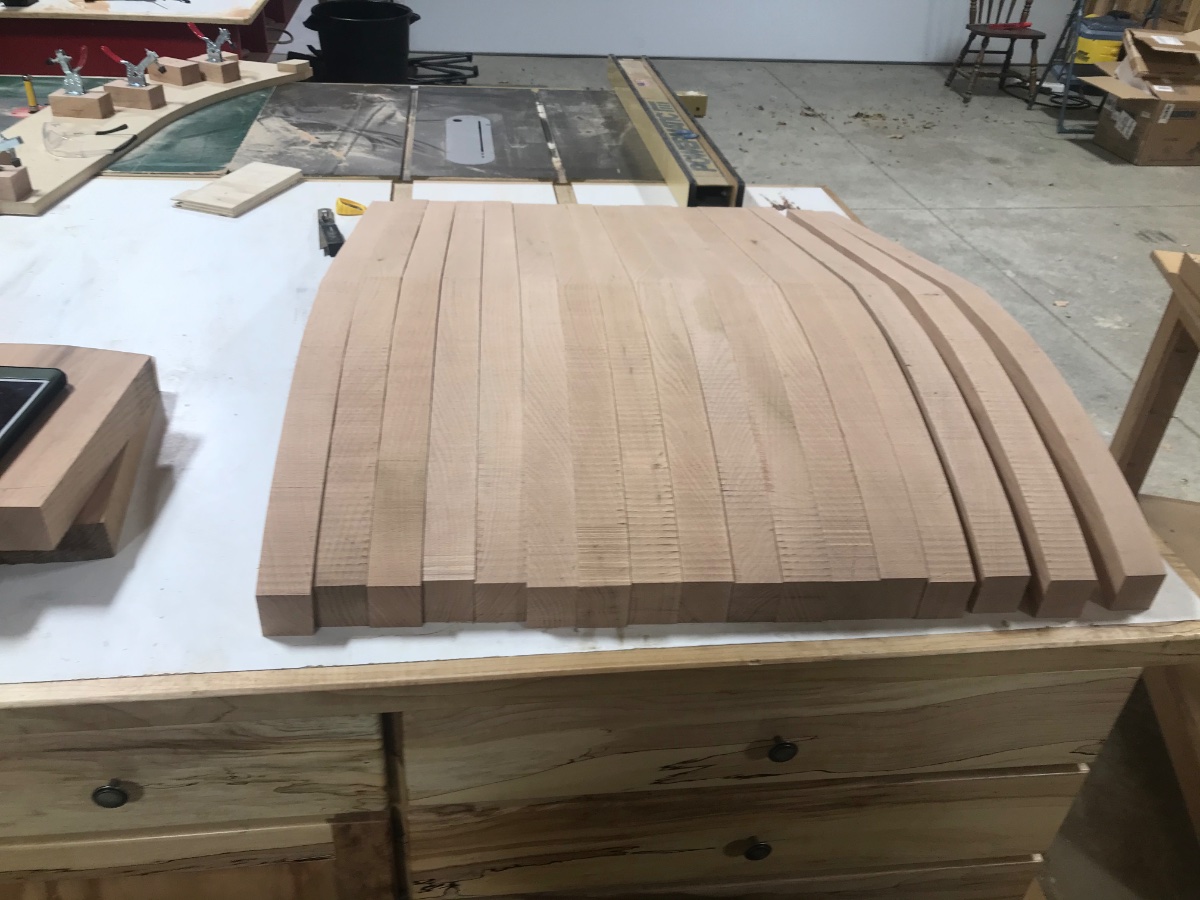
Well I found a little time in the shop the last couple nights. Kept working on roughing out the back legs. All in all it took a couple hours at the bandsaw to get the 17 legs cut. I then moved on to the other parts of the chair that needed to come from 8/4 stock. Was able to use up some of the off cuts from the back legs to make a few of the other parts. Just a lot of trips between the jointer, tablesaw and miter saw to get the parts cut. I like to cut all my parts about an inch longer than the final dimension till I get them milled to thickness and width. I face joint and then edge joint each part and use the planer to bring them to 1/16” of final dimension. The last 1/16 I’ll take off with the drum sander.


-
I couldn’t handle that much heat for that long! We have had a couple frosts here already. Chance of snow Friday morning. Gosh I hope that stays away!
-
For wood movement I figure a 1/16” per foot of width. You could use quarter sawn to eliminate most of the movement. Not sure if your wife will like the look of it. Would bring a contrast to your floor as well.
-
Did finally get a day away from the real job. Took the wife and kids on a little day trip to a cave and a lookout over the Mississippi River. The leaves around here are about at their prime color so enjoyed taking in the sites. Also got in a little shop time when we got home. Only about an hour or so. Started roughing out the back legs on the bandsaw had enough time to get about half of them cut out. Was being really careful in my lumber selection for them but the same problems are popping up that I had on the table. There is some shake and fine cracks running through some of the material. Makes it very frustrating.

-
Nice job on the fix! No one will ever notice once it painted.
-
That is a bummer. The thing is we have all been there. If you use your extra web frame to fill in the front it should work out well. The picture that @Tmizeshared in photo “d” they show a runner going back. That would solve your strength concerns and would be fairly easy to do. You got this!
-
Looks great!
-
That sure seems weird that they would just blow apart like that. First thought that came to my mind is over tightening them to the point they were smashed. But that doesn’t add up either. Must be a defective build on the manufacturer. Glad they are standing by them! I have a metal set that came with my frued set. They seem to get stuck on the tablesaw arbor threads, which makes them a royal pain to get off. I just resort to some pieces of paper with a hole cut in them bigger than the arbor.
-
Only laughing at the local news line there @Coop
-
That looks dang good! If I were closer I’d be all in on the steaks!
-
That is to truthful on how I operate in my shop. I don’t think I have ever sharpened a pencil more than one time. There has to be a corner in my shop with 700 pencils in it.