Every purchase made through our Amazon Affiliate Page helps support this site
-
Posts
1,467 -
Joined
-
Last visited
-
Days Won
54
Content Type
Profiles
Forums
Downloads
Gallery
Events
Store
Articles
Blogs
Everything posted by Jamie
-
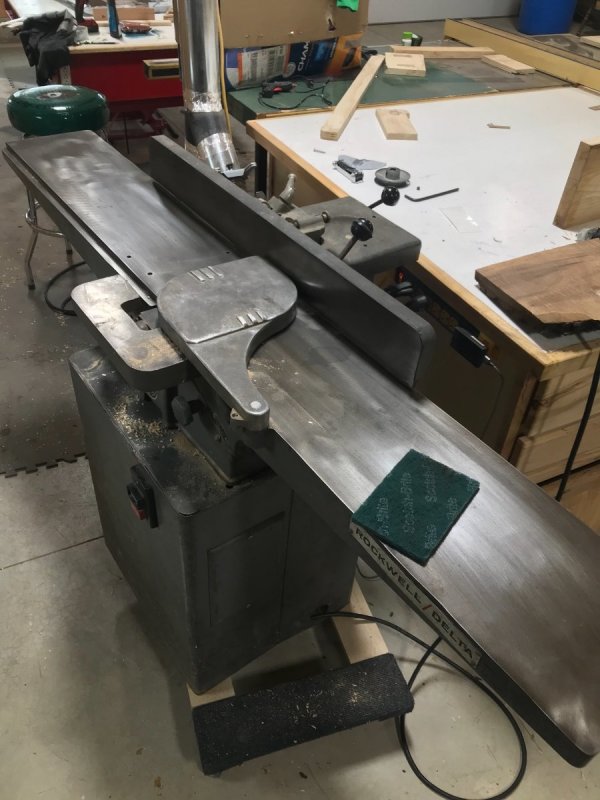
Got the jointer home! Didn’t need much clean up. Did have a little vibration that I wasn’t fond of. It came wired at 110v and the guy I got it from said at times it would trip a 20amp breaker for him. It ended up doing that for me as well. I have a neighbor buddy well a couple of them that are electricians, one does residential and the other works maintenance at John Deere. We were doing a flooring project for the residential election and had some time to allow glue to tack up so they came over to check it out. They talked me into switching it to 220v and we tore into it. Another neighbor had some heavy wire laying in his garage that was salvaged, I for some reason had some plug ins and they had the know how. Got it rewired pretty quickly and fired it back up. Still had a shake than none of us were happy about. Did some digging and tightened everything up, motor mount was pretty loose. At this point I I had already replaced the belt and fixed a little bend in the pulley off the motor. We did a little more investigation and pulled the motor out and found that the bearings in the motor had some pretty good wear. Have a new set ordered along with a pulley for the motor.
-
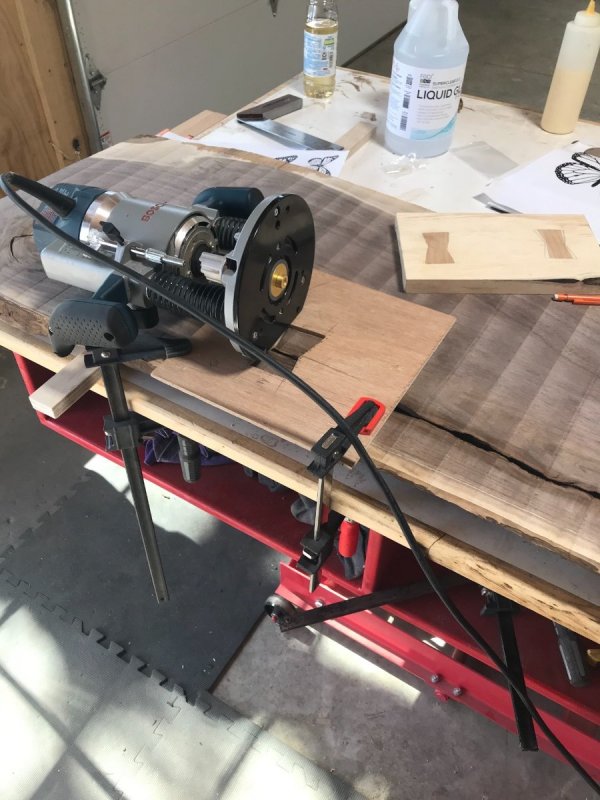
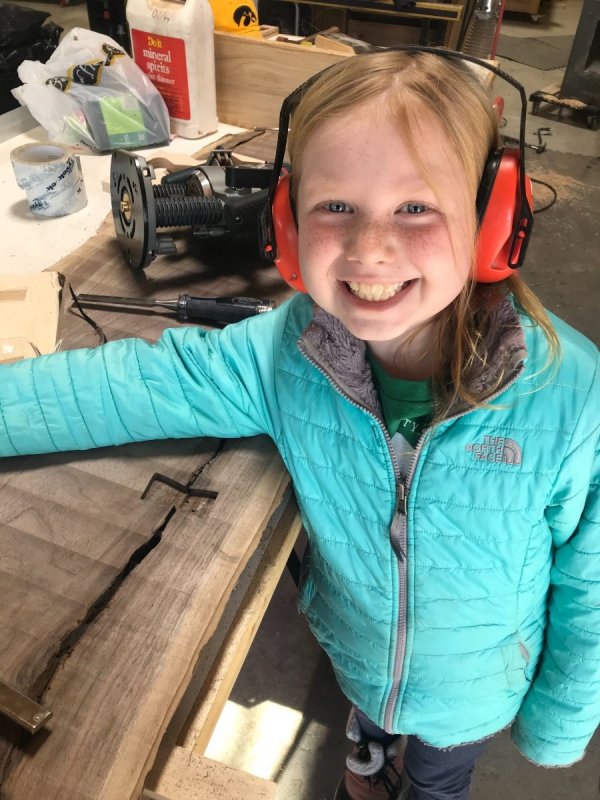
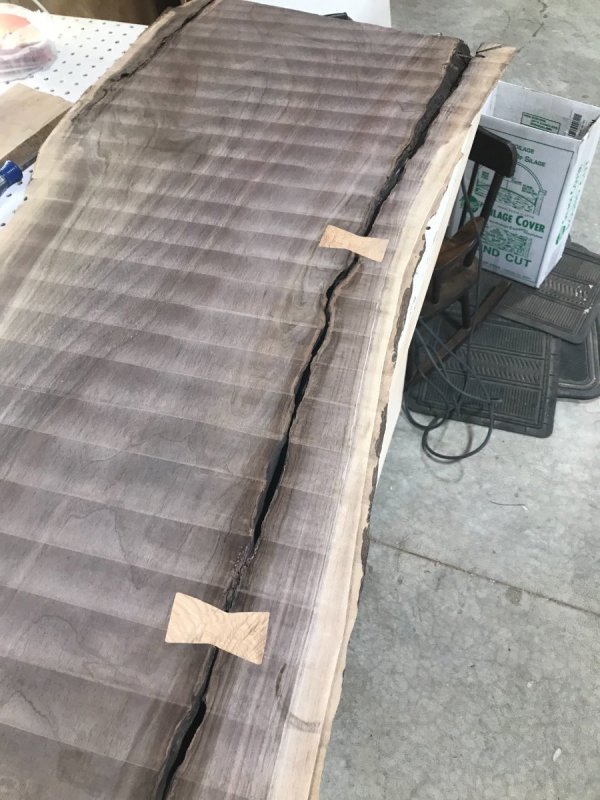
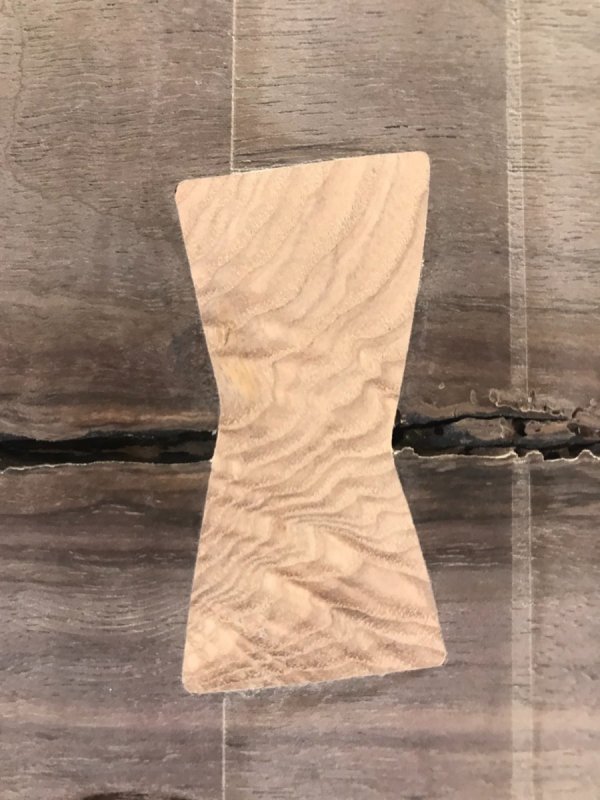
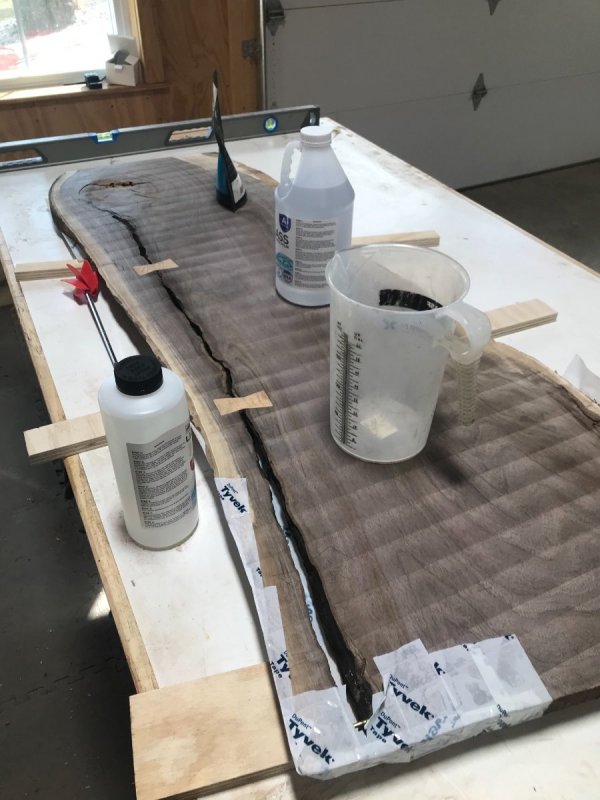
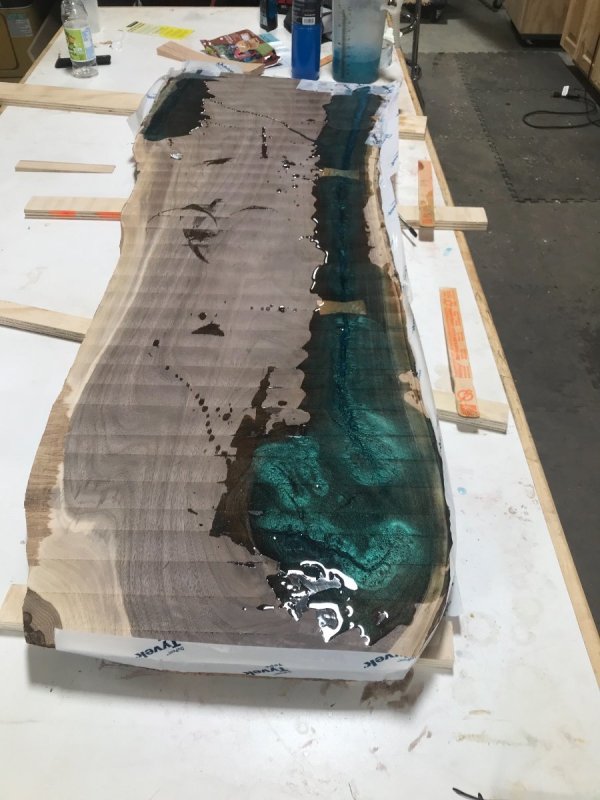
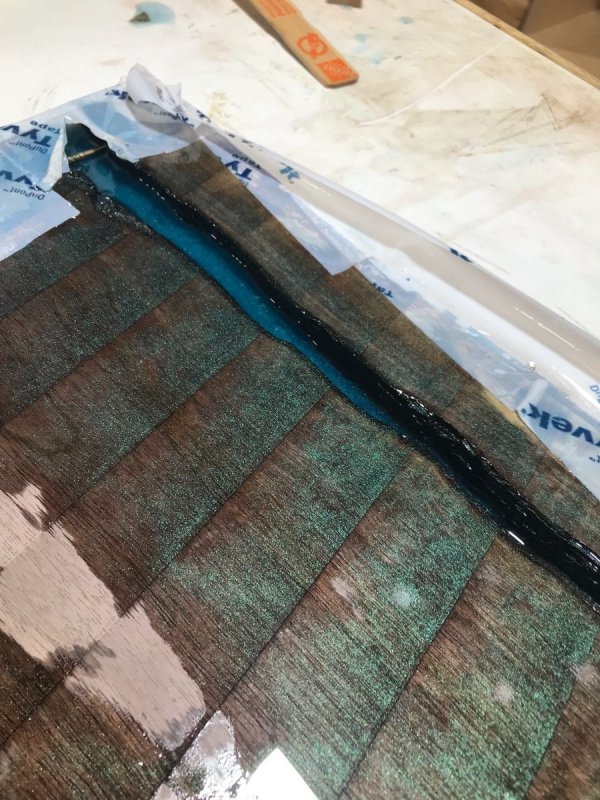
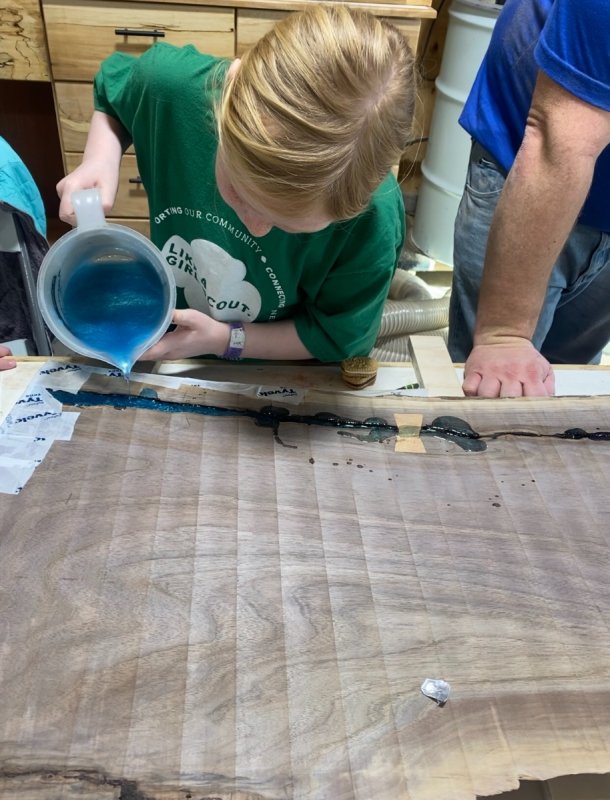
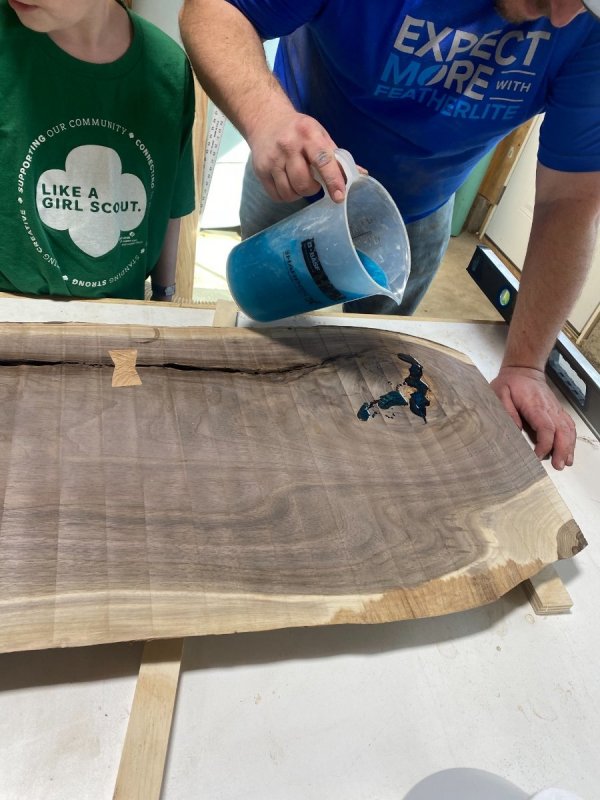
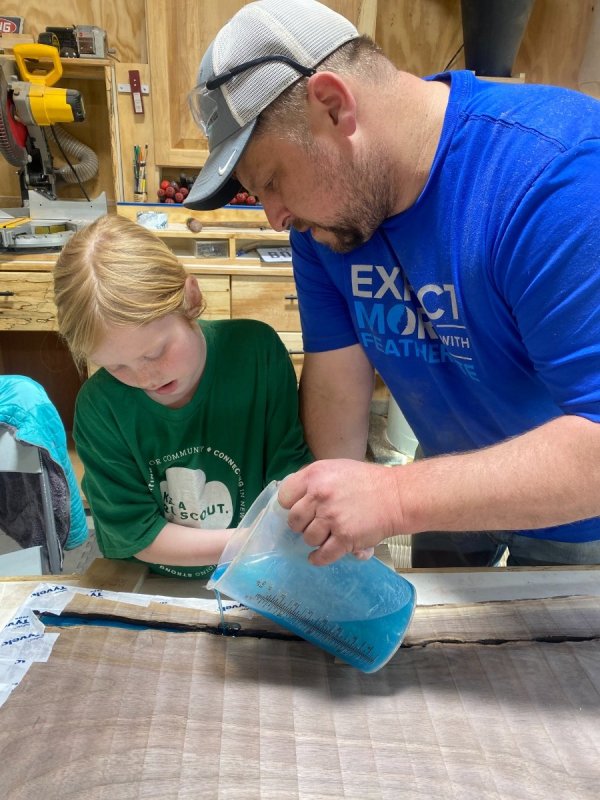
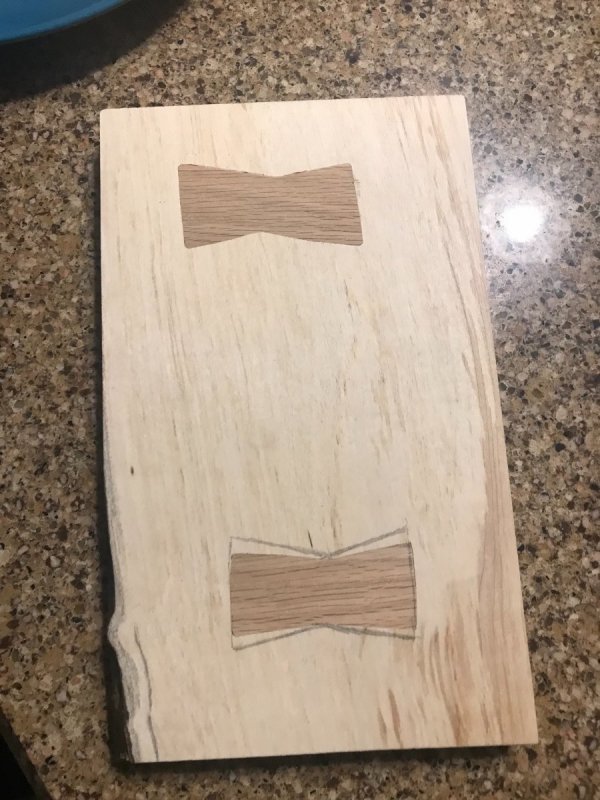
Made some progress on the desk learned a lot along the way. Started out putting a couple Dutchmen into the top. Came out really well! Using the router jig is a very simple process, make a template, rout it out and use the same template with a bushing removed to cut the fill in pieces. Only a little sanding on the corners to match the bit to make them fit. I did also chamfer the bottom edge of the ash piece to make it start easier. Shop helper was in and out of the shop but checked in on me quite a bit. She was happy with the progress. Decided on 2 of them. Wanted to get a 3rd on the far end, with the curve of the tree it got pretty thin on the edge so didn’t want to risk cutting through. Found this nice grain in my stock of ash, was a section of the board between 2 knots. This pic hasn’t been touched by a sander. Looked quite a bit better with a little random orbit sanding. Move on to the epoxy at this point, and where the learning came in. I went against better judgment and decided to pour from the top down. The bottom side of the slab has the wider crack than the top. I didn’t get any pictures of this step. I used what I thought was an overkill amount of tyvek tape to seal off all the cracks. Was happy how it looked and felt. I then placed the slab on top of 4 sticks to allow airflow to get to the bottom side per the directions. All leveled up and ready to mix. A little instruction and she was set! All was looking well for about the first 15 minutes. Bubbles popping wasn’t an issue. I did crank the heat up in the shop according to the instructions to 77 degrees. Needs to be there for 72 hours. Then there was a little drip that hit the table. Then a couple more drips. Then you could see the level in the crack starting to go down. All hell was breaking loose! Looked between the slab and my bench top and noticed the tape was starting to sag with the weight on the epoxy or a chemical reaction with it. Decided to pull the shims out from under it and let it sit on the bench. This in turn pushed a bunch of extra epoxy back up onto the top. At this point I was at a loss on what to do. I did try putting extra tape on where I could to no avail. After babysitting this for a few hours and checking on it every hour late into the night I decided to just let it sit. This morning I came out to the shop to find about half the epoxy drained out. It’s still not set and is sticky to the touch. But it did set enough that the slab is stuck to the bench. Later in the day I did try to pry it free and the epoxy wasn’t lifting with the slab. Going to let it sit for a few days and see what happens. Shrinkage.
-
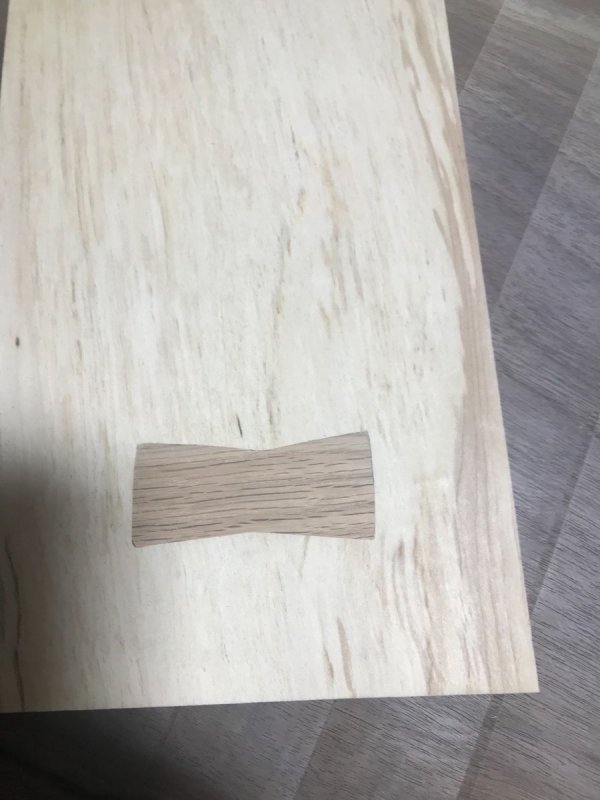
Did a little inlay practice last night. Haven’t done one of these for a long time so thought we would start on some scrap. Wife talked me out of the butterfly inlay idea.....she thought that it would be neat for emmi considering she is 8 but in a few years butterflies won’t be so cool. Not sure that I agree with her on it but am going to take her advice and stick to just bow ties. Made a quick template by drawing a design out on some 1/4 ply and cut it out using a jigsaw. Did use the Freud inlay router kit to cut the parts. Did fit together pretty well! Didn’t quite like the shape of this attempt so did a little modification to the template and ended up with better results. I purposely didn’t make the tie symmetrical, I do like the look of it. I am thinking putting 3 inlays in the length of the crack. Might make each one a little different size to better if the look.
-
I have used ready seal on some out door projects and it held up well. Got it from Home Depot website.
-
I honestly haven’t checked the moisture content, it did come from a trusted source and would assume that he checked it before putting them up for sale. I might just have to hunt down a moisture meter now. As far as coating the edge, I was thinking about putting some clear epoxy on it to seal it up. Just not sure if I should wait for that to completely dry before doing the pour?
-
Thank you sir! It ended up a little thinner and has a little ways to go. Currently it is at 1 3/8” think. I went with liquid glass deep pour. Nice thing I didn’t realize till I ordered it is that it was 25% off! Perfect for my cheap ass. Emmi wanted a turquoise color, we decided on this one..... Was kinda surprised how much came in the package. Will be enough peacock teal to last me a lifetime. Question for the group.....I was thinking of doing the inlays before pouring the epoxy. Would anyone do it after?
-
Well I said goodbye to the ridgid jointer over the weekend. Did take a little bit of a bath on it but feel like it was worth it for the upgrade I found. I ended up getting a 8” Rockwell delta. Pics to come soon. A quick little review of the jointer...... Pros: Easy to assemble and ran true out of the box Fence was easy to adjust and only came out of square when you moved the angle Quiet machine with minimal vibration never ran out of power Easy to read depth of cut with smooth adjustment Cons: The adjustable feet wouldn’t stay tight. Would get a little wobble after time. Could be easily solved by building a base out of 2x material Adjustment on the knives was a little tricky, the set screw that the knife rested on had to course of thread to fine tune All in all was a great machine and a pleasure to use. Would buy it again without hesitation.
-
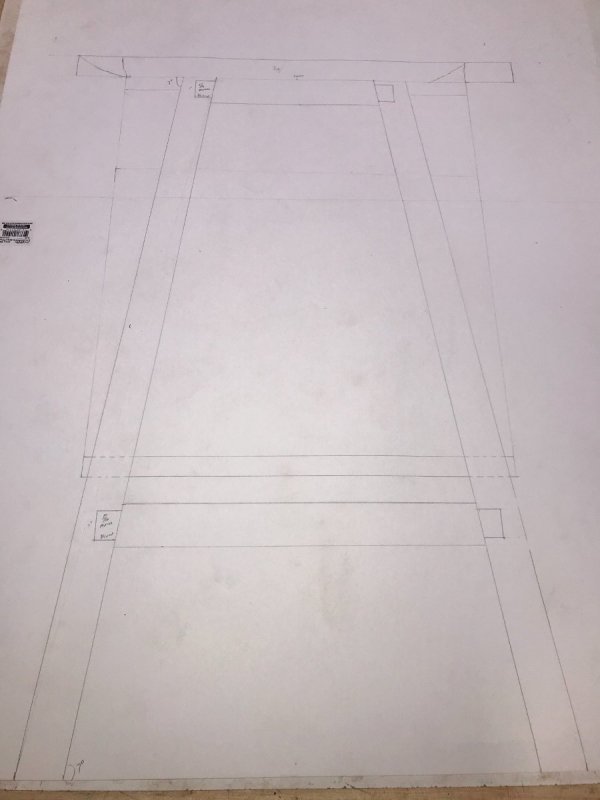
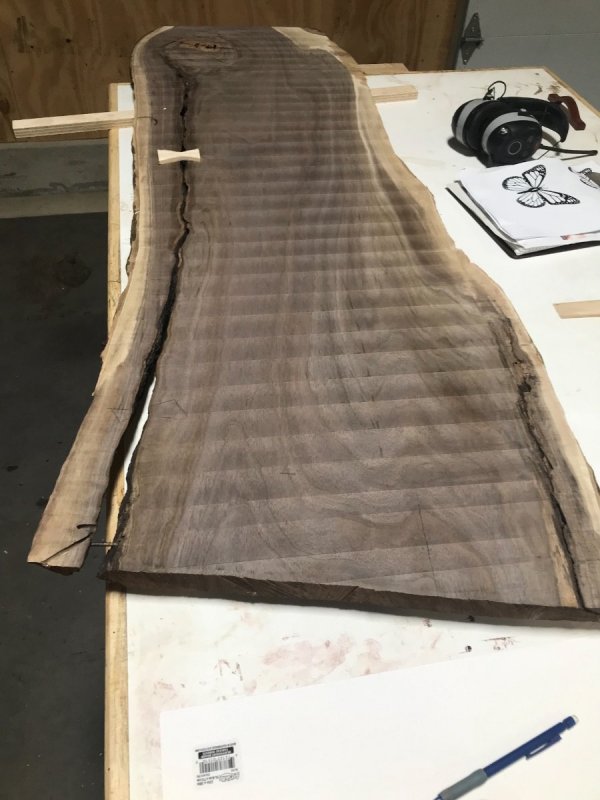
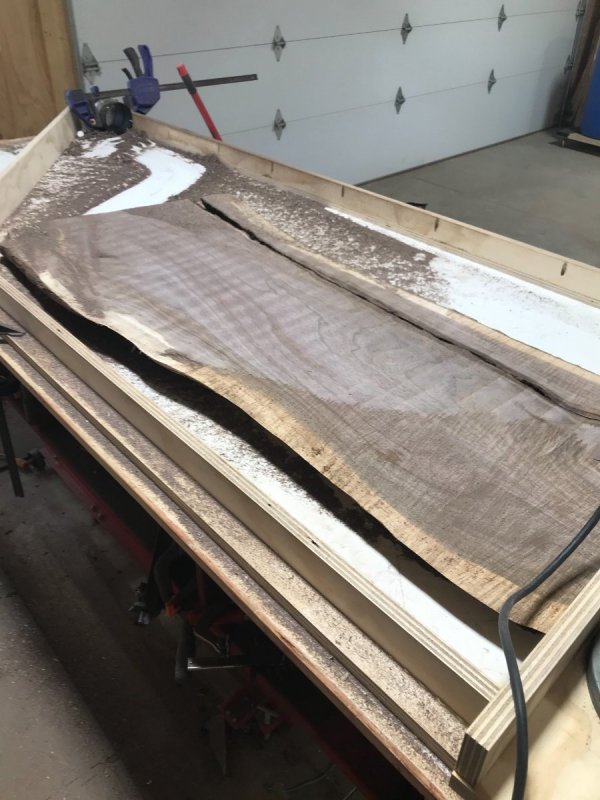
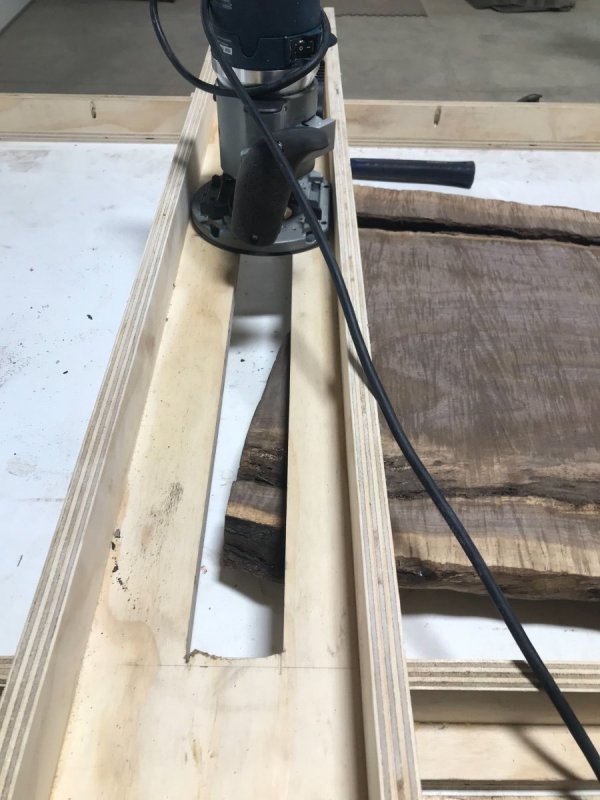
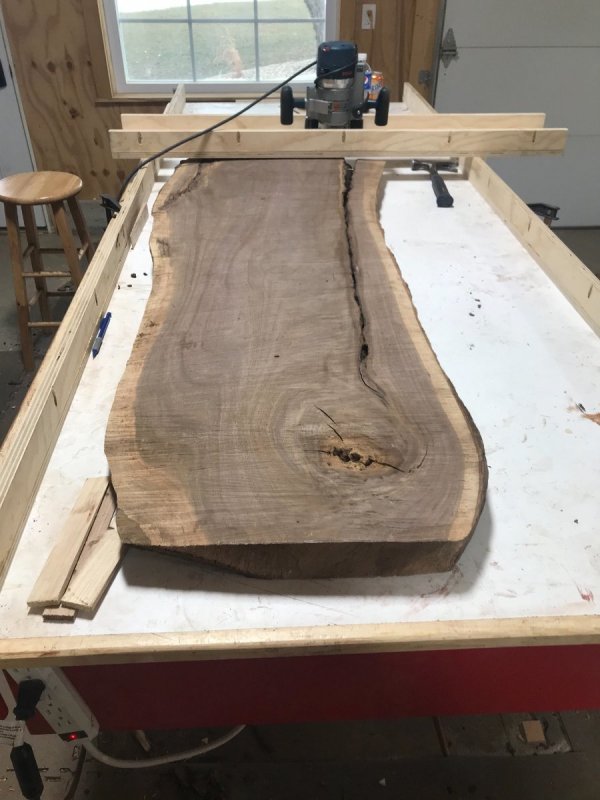
I’m a little behind on posting to this thread. Quite a bit of progress made since my last post. Decided against using the second piece of slab as the bottom side was 3/4 bark, it had a nasty twist to it that I didn’t think I’d be able to flatten out without getting into the bark layer. Wouldn’t have any strength left at that point. Also with the wife getting on me about the cost of epoxy I decided to make due with what we have in the original slab. Made a simple slab flattening router jig. Just glued and nailed it together and shot in a few pocket screws to add some beef. Made the jig rails 2 3/4” x 2”, thought behind making them those sizes was if in future needs, basically to accommodate different thickness slabs or pieces that need to be flattened. Made the jig 8’ long for future use as well. The router sled I’ll call it is 4’ in length. To accommodate the router bit grove I took some measurements and added a little space and cut it on the table saw by raising the blade up into the piece and finished it off with a jig saw. Then gave the sled a waxing along with the rails where the sled rests. Did end up nailing on a stop on one end of the sled to prevent pulling the sled off the rail as I pulled the router towards me to make the cuts. Here is the slab after making a pass or two. I set the plunge base for the initial cut at my high point of the slab, then using the stops I could lower the bit about 1/16 of a inch per pass. I didn’t snap many pictures of this process as it was just way to much fun to stop! I did figure out after the first pass that most of the dust was spraying at one corner of my bench, decided to set a dust hose there to try to eliminate some of the dust. Did a fairly good job of grabbing dust, after every pass I would just sweep a bulk of the chips to the hose. This worked really well till I plugged the pipe! Of course it plugged behind the miter saw stand. Tried using a sewer tape to get it freed up with no luck. Ended up taking my shop vac and shoved the hose up the pipe which is a 4” pipe that runs horizontally behind the miter stand then hits an elbow to go up the wall. Is a 5 or 6’ length of pipe that the shop vac hose just reached the elbow. To my surprise there was some bigger chunks of off cuts in there, not sure where they came from but the shop vac cleaned them right out. The hose that plugged is the hose beside my dust collector that I use for cleaning around the bench, also my daughter likes to use it to help clean. Thinking a few little chunks got sucked up when I wasn’t looking. Here is a picture of the flattened slab. The bit I used was a cnc bit from amazon, 2” diameter 4 wing cutter. Was under $20. Have to say it out preformed expectations. I did sharpen it when I flipped the slab. Never have I before sharpened a router bit and was shocked how easy it was. Just made a few stokes of the face of the cutter on a 400grit stone. Was like new! With the slab flat and waiting on some shipments I gave the shop a deep cleaning. It was an absolute disaster with the work on this slab. The walnut dust has a disturbing odor to me, had to get it out of the shop! Even pulled the floor mats up to get as much as the winter dust buildup out. I used the m18 leaf blower to handle quite a bit of that project, open the garage door and blow it out and let the wind do the rest! Did quite a bit more planing on this one with the angled legs. Taking lessons from the chair build to give me a full scale drawing to work off of. Really think going full scale helps with laying out the joints. With the slab being different on both ends width wise there is a lot going on in this drawing. Still a few details to work out but am almost complete with it. Waiting on the epoxy to show up along with a inlay router set. Have an idea of cutting a butterfly shaped inlay in the crack of the slab. Figured since it’s for my daughter I’d go that route other than a bow tie.
-
Nice repair! I think only you will know it is there. Well I guess the rest of us know as well but I promise my lips are sealed.
-
They are on hold waiting for her lender. It has taken longer than expected with the appraisal and such to get wrapped up. She should be getting a down payment to me in the next week or so. Which should give me time to complete the desk.
-
Nice looking legs! I’m going to be using your trick on legs real soon!
-
I’m not a huge fan of the look but like the concept of taking not the best lumber and turning it into something. Think I have it half way figured out with the second slab. Did end up cutting the left edge off which will be the back. Trying to use as much wood and little of the epoxy that I can. The left slab has a pretty good twist to it so will be thinning these up quite a bit. Thinking will be around 1.5 inches said and done.
-
These ideas have crossed my mind as well. Now having the 2 slabs it might make this go quite a bit better to get the desired width of 22"+ hopefully get some time to mess with it tonight.
-
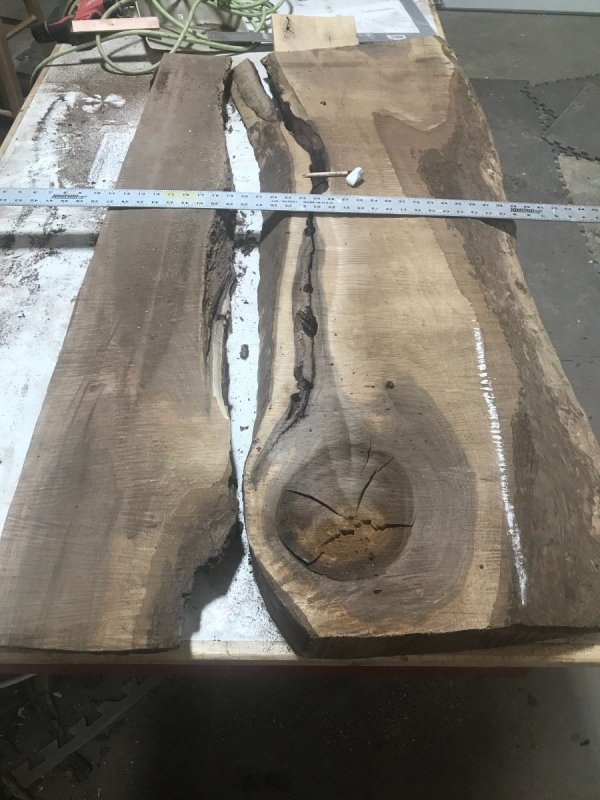
We are thinking the same. I was messing around with some layout on the top which is 16-19” wide and will finish at around 49” long and is over 2” thick now yet. Not sure if that will be wide enough to be useful as a desk with the curve of the tree falling off the front, which narrows the usable writing space. I did go back to the shop tonight and got another piece of that tree. This time for $30 as it’s pretty narrow and will have a lot of bark on the bottom side. So not sure if it will even work. The guy who I got the slabs from said to try it and see if I can get it to work if not I don’t owe him for it. I didn’t grab any pictures of it yet but will grab some later on. I’m half tempted to cut the live edges off on the outside of the top to give it a finished edge and use a mold to do the pour. I think in the long run that would be the way to go. I received the same email from infinity. From what I am finding is that they all cost about the same. Think most of them are made in the same factory with a different label on the bottle.
-
That is a great question.....I have zero experience doing this. Was looking at stone coat counters deep pour, also looked at liquid glass. Anyone with experience on a different product I would love to hear about it.
-
I like the morris chair! Im not sure why you would need a sitting area in your bedroom tho? I mean my bedroom only gets used for 2 things. One of them is sleeping and the other rarely happens. ?
-
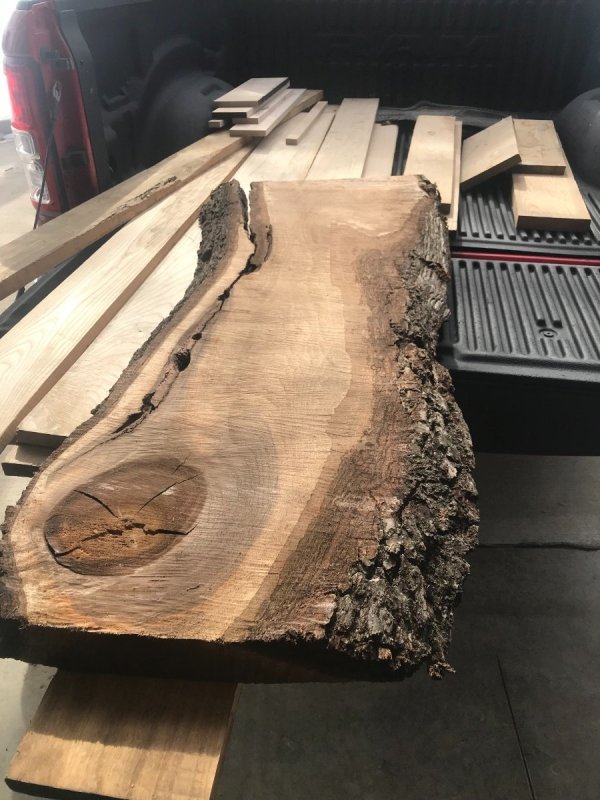
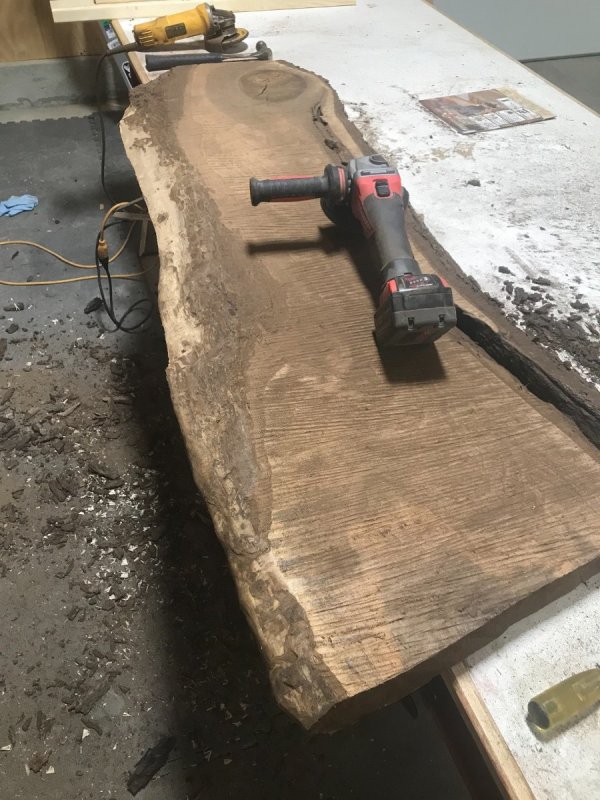
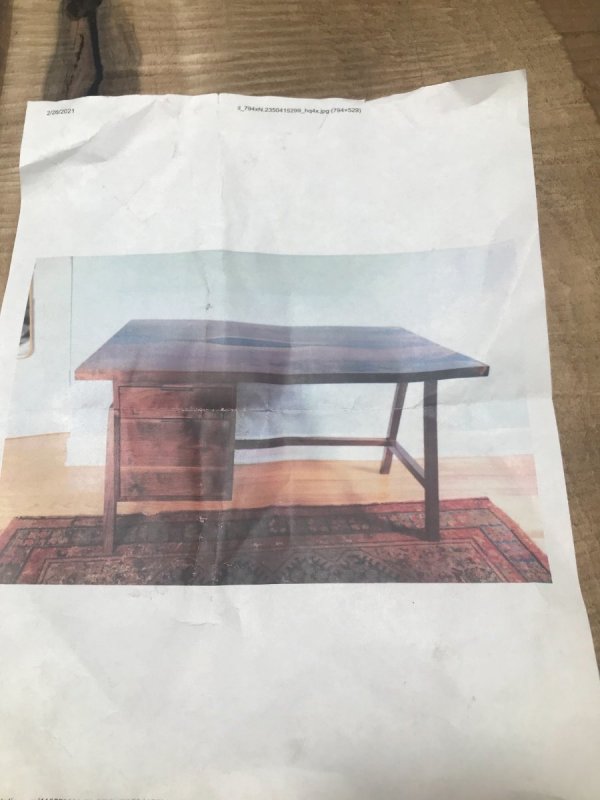
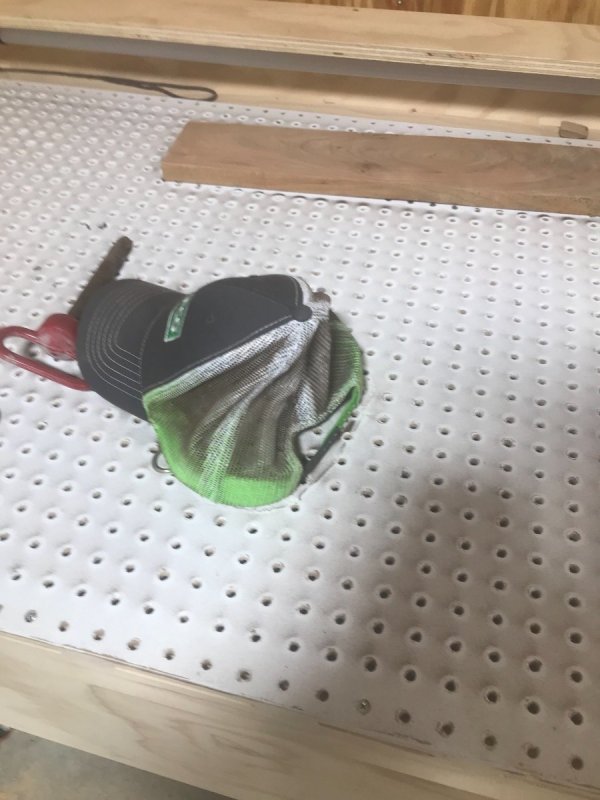
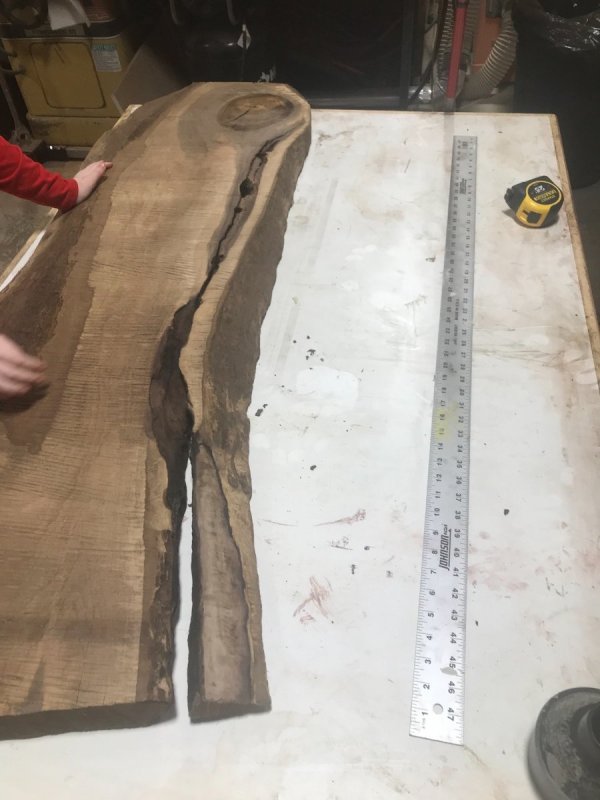
Starting a project for my daughter, she like so many people in the world is addicted to YouTube. She has seen many river tables and has been asking for me to make her a desk. We agreed to do the top as a river table, which is a interesting project to me. I like the look of them but just never had a place for one in our home. A 8 year olds room is a different story and should look pretty nice in there. This is the look that she is after for it. I will be doing the top out of walnut and the base out of ash to try to cut some expenses in this project. The slab and ash that we are starting with. Paid $100 for the slab and $3.69 a bf for the ash. Started by debarking the slab. Boy what a mess! Started with a claw hammer and chisels. Bark didn’t want to give up easily. Ended up getting the bulk of it off with the hammer and chisel, went back over it with the grinder and a wire brush. Went super fast with that method! Just made an insane amount of dust. After the brush head I used a sanding head in the grinder that I had for sharpening lawn mower blades. That disk is the best thing I found for that task. After getting the bulk of the bark off it really narrowed up the top. So am in a bind with it. I could split the top and have square edges which I think would be best for a desk. Problem with that is it will take quite a bit of epoxy. Wife is already not happy with the cost of this project. I’m thinking about checking where I got this slab to see if they would have something that I could use to fill some of the space and use 2 different slabs cut down to limit the damage on the cost of the epoxy. When I took the brush grinder to the slab edges is sure made a mess! Had the downdraft table running during the process. It sits about 20’ away from the bench I was using. The hat you see in the picture had a white mesh. It was sitting on the downdraft the whole time. Was shocked to see how much airborne dust the fan moved. Only reason I shared this picture is to show the amount of air flow this table has.
-
Great progress!
-
I thought it was crazy high!! Maybe its just me being cheap again ?
-
I’m curious on this as well. Just priced some cherry at $5.32 a bf. Skip planed to 15/16 and straight edged
-
Thanks! The light actually came on the drill press, it also has a laser on it. Thing is neither one of them has ever worked. It has a spot for batteries to run them and have tried a few times to get them to turn on. No luck.
-
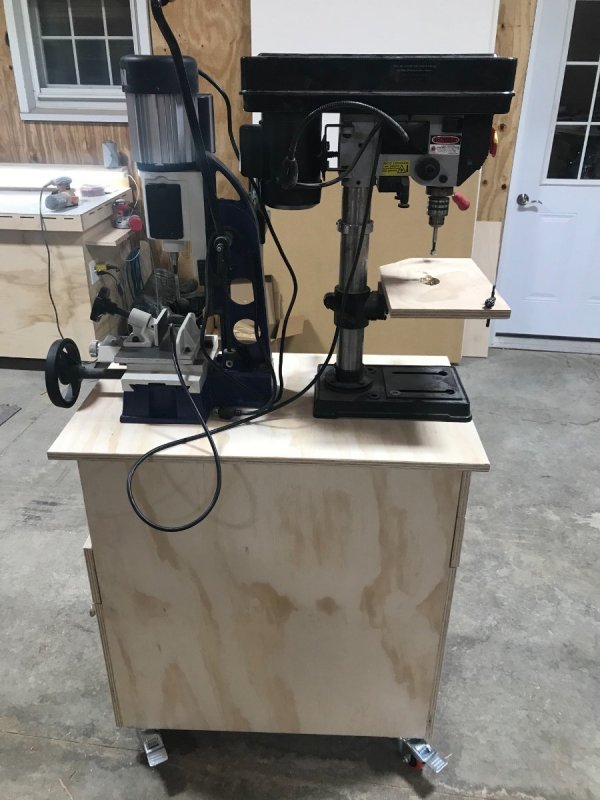
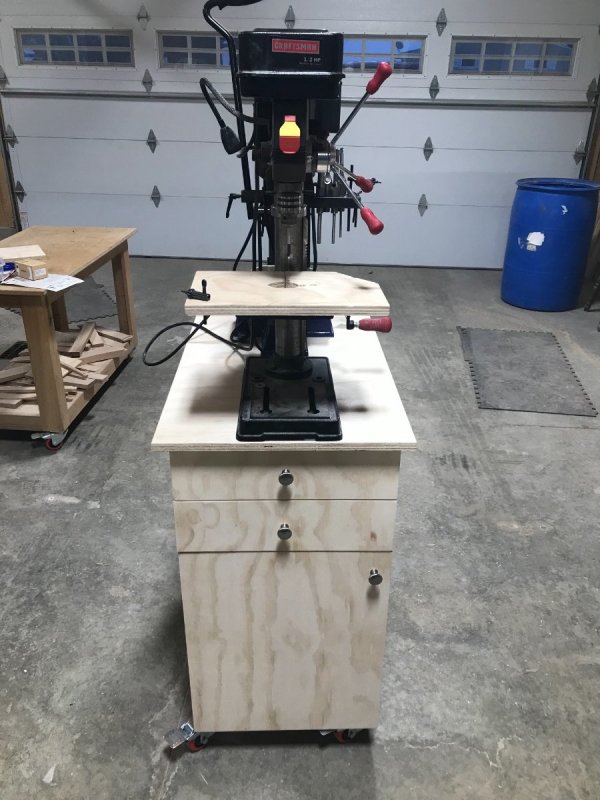
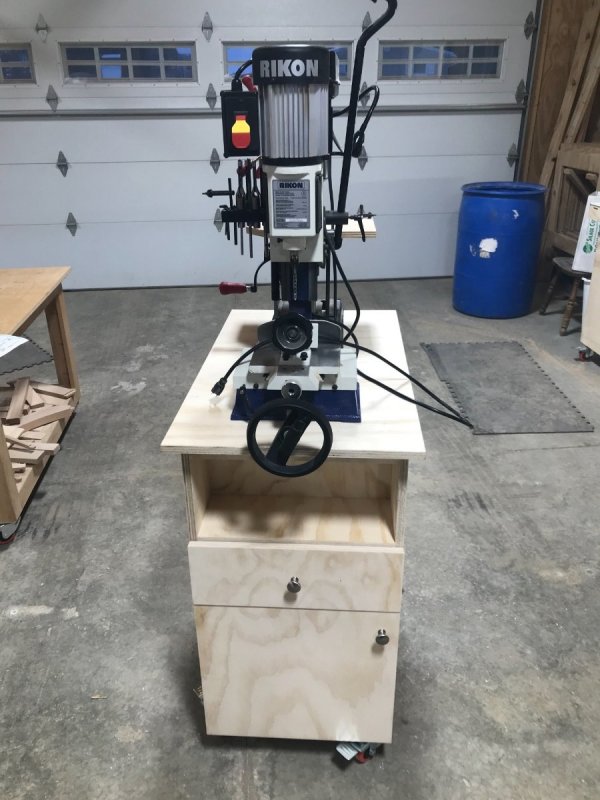
Did a quick little cabinet stand for the drill press and mortiser over the weekend. Took just over a sheet of 3/4 acx ply and used a few hardware parts I had laying around in the shop. Goal was to make a home for the mortiser and get it off my shaper. That has been its home for the past couple months since I got it. Also to get the drill bit storage next to the drill press. Which in turn frees up a drawer in the outfeed table to make room for table saw blades and accessories. The cart I am replacing was a $1 auction find that has more than earned it’s keep. Just didn’t look very good, it help my spindle sander and drill press since my old shop. It’s a two sided cart with a couple drawers on the drill press side and one drawer on the mortiser side. The door opening holds my tenon cutting sled and spacers . Did find a parts try that I had in a cabinet that I cut down to fit in one of the drill press drawers that holds quite a few of my mixture of drill bits. Didn’t get a picture of it but can if anyone is interested in seeing it. Did not bolt down either tool yet as I am waiting to see if they need to be positioned differently.
-
That seems like a great price!
-
Beautiful lumber! Should be a treat to work with!

