Every purchase made through our Amazon Affiliate Page helps support this site

Jamie
-
Posts
1,467 -
Joined
-
Last visited
-
Days Won
54
Content Type
Profiles
Forums
Downloads
Gallery
Events
Store
Articles
Blogs
Everything posted by Jamie
-
You are spot on. I’m thinking production mode instead of building one piece. @Coop you will like the adjustment on the glides. Pretty simple and easy to adjust.
-
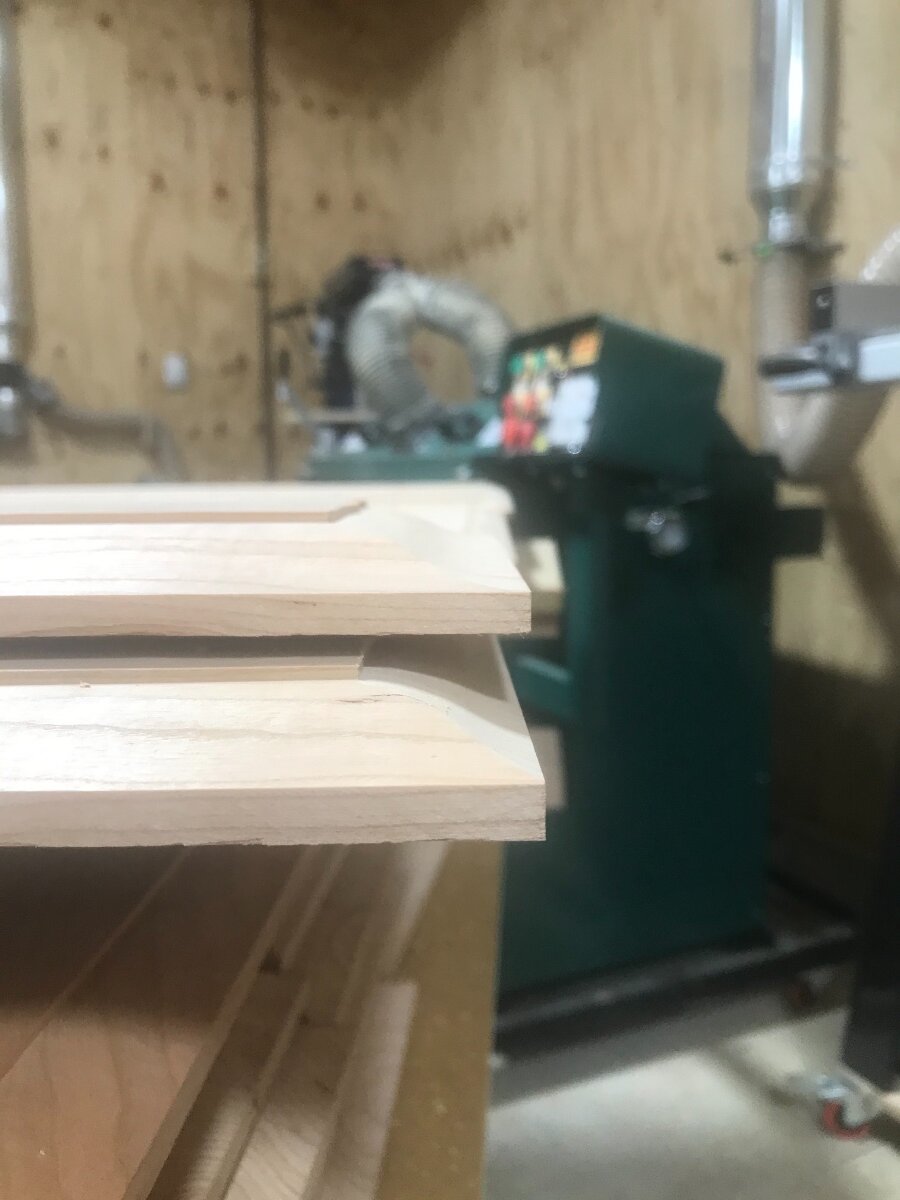
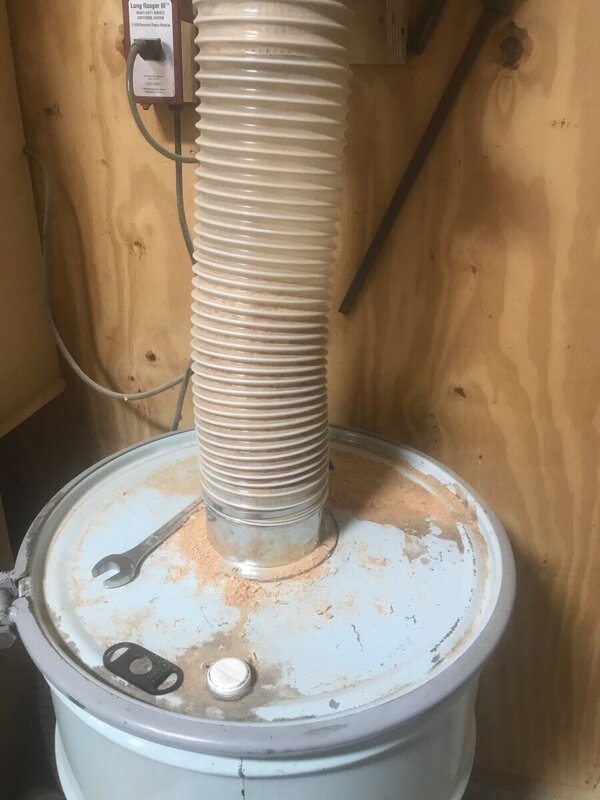
Need more horsepower! Got started raising the panels last night, tried taking the full depth of cut in one pass. The grizzly 3hp shaper didn’t like it one bit. Belts squealing and it actually stopped the cutter head. Had to back it off some and take 3 passes at the raised panel. I am also running a back cutter as well. The bottom panel in the picture is the depth I took on the first pass. Another small issue that I ran into with this is the amount of big dust shavings. They wanted to stack up in my drum and would start to fill up the drop hose. Was more annoying than anything and made for a good stopping point last night. Had all the panels through 1 pass. Got back at it tonight by taking the 2 full barrels of dust out to a farm where I get rid of the dust. Have taken him 3 full drums so far from this project and have the 4th one almost full again. Just raising the panels filled 1 1/2 drums. Granted there is quite a bit of air space in there. Just a weird shaving. All the panels raised. The mess left behind. When taking lighter passes with big cutters, on the second and 3rd pass the chips really flew. Just no way to direct them into the dust chute.

-
The nicest part about the under mount is that all the drawer faces should be in the exact same spot. Can make a jig to set the drawer on and figure in your overlay. That’s maybe for more a production setting, but might not be a bad jig for having around.
-
I am really curious on how it works. I am pretty simple minded when it comes to finishing, pre cat lacquer is my go to. Just a pain to clean the gun and the stink.
-
I cheated @Coop I just googled a cabinet door calculator, found 3 different ones. They are kinda nice to use, just put in cabinet opening size and it figures the rest. I did double check the math on them. It also figures in your depth of tongue cut and the gap that you would like for your panels. Only thing it wouldn’t figure is the doors with a mid rail. Did those the old fashioned way by using the calculator on my smartphone.
-
The guy had it on a 2 hp grizzly that actually was directed outside. Not even a collection bin, just shot it out into the air. Was the only machine hooked to that dust collection system. He actually had about 4 different dust collectors around his shop.
-
Yeah that adds a whole new level to the organization.
-
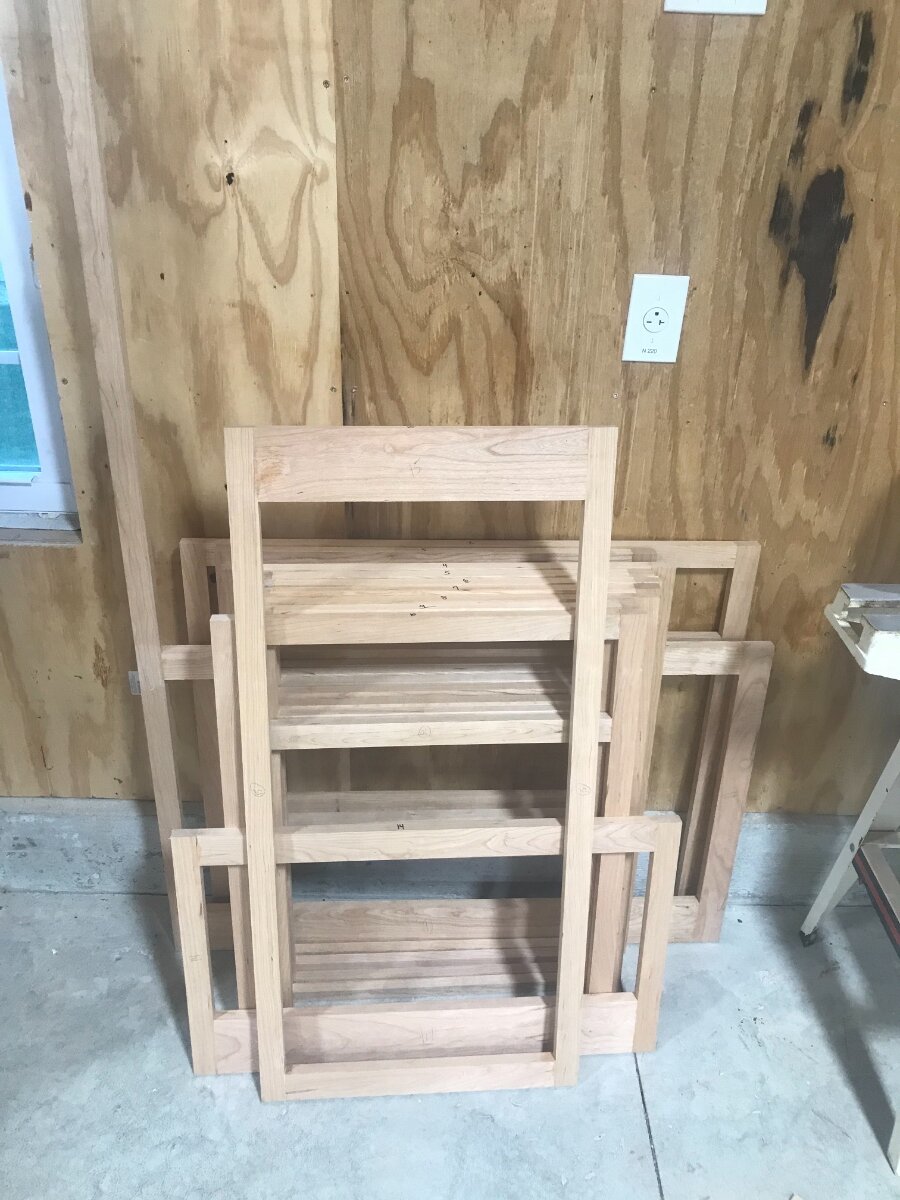
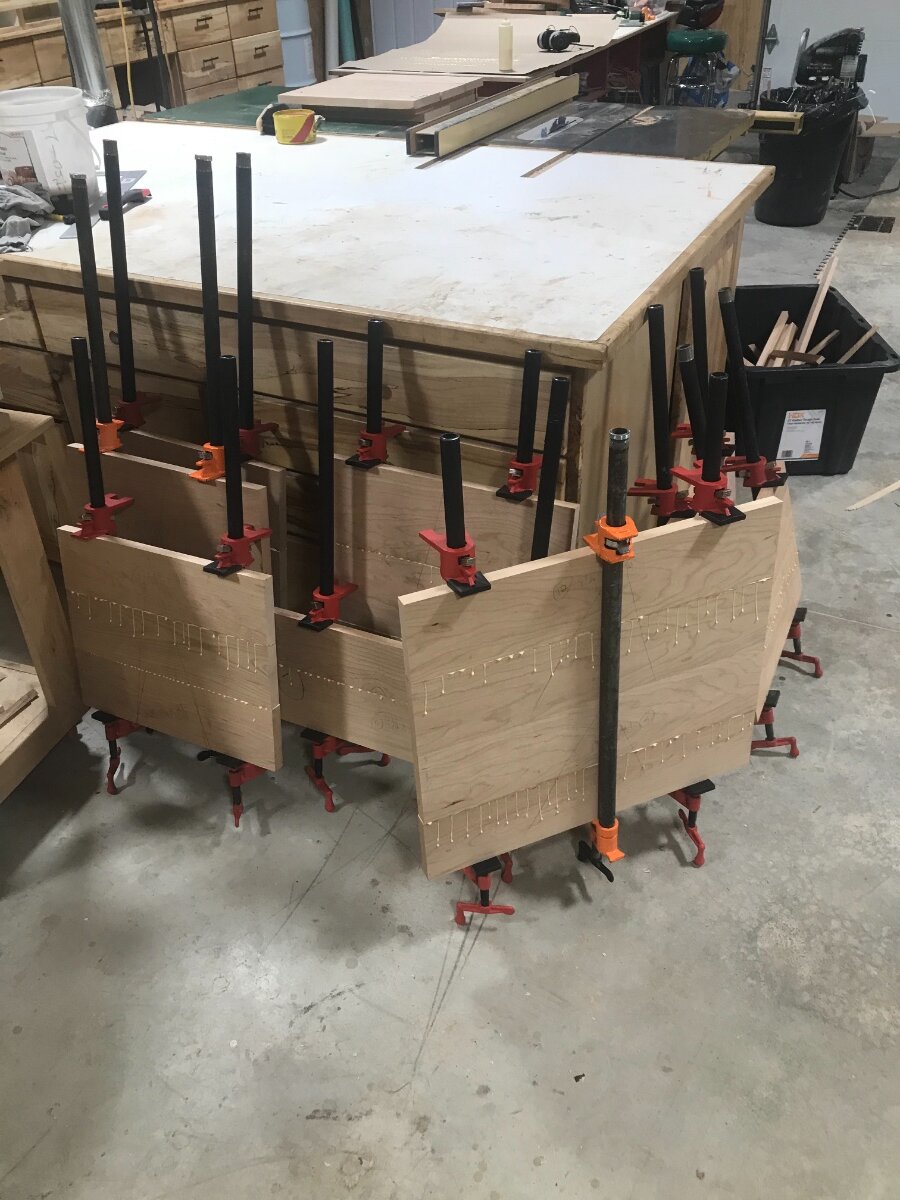
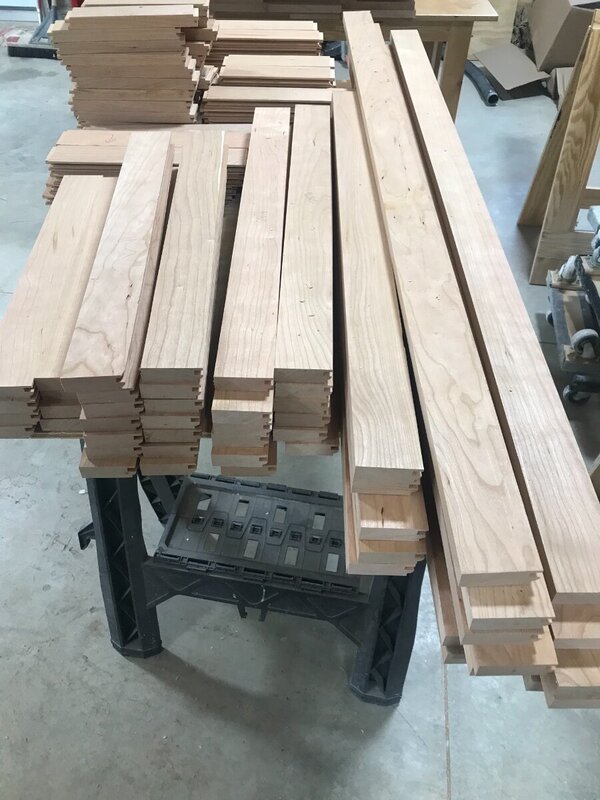
This is 18 cabinets, for instance on let’s say a basic single drawer base cabinet there are 5 parts to the frame. Let’s call the cabinet #3 in the run. The stiles get a 3a, the top and rail for the drawer space get 3b and the bottom rail gets labeled 3c. I use that same labeling process for every face frame. Start with the sides and then work from the top down. If I can remember correctly one of the pantry cabinets is stretched out to letter F. Can never have enough notes! I think as long as we can wrap our own heads around a label it should all come out in the end with a minimal pile of scrap.
-
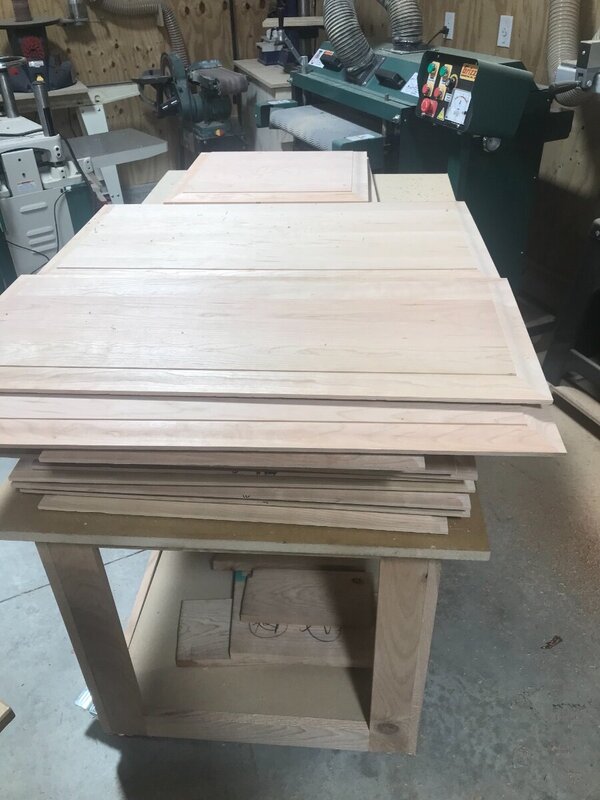
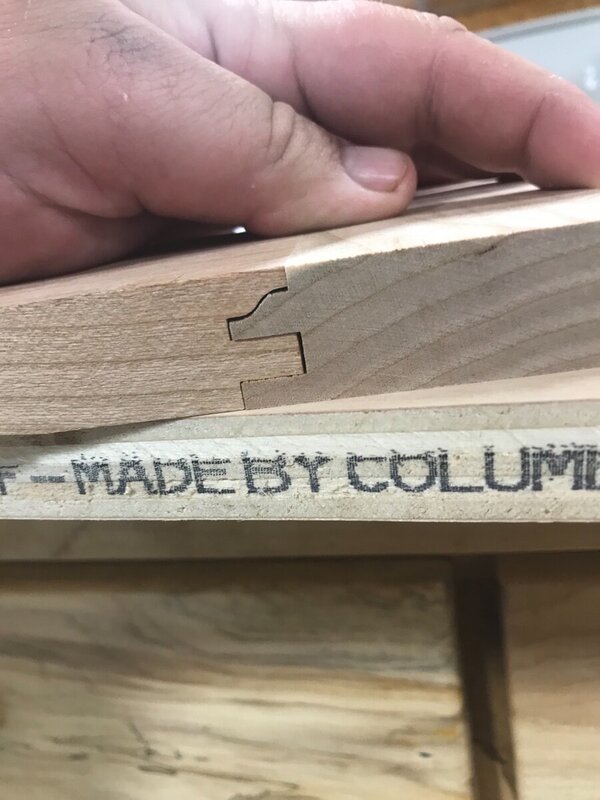
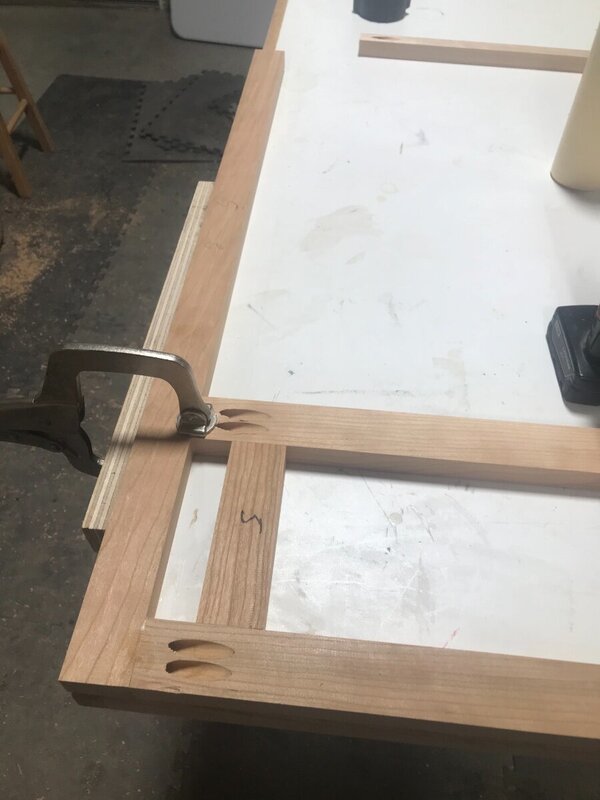
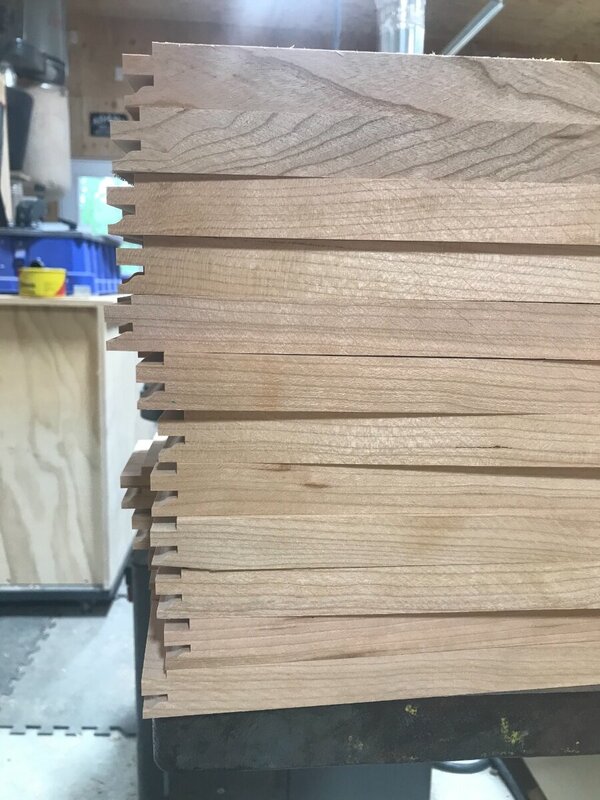
You are spot on with the lot of parts. When dealing with this many organization is key. It’s pretty sickening writing on every part but it pays off in the end. It will save a lot more time than measuring them all a handful of times. The door panels especially are great to have numbered. Problem is you plane off your info so I try to remember to put it on the edge. I think you can see a little chicken scratch on the edge in the picture of the panel on the table saw. It then get rewrote on the face because the edge will be mostly removed by the panel raising.
-
You are spot on, it’s actually 23 1/2. Was a little bit of a trade off vs the shopfox which is 26”. Did save a grand over buying new by time it ships and tax. I will more than likely be adding a digital gauge to this as well. Love having them for repeatability.
-
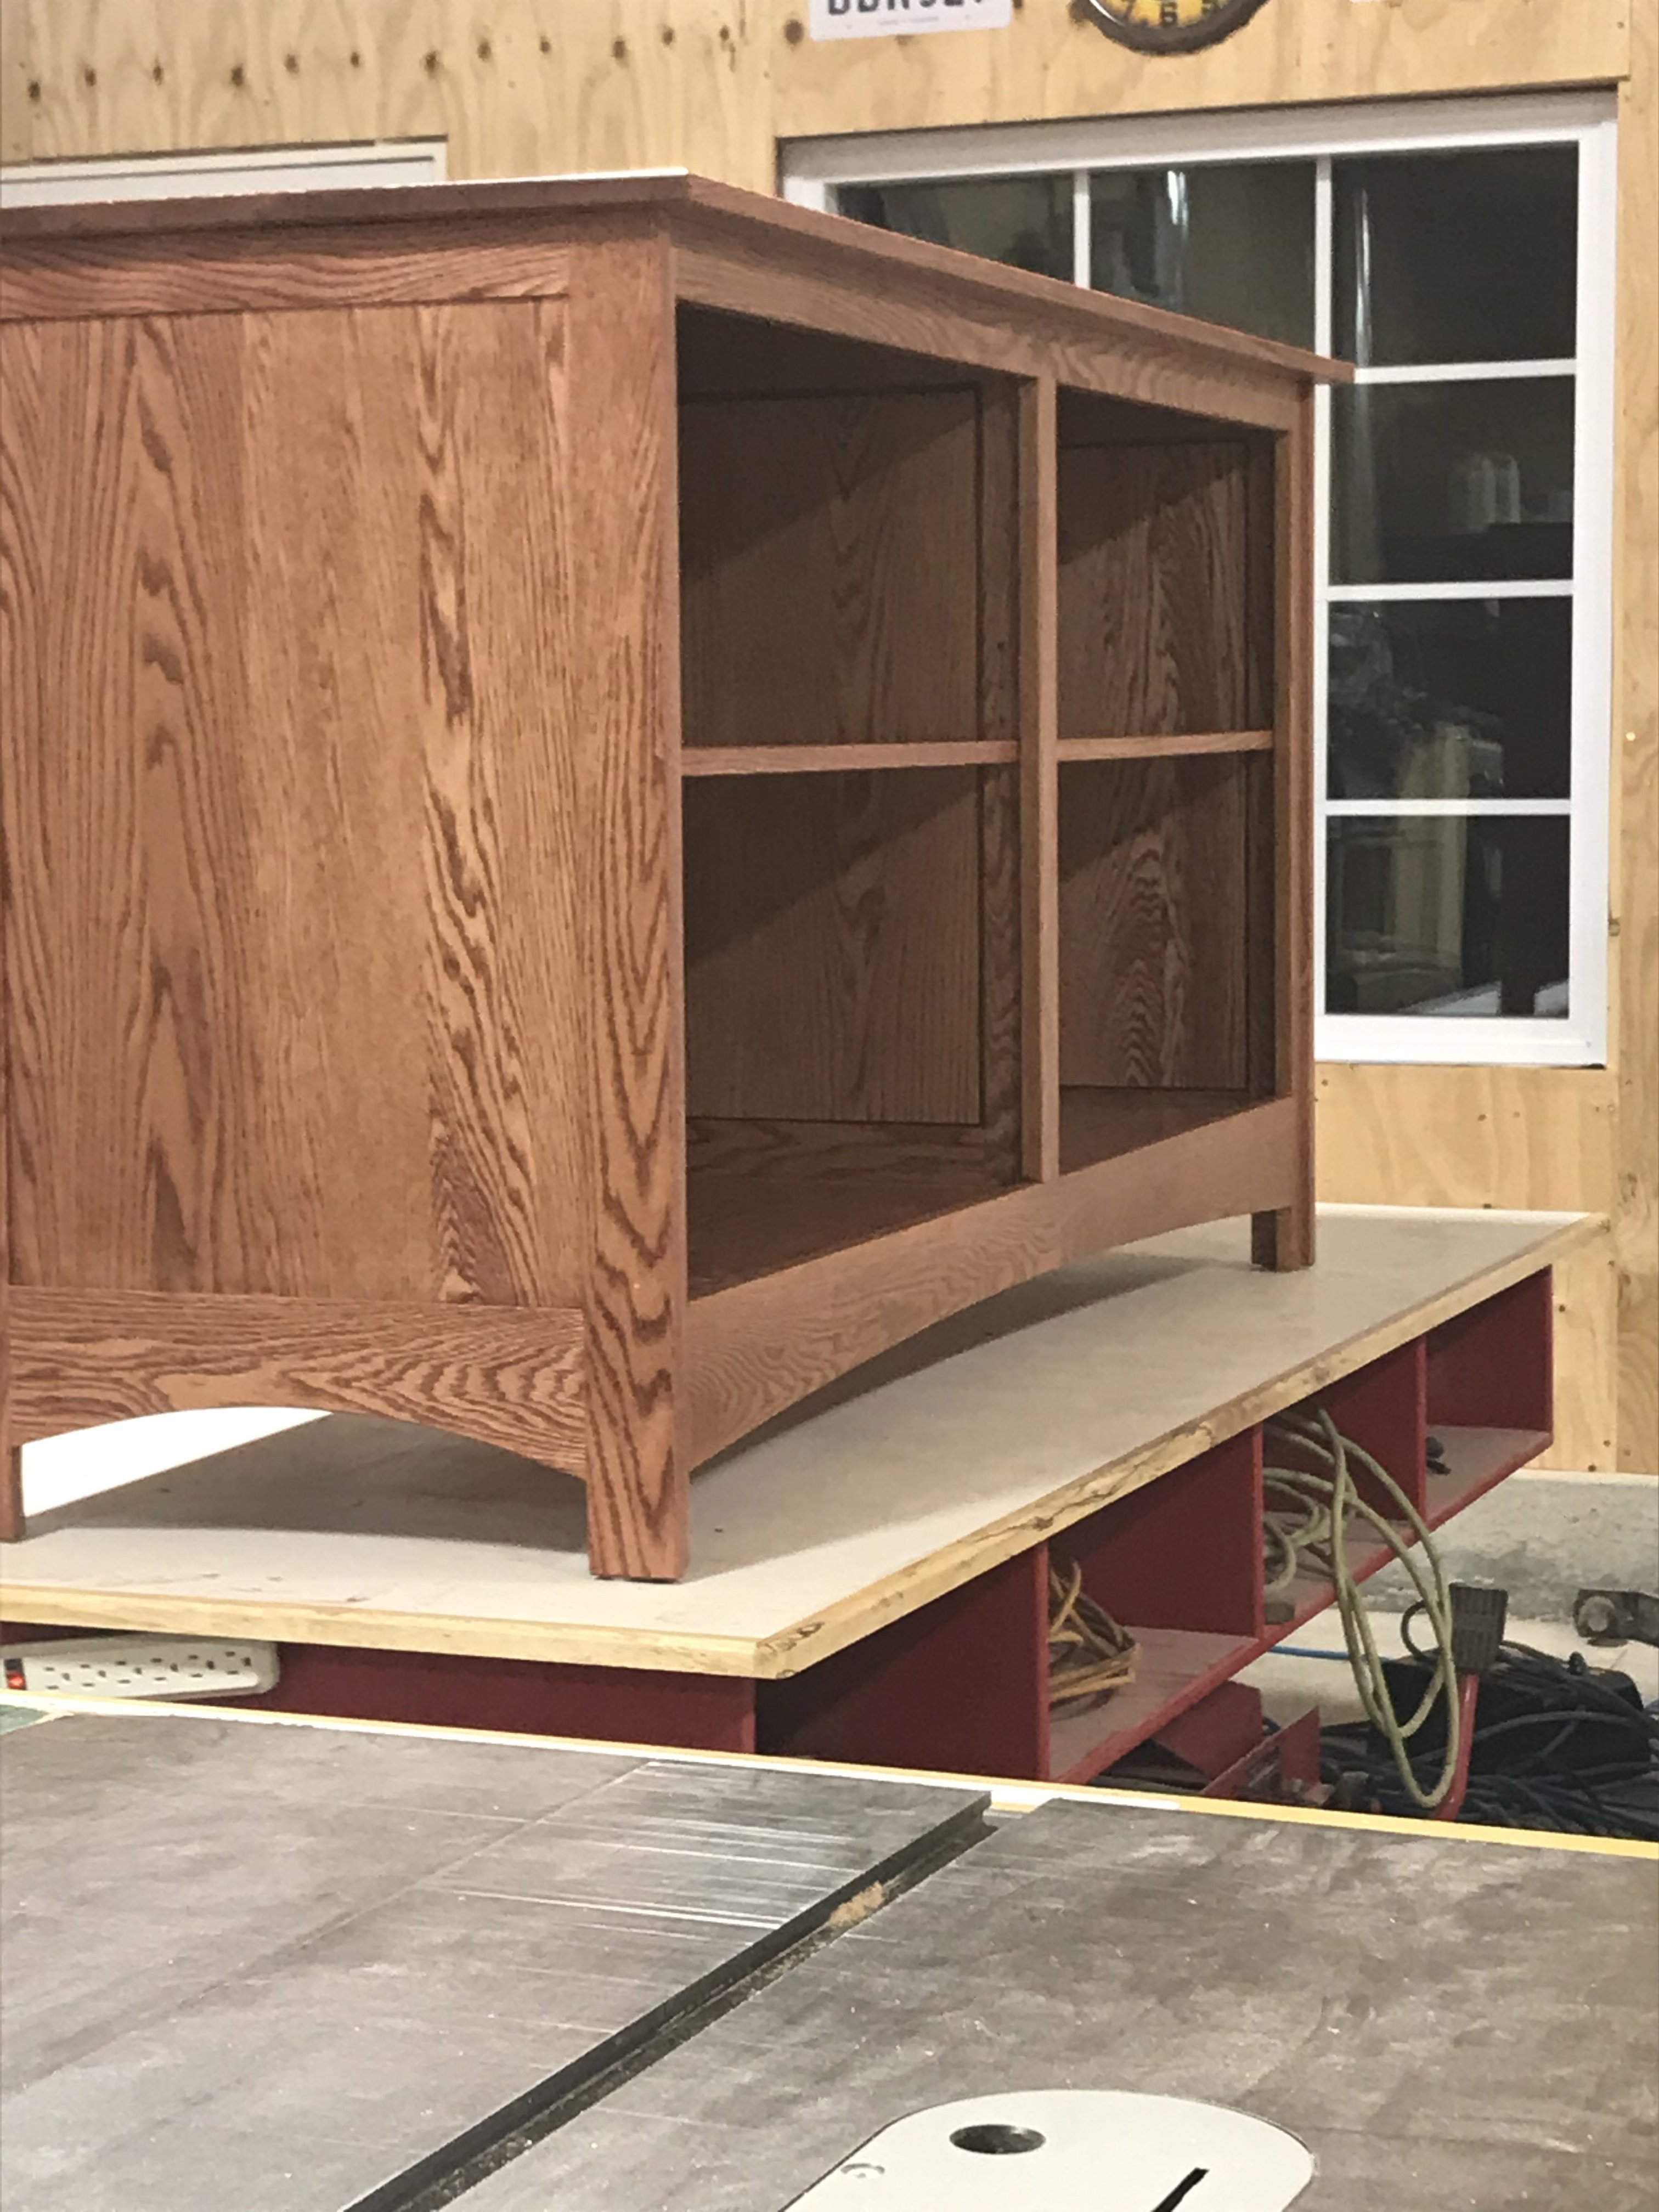
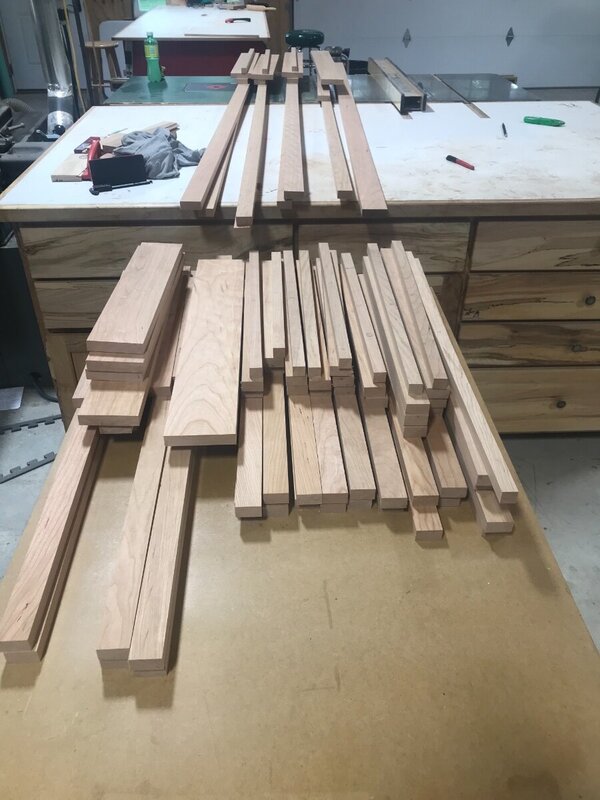
Overdue update..... Had a pretty major hiccup with the door style and rail cutters. Assumption....bit me in the butt. I did assume that the brand new cutters wouldn’t need any shimming or adjustment. Boy was I wrong....about 30 thousands off. The tongue was loose and the ogee profile was just as bad. I messed around trying to get it shimmed to fit but it’s not possible. The ogee shape on the tongue is not matching up to the groove cut at all, got the tongue to fit tight but just no way to adjust the profile. Reached out to infinity via email a week ago Saturday, got an instant response saying 24-48 hours for a response. On Wednesday I called them after not hearing a word. Talked to a nice lady who said the technician was working on it and should get a response by Thursday. Friday I called them again, same story tech was working on it. They are located in Florida and close for the weekend at 5 my time. At 5 min to 5 I got an email from the tech requesting more pictures. I sent them and am waiting to hear back. Decided to put the doors on hold and moved on to the face frames. Milled all 4 sides of the face frame parts through the planer. Having the digital gauge on the planer makes this super easy and accurate. Cut all the parts to length at the mitersaw. I sort the parts as I cut, on my cut list every part is identified by a cabinet number. As I cut the different widths of stock starting with the longest working to shortest each part gets the cabinet number wrote on it and is stacked in order. Makes it pretty easy to find the right parts for assembly of the face frames. Face frames are assembled using pocket screws. Fast and easy way to put them together. I clamp them to my bench and with the vice grip clamps it makes it go pretty fast. For repeatability of spaces I cut a block and use it to set the gaps. Here is a picture of most of the face frames assembled. I do have them all put together. I will be taking these to a shop to get sent through a wide belt. Really probably could’ve sanded the parts to final thickness and cleaned them up after assembly, this was before I had the new drum sander so at the time that was the best option for me. Started back in on the doors today, decided to use a different tongue and groove cutter set that I have. More of a bead than the ogee style. Shouldn’t really make much difference in the final product. Had to cut new rail parts to remove the ogee profile. Ended up not being very much wasted lumber as I cut the new parts out of the old as much as I could. Ended up cutting 4 new 8’ pieces of door stock. Didnt take any pictures of the process since it’s the same steps as the previous post. Did get all the parts ran. Using the table saw to trim up the panels to length. Got through about 3/4 of them before had to get outside and do a few things in the yard.


-
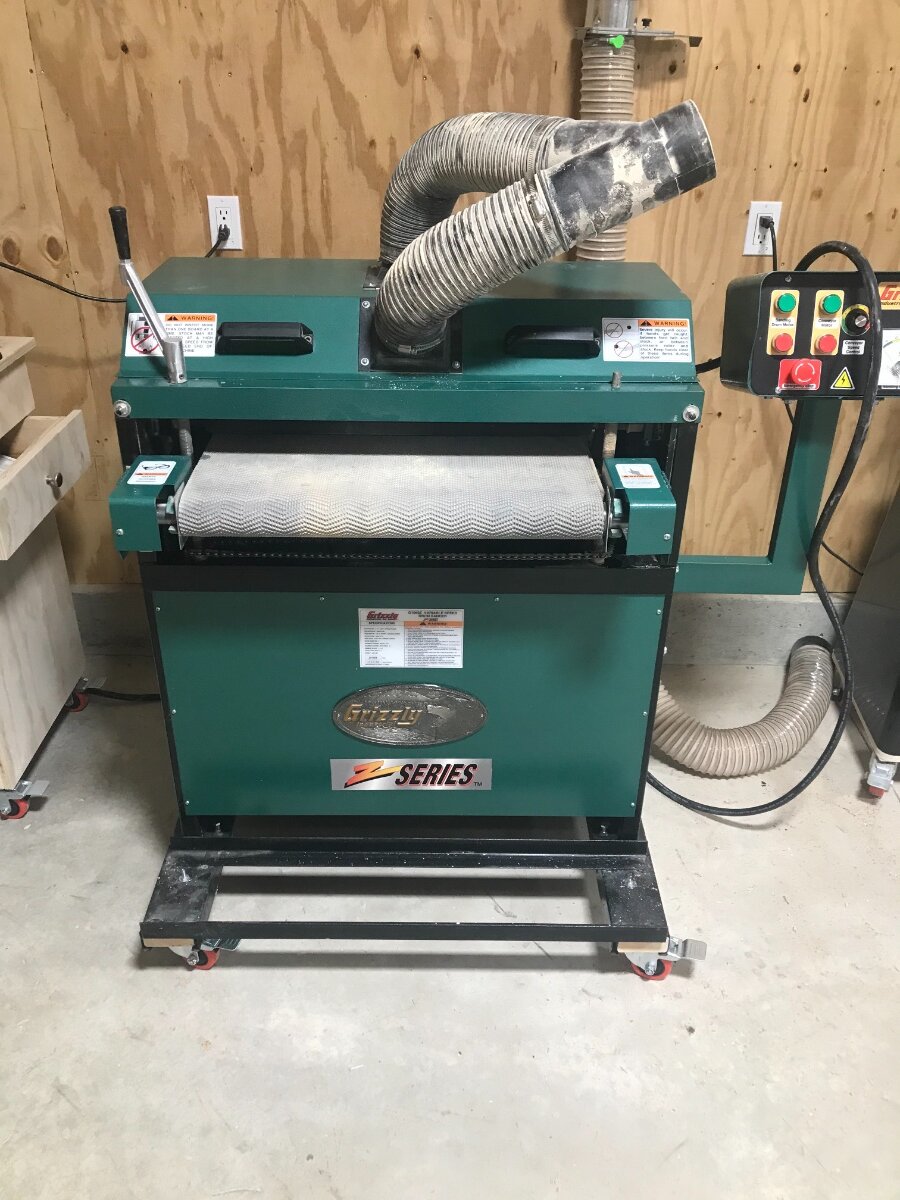
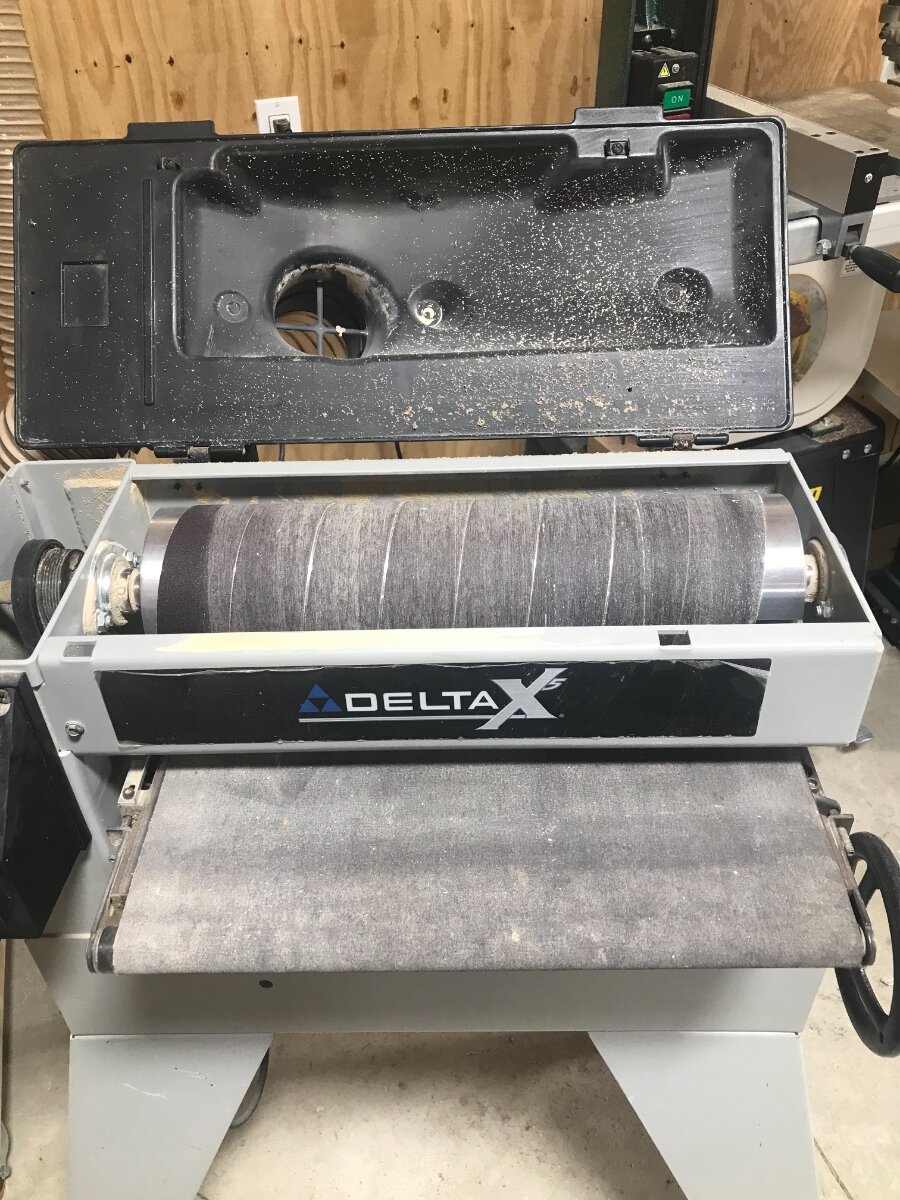
Well I had a used drum sander pop up about 3 hours from home. Found it Friday and went down on Saturday. 24” 2 head about 4 years old. Gave $2100 for it. It came with a couple full rolls of paper as well. The pic of it is after I cleaned it up some. The dust collection fittings I didn’t touch and they seem to be a good example of how dusty the machine was. An older gentleman was the original owner, he decided to retire from doing anymore woodworking. The machine did come on the metal skid and I added the casters to it. Worked out perfectly to screw the wheels to a piece of 2x4 and slide them into the skid. I did drill trough the skid and put a bolt in. It was kinda nice, the neighbor guys were waiting for me when I got home to help unload the machine from a trailer. Within an hour we put the wheels on, cleaned the machine, put a longer cord on and changed the plug-in on the wall. Before I left I took a few pics of the old delta and put it on Craigslist and had the wife put it on Facebook. Sold it on Saturday for the asking price of $900. Which I thought was an insane asking price! I did see one listed just like it a month or so back at that price and was gone in a day or two.


-
In the past using poplar on painted products it tends to be a little fuzzy, maple would be my choice. Around here can get soft maple which is still possibly harder than poplar pretty reasonable and no fuzzies.
-
I ended up ordering some 1/4 wide 1/8 thick foam weather stripping. Am going to play around with the lexel as well. Thanks guys!
-
Every night you turn it down is one you don’t get back. Nice job on the project!
-
So you just put a small dab in the grove?
-
You have to explain to me what lexel is....
-
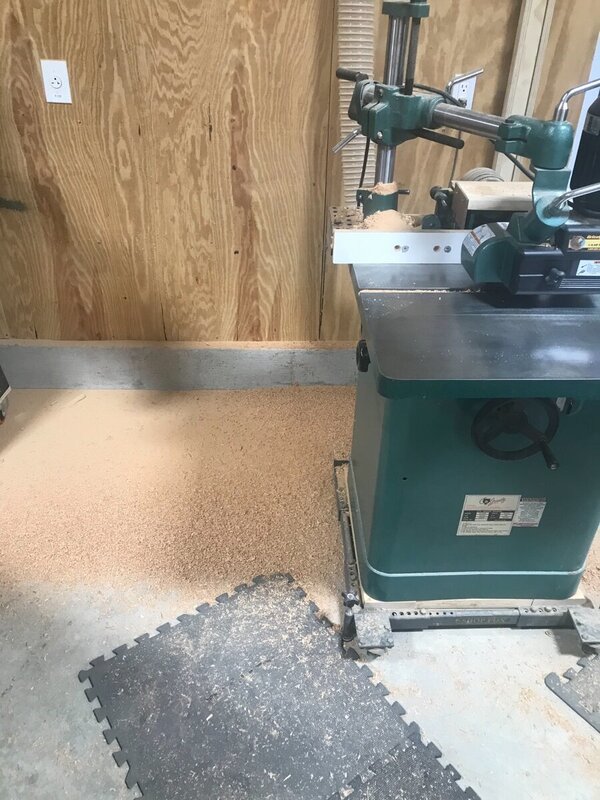
Yeah I was surprised how much I got worked up. Also had to take the dust barrels out and dump them. Running them panels fills the drum in a hurry! Have made about 80 gallons of dust already in this project so far.
-
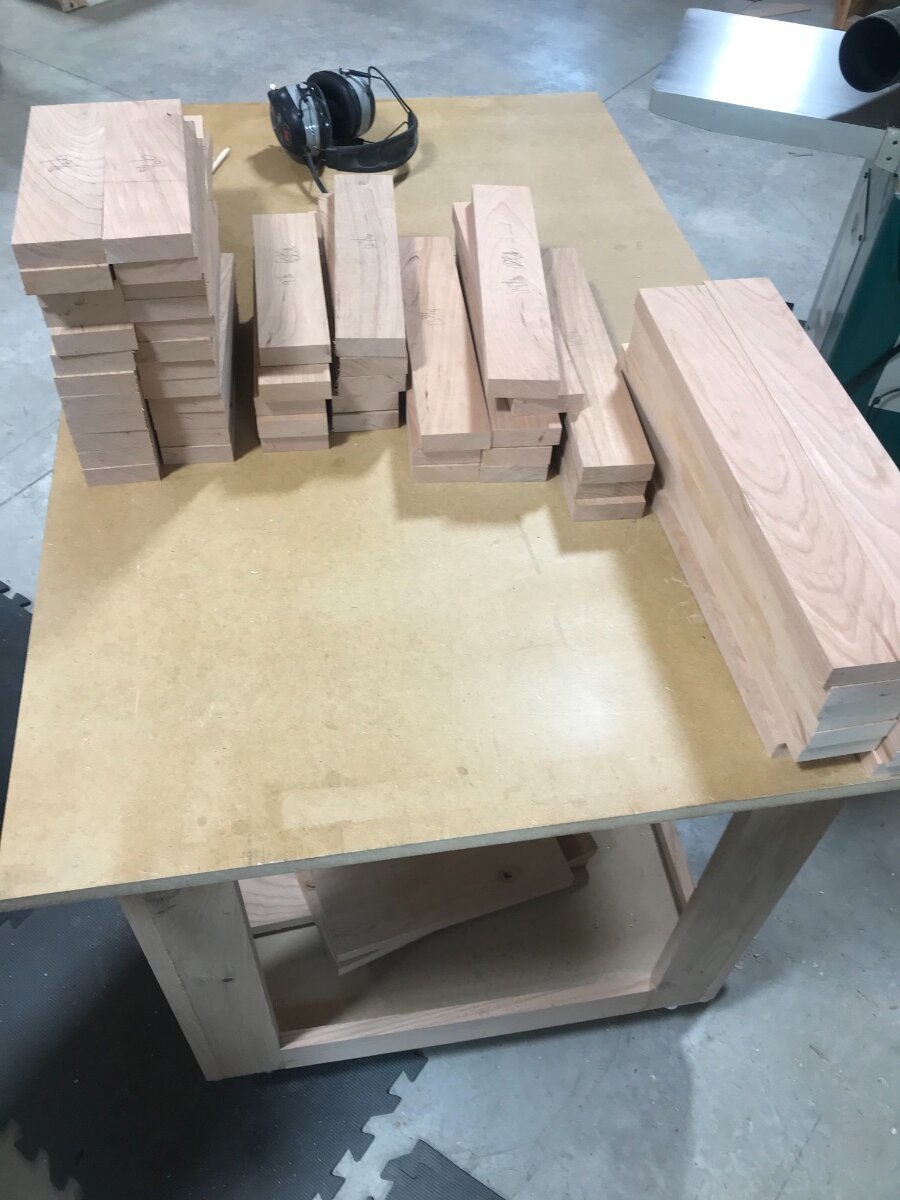
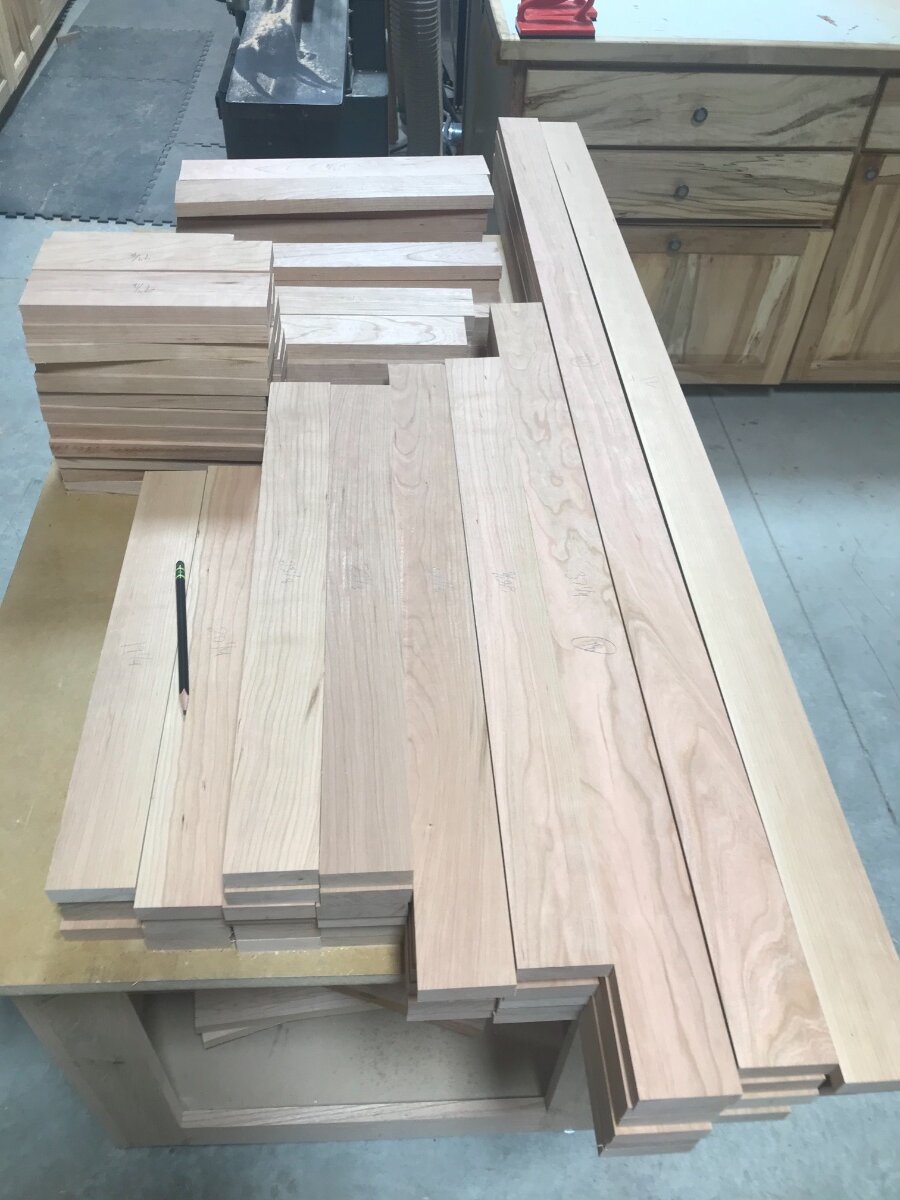
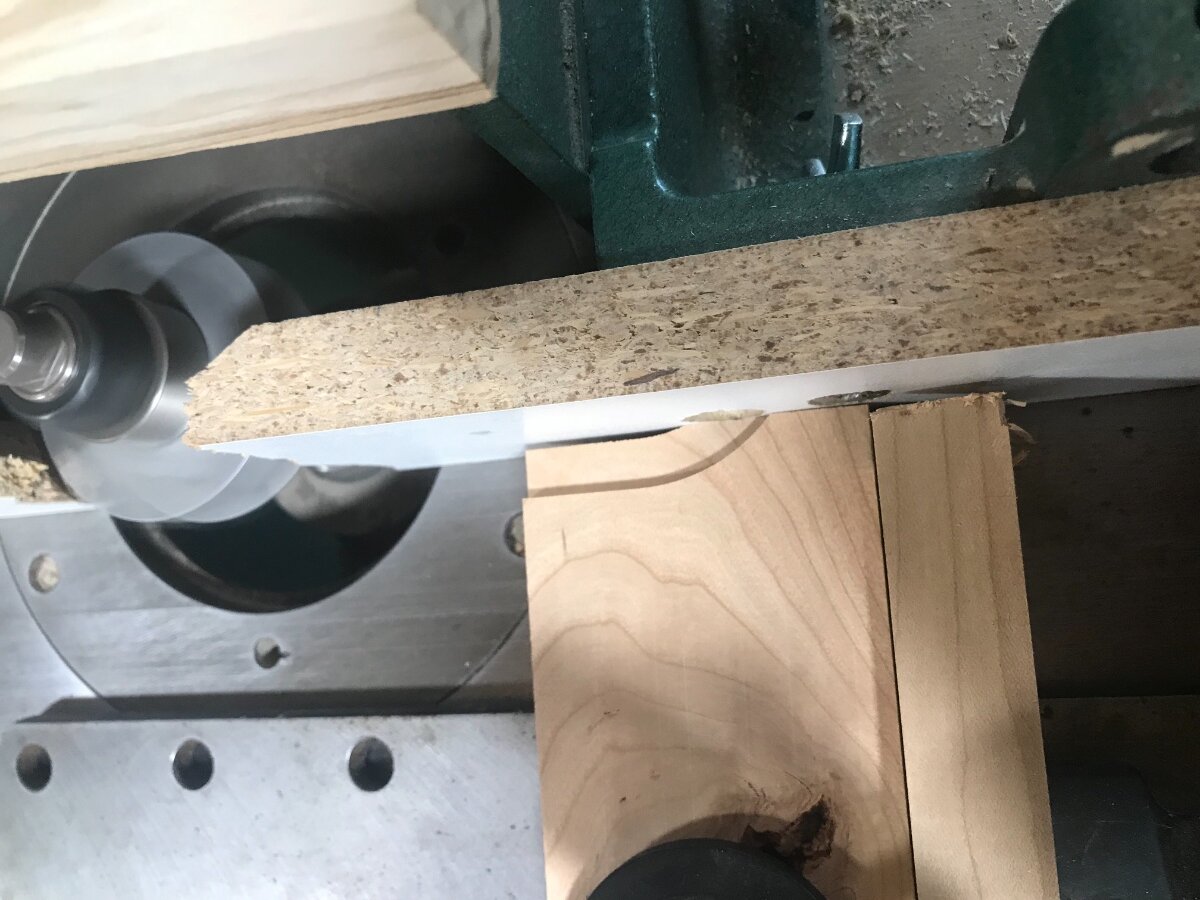
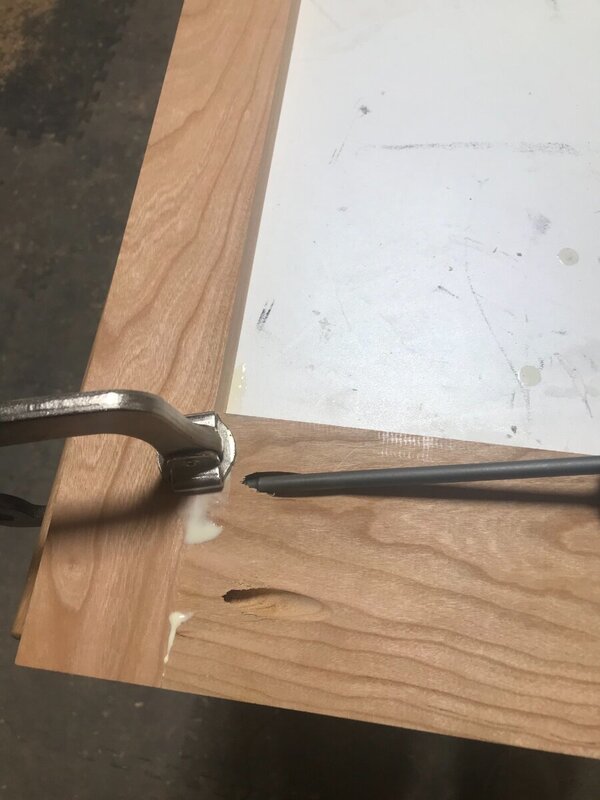
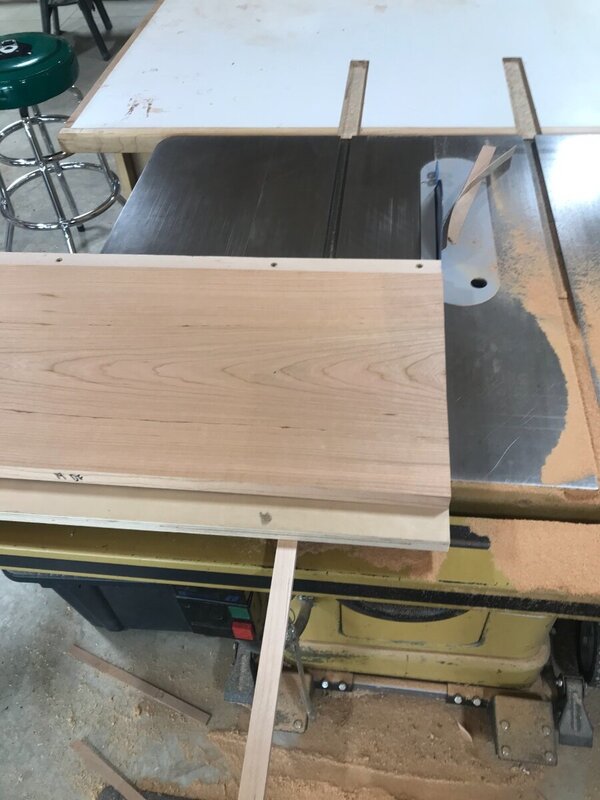
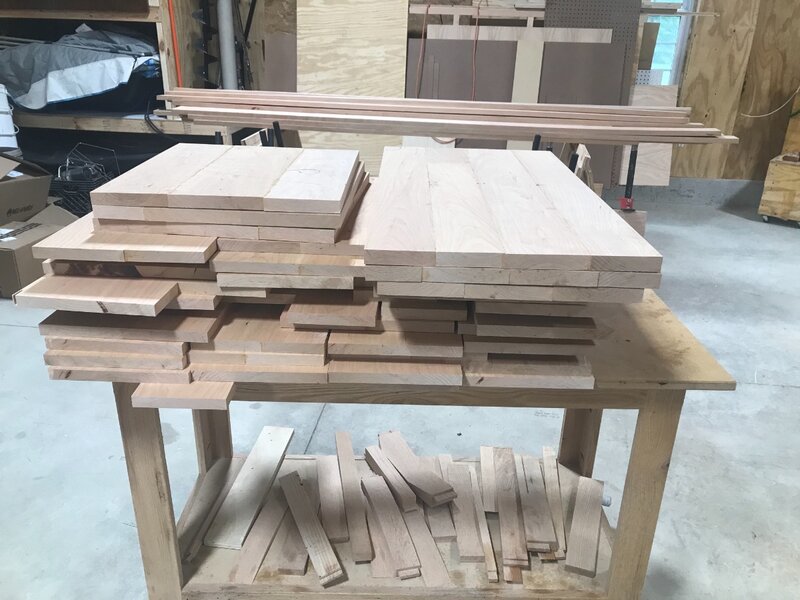
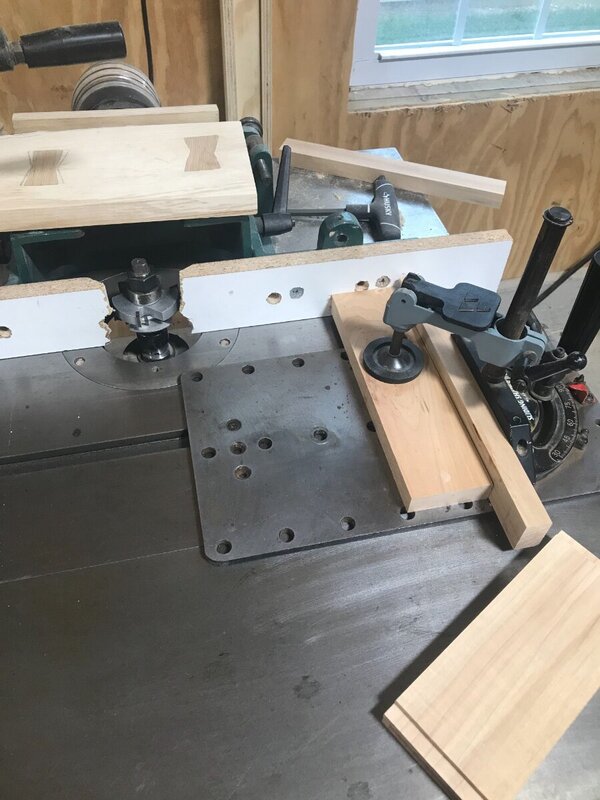
Had a little rain today which allowed me to leave work a little early. Got about 4 hours in the shop late afternoon into evening. Started off by cleaning up the squeeze out off the panels and ripping them to width. The door panels I ripped to allow 1/4 of movement. Which might be a little to much space. Typically I have used 1/2” deep tongue cutters and used 1/4” space balls to keep the panels from rattling, with the 3/8” cutters that I have that doesn’t leave a lot of room to use the space balls. I might try to find some foam to place in the grove to help with it. All the panels and drawer fronts surfaced to .820 or a strong 13/16”. There are a few that were to wide for my planer and will be taking them to the cabinet shop to have them run them for me. From there I went on to cutting all the stile and rail parts. All these parts are cut 1/8” longer than the finished size on the cut list. To keep them all organized I do write the length on each piece, which might be overkill since they are all stacked by length. The stiles all are placed on the cart length wise and the rails go the opposite way. Just something I have always done to help me keep them all a bit organized. These parts are also planed to .820 Setting up the shaper to do the tongue cut is pretty critical. I have added the extra cutter to the set that allows me to trim off some of the tongue. I like this just for the fact that you know your parts will be square. As you can see I’m removing 1/16” off the tongue, do that on both ends and there is the 1/8” oversized cut. Before I ran parts I gave the shaper and the sled a good waxing. This cut would be pretty hard to do without a sled that clamps your piece in place. The part actually registers off the infeed fence and the clamp holds it there. The outfeed fence really is only there for support when taking the pice out of the clamp. Did get a stack of parts ran before had to go to the house.


-
If I started driving now I could be there in time for supper
-
I actually store some longer pipe up on the lumber rack, have taken the clamp parts off them because they aren’t used that often. Big box store is about an hour trip for me, the plumber is about a half mile from work. They sell it just so much a foot and so much to thread. When I picked it up they didn’t have a bill figured up yet. Will let you know what they cost me.
-
I love the look of the caps! It is a great touch! Nice job bud
-
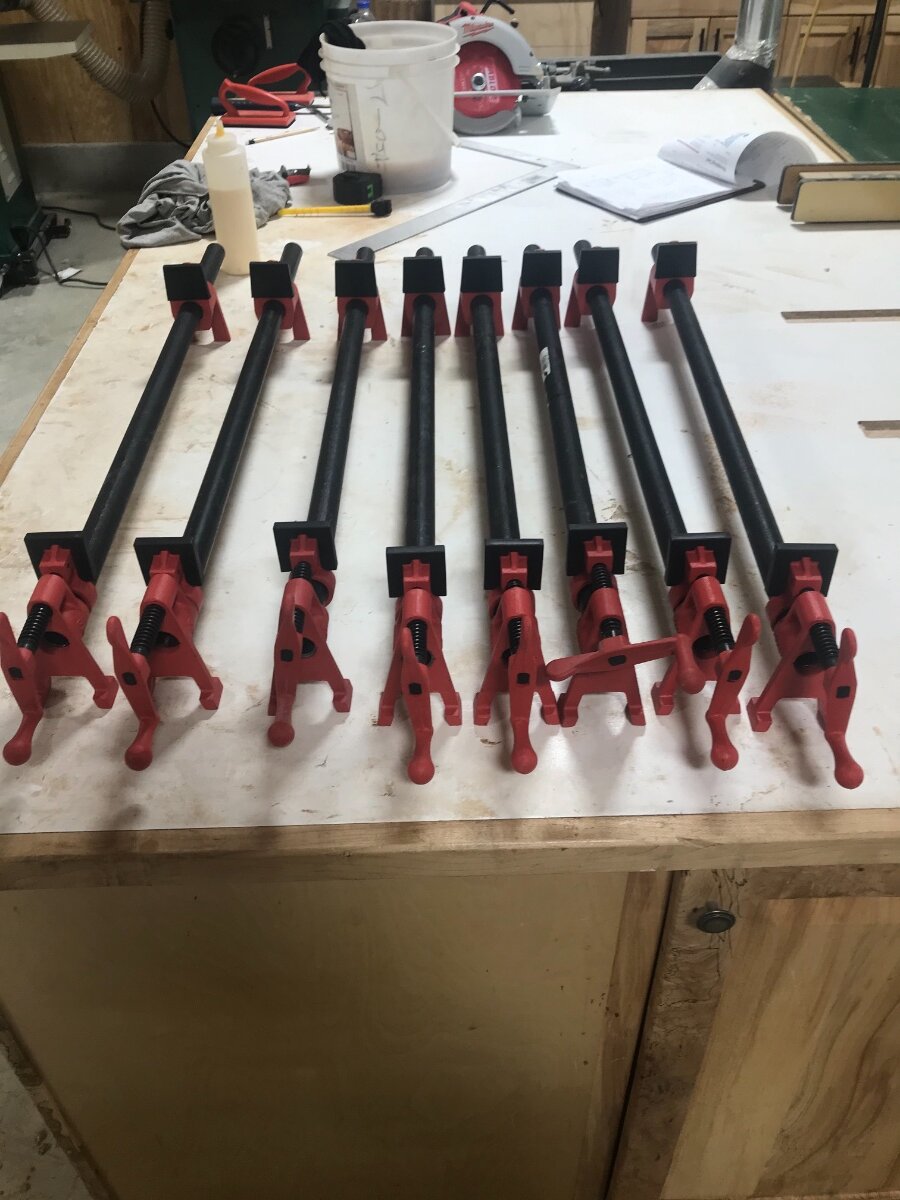
Clamps came in yesterday, just in time! Had a local plumbing shop cut me some pipe for the, Still not enough clamps! But an improvement from what I had. Did get all the panels rough cut to length and ready to be glued up. At this point I have 3 panels left to get glued which I will do either tonight yet or tomorrow morning before work.


-
Wow! The ars did wonders for you! The grain in the hb top arch is a perfect placement!
-
All I know with the way the world has been affected in the past year has changed all our lives some. The amazon culture of next day delivery has us all spoiled. With the delay it will give me more time to see if I can find a good used machine. Sure it sucks for the current project but I will make it all work.