Every purchase made through our Amazon Affiliate Page helps support this site

Chet
-
Posts
2,277 -
Joined
-
Last visited
-
Days Won
92
Content Type
Profiles
Forums
Downloads
Gallery
Events
Store
Articles
Blogs
Everything posted by Chet
-
If it were me and beings he is going to add some back on anyway I would add on enough to get back to at least his original plan for 3 inches.
-
Yea, that would be a good idea. You would only need a 1/16 of an inch or so on each side.
-
I would laminate also. I know that a bench is a biggest and most costly project for most of us for our shops and want it to look nice but bottom line is it is a tool and you want it to do the job properly and that is more important then pretty and perfect, in my mind. You could laminate a totally different species to make it a feature instead of a boo boo.
-
I am wondering now if I had put down a couple of more coats it might have been okay. I am pretty sure that the problem was the foam strips on the back of the track gripping on the finish. It was only the back portion of the rack where the track foam was against the plywood. The other section of the rack was Sapele and had a smoother feel to it.
-
Interesting point - After I hung these racks and was satisfied with everything, I took them back down and sprayed them with one coat of rattle can poly and let that dry over night. Today I put them back up and went to put the tracks back in place and they wouldn't slide with out more force then I want to use. So I grabbed one of my rasps and removed all the finish that is on the surfaces where the track touches and now everything is good again.
-
My second comment about public domain was strictly tongue in cheek.
-
My design is kind of a lazy version of something Paul Marcel did about ten years ago.
-
You can use them if you like I have no problem with it. Kind of hard to stop you anyway they are here on a public domain.
-
The first Roubo on the new forum. ?
-
I heard an argument a while back about making your work bench out of hard maple. What the person was saying was that you don't really want your bench top made out of a real hard species and his thinking was that if you drop your work piece on the bench, your bench top will be okay but you work piece may get a dent. Where as if you use a softer species the bench suffers the dent but your work piece survives. Just a different opinion.
-
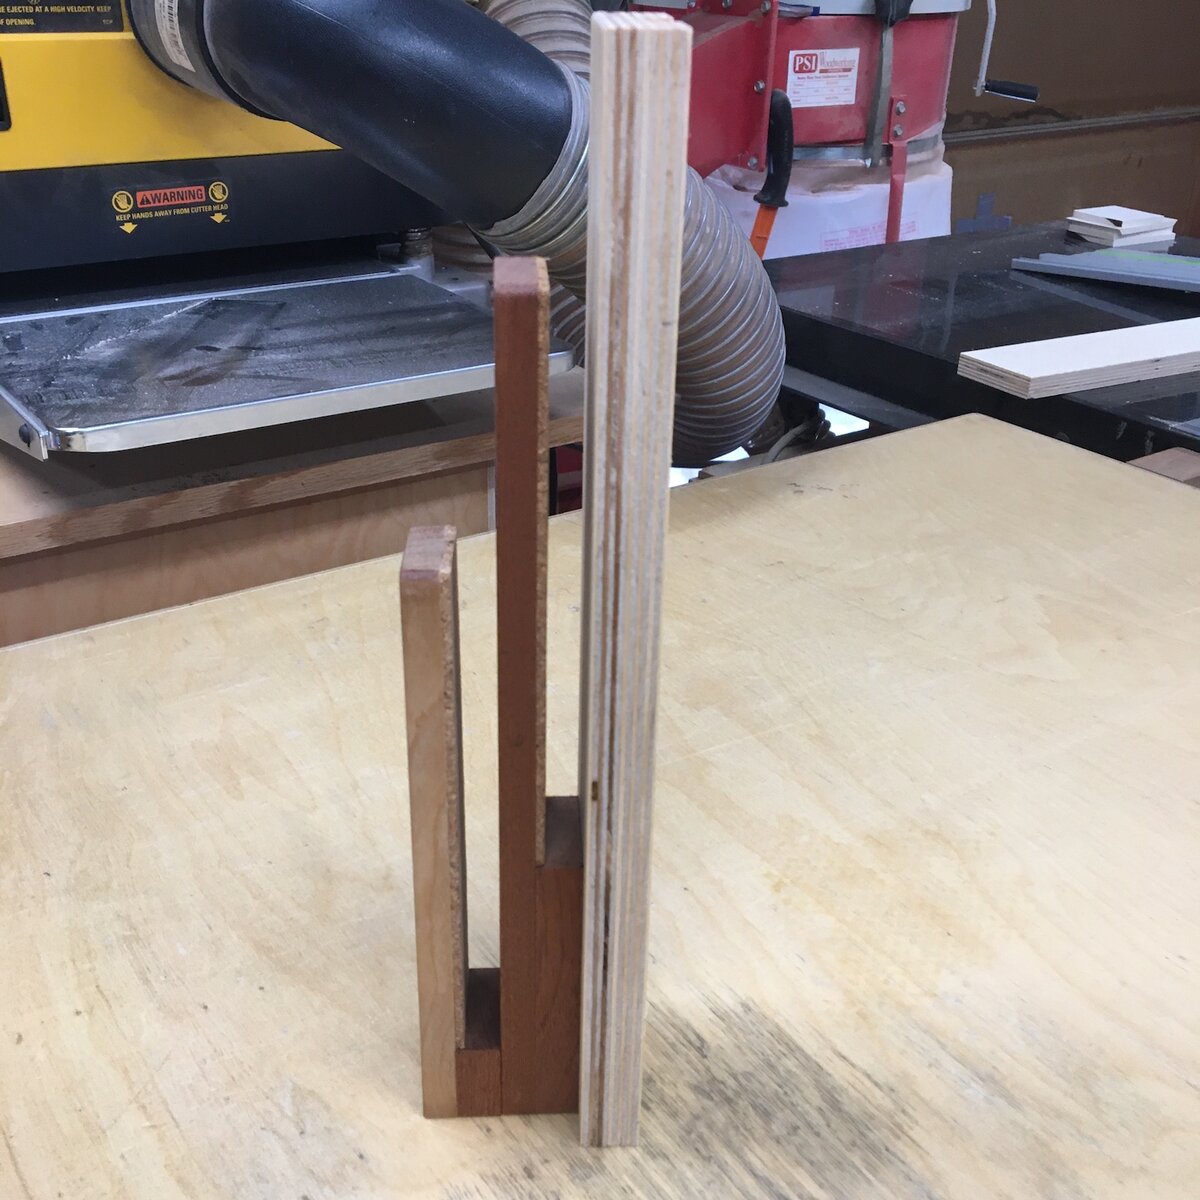
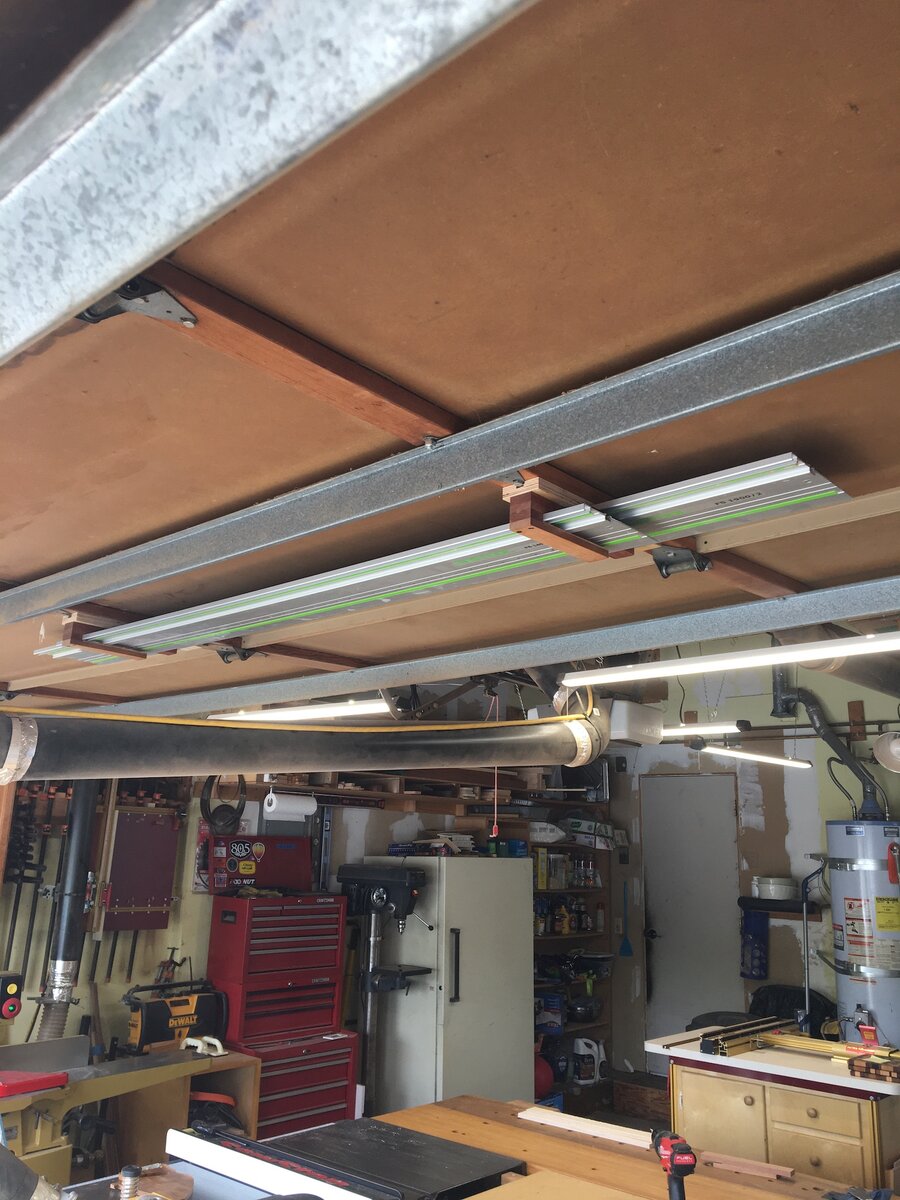
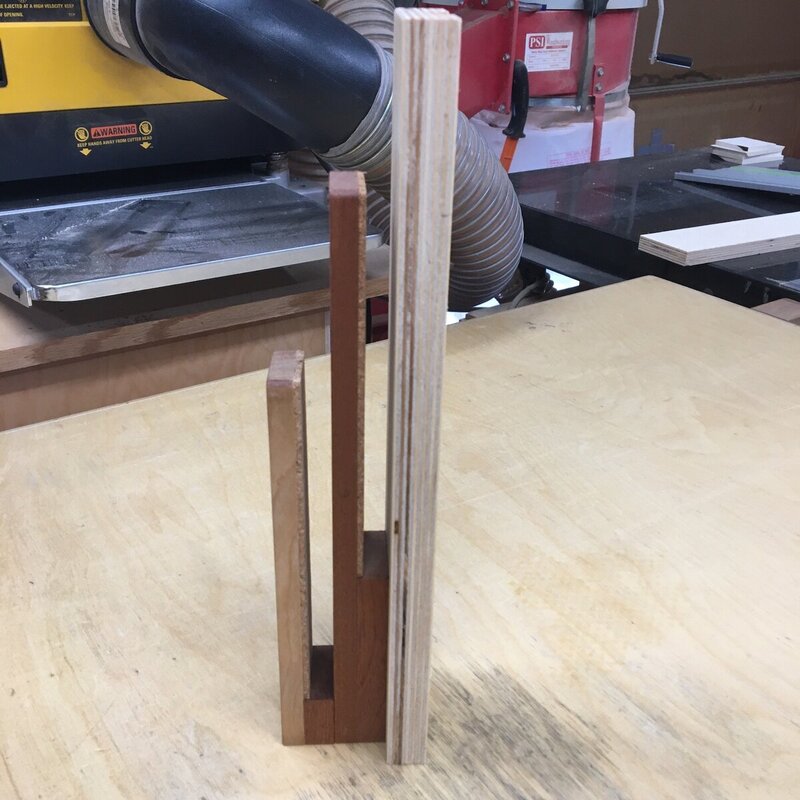
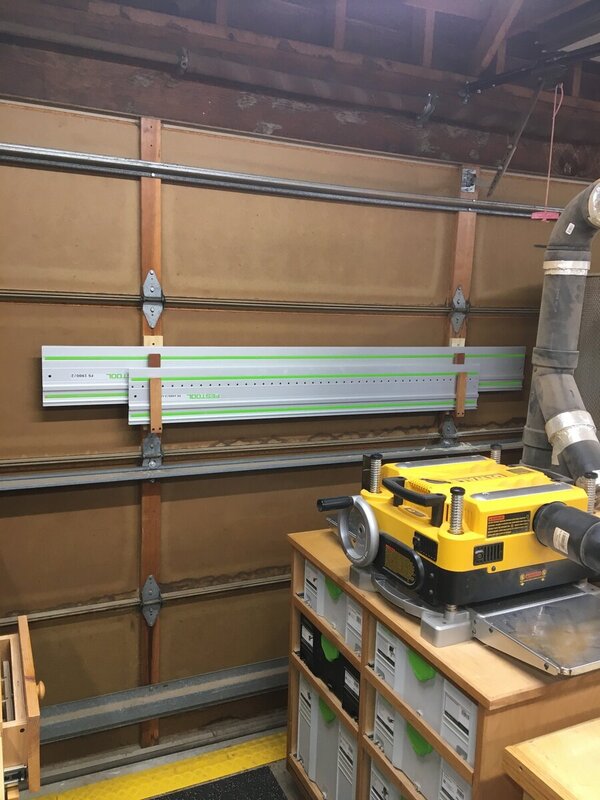
Bryan's recent "A week in the shop" post motivated me to do something I have been thinking of for a year or so. I have been storing my tracks on a rafter in the shop which required the garage door to be closed and a ladder to retrieve them when needed. I have always thought about making something to mount on the garage door so they would be easier to get at. Pretty simple design, I put cork on one side to create a friction fit so they don't slide out when the door is opening. Also, It is a minor stretch but I can reach them with the door open. First picture is a side view of the bracket. Mounted on the door. Door in the open position.

-
I don't have vertical spot either. Mine are up on a rafter which require a stool t get to and I don't like it. I have been thinking of making a bracket to hang them on the main garage door
-
Yep I like a real paper, the kind that I find under my car or gets wet when it rain. I like to read the news and if I spill coffee it won't go up in a series of sparks and smoke. And to just get this out of the way I also, still read books with paper pages. I just like the process of turning the page.? I know, I am past my shelf life.
-
We can both get booted together. I try to stay just enough informed with world events to make me dangerous but what you mentioned is really starting to wear me down and I don't read as much of the paper as used to. It used to take two cups of coffee to get through the paper, today I noticed I had half of my first cup left when I pushed the paper aside.
-
Some times this is all that it takes to rejuvenate or regenerate the mind and soul.
-
Well, no not necessarily because you create the edge of your sled by making a cut so your thin kerf would be the same distance from the edge of your sled as my blade would be from mine.
-
I am using a stop block. I measure back from the edge of the sled closest to the blade back to the stop block, minus 1/8 of an inch. This gives me the correct bevel on Bothe sides and both ends. I don't know if you noticed in my practice box, but I am using a "V" glove instead of dado, I think it will look a little more elegant for small stuff.
-
I hope they stayed and watched it the whole time to make sure it didn't actually fall over and then stand back up on its own.
-
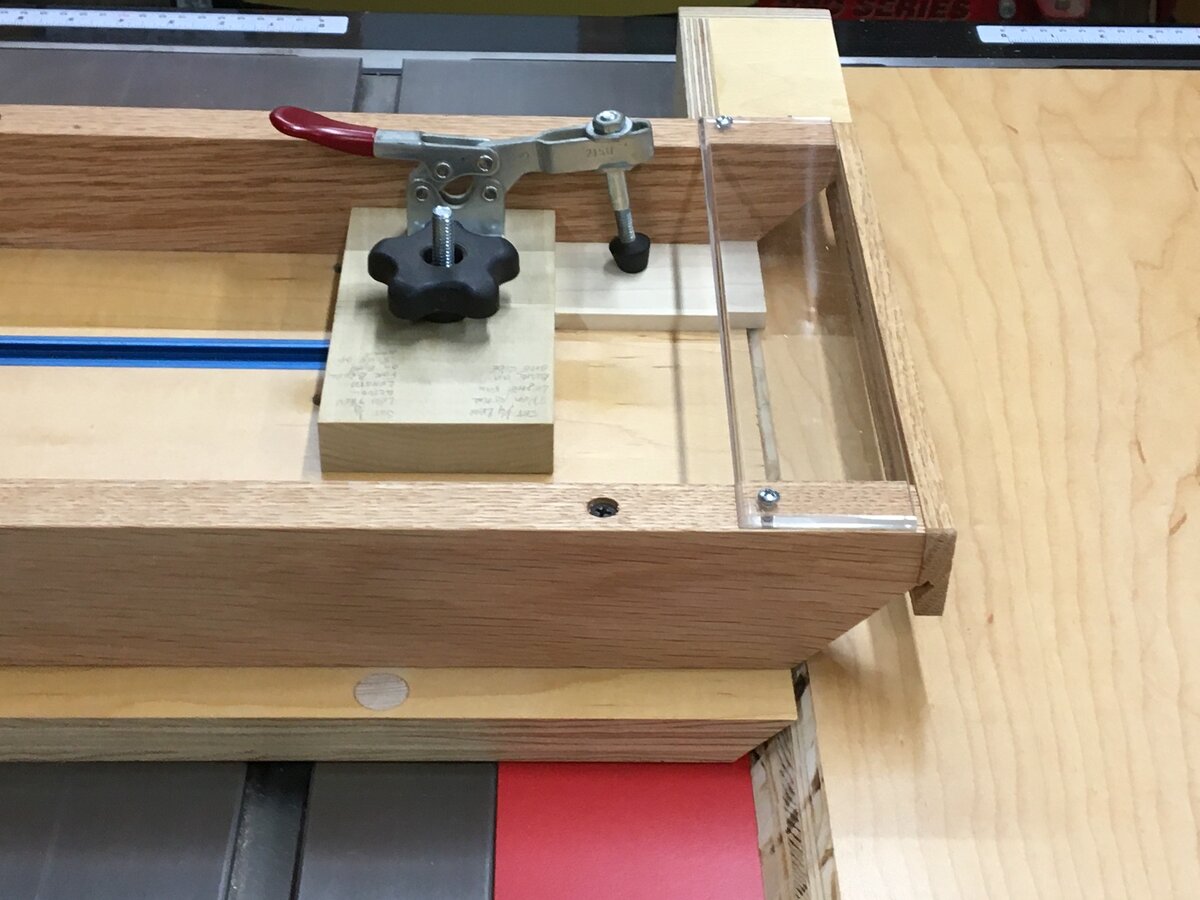
Just a point of interest. I designed this so that the blade is tilted away from me and my fingers. So if someone has a right tilting blade, they should design their sled to go on the other side from mine.
-
It has a runner just like the sled so it doesn't hit the blade and I made it pretty snug so that it also doesn't move parallel to the blade either, it stays pretty much in place. You are correct when making the front and back and ends of the box it is not critical as long as the front and back are the same and the ends are the same. When it gets to dividers or other internal parts it needs to be a more dialed in situation. I learned with my practice pieces that if I measure 1/8 inch less then my needed length from the edge of the sled closest to the blade back to the stop block then I am good. But until I an really convinced thats what works, I am going to be setting up and cutting scraps to check my work. I will be milling some poplar pieces along with my chosen species to us for set up through the project.
-
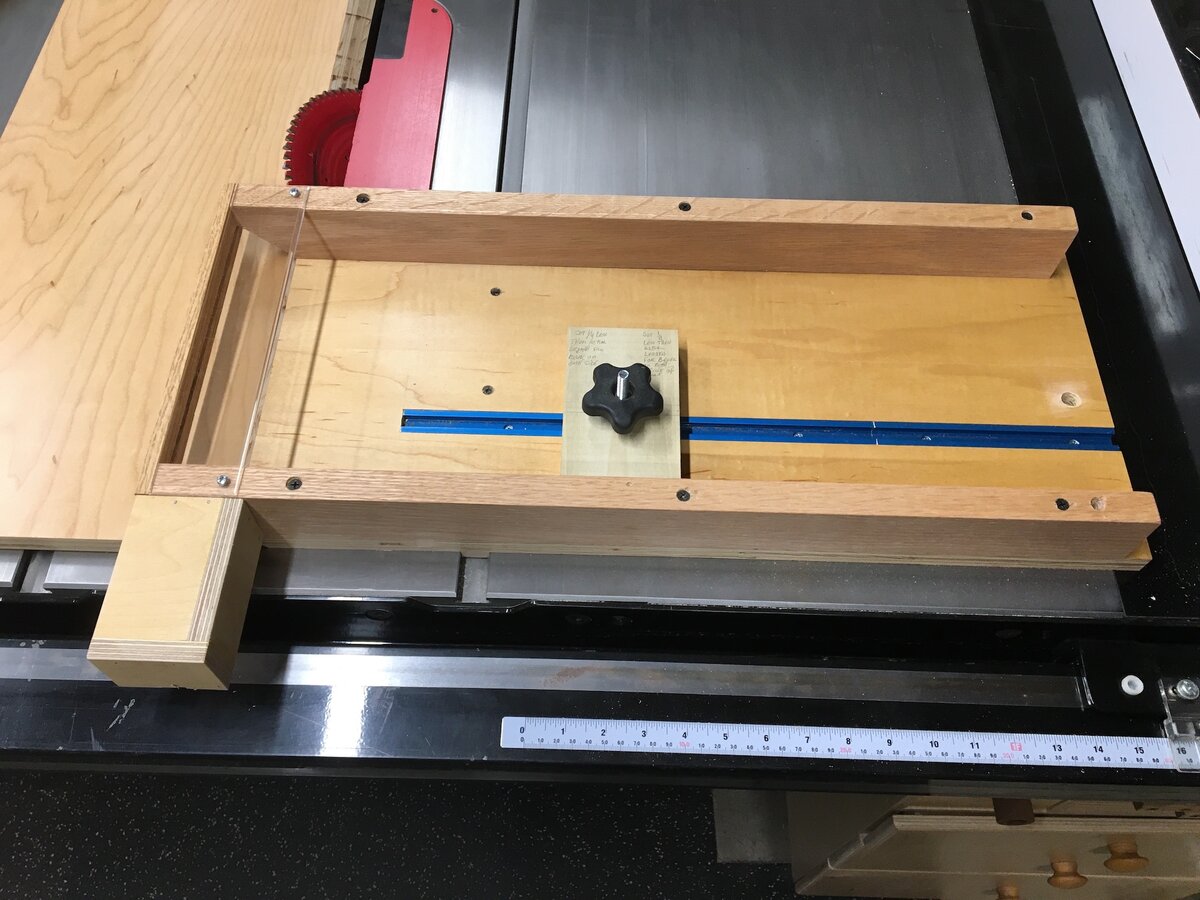
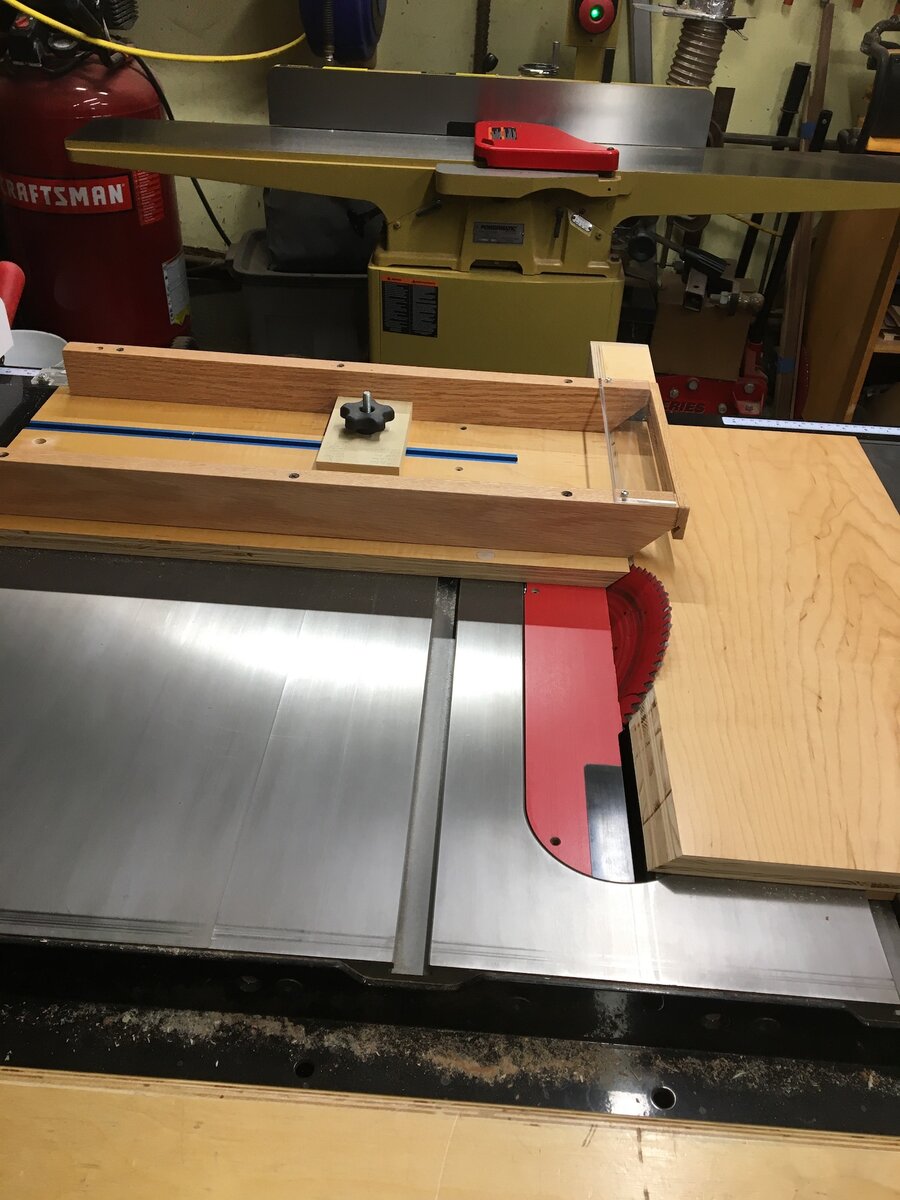
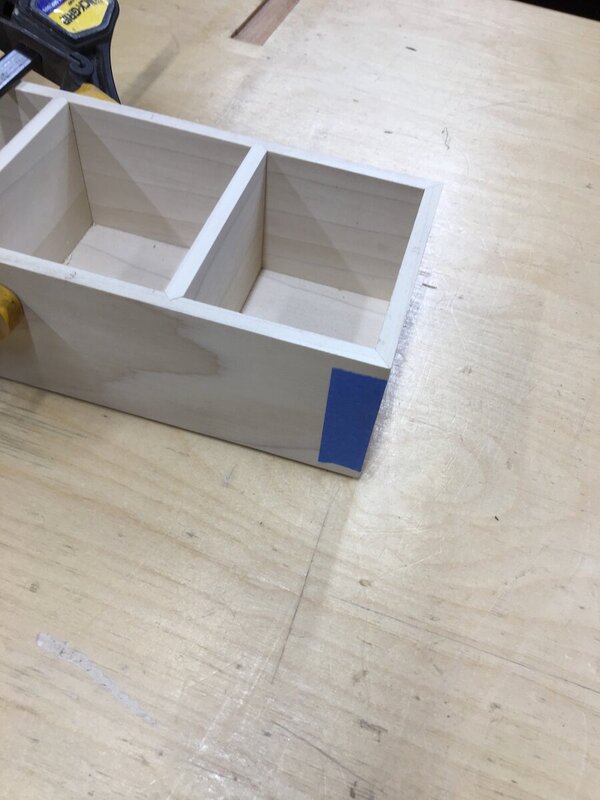
I saw a version similar to this in a video posted on Matt Kenney's instagram account. I am running out of room in the house for major furniture builds so I started to think about making small jewelry boxes or keepsake boxes, maybe to sell. I wanted a sled that was designed for nothing but cutting 45's on box pieces. What I ended up with is a two piece jig. One part sits in the left miter slot and catches the off cuts, the other part is the sled itself that holds the work and slides on the right miter slot. The sled is 10 inches by 24 inches and has a tee slot for a stop block. I have a safety box on the back edge to keep the blade from being exposed on the back side of the fence and there is also a piece of plexiglass 2 inches wide over the blade end that allows me to see my work but keeps my fingers away from the blade. I built some practice boxes to test the concept and ended up adding a toggle clamp to the stop block to make it much easier to hold the smaller pieces. I should make a comment about safety - In the first three picture I have the blade a lot more exposed then I ever would during operation. I had it up to make sure I had all my safety clearances covered properly. I didn't noticed that I had left it that way while taking the pictures until just now. Four pictures of the sled and the last is one of my "test run" boxes, not even glued, just tape.


-
If you believe what Coop says about his shop house keeping, he isn't any good with a broom.
-
Yea, when you stop and think about it you fit the tenon to the mortise anyway.
-
I would think that low power will have more likelihood of a kickback but with more HP you might not hear or feel it coming. Also the higher the HP the bigger the mark the kick back will leave in your body. ? If I needed to purchase aftermarket splitters I would go with the micro jig set. https://www.microjig.com/products/mj-full They have some like the ones you described Ken but their standard ones have a bracket that mounts on the underside of you zero clearance plate and in the saw kerf. Looks like easier alignment. I think the have a video on their website.