Every purchase made through our Amazon Affiliate Page helps support this site

Chet
-
Posts
2,277 -
Joined
-
Last visited
-
Days Won
92
Content Type
Profiles
Forums
Downloads
Gallery
Events
Store
Articles
Blogs
Everything posted by Chet
-
That came out real nice Coop. Way nicer then the ones that show up on your Etsy link.
-
This isn't just drum sanders. A lot of power tools are in short supply, actually a lot of everything is back ordered. I just passed week four waiting for a garage door.
-
That's coming out real nice Jamie.
-
Its just a snug fit in the miter slot.
-
Yes.
-
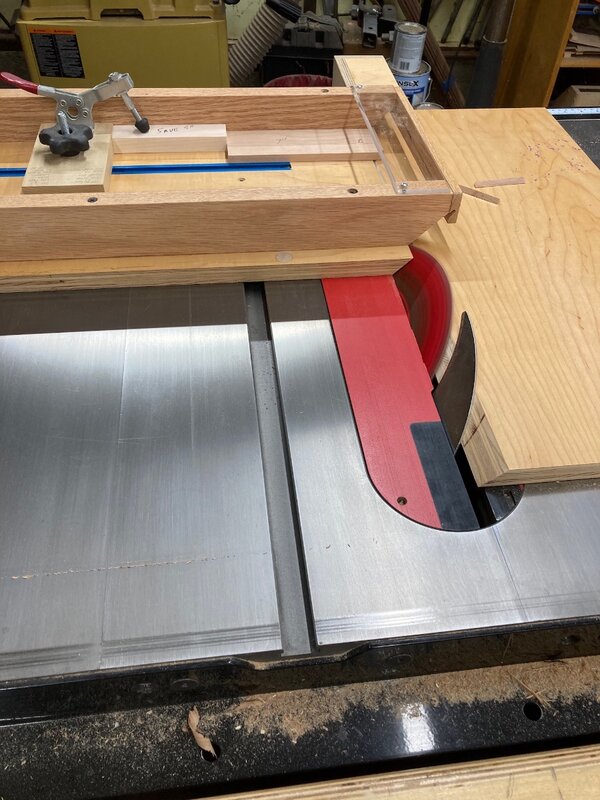
This is mine - it is totally dedicated to small parts and 45°, nothing else. Because when you are dealing the blade at 45° it is more exposed no matter what height I put a boxed blade guard on the back and a plexiglass piece across the business end on top, this way you can see your work but there is something there to keep your fingers from the blade. There is a tee track and stop block with a hold down.
-
Thank you.
-
I use one of these quite often Starrett Protractor Pretty handy and I think I have more then gotten my money's worth. Really helpful for baseboard on wonky wall corners. It gives you the angle for a single cut or two cuts.
-
Stupid things I remember from coaching softball for 20 years. The home plate has three 90° angles A,B & D in Bob's diagram and two 135° angles E & C according to the rule book description.
-
I am a fan of cock beading, I like the look but I think in this case with the other details and the recessed top drawer that it would get to looking too busy. I think I am going to just ease th hedges so they aren't sharp to the touch and leave it at that.
-
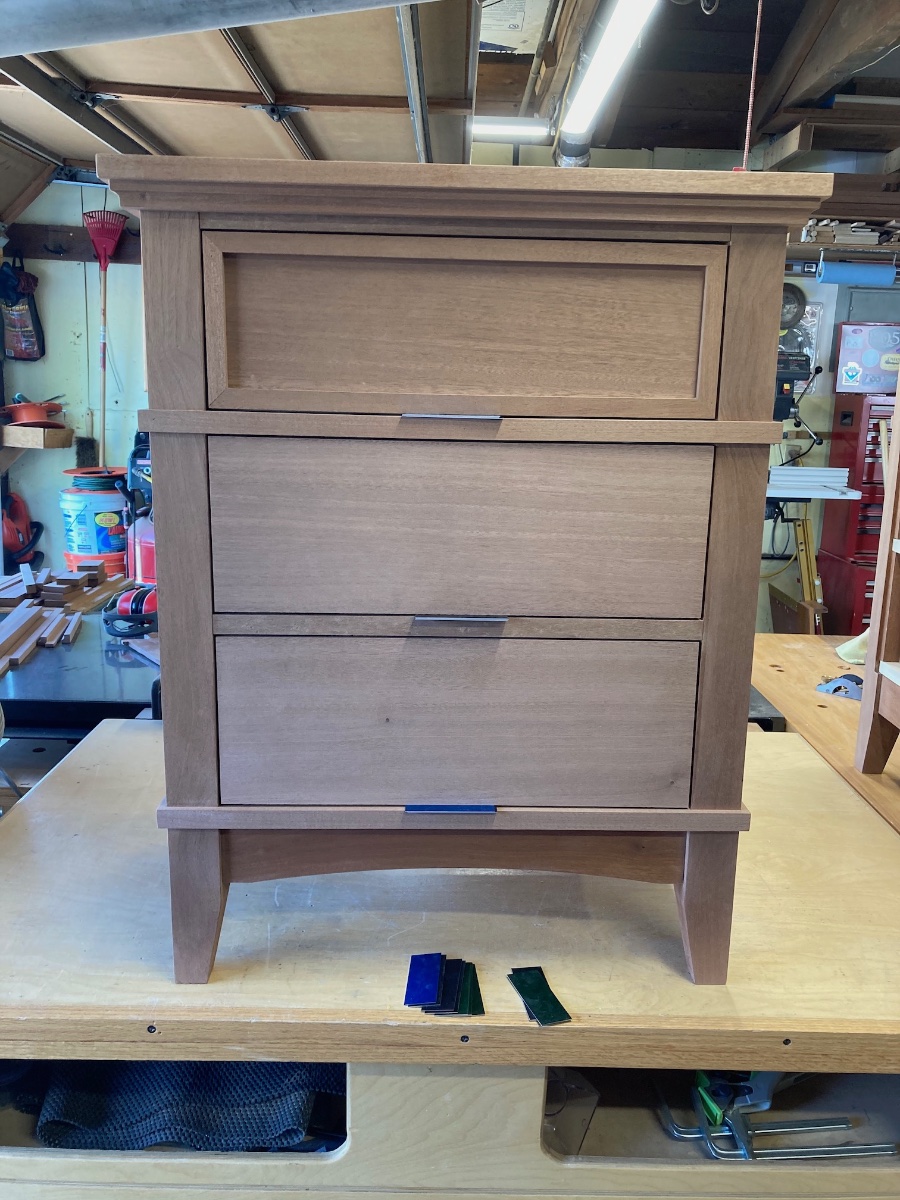
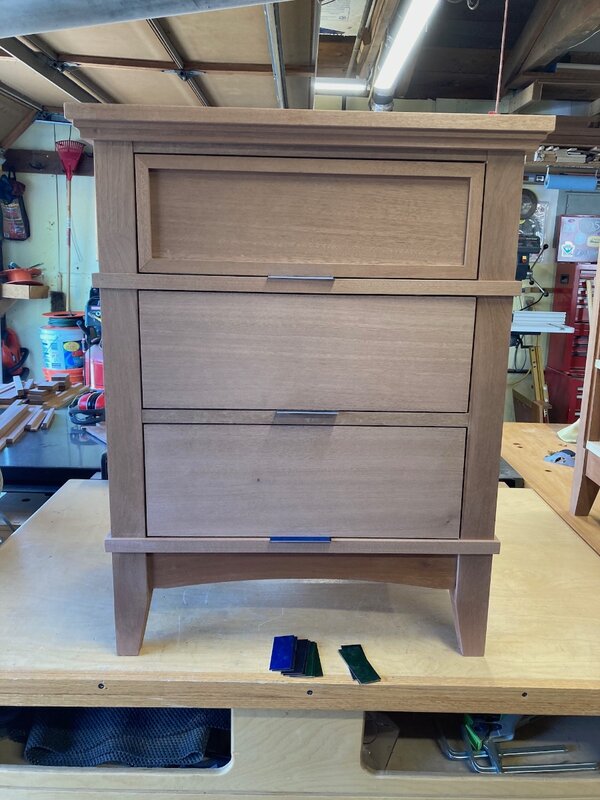
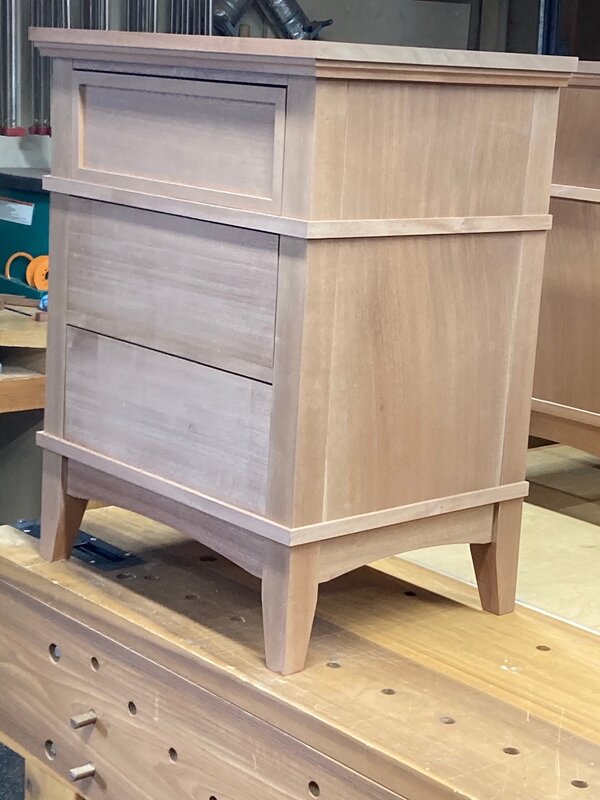
I work on getting the gapping on my drawer fronts. I was looking for about 1/16 all the way around and then I was going to do a real small chamfer on all four edges. But as it turns out I had too many thumbs on each hand today and managed to drop and ding the edges on three of the six drawer fronts on the edge of my work bench. 😟 The fibers were to damaged to steam out on two so I ended up having to have a gap that ended up being a heavy 3/32. Now I would be afraid that a chamfer would make the gaps look to big so I think I am going to be stuck with just easing the edges with some sand paper and calling it good. This is what I have right now, nothing has been done to ease anything so far. Whats the group here think?
-
I will do that when I get a chance.
-
Thought about it a little bit but as these are nightstands we generally have a book or two laying on top and my bible is always on one corner so I need some flat surface area.
-
This is the one I use Enduro-VAR But it has gone way up in price, I may have to re-think this. I may end up going with High Performance.
-
How come you don't have the gallons of General Finishes High Performance and Endro-Var listed. Don't you use that stuff?
-
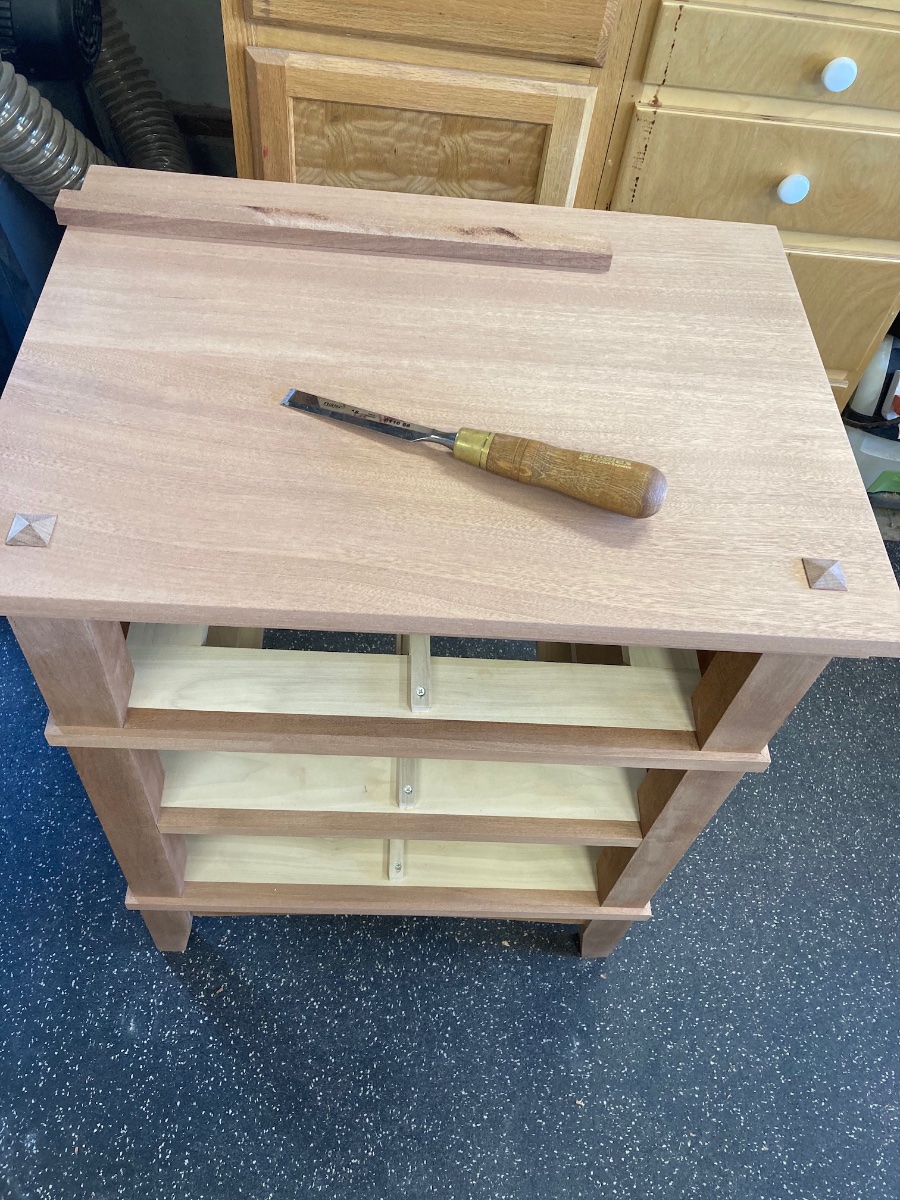
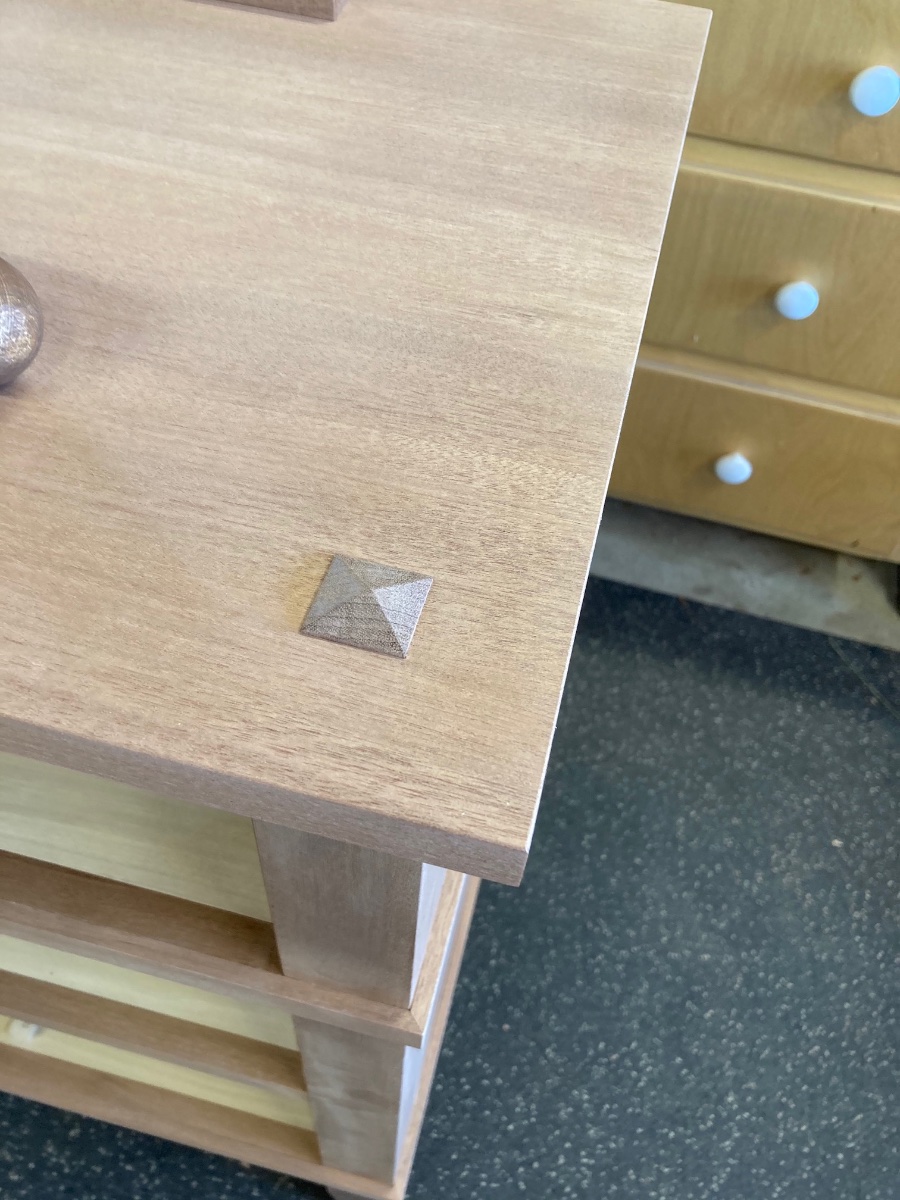
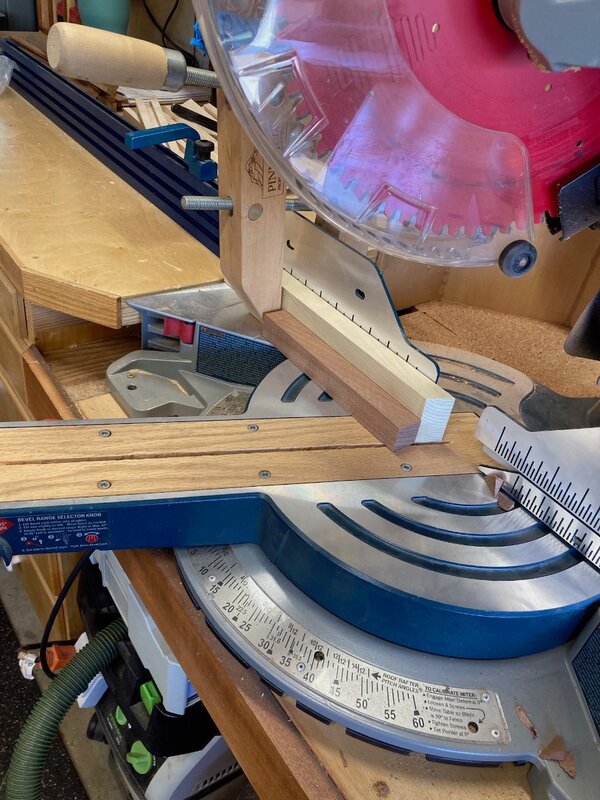
Not a lot to show today, I just finished up a lot of hand sanding. After that I did the pyramids of the faux through mortises. I didn't do a good job of documenting this process but I will try to explain. I have found that the downward cut on my miter saw seems to do a better job of this then cross cutting on the table saw. I don't know why but it does. I also think that it helps to have a Miter saw that doesn't have any real blade deflection and a saw that stays tuned up. I attach a scrap of wood to the fence on my miter saw, set the miter to 22.5° and make a cut. Then line up the inside edge of you stock with the outside edge of the cut you just made on you sacrificial piece. Then I used a screw clamp as a stop block. From here you simple make a cut, rotate the stock toward the fence make a cut and continue until you have done all four sides. Then I take it to the table saw and using the miter gauge cut it a 1/4" long from the bottom edge of the pyramid. Here they are in place. Closer view.


-
You are getting some really nice colors in that top. I said it before and I think it got lost but I think it is a real plus that you left the sap wood alone, to many times people think you have to remove it. Well done.
-
Shouldn't be too hard to move with all the shortages in the supply lines right now.
-
Wow Bryan are you giving up the sanding stage on your projects? Are you going the hand plane route?
-
On the nightstands that I am copying the thru tenons are fake and then to top it off there is no top apron either so that makes them just dumb. I drew them in because they where on the originals but never really planned to incorporate them. They are edge grain to edge grain but I did put in a few small floating mortises just cuz. The legs are 2 inches square the aprons are 3/4" and I just used floating tenons with mortises.
-
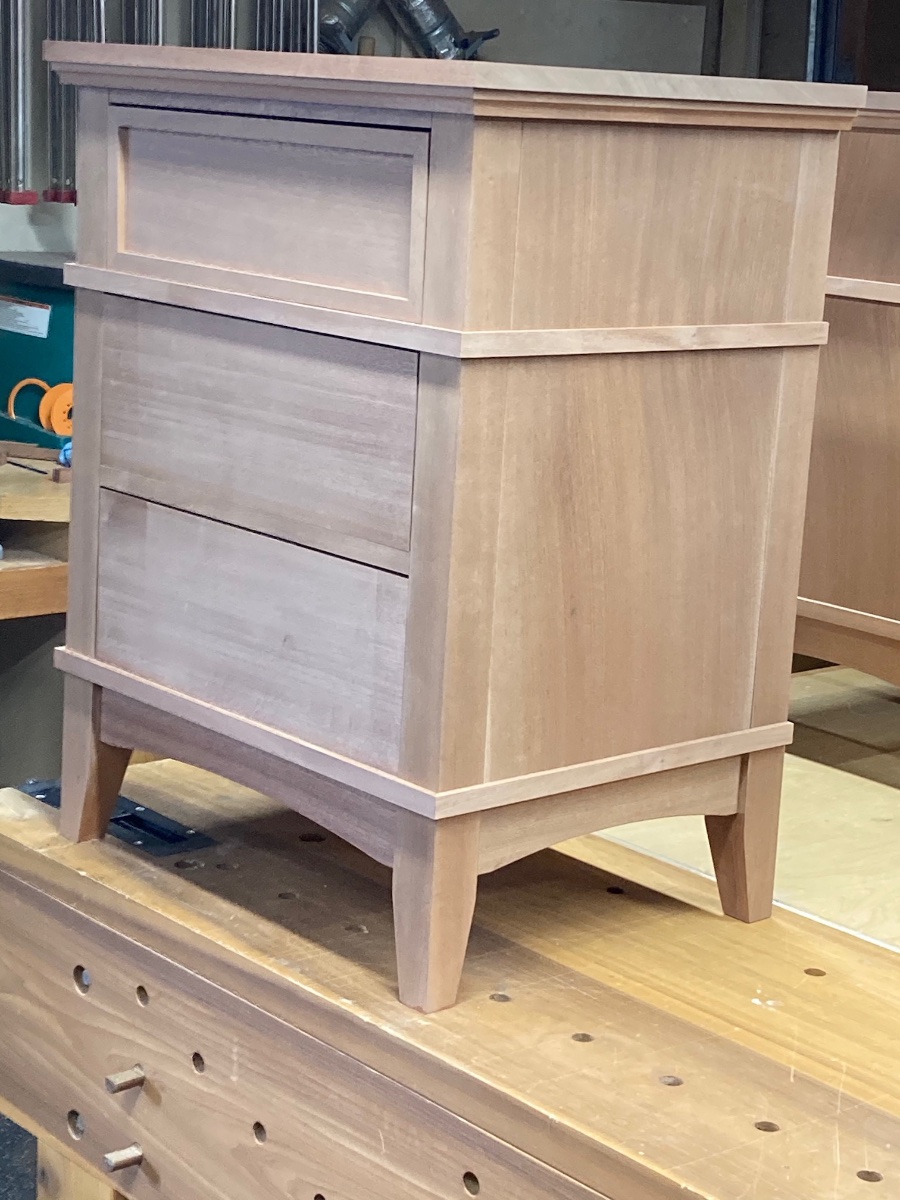
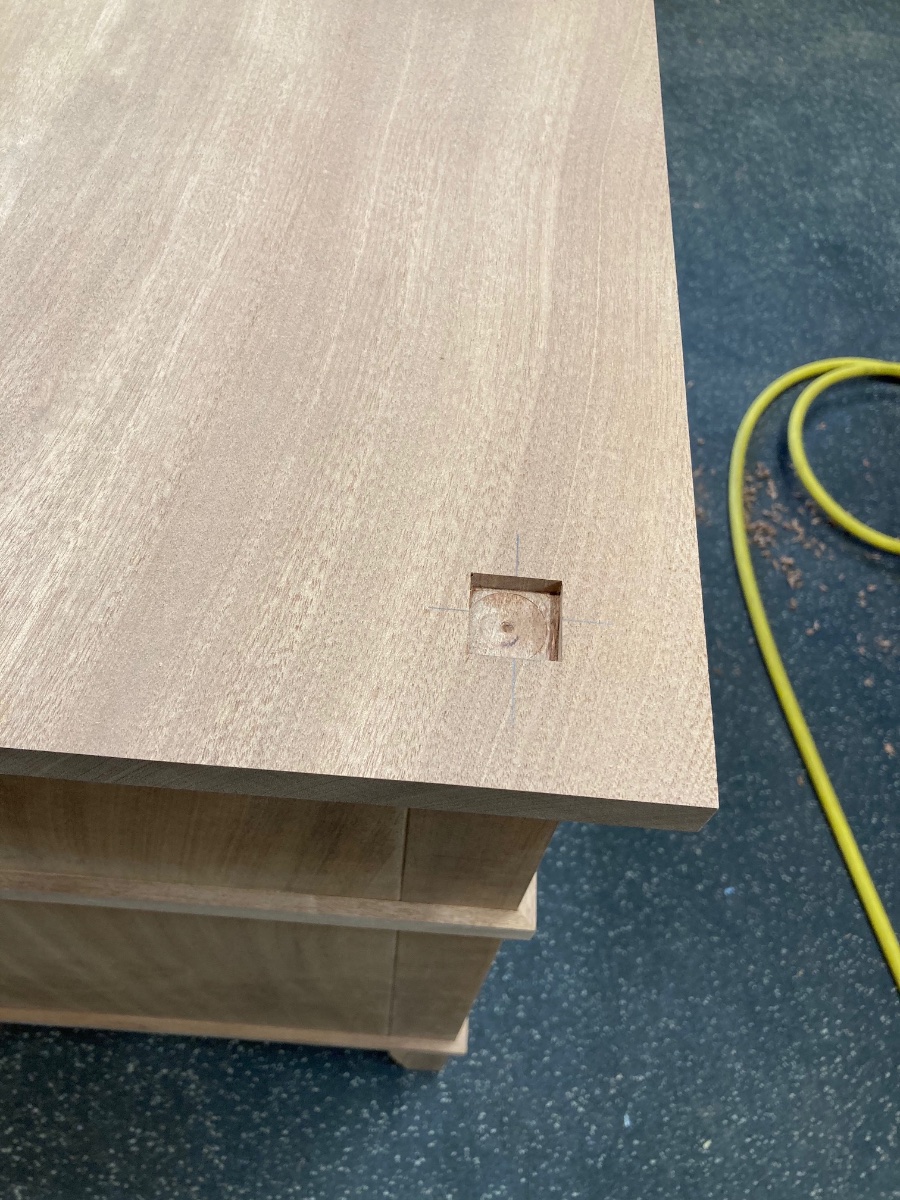
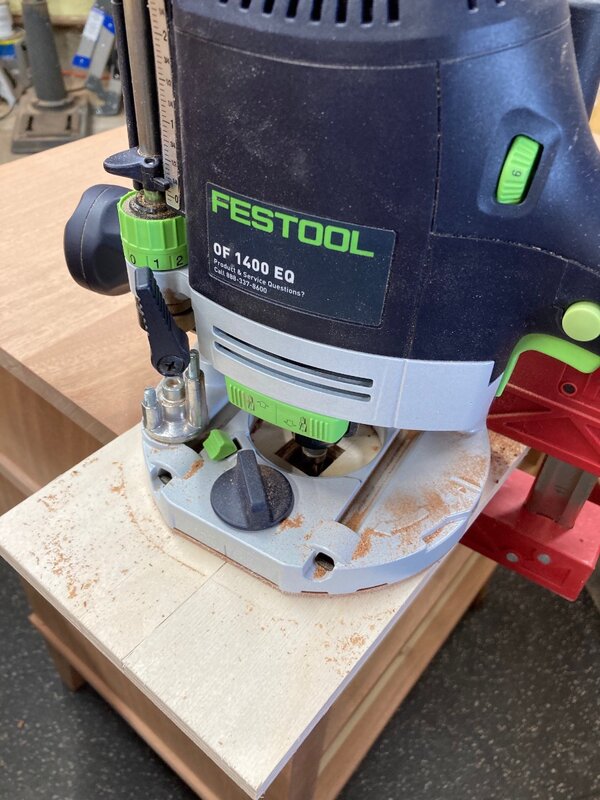
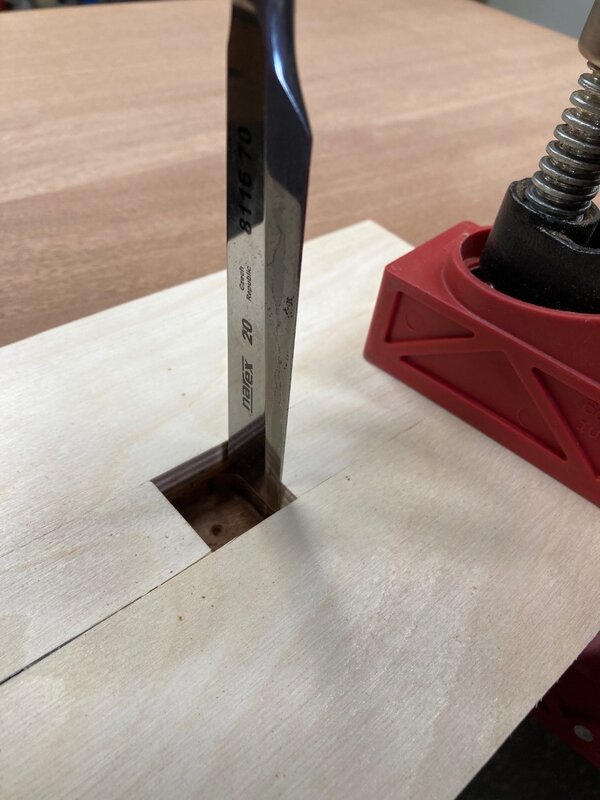
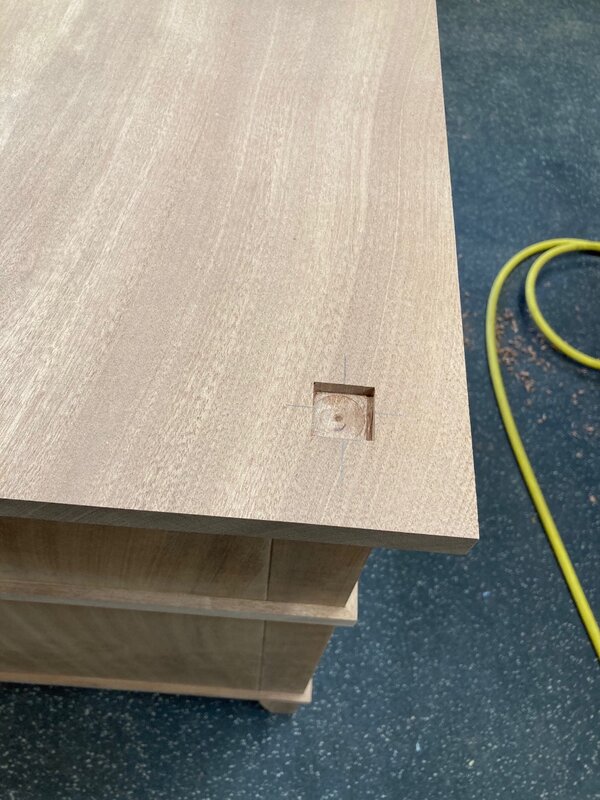
Next thing I did was get the top on and trimmed it out with some shop made molding and added a banding detail around the case at the base and below the top drawer. There is one other detail I am adding. I am doing a faux through tenon with a pyramid design on top on the from two legs. I removed most of the waste with a forstner bit. Then I clamped my template and routed out the rest. Then leaving the template in place, I cleaned up the corners with a chisel. and it left me with this on the two front corners. By this time in the day I didn't feel like tackling the pyramids so I finished the day by spending an hour and a half hand sanding all the details on one of the nightstands... fun stuff,🙄 Shoptalk Live podcast helped it go a little better.

-
You didn't show the drawer construction, which is fine, I was just curious how you ended up doing the file drawers. Did you do them for hanging files or just a file size box?
-
Kev's not old enough to have to worry about these things, but I hear you Coop.
-
Is this were we ask - how do you know all of this? Lol.
-
Isn't Montana's humidity pretty consistent? I would think you would be dealing with pretty small movements most times.