Every purchase made through our Amazon Affiliate Page helps support this site
Kev
-
Posts
6,303 -
Joined
-
Last visited
-
Days Won
575
Content Type
Profiles
Forums
Downloads
Gallery
Events
Store
Articles
Blogs
Everything posted by Kev
-
Currently, it looks like we have the picture issue fixed.. Please let me know if any are missing..
-
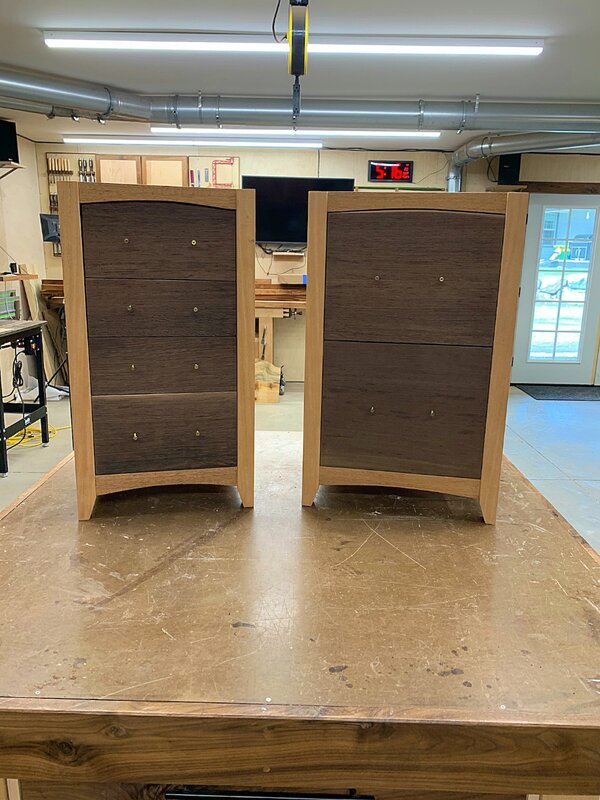
Both drawer cabinets are complete! Again, this post/picture is mostly about the forum issue but, I wanted you guys to see where the project was at.
-
First and most important, apologies for the down time. It started with a faulty hard drive and led to a bunch of other issues. If anything is missing, we have to company we entrusted to do our backups to thank for that! At worst, it should only be a few days. We're currently working on the issues with the older pictures. Even though I'm going to post an updated picture on the Desk build, I would suggest waiting to post pictures until we get that issue resolved. My Desk post with a picture is as much a test as it is an update. We're working diligently to ensure that this doesn't happen again! I'm learning this process as I go and learning a lot of lessons!
-
Lots of stock, no issues there! The only issue I had was not finding stock wide enough to do the 11" drawers so, will have to do a glue up.. The widest board I could get was around 10" The other bright side is that my dealer sells it as "soft maple" at about $4.50 a BF. In reality, it's all curly maple with some really good curl to it!
-
That's the table that the picture was taken on....lol. I'll try to line the boards up better in the future...lol
-
No tapers in that one..
-
Looks awesome! I think your finishing choice will look awesome! Just make sure the ARS is cured before hitting it with the Lacquer.
-
A dowel plate is really nothing more than a piece of steel plate with appropriate sized hole drilled in it. They're just not complicated. From what I see in that design, I don't think you're going to get much if any side to side racking. The thickness of those shelves should be more than adequate for that! Nothing "upcoming" in store for them. That could easily change tomorrow...lol. There's been a few times in the shop over the last year or two where I wish I'd of had them on hand. So, just adding them to the clamp wall so they're available when I want/need them.
-
No real update today.. My mom is in town so, spent the day with her. I did still sneak in a trip to the HW dealer to pick up enough maple for the drawers. My mom is supposed to leave tomorrow so, I'm hoping to break down the maple and get it milled down to rough thickness.. Should be a long milling process!
-
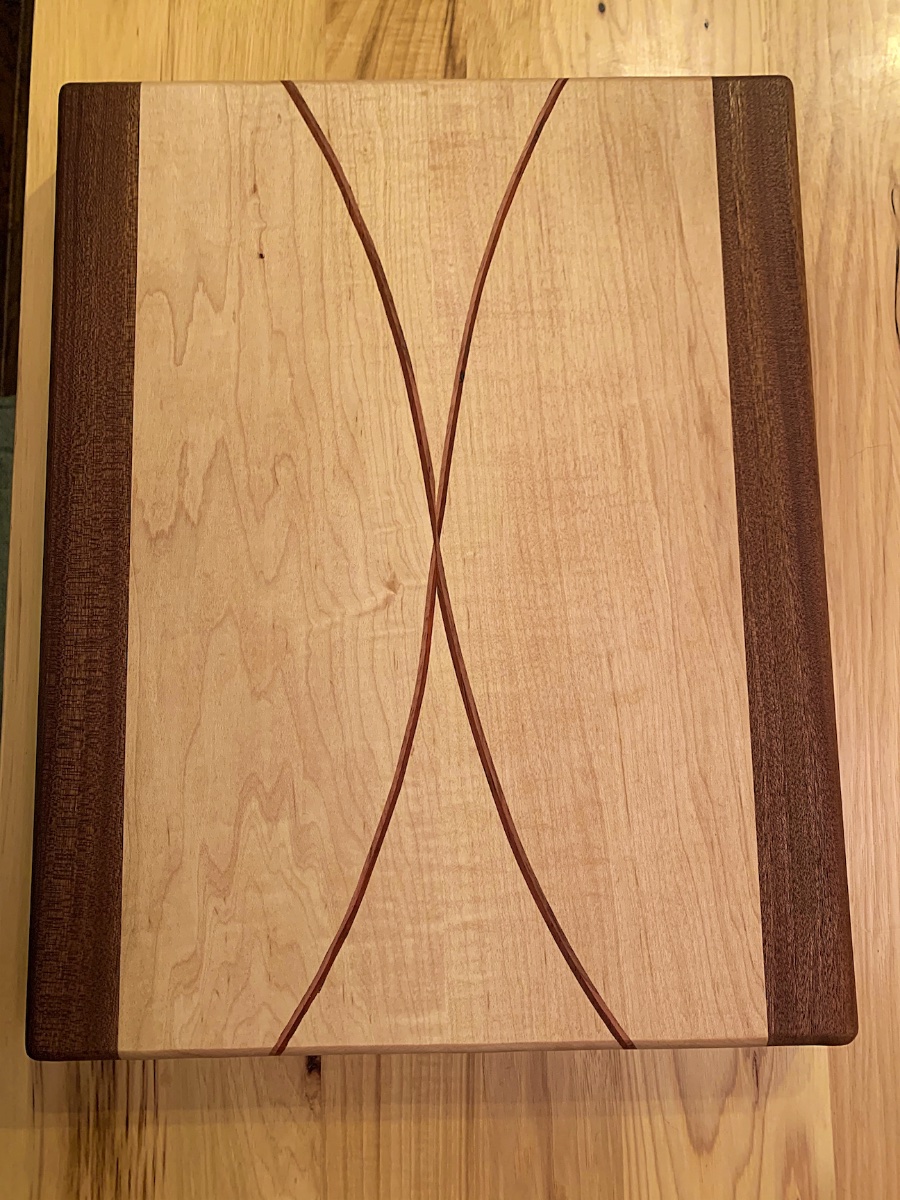
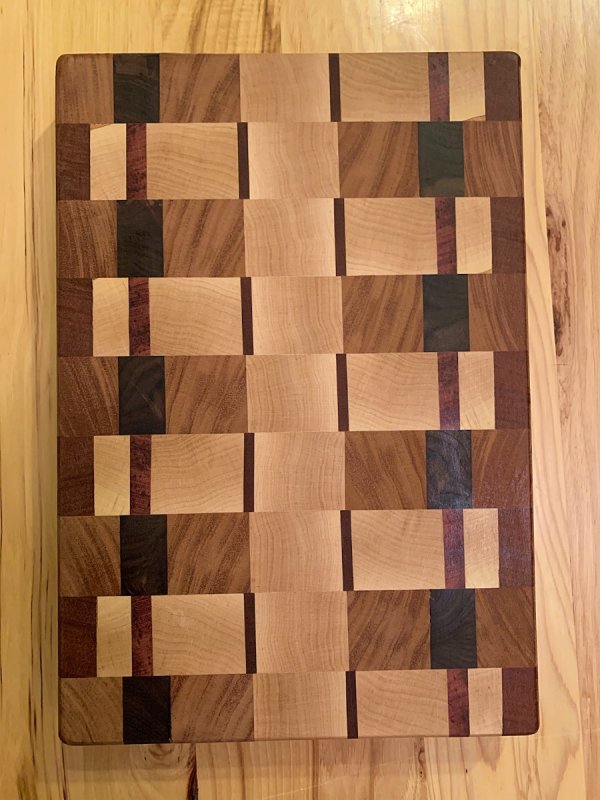
So, since this one had the big dent in it and was considerably thicker than it needed to be, I tried popping the curl in this one with some red transtint die and it came out hideous....lol. So, I removed the pink from the board at the planer which ultimately took out the original mistake as well.. As for pictures, here's this particular board as of now.. Not sure I'll do anything else to it.. Additionally, I used up some scrap in the shop to make this end grain board..

-
I've actually thought about this idea some as well.. My concern is its positioning to the wavy line I've put in the board.. This was a total dumb-ass mistake on my part and the "easy" solutions are not jumping out at me.. Here's hoping the epoxy comes out well! Hell, by the time this little quick project is over it will be a river table! ?
-
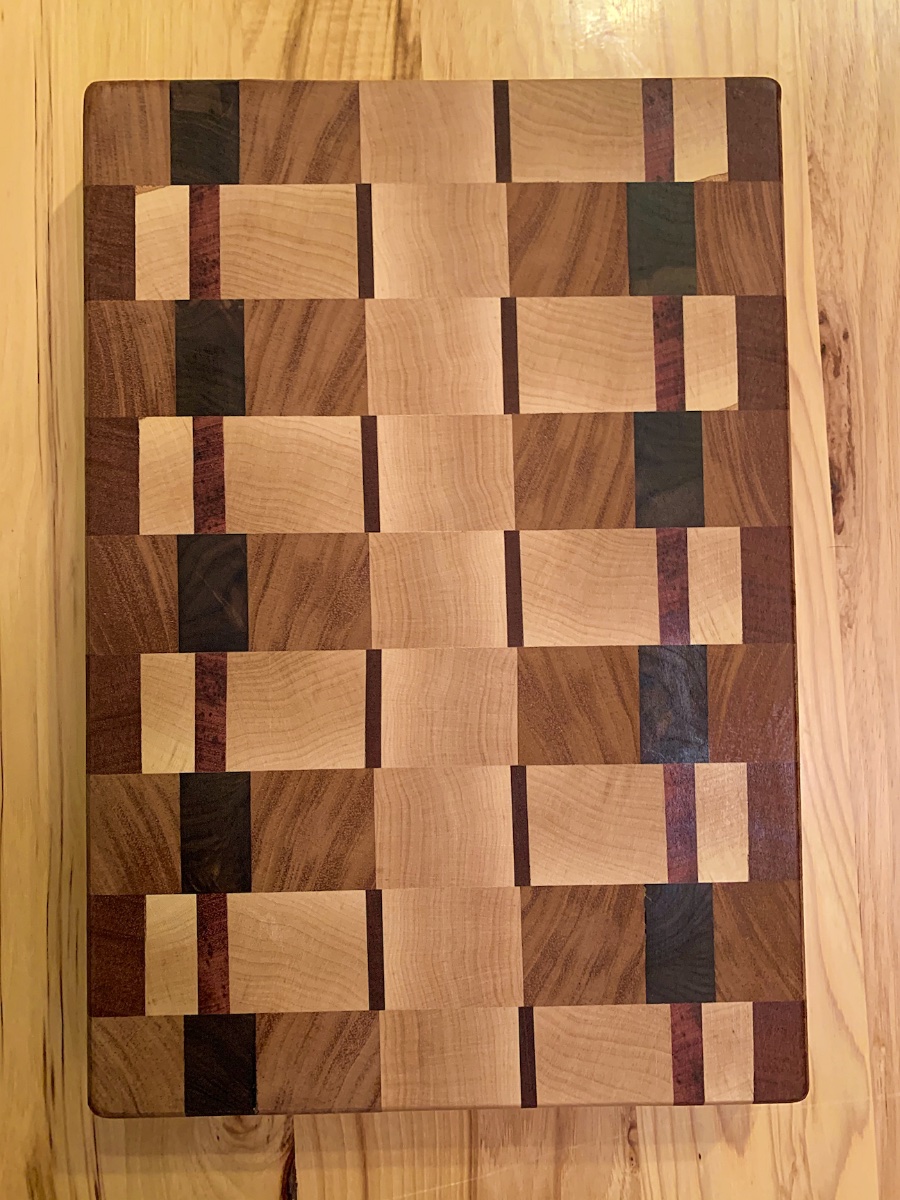
Sorry.. The keeper board (second board) is end grain.. This board is face grain.. Now that's something I didn't consider but, I like where you're going! ?
-
Thanks Bob! Maybe I've been on forums too long and try and think about the questions before they come up.. Regardless, your answer to the post made my day! I mean this in all sincerity! I'm am literally laughing hysterically because I've answered this post so many times.... This is really deep.. I really don't think steam is going to do anything for this one! The other board is an end grain that needed a little epoxy love so, I dropped some in the damaged board as well for now. I am considering doing some kind of epoxy inlay. The damaged board is all face grain and intended for more decoration so, I could probably get away with something like that.
-
Yes! When you're focused on something, time flies by! I always get a little comfort knowing those numbers have a bit of a "safety factor" built in..
-
I had a couple cutting boards that I needed to get done as client projects. Upon applying salad bowel finish to the first one, I dropped it when flipping it over and it landed really hard on a painter's pyramid. Things I know.. 1. It's in such a location that I can't just simply make the board a little smaller 2. It's sufficiently deep enough that I can't steam it out 3. It's not in a location where a juice groove will take care of it. 4. I'm really pissed at myself! Additional info: 1. The client hasn't seen this board yet so, it's not the end of the earth if I have to completely remake it, it's only time. And, frankly, I'm not that excited about this board either but, I don't want to call it a waste of time. 2. I've thought about tossing some epoxy in it with some color and turning the flaw into a feature. 3. I've also thought about drilling it and just popping in a dowel 4. It's endgrain Looking for something I haven't thought of..
-
I'm sure the others will chime in with more cost effective options that work just as well but, all of mine are Nordfab and work well.
-
Yea.. The blue is probably a better option..
-
To be honest, I'm not sure.. From memory, the red is for high heat I think so, you wouldn't need that.
-
Yea, I'd start with the lock-tite then. You'll have some working time with it.
-
Yep.. Curious how often you need to adjust these screws? If you need to adjust them fairly often, I think I would epoxy the holes and start with new pilot holes.
-
Updated list! I only did one item yesterday so, did 3 today. Edit: I don't like this smaller size! I'll need to do some work to make the information appear correctly..
-
Ok.. So, it sounds to me like those are vibrating out on you.. If they were really bad, I'd suggest epoxy filling the hole, pilot drilling, and putting the screws back in. Since it's not happening a lot, I'd start with a little loc-tite and see if that helps first.
-
I thought the plates were held down with magnets? apologies for not fully grasping this!
-
Yep, just cauls.. That top is completely flush with everything.. There's a 1" Wenge riser that goes on top of this "top" (centered) that gives the appearance of a floating desk top. That's why I did the extra support under that ply.
-
Ok, that is strange! lol Odd suggestion.. Pull one screw at a time and fill the hole with epoxy. pilot drill and reinstall the screw. It's just a guess but, knowing that you have a DC box on that router, I'm guessing the force of the DC is placing force on those screws and has finally worn out the threads on the MDF. In the end, you lose nothing but time with the test.