
Every purchase made through our Amazon Affiliate Page helps support this site
Kev
-
Posts
6,298 -
Joined
-
Last visited
-
Days Won
573
Content Type
Profiles
Forums
Downloads
Gallery
Events
Store
Articles
Blogs
Everything posted by Kev
-
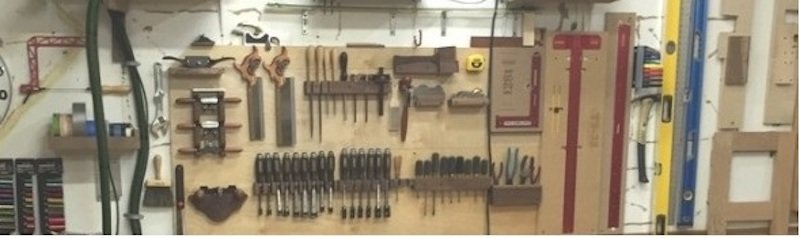
Continued: With the extremely gracious help of Kev and getting his thoughts on a layout for my garage... I have taken quite a few of his ideas to kinda get a starting point on where things should go ... A few things on reading the drawing ... - Overall garage is 20' x 19' - The lower dotted line is the garage door when it is up, lowering the overall height of the 8'+ garage ceiling, plus something to think about when running DC lines - The upper dotted lines: - The top one is the 17" off the wall that the wood rack goes out, bottom row is about 4' 6" off the ground - The bottom line, just below it, is 18 1/2" off the wall where there is a 2" raised section (not sure where you call it) - These are a few reasons why the equipment, for now, is out away from the wall - The dust collection is moved down a little further due to 2 electrical panels on the right wall and the sub panel ... Not 100% sure where it needs to go, but I will see once I get more room to play with out back there. - The green tools are the ones I have now - The pink tools/cabinets are the ones that I am planning on bringing into the shop - The sink is already plumbed in and cant be moved - The left wall door is the one into the house - The top wall door is to the back yard Now on the center tools --- I moved the TS/Joiner/Outfeed over away form the miter station ... only reason for now was just to give the little kids more room to walk and not bang their heads on anything coming and going through there. It could get moved closer to the miter station once they get a few more years older if needed. I do like the idea of having 1 drop to handle those middle tools. Things to come --- Tools: 1) Bandsaw - Hoping to pick up one by my Bday in May. Still debating on the Laguna 14BX vs Rikon 14" Pro vs Jet 15" 2) Router Table - Will most likely build the cabinet and pick up a nice lift for it, most likely the Jessem. 3A) Drum Sander - Definitely not using the stock stand for it. Will be for sure taking Kev's cabinet and maybe modifying it a little to what I need. - Looking at the Supermax 19x38 since that seems to be the most agreed upon drum sander out there 3B) Dust Collector - Looking into a better DC unit ... my Jet 1200 1 1/2 hp doesnt seem to be able to handle to the level I would like it. Right now is is running on a 4" 15' flex hose and still not doing that great. I would expect better with that short of a run. - Thinking of possibly the Oneida Supercell Building: 1A) Miter Station 1B) Assembly Table - Not sure which one I need to build first yet ... neither are just must haves and I cant work without. However, I am thinking the miter station for the sole reason of more storage capabilities than the assembly table, even though that will have storage as well. Thoughts on anything above? Getting another item off the checklist ... I went with the fliptop for now so I could get the spindle sander off the floor. Drew out a version to get an idea ... Breaking everything down hopefully the last time on the huge outfeed/assembly table. Starting to assemble the carcass. Setup an ugly tenoning jig to cut out my pieces. Drilling the holes in the 4 corners for the eye bolts and stuff ... On a side note, if anyone is in the market for some forstner bits ... these things are amazing. Super sharp and forgot how much I liked them until this. Center holes drilled for the pipe to rotate on. Cutting out the eyebolt holes to slide around and lock ... I dont know what it would actually be called haha Putting casters on and breaking out the new christmas gift! The 4in1 from Milwaukee is a sweet little tool. Plus saved quite a bit from getting the Festool. First look on the casters and stand up. Spins just fine! Here it is with everything attached! Super happy with it, and rotates just fine even with the weight difference. 2 things I did learn from this ... drilling the holes for the bar and then pushing it through the top really sucked. Not sure if my tolerances were too tight or what, but I was beating the crap out of it with a hammer to get it all the way through. Glad I got it through and to the other side and I can still spin it just fine. I think the holes were drilled just a tad out from 90* since I did it free hand. Next time, if there is one, I will be going to the drill press and doing it there. The other thing is to look at the over all size of everything ... if you look closely in the picture you may notice the handle that raises/lowers it will not fit ? ... It is super quick and easy to take it off when I flip it so I am not too worried about it. I dont imagine I will be flipping it too much, so I am not too worried about it. Lessons learned like always ... Now next hopefully I can get the outfeed/assembly table out of the garage this weekend and work on getting the middle set of machines setup there. Got some good work in today, cleaned up enough to get a basic layout and at least the big stuff out of the way ... Old cabinets broken down and ready to be stored until I can break them down a little more Everything out of the cabinets and now crap is everywhere working on the new layout trying new things out ... Lots of cleaning to get around to, but it seems to slowly be coming together. As far as the layout, some things are not in their forever homes, like the DC since I have not put all that in. So for now it is just hanging out by the big machines for now.
-
Continued: Here is the new outfeed table built ... I have not put anything on the bottom. Debating putting a shelf there as I am thinking I may add cabinets in there for storage, but not 100% sure what I want to do with that space yet, so I am not touching it so I dont limit my options in the coming months. getting final coat and will be ready for now. Still not sure what I want under it yet so leaving it a blank slate for now till I get some work done with it around to see what makes sense. Still working through getting some organization stuff ... went after a clamp rack to get them off the ground and out of my way. drawn up and a little quick math on the holders done ... Everything cut up quick little jig to cut the angles for the supports The hardest part of the build was getting these attached ... it was a real pain in the ass by myself and not sure of any other way to do it. So there are a couple that are not level across as they slipped a little when trying to screw them in. Hung up now on my south wall, not all the clamps in but the ones in the garage at least are on it. Will add the others later on. Still thinking of how to add a few more different clamps to it. Like spring clamps and the the trigger clamps I have laying around too. Thinking of maybe a dowel coming out of each side about 10" or so to slide them on and off ... not sure what else I could do. Here is 3/4 dowel added to the side ... 2 should be plenty for now for my smaller clamps. Took about 5 mins and a home Depot dowel rod and got it done. Quick and simple ... not pretty though, but good thing it is just shop furniture. Worked on a drill charging station to help get those up and out of the way and some extra storage for some miscellaneous stuff ... A quick little drawing to get an idea of what I need to do ... Cut sheet .... Cutting out the drill spots ... the new outfeed table and the old outfeed table kinda work well together, for now. Hoping to get the same type of cohesion when I finally get around to building an assembly table later on in the year hopefully. At least that is the though Laying out some dado's because we always seem to have a wonderful convo about changing out blades/dados I timed myself this time. Not going crazy fast or anything and just normal speed and switched from rip blade to 3/4" wide dado setup in 4:23 ... Not sure if that is slow or fast or normal time haha. Everything together and installed next to the clamp rack. Should get some stuff loaded up and I will grab a pic once I get most of it up. Definitely not the the prettiest thing to look at but it should be very functional and do what it needs to do ... I hope haha
-
Submitted from the original forum by Bushwacked Been a looooong sloooooow process to get my garage where it has more than 2 outlets. Plus wrapping up a 5 year house reno that took all the time away from making the garage more functional. This is where I started ... A lot of wasted space in there but was functional for holding 16' pieces of trim etc. Also cutting lots of 8' sheets of plywood. Now it starts to become more of a non remodel shop and more functioning furniture shop etc .... Down goes the sheet rock! If you look at the 3rd pic, the ceiling was already coming down on its own. It fell down about 3-4' from the back wall and was the main reason I decided to redo all the walls. Figured while I struggled with trying to patch the ceiling, it would be easier to just take it all down and do the walls like I want them and fix the ceiling along the way. Also in the 3rd/4th pic, there is a sub panel wired in by my brother in law ... it is a 100A panel so it should be plenty of power to everything I need without effecting the house stuff, or vice versa. Than plan is to have 200v on the right and 120v on the left... about every 6' around the whole garage. Been a busy few days ... Insulated, redid the drywall on 1 wall and the ceiling. Also tested new lighting in 1 of the rows. 3/4 ply on the other 2 walls and then added a new lumber rack from the home depot storage section, the rubermaid stuff. Painting to come on the drywall wall and ceiling , dont think I will touch the ply for now. Due to holidays I lost my electrician to finish the back wall electrical outlets and the lights on the ceiling for awhile. It will give me time to rest and work on a few other projects though so all is good. Yes, I will have a air filter in there, I do have 1 ceiling outlet in the middle, but I think I may look into a couple more. Wall painted and ceiling painted .. starting to move things around to test out locations. Still no clue where I really want anything yet. Even the tablesaw ... I am not 100% sold I like where it is since I have to open the garage door to make a cut. However convient it is for cutting long pieces or ply easily, just not sold on it yet. For now it will stay until I get more pieces put in place and see what kind of room I am working with after that. Tested 1 set of 3 lights .. will have 3 sections total, for now and see how well that does. A lot of the stuff around the lathe on the floor is not mine, so just storing the extra tools from my brother in law there while he helps. So that should clear up in a few weeks as well.
-
For those that remember, these TS issues kept coming up one after another with this particular saw. Rather than drag out about 11 pages covering about a year's worth of time from the original forum, I'll post the relevant videos here and answer any questions that anyone may have.. Also, I've had several requests for updates on the saw and always cover those updates in the quarterly review videos. Feb 23, 2019 Oct 25, 2019 Nov 12, 2019
-
Great work Richard! What finish did you use? It worked well with that maple.
-
So, if you go to the very bottom of this (or any page on my sites) page, you'll see a link to my FB page.. Look for the blue F
-
For those that use my email for contact, please note that it's changed with the new sites. You can now reach me at the following email. kev@kcwworks.com
-
Looks like you got some killer help there! As for the TS blade height, they do make a gauge that straddles the blade with a digital read out. However, you're still relying on the blade being at top dead center so, I've never found these gauges to be a good value. I'm still doing exactly as you showed and running a test piece to verify.
-
I don't think the PM blades are reversible, looking forward to your looksie!
-
Are the blades reversable? Yes, full sized pic!
-
Running another test @Tmize
-
If any Moderator is satisfied with this "fix"/"solution" and wants to edit or remove a post, this is a good practice post.. Just don't ban me or flag me as a spammer! Both would kill my admin account as well. ?
-
Submitted on the old forum by Jamie. asked to build a table like I built for my own home this summer. Thought i would share the progress of this one. This is the table that I’m trying to copy for this build. As I’ve been waiting for hinges the last few days I decided to get started on it. The build is out of cherry, luckily I had enough left over from my previous tables that I didn’t have to hit the dealer up for more. For the record this is a new yankee workshop project. It is the first set of plans that I ever bought from them and they are not real detailed. Thank god for YouTube and going back to watch the show to figure a few things out. Started on the tables by gluing up the leg blank and top. Chose the best grain pattern I could for the top and cut the boards to have the bullseye really close to center. The grain pattern did line up pretty good so should be interesting once finish is on it. Really enjoyed using the new jointer on this! Did use the norm trick and knocked the corners off before putting it on the lathe. It really does save a lot of time turning it down. Spent some time sharpening a few chisels up, man I need to get better at sharpening. The chisels I have are pretty old and a glorified starter set so the steel in them doesn’t hold an edge very well. I did manage to get the basic shape spun out pretty quickly. I am by no means a master on the lathe. It is a whole new world for me really, other than making a few pens and this being my 3rd table leg I really haven’t done much of it. have the blank pretty much complete. Struggled through with the old dull chisels and then this little surprise showed up today. WOW! After using the carbide for 3 seconds I am hooked! The single chisel purchased was a deal at 55$ is now gonna cost me quite a bit more as the steel chisel are going to get a new home in the dumpster. Got the center leg turning completed and finished sanded it to 280grit. Will sand it by hand to 180 grit before I stain it. Doing it that way seems to help with the cross grain scratches from the sanding on the lathe. Also opens some of the pores to take the stain evenly. Cherry seems to be a little touchy for me when staining if it’s not all sanded exactly the same. I’ll take a fresh piece of sandpaper over it all before the stain goes on. Moving on from the turning it was time to cut the dovetail slots. The jig from my previous build was a little to tight for this one, had to cut a little out of the sides of the jig to get it to fit. Also had to shim the top plate up about an 1/8” to get the router to pass over without rubbing. use my router with a 3/4 dovetail bit and the guide fence on the plunge base. I did make the complete cut in one pass. Coulda used a straight bit to remove the bulk of it but find it easier and a lot less switching bits between every pass. It is kinda nerve wracking making these cuts, especially in a piece that you have a few hours of time invested in. In the end they all cut just fine, did get the 3 legs roughed out and are at the point of cutting the pins on them. Well Courtney and the girls were gone for the weekend so I spent my free time in the shop. Didn’t make much progress on the table during the week. Was fighting off a bug. Through the worst of it I hope! Started out by trimming the legs down to fit the turning. Took a little trial and error to get them, as you can see I had some pretty bad tear out from the dovetail cut. Did get the bulk of it to sand out after I had the legs fitted by sending them through the drum sander. to cut the matching curve on the dovetail I used Norms method of a utility knife and a straight edge. Actually works surprisingly easy to do it that way. The dovetails that I cut weren’t exactly square to the world. So they didn’t come out as tight as I was hoping but did turn out with lots of small adjustments. Did quite a bit of the fine tuning with a chisel. Put a small round over on the legs, with no router table sometimes you have to improvise. Got the legs and turning finished sanded and glued the legs in one at a time. Thought about using gorilla glue on them to take some of the gap. Remembering doing that on the first tables that I did the glue actually pushed to much and made the cap show on the turning. No really good way to clamp them, thought did cross my mind to shoot a pin nail in the bottom. Decided to just take the time for the glue to set up some. While the glue was setting up I started cutting the top and the top support piece. This is where my day went down hill. Was going to cut a bevel on the support piece. Took a knee by the table saw and started cranking away. All of a sudden it started turning harder and harder. I was looking at the gears and backed it off and then turned it back and it just stopped. Stuck at about 20 degrees. Look at the table saw top and seen the issue. Had my zero clearance plate in the saw. Needless to say I now have a few month old forest blade with a bent tooth. Am going to reach out to forest to see if there is anything they can do. Did get the top cut and was mad and frustrated so messed up the top support piece. Decided that was a good place to step away from the project. Did some shop improvement projects to finish up Saturday and most of the day today. Also worked on a couple pine wood derby cars for my nephews. Was nice enough to have the door open for a bit! Finally finished up the sheeting on the wall between the old garage and the new one! What a difference from the insulation board. Got the table finish sanded and dry fit tonight. Will make a few tweaks to the table support piece before staining it. Table is stained up! Have a few blotchy spots in it it think. Will see how it comes out when it dries. Know one of them is from a glue wipe up, cherry is so unforgiving when staining. In general like how it has turned out. Also stained up the drawer pull that I made up. I didn’t spend a lot of time cleaning it up when I made it and it shows once the stain was applied. Idk.....I kinda like the look of it contrasting the maple. Three coats of pre cat applied. New saw horses did the trick. Thing I don’t like most about spraying is that it ties my shop up for the whole day. Snowing here today so can’t do any projects outside, no ice to fish on and with all the sporting events canceled I’m struggling through a lot of boredom. Am pretty happy with how the finish has turned out on the table. Will assemble it tomorrow. Table is complete. Overall am happy with it. Learned a few things along the way so it’s a success. Few things that could be better but isn’t that the case with every project?
-
Journal from the old forum submitted by Chet This isn't really a journal but I could resist being the first post in this section. I am making a morris chair and I am using sapele. I got real fortunate when I went in to the lumber yard to pick it out. Just as Started to look at the sapele the own walked up and told me that all the wood that was on the rack at the time came from the same tree. I will update as I progress but not in great detail mainly because I get engross in the work and forget to take pictures. I am taking the basic design from the guild project but there will be a number of changes. Marc had a nice design but I wanted to go back to some of the more traditional design elements in my project. One of the first things that is different is the legs. The blanks are glued up from 1 1/2 inch thick stock, final size is 2 7/8 square. Marc left the glue line exposed because he tapers his legs. I am not tapering my legs for two reasons, one, they traditionally weren't and two, I want to veneer the glue line edge to hide the glue line. I cut some veneer just a fuzz over 1/16 inch thick. In the picture below you can kind of see how this looks although at this point it hasn't been sanded. The next two pictures show the chair and stool at a dry fit stage. In the first one you can see the mock up of the slat pattern I am going to use between the upper and lower side rails of the chair. I need to come up with a similar design for the stool. In the second picture you can see my somewhat anal pursuit of the ever elusive prefect project. I tend to over work at custom fit of all the mortise and tenons so I go through a large amount of blue tape marking and numbering mating pieces. But hey, it keeps me off the streets. Continuing on, I took everything apart and numbered things so i could get rid on all the blue tape. I cut the mortises for the slats that go between the top and bottom rail on both the chair and stool. In the guild build he cuts a grove all the way down the center of the rails for the slates and then he glues in spacers between the slates. I went ahead and did mortise and tenons Just cause I am trying to be true to the era in my joinery... It's just me. Fifty six mortise and tenons so far and more to come I added a cut out detail to some of the slats and also added a detail to the bottom of the bottom rails. Everything numbered and ready t remote all the tape. Then I re-assembled it to make sure I didn't miss mark anything. Then I dis-assembled it and sanded everything to 150. I hit it with 180 once I am sure I am done banging it up. I hope you are able to double click on the pictures to make them larger. Next up was the bent lamination for the arms. I built the form for this before I started the project. It was easier to deal with a sheet of plywood in the shop this way. I cut my strips and ran them through the drum sander to clean them up and get to the final thickness. I used Unibond One for the glue, I didn't want to deal with urea or formaldehyde. I heard Phillip Morley talking about Unibond One for veneer work and said he was really happy with it. And now I can tell you I am really happy with it. Anyway here is the first one in the clamps. Lots of clamps. These next two pictures are of the final result. I can't begin to say how happy I am with how they turned out you cannot detect and glue line at all. I got lucky. I cut the back end mortise and thru mortise on each of the arms. And then was able to cut the curve on the top of the top rail. I did this by roughing it out on the band saw and then cleaning it up with the router and a pattern I made of the bottom side of the arms. So this journal got side tracked because of to many photos, then Kev fixed it but I kind of dropped the ball by not getting back to it. So what was missing is I got the back slats all glued and on the bending form I was cautious wit this in not taking them out of the form too quick so it was one per day that totaled six days, but there was little things to work on each day in the mean time. So the short version is I did the pyramids on the thru tenons on the front legs, and the top of the stool legs. Cut and shaped the corbels for the legs and arms. made the support pieces for the stool cushion panel. Also the the support pieces and seat frame for the chair. As of today the chair is completed so I will give it one more sanding just to make sure then a coat of shellac before spraying the finish then off to the upholsterers. I just realized that i had not posted some final pictures here after I got the chair back from the upholstery shop. So here a some pictures. The pivot and adjustment pins are made from copper. Also someone here had ask how much I had this had cost me so here is a break down. The Sapele was $427.64 The upholstery work and material was $1579.03 - Although you can save some here but I chose to go a traditional way and have the frame for the seat cushion constructed with springs instead of the frame having the just webbing and then a cushion made to sit on top of the webbing. Also you can save a bunch by using something other then Mohair for your fabric. Good mohair runs about $400.00 a yard so it was more then have the cost for the upholstery. The copper for the pins cost $96.74 - $8.50 of that was shipping and my son in law did the machining for me so there was no labor but he gets to stayed married to my daughter. Everbrite $28.55 - This is for the copper pins. Its a clear coat that is pretty weather proof. Its used for al sorts of things like copper weather vanes and cupolas fancy copper hoods over stoves. It keeps the copper shine and protected from tarnish. The only cost I can't give is the finish, I poured it in the sprayer sprayed the chair and then poured it back in to the gallon can but I would guess I used a little over a quart. General finishes High Performance satin.
-
Journal from the old forum submitted by Tmize So this the sketch I did to the wife’s design. This will use more plywood than I normally do mainly due to her impatience. How legs, face frame,drawers, doors will be soft maple. The sides and back will ply with edgebanded maple for a bead along the bottom. I got the legs glued up after work and rough sized. My explanation on the rest of my joinery got lost some how with the last upload of pics. So the face frame will be all thru m&t. My top brace from from to back will be half lapped blind dovetails also double as a way to attach the top. The bottom support that the ply bottom will sit on will be tenons into the legs with either half laps or dovetails or m&t together haven’t decided yet probably just half laps. Then the plywood bottom will be cut and dropped in tight and screwed from the bottom. I’m hoping this overkill will nearly eliminate any racking or sagover the long span of it Been slow this week ( sick kids). So I got all the m&t cut I really need to get a mortiser I cut back the thru tenon an went to normal size. I ganged mark all my shoulder line on pieces the same length. Which pays off on the glue up to pull together perfectly square with little pressure. Glue up is done man was that little tricky such long piece had to have the wife’s help. It turned almost perfectly square I consider 1/64 over 7’ dead on in my book. Now to the tedious parts for drawer frames and interior fit out. I’ve been thinking about doing lipped drawer fronts instead of inset that I normally do think it may be a fun challenge with the half blind dovetails. An leave the door raised inset doors? What do y’all think? Just some quick update pics. Hard to tell from the pics but I put a 3/8 bead along the bottom of the front and sides of the case Got the doors glued up and sat in to place. I still have to fit them but that will wait til the hinges come in this week. I also fitted the drawer faces. This maple has really tested my hand planing skills. I like a good challenge tho. It has a lot of reversing grain with bits of it being curly. I had to trim nearly every tenon of the match set so something was wrong. My test pieces fit just right. This were just a fuss to tight so I took pass off each side with my side rabbet plane. I got the doors up and hung and fitted to the case. It went well the adjustment in the Blum hinges made it fairly painless. I started building the 3 drawers today. I re-sawed are the cherry for the side on my bandsaw. They are about 7/16” that should me enough thickness that I can groove them for the bottom and not have to do slips. I start by planing the inside to the drawer parts. In I lay out the dovetail. This drawer is 5” tall so a layout method I do is do one less tail than the drawer is tall. It makes for a nice tight spacing. Cut and transfer to the front. I lay it out so the sides are a few thousands proud on the sides that so when I plane the sides down to fit the drawer pocket it will also help fill any gaps that I made. I hate filling gaps in joinery I make a point not to. Not that I cut it perfect I use the gaps as learning and a remind because all my project end up in my house. So as I walk thru my house I can look an see how I’ve got better with each piece. It could be the plane tracks I accidentally left or I over cut the base line I got all the drawers planed down and fitted. I noticed when I was cutting the dovetail that this board of cherry is very grainy and chips out very easy it planed easy like what I’ve worked with before. I thinking it wasn’t dried properly? Sit need to cut the bottoms and attached. Slow progress but almost time to start painting the case. I’m run some test pieces the other night. I’m going the put shellac on the drawers inside an out to bring out the cherry some. Should I put the shellac on before I paint the drawer fronts or after? Well not many pics (I forgot) but I finished up the building part for the case. The pictures are going to the top not my choice but the wife told me I had to use these old fo beam we had in our living room before we remodel. Nothing special just 50yo pine the pantina on them is interesting are the raise is seriously raised. Luckily they straight once I got them jointed the glue line was spot on. The issue I had was they was different thickness. I didn’t won’t to risk running them thru the planer an ruining the show side of them. So I marked out referencing from the show side an used biscuit for alignment. It worked out except for couple spots that when I wire brush it down the surface to remove the paint splatter from the previous owner it should come off. I forced most off the glue squeeze out to the bottom. When I get it out of the clamps I’ll have a Hellava under side to level out give my jointers a workout. I got the drawers shellac an waxed the and one coat of paint on the fronts. The doors was disassembled and got one coat on the front side of them. I’ll move the case and everything else to my finishing room (kids playroom)tomorrow after work tomorrow. So that I can paint and work on the top without having to wait and lose time Flatten the beast Finished and installed
-
Transferred journal from the old forum by Jamie. Well didn’t get much time in the shop over the weekend. Well let me start over, spent time in the shop making hot sauce and managed to make a little dust. Have you ever smelled 3 gallons of hot sauce cooking at once? Makes the eyes tear up and the lungs burn more than mdf dust. So I have this motorcycle lift that I got from harbor freight about a year ago with the intentions of making an assembly table on it. It’s a foot pump adjustment that works surprisingly well. After about a year of thought I decided to make it out of mdf with storage drawers in it. Quick and dirty build. I built up off the frame with 2x4s to get it over a lip on the edge of the steel frame and carriage bolted them down. Got the sub top on tonight and broke all the edges. Didn’t like the look of the mdf so decided to paint it. Got first coat on. Well half way. Ran out of paint. The drawer fronts are going to be spalted maple to match my out feed table. Trying to decide on the table top being white laminate or being replaceable hardboard. The white laminate would match my out feed table as well. Only problem with the laminate is I would have to go about a hour to get a sheet. Well didn’t do much on the bench this weekend other than get the vice mounted to the end. It’s going to work out to get the laminate top for i5 on Thursday as our local high school football team is playing a state game in that town. Did get the doors and drawer fronts sprayed so feeling like I got a little something done before the work week fires back up. The doors and fronts are for my table saw out feed table. Made from some free air dried spalted or kinda crappy maple. My uncle had a pile of it that he gave me and has more to get to me. Never realized how 11% wood acts so much differently than 7%. Sands hard, machines even harder with tear out in places you would never expect. Figured that a little wetter would be fine for shop furniture. Well didn’t do much on the bench this weekend other than get the vice mounted to the end. It’s going to work out to get the laminate top for i5 on Thursday as our local high school football team is playing a state game in that town. Did get the doors and drawer fronts sprayed so feeling like I got a little something done before the work week fires back up. The doors and fronts are for my table saw out feed table. Made from some free air dried spalted or kinda crappy maple. My uncle had a pile of it that he gave me and has more to get to me. Never realized how 11% wood acts so much differently than 7%. Sands hard, machines even harder with tear out in places you would never expect. Figured that a little wetter would be fine for shop furniture. Got the doors on the outfeed table. Used som cup hinges I got off amazon. Soft closing not sure a brand on them. But the screws suck! Pre drilled into the face frame and still snapped one off. Never have done that in that situation before. Got the top on the table. It ended up being 40x96 with the edgebanding on it. Put the bench to use making a roll around parts cart. During the parts cart build it pretty much finished off my jointer. Sad day as it was my wife’s grandfathers. It is a tool that I was planning on upgrading but now it moves to the top of the list.
-
I appreciate all who took the time to actually look here before posting. Pretty simple set of rules to go by. 1. Politics and religion are out 2. Keep it clean 3. Keep it civil - We don't need or want jerks 4. No "Drive By" video posting or Linking 5. No Spam


