
Every purchase made through our Amazon Affiliate Page helps support this site


Bushwacked
-
Posts
1,605 -
Joined
-
Last visited
-
Days Won
98
Content Type
Profiles
Forums
Downloads
Gallery
Events
Store
Articles
Blogs
Posts posted by Bushwacked
-
-
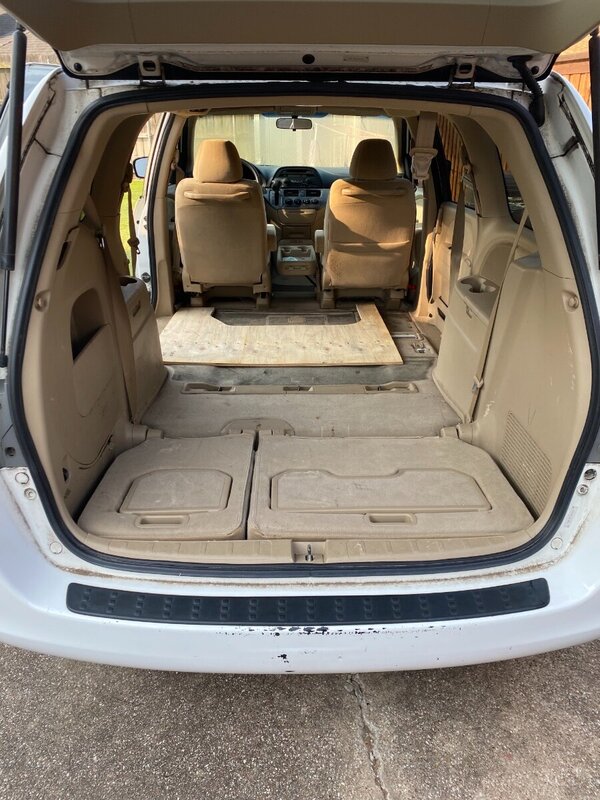
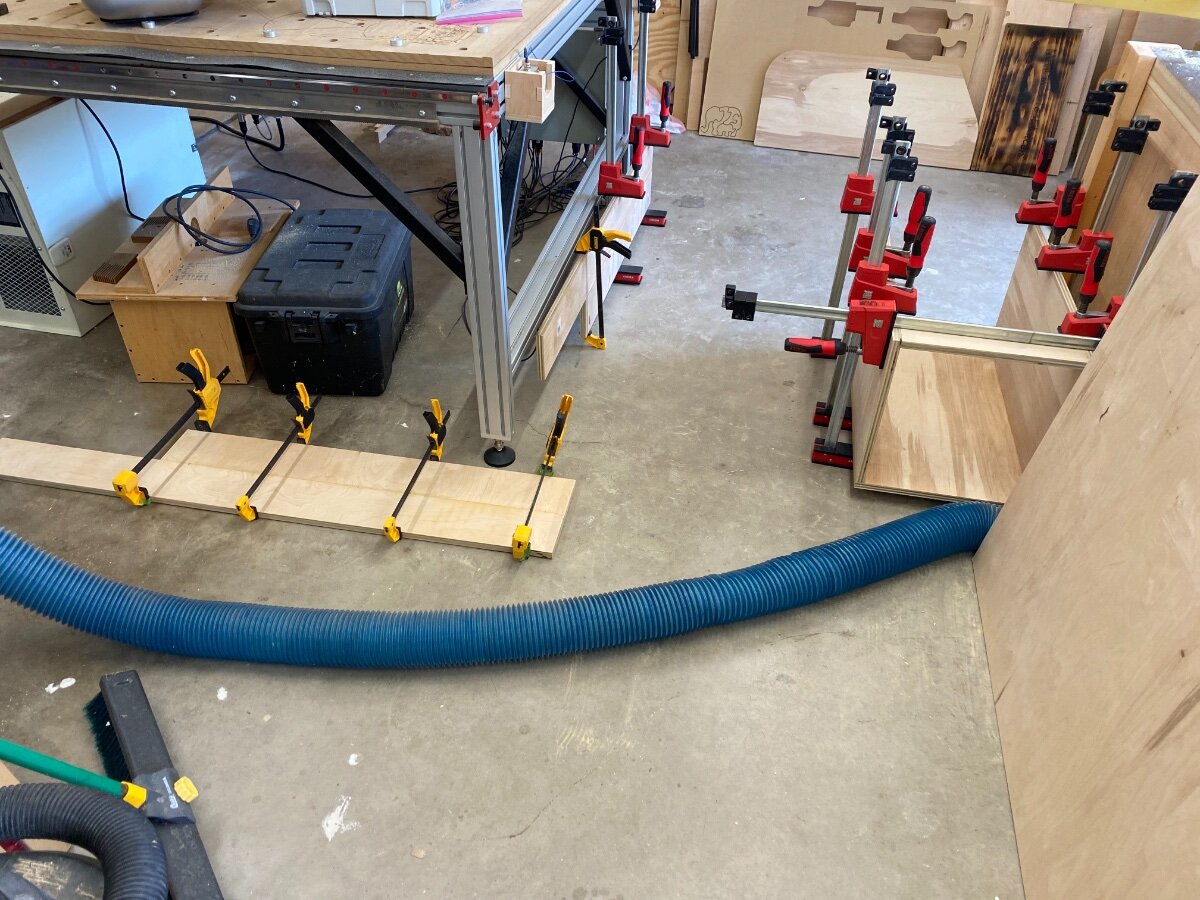
When my buddy called me up and mentioned he’d been watching a lot of YouTube and bought a minivan for me to convert, I first laughed and thought he was kidding . He wasn’t so I said hell ya let’s do it!!
the sweet ride …

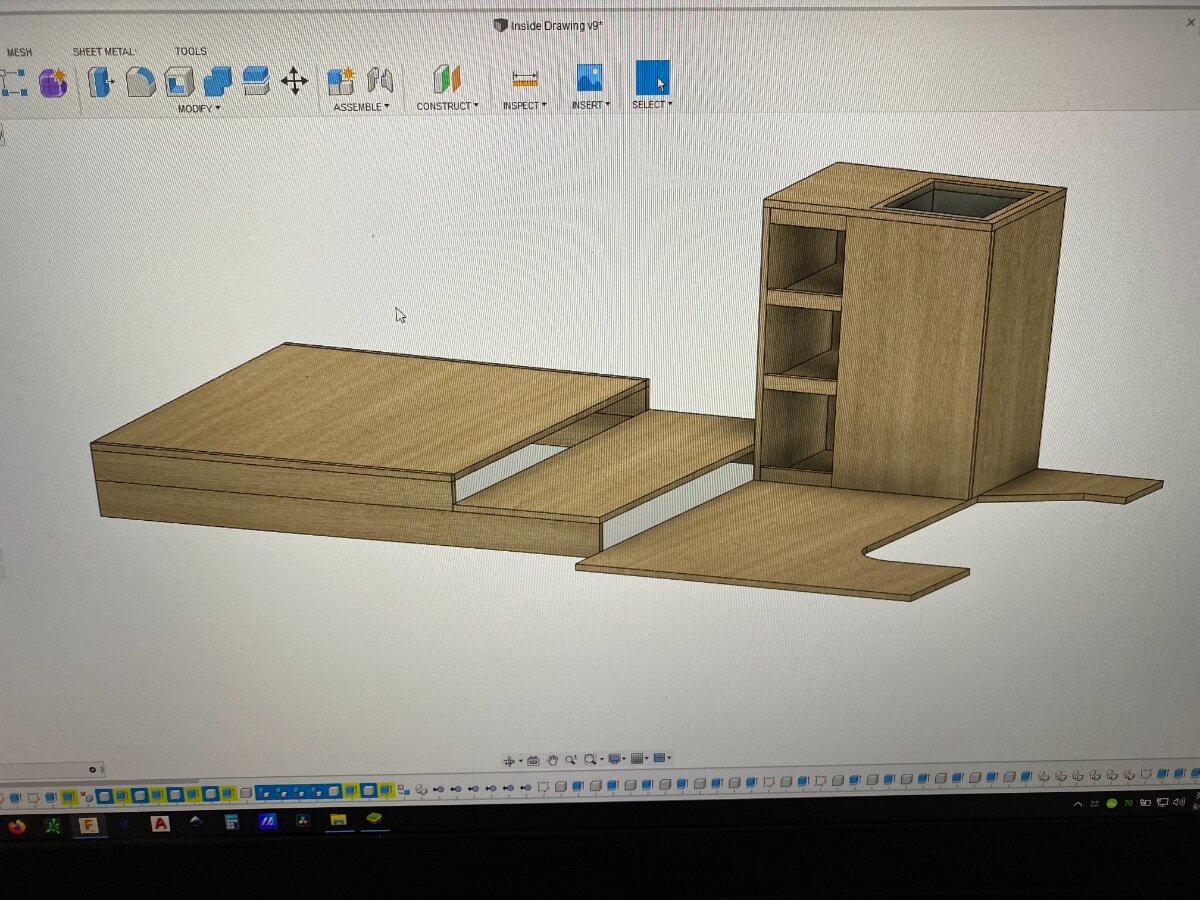
overall design idea at the moment ..

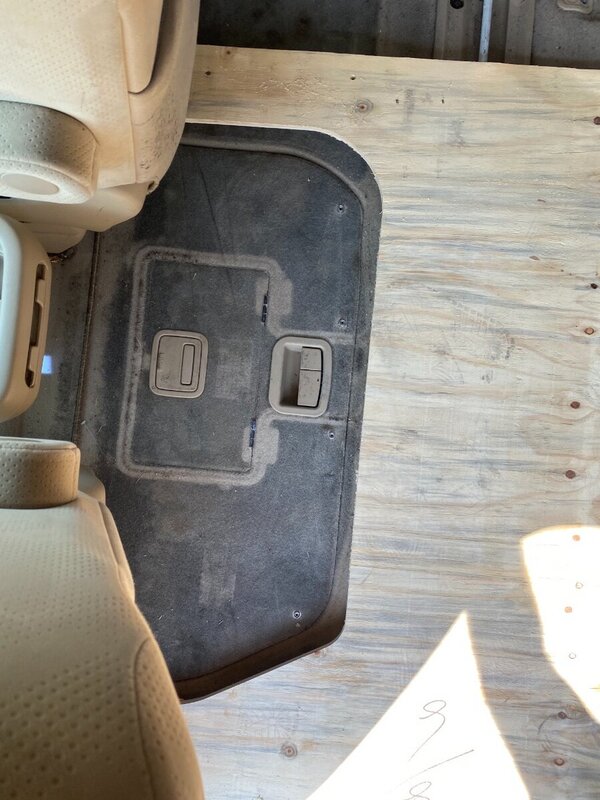
getting a template cutout for the in floor storage…
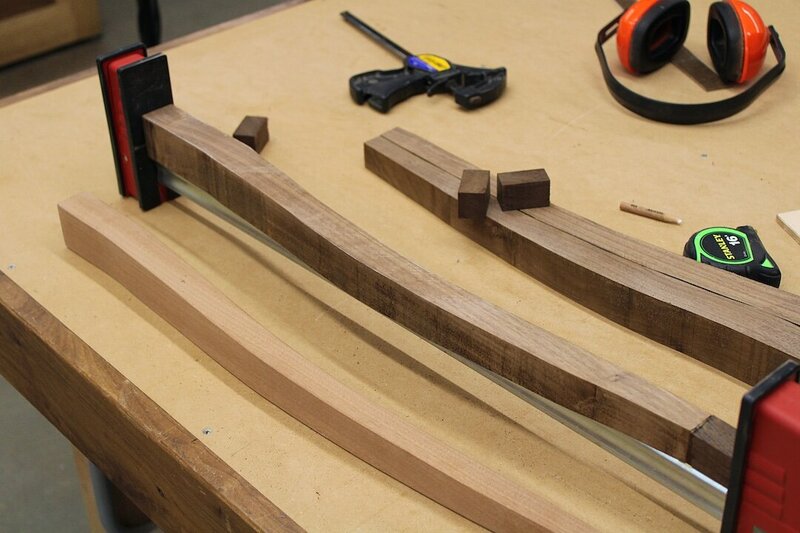
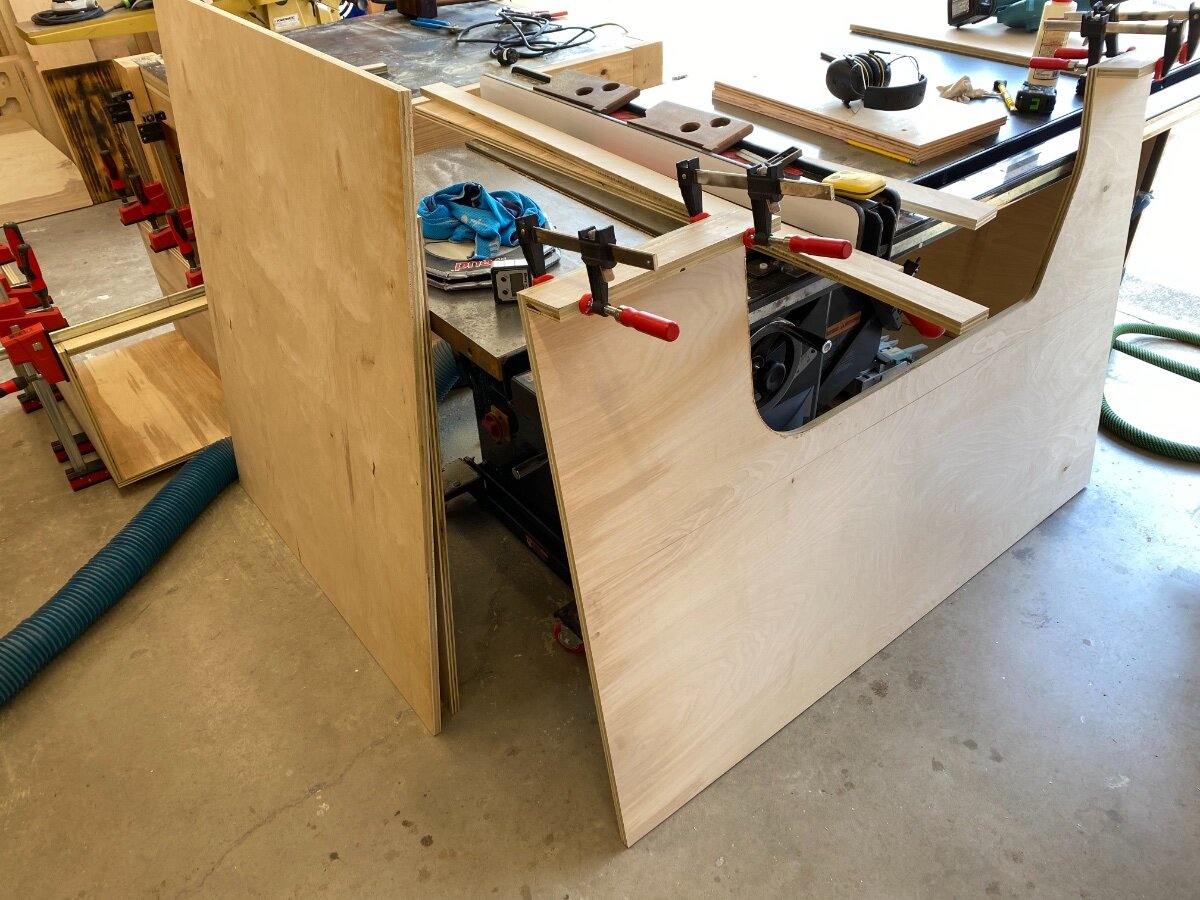
Gluing the bigger pieces together


this is pretty fun getting to do something out of the ordinary!
my main question for now is what type of finish would be good for this? Mainly thinking of the floor in the “kitchen” area where shoes/dirt/water/mud will be in contact with it.
I was thinking maybe shellac or something cheap for the majority of everything?
-
 1
1
-
-
Saw this in a FB group and figured I’d share as I have never seen it like this before .. super simple looking and cuts both side


-
4
-
-
9 minutes ago, Kev said:
Turned out great! What is the finish of choice on this one?
I just went with 2 coats of shellac ... had a little bit left in the can and worked out to be just enough.
-
That was pretty neat! Some people really do have that 'out of box' ability
-
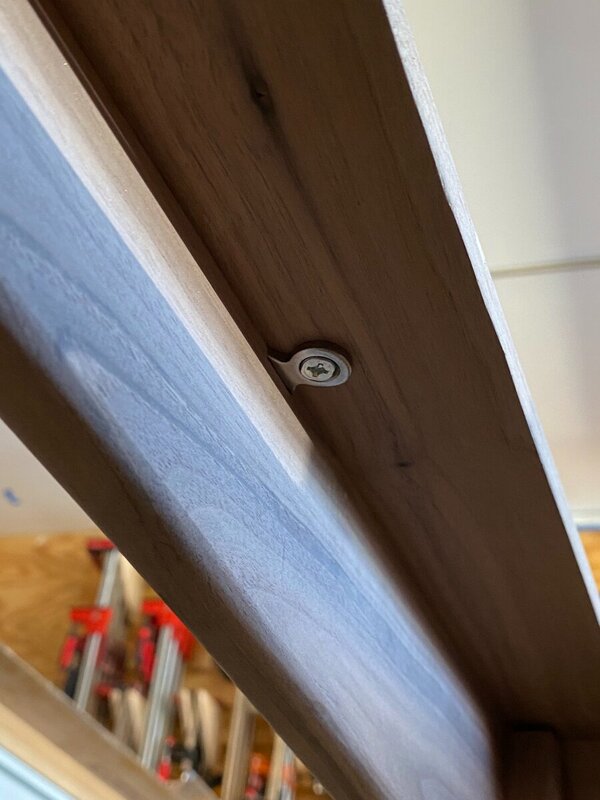
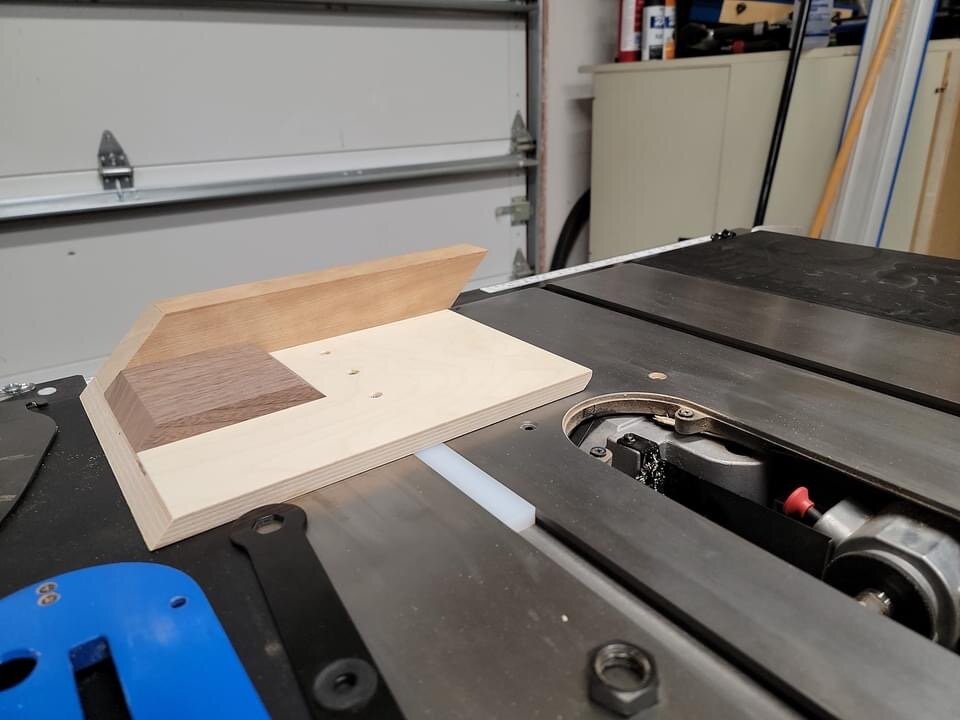
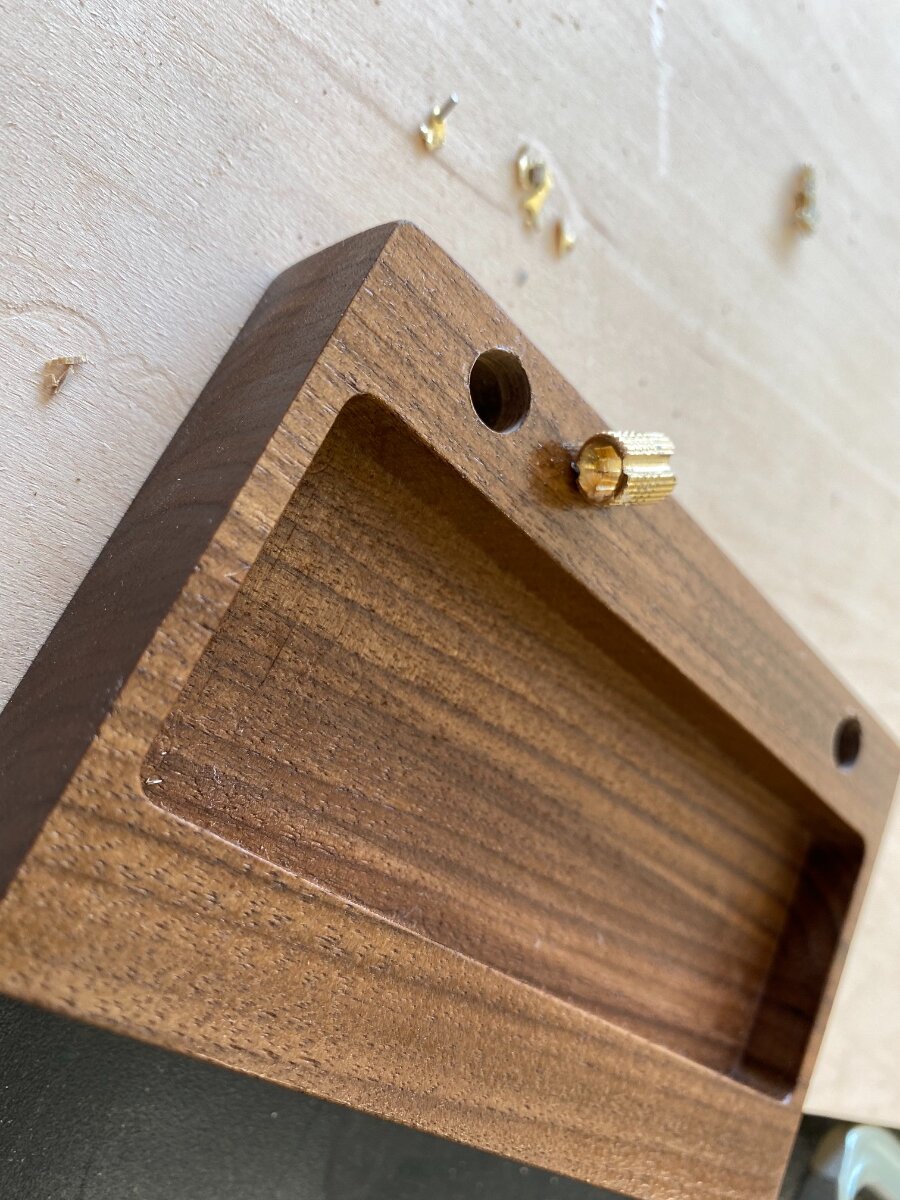
ended up redoing the top piece that was ruined ... went with some gorilla epoxy, as it was at HD and I could get it right then. Dabbed it into the hole with a smaller dowel and then rubbed the edges a little with it. The hinges seem to be stuck in there pretty good now ... what a pain in the ass!! Took way more time than it should have haha. Guess next time I need to go with different hinges if its going to be that small, or upgrade to bigger hinges with the actual screw you can use to tighten.
Thanks for the help guys!


-
6
-
-
19 minutes ago, Chet said:
Yours didn't have the small screw that expands the barrel?
https://www.wwgoa.com/video/installing-barrel-hinges-properly-003131/
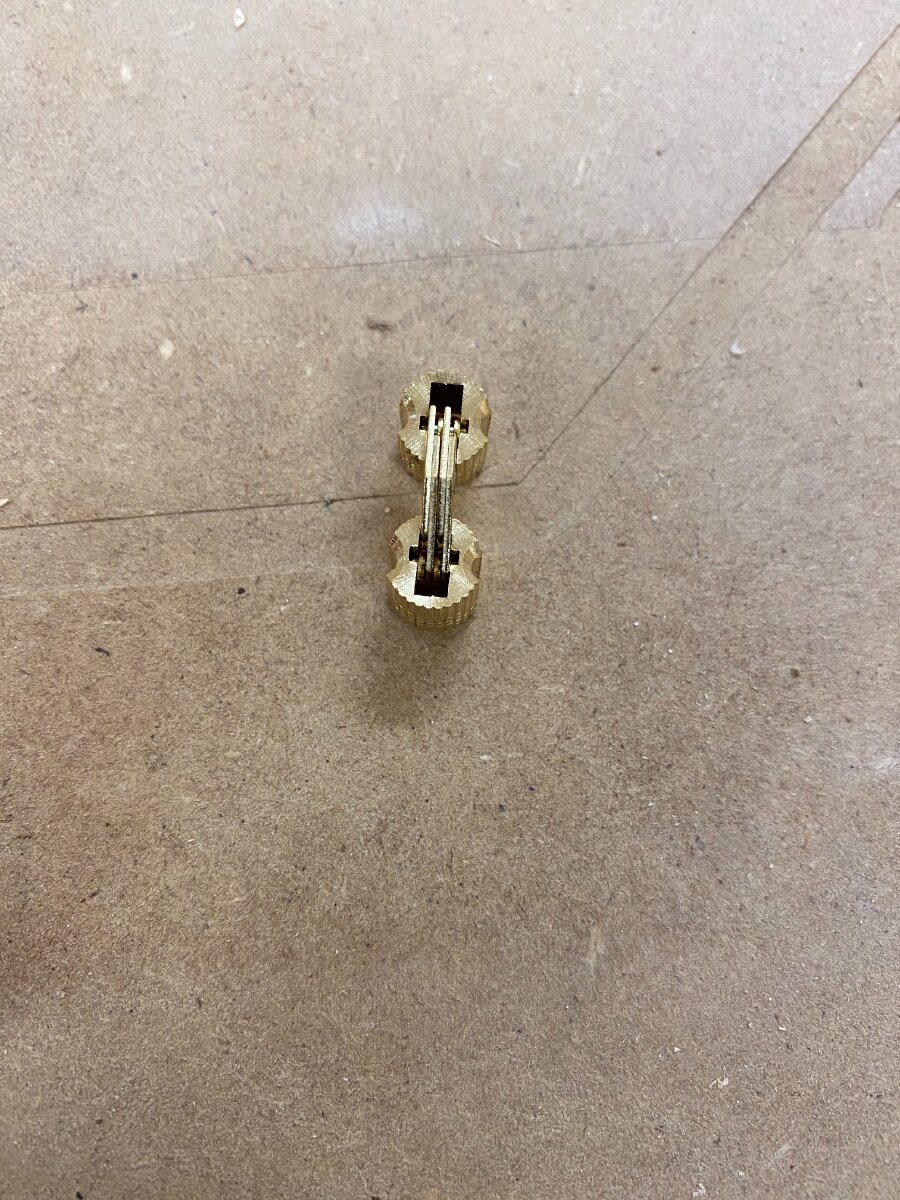
Not these … not sure if too small or Chinese knock off but this is the inside …
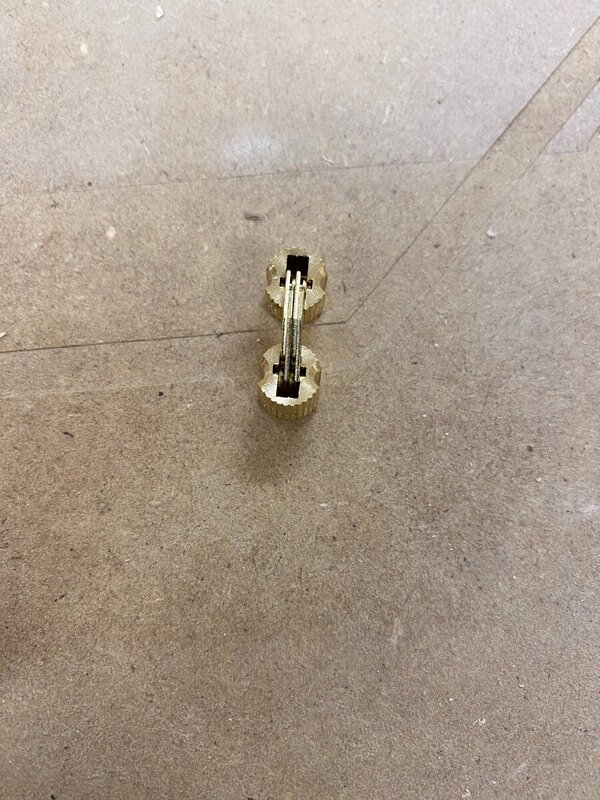
-
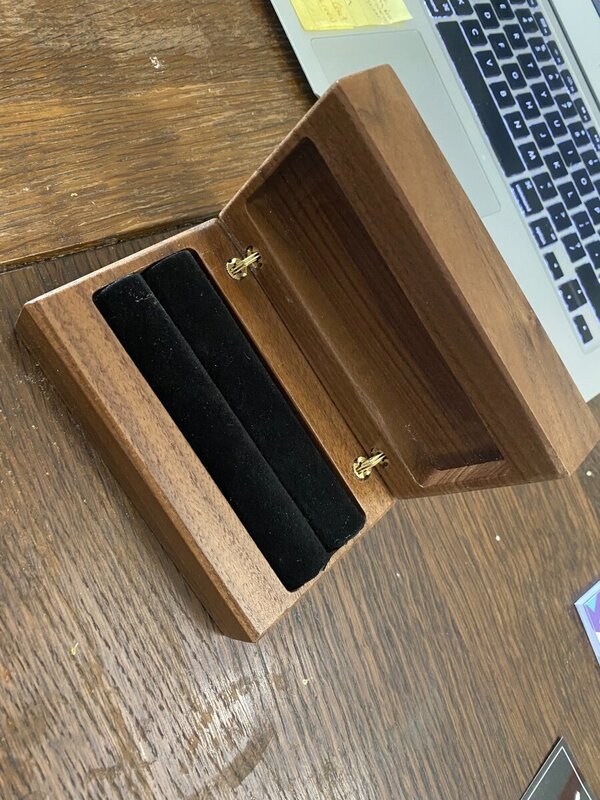
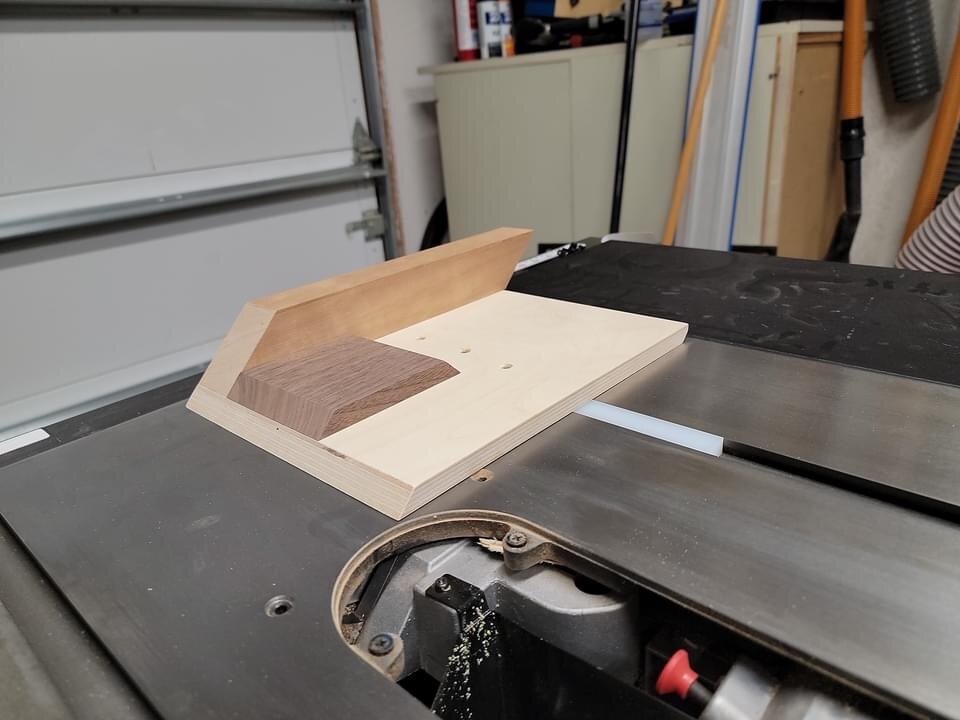
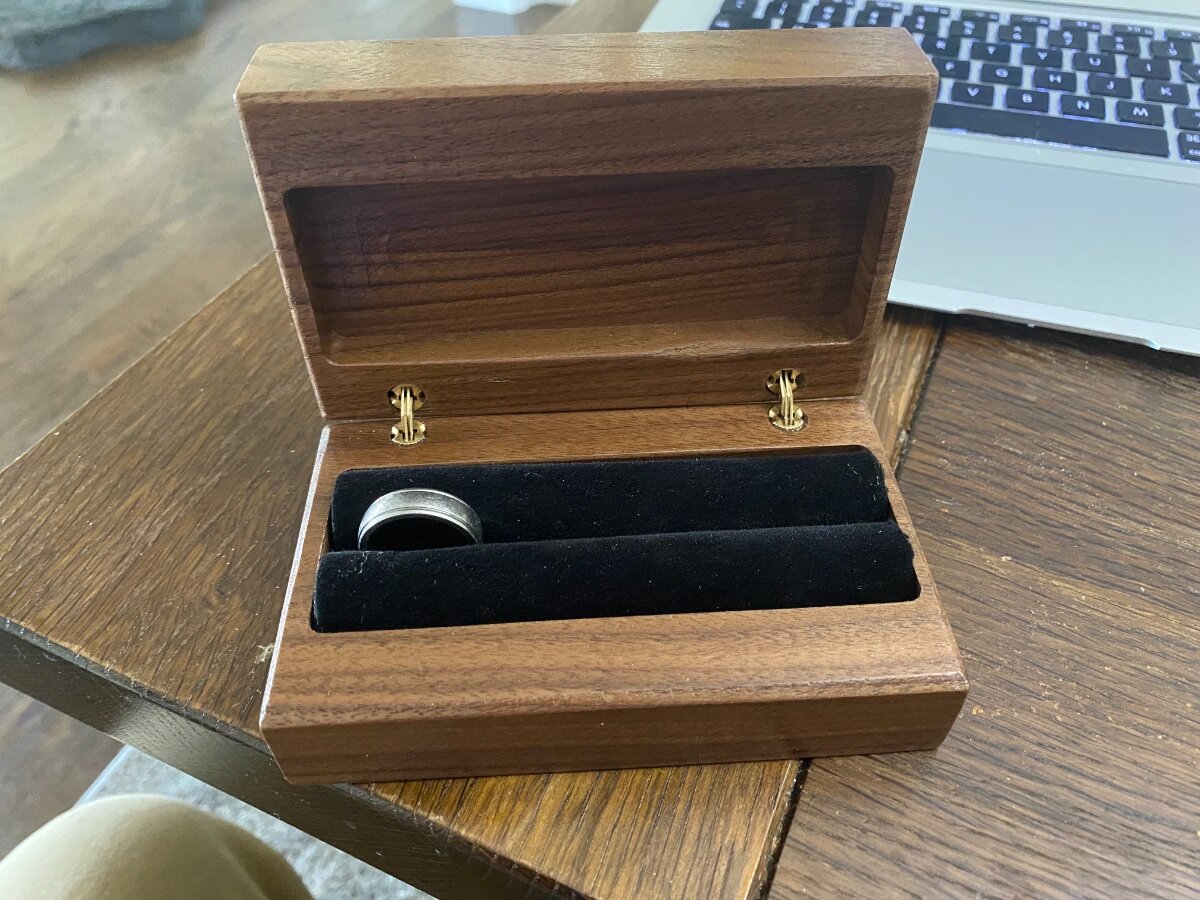
I have these barrel hinges for a little ring box I am making. Ruined the first round because I tried CA glue and it got into the hinge mechanism and clogged it all up. Assuming I just put too much in there … but is CA glue still the best idea to glue them in?
this was after I ruined it and drilled out that hinge

-
Thanks guys!!
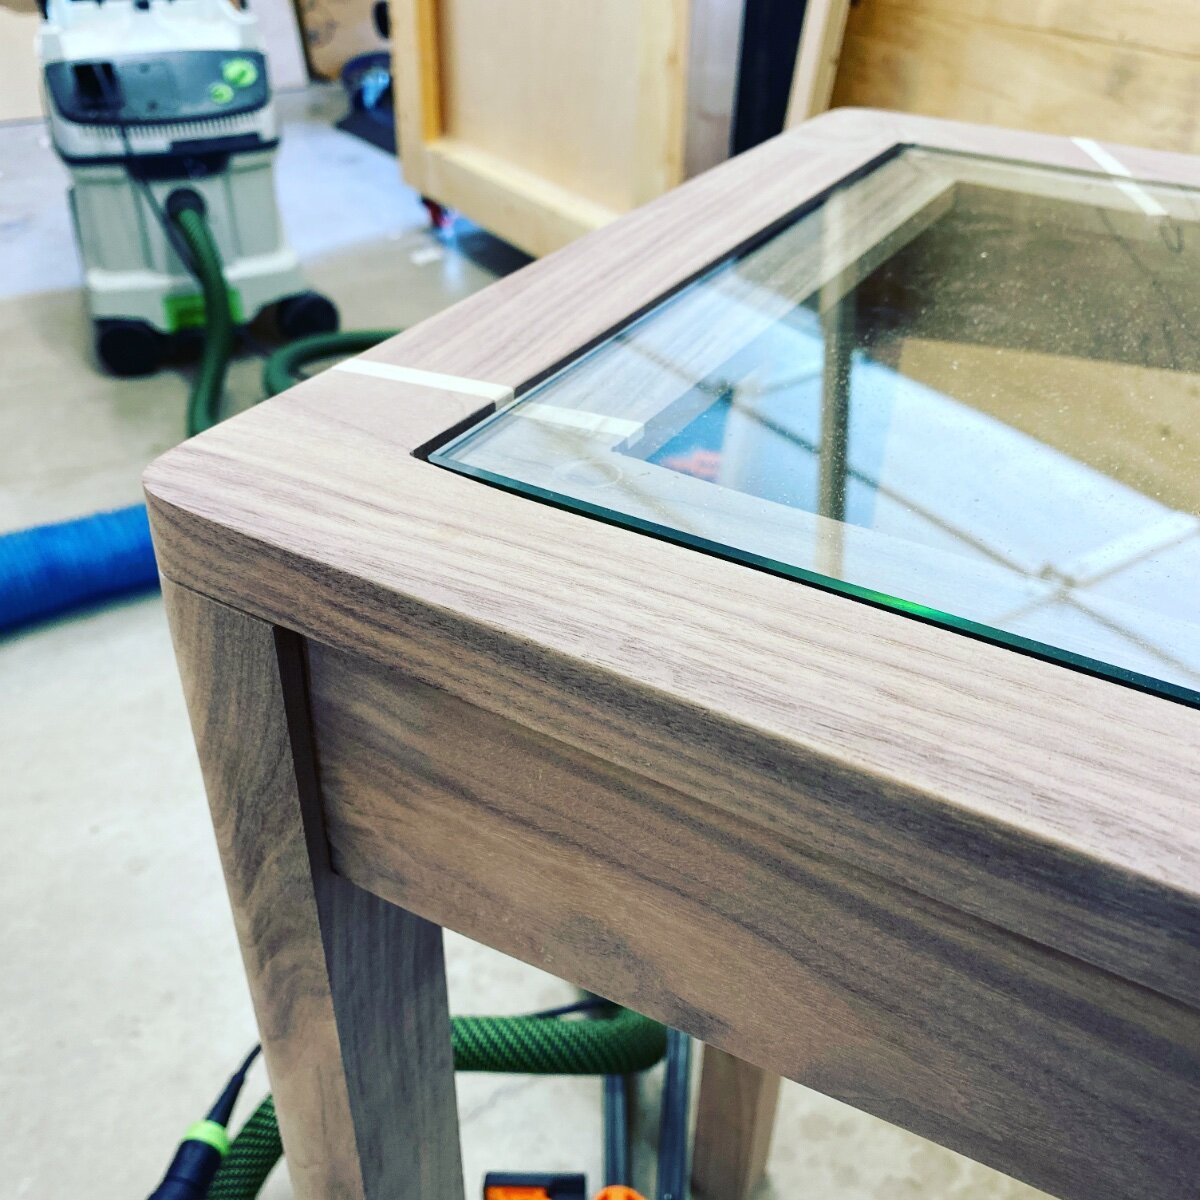
On 9/1/2021 at 8:46 PM, Coop said:Man, that looks great. Did you decide to leave the glass clear? Can’t tell from the last pic.
yes I went with a film topping as it had a cool pattern however it was put on only with water and static?? I’m not sure how well it will hold up. I wouldn’t recommend the film on it either and I won’t use it again. It was easy to install and everything I just don’t think it is going to last long and not bubble.
A couple other pics… it was super hard to get the texture from the film in picture
-
6
-
-
Sorry got a little busy with sport seasons kicking off … we got 2 soccers, a baseball and a softball season haha. We kinda busy.
I will take a few better pics tomorrow when I get some free time. Here is a quick and dirty one though.

-
6
-
-
6 minutes ago, Kev said:
Especially if you use my affiliate page 🙄🙄🙄
LOL! I see what you did there 😉 I need to get better at remembering to use it
-
 1
1
-
-
Does anyone have any idea on where to get just the velvet ring holders like this:
Is there any place outside of target to get these? I just need the holder like the picture as its going into a box ... Never messed with this type of thing before. Can you make your own?
-
is he still using it or has life gotten in the way?
-
12 hours ago, Kev said:
Not a good day in the shop...lol. It happens but, it's still frustrating when It does!
Started out ok and got the top glued up. Then, I had some house chores to get done and when I got back to the shop, my brain wasn't in the game..
I got the legs roughed out and set up at the TS for the little tenon.. Long story short, I set up on the wrong side and then batched the rest to match...lol. So, this meant that my legs were now too short and had no tenon for the feet.
Would have been easy to throw some things and toss out some 4 letter words but, I was looking for a save before calling it quits for the day. For the record, there were a couple 4 letter words before I gathered my thoughts..
The "save" was cutting some Wenge blocks and using a 5/16" dowel to attach the feet. I did attach them using epoxy with a few drops of black transtint in it just incase I had some gaps..
So, legs roughed and feet on.. That's a wrap for today as things just aren't going my way today. I'll working on shaping and forming the legs tomorrow..
haha glad to hear you are human after all in the shop 🙂
The wenge addition might actually turn out to be better than you think. It could add just enough contrast to really make it a great addition. But ya, I am with Coop, I would of had a smaller table haha
-
I have been thinking of trying out Rubio as well ... been watching a lot of blacktail studio builds lately and that finish always makes the wood look great! Also seems pretty easy to apply too.
interested in hearing both sides...
-
32 minutes ago, Tmize said:
I think what kev showed would work better. We have the once’s that coop linked an they work great for about a year then you just have to keep fiddling with them to lock in place. Of course we have kids an they could have just broke them an I just haven’t noticed enough. 🤔
20 hours ago, Coop said:These work well. Our vet also uses something similar on his exam table to hold the dog leash in place.
Hah! after reading Tmize comment I will skip this one for now since I have a 7 and 5 year old so they need to be a little tougher.
20 hours ago, Kev said:Interesting room design/dilemma!
For starters, if things stick out a little, it is what is is. Unless you find a product that works that also fits your space.. Our vacuum lives in a spare bedroom for this very reason.
As for tool holding, I came across these recently from the fire fighting industry for mounting tools on the trucks that looked pretty cool.. I've seen them on the trucks but, haven't had the chance to really test drive them..
ordered 1 of these to test out and see how it goes. will order more if they work as good as they look to in the pictures.
Will let you know my thoughts once they get installed ... they show up on Thursday so I think Friday I should have time to get to it.
-
2
-
-
12 hours ago, Bob said:
Looks great! Would really like to see the whole table. From the little I can see, I am not sure about frosting the glass. I really like the clear glass look.
thanks!
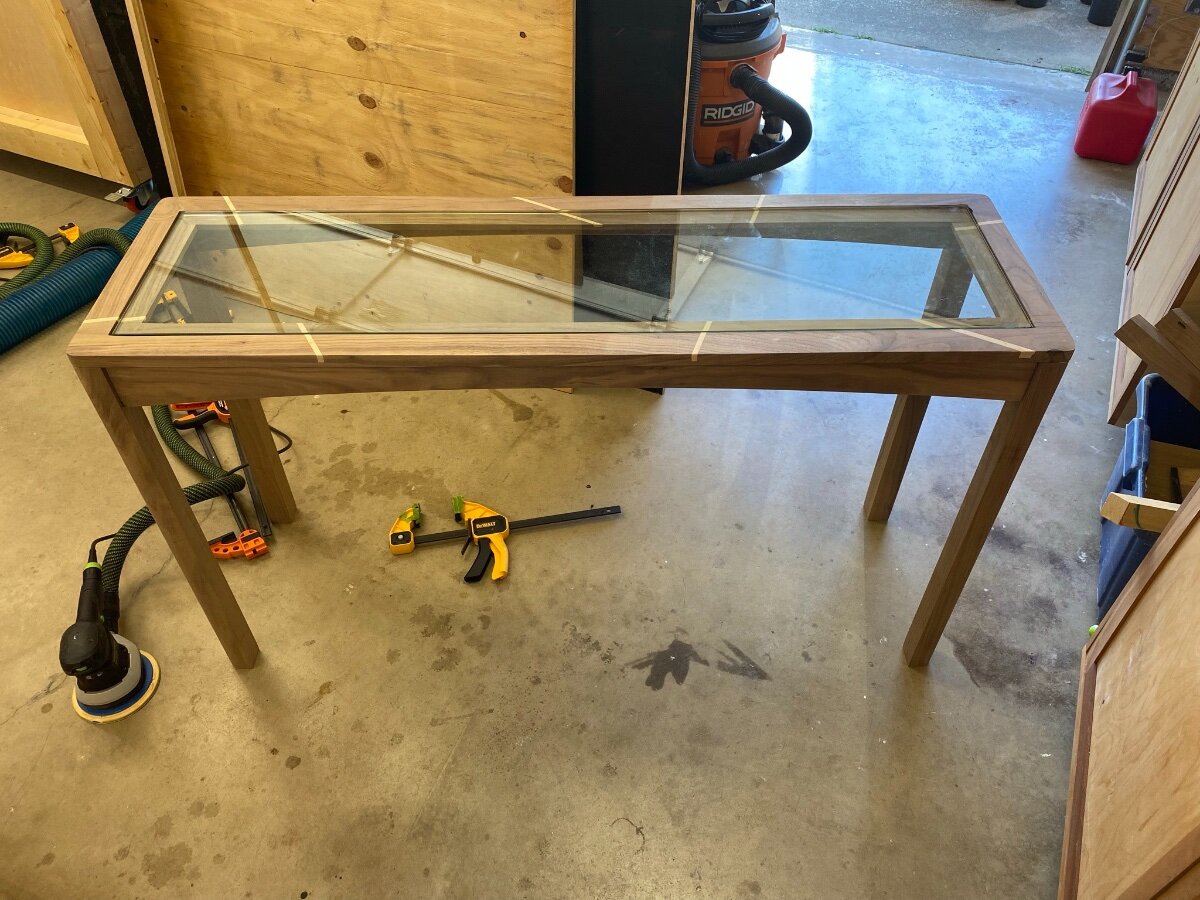
here is a quick and dirty shot I took the other day …
 13 hours ago, Kev said:
That turned out cool! Only pic missing is the whole table pic...
Happy to see the figure 8s worked our for you!
What's the finish going to be?
GF high performance will be the finish sprayed on
-
3
-
-
Thanks guys I’ll take a look!
hah! Coop I’ve never had a basement either. Must be nice to have that extra space.
-
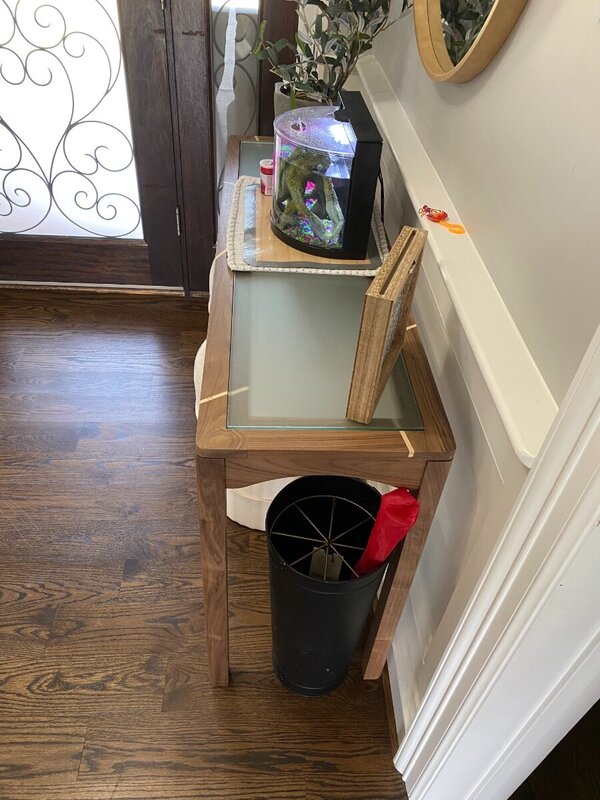
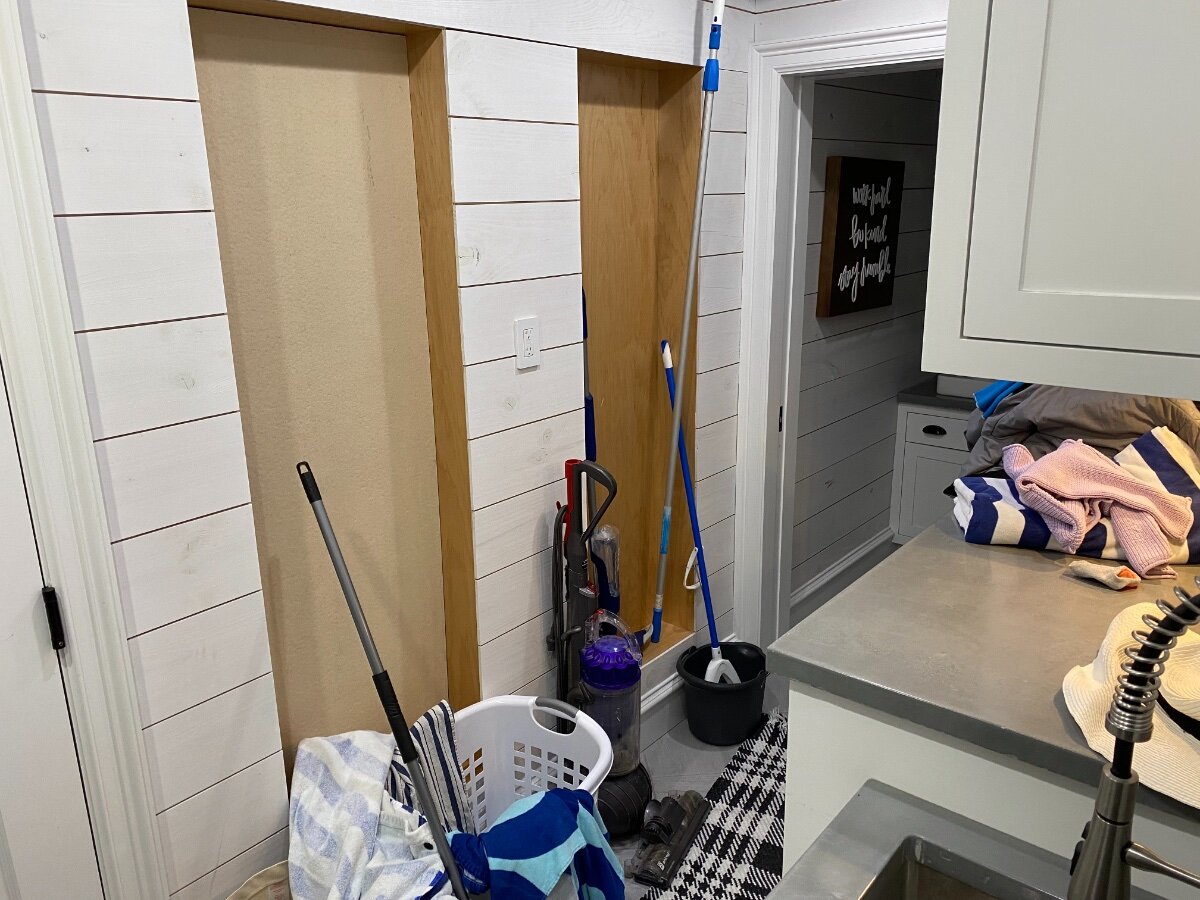
Soooo when we built the mud room we had a great idea for in the wall storage. Brooms and mops and stuff. Thing ls we though would be small enough. However all the mounting options we found don’t really help keep things clean looking and in the wall.
first idea we had was a cork board door that we could pin stuff to if we needed. Well with having a door on there doesn’t leave much room at all. So the cork board (left) is just sitting there waiting to be turned into a smaller board for my daughters room to tack stuff onto it.
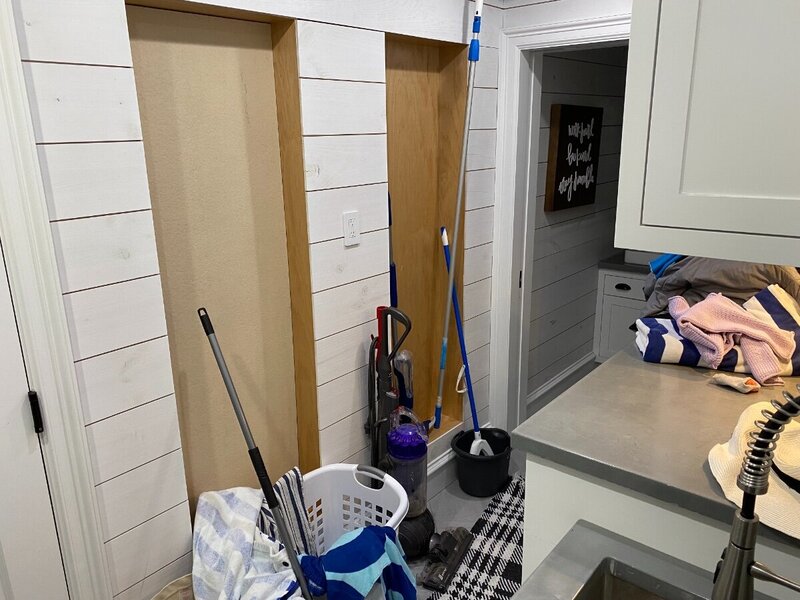
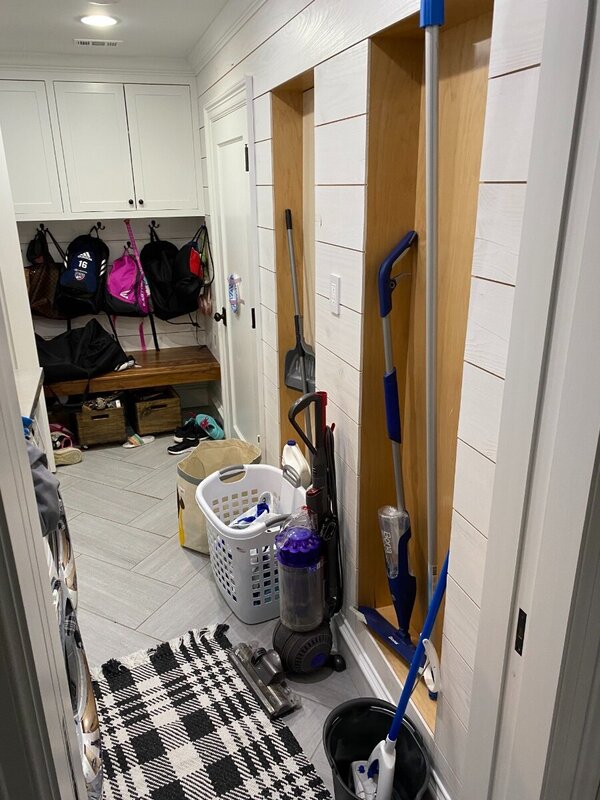
do y’all have any ideas on getting stuff in there? Mounting hardware? Would it be ok for some stuff to stick out a little?
-
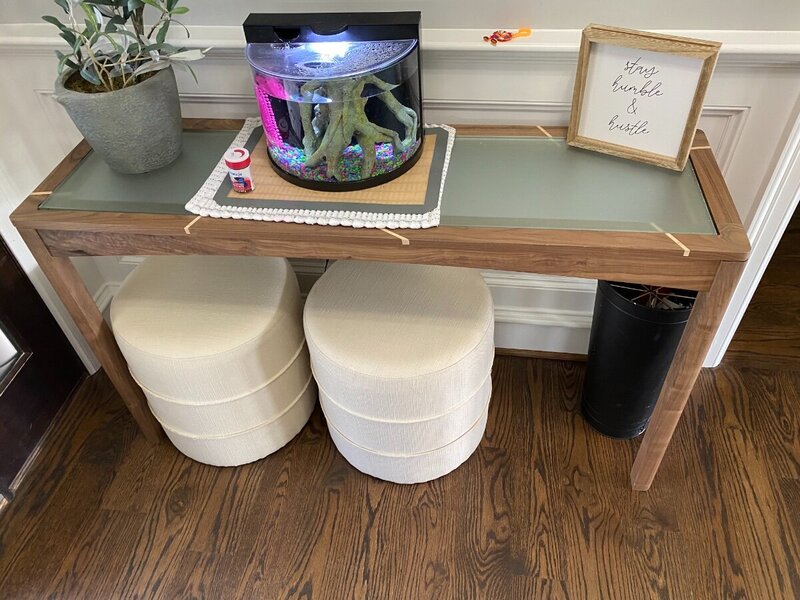
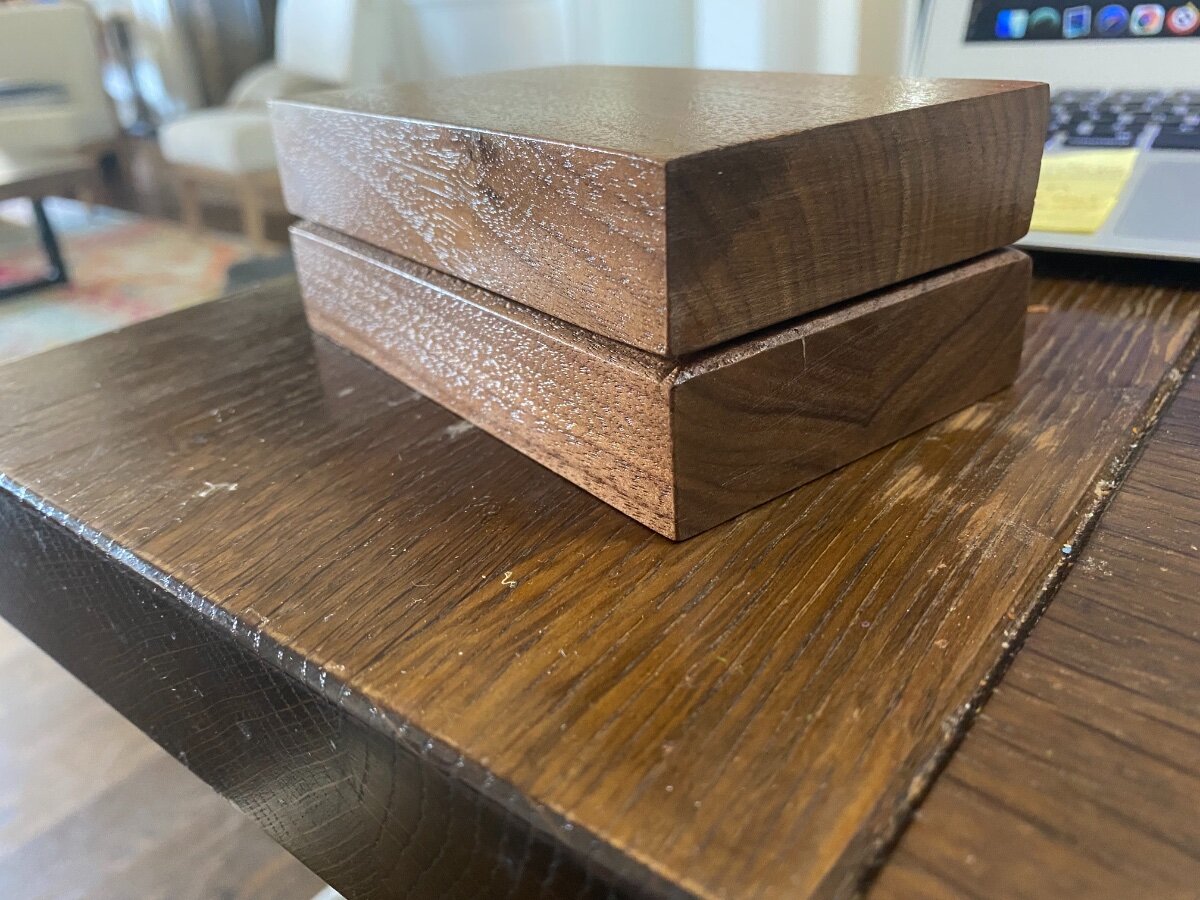
Final check with glass and rounded corners ..


got my figure 8s figured out
wiped down with mineral spirits and ready for finish tomorrow.

-
7
-
-
9 hours ago, Kev said:
Assuming your rails are 3/4" (or close to it) they should fit fine.
yes they are and they did 🙂 ... good to know though for the future when I need to use these
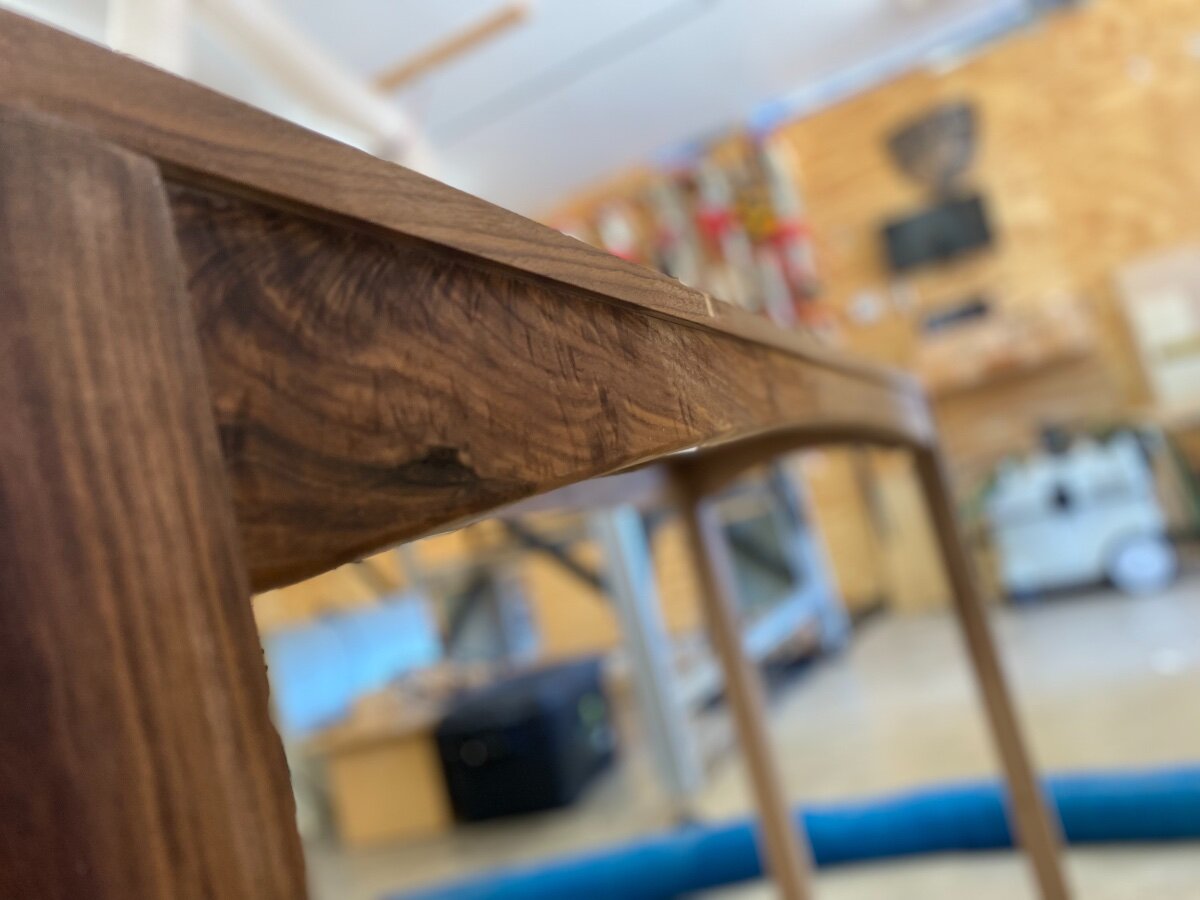
9 hours ago, Coop said:Figure 8’s should work as you have them shown. I would have used a Forstner bit to recess them into the legs. Each figure 8 has a recessed bevel on each side to receive a tapered wood screw. From the pic, you have it reversed. If after recessing the figure 8 and flipping it over, and the screw still pokes thru, get a shorter screw.
I did recess them, its just a really weird looking picture ... that is actually sitting flush with the top, although it looks like it is just sitting on top haha.
The problem with using those is where they are, the rabbeted wood is only about 1/4 thick so I would need a tiny screw for that and not sure how well it would actually hold
-
2
-
-
18 minutes ago, Bob said:
Glue the dowel into the leg. No glue for the top just a hole to fit over the dowel. I don't know where you live, but I am not sure I would worry to much about movement in your top frame. It is essentially a raised panel frame without the panel. When building a raised panel door etc... the wood movement concerns come from the wood panel and not the frame. But you can just make the holes for the dowel slightly larger than the dowel to allow for movement.
I will definitely try this out on a future build ... got my issue worked out for now
-
10 minutes ago, Kev said:
Yep.. Long enough to attach the top without popping through
No glue and they would need to be undersized slightly on one side with this method. Or, you could glue in one long side dowels and leave the other side undersized and unglued.
There's a down side to either what I suggested or what Bryan suggested. Any warping of the table with seasonal movement could show a gap off of the rails. This could be compounded is there was no weight on the table.
Looking back at your original picture, is there any reason you can't use the figure 8s installed on the side rails? That's actually how I usually do it with 2 per side. This allows for movement and good hold down force.
gotcha .. thanks for the info
As far as the figure 8's on the side ... I just assumed they were too big to fit, but I didnt look as I was frustrated with the other part and had to go pick up kids from school. I just went to check and they did fit so I installed them.
-
3 hours ago, Kev said:
You might consider one screw centered on each side rail from the bottom into the frame. A centered screw won't restrict wood movement and still secure the top in place.
No, I used a rattle can with good success.. Like this ..
so just some like 3" screws or so, I believe, would be the length to attach it? so just the 2 screws in the sides ... would let wood move enough and hold it if picked up by the top?
Thanks I will take a look at that and see
2 hours ago, Bob said:No harm, no foul. I would probably use dowels, centered, one on each leg. The dowels will locate and keep the top from moving side to side, and the weight of the glass top will keep the top tight to the legs. The other advantage it will allow the top to be easily removed in case you have to move the table.
+1 on the rattle can frosting @Kev linked. I have used it on several glass door projects.
Interesting on the dowel idea ... assuming the dowels would still let the top wood move? Even if they were glued in?
-
also ... for the frosted glass ... did yall use a film?
Like that? Just one of the first things that popped up on amazon.


Campervan for a buddy
in Member Project Journals
Posted · Edited by Bushwacked
Interesting thought on the mats. Going to have to look into that as that does sound like a great keep clean solution.
paint eh? Didn’t even cross my mind … what color would you be thinking for the wood? White? I’ll have to bring this up to my buddy.
Lol!! Shag carpet in those big conversion vans. I remember my moms and she’d drive around the baseball team when we were little.
I was thinking that but not sure on how well the weather would be or how slippery etc if it got wet boots on it
Test fitting the foam pads …
I’m 6’2 and I fit diagonally accord without bending goofy. I was surprised by this.
starting work on the sink …