
Every purchase made through our Amazon Affiliate Page helps support this site


Bushwacked
-
Posts
1,605 -
Joined
-
Last visited
-
Days Won
98
Content Type
Profiles
Forums
Downloads
Gallery
Events
Store
Articles
Blogs
Posts posted by Bushwacked
-
-
4 hours ago, Chet said:
I would use a round over bit in the router with a bearing. I myself would probably use a hand held router as apposed to the router table and have the bottom side of the table top up to do the work.
Ok was thinking that … but it looks like a 6/4 to 8/4 top. That’s a hell of a round over bit. Yes, take small passes and work your way up but still a beast. Assuming like a 1” round over bit or so.
-
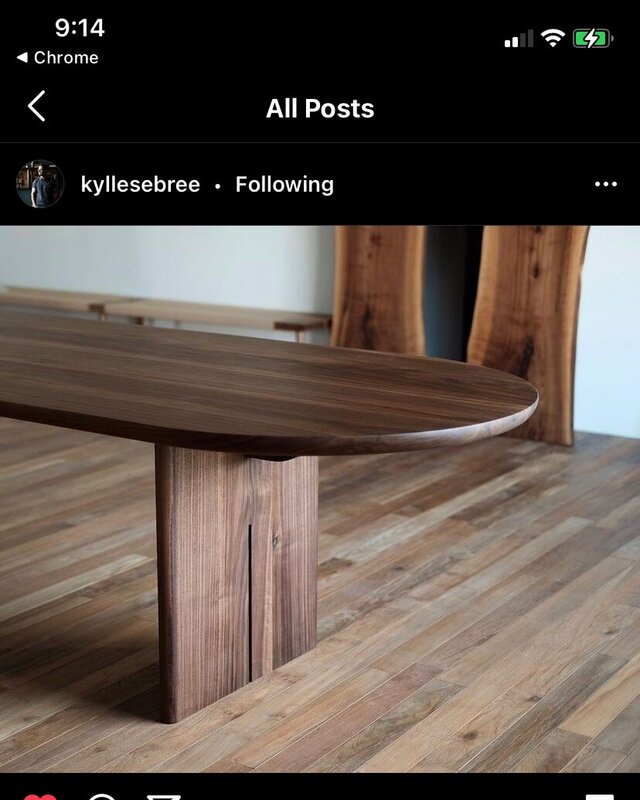
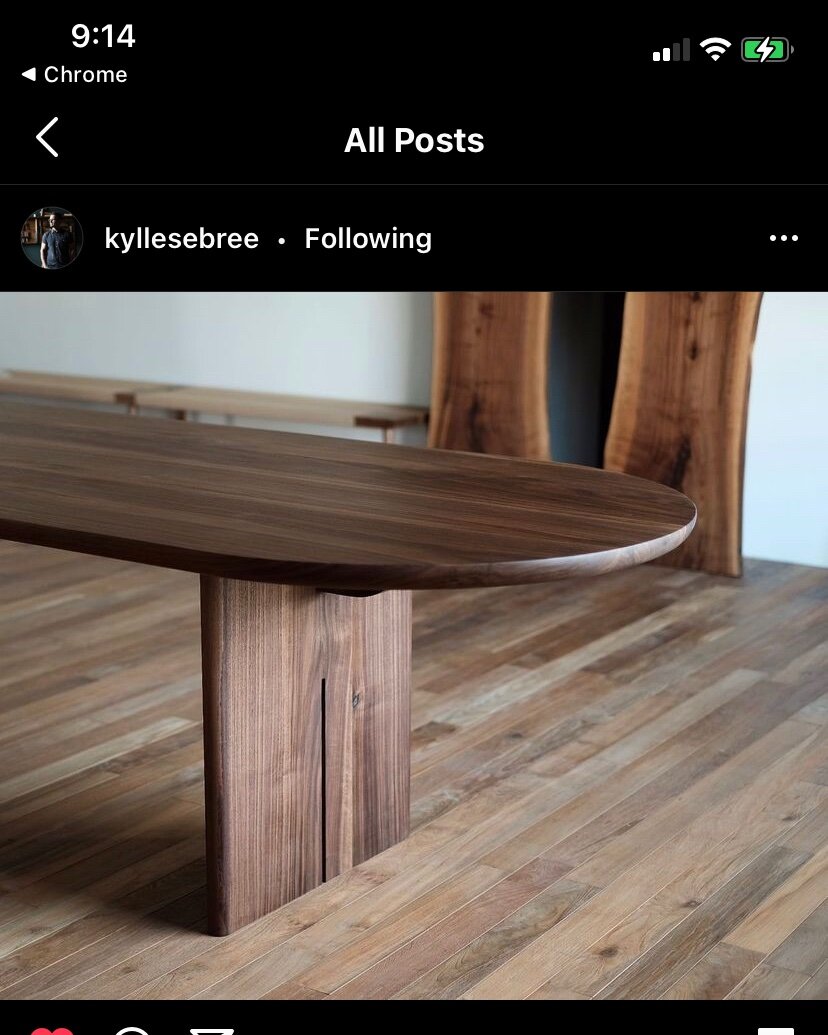
so just came across this … it got me thinking about how to make that rounded bottom.
Am I over thinking it? Is it just a big round over bit on the bottom?
#2…

how would you cut a 10* bevel on a rounded edges?
been a learning morning so far trying to figure these out haha.
-
oh interesting ... I will take a look at that and see about the whole frosting thing ..
-
On 7/20/2021 at 8:50 PM, Coop said:
I used this kind of glass on my door and it looks sharp against the walnut.
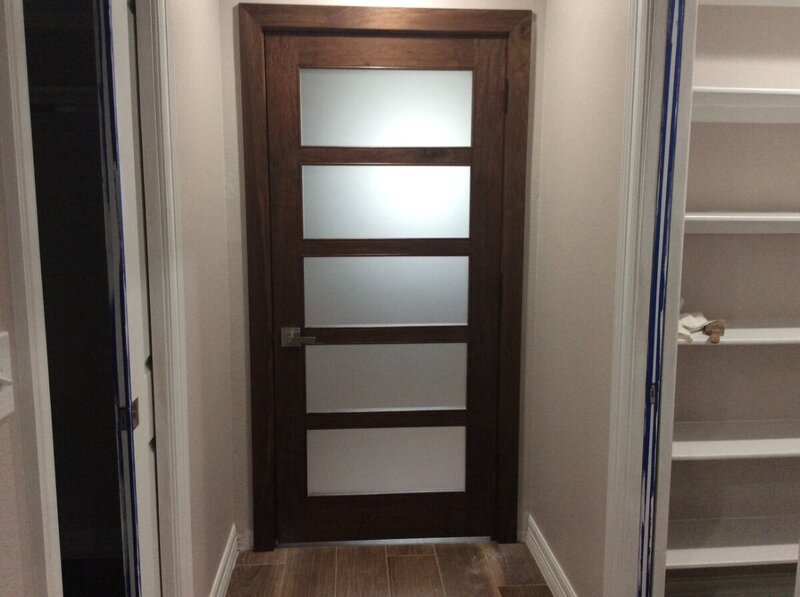
Yes that came out looking amazing! problem is I already have the clear glass 😞 Next version will definitely have some glass like that
On 7/20/2021 at 10:03 PM, Kev said:I did the entry table with the floating top a few years ago that turned out pretty cool!
ooooh I forgot about this one ... watched it back in the day though. yes that is great looking by itself
-
5 hours ago, Kev said:
I see that you show them just across the top in this latest pic.. That might look a little strange from the side view to see those little "tics" of maple at the top on the side?
This is what I am going back and forth in my head about ...
4 hours ago, Woodenskye (Bryan) said:Just my opinion, I think doing the table without the maple would look good on its own.
True, just trying to add a little something else to it ... maybe the glass feature will do that all on its own?
7 hours ago, Coop said:From the new pic, I like the design!
thanks Coop!
-
9 hours ago, Coop said:
If the maple accents are the thin strips that you see in the first frame of the video, I don’t see them being worth the effort. JMO but the glass breaks up any continuity they would have, from one side to the other. And I do like maple and walnut in a build. Not to bust your bubble.
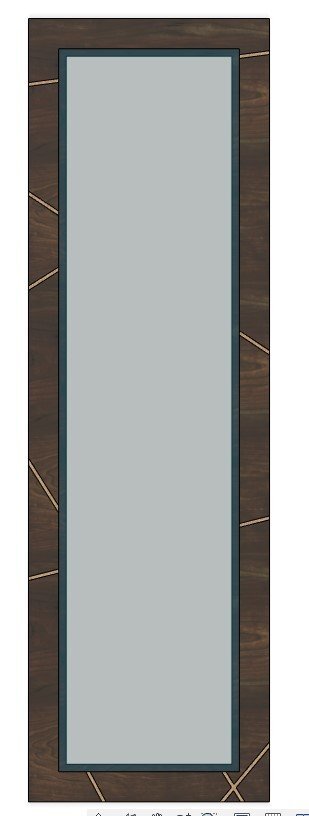
So, yes they are the thing strips you see ... here are some better shots:
The plan was to have the actual lines line up across the top. In the pic above if you followed the lines, all but 2 have a continuation across the glass, and those 2 I was just tired and for some reason they were fighting me so I gave up for the moment haha.
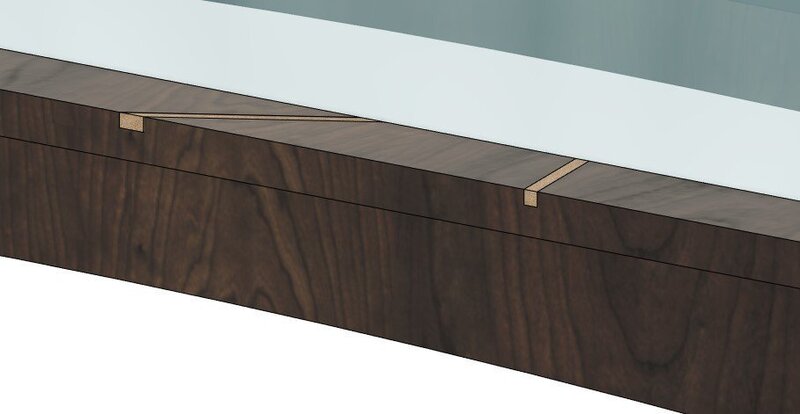
Here is how deep I was originally planning on going, about 1/4"
9 hours ago, Coop said:Giving it more thought, I think a thin inlay or laminated piece of maple centered or not, around the perimeter of the top would look good.
I will have to give that some thought ... so are you saying like wrap the outside in maple on the edge? Or like a 1/4 deep rectangle around the edge or somewhere in the middle'ish?
2 hours ago, Kev said:Doing them all the way through, I'd be concerned structurally since your glue ups would be end grain. You might get away with it with some loose tenons and epoxy but, I would still consider them suspect. I think some shallow inlay would work out better structurally even though it's probably more work.
I was thinking the same thing ... and that is why I was going with the 1/4 deep grooves to start with at least. glad to see I was thinking about it correctly for once 🙂
-
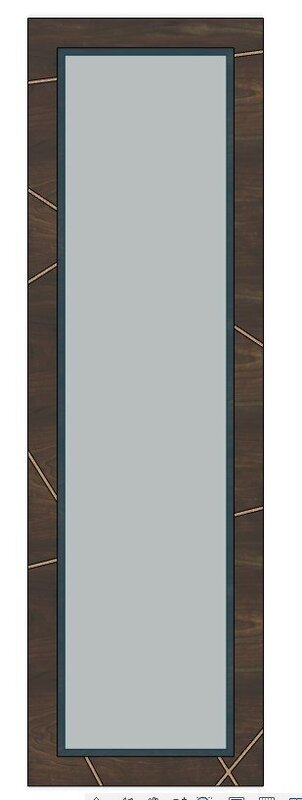
well got a new piece I am going to be working on ... a Walnut/Maple hallway table. I have seen so many of these done and tons of variations over the plane look. So I took a stab at making this one be a little different as well.
Going to have a glass middle ... with maple accents cut through out the top. The legs do have a taper on them, just hard to see in the video.
2 main questions starting off
1) what do yall think of the maple accents, should they go all the way through the top or is 1/4 deep like they are fine? Yes, you will see them not all the way through on the sides the way it is now ... which is why I am curious how that should be handled and if it would look stupid not going all the way through.
2) The glass will sit flush on the top, do the edges need a 1/32 or so gap from the wood to help with movement?
Any other thoughts on this one?
-
 1
1
-
-
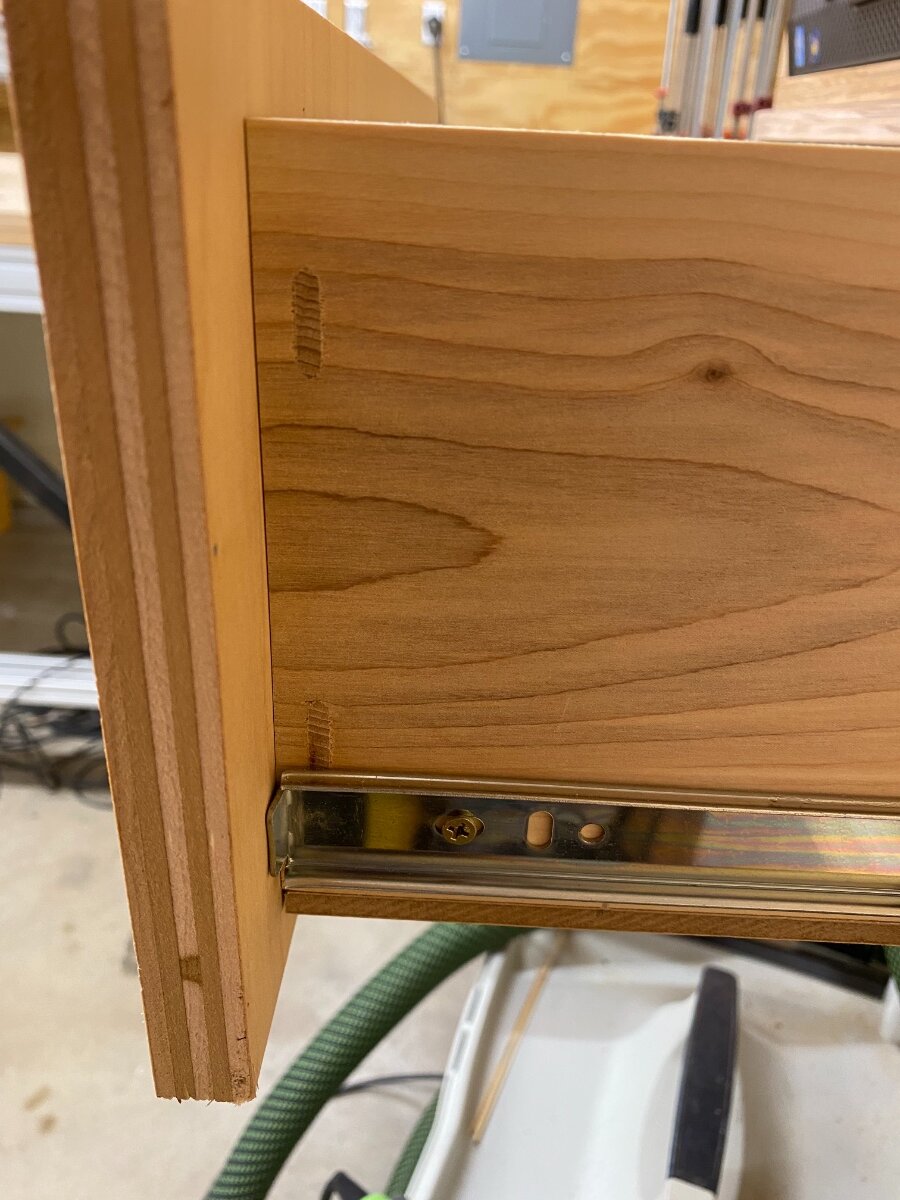
So I saw awhile back on the Festool FB page … exposed dominoes as a feature. I figured I would try it out on the bits drawer I made.
this is a 1/2 drawer. So the dominoes are #5 and tiny.

turns out to not be as ugly as I thought in person and kinda a neat feature. Also super easy to make marking everything off the domino “bendable tabs” not sure what those black things are called next to the cutter.
let the slamming begin 🤣
-
3
-
-
just to add some to this ... as a makita track saw owner ...
1) The stock cord is short, at least I thought so and so having ply on saw horses and plugged into my shop vac, I always felt like I barely had enough cord to finish the 4' cross cut. With that, I did make my own cord and added another 5' to the orginal length ... I think it puts it somewhere like 15-17' now or something like that. I would have to go measure it.
2) I have never ran into anything it couldnt handle ... with some real hard woods, I normally just take 2 cuts anyways on things in the 6-8/4 range.
3) would I buy it again? possibly, but I would really want to look hard into cordless, I think it would be easier without the cords. As I know nothing else than the makita, I like it and have no complaints, minus the cord length.
-
1
-
-
14 hours ago, Jamie said:
Now that turned out really nice! Great job!
Thanks!
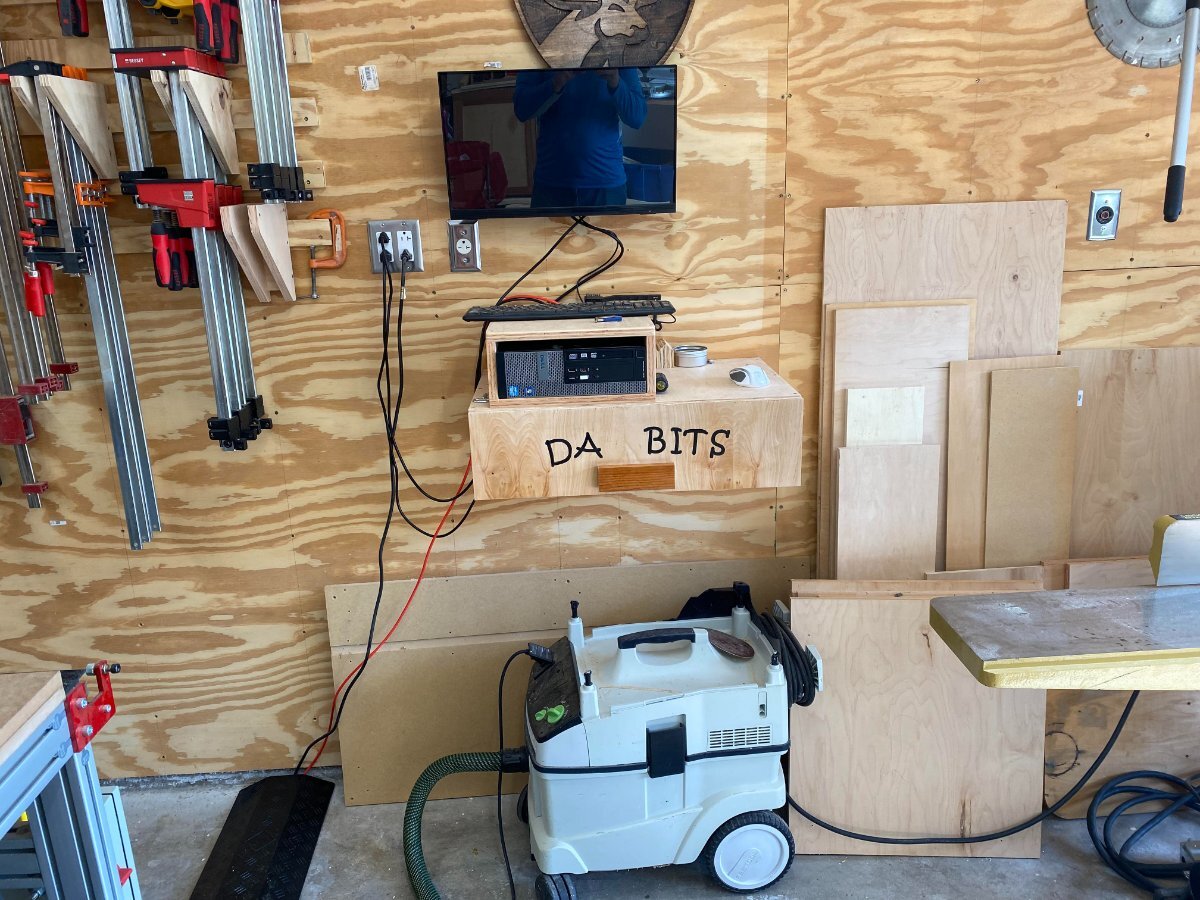
Well finished up my computer area and bit drawer today ...

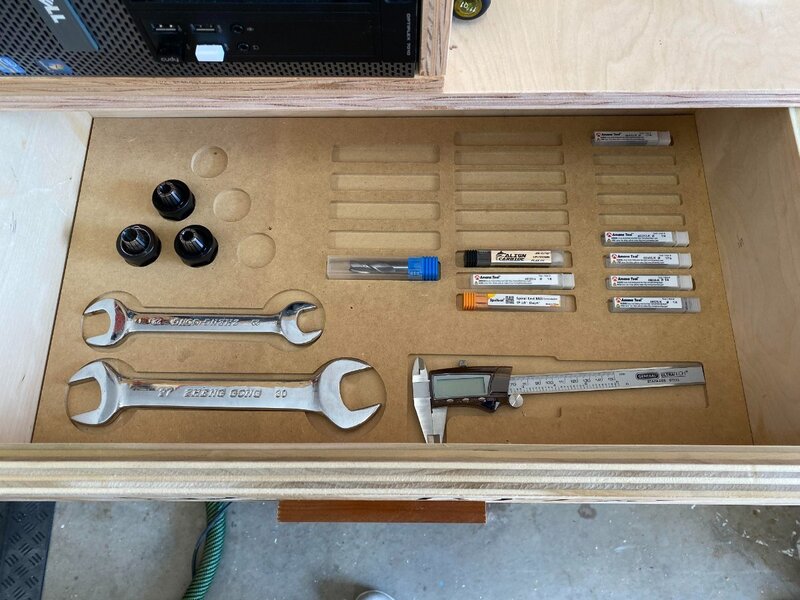
everything has a nice spot to live in instead of just thrown in there.
This should be one of the final projects for a bit in the shop, until I go after some door on the upper miter saw cabinets sometime. Also have 2 temporary cabinets in the middle of the miter saw cabinets. Trying to see how I like having things there and what actually works there. I will try to remember to grab a pic tomorrow of those. Then once I get a better idea of what should live at that level I will make nicer non scrap wood ones with the final designs ...
-
5
-
-
3 hours ago, Chet said:
I ran a custom made heavy duty extension cord along my over head ducting for my DC to the right side of my table saw to power my DC which sits just to the right of my table saw. I just used zip ties every so often to hold it in place.
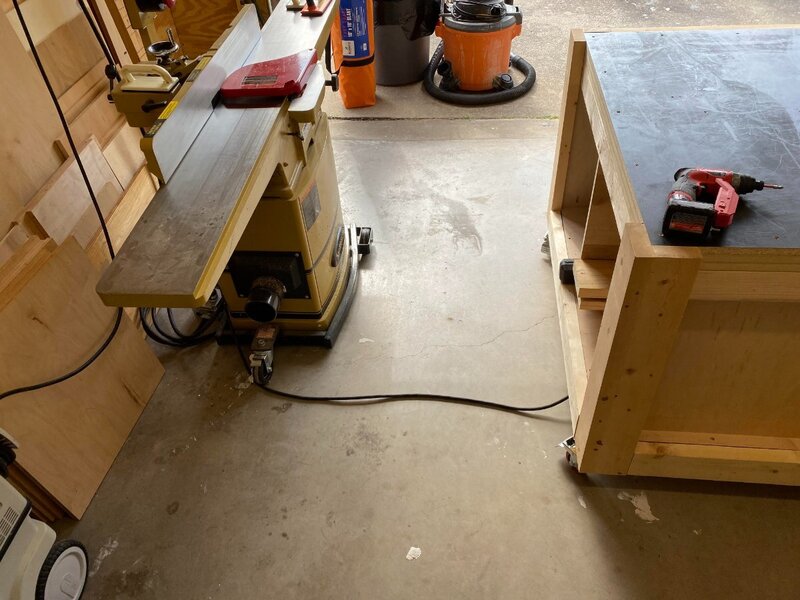
Hmmmm, this might be the approach I need to take ... if this step doesnt work out. Not sure on final position of it, we shall see how annoying it is jointing or not. From this angle the outfeed of the jointer is closest to us.

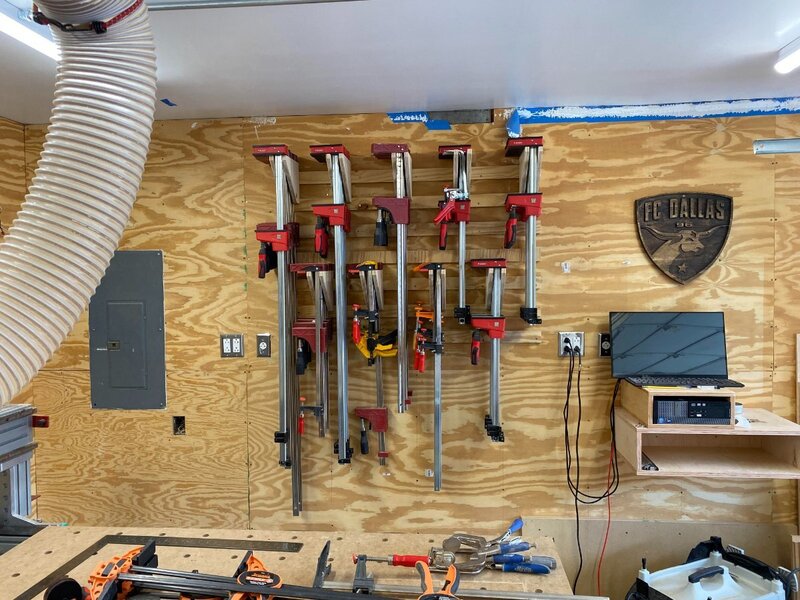
Also finished my new clamp rack area ... feels so much more roomier over there now without the bulky box type. It was J kats' new setup which looked great, so felt I should try it and like it a lot. All the clamps up there and can easily move them around and reorg if needed.
-
5
-
-
18 hours ago, Jamie said:
Is there a way you can get the power from overhead?
not easily ... I looked into when we were running all the lines, but it would not have been a fun/easy process getting to the middle.
-
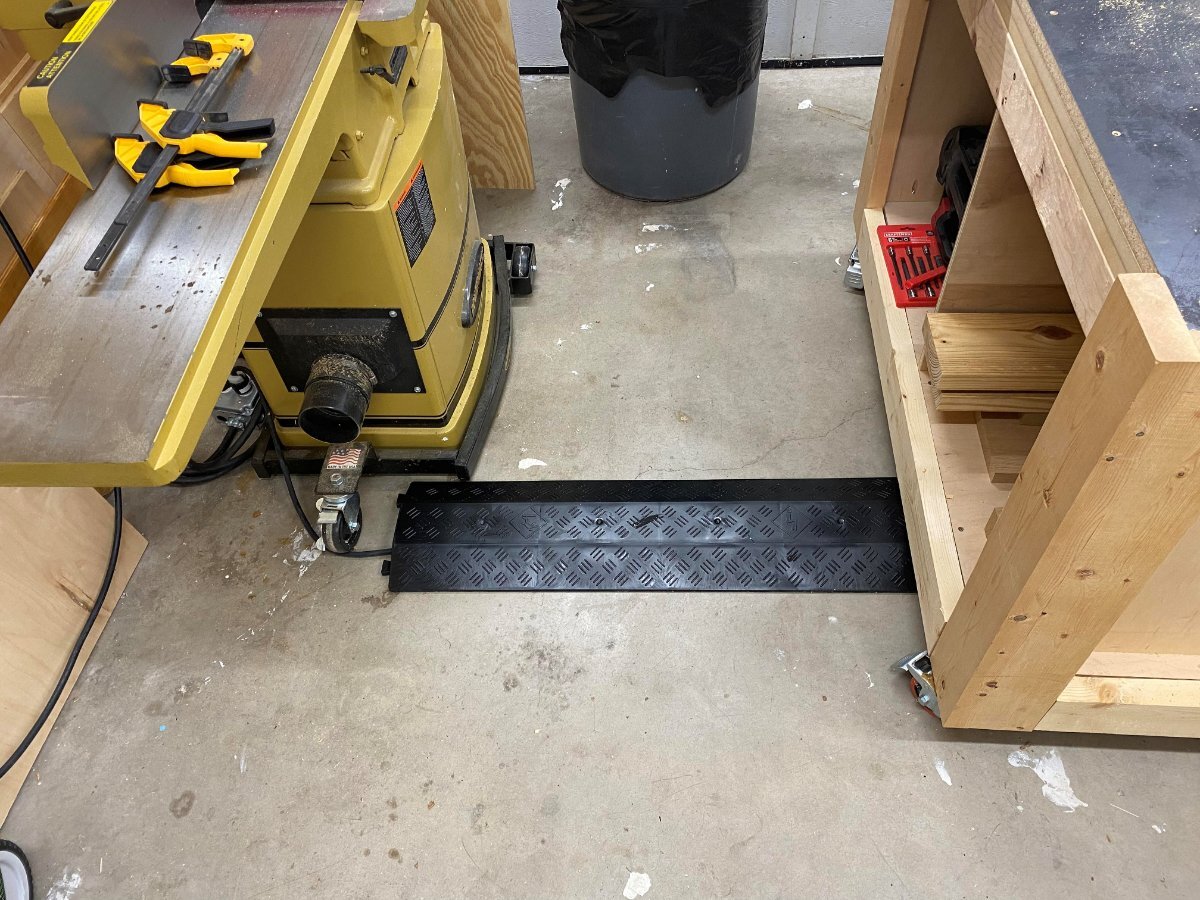
19 minutes ago, Chet said:
I use these in one spot for cords in my shop everything else is out of the way. I have two pretty heavy duty cords under them, I think I could get three if needed. I ordered them from Uline. I have two of the smaller ones, 36"X5"X1". They are designed to interlock end to end.
https://www.uline.com/BL_2869/Pedestrian-Cable-Protectors
My Tablesaw sits the same as your but with a little less then 5 Ft. behind me and it works well. My Jointer sits behind me when I am at the saw so if it is something like a 5 X 5 sheet of ply I just rest it up over the jointers pork chop for the firs few inches.
How well do those stay down and now slide around? Is there rubber feet or something like that to keep them in their spot or what?
-
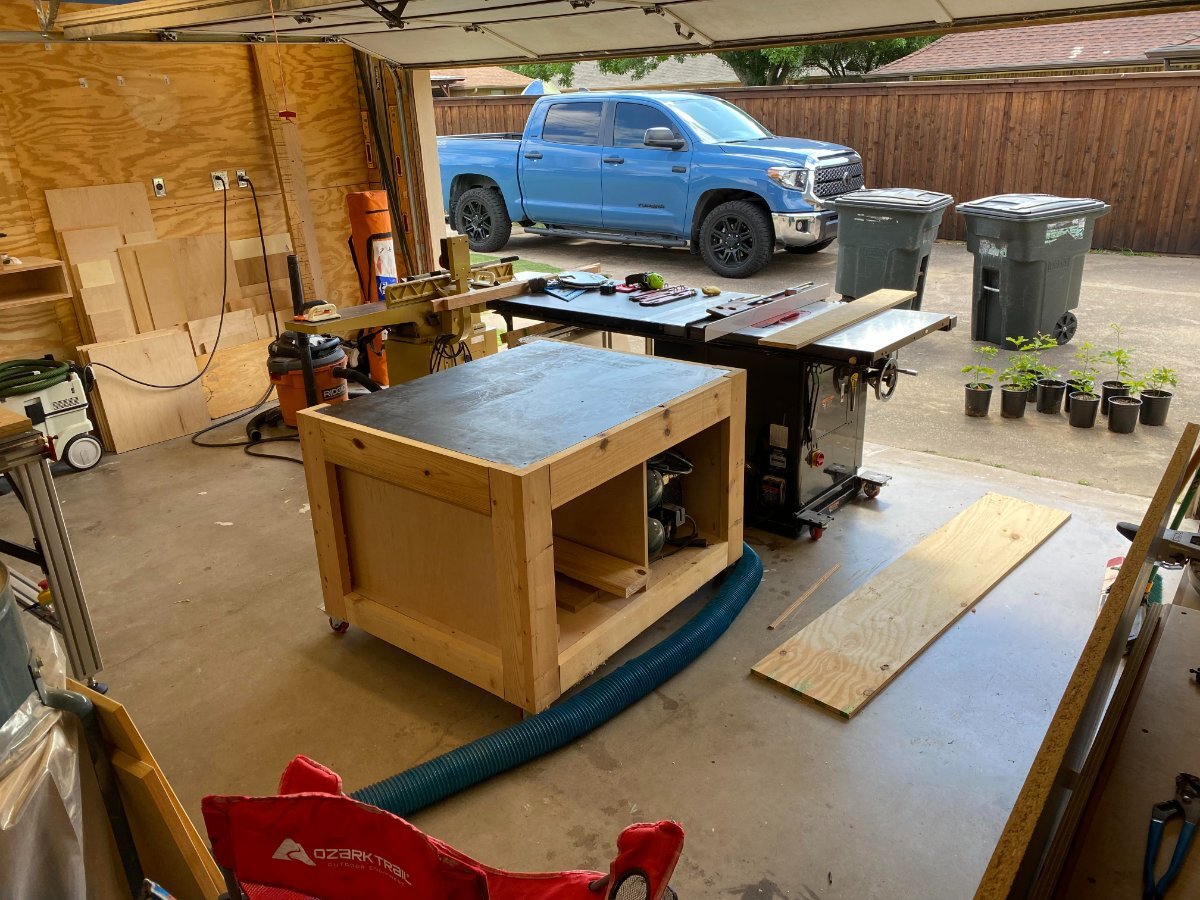
HAH! yall just thought this was dead and done 😛
Switching around the layout a tad to see how it goes. This was current setup ...
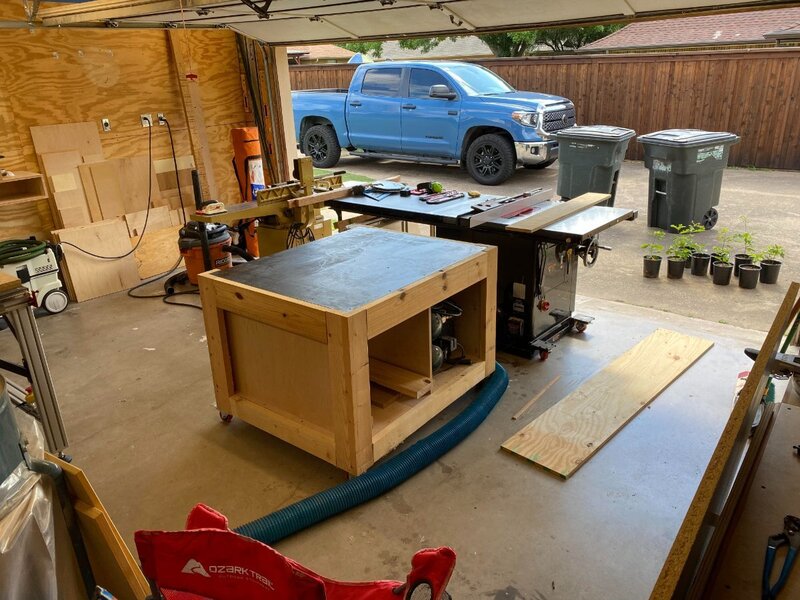
Here is the switch ...
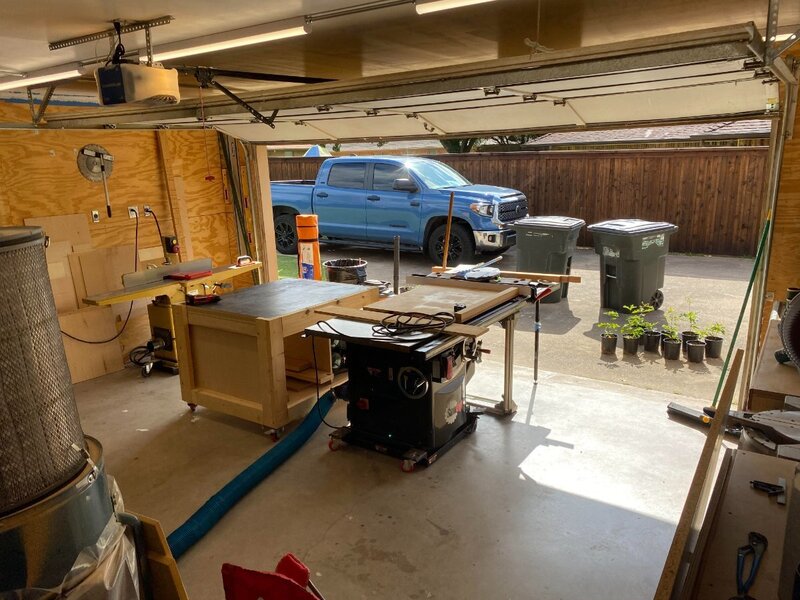
I have 5' behind the TS of space before hitting the cabinets ... this should get me through like 95% of my cuts, and if I need to cut longer I will just turn it back to where it was for those.
Mainly, it lets me cut with the garage door down. I dont have to stand in the sun after noon to cut as well. and the 3rd thing the dust collection run is easier to hook up and doesnt require me crawling through the outfeed table to attached it.
The other thing ... what have yall used or seen used to cover up wires running on the floor? I was thinking one of those rubber covers ?? not sure what would work best here ... This is the TS power cord
-
3
-
-
I think they are fine ... small and out of the way so I dont really notice them that much.
-
1
-
-
2 hours ago, Kev said:
I did a thin veneer on one of the legs on the big dresser .. Around the 3:35 mark..
As for the 45, I think I found an actual offcuts from that dresser to illustrate what I'm talking about..
First picture I used a sharpie to highlight the seam.

Then I drew the 45s to show the cuts to put the seam on the very corner where it should be undetectable.
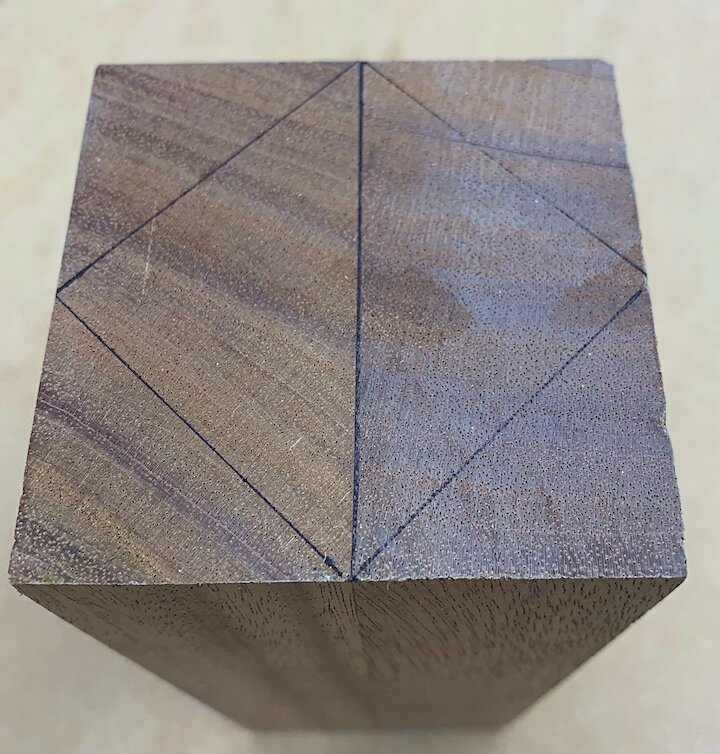
In reality, you only have to make one 45 degree cut. The rest are straight 90 degree cuts referenced off of that first 45 degree cut.
If this is still not making sense, I can actually cut this to illustrate further..
nope that makes perfect sense now!!! Just had to see something physical to get it through my dense head 🙂
Appreciate it as always Kev!!
-
11 hours ago, Kev said:
There's a couple ways that spring to mind..
1. After lamination (2ea 8/4 pieces), cut to 45 degrees placing that glue line right on the corner, you'll never see it
2. Thin veneer on the glue line side. My next bed video will show this method.. If you'll be doing this before that video, let me know and I'll share the video with you.
Finishes really fall into 2 categories!
1. Super durable but a PITA to touch up or refinish
2. Not as durable but, super easy to touch up/refinish.
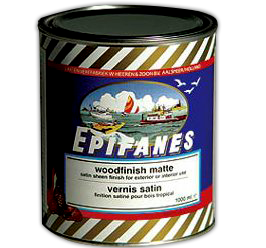
You just have to decide where you want to live.. I really like Epifanes for the outdoor stuff but, I also haven't had to refinish anything I've used it on.
I am confused on what you mean cut to 45* from #1 ... I just cant imagine that in my head at the moment.
I did some youtubing and found this video, I think is somewhat close to what you are saying for #2? I am in no rush really, I have until August or so before I can start on this anyways ... want them to at least lay down the slab first so I can mark everything off and make sure sizing and all that is good to go.
as far as finishes ... I was thinking about it, UV would be a little lower on my list of worries as the table should be far enough under the roof that the sun, I dont think, would have a direct line to it. Wont know until its built out and I see where the sun hits. Out house is laid out almost directly north/south so the sun goes over sideways on our house if that makes sense ... so it should provide decent shelter from the direct sun I am thinking. I am just worried more about the crazy rains we get and water getting on the table.
At least as of now haha ...
10 hours ago, Coop said:Marc recently did a video on past outdoor projects he built, using different finishes and how they survived. Might look it up. His take was that UV exposure was worse on finishes as a whole, than the other elements, if I recall correctly.
Ah, ok cool, I will go search through his videos and see what he has to say ...
-
11 hours ago, Kev said:
You could always laminate the 8/4 to get the thickness for the legs. There's a few ways to hide the glue line if needed.
Epifanes is awesome for outdoor furniture. Word to the wise though, it will be very difficult to repair/refinish in the future.
I would like to hear more on this laminate process and hiding glue lines ... do you have a video speaking on this in one of your builds?
Hmmm, that sounds terrible for trying to refinish a few years down the road haha. What would be some other options that that would be a nightmare to touch up later?
-
The more and more I hear about and look at cypress pics, the more I like it... I think that may be the winner. I went and grabbed a cypress wood pic and added to my library in F360 to update the look ...
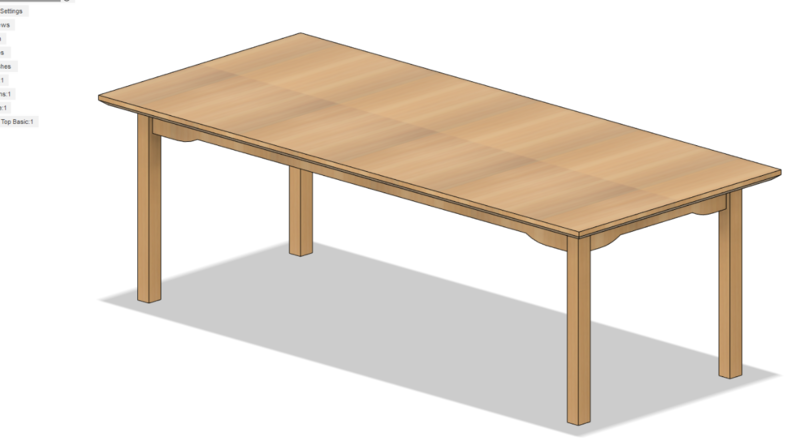
I think it looks pretty good in a lighter color.
Now looking at on of my suppliers, they only go up to 8/4 stock, I made the legs here 10/4 which would need 12/4 rough ... gotta do some shopping around and see if I can find it thicker.
Also, would this be the Epifanes I am looking for? I dont want the high gloss version and this seems to be their matte finish. That is the correct one for this right?
https://www.epifanes.com/page/wood-finish-matte
-
4 hours ago, TheDudeRN said:
There is a fairly large add budget but I have to get all the bugs worked out before we start the big campaign for advertising.. As far as the search criteria I believe that we have some control over it. Was there something you wanted to happen? The people who form the beta testers will have a lot of time to give us the vital feedback and suggestions for improvement before we start the big campaign.
Nothing in mind at the moment, I was just curious on how robust the search function will be internally and how well it will be setup for finding something through google potentially ... i have seen great sites die because it was so dang hard to find things ... just my .02 🙂
-
7 hours ago, Kev said:
Glad to see you back and to hear that things are looking up for you!
I'll toss my 2 for your questions...
1. Even though it's covered, I think I would still select a species that does well outdoors. Cedar does well outdoors but, it's also. really soft. Perhaps Cypress or something in the harder species will hold up a bit better?
2. Yes. Since moisture will wick up the wood, I could take it a step further and bore out the hold for the feet oversize and then fill with epoxy. That way when you actually drill for the feet, it's in epoxy and not the wood. Ultimately, this will be stronger and more water resistant.
3. My kitchen table is at 30" so, I think you're in the ballpark with height. My caution here would be the chairs and your aprons. It's annoying to sit at a table in chairs with arms that won't fit under the table because the arms hit the aprons.
4. If you ever see this table getting wet, I would design some sort of drainage into it. If it's not going to get wet then I wouldn't worry about it. What I would consider with the top is a way to keep it flat especially since it's an outdoor table. Either BB ends or some C Chanel on the underside to help prevent cupping. I would also probably add additional support instead of just one in the middle.
And lastly, a question.. What's the finish of choice going to be?
1) Ok, I will take a look at Cypress too and see.
2) That is a great idea!! I will have to use that once I get to the feet install
3) very true, this is why I was going on the higher end of table height to hopefully avoid that. The aprons start at 4" and then curve up to 3" .. should they be smaller than that? I didnt want to get much smaller, I just assumed it would look weird and not provide much help if they were like 2" or so.
4) Do the BB ends and C channel provide about the same amount of support to help with cupping? OR is one better than the other?
I updated the drawing ... so something like this for supports? They are all about 27" apart.
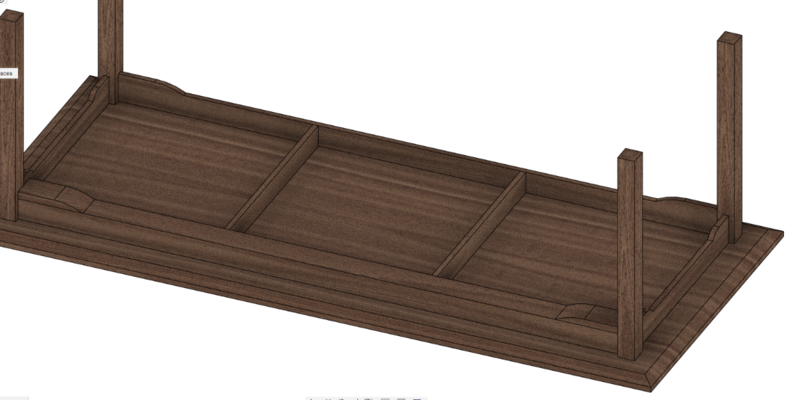
Hah! Finish? ummmm have not got that far yet, but was thinking epiphanies since it would be outdoors with potential sun and weather ...
1 hour ago, Woodenskye (Bryan) said:Drew, good luck with the new venture! As for species, you could also use white oak. If I’m not mistaken isn’t mesquite fairly weather resistant? Only mention since your in Texas.
Appreciate it Bryan! White Oak eh? That didnt even cross my mind! Although "management" is not a fan of plain ol white oak and she would expect some type of stain on it. I would assume mesquite is weather resistant ... I mean you can kill the damn things haha
-
On 7/4/2021 at 5:53 PM, TheDudeRN said:
Are you a woodworker who makes things to sell. I am a semi retired woodworker and I was sick of selling in a store for crafts and doo dad's. Wood working is a passion for me. This is why I have built woodshopstore.com I will be giving 5 beta testers a 5 year 50 percent cut in the commission fee for listenings
If you would like to be a test team member please email me lance@woodshopstore.com
what will be driving traffic to the site and how many views are you expecting? Is it like Etsy where the sellers would be in charge of all the search criteria (tags) etc etc or how would that work?
-
Sorry I have been absent for several months but life got busy and me trying to start a new business after being laid off has been a time sink for sure. I am getting coming up for some air and have slowed down to a somewhat manageable pace so I should be back around more regularly.
So, the wife is finally getting her wish of an outdoor kitchen (my wish) dining/hang out area (hers) and we all know what that means, more work for me lol.
With this, I will be building the dining table and some other side tables and stuff to go around everything. For now, it will be kicked off with this build, which I should be able to start on once I get the plans back from the company doing the work. We have the 3d rendering of it overall, but I didnt get my floor plan yet. So it is roughly dimensioned 96x42 so its gonna be a big boy when its all said and done ... Here is my first initial take on what I am thinking for the build ...
A few of my starting questions though I need help thinking through ...
1) Wood type? I was thinking Cedar, as the ceiling will be cedar and might look good to tie into that. Was also thinking flatsawn Sapele and not riftsawn/quartersawn I think the racing stripes might be too much for this table haha. Also tossing out the idea of just mahogany as well. Really struggling with what type of look for it.
2) Since it is outside, I am planning on putting a layer of epoxy on all the leg bottoms, then tossing some leveling feet on there. Does that sound like a good idea? Not sure on what kind of leveling feet yet, have not even started looking. Assuming they have some basic ones that are not too hard to mess with.
3) The total height of the table is 31" I think that should be good? I need to go look at some outdoor dining chairs and get an idea of their height once sitting in them. Then finalize the height of the table.
4) Table top ... I was thinking doing slats, but this "should" not really be in the elements as it will be under a roof. So I was thinking a solid top should be fine and rain would not be hitting it just laying on top. Plus, it would be easier to keep clean as well. Any reason to consider a slat top?
Anything else in the video you see or thoughts on things I could add/try to the table? For the most part, it is a pretty basic build, just big. Main goal was just to make sure it wasnt "blocky" looking and that is why I have some of those subtle additions on the top and the aprons.
-
2
-
-
On 5/20/2021 at 12:05 PM, Kev said:
I can also buy BB Ply cheaper than I can buy AC ply.
why is that? Seems craaaazy if that is the case. might need to go load up on some BB haha. Been awhile since I have been to my dealer.


picture hanging equipment
in General Discussion
Posted
not sure if this goes here ...
I am looking for better picture hanging equipment than the cheap stuff from HD. I have snapped like 4-5 screws off in the back of the boards I am trying to hang, it is quite annoying.
So I was thinking something like this wire: https://www.amazon.com/Picture-Hanging-100-Feet-Braided-Supports/dp/B082XXKVMF/ref=sr_1_5?dchild=1&keywords=picture+hanging+wire&qid=1627342256&sr=8-5
I like these type of D ring hooks: https://www.amazon.com/Ring-Picture-Hangers-Screws-Solutions/dp/B019QX7CY8/ref=pd_bxgy_img_1/147-4197979-2832646?pd_rd_w=JXAqI&pf_rd_p=c64372fa-c41c-422e-990d-9e034f73989b&pf_rd_r=3B4JYBQWXHTB8RRYB1QX&pd_rd_r=92700f45-9147-4abc-acaa-89d93119248d&pd_rd_wg=4ahXp&pd_rd_i=B019QX7CY8&psc=1
However the screws are what get me ... is there screws this size that are actually good? Or are they so small no one cares to make good screws and I am stuck with garbage?
thoughts?