Kev Posted June 10, 2020 Share Posted June 10, 2020 18 minutes ago, Tmize said: Well I got the first slab glued up this afternoon. My normal projects it has never bothered me much not having a jointer. Now this is way to much work. Guess I know what my next big purchase will be now. I understand wanting to be primarily hand tools. However, there are projects where the enjoyment just goes away.. ? Even Shannon Rogers has a jointer and a planer.. Quote Link to comment Share on other sites More sharing options...
Tmize Posted June 11, 2020 Author Share Posted June 11, 2020 Well for me it the hand tool decision was more of the money at the time. Know I’m much more stable now. As you may have noticed more an more machines keep showing up in my shop the last year or two 1 Quote Link to comment Share on other sites More sharing options...
Chet Posted June 11, 2020 Share Posted June 11, 2020 Got some good progress going there. Interesting using the unistruts for cauls. Quote "Do not spoil what you have by desiring what you have not; remember that what you now have was once among the things you only hoped for." - Epicurus Link to comment Share on other sites More sharing options...
Kev Posted June 11, 2020 Share Posted June 11, 2020 1 hour ago, Tmize said: Well for me it the hand tool decision was more of the money at the time. Know I’m much more stable now. As you may have noticed more an more machines keep showing up in my shop the last year or two Where do you live? I think you're kind of close to where I am? Quote Link to comment Share on other sites More sharing options...
Woodenskye (Bryan) Posted June 11, 2020 Share Posted June 11, 2020 Nice work on the top. I haven't begun that lamination yet. 1 Quote Link to comment Share on other sites More sharing options...
Tmize Posted June 11, 2020 Author Share Posted June 11, 2020 36 minutes ago, Kev said: Where do you live? I think you're kind of close to where I am? I live about 30 minutes north of Birmingham,Alabama Quote Link to comment Share on other sites More sharing options...
Tmize Posted June 11, 2020 Author Share Posted June 11, 2020 2 minutes ago, Woodenskye (Bryan) said: Nice work on the top. I haven't begun that lamination yet. I started with the top on mine. Since my legs I want flush with the edge of the top. That lamination is a bear I promise. ? Quote Link to comment Share on other sites More sharing options...
Jamie Posted June 11, 2020 Share Posted June 11, 2020 2 hours ago, Tmize said: Well for me it the hand tool decision was more of the money at the time. Know I’m much more stable now. As you may have noticed more an more machines keep showing up in my shop the last year or two Nothing wrong with equipment to make life in the shop easier, with kids shop time is limited have to get the most out of it you can. 1 Quote Link to comment Share on other sites More sharing options...
Kev Posted June 11, 2020 Share Posted June 11, 2020 8 hours ago, Tmize said: I live about 30 minutes north of Birmingham,Alabama Bummer.. About 9.5 hours from where I'm at.. Quote Link to comment Share on other sites More sharing options...
Tmize Posted June 11, 2020 Author Share Posted June 11, 2020 Yea I knew it was a haul. Quote Link to comment Share on other sites More sharing options...
Tmize Posted June 12, 2020 Author Share Posted June 12, 2020 I got the second section glued up tonight. I used a 6” cabinet roller a paint liner to put the glue on each board. This lil trick is awesome nowhere near the mess an faster. That gives some extra time for clamp set up 2 Quote Link to comment Share on other sites More sharing options...
Kev Posted June 12, 2020 Share Posted June 12, 2020 31 minutes ago, Tmize said: I got the second section glued up tonight. I used a 6” cabinet roller a paint liner to put the glue on each board. This lil trick is awesome nowhere near the mess an faster. That gives some extra time for clamp set up I use an ink roller a lot but, typically still have to squeeze the glue onto the surface.. Do you find you "waste" a lot of glue this way? Quote Link to comment Share on other sites More sharing options...
Tmize Posted June 12, 2020 Author Share Posted June 12, 2020 Not really but I’ve never used a ink roller. I do think it is less waste than spreading it with a piece of plywood or old card something. Quote Link to comment Share on other sites More sharing options...
Woodenskye (Bryan) Posted June 12, 2020 Share Posted June 12, 2020 I use an ink roller and probably use to much glue anyways. 1 Quote Link to comment Share on other sites More sharing options...
Jamie Posted June 12, 2020 Share Posted June 12, 2020 I have a roller on a glue bottle, doesn’t work that well as the hole in the bottle needs to be bigger. A simple drill bit would probably fix that issue. I recently bought a tightbond rubber glue brush and that thing is amazing! Just load the glue on and spread it around. Nicest thing about the brush is if you don’t get it rinsed out that the glue doesn’t stick to it, once it is dry can just peal the glue out. Quote Link to comment Share on other sites More sharing options...
Tmize Posted June 12, 2020 Author Share Posted June 12, 2020 8 minutes ago, Jamie said: I have a roller on a glue bottle, doesn’t work that well as the hole in the bottle needs to be bigger. A simple drill bit would probably fix that issue. I recently bought a tightbond rubber glue brush and that thing is amazing! Just load the glue on and spread it around. Nicest thing about the brush is if you don’t get it rinsed out that the glue doesn’t stick to it, once it is dry can just peal the glue out. I’ve looked at them a few time. I’ve just got a few of the plastic palte knives. They work good on m&t and dovetails not so much for edges. Quote Link to comment Share on other sites More sharing options...
Tmize Posted June 12, 2020 Author Share Posted June 12, 2020 Glue peels right off to Quote Link to comment Share on other sites More sharing options...
Kev Posted June 12, 2020 Share Posted June 12, 2020 This is the one that I use and it's held up for many years.. I just rinse it off after a glue up.. https://www.amazon.com/Speedball-Deluxe-Soft-Rubber-Brayer/dp/B003IFY622/ref=sr_1_8?crid=8N5X2D25SXIO&dchild=1&keywords=ink+roller&qid=1591955520&sprefix=Ink+R%2Caps%2C258&sr=8-8 Quote Link to comment Share on other sites More sharing options...
Chet Posted June 13, 2020 Share Posted June 13, 2020 This is what I started using for big glue ups and don't think I will look for anything better. This thing is great for this type of glue ups and you can't beat the price, it comes with a spare roller but I have yet to need it. They also offer a larger model. JAC Glue Applicator Quote "Do not spoil what you have by desiring what you have not; remember that what you now have was once among the things you only hoped for." - Epicurus Link to comment Share on other sites More sharing options...
Tmize Posted June 13, 2020 Author Share Posted June 13, 2020 I’m thinking about making the top removable? In doing that I’ll still tenon the legs into the top. Instead of drawboring the leg into top I’ll run another rail an lag bolt up thru it into the top. I’m torn on wrath to make it removable or not. I’m afraid I’ll lose some of the rigidness of the bench by making it removable. Problem is if we ever move I’ll have to move this massive thing in one piece. I’m not planning on moving but I’m young an this is our second house so far it is possible we could Quote Link to comment Share on other sites More sharing options...
Woodenskye (Bryan) Posted June 13, 2020 Share Posted June 13, 2020 I doubt you will have an issue, the shear weight of the top will maintain the rigidity of it. Plus the lag screws will keep in place. I haven't decided if I'm going to glue the leg tenons to the top for the same reason. 1 Quote Link to comment Share on other sites More sharing options...
Kev Posted June 13, 2020 Share Posted June 13, 2020 My son's bench isn't glued down, it's only lag bolted. If needed, the top could be removed.. We've moved it twice now without removing the top and got the job done. Adding the flip up casters really help to move the bench around when needed! 1 Quote Link to comment Share on other sites More sharing options...
Tmize Posted June 13, 2020 Author Share Posted June 13, 2020 After much disappointment last night I can’t use my new mortiser. The leg is to wide it won’t fit between the chisel an table. The other way it’s so wide I have to take the clamp off to fit on the table. So guess I’m going old school glad I went with poplar for the base? 2 Quote Link to comment Share on other sites More sharing options...
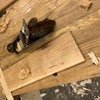
Tmize Posted June 14, 2020 Author Share Posted June 14, 2020 Got all the mortises cut in the legs and the final glue up on the slab done. Cut the tenons on the long rails. Once the slab is dry I can get the length of the short rails an layout the mortises in the slab. I have about 5 joint lines in the top that didn’t come out very tight I may try an fix later. Here so pictures of the way I jointed the two slabs together. I used the blue tape a super glue trick to hold the batten down an steady in the middle. Homemade track saw. 2 Quote Link to comment Share on other sites More sharing options...
Tmize Posted June 14, 2020 Author Share Posted June 14, 2020 I forgot the skil saw would cut all the way thru the slab so I finished the last section off with a hand plane. My plan was to use pattern bit in the router but it was 1/4” to short. Slab turned out at 3 5/8”. I’m asking around at work this week an see if anyone has a 10 1/4” skil saw. So I can cut the ends in one pass. Quote Link to comment Share on other sites More sharing options...

Recommended Posts
Join the conversation
You can post now and register later. If you have an account, sign in now to post with your account.