Every purchase made through our Amazon Affiliate Page helps support this site

Chet
-
Posts
2,276 -
Joined
-
Last visited
-
Days Won
92
Content Type
Profiles
Forums
Downloads
Gallery
Events
Store
Articles
Blogs
Everything posted by Chet
-
Where as you don't want the frame to be the center of attention, especially with photography, with the photos being as large as they are I think one inch will be fine.
-
So far I am real impressed with this company. I ordered the four casters at 10 am Monday morning and they arrived at 1 pm today (Wednesday). They're in Pennsylvania and I am in California. The ones I ordered are 3 1/2" in diameter, polyurethane tires, with total lock. They have a 300 pound capacity each. The quality of these, from everything I see so far is top notch. They had them packed like they were fine china.

-
I vote for the insurance companies.
-
I am currently working on a rolling tool box project to replace an old craftsman tool box that was their cheapest model at the time I purchased it 45+ years ago. I needed 4 casters for the base and in researching what I wanted I stumbled across this company Service Casters. This place has just about anything you could need when it comes to casters. The casters I wanted including shipping were $46.00 cheaper than at my local ACE Hardware. As much as I like supporting a locally owned business $46.00 savings was to much to pass up.
-
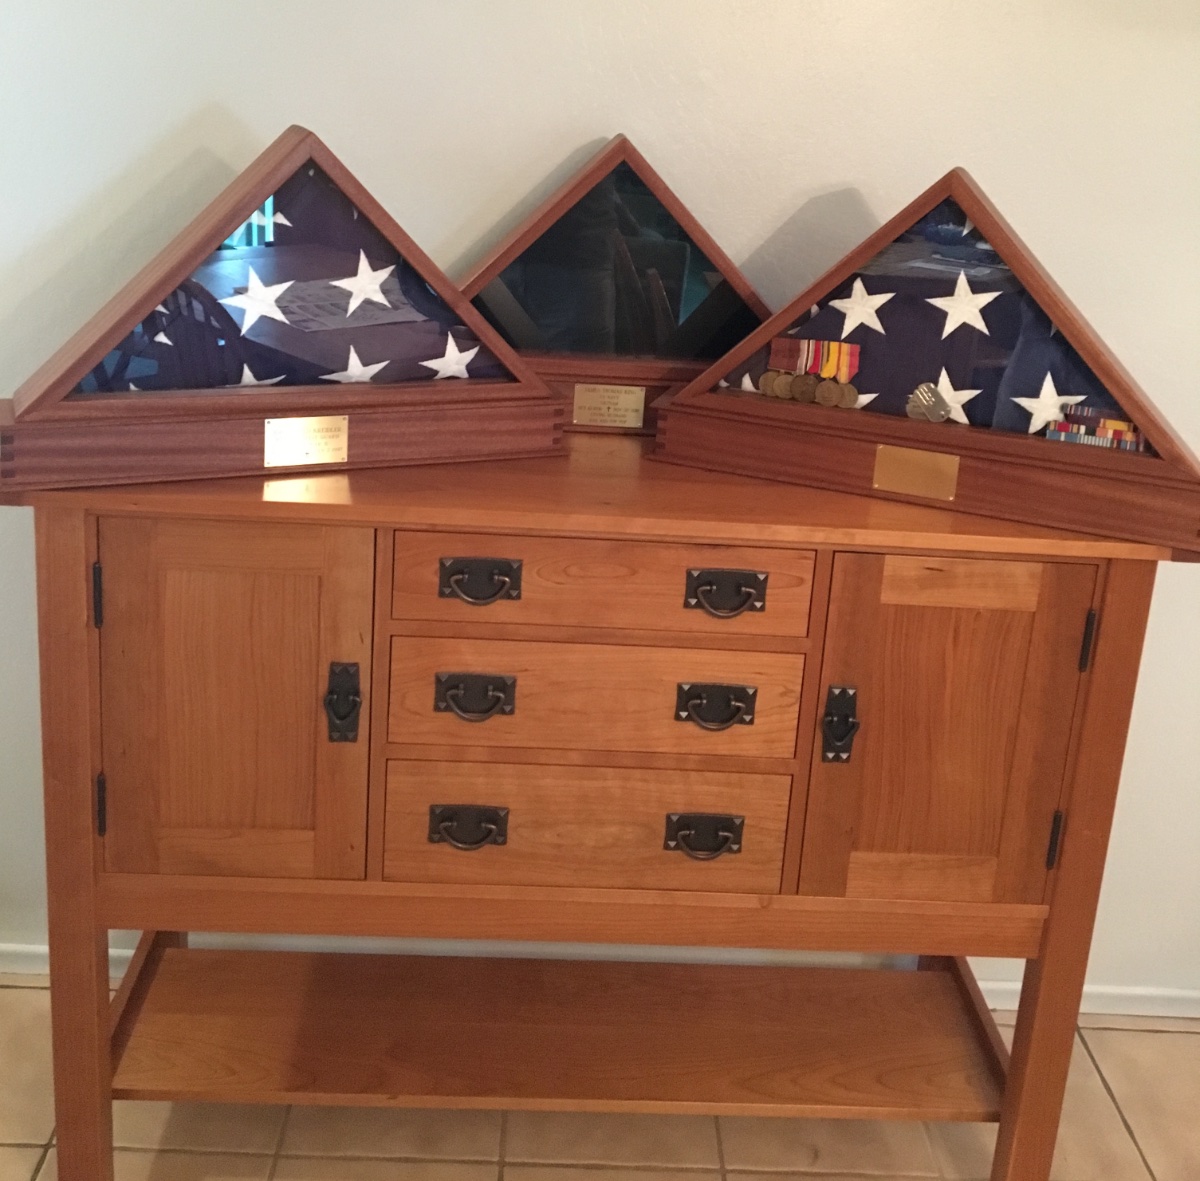
These three were 1/2 thick material. The finish was garnet shellac and then High Performance for the top coat. I used glass, I think it was 3/16" thick. All the joinery was box joints.

-
Are you planning on doing the upholstery work or have it done professionally.
-
Yea, that's what I was kind of thinking but it is probably required in some businesses or municipalities.
-
I was just looking at fireproof cabinets on Uline. I did a quick measurement of the space my stuff takes. They have on that is 17' X 17" X 22" for $635 or $725 with the self closing door.😮
-
I have gotten too were I hardly use mine on projects of the furniture nature. I come real close to moving it to the shed every now and then but it is the 12 inch Bosch and real heavy so it would be a challenge to move it out when needed for home stuff. I sure wouldn't mind having the footprint that it takes up though.
-
The only thing that comes my mind is maybe on a kick back the roller guide would cant in the miter slot which woulds maybe sort of jamb it in place. But you would think that this would be something worth noting in their information. Their sales pitch on this kind of reminds me of Woodpecker in the way they want to convince you that you NEED this when you really don't. There are more affordable solutions out there for the average wallet. I think they maybe developing "Compass" as their high end accessories brand.
-
Welcome to the forums Matt.
-
I would appreciate that.
-
That's some great stuff and getting to mentor kids is always a big plus. I may be borrowing that first Christmas tree idea. Actually I am sure I will be borrowing the idea.
-
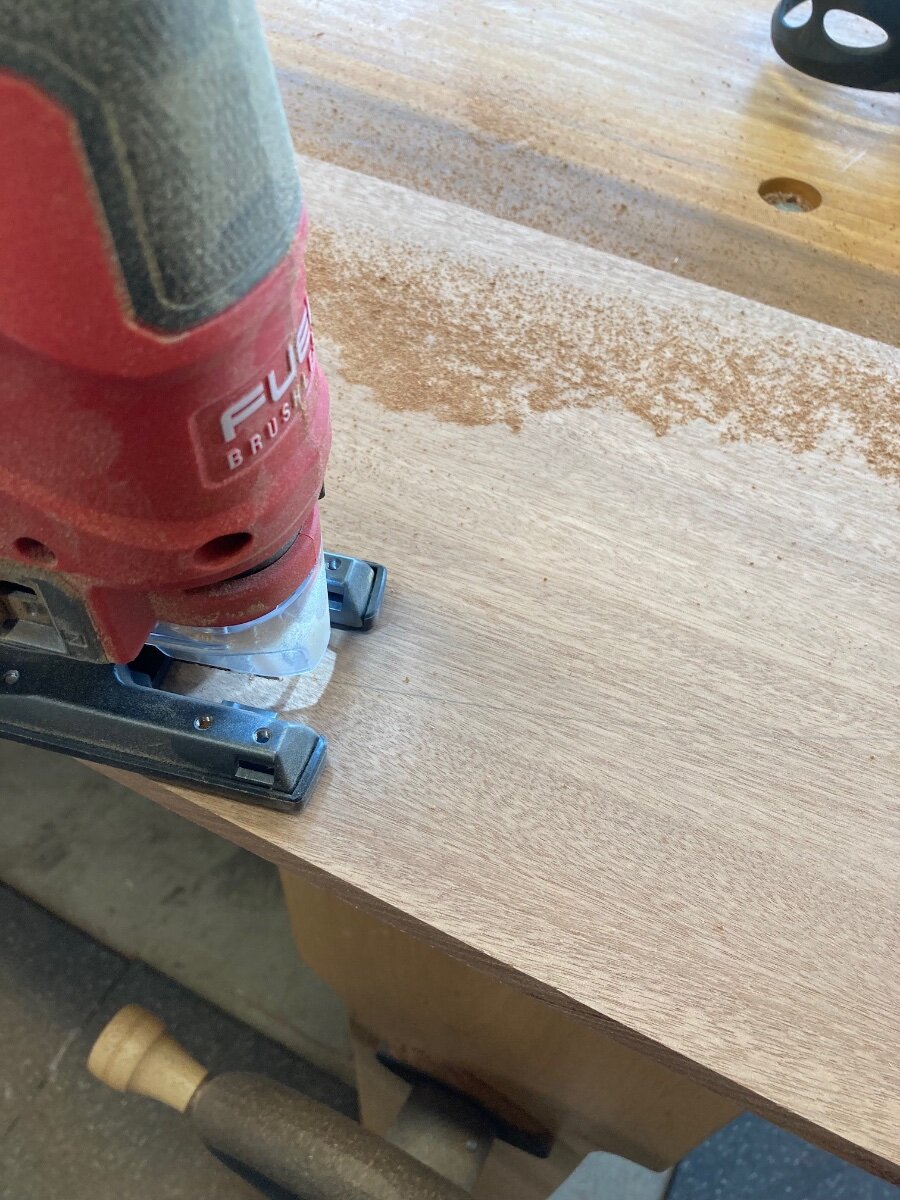
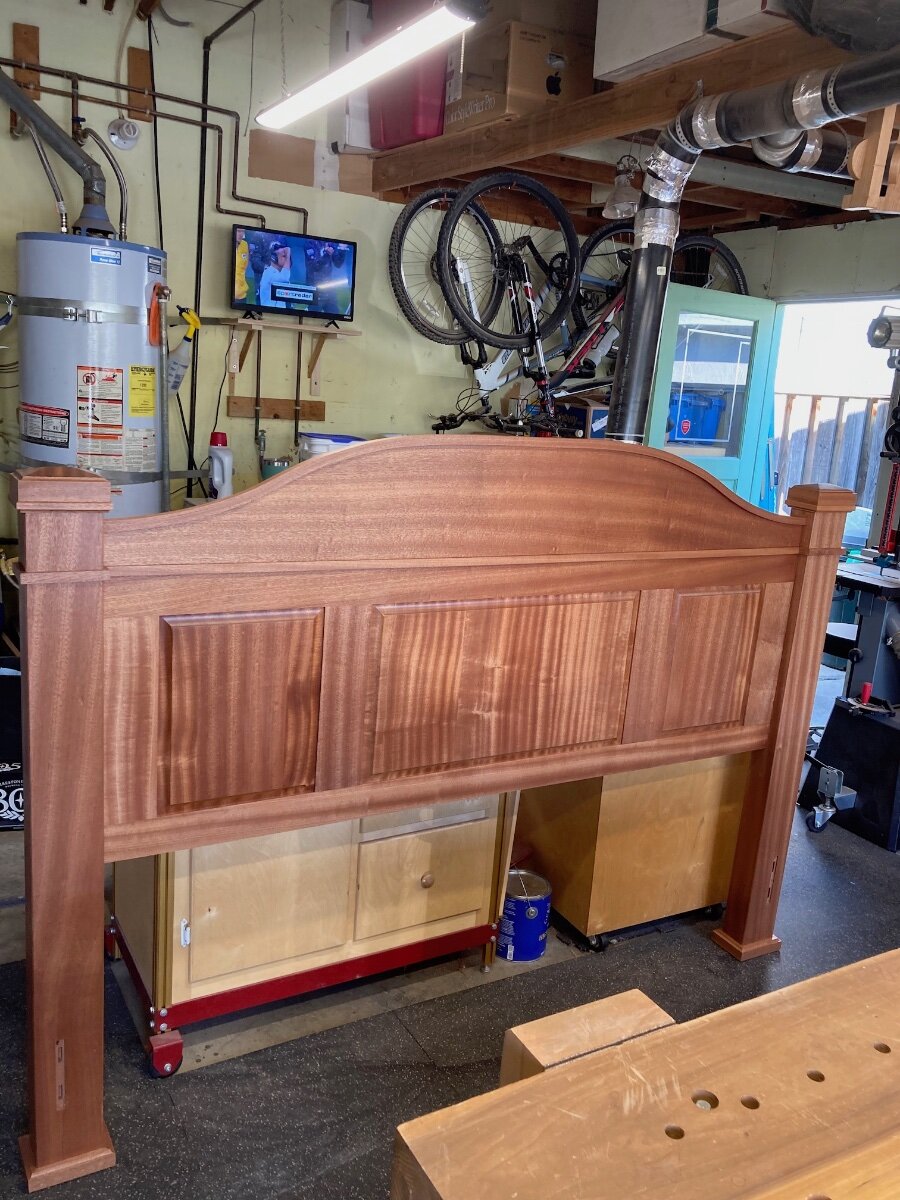
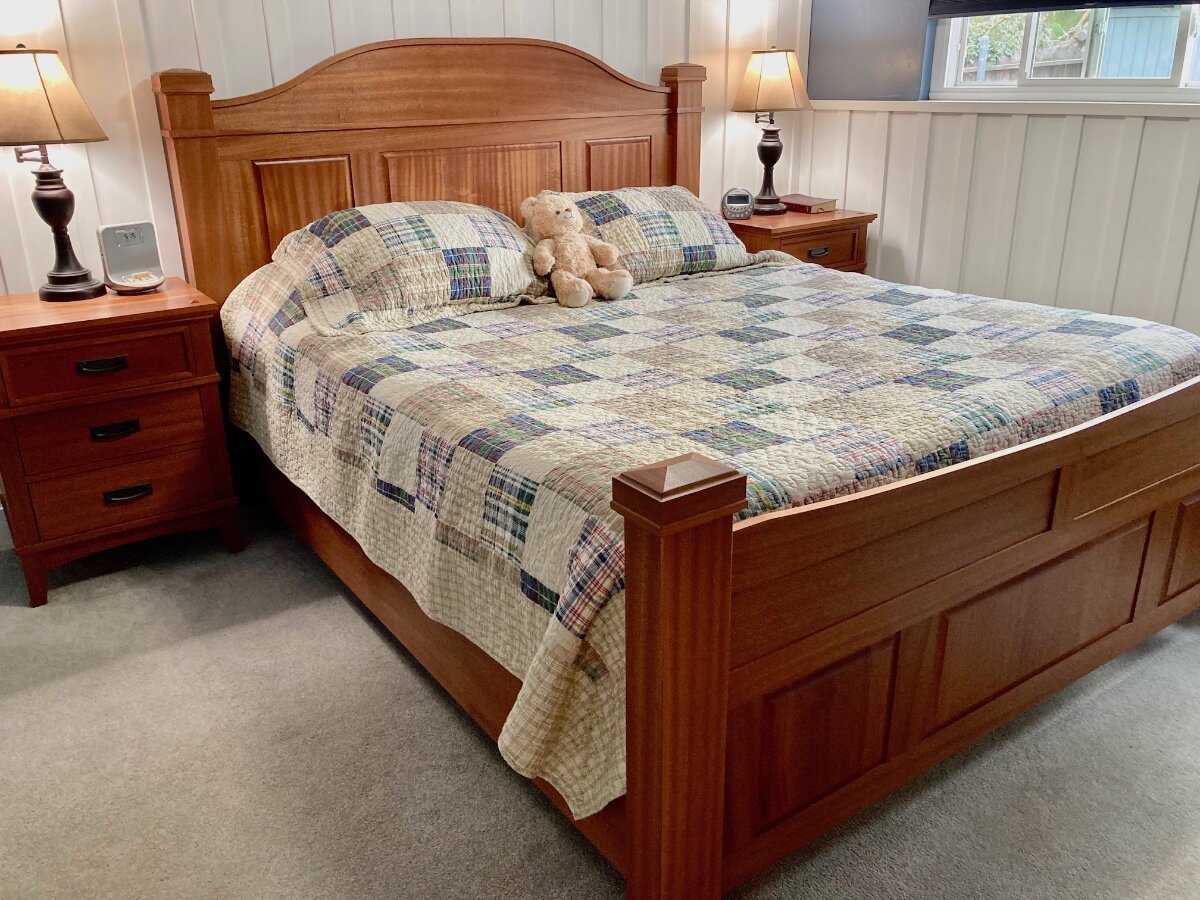
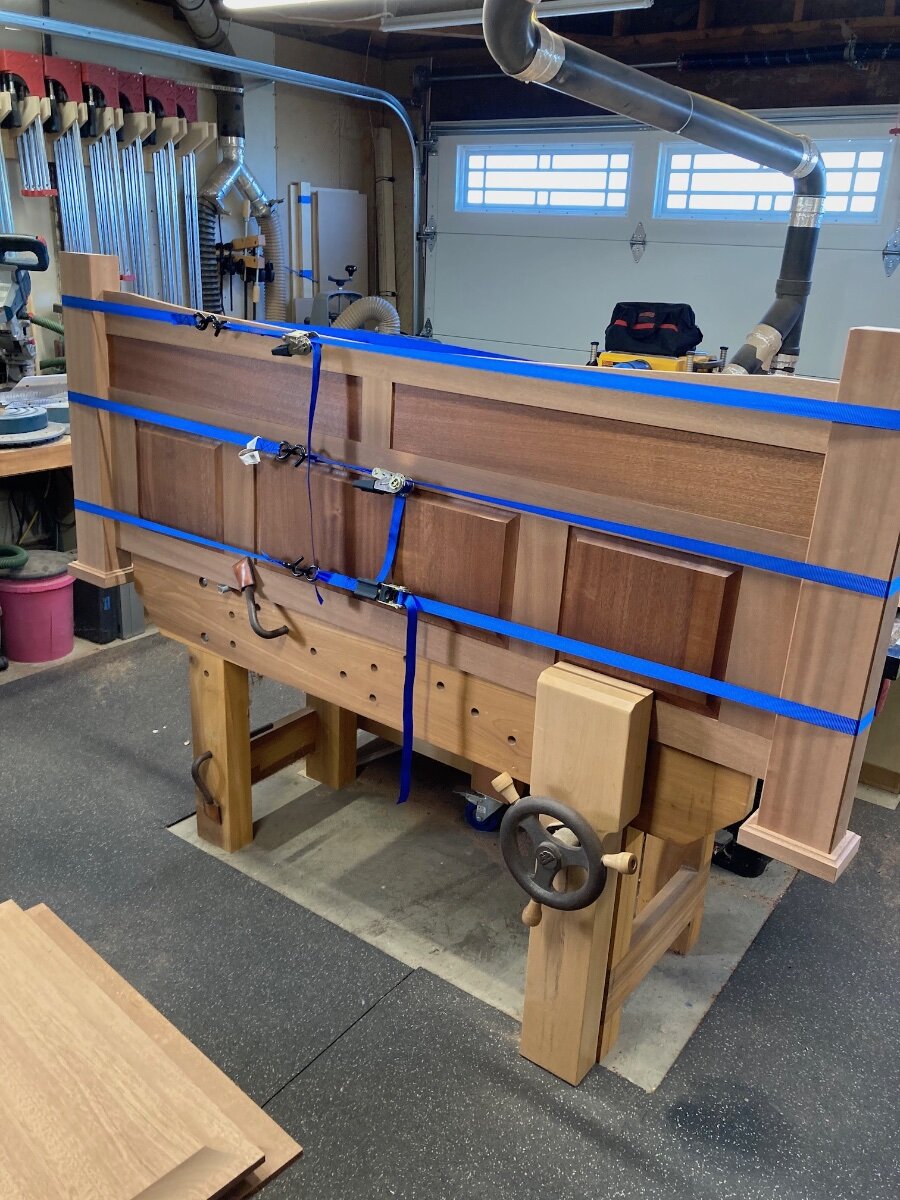
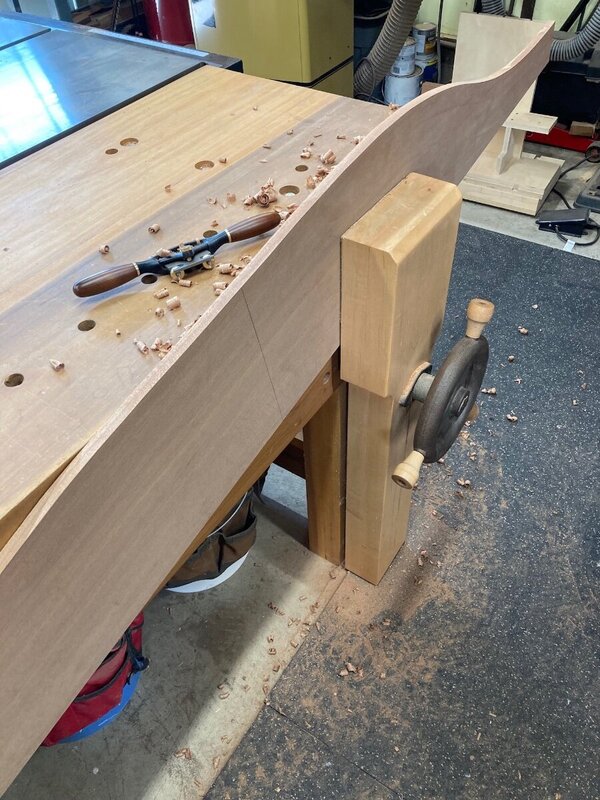
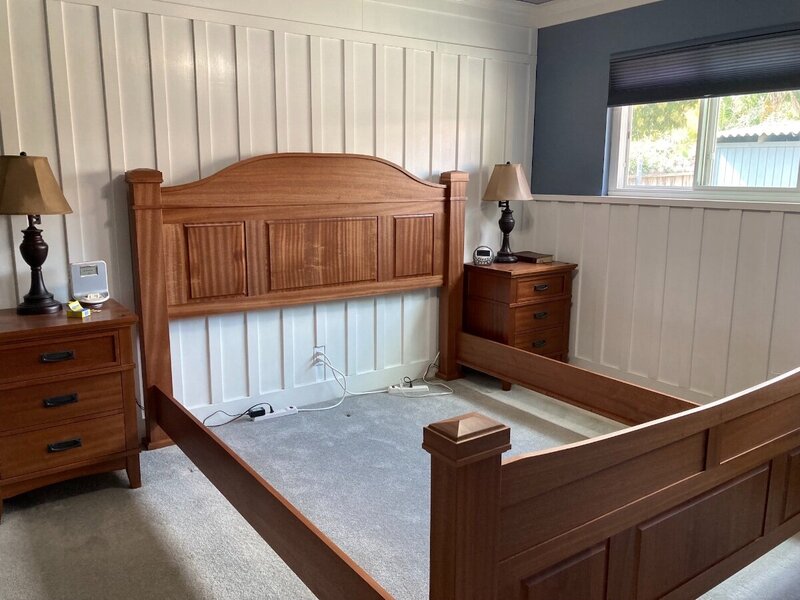
There isn't enough room in the shop so I moved it out in front of the garage to be able to get a decent picture of the finished product. The headboard should go faster because I think I have worked out most of the kinks in the process. Like I mentioned before a lot of the parts for the headboard were done at the same time as the footboard because of using the same set ups for both. The only part that still need to be made was the top panel. The panel had a curve at the top and again because of the space in my shop I couldn't use the bandsaw for the cut so I used my jigsaw. I cleaned up the edge with a spoke shave. At this point I was like a horse headed for the barn and ceased to remember to take any pictures, but basically the only other thing I did before starting all the glue ups was to cut a rabbet along the bottom of the curved top panel and the top edge of the top rail to glue the two pieces together. The rest of the glue up was the same as the footboard. Completed headboard. My intention was to have the top panel have a recessed appearance similar the top drawer of the nightstands with the same band of molding right below it. We completely emptied to bedroom and I shampooed the carpet. Then the next day I set everything up. This picture got taken before the slats were in place. And the new mattress, which instantly made this project very expensive, arrived the next morning. The nightstands have gained a rich dark color since bringing them in the house, I can't wait until the bed is the same. This project was also an interesting milestone, with the exception of two couches and my wife's piano all the furniture in our house has now been made by me.


-
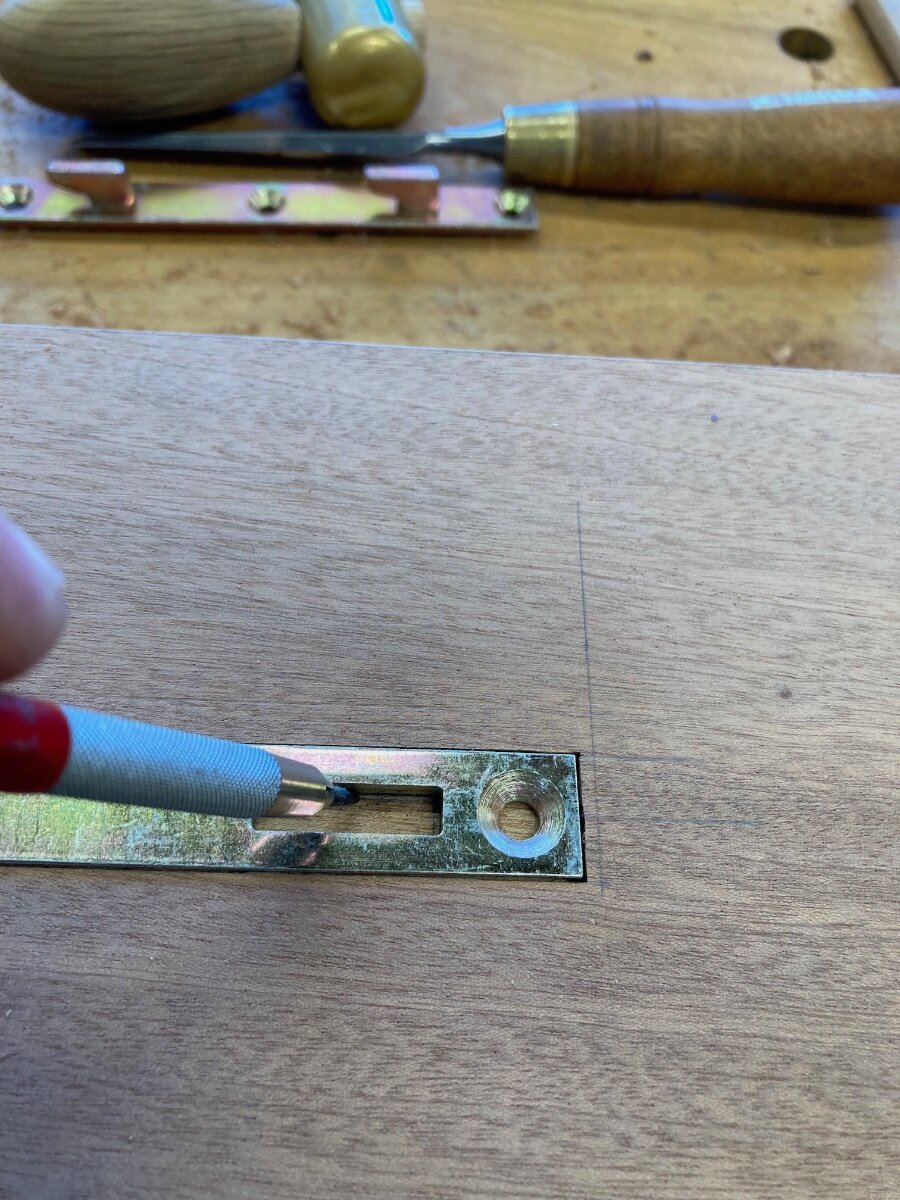
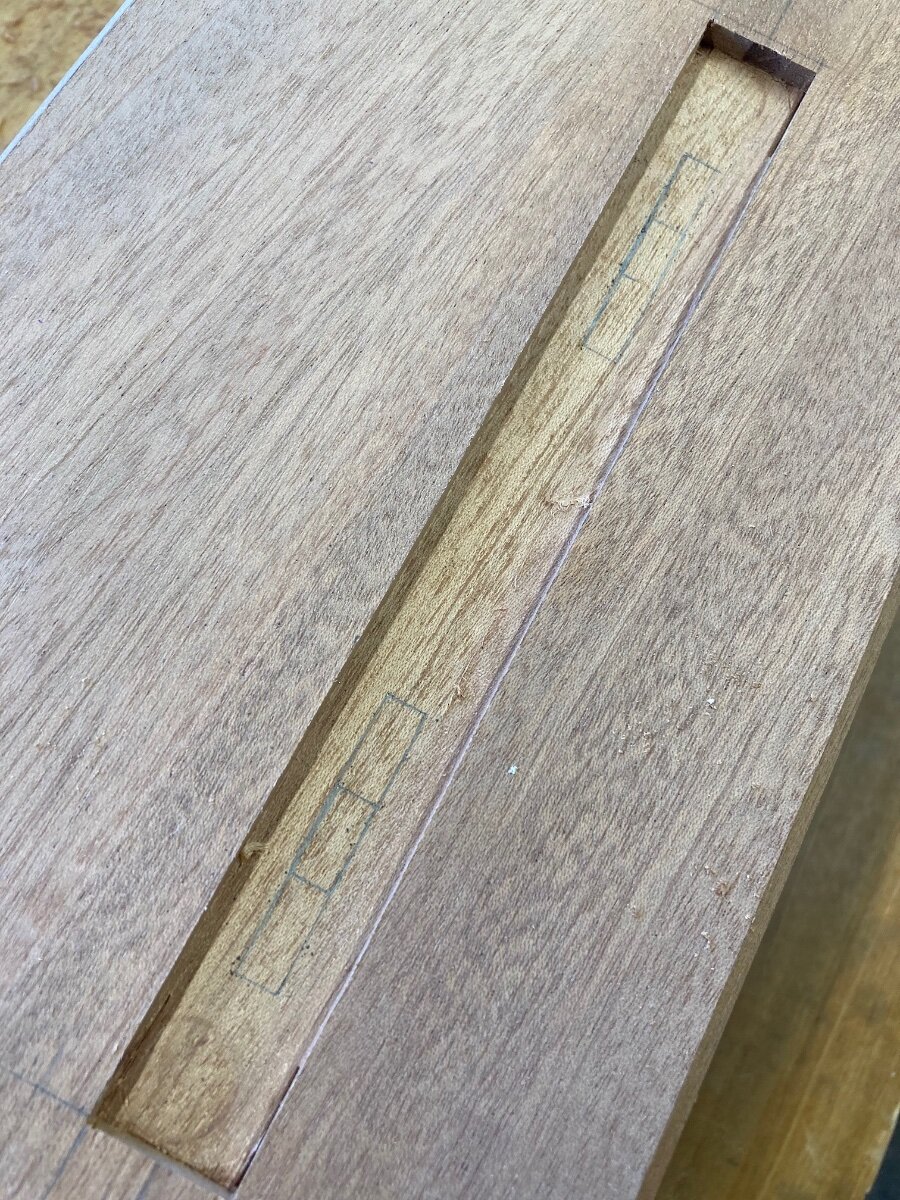
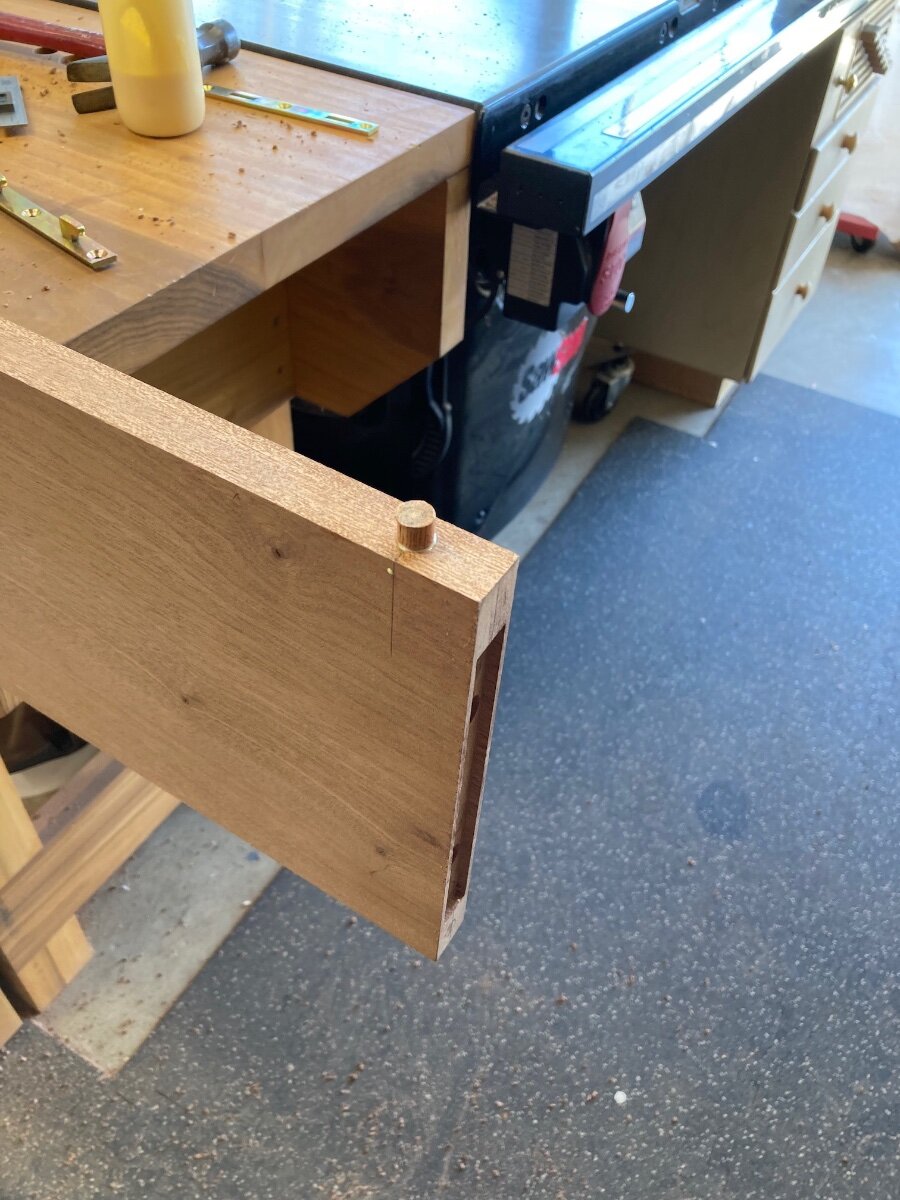
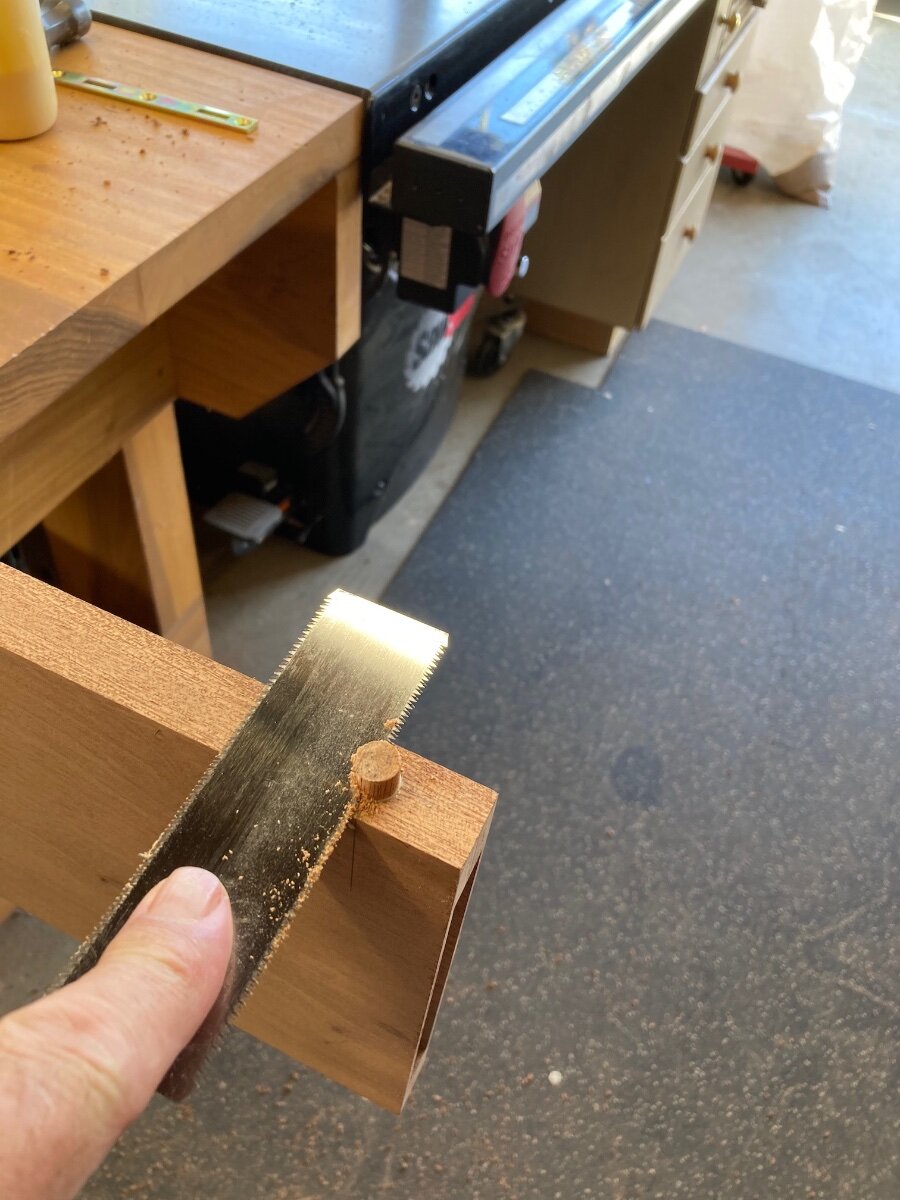
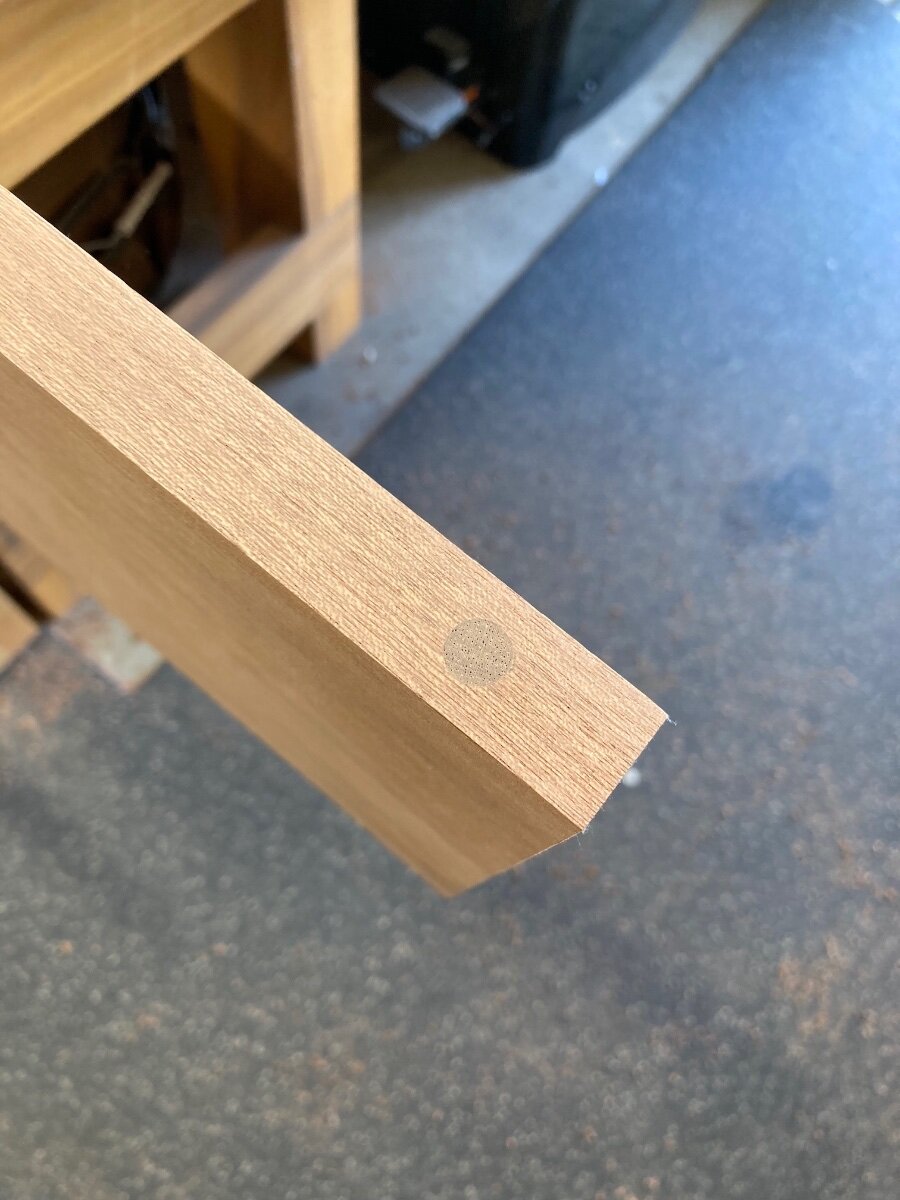
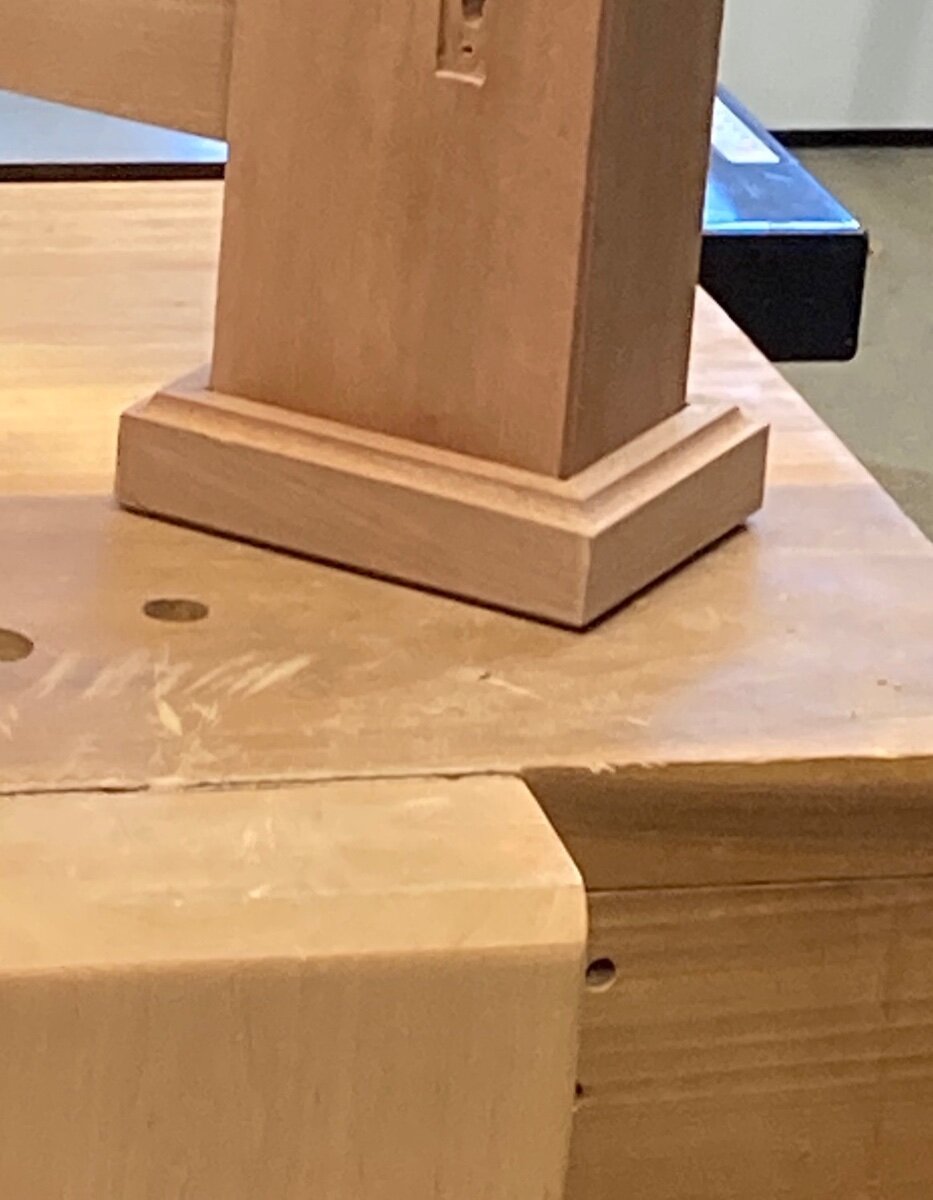
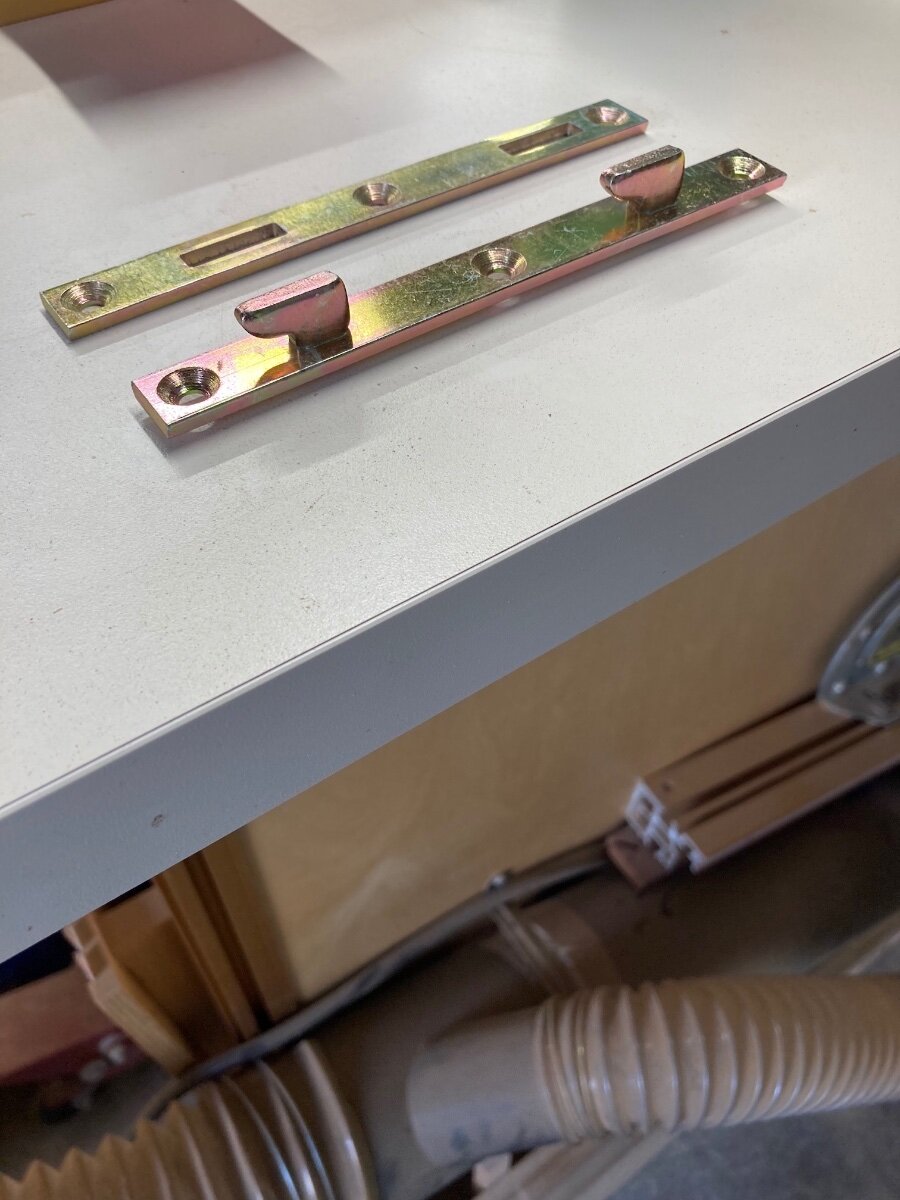
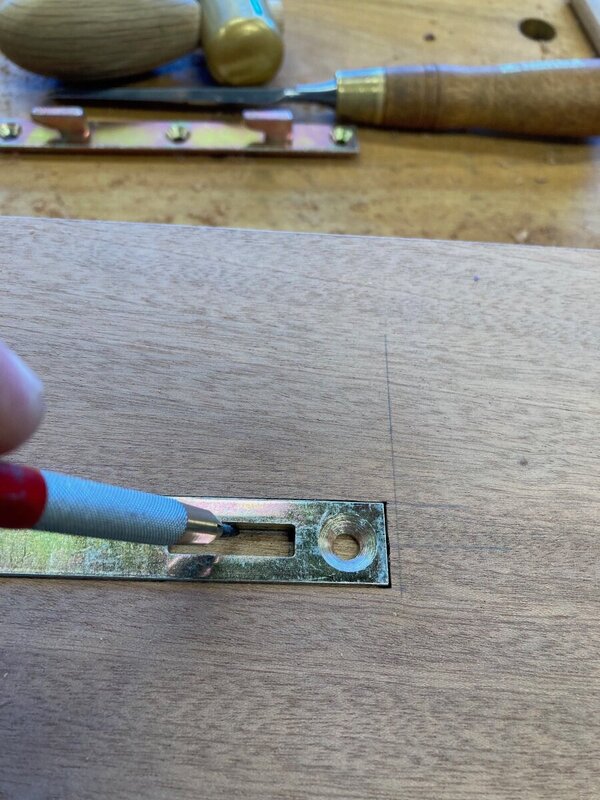
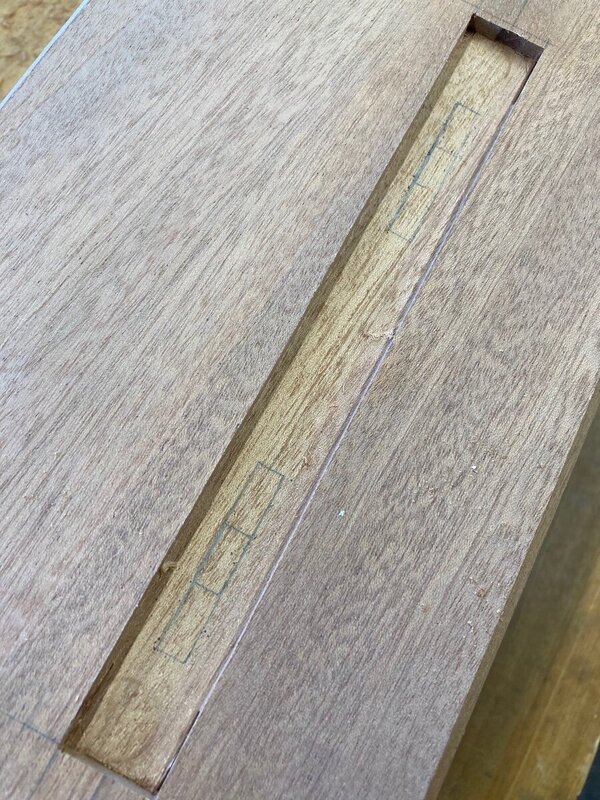
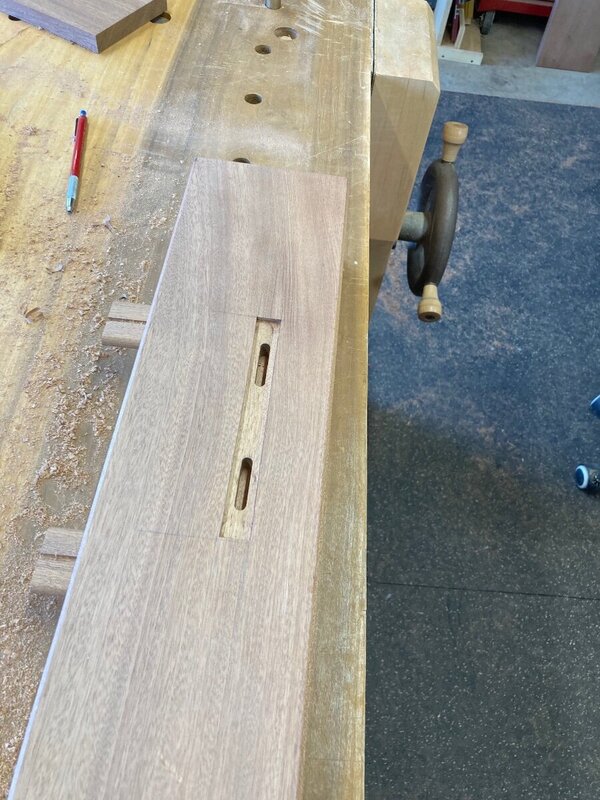
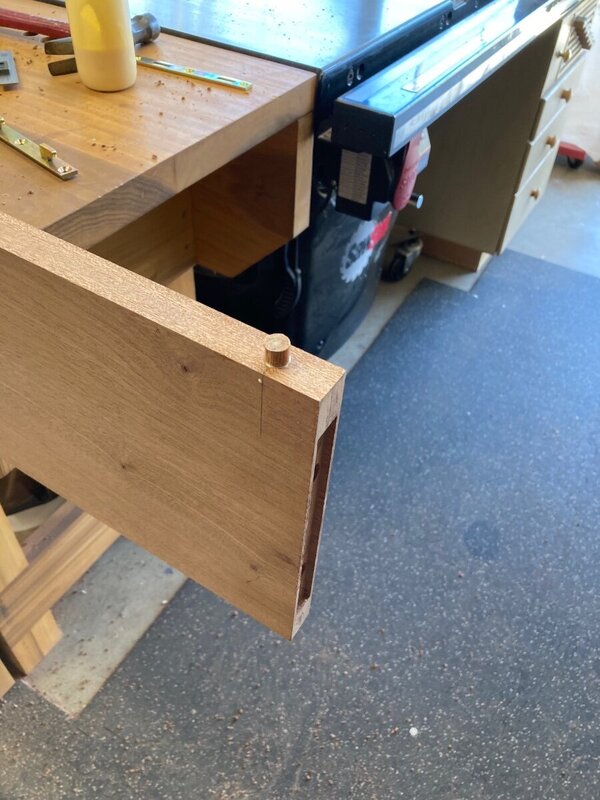
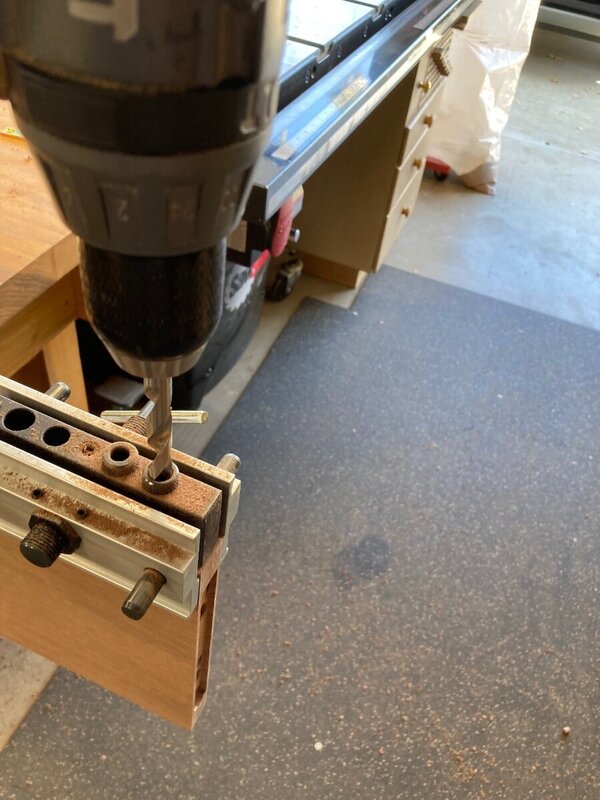
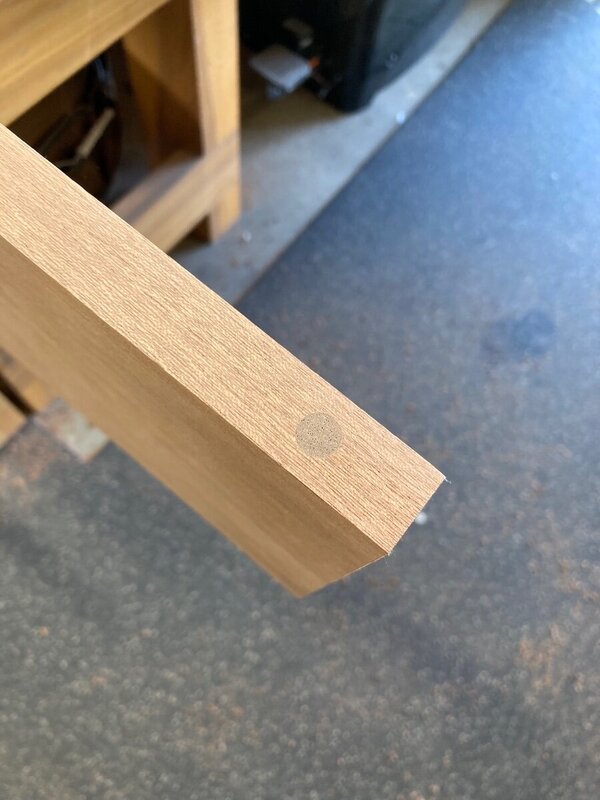
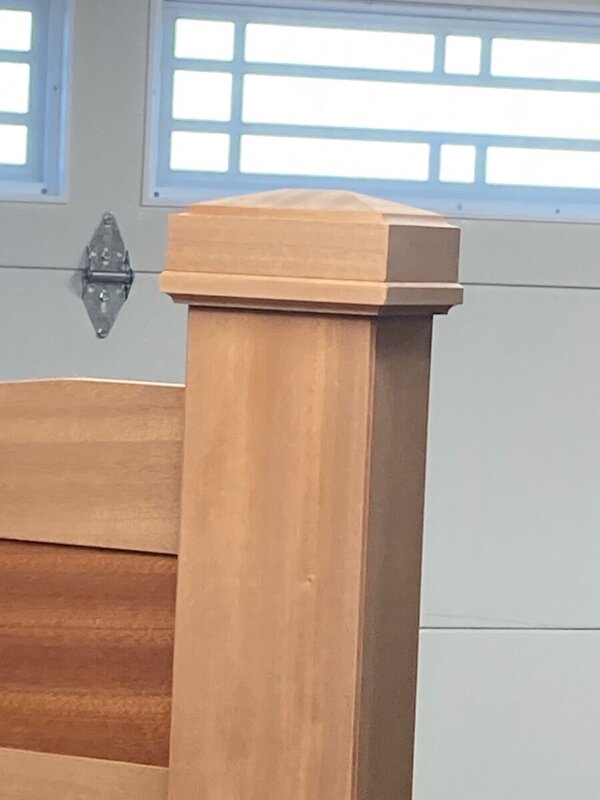
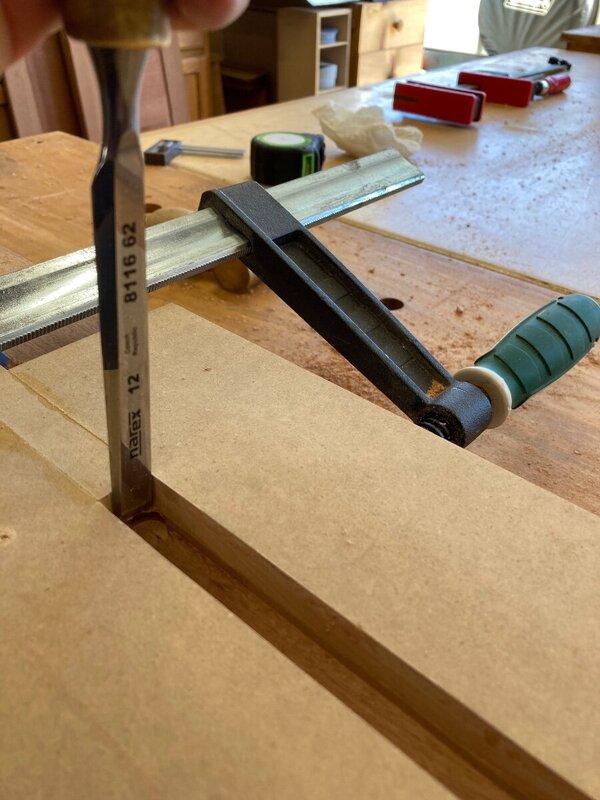
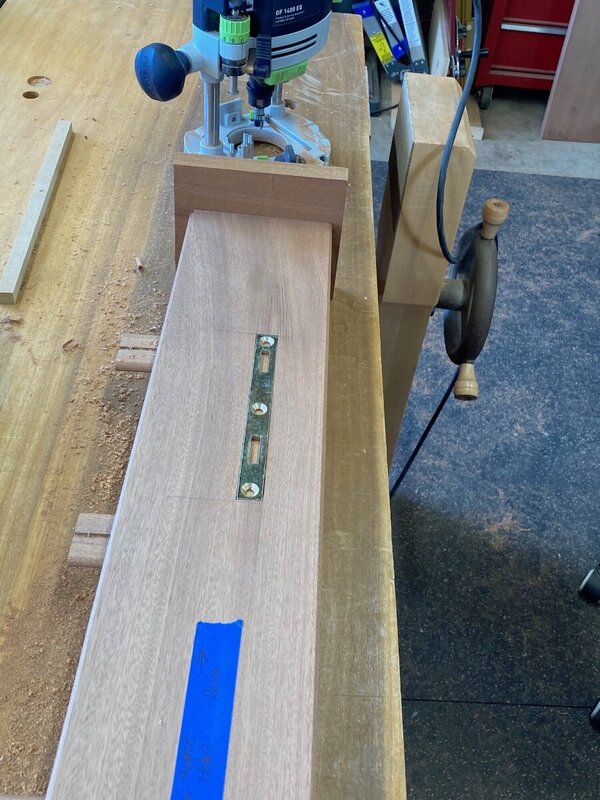
I had to cut a deeper mortise to provide clearance for the male portion of the hardware. I did this by placing the female piece in its mortise and tracing the slot. After I traced it I flipped the piece end for end and traced it again, this gave me the proper length for the mortise. I used the double fence with my router and a 1/4" up spiral bit. And this is the completed mortises in a mortise. After this I finished up a couple of things on the sideboards. First, I put a 3/8 dowel an inch back from the end. I did this from both sides instead of drilling one hole all the way through because the bit wasn't long enough. The reason for the dowel is I am screwing the hardware in place with 1 1/4" screws and the dowels will give the screws something a little more substantial to bit in to other then just the end grain. I start by using my dowel jig and then complete the hole after removing the jig. Glue the dowel in, flush cut it and sand it smooth. The last thing was to attach the ledge that the slates will rest on. When I did the glue up for the legs I didn't have any clamps long enough and I don't have enough of the proper length to even hook two together. So bought some good quality load straps which worked out real well. And it made cleaning up the little bit of squeeze out pretty easy. I did glue on the bottom molding for the legs before attaching the leg. This allowed me to glue it on with the leg standing on the flat surface my assembly table. This is the bottom of the leg. When the panel and leg glue up dried I did the top cap and molding on the two legs. I glued the pyramid cap on to the to of the leg, then the first molding is about an 1 1/2 strip with a cove at the top that blends it to the pyramid. After this I attached a second piece that has a chamfer on top and cove on the bottom. This is the results.


-
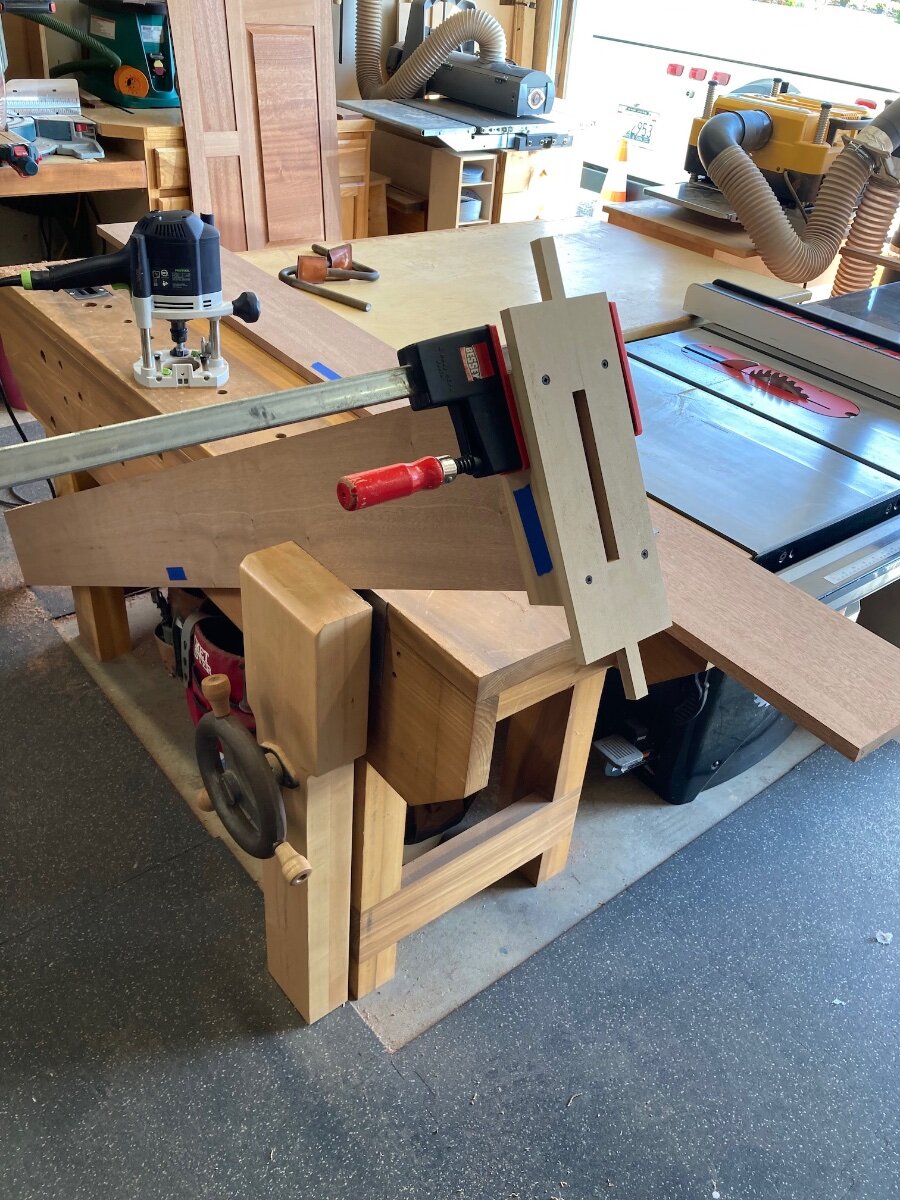
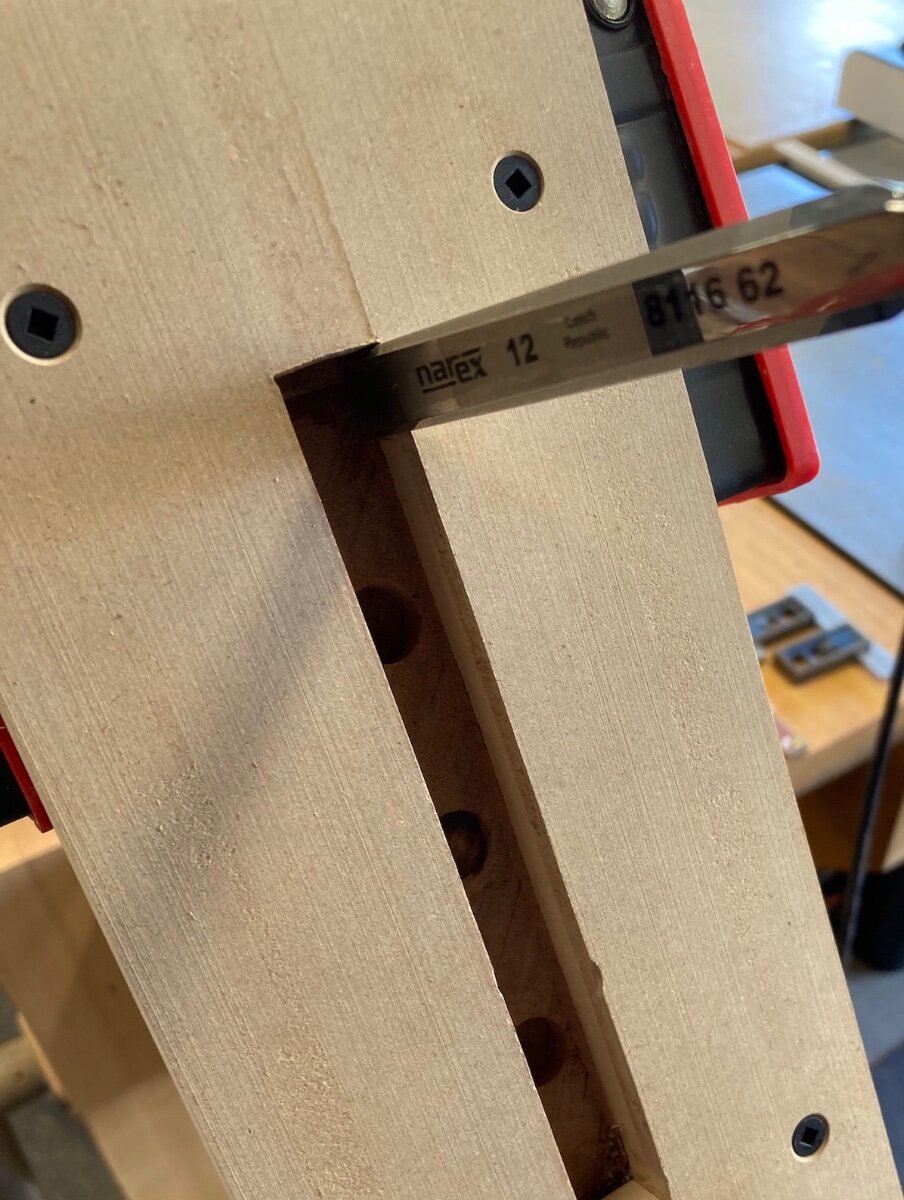
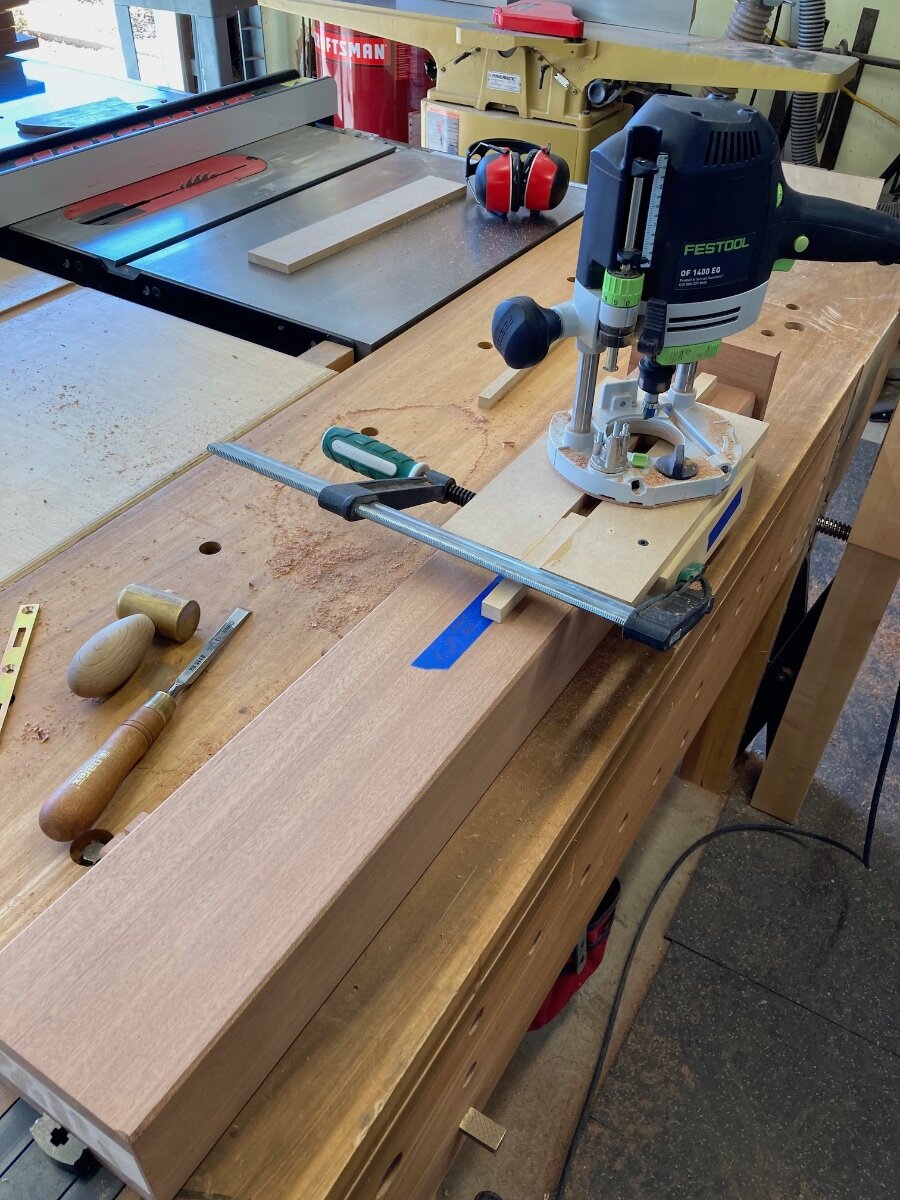
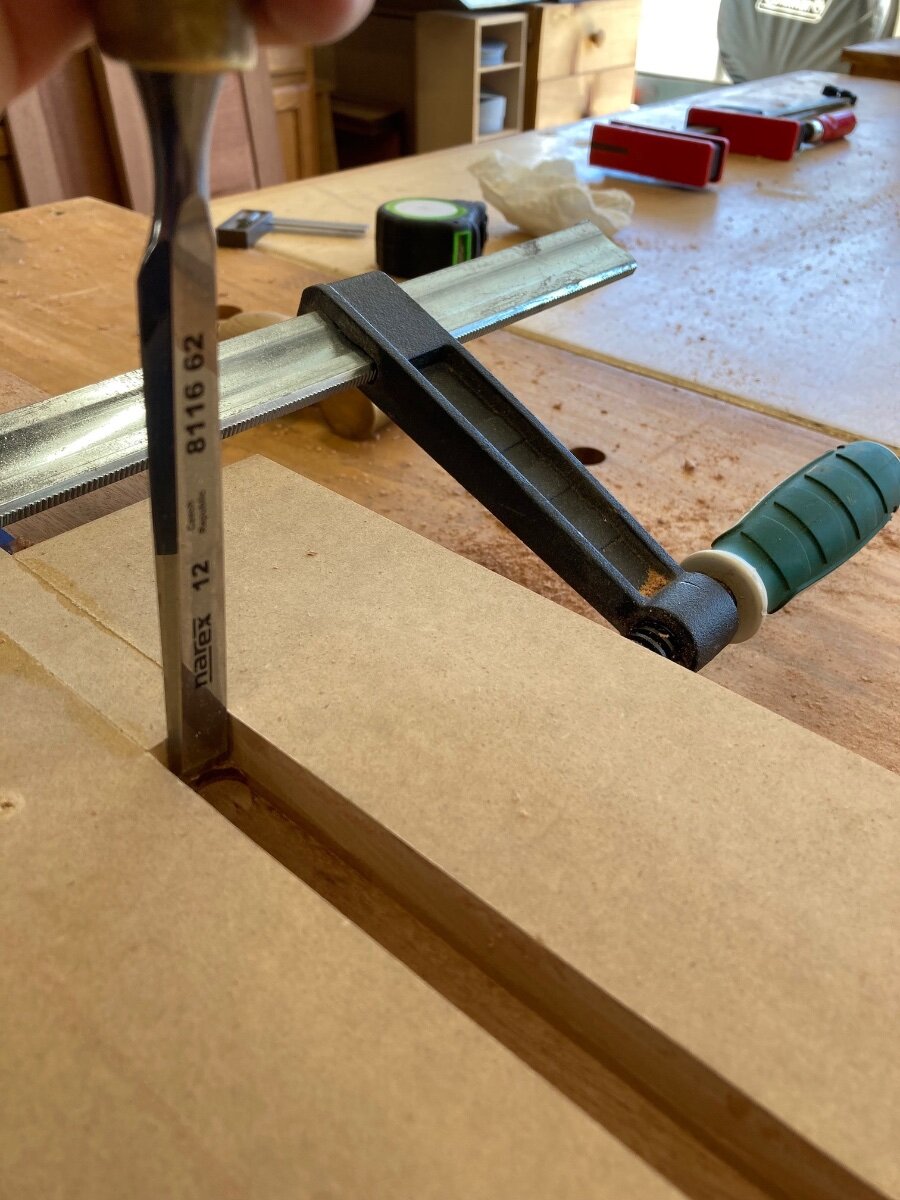
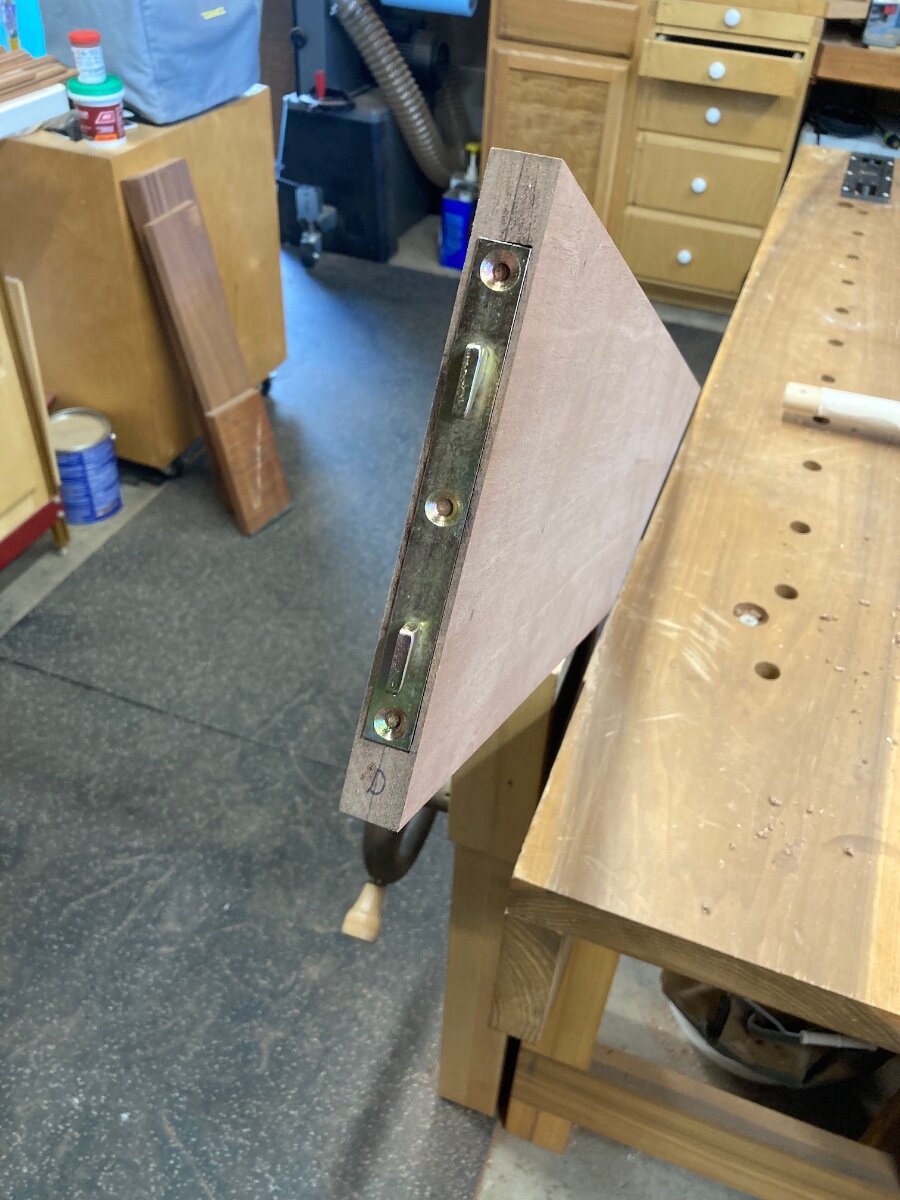
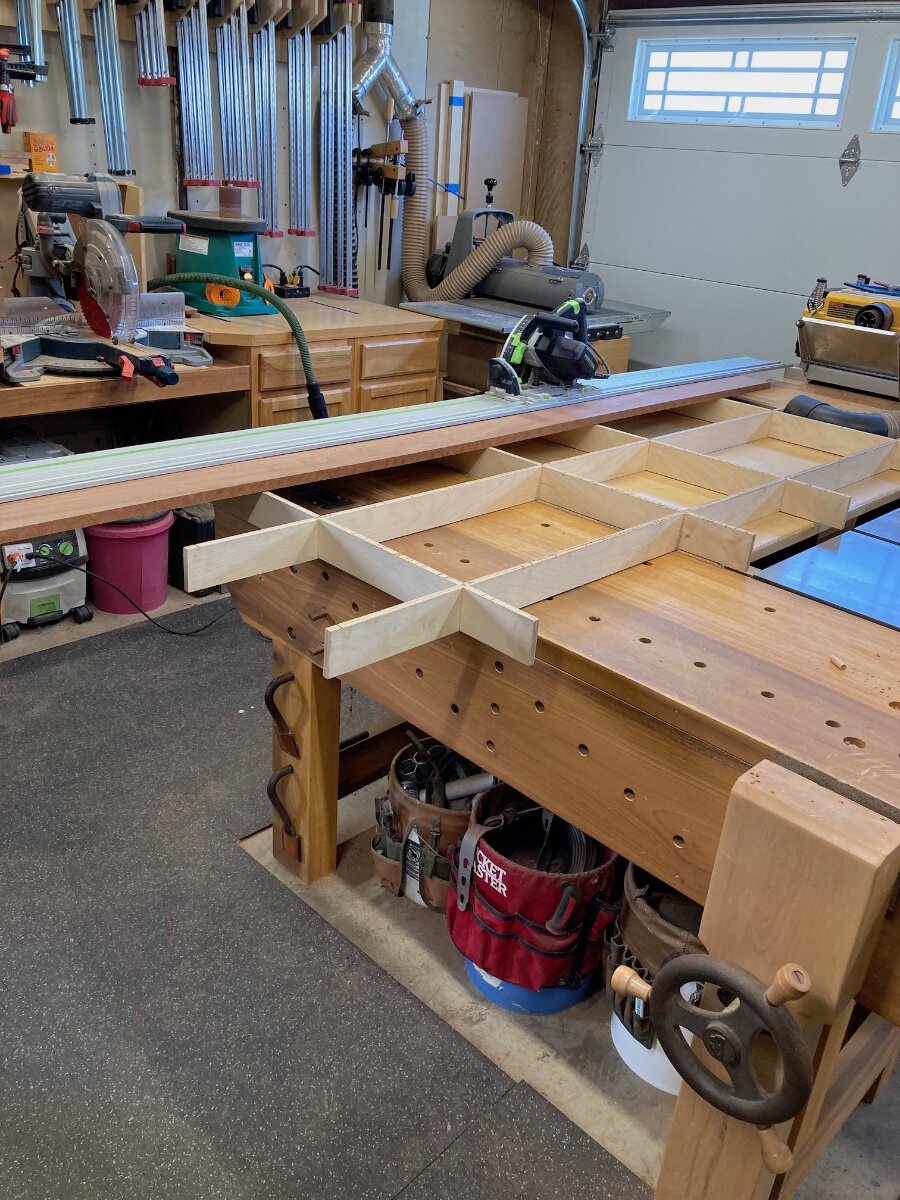
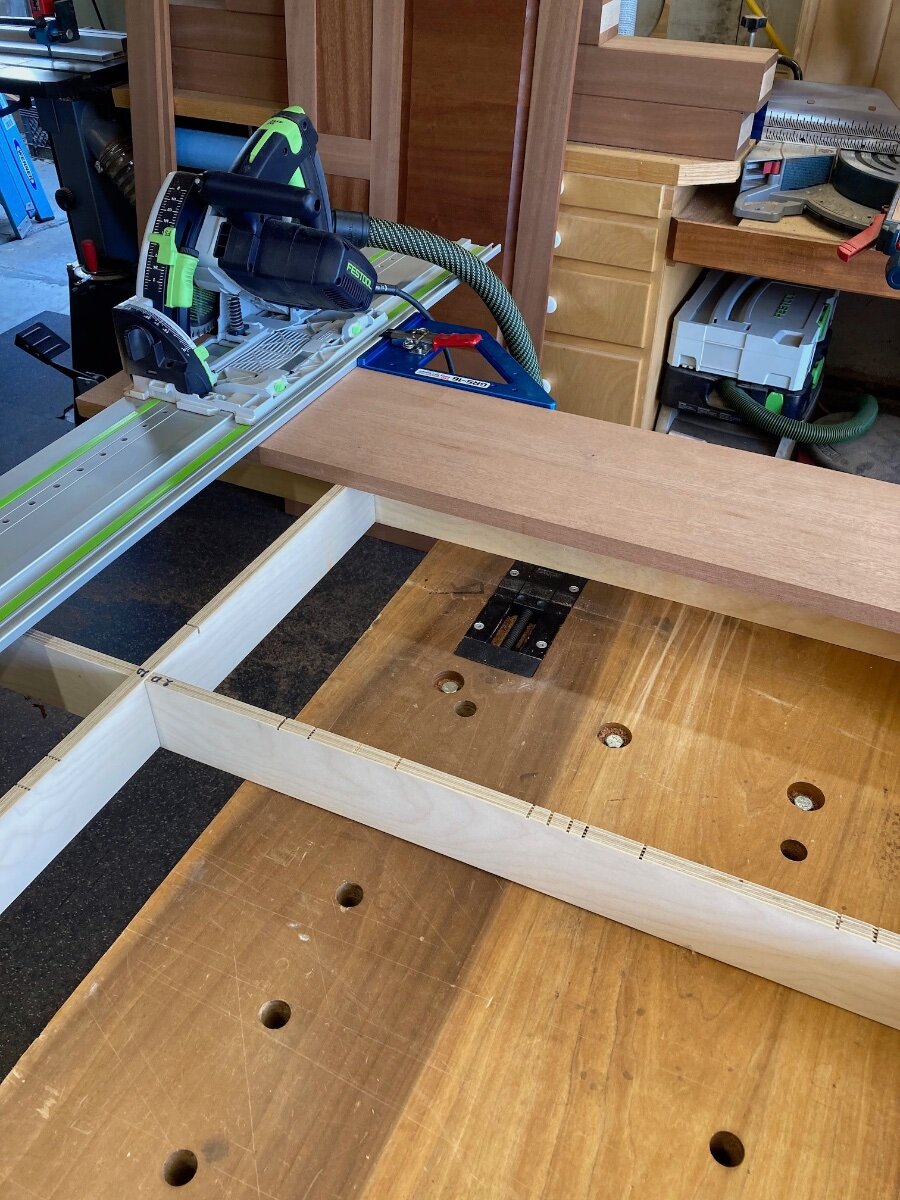
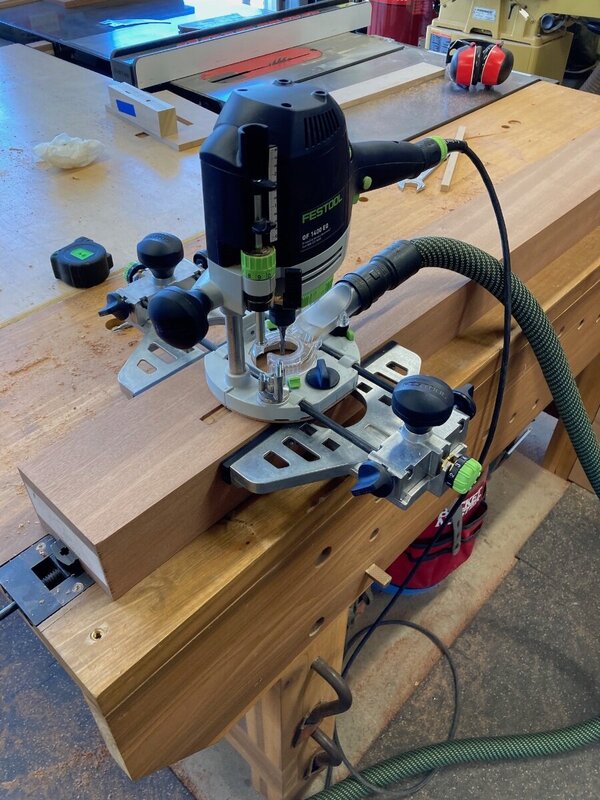
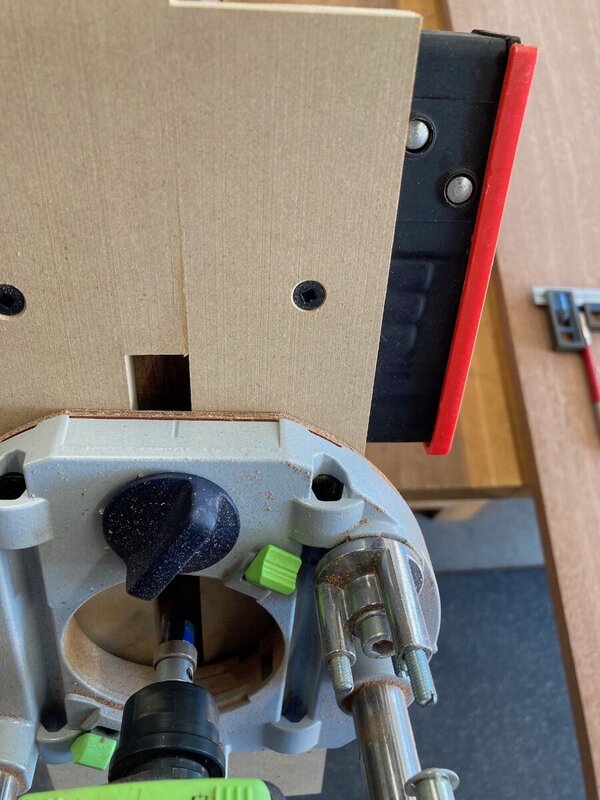
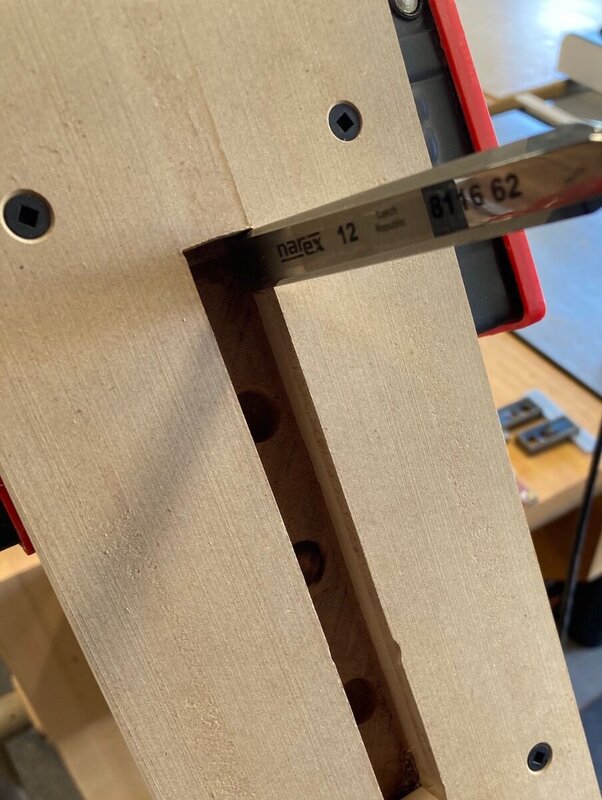
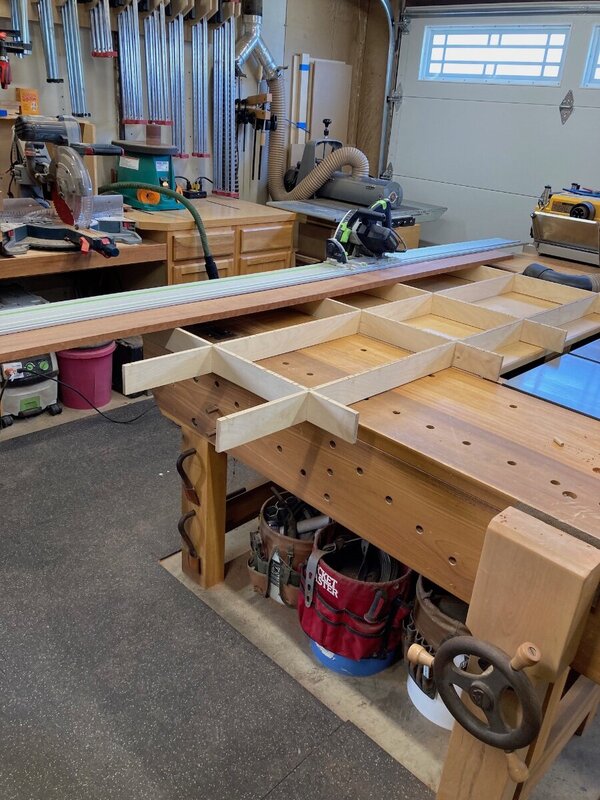
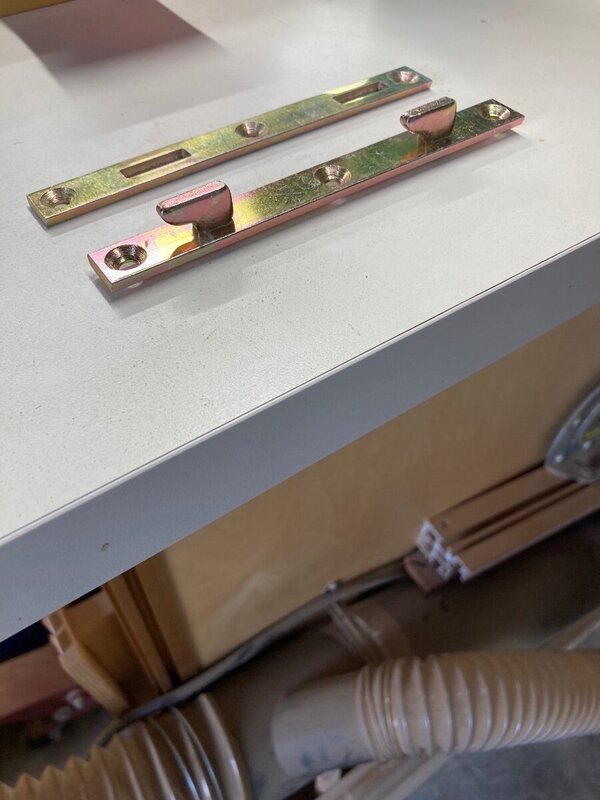
Well I actually finished this project a couple of weeks ago but haven't been keeping up with it here so this is going to be a long update. This is the hardware I am using to attach the side boards to the legs each part sets flush in a sallow mortise and attaches with screws. I'm thinking it will be easier to rout the mortises for the hardware before gluing the legs to the foot board panel section. I have been working mainly on the foot board at this time, but as with some of the other steps it seems to make sense to do the mortises in all four legs and the two side boards at the same time. So first up was prepping the side boards. After milling them flat I need to rip them to width and cut them to final length. My shop doesn't have the space to do this on any of the stationary equipment, so I am using the track saw. Cleaned up one edge and the ripped to width. After ripping the two sides I was able to pretty up both edges on the jointer. This was the set up for cutting to length. I used my shorter track along with the TSO guide rail square. made up a jig to cut the mortises along with the plunge router and a 1/2 long pattern bit. Then leaving the jig in place as a guide I cleaned up the corners with a chisel. And the fit. The legs were pretty much the same process. I do have one more step to do on the legs.


-
I have decided that in the future I will buy the smaller container, not the gallon just so I get through it before it goes.
-
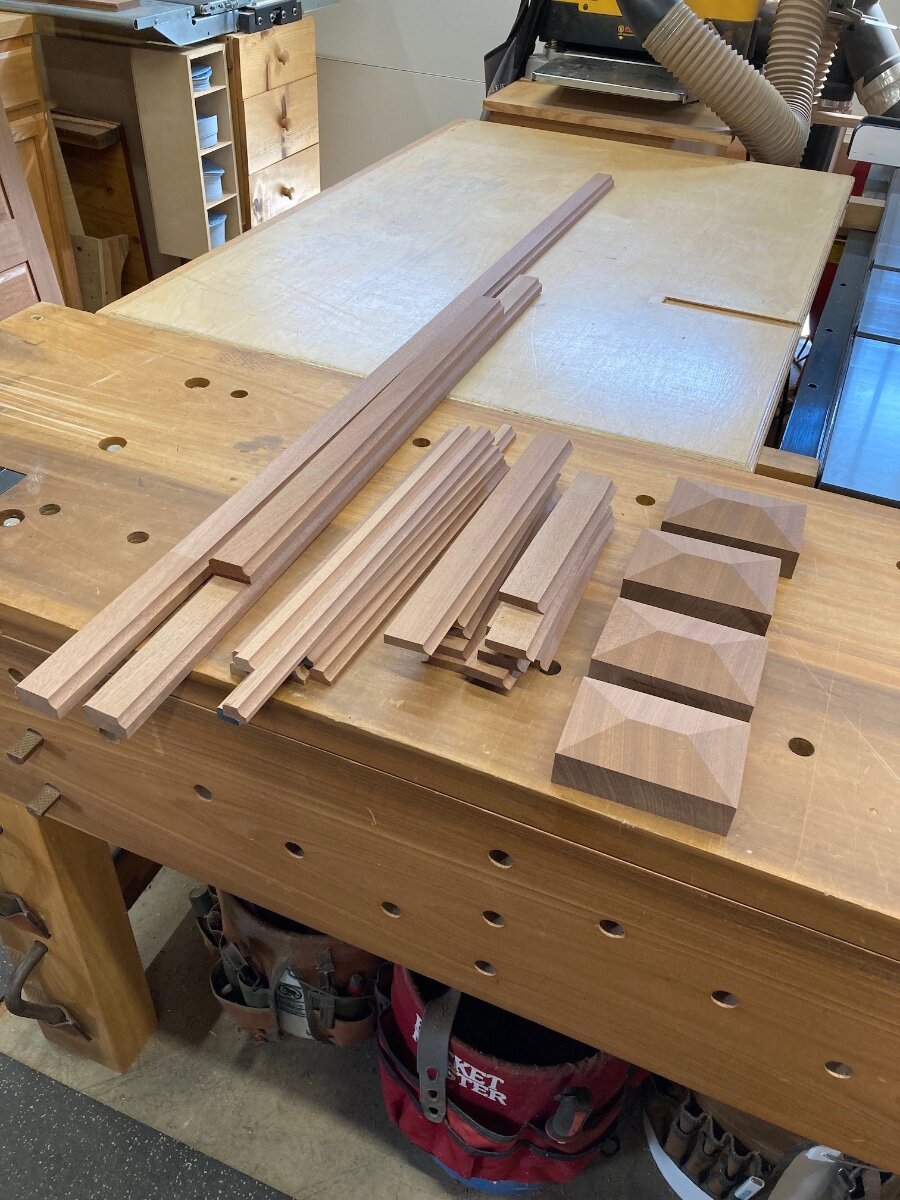
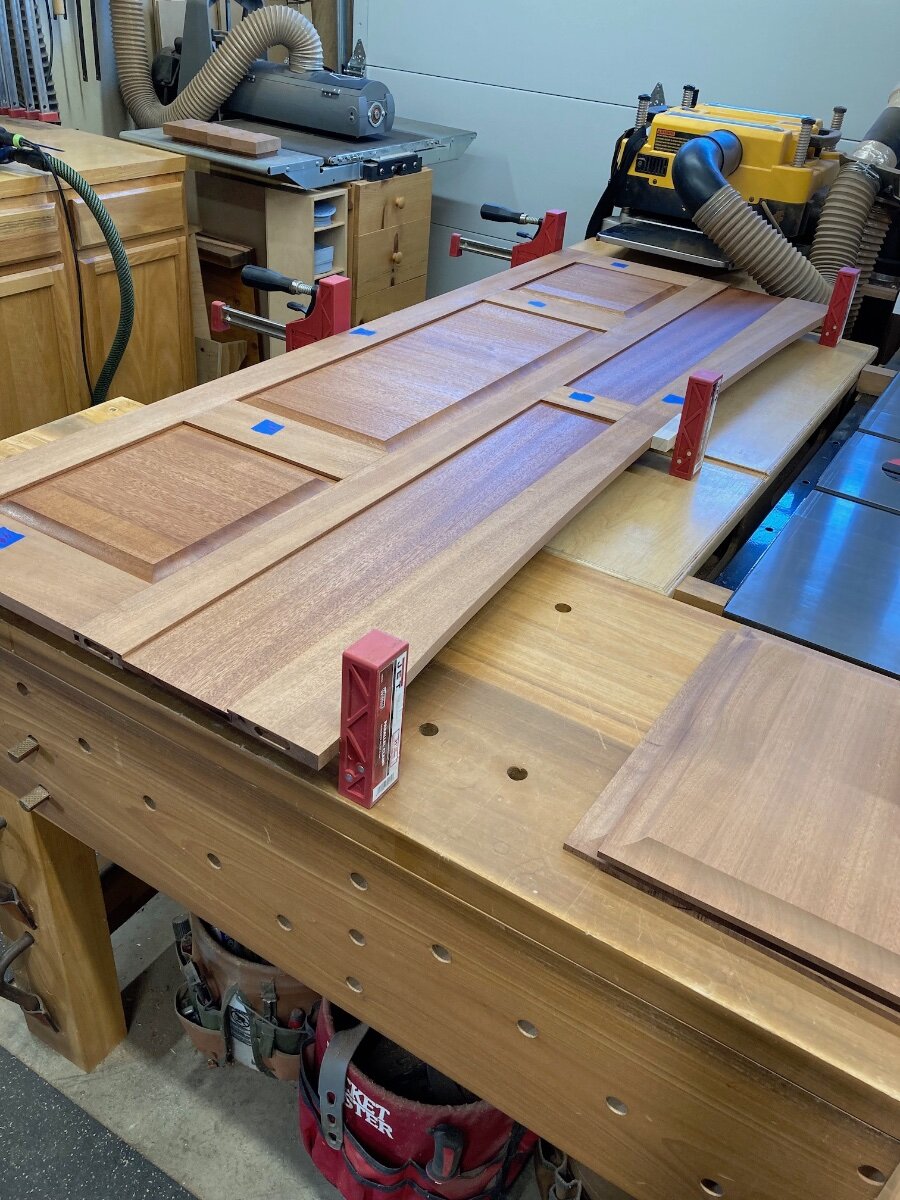
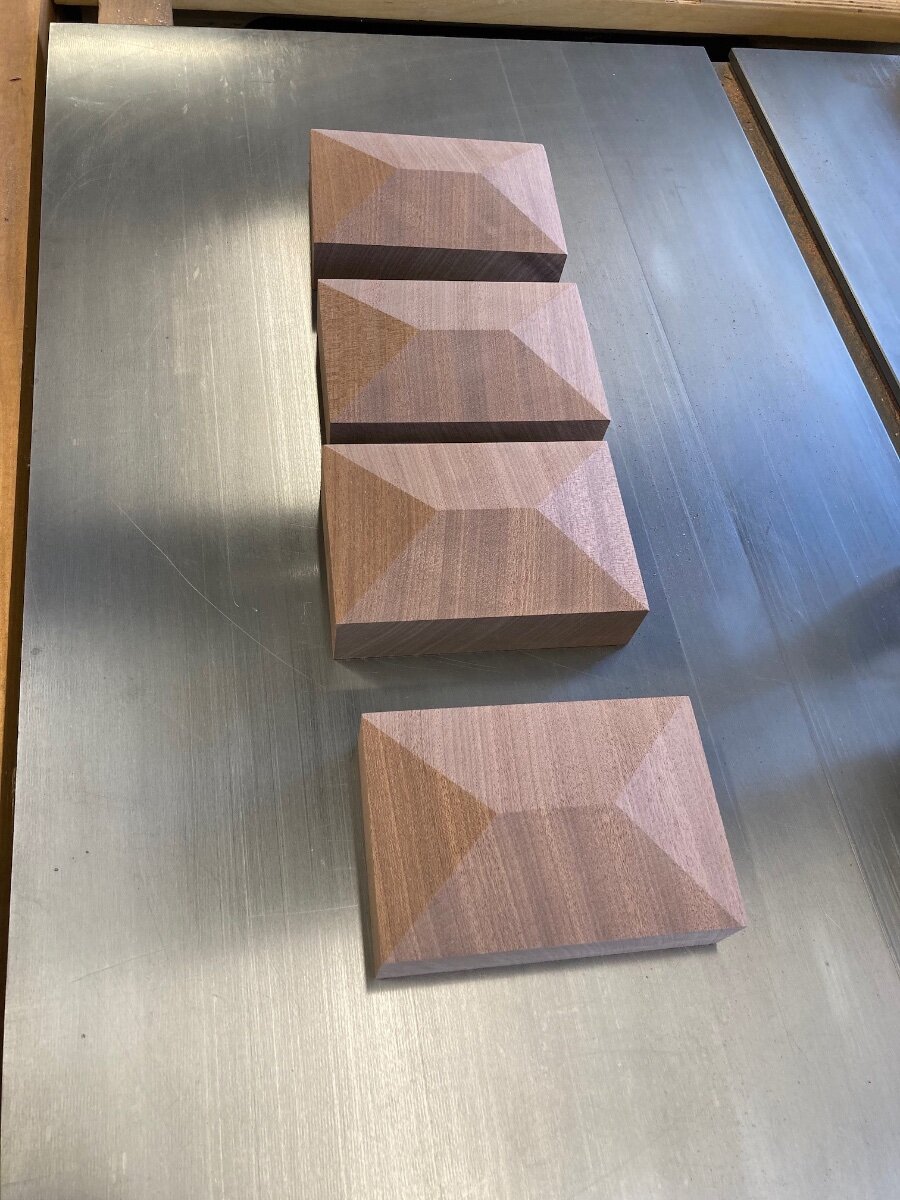
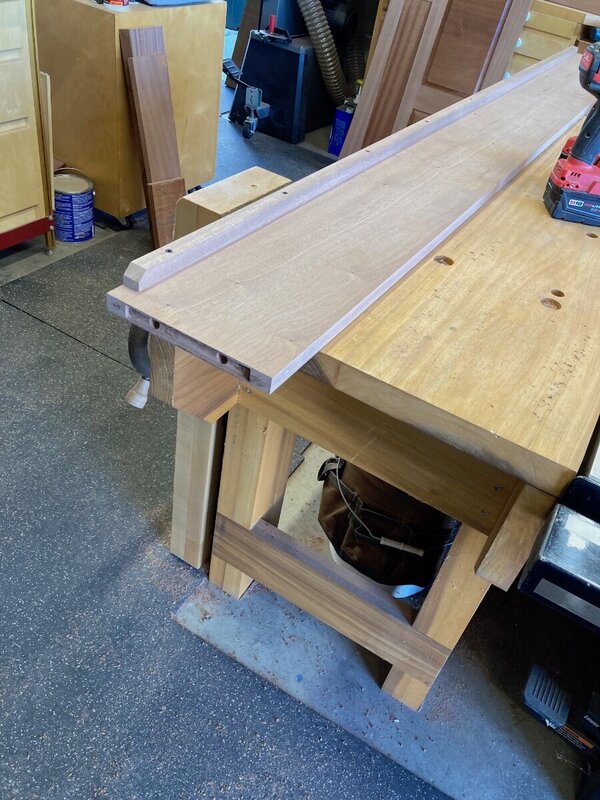
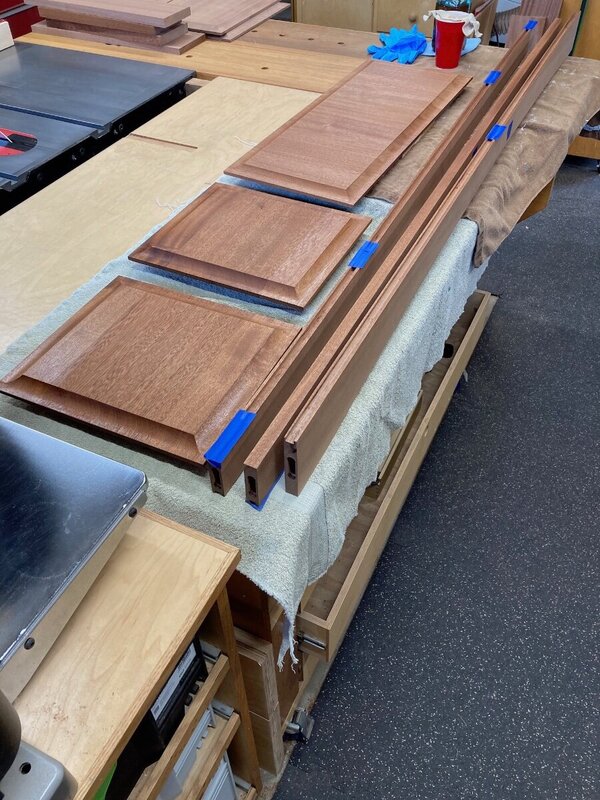
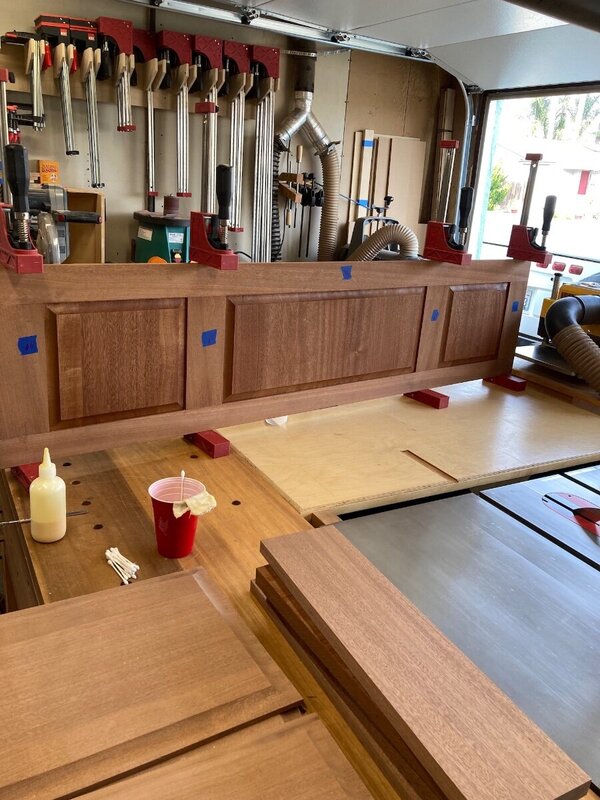
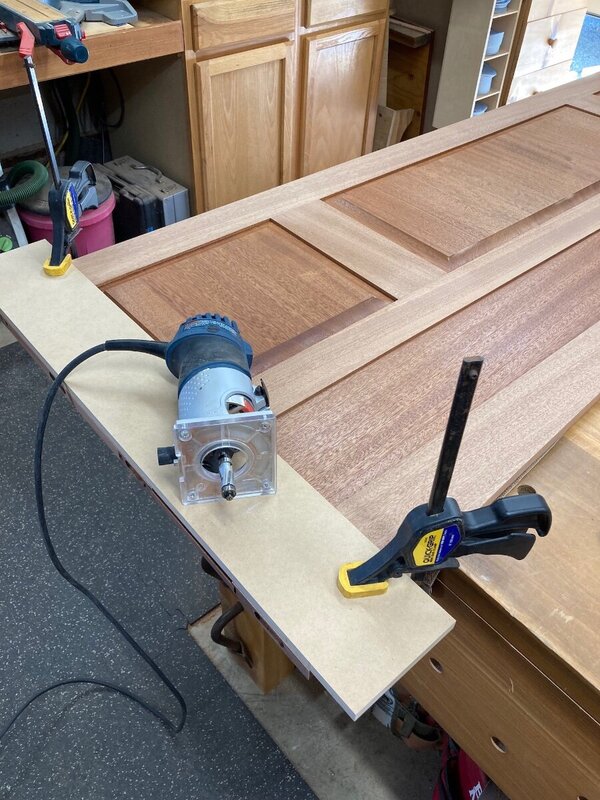
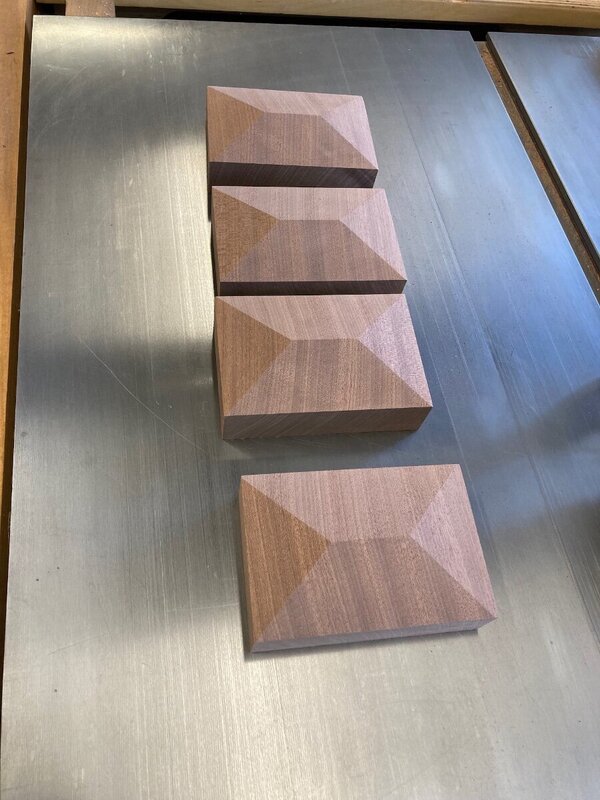
I made some caps for the legs. I started with some blocks 1 3/4" thick and the same width and depth as the legs. I set the table saw blade at 15° and cut the two short sides and then the two long sides, pushing a scrap behind them so I didn't get any digits tangled up in the saw blade. I took some lengths of scraps and made up some molding to go with the caps and also at the base of the legs. I there should be way more then needed of the three different moldings but I don't want to have to go back and recreate something at the last minute. Next thing up was to put a coat of shellac on the panels and the edges of all the stiles and rails before I start the glue ups. I put some blue tape on the edges where glue will be applied. The first glue up was the lower section that has the three panels. When that dried I added the horizontal panels and top rail. After that came out of the clamps I used a flush trim bit and straight edge to trim just a fuzz off of the edges so the legs will set perfectly flush with the panel section. This section was 69" in length and after running the router along it its now 68 31/32"


-
There is a list for that six forums above this one. 😀
-
Yours didn't have the small screw that expands the barrel? https://www.wwgoa.com/video/installing-barrel-hinges-properly-003131/
-
Lol. Well mostly I didn't have a lot of options as to where to put it. The two car garage is my shop but I still have family stuff in there too. Washer, Dryer, Freezer and Food Pantry. But the reality is that if they still had college football on the radio that is all I would need and there would be no TV, when there is no college ball I listen to music or podcasts.
-
I enjoy college football so I finally added a small TV in the shop so I can have the games on in the back ground. You know you have most of the tools you need when you start adding things like this.

-
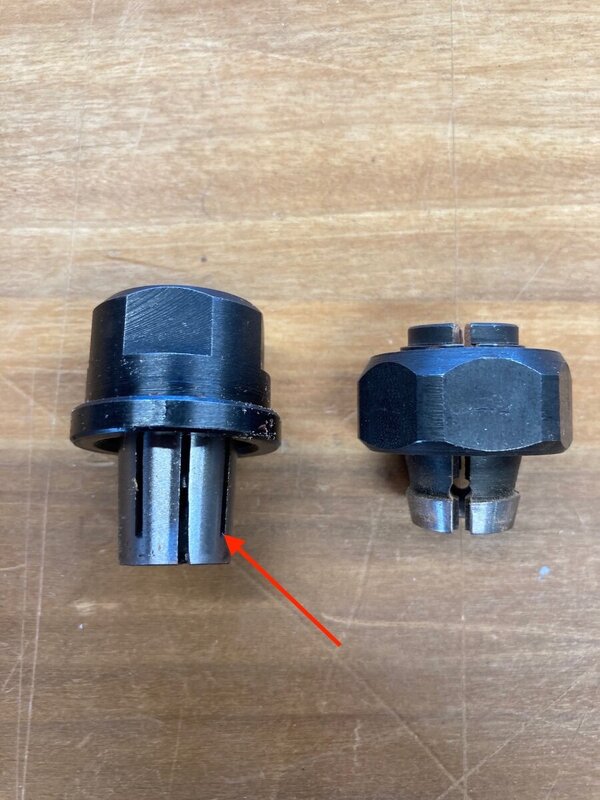
Upon further review the Festool collet looks quit a bit different from others but the main thing that keeps it from working is the part on the bottom (arrow in the picture) is so long compared to others.
-
The Festool one doesn't work in the Porter Cable motor, if that is the motor you have. I checked that one before my first post about it and I think the Bosch is the one I am using.