Every purchase made through our Amazon Affiliate Page helps support this site

Chet
-
Posts
2,276 -
Joined
-
Last visited
-
Days Won
92
Content Type
Profiles
Forums
Downloads
Gallery
Events
Store
Articles
Blogs
Everything posted by Chet
-
Yea, but you might need that collet next time. You just never know.
-
I had a Jet lathe for about 18 months. I tried all sorts of things, bowls, spindles, table legs, I even made a baseball bat but non of it held my interest. For some reason the price of lathes really shot up during that time and I ended selling it for twice the price I paid for it new, to the first person that saw the ad. I used that money to help buy my Laguna bandsaw which I use ALLLL the time. It even sits in the same spot the lathe was in. And I have never missed the lathe.
-
Just get a quarter inch collet for the router table. I have one that came with a Bosch router that someone gave me, 😉 I don't use it a lot but it is nice to have when a 1/4" shank bit is all you have.
-
I am not a turner but every once in a while I run across something that is fascinating to watch. Some people can really think outside the box.
-
A really nice job Drew.
-
Rockler also sells it.
-
I would say with the leg design you have and the Demilune style, 1 3/8" isn't going to look good at all. First thing is if she really need the thick feel you could do a under cut bevel around the curve and leave the back edge thick. The good thing is the thickness of the top is pretty much the the last thing you need to worry about. You can finish the rest of the table, set the top on it and hope she sees the light and decides it needs to be thinner. The legs look nice and the wenge cuffs came out looking real good.
-
I was out in the shop when I realized in talking about wood movement I failed to respond to some of your other questions. I don't know if you recall from Morris chair there was a top and bottom to the form for that arm laminations. Because of the length of this piece and the depth of the curve I thought that it would be a bit cumbersome during the clamping process to use something similar. Your do need some sort of caul or you will get bubbles in the lamination, so I went with some MDF kerfed about every 3/4" It worked real well. Every time I got on the stool I bumped my head on a light fixture. I finally got smart enough to raise the fixture up. Just like the nightstands I am using the existing queen bed for ideas so everything look like it sort of belongs together.
-
Nothing wrong with educating ones self here and there. It may make me of service down the road to someone else. Also I saw a chart that showed the radial and tangential shrinkage of wood. Both were 4.6 percent radial and sepele was 7.4 tangential and poplar was 8.2. These numbers were from green to kiln dried. So I would think that seasonal movement would be a pretty tiny fraction of that.
-
Well I am doing some research to see if I screwed the pooch on this one. We just don't see a lot of movement where I live. I don't work recklessly because of it, I still try to think about wood movement. I never thought about different species together. I did find this on Woodweb - Q. I am laminating three layers of 3/4" stock. Since only the exterior layers of the lamination are visible, I'm considering using poplar for the center. My question: is it all right to face glue different species in lamination? This piece will be placed in Tucson, Arizona. A. It is okay to laminate different species so long as the top and bottom are identical thickness and species. It is okay to laminate under any conditions if the MC will never change--it is only when the MC changes that the different shrinkage could (but not always) cause a little warp. - Professor Gene Wengert is Extension Specialist in Wood Processing at the Department of Forestry, University of Wisconsin-Madison.
-
I didn't think there would be a problem but the fact that you brought it up has me concerned. What comes to you mind?
-
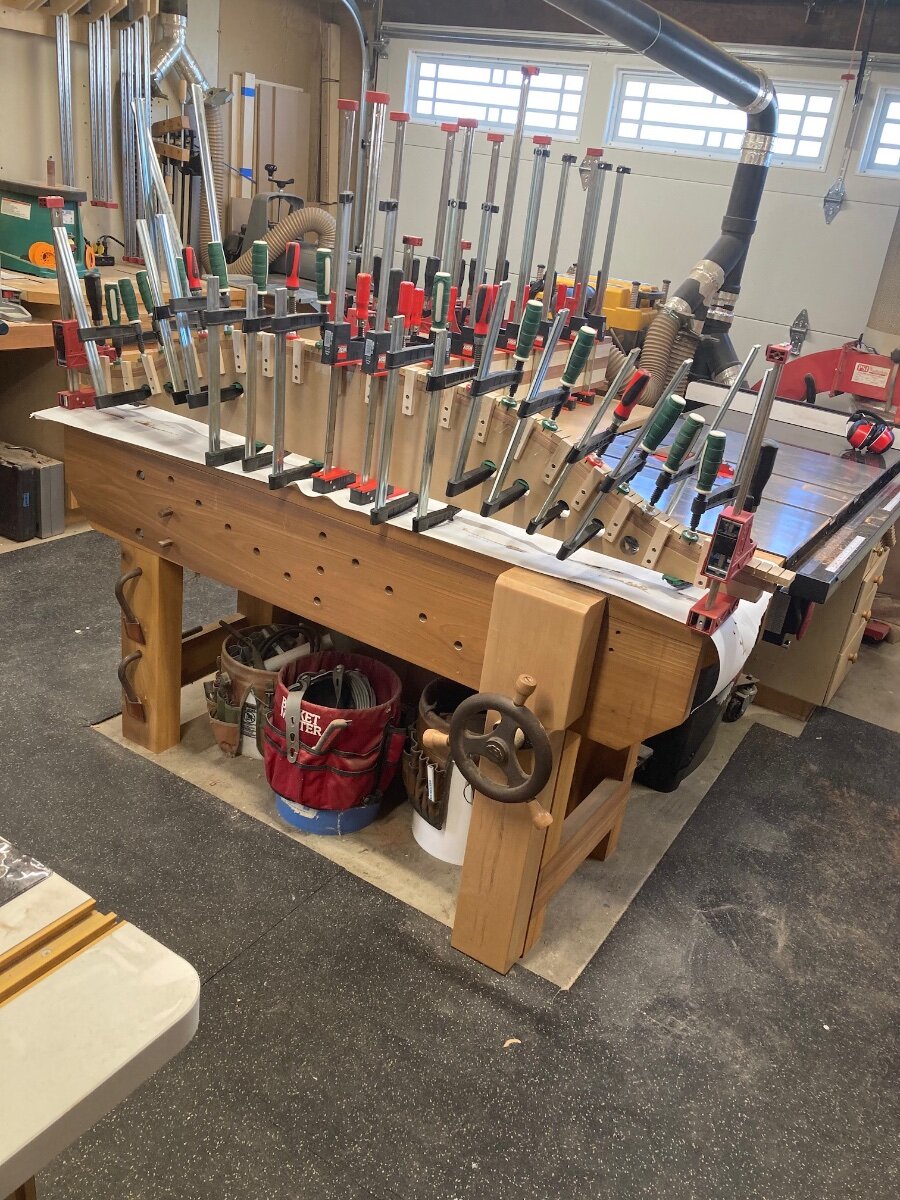
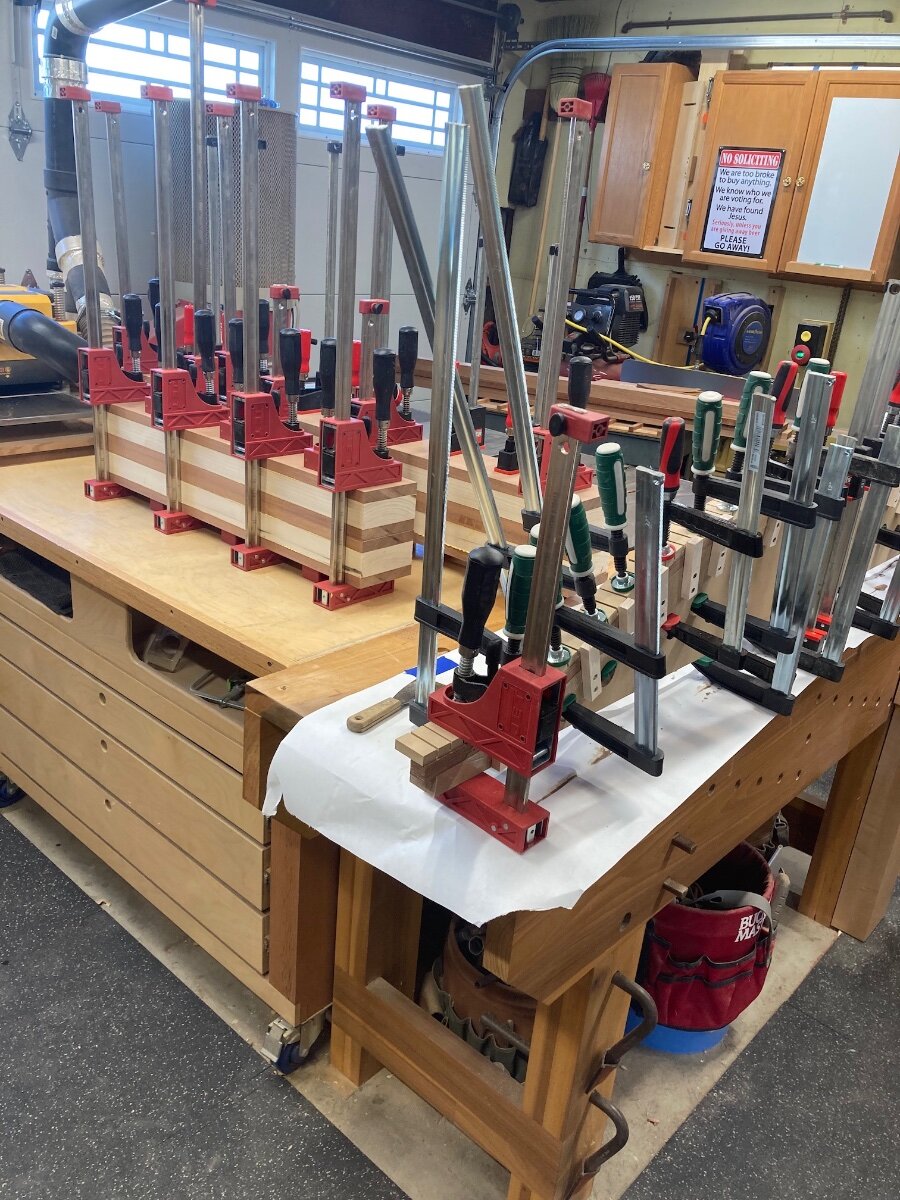
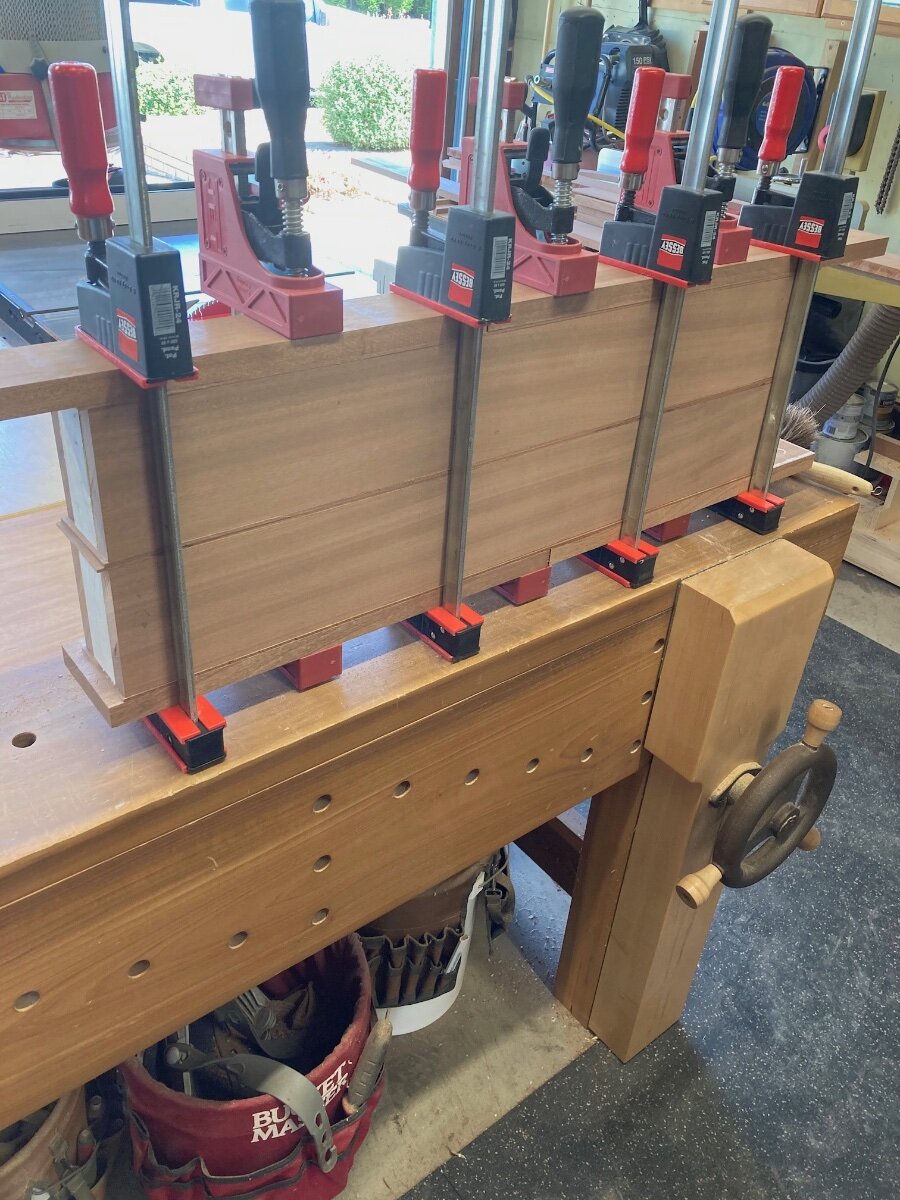
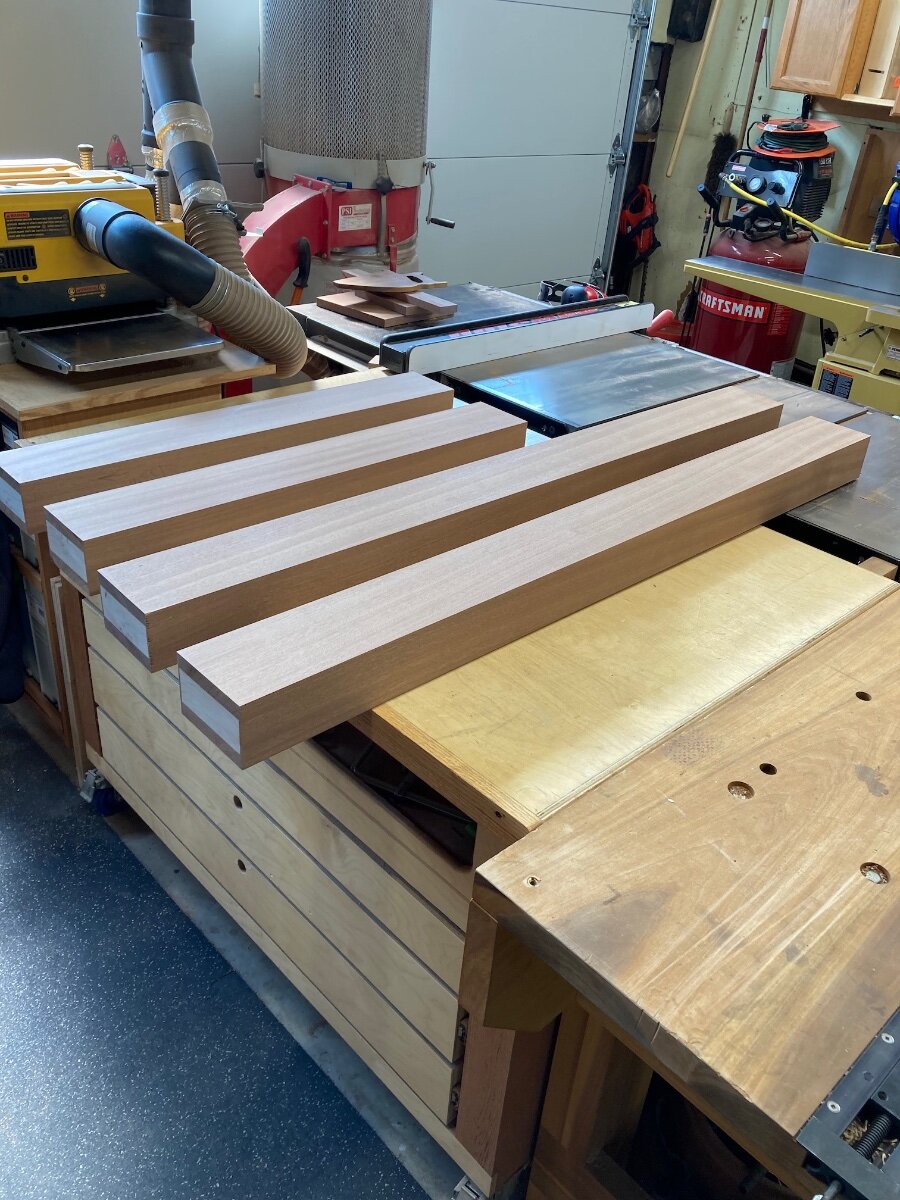
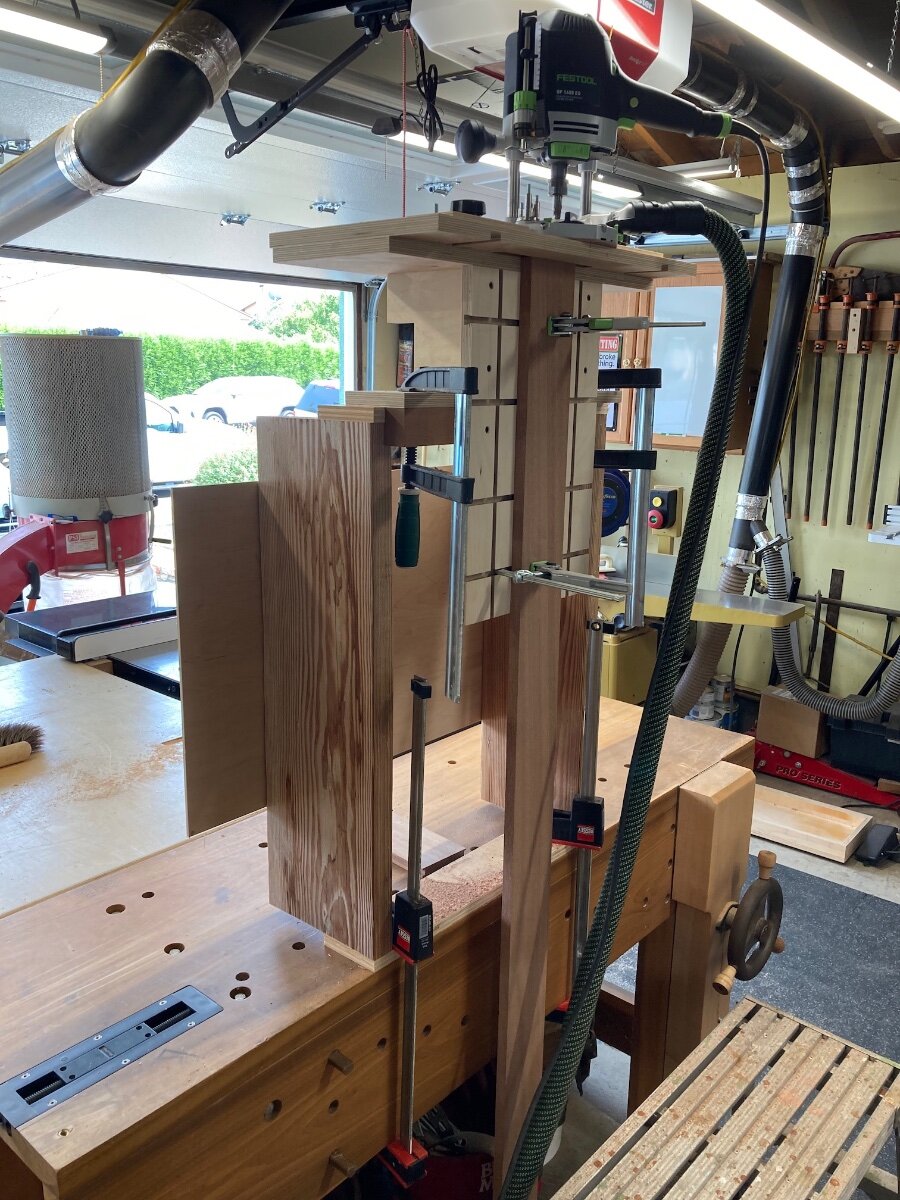
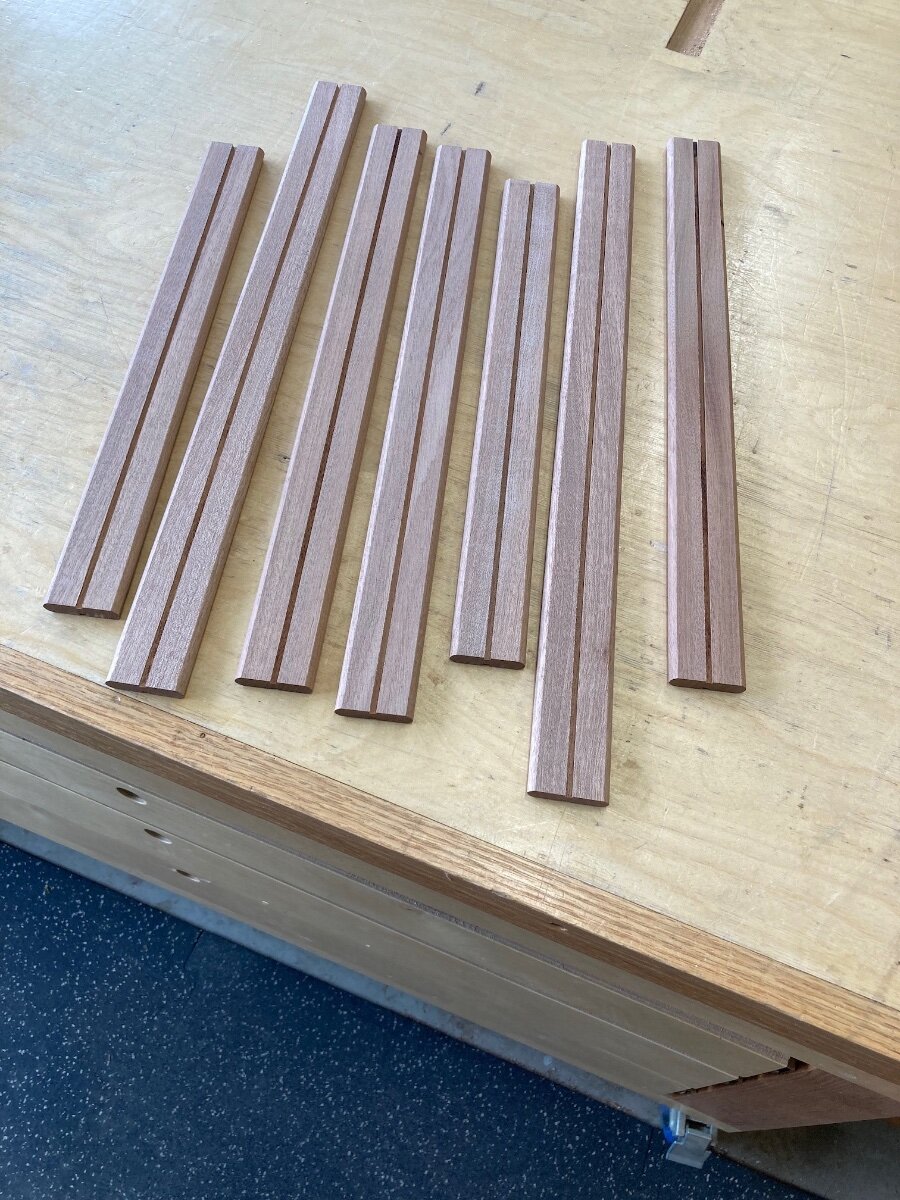
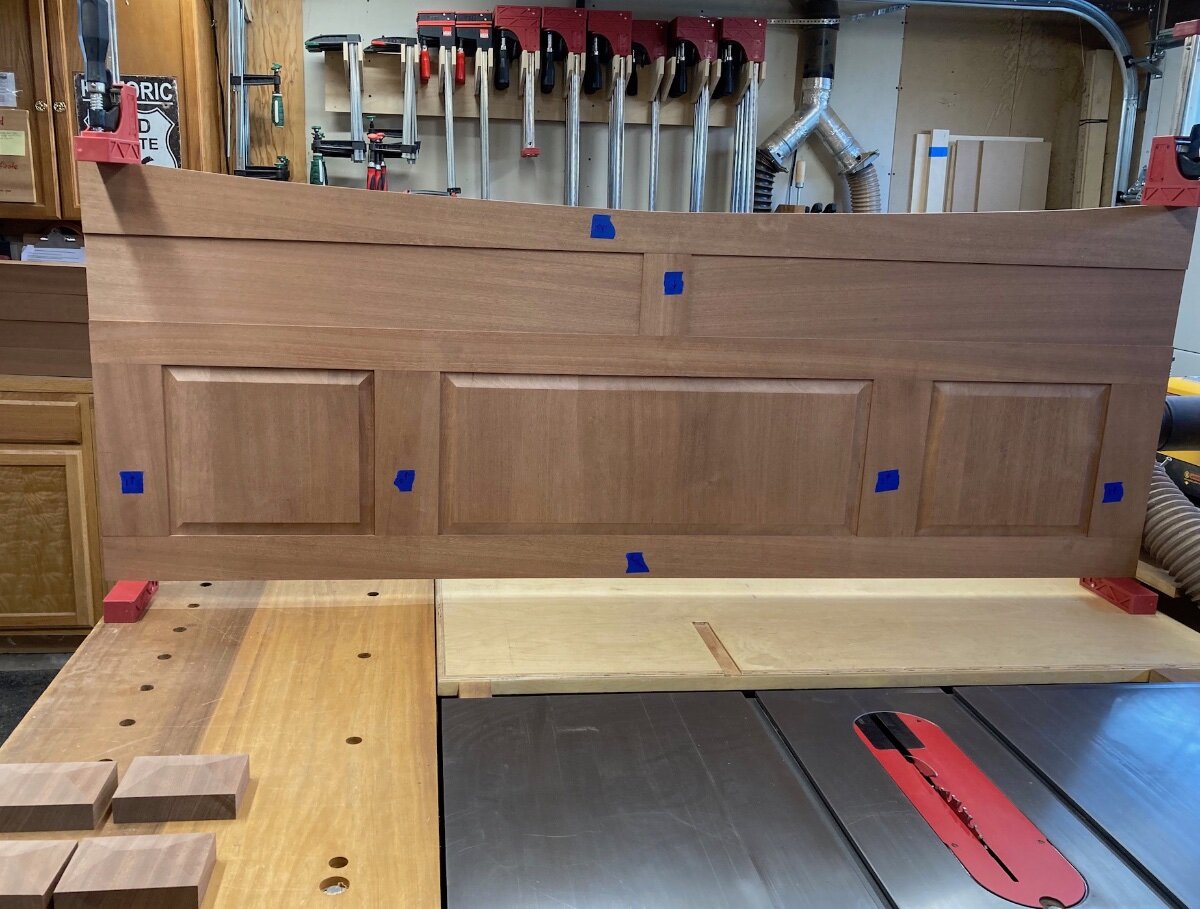
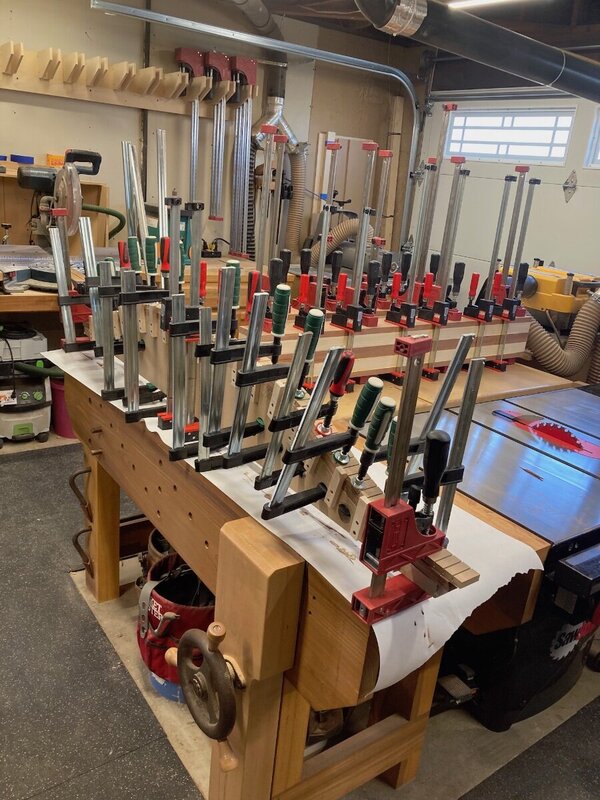
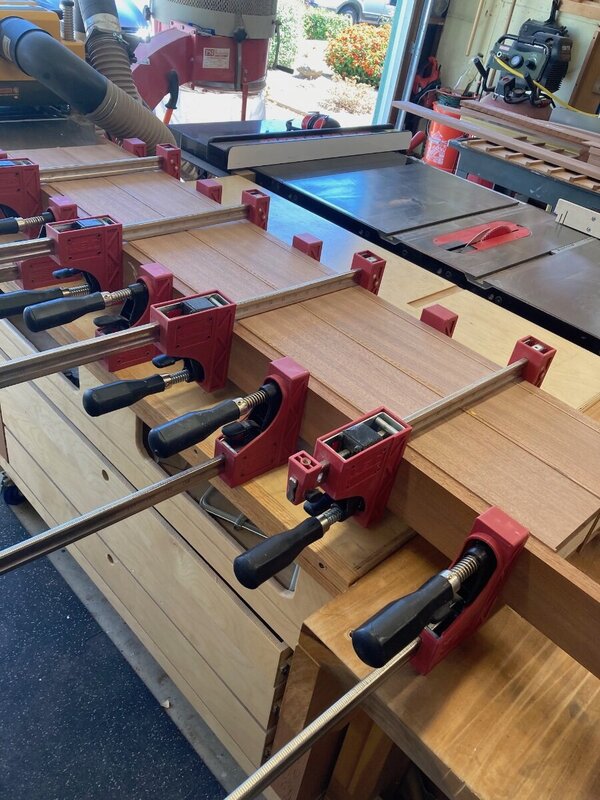
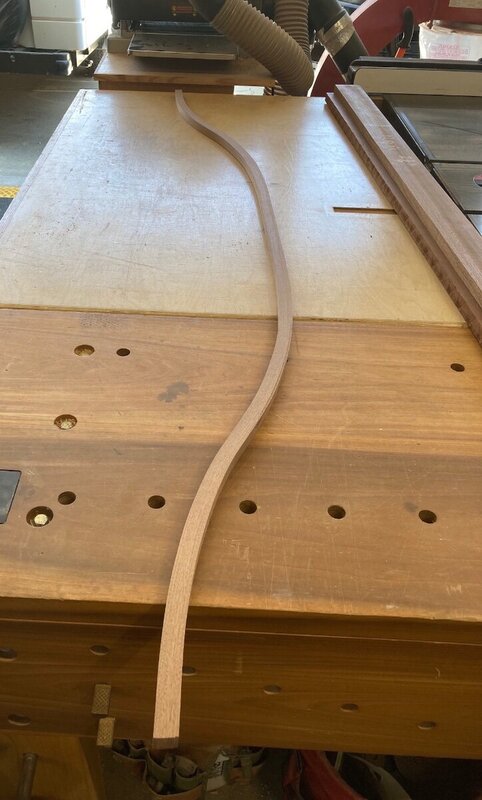
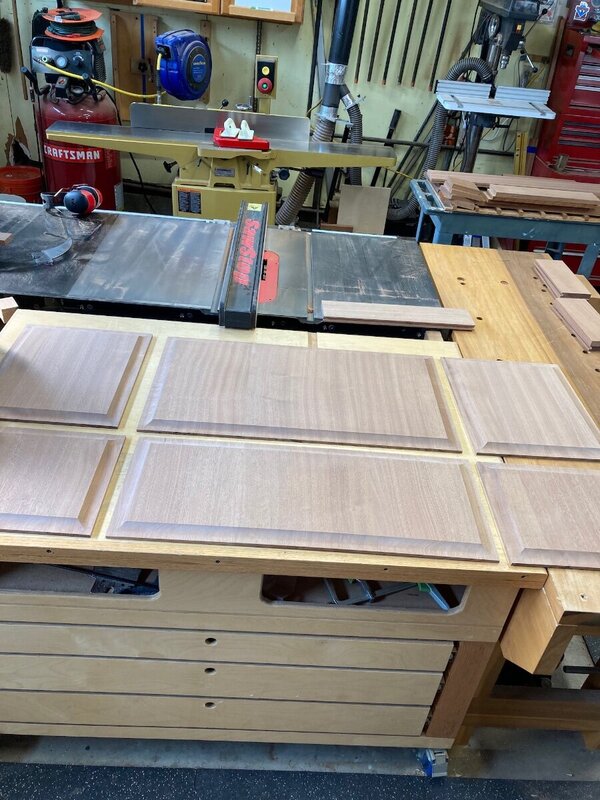
I started the bed on this project a few weeks back and it has been slow going for a few reasons. One even in retirement I only spend 4 or 5 hours a day in the shop because there are other things like reading the paper and drinking coffee. Second and more of an effect on this project is the size of it and the size of my shop. Building a king bed in a two car sized shop is a chore. At first I was thinking that I would build the foot board get it out of the way and then the head board. Then reality set in, first thing is there are two legs for the foot and two for the head board, also there are three raised panels on each and you are just asking for problems milling the foot board parts first and then trying to duplicate the set-ups when you start to work on the head board. Along with this there are stile and rail parts that are similar. This is a long way of saying I have parts stacked all over the shop and every time I want to us a tool there is something that needs to be moved. Needless to say this slows things down. I haven't been real diligent in my photo taking but here are some to catch you up. The first thing i did was a bent lamination for a piece that will be the top molding for the head board. I started here because I wanted to make the form, us it and then get it out of the way and out of the shop. I also want to use the finished molding to draw my shape on the panel that the molding will go on so they match up nicely. This was the finished molding, it is a little over an inch square. At the same time I started gluing up the legs. I used Poplar in the center and 4/4 sapele front and back. These are the foot board legs with the head board legs lurking in the background. Next I glued on a 1/8 inch thick veneer to hide the glue lines. Head board legs. Foot board legs. After this I worked on the raised panels, no work in process pictures just the final product. The end grain cove took a lot of hand sanding clear up to 400 to get it to look like the edge grain coving. I think they all came out pretty nice but I did give more attention to the head board panels (top) as far as matching up the grain to hide glue lines because when you walk into the room they will be more eye level. Each of the 6 panels is made up of three pieces. I am using floating tenons all around so next up I cut all my mortises in the foot board stiles and rails. The stiles were first using my mortising jig and a 3/8 up spiral bit. I cut them 1 1/2 inches deep. Now I don't want you all laughing at this next picture. The rails are 69 inches long and to cut the mortises in the ends I need to get my jig about 70 inches high. So I built a down and dirty platform 29 inches tall to clamp my jig to. I wasn't going to pay the current silly prices for some construction lumber ,but I did have a neighbor having their kitchen remodeled and I found a couple of scraps of 2 X 10 in his tear out pile that would work along with a couple of pieces of ply on my part. I had to stand on a stool. Then I made a bunch of tenon stock out of scraps. A dry fit of the foot board.


-
Did you give any thought to shifting your arc to the right (as it sits in the picture) to center the seam a little more. It also looks like doing this would give you a little more even color in the top, you would lose some of the lighter color at the back edge.
-
Yea, I think I would do a frosted pattern that would create lines across the class that connected you maple inlays.
-
R.I.P. Dusty Hill. Going to miss your bass playin'.
-
Maybe you could hit the routed shapes and lettering with a propane or MAPP gas torch and then run it though the drum sander to clean up the edges to get them crisp looking again.
-
I would use a round over bit in the router with a bearing. I myself would probably use a hand held router as apposed to the router table and have the bottom side of the table top up to do the work.
-
So do I. Nice looking project so far.
-
Good thought, didn't think of that.
-
Not a bad idea. certainly would be a strong joint. I have seen this before, the first time was one of the big name woodworkers, can't remember who, they made their own dominos out of a wood that accentuated the project.
-
I have the Festool TS 55 the smaller of the two corded saws. I think I would want to use a cordless version before committing to it. I would like to see how it felt balance wise compared to the one I have. Its probably just because I have the Festool but recently my neighbor bought a Mikita track saw and it seemed nice enough but it just felt different in the plunging action. I would imagine that if that was the only one you ever used it would be fine but I like my Festool. Just if you are interested I like having a 55 inch track and a 75 inch track instead of a long single track. I have the two bars that allow me to join then together if needed. They slide in on the bottom side with set screws to tighten them in place. There is no performance lose with this set up, you don't even feel the saw going over the joint of the two tracks. Its easier to find storage for two short tracks in my garage shop as apposed to one long one. The TS 55 has a depth of cut of 1-15/16" at 90° when using the track. I clamp the track on critical cuts but the track does a good job by itself.
-

Bushwacked Garage Reno Complete in 2020 sometime ... Hopeful
Chet replied to Chet's topic in Member Project Journals
I ran a custom made heavy duty extension cord along my over head ducting for my DC to the right side of my table saw to power my DC which sits just to the right of my table saw. I just used zip ties every so often to hold it in place. -
Bushwacked Garage Reno Complete in 2020 sometime ... Hopeful
Chet replied to Chet's topic in Member Project Journals
No, they can slide some if you kick them or something like that. But with them being Yellow (I see now they went to Orange) you see them out of the corner of you eye. They have some weight to them but not so much that they stay put when kicked. But if they do slide the cord stays under and even with the fact that they can slide I still like that better then catching a cord with my toe and going down. -
Bushwacked Garage Reno Complete in 2020 sometime ... Hopeful
Chet replied to Chet's topic in Member Project Journals
I use these in one spot for cords in my shop everything else is out of the way. I have two pretty heavy duty cords under them, I think I could get three if needed. I ordered them from Uline. I have two of the smaller ones, 36"X5"X1". They are designed to interlock end to end. https://www.uline.com/BL_2869/Pedestrian-Cable-Protectors My Tablesaw sits the same as your but with a little less then 5 Ft. behind me and it works well. My Jointer sits behind me when I am at the saw so if it is something like a 5 X 5 sheet of ply I just rest it up over the jointers pork chop for the firs few inches. -
I could care less about them, but it seems kind of silly to make someone a mentor just cause they talk a lot ,lol Wish I had thought of this.