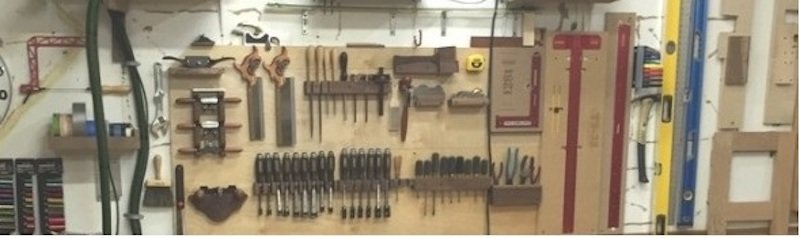
Every purchase made through our Amazon Affiliate Page helps support this site
Kev
-
Posts
6,303 -
Joined
-
Last visited
-
Days Won
575
Content Type
Profiles
Forums
Downloads
Gallery
Events
Store
Articles
Blogs
Everything posted by Kev
-
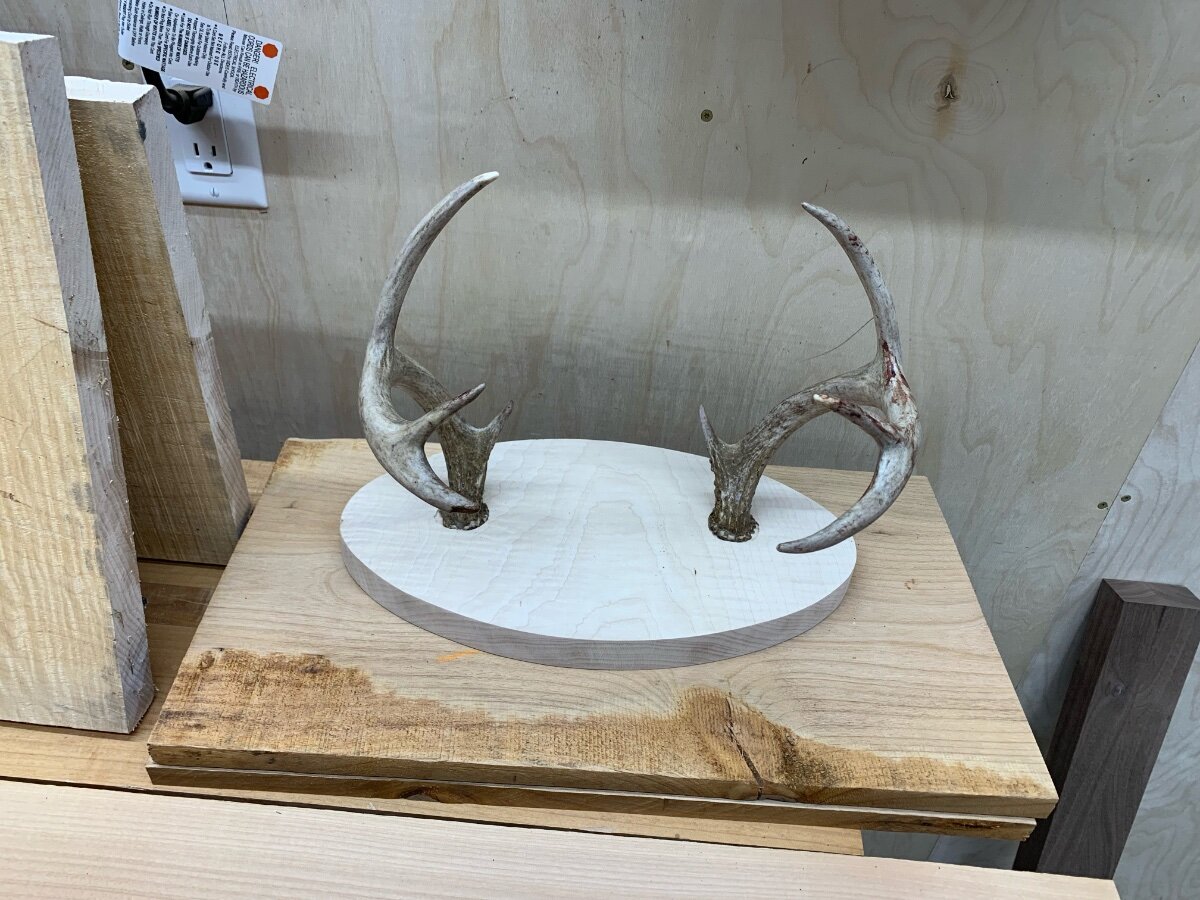
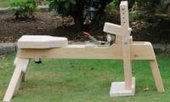
Been a crazy couple days! I'll start with the cradle... The bottom is in and some of the sanding has started.. Still lots to do.. I also had a couple local clients hit me up for some "quick" projects.. The first one started as a phone call from my hardwood dealer asking me if I could resaw a piece of Alder for someone. Should have been a quick job but, no! Come to find out, the dealer sold her Alder and she wanted it to look like Walnut.. Long story short, I gave her the best education I could, told her "Merry Christmas" and laminated some walnut I had on hand for her project and still resawed her Alder. I also stabalized the knots that were in the alder.. That's her "keeper piece on the router table.. It had a small knot to stabilize as well.. And, of course, I got hit up to mount some deer horns that were improperly removed.. I still need to apply an edge treatment to the oval and secure them permanently with epoxy but, this one's close to being done.. I wouldn't have taken this job except is was a little girl's first deer and it hit a soft spot in my heart. I'll finish up these two "last minute" projects tomorrow and then get back to the cradle.. Currently stabilizing a knot in the stretcher so, all the epoxy work today worked out ok on that front.. Merry Christmas to all!

-
To everyone here, I wish you the the best Christmas possible with your families! I look forward to seeing the loot, it's always fun to see what you guys got for the holidays!
-
Yes.. That's the Walnut that I got from Spanky..
-
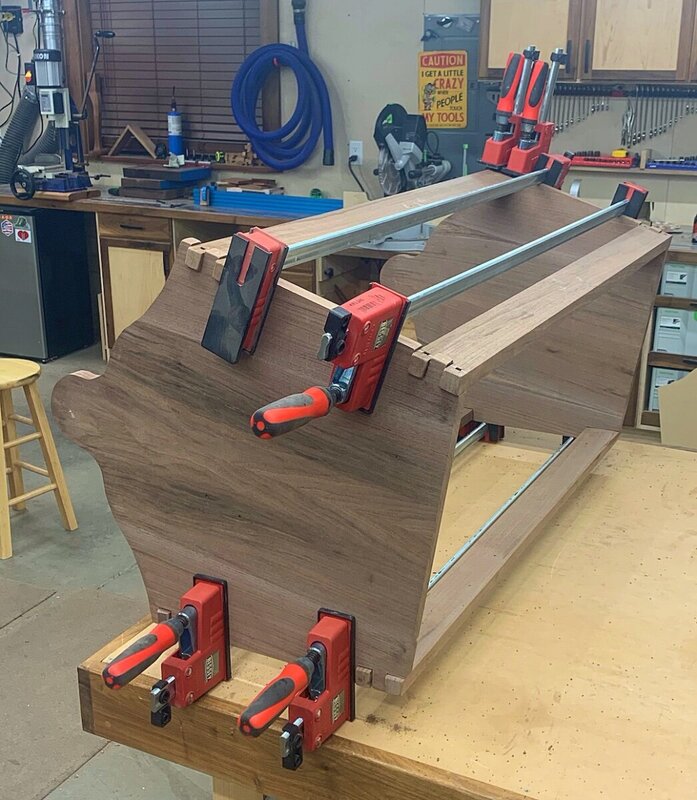
Nothing on this project today.. Our company has departed and I've only got about a week left before I leave for work. I need to get a lot done including this cradle. I spent the day wiping other stuff off of my list to free up some time to finish this.. I did get it out of clamps but, that's about it..
-
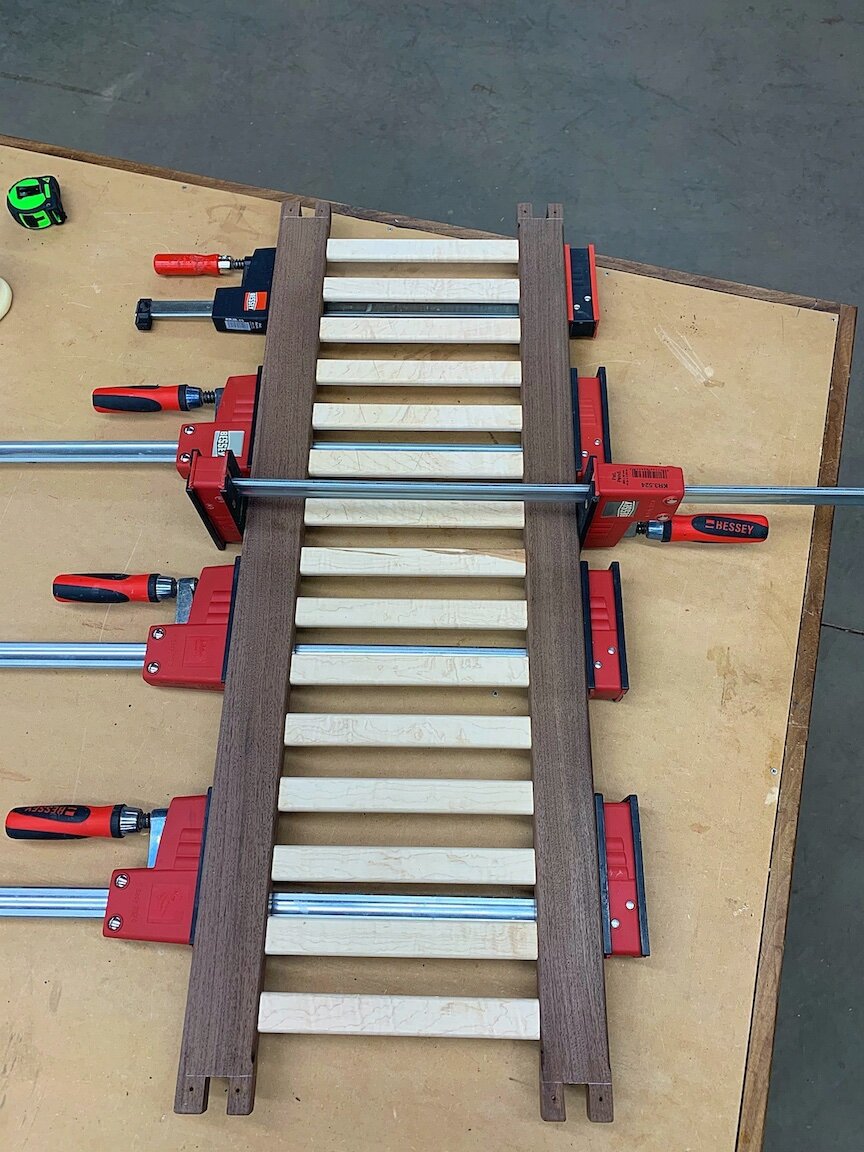
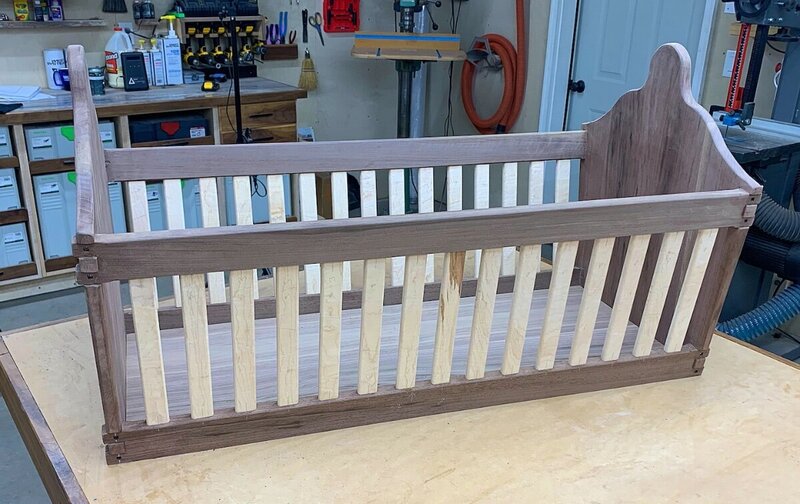
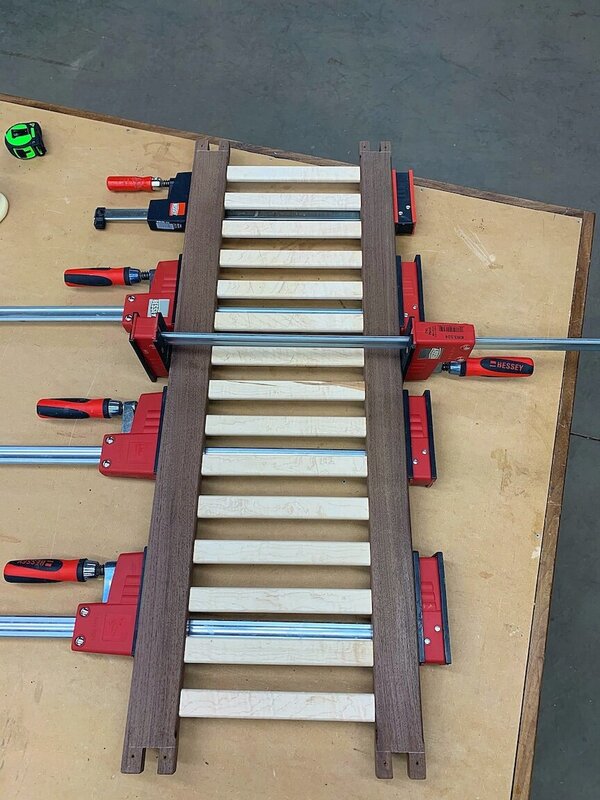
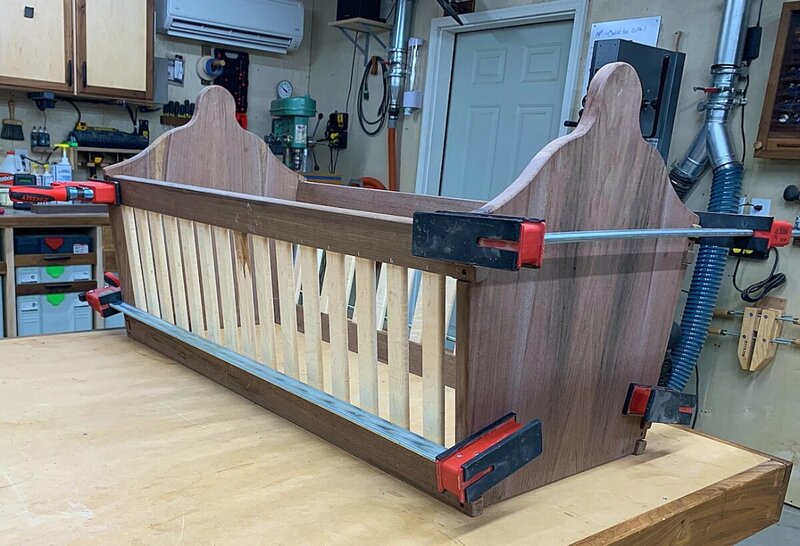
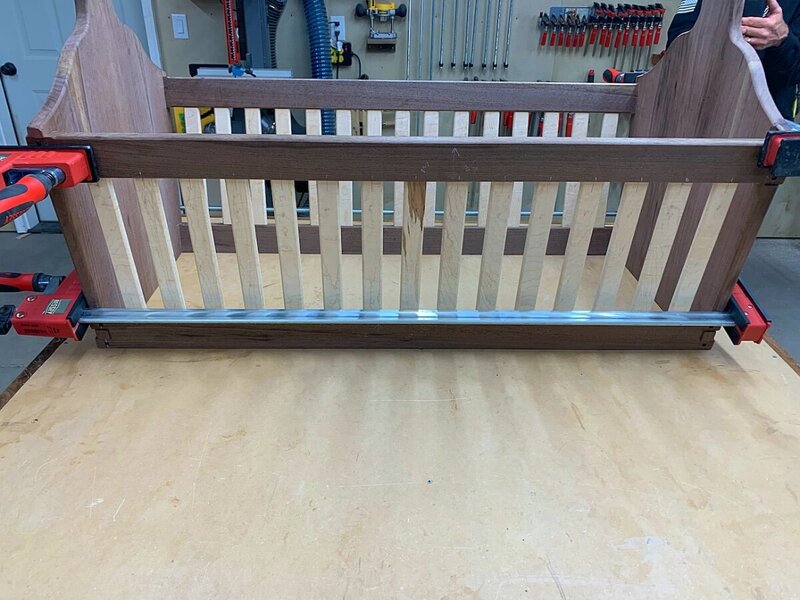
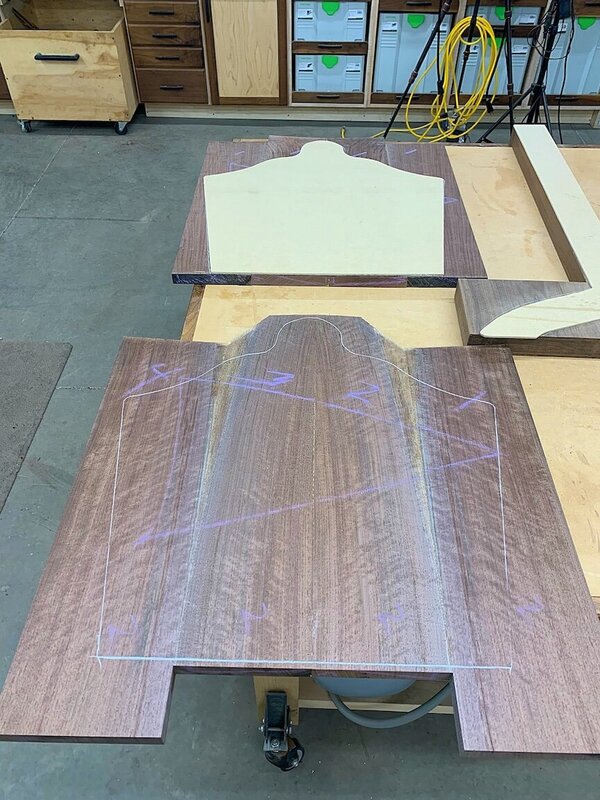
More good progress today! We created all the slats for the side rails. I used Sketchup to help determine the proper spacing based on the actual dimensions from the piece. These were all milled to 1/2" and rounded over on each edge. Although this picture is a dry fit, this is exactly how the actual glue up looked.. Dominos for the joinery. The pictures don't do the maple justice but, it is absolutely amazing! Thanks @Spanky After softening the edges on the panels, we went ahead and glued the cradle portion up. We made a small error and forgot to locate/drill for the dowel first but, that can still be done by hand. Still lots of sanding to do as well as finish up the floor. Then it's off to finish up the legs and stretcher to get this to finish.
-
Got the legs and panels cut out and rough sanded as well as the stretchers and finger joints. Will start working on slats tomorrow and getting them laid out..
-
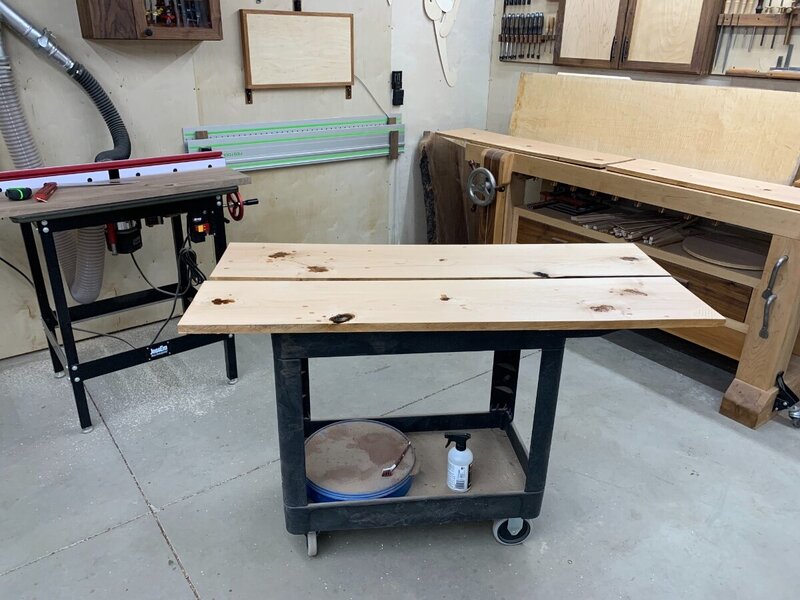
Got up early this morning to grab some pics of our progress so far.. These are the 2 side panels. They are book matched and glued up.. We'll be cutting them out today along with the legs. And, this the the leg blanks all glued up as well. I had one small spot that needed some epoxy. After all this stuff is cut and shaped, we'll start the joinery to the side rails. We did initial milling on that stock 2 days ago so, it's good to go.
-
Yea, I was horrible about pictures today as we made some small steps.. Mostly some milling and a little bit of template cutting but, nothing major.. There's just not a lot of pieces to a project like this but, I will try to get some progress pics in the morning before they get up so I can show them here.. They're leaving on Wednesday so, I can get back to my normal process..
-
He definitely did some unique stuff that was pretty cool! Welcome to the forums!
-
Apologies for not posting shop stuff in a couple days, we have good friends visiting from out of town which chews up quite a bit of time. The bonus side is that he's a fellow woodworker so, we did get a jump on the cradle! No specific plans in mind but, I do have the mattress and a purchased set of plans to help me with some of the dimensions I didn't know (spacing of the slats, mattress size, etc).. We did some resawing of the walnut I got from @Spankyfor some book-matched end and got those glued up. We also rough milled the stretchers between the panels and called it quits for a great dinner and some visiting time. I'll post some pictures of the progress tomorrow when we take the panels out of clamps. Unfortunately, I don't have enough walnut to account for the legs that I want to do so I'll need to make a run in the morning. I think I have everything else on hand. Unfortunately, we're under a winter advisory so, this trip might be tricky...lol I will say that it was quite a pleasure to have some help in the shop!
-
lol.. She hasn't missed her trips since we moved.. It's all good.. It's actually not a bad drive unless it's this time of year with 3 mountain passes to go over...
-
11 hours away..
-
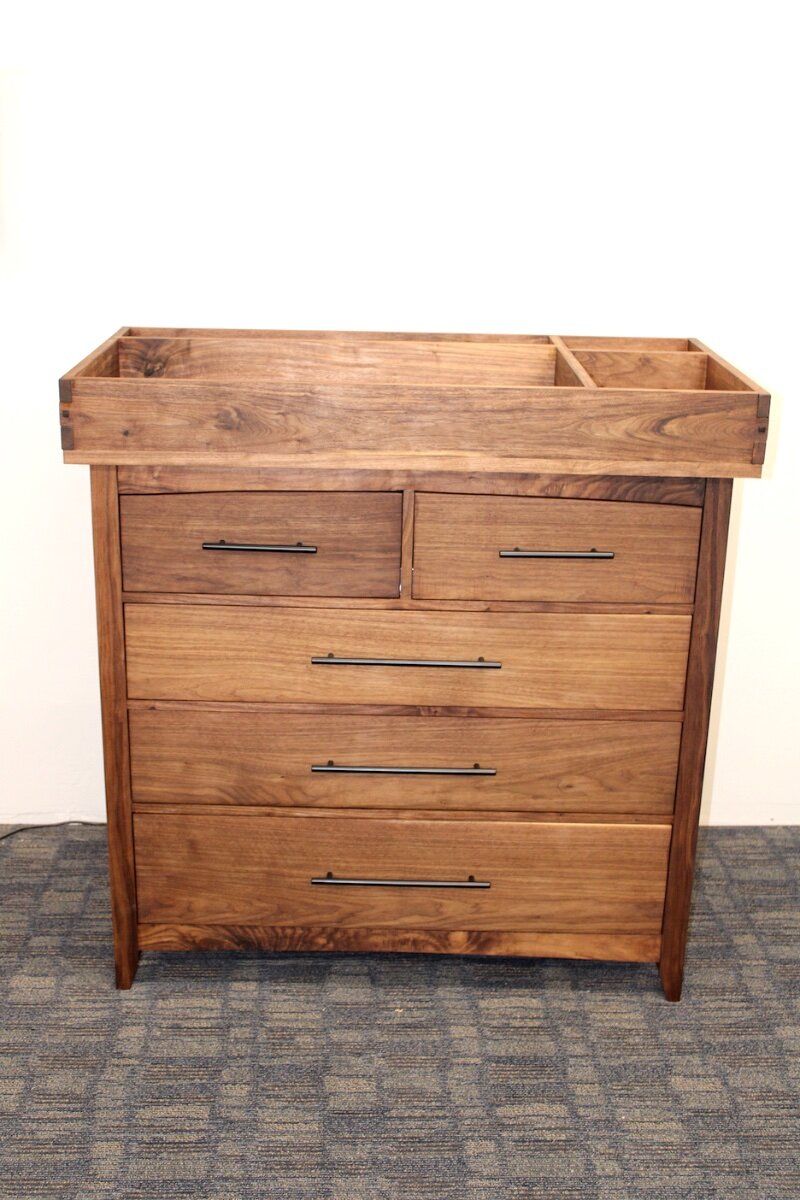
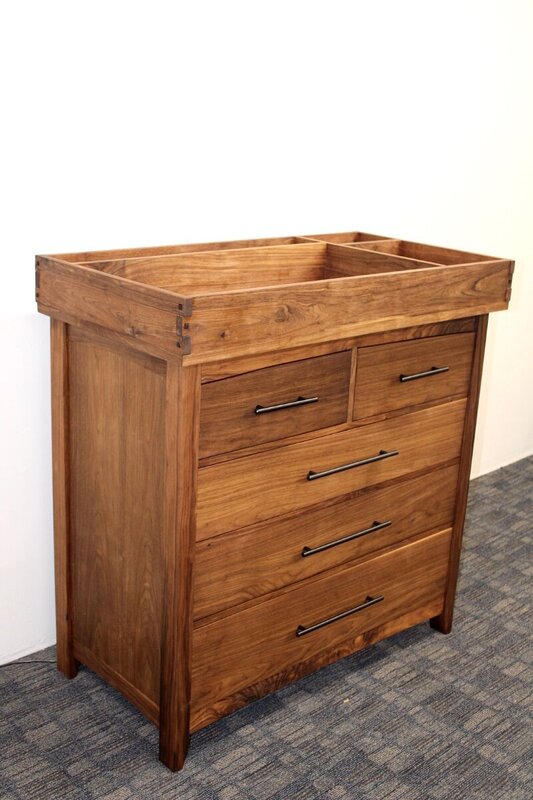
Absolutely no doubt in my mind.. I think it will be a nice height for a long term dresser.. The drawers are a really good size and the height is nice to fit below a wall mount TV or whatever they're watching on the wall when this one's a teenager..
-
I did get it moved to my wife's quilting room and a couple better pics..

-
Now taking a much needed evening off and I'll get after it again tomorrow!
-
Middle of May...
-
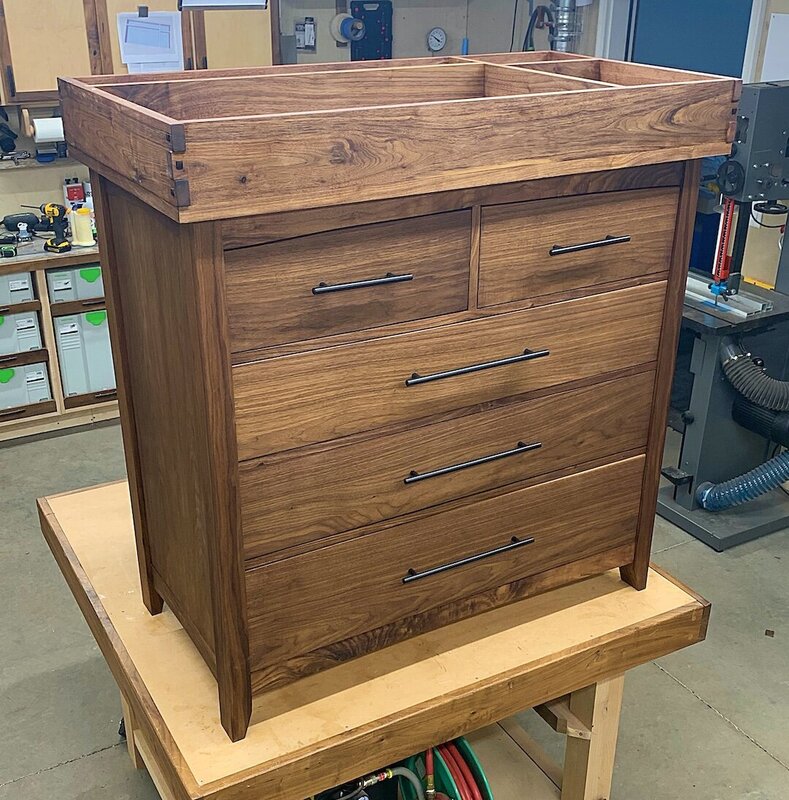
A long day in the shop for sure! But, pretty happy with how it turned out.. Not the "money" shots because it's still on my assembly table but, you get the idea.. Pulls were chosen by the expecting couple.
-
Since I can't flip this thing over by myself to actually mount the top, I thought I'd just get some finish on it and wait for my help to come home... Rubio Monocoat..

-
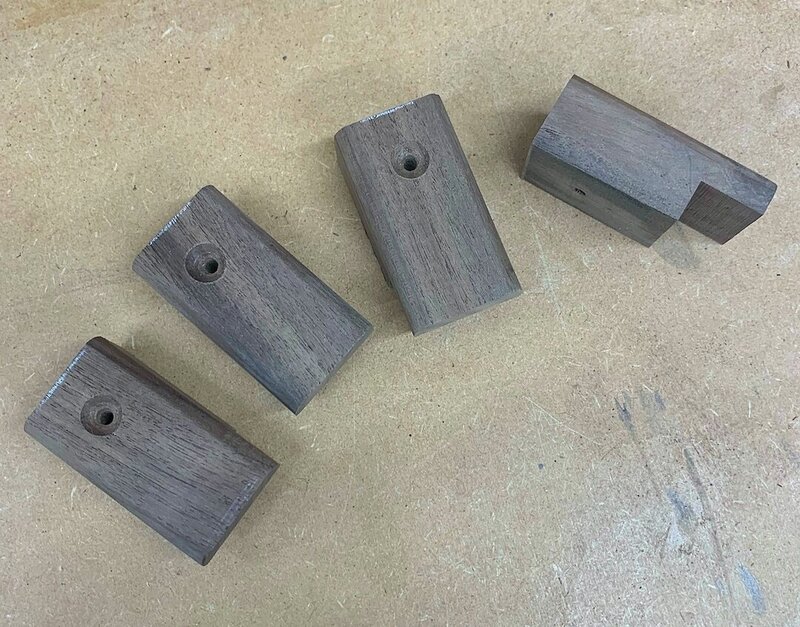
Got an early start this morning making the hold down clips for the top.. I've used figure 8s in most of my projects so wanted to do something different this time.. I will be using the Domino to cut the mortises in the rails. I upsized the bit from 8 to 10 to give these clips a little more beef..
-
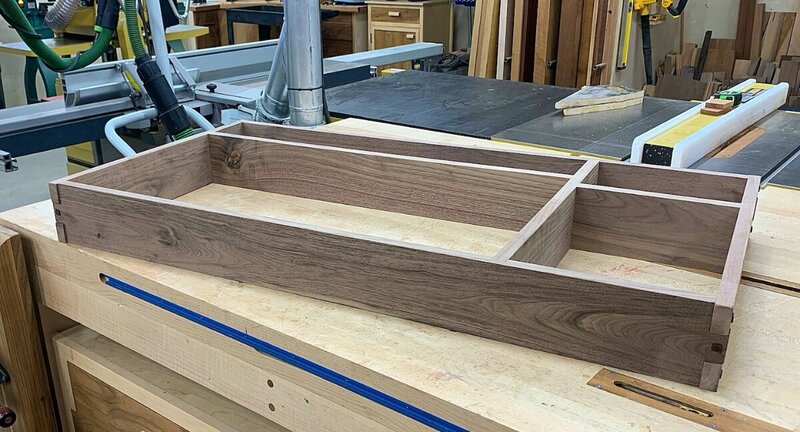
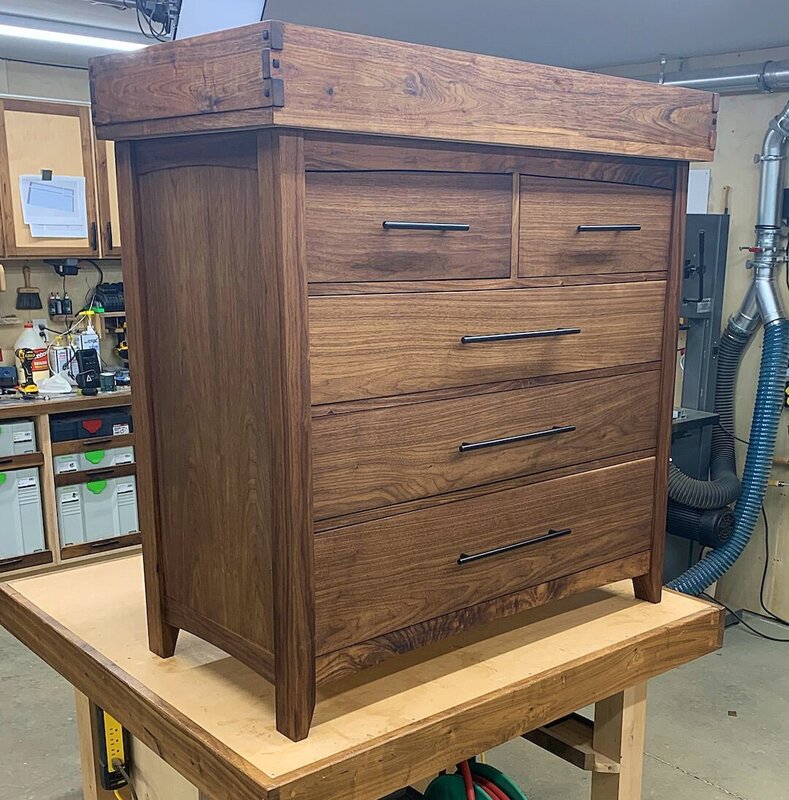
I was going for the more G&G large finger look on this one but, I like box joints.. Plus these are all reinforced with screws behind the plugs.
-
I'd of been quite a while trying to hog out an inch and a half at the router table.. I also made them a bit deeper at 7/8" for the small reveal.
-
This is a bit more than a box joint as those fingers are 1 1/2" each.. I'll be the first to admit that I need a box joint sled and might have to give that one a look..
-
Bandsaw for the most part. I nibbled away the middle finger at the TS after the kerfs were cut at the band saw.
-
Got the top portion completed today! That was more work than I thought it was going to be to be honest! Anyway, it's square and the square plugs are epoxied in.. I should be able to attach it to the top tomorrow, do some finish sanding, and get some finish on this project..