Every purchase made through our Amazon Affiliate Page helps support this site
Kev
-
Posts
6,323 -
Joined
-
Last visited
-
Days Won
583
Content Type
Profiles
Forums
Downloads
Gallery
Events
Store
Articles
Blogs
Everything posted by Kev
-
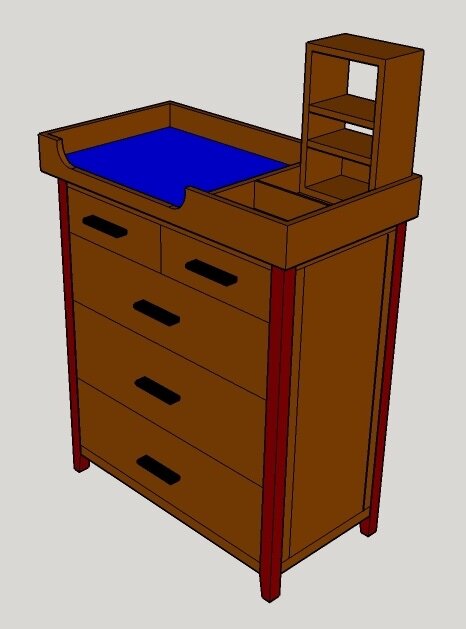
Yes, the initial top will simply be scrapped when it's no longer needed as a changing table. I'll use figure 8s and pre-drill the long term top as well. As for finish, I'm seriously considering Rubio. I was really happy with how it came out on the router bit case. The changing section will have a custom mattress pad with removable plastic covering as well as washable sheets. I will probably apply a few coats of poly and wax to the ply under this section to ease of clean up for the accidents that will certainly happen.
-
Starting a new topic here and will journal as I go.. Obviously, there will be a video as well at the end but, I'm sure we'll have lots of good discussions here along the way.. No domino on this one.. Traditional M&T. 2 tops. The changing table top will be BB ply wrapped in Walnut. This top will go away in a few years so, I just couldn't justify doing it in walnut. I've got some 6/4 walnut coming for the long term top. Both tops will go with the changing table when we deliver it.. Pretty sure I'll add some gentle curves to the rails as well even though I didn't add them in the drawing. The drawing is more to keep me on track. Here we go!
-
Well, it's taken me a long time here and several "expensive wood" fires to finally find some people that want what's in my scrap bin! Took a visit to a local craft fair to find some people making small projects that were perfect for what was in my scrap bin. Those of you who know me know I'm a huge fan of paying it forward! It was a healthy cleaning of my scrap bin today but, I know it's all going to a fantastic home where it will be turned into some pretty cool projects! I'm really hoping he joins the forums and shares some of the work as he makes some pretty cool stuff! So, tip of the day... Try not to burn that stuff! Pay it forward and give it to a turner or someone that builds small projects.
-
yea, I was talking about your long splines in your miters.. The jig you used on your router table could be used on the small box miter sled and those could be cut at the table saw
-
The length of the piece is nearly irrelevant.. Set your router table jig on the small box miter sled and clamp it down.
-
If you add the latest addition to the small box miter sled, you can cut those length wise splines at the TS on that sled.. It's essentially the same jig, just clamped into the sled with a little T-track added for work holding.. You could probably make this one work.. Super nice job regardless of how you got it done!
-
Looks like we're in a similar boat! French cleat walls for foreign to this hobby so, they think it's the best thing since peanut butter!
-
Not sure who locked this topic but, I unlocked it.. If there was a reason for it to be locked, please PM me and let me know..
-
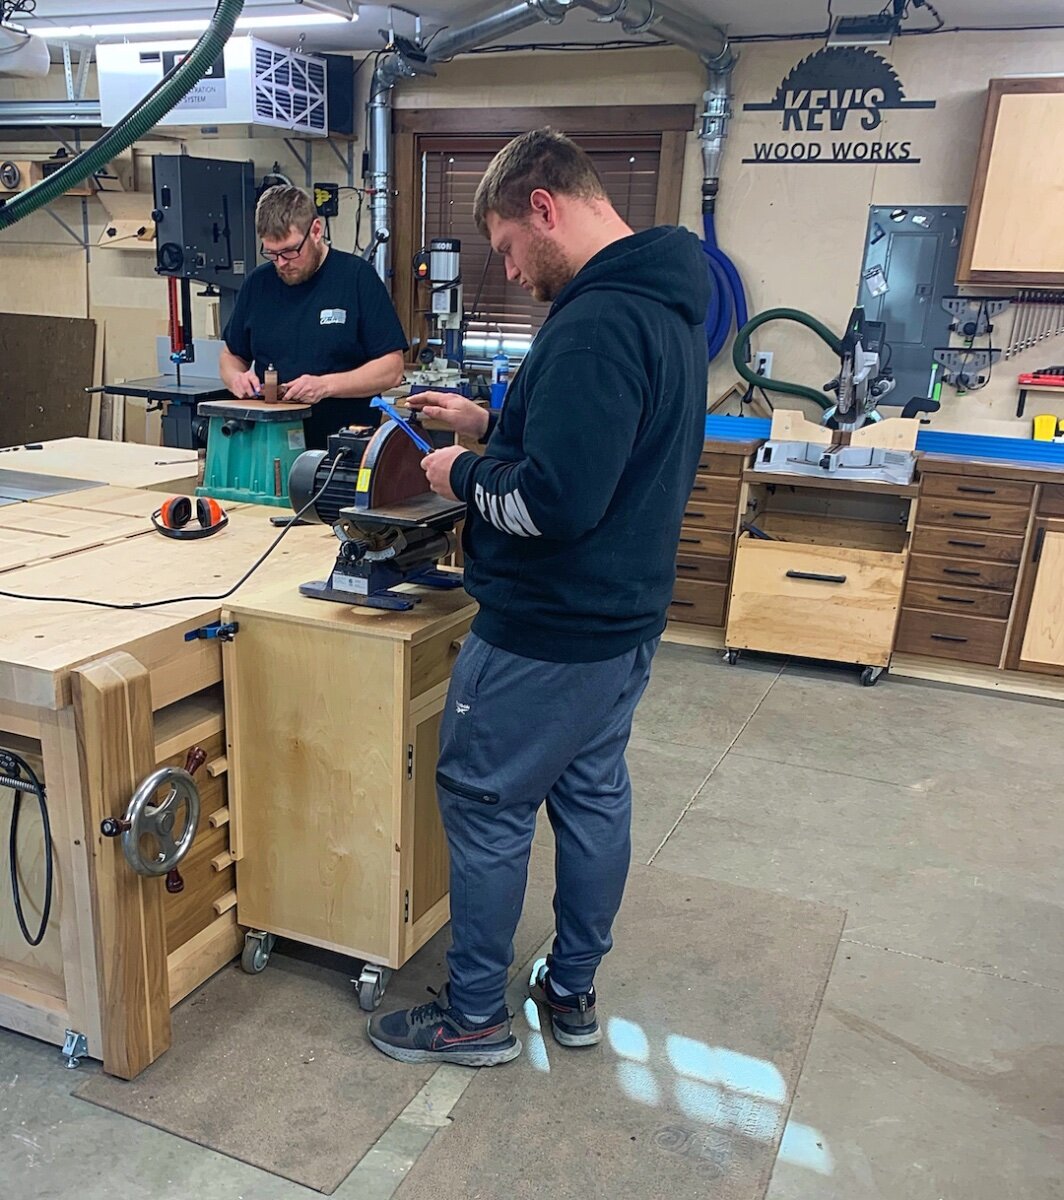
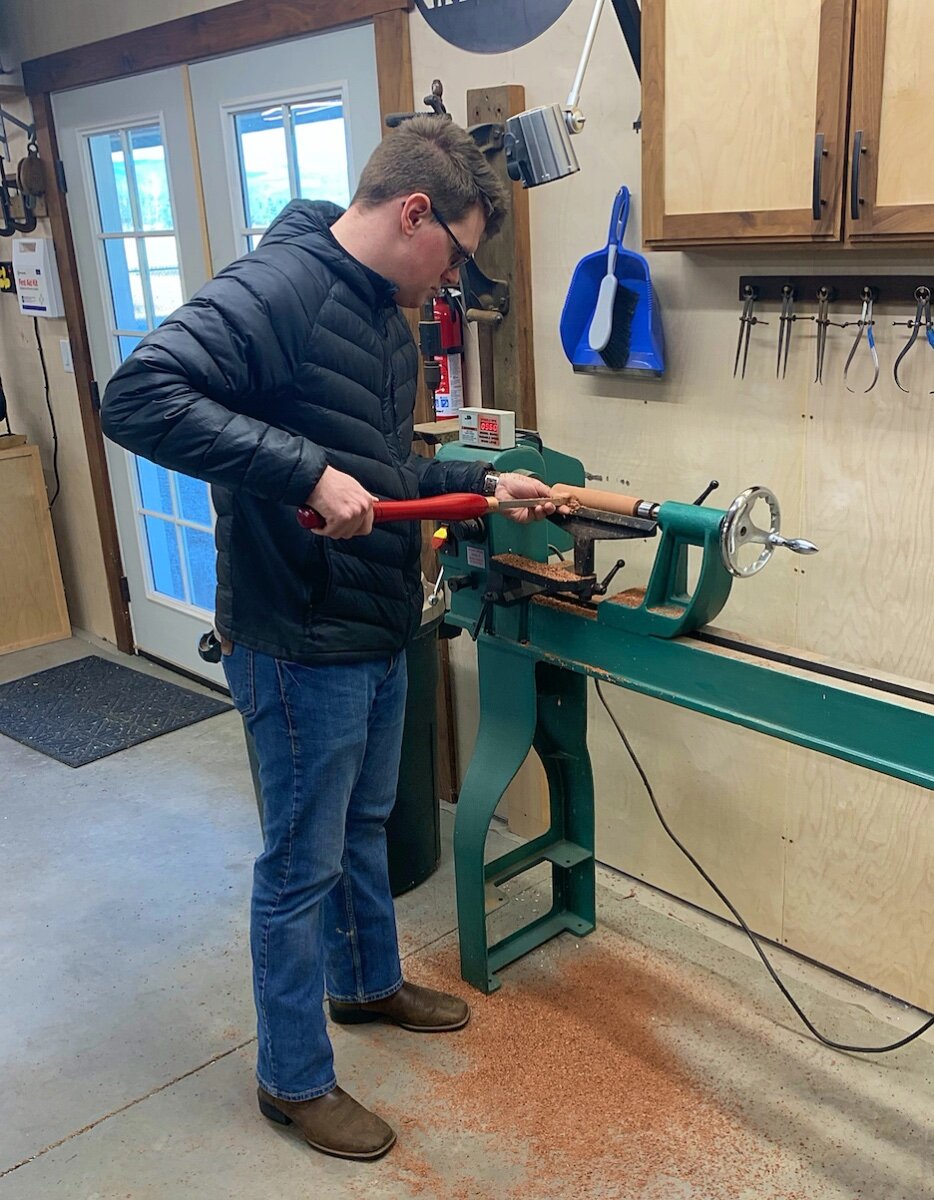
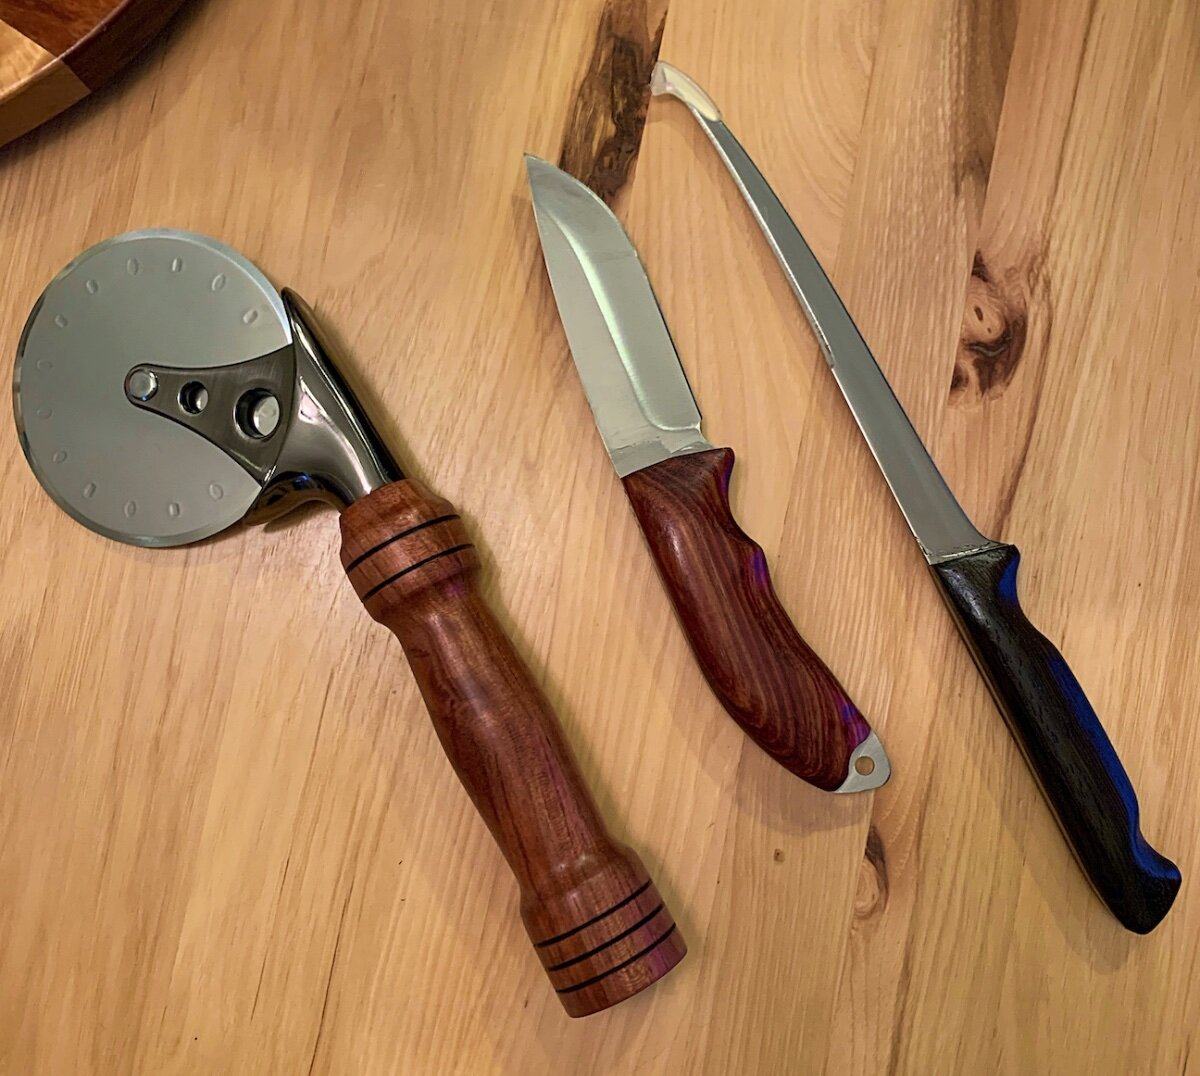
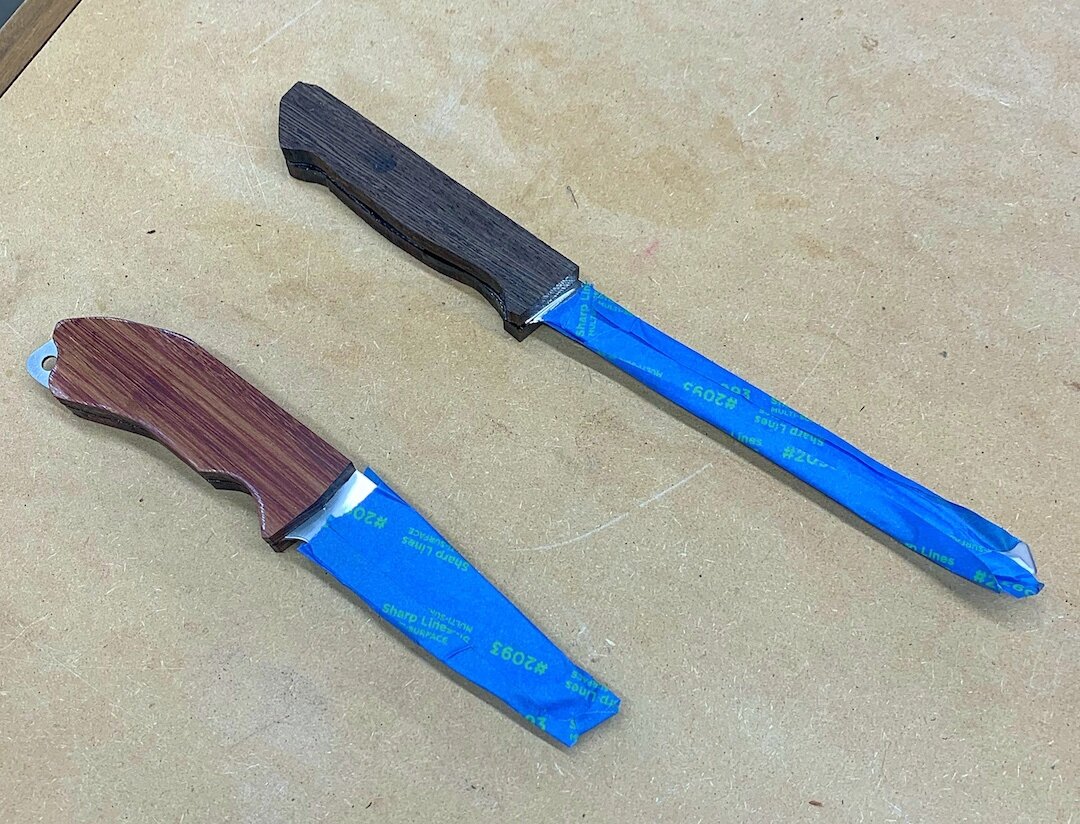
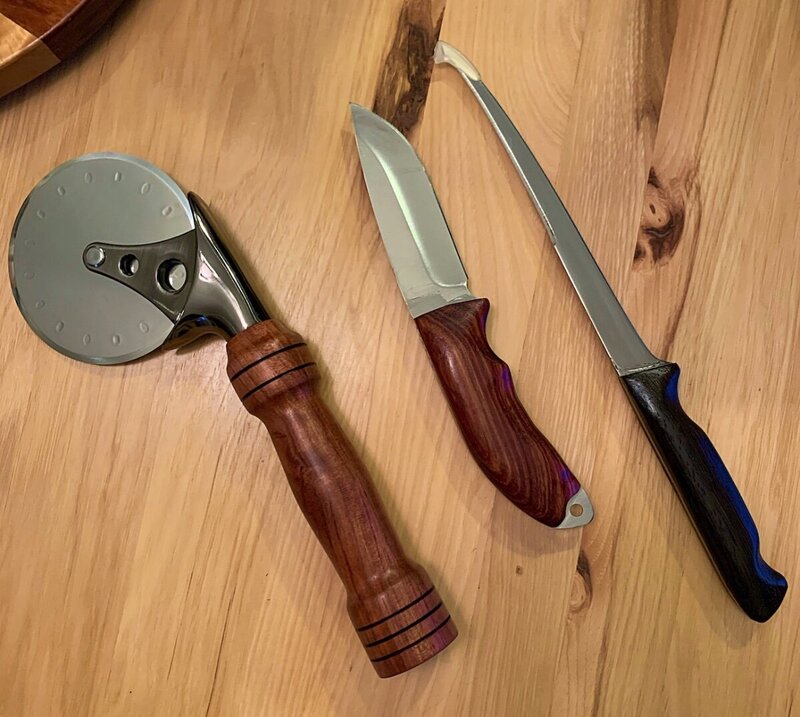
Turned out to be an interesting day! Here's the older boys working on their knife handles.. And the youngest one (You know him as Webmaster) turning his pizza cutter.. It wasn't but a few minutes after these pictures were taken that one of the visiting dogs (The older boys both brought their dogs) ripped off a dew claw and needed a visit to our vet. So, while most were gone dealing with that, I worked 2 of the projects at one time to stay on pace with the one boy who stayed behind. So, when everyone returned from the vet, all 3 projects were on pace to be finished up in a timely manner. This is the reason for so few pictures.. For the record, the dog is fine and doesn't seem to mind his bandage at all. Here's the finished projects.. Blades on the knives still need some clean up but, that can be done anytime. Finished with ARS followed up with a few coats of lacquer. The Pizza cutter didn't get any lacquer..


-
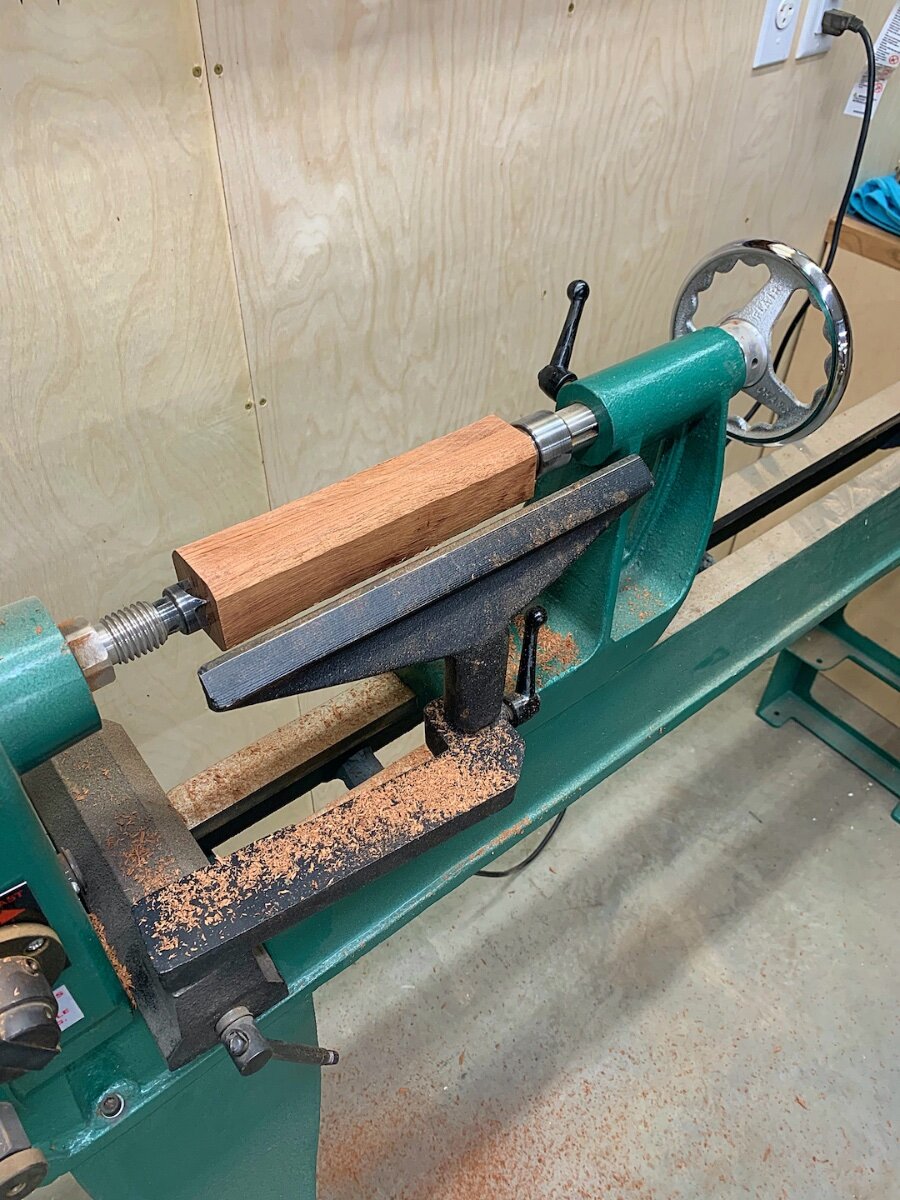
Spent the morning doing a little more prep for the kids to take over... Got the knife blanks out of the clamps and cleaned up the epoxy squeeze out at the blade with a chisel. I also added another layer of blue tape to protect fingers as they are sharp. All ready for shaping with the various tools/options in the shop. I also got the turning project set up on the lathe. I didn't start this on the table saw by taking the corners off, I did that at the lathe. This just makes it a little safer for someone inexperienced on the lathe. I also set up a couple calipers for him so he'll know what to work to.. All of these project are only supposed to be a couple hours so, we'll see how they go.. I'll make sure they get to take their projects home when they go.


-
For those that didn't know, my family is doing the holidays a little different this year. With all 3 boys being married now, we have to be flexible around their spouses families during this time of year. Add to that the 11 hour travel (Over 3 mountain passes) for 2/3 of them and my crazy work schedule, it just really gets tricky to plan time to get everyone together. So, this year we're doing a combo Thanksgiving and Christmas at the same time. In the early years, me and the boys would often go to the shop together and build many of the Christmas gifts that ended up under the tree. As the boys got older, this evolve to only me doing this task. And, as they got married, this transitioned with some sort of craft project in the house or shop that would also include the additions to the family (Daughter in Laws). This year, my wife had selected some Christmas tree ornaments that the Boys really weren't interested in doing. So, fortunately I was able to give them some shop options because I keep a fair amount of those project's hardware on hand. The 2 older boys each selected a different type of knife and the youngest one wanted a pizza cutter. Since we'll be doing these projects tomorrow, I needed to get into the shop today to do a little set up so that these projects could be pulled off in a couple hours. Not the best picture below but, this is the skins of 2 knives epoxied onto their knife blanks (Bubinga and Wenge) as well as some Bubinga glued up (using the left over epoxy) to be thick enough to turn a handle for the pizza cutter. They each chose their own species for their project. I'll snag some more pictures tomorrow as the boys are working on their individual pieces.. Now, off to do our Thanksgiving - fresh off the Traeger - and then watch the kids put up the tree and load it up with presents.
-
Video is up!
-
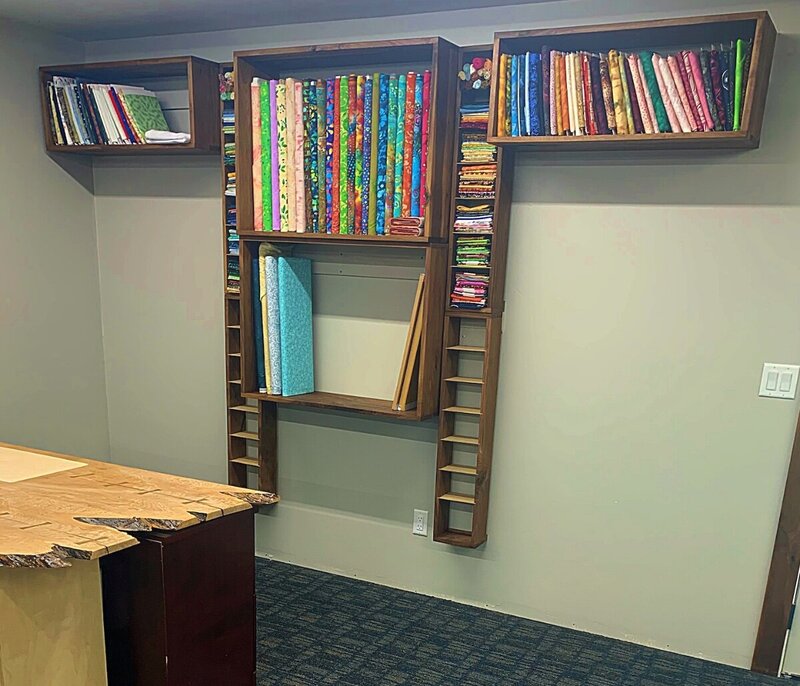
Well, it didn't take long for my wife to let me know what she needed me to do with the walnut stash I recently acquired...lol I added 2 more of the small fabric boxes (vertical ones) and one more of the large cabinets for the bolts. She still wants 2 more of the mediums but, I didn't have enough walnut on hand to pull both of those off so, they'll have to wait. Simple boxes left "rustic" per her request. Left over free plywood sheet protector stock for the small shelves in the vertical boxes. Finished in ARS and hung on a French cleat. No fancy joinery, butt joints and screws as they can't be seen.
-
Happy Thanksgiving to all! I have a lot to be thankful for and one of those things is this group! May you all have a great holiday and enjoy some time with your families!
-
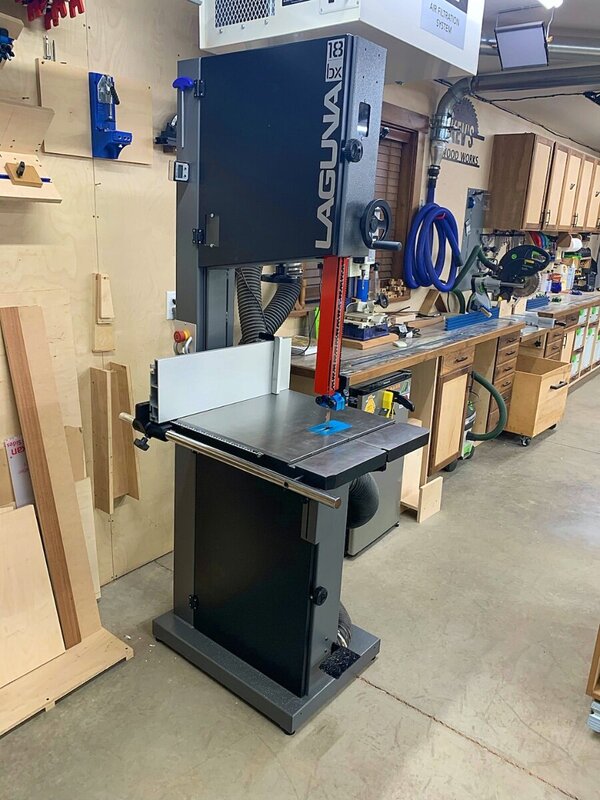
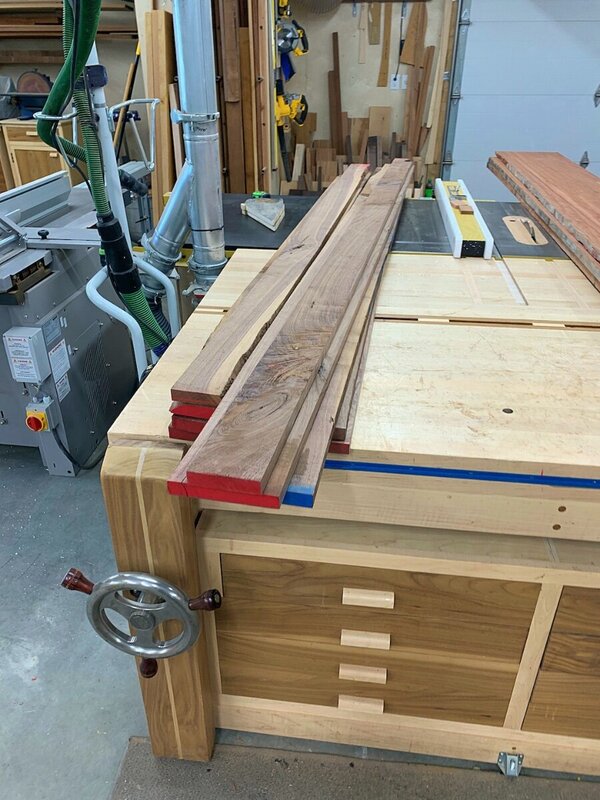
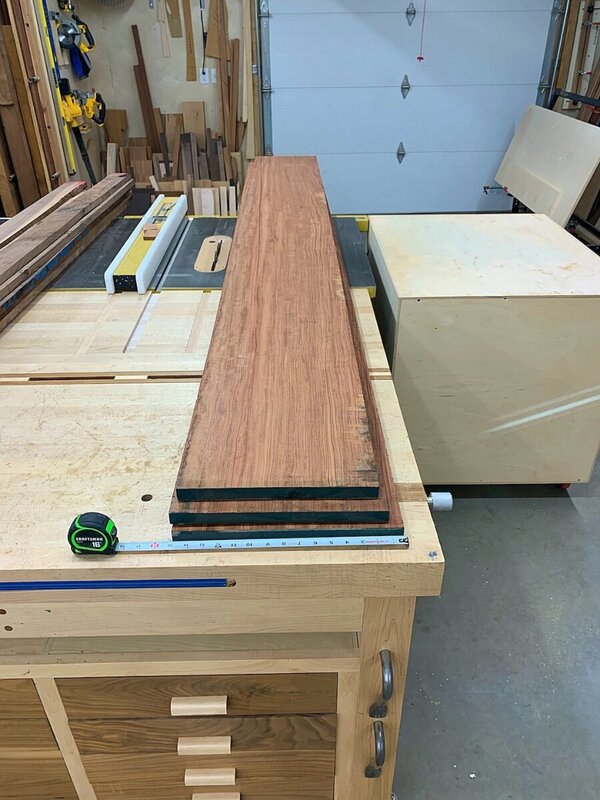
I have a few small projects for my wife's quilting room and was running low on Walnut in the shop so, it was time for the great deal with my local dealer for stuff he couldn't sell.. He didn't have much this year.. And, his prices were pretty darn good on the Bubinga that he had so I couldn't resist.. Wide boards to boot! For the record..... Those 2 piles equaled exactly what I sold the old bandsaw for.. Kind of seems strange to essentially trade lumber for tools...lol
-
I'll be releasing this video this week.
-
I realized today that it's been over a year since I shot that video.. Just in case anyone else wants the video, here it is...
-
If you're only looking for a small piece, I have some scrap laying about that you're welcome to..
-
I have quite a bit of extra on hand because I still have some drawers in the shop that I haven't made decisions on yet..
-
lol.. Once the "need to replace before I retire" equipment is taken care of, I just might replace that table saw.
-
Fingers! Take a look at my under table saw storage video, I use it in that video..
-
No.. It's a bit taller as was the old one..
-
Believe it or not, I was hoping to get the Harvey as well.. Things just didn't line up quite right and this fell in my lap. I set it up with a 3/4" Resaw King so, I'm looking forward to cutting something thin to test it out!
-
All set up! Just need to wax the table and slide it into its home.. Was helpful that I set one of these up not too long ago! I like that this one comes with a stopblock for the fence! I need to check and see if it works on the other saw..