Every purchase made through our Amazon Affiliate Page helps support this site

Jamie
-
Posts
1,467 -
Joined
-
Last visited
-
Days Won
54
Content Type
Profiles
Forums
Downloads
Gallery
Events
Store
Articles
Blogs
Everything posted by Jamie
-
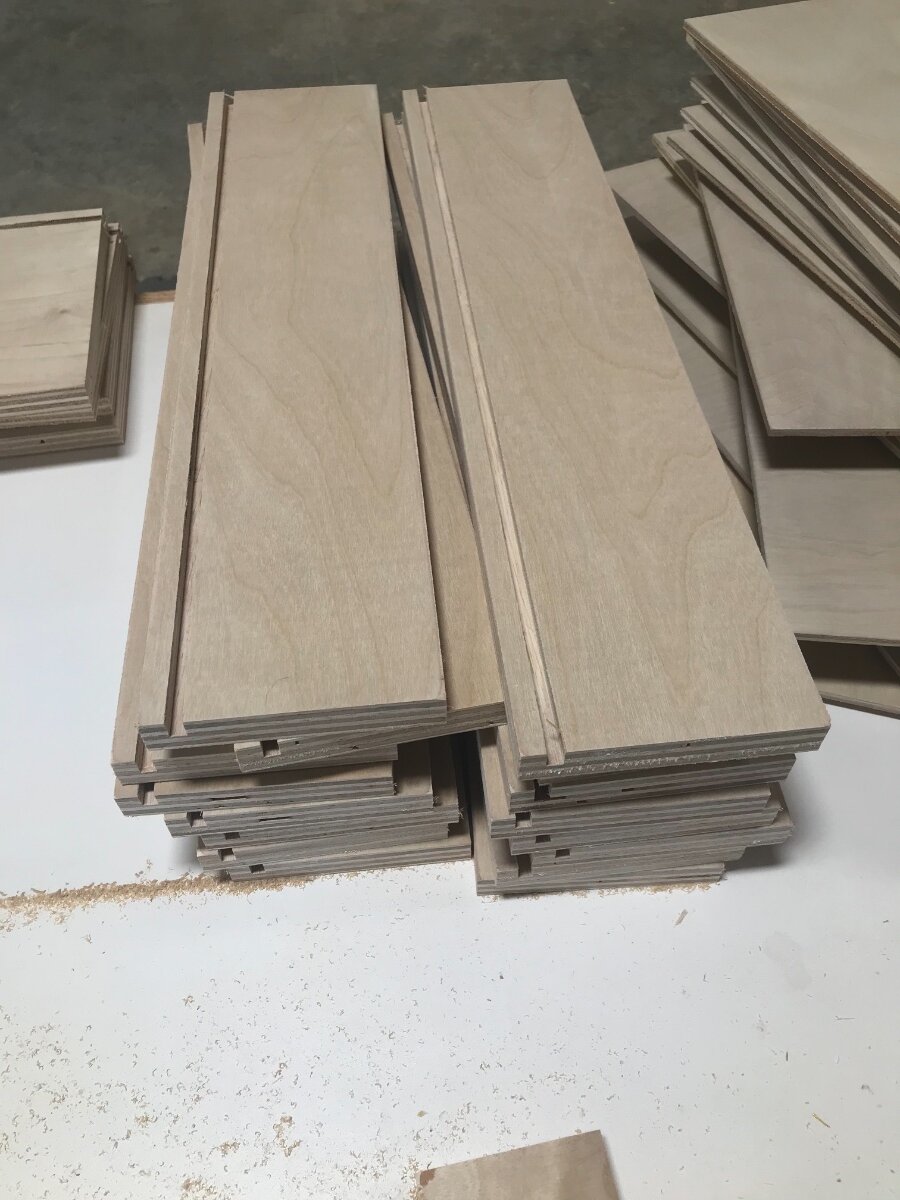
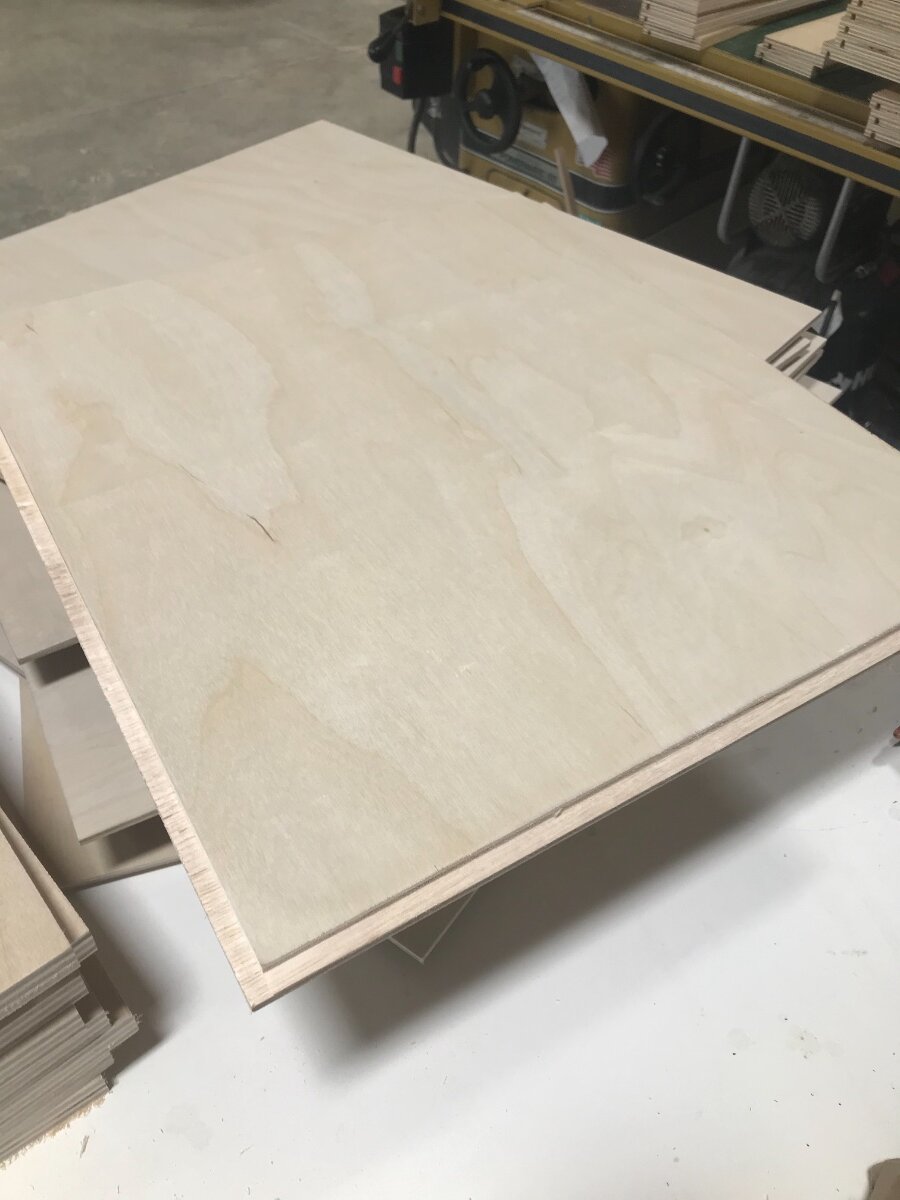
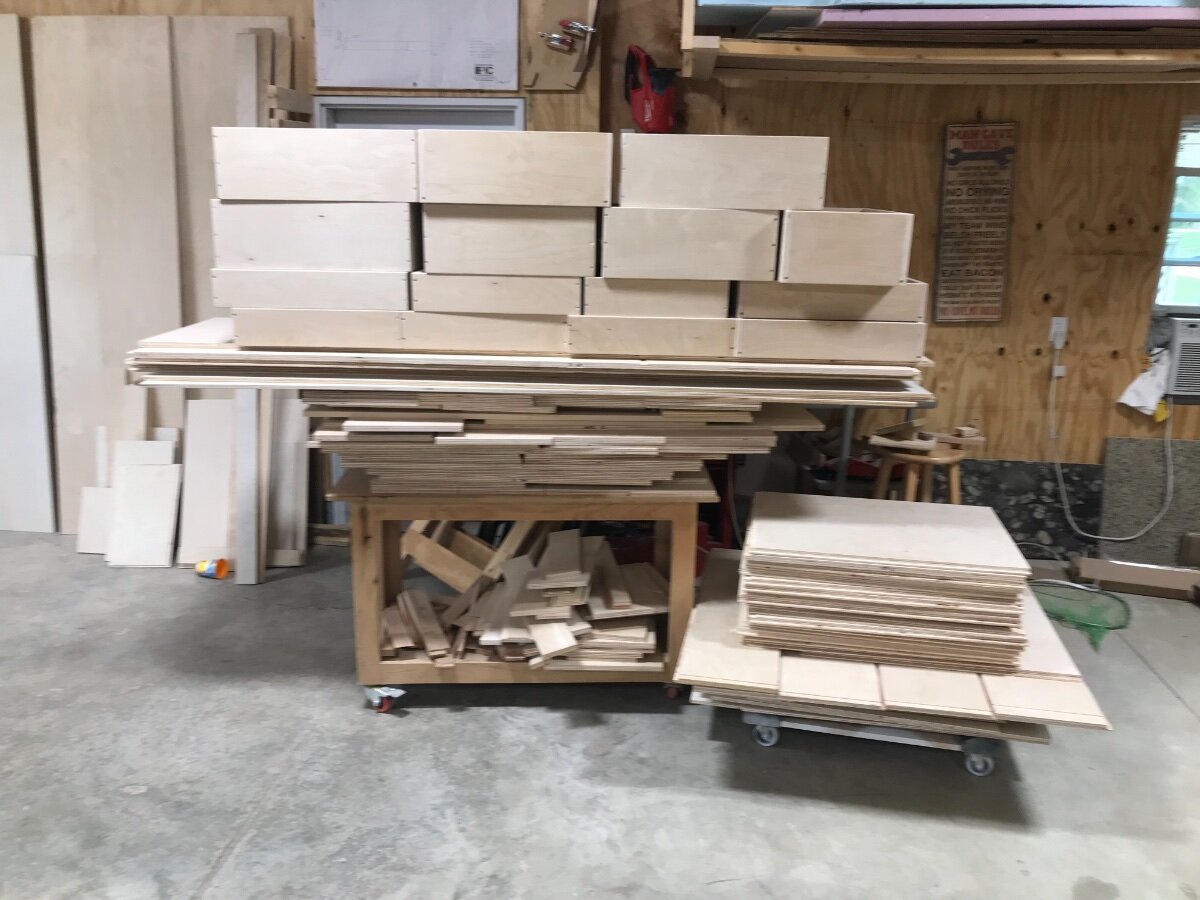
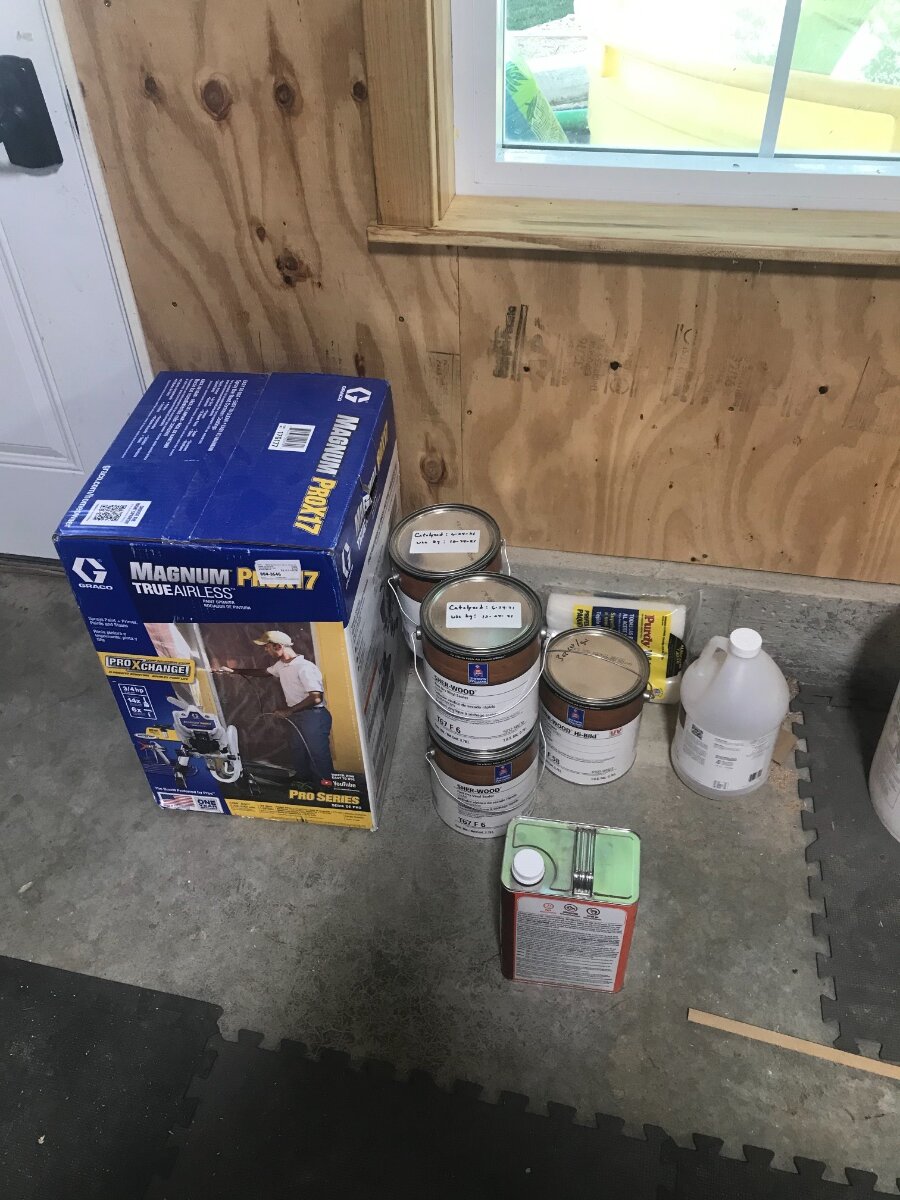
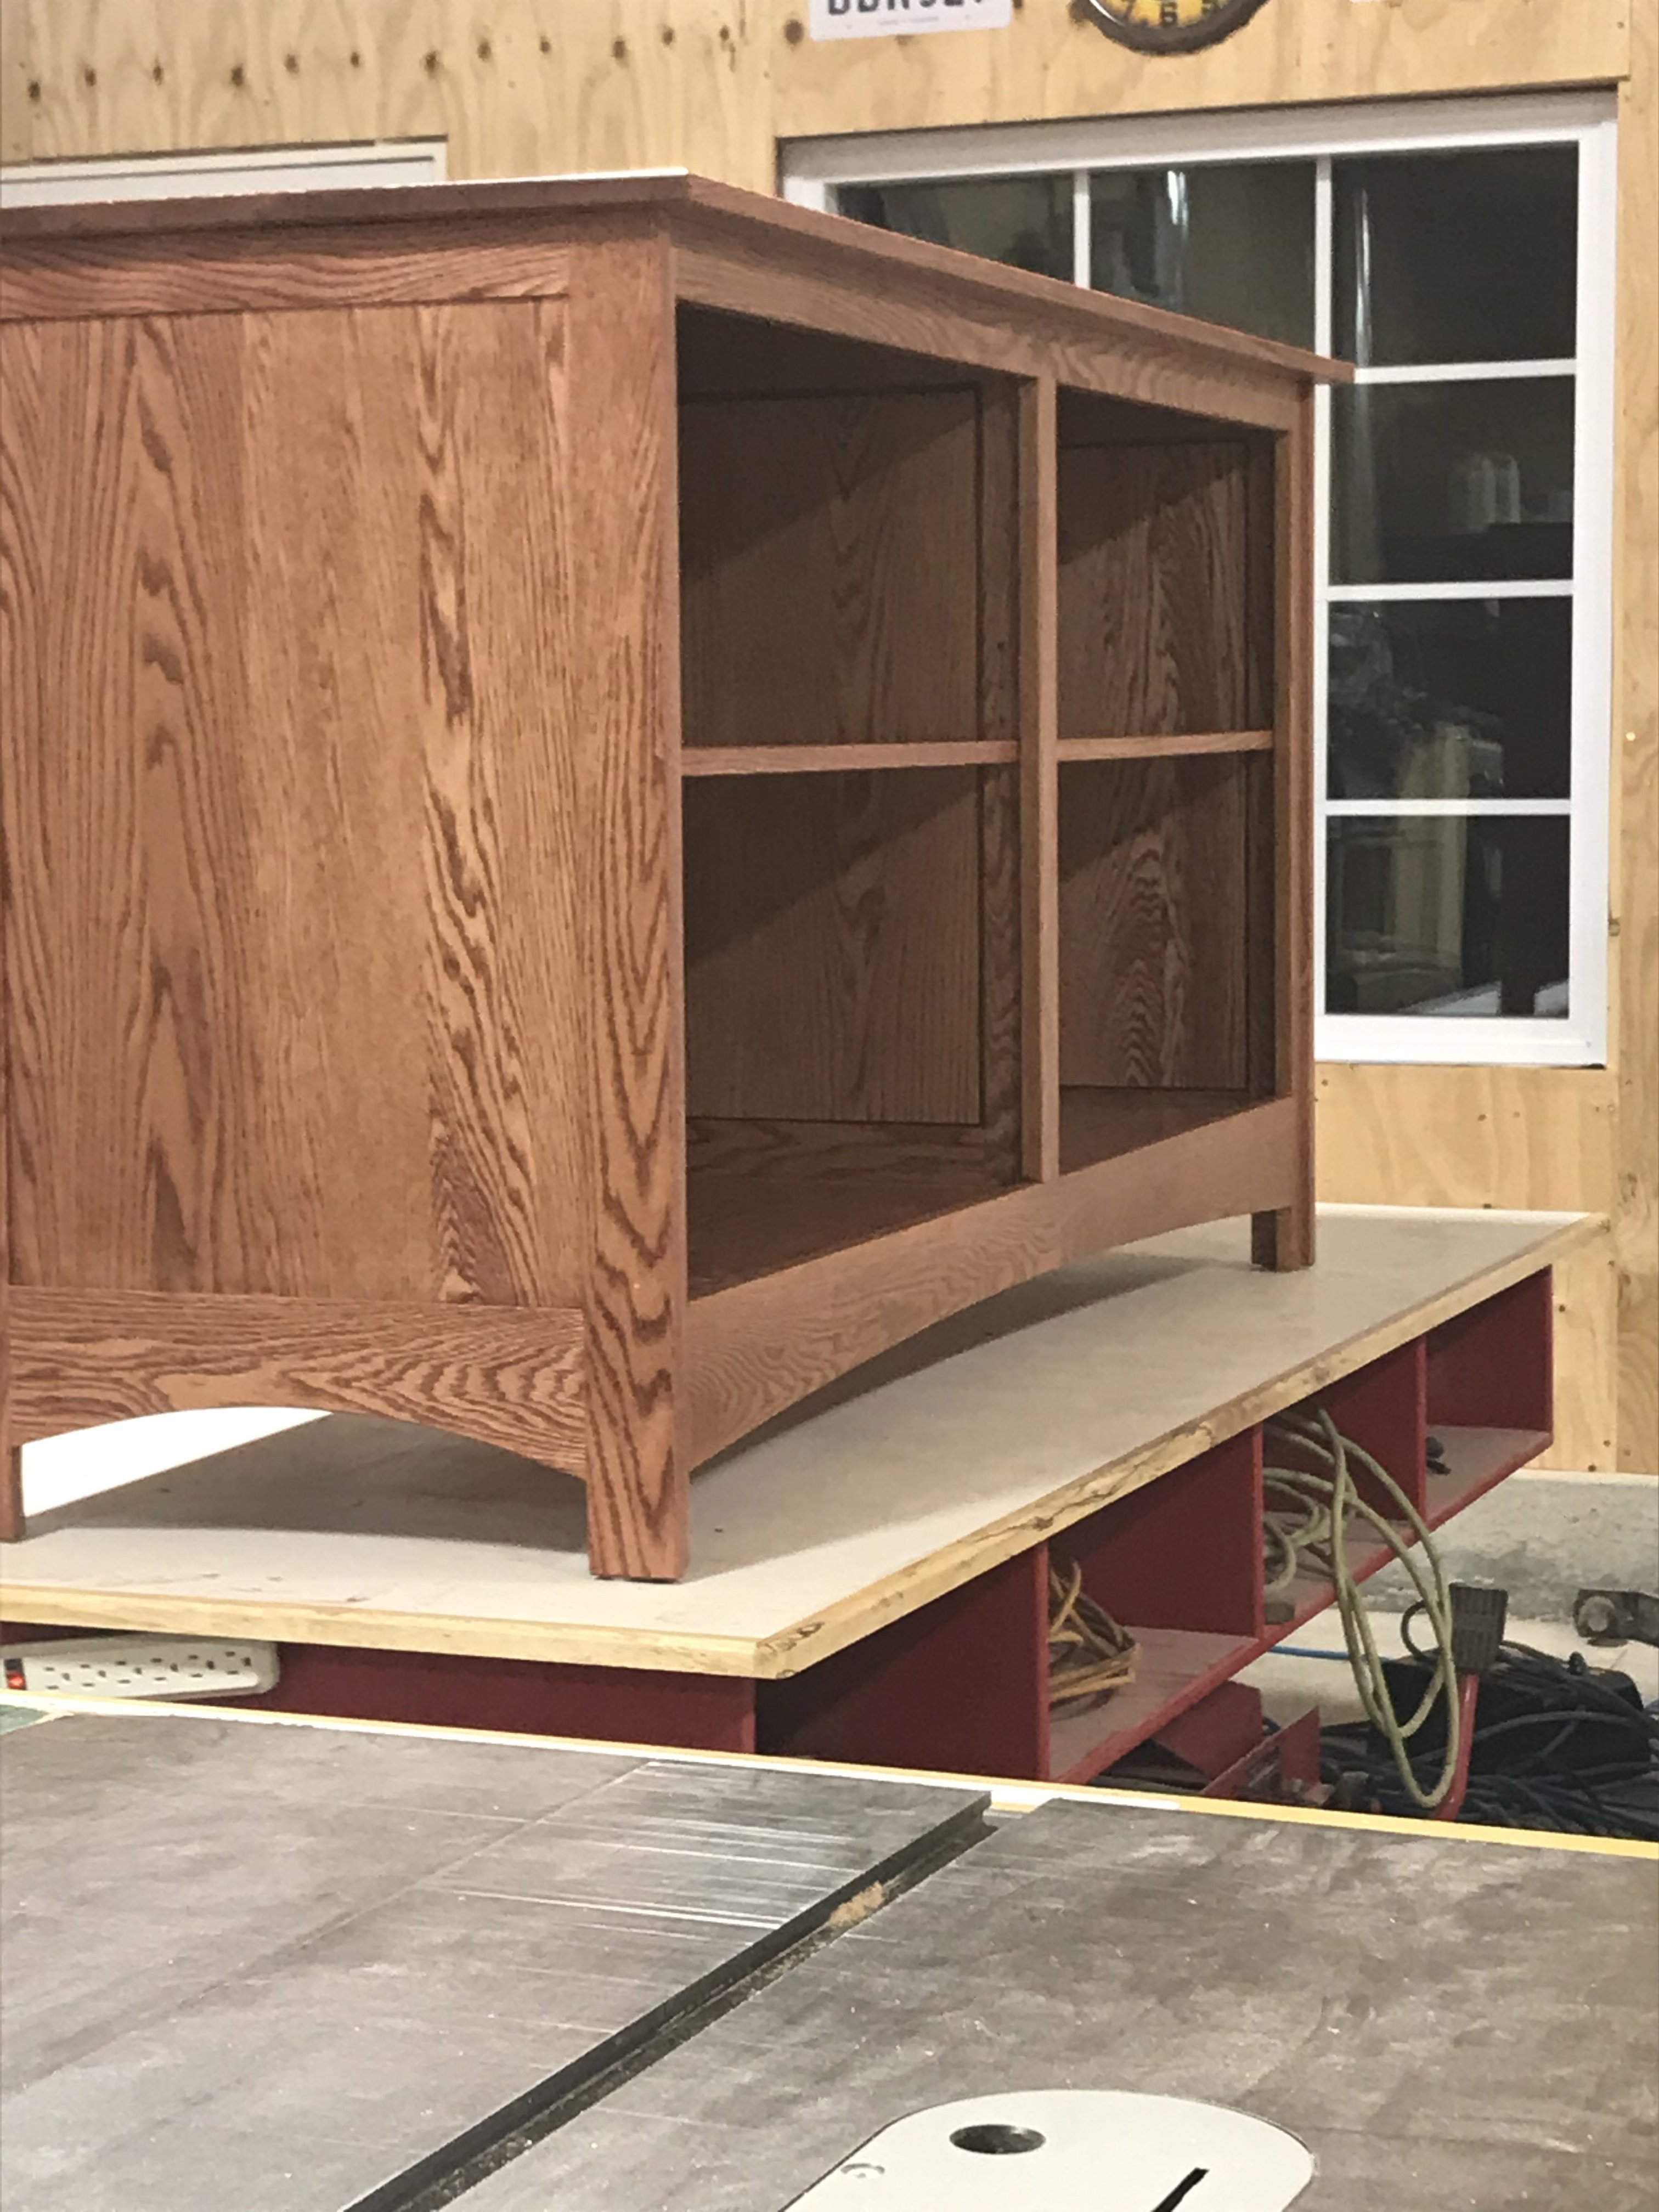
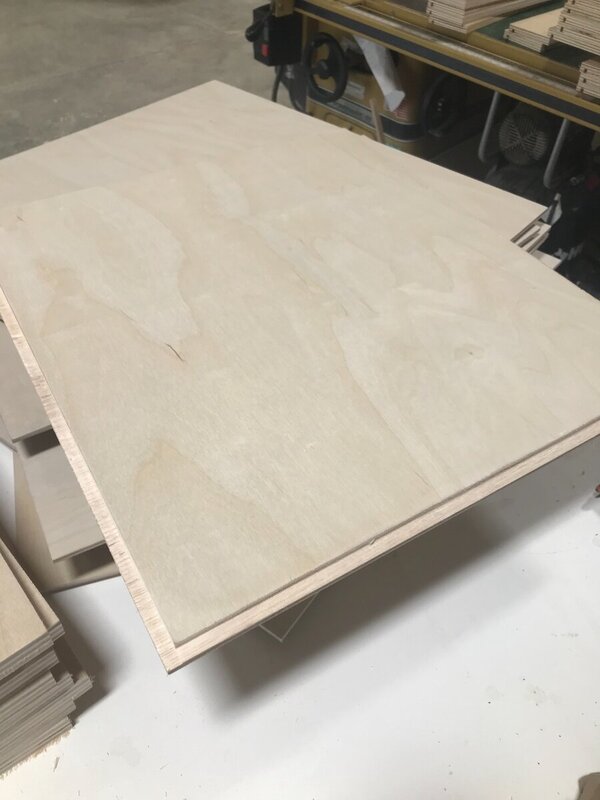
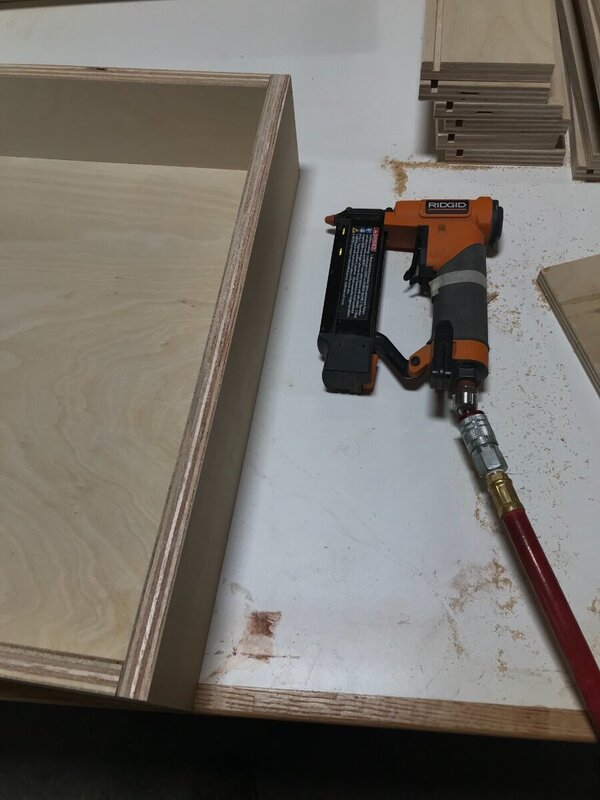
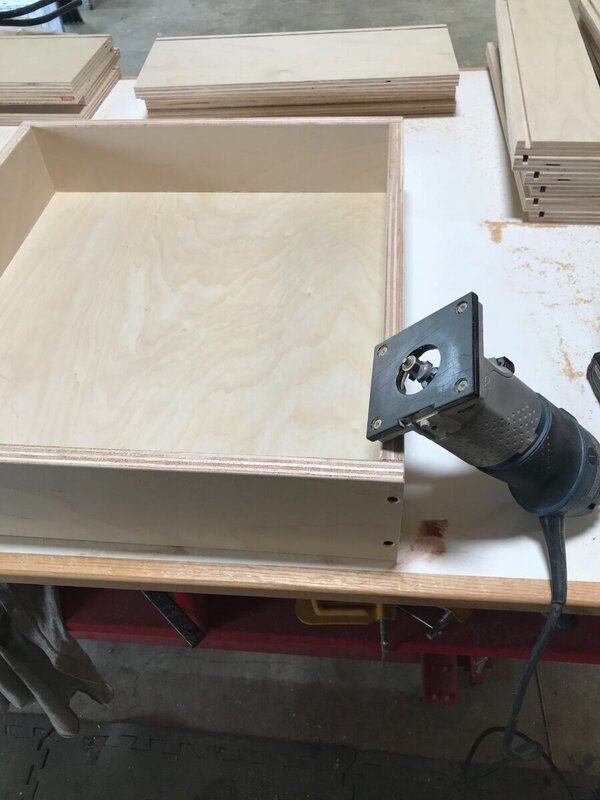
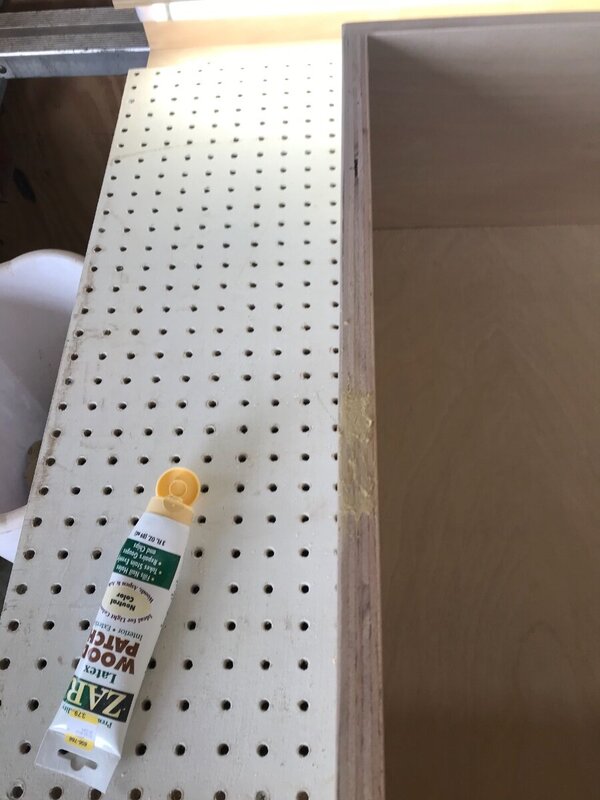
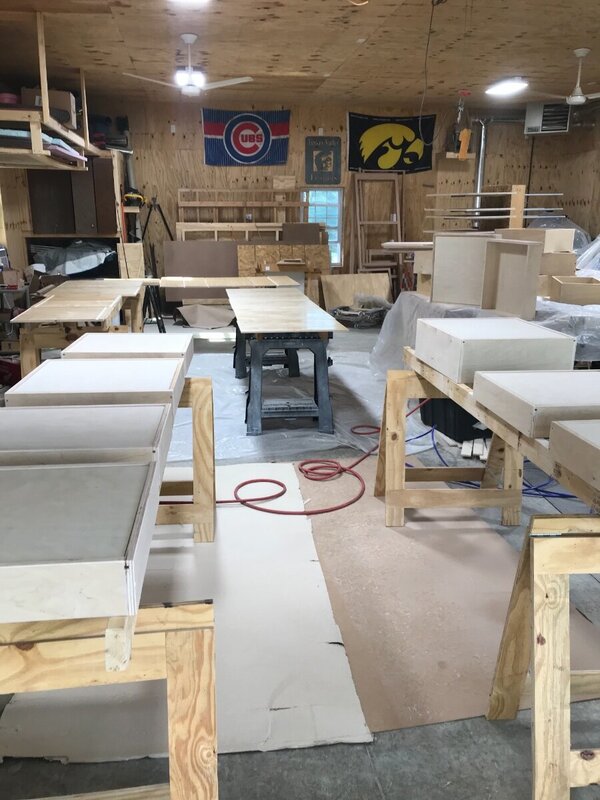
Well it’s been kinda slow going on this project the last few weeks. I would find a random hour here and there to work on it. This weekend that changed, spent the better part of both days in the shop. Was talking with the client and she decided to go with plywood drawer boxes. Typically I would go with a lighter colored wood like maple or birch to make the box sides and dovetail them. So this was a little change for me. Kicked it around on how I was going to put them together and decided just glue and screw with butt joints. The drawer sides got a 1/4 grove cut in them to accept the 1/2 bottom that gets a rabbit on the edges so it fit the grove. The inside face of the drawer box gets sanded before assembly along with the bottom. I used a pin nailer to hold the parts in place till I could get a couple screws in. I ended up switching to the 18g nailer after a couple boxes as the pins weren’t holding very well. I then would countersink a hole and put a 1 3/4” screw in. Was really the first project that I got to use the m18 surge impact driver and was really impressed with how quiet it is. It runs pretty fast so did over drive a couple screws at the start. With the box assembled I took an 1/8 round over bit to the top and bottom. Trying to reduce the chances of a snag on the plywood veneer. It’s an imported plywood that I am using and the quality and veneer thickness is less than deserving of a positive comment. I had some latex wood filler laying around that I used to fill some of the voids in the plys. Really wasn’t to many of them to fill and is a step that I’m glad I took. Most of the plywood and drawers ready to get finish put on them. Happy to say I did get all the play wood and drawers sprayed tonight. The new sprayer worked perfectly and will be ordering a little wider spray pattern tip for it. The 412 tip I got was for a different style gun and wouldn’t fit this one. Used the 311 to get by for today. I did grossly underestimate the amount of finish that I actually needed. I had 2 gallons on the sealer and 3 of the top coat. Burned them up really fast. My brother came down today so I had him pick me up 5 gallons of each to see the project through. All the dados were glue is going to be applied get taped off. Am really happy with the progress this weekend. Wanted to be at this point as we are taking off for Colorado to take in some sites.

-
Late to the party here but will throw in my 2 cents, I did some outdoor furniture chairs about 20 years ago out of redwood. These chairs have not been maintained much if any over that time and have sat outside not protected from the elements at all. I have power washed and stained them once in those years. Now saying that they have greyed overtime but are showing no signs of rot.
-
Im with Bryan on this one, I think the filler strips make it look like an after thought. I'd leave them out, nobody will ever notice that little detail. With adding them I think it will draw attention to it.
-
Yeah I’m a little nervous about it. Back 20 years ago at the cabinet shop we used one very similar to it. I think it was a 495. Used that sprayer for a number of years and it was bullet proof. I didn’t think the clean up on it was to bad. Then again putting lacquer through it and not paint. All we did was flush it with lacquer thinner at the end of the day. When starting up the next day by flushing the thinner back out with lacquer or sealer. I did talk with a local guy who sprays finish for a living, he mentioned that the only sprayer that he uses is the graco 395 and he thought that this one would be about the same just more of a home owner model. So it’s an experiment. I did pick up some different tips than what it came with, a 311 and a 412. He recommended the 412 is what he sprays with 95% of the time. I should note he uses the exact same product that I do. If it doesn’t work it’s not the end of the world as I have some painting projects coming up in the next few years that it will be used for.
-
Sorry coop didn’t see this till now. Yes they are. The back is also flush, all door parts are planed to .820 then ran through the shaper. After assembled they are sent through the drum sander. This set of doors cleaned up at .770.
-
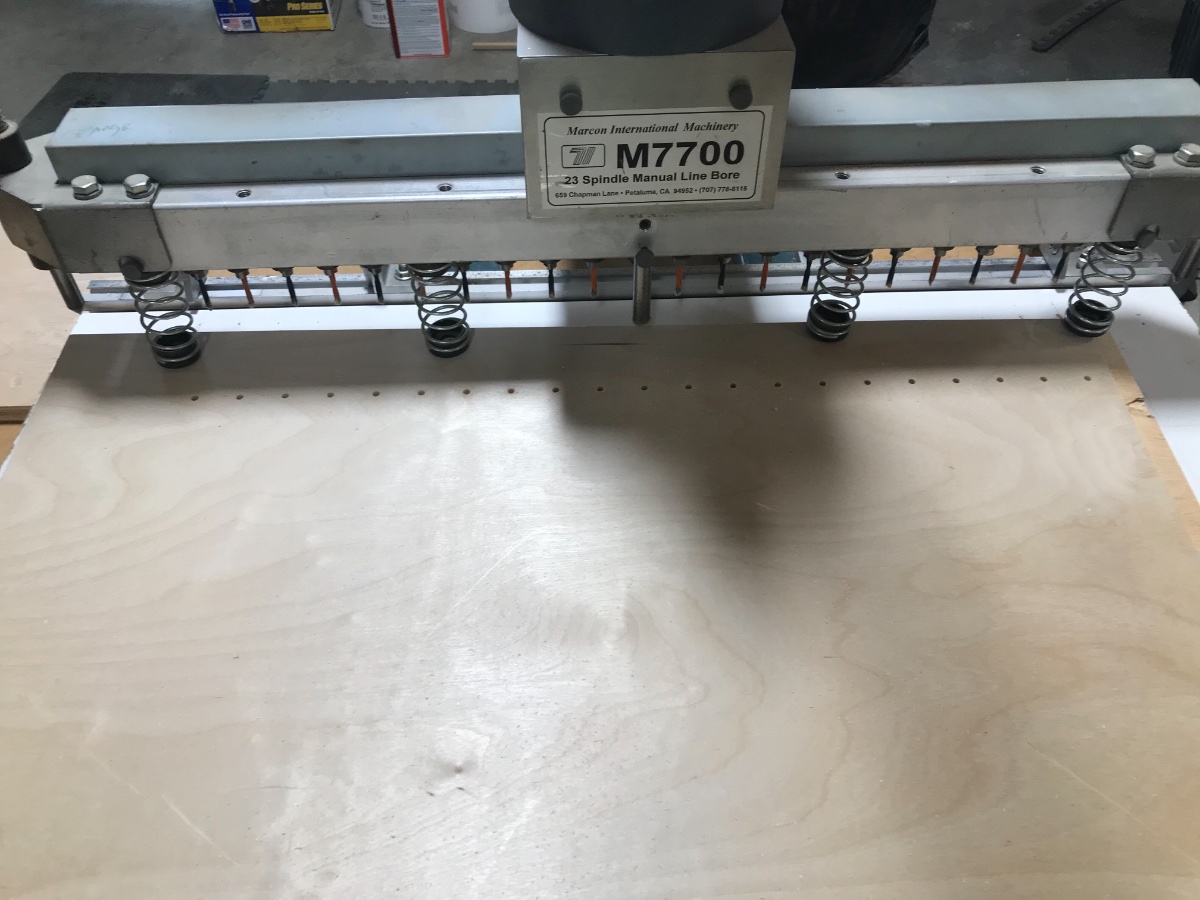
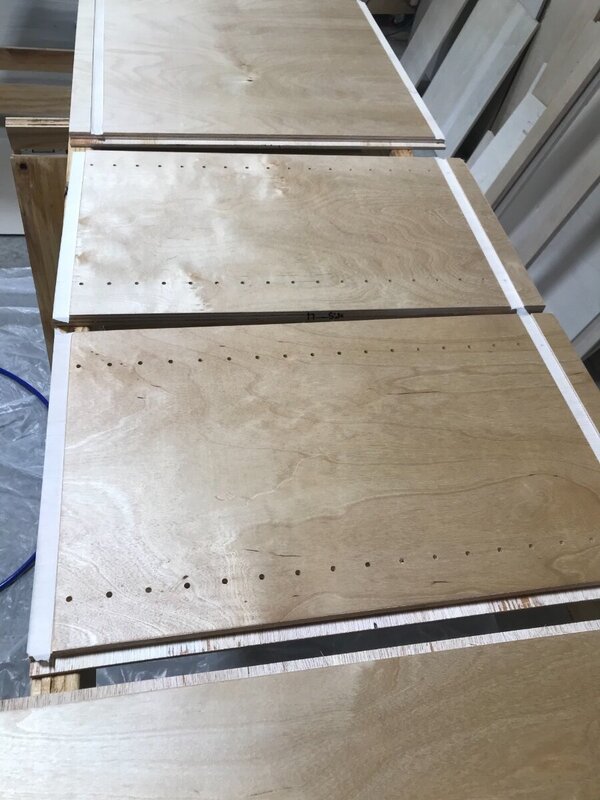
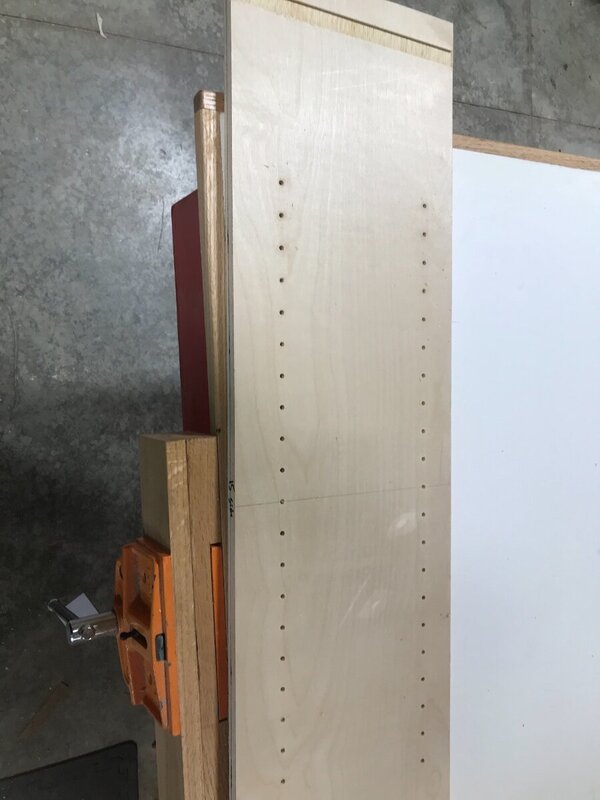
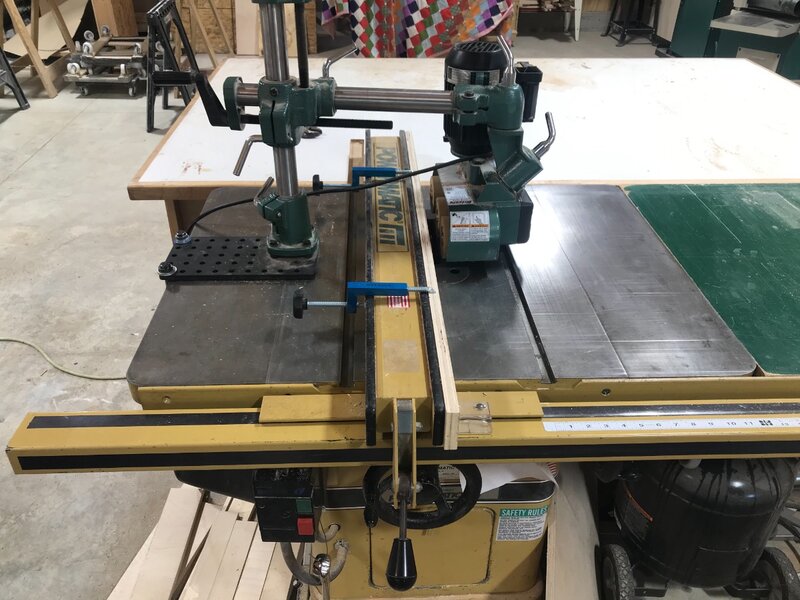
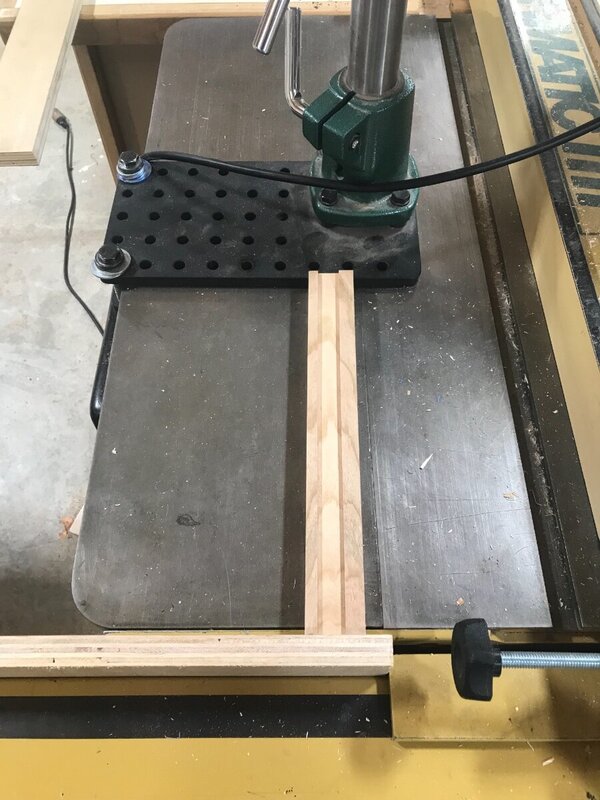
Haven’t gotten much time in on this project the last couple weeks. Well mostly because I was waiting on picking up the line bore machine. Took a day off work and drove up to the twin cities to pick it up. Did take a little time in getting it setup, I ended up taking the left and right end bits out to make it a 21 shot. It just seems to line up better for base cabinets being that way. The hole placement on a base cabinet side is pretty critical. I use a spacer to bump the drawer slide over so it is flush with the face frames. The plastic spacer is screwed into the shelf hole. I line the drawer slide up with the elongated holes. Then drill each set of holes, making sure to register off the bottom of each side. The upper cabinets are 42” tall so for their holes I mark center and line the bit up by eye. The bits are carbide with a Brad point. All the plywood is cut, dados in and groves along with the shelf holes. Have it all staged around the sanding table. Will hit it all quickly with 180 grit. Will knock off all sharp edges and hit the finished face looking for any scratches or dents. It goes pretty quick. Did get a different finish gun for this project along with the finish. What’s left to build is the drawers which I need to get material for yet, some crown molding along with a few other trim strips, the 1/4” cherry skins need to be cut, and build the toe kick bases.


-
I’d kill to have a riving knife! It’s more of a mental safety feature for me. With my pm I put in the aftermarket splitter system in the insert plate. I was scared to death of my saw before I had it in, now it’s an extra sense of security. I know it has prevented kickbacks with it in.
-
I run a lawn care business. Mostly spraying and fertilizing with just a little mowing. Currently have 4 full time guys and 2 part time. Not counting myself. The business is owned by a local co-op which works out well. They let me go like it’s my baby and have the benefits of being tied to a bigger company.
-
Lol I am right there with ya. The nice thing about cabinets for me is that it funds quite a bit of equipment.
-
Thanks! Well word has gotten out that I am building a set of cabinets and have been approached by 2 other people other than my wife about possibly building theirs as well. Not sure how I feel about building cabinets that often but if I do it might be nice to keep it around. But of course can always sell it.
-
@Woodenskye (Bryan) took my first thoughts. Great idea on this video. We can a use a refresher
-
I’m curious on the durability of both. Since they don’t really build up my worries with them on say a coffee table is the long term. Also if used in a situation like that where a water ring can easily happen how hard are they to refinish?
-
Found another couple auctions pop up in the last few weeks. Did end up getting a few items at one. Bad part is its in St. Paul MN about 3 hours from home. Will be taking Friday off to head up to get the items. Big item was a line bore machine. Picked it up for under $400 bid, throw the buyers premium on and tax and it was around $450. It is a one trick pony and will take up more space than I like but with the cabinet build going on it will be super handy. Also with this set of cabinets my wife is getting kinda anxious to have a new set for herself. I will assume that our kitchen remodel will take place in the next couple years. Also picked up a set of new bits for the line bore along with a couple routers, a drywall screw gun, a craftsman molding head for a tablesaw and a couple other small items. Figured if I was going to make the trip I would grab some bargains.
-
I believe it is a design flaw without the shroud. Have used saws in the past that have a shroud and do a pretty good job. Still have some sneak by. I am really considering and over head arm for the saw. Not only for safety but for dust collection. The cabinet filling up doesn't bother me a whole lot, its the spray that comes off the blade that drives me nuts. For most of the projects in my shop im not busting up 25 sheets of plywood so its not a huge deal. Thank you all for your input!
-
Looks great! I’m blown away on the amount of detail and time you all spend on shop cabinets. I need to take notes 🙂
-
Thanks @Kev Im a little late to this but happy Father’s Day to you all! Hopefully you all got a little spoiled!
-
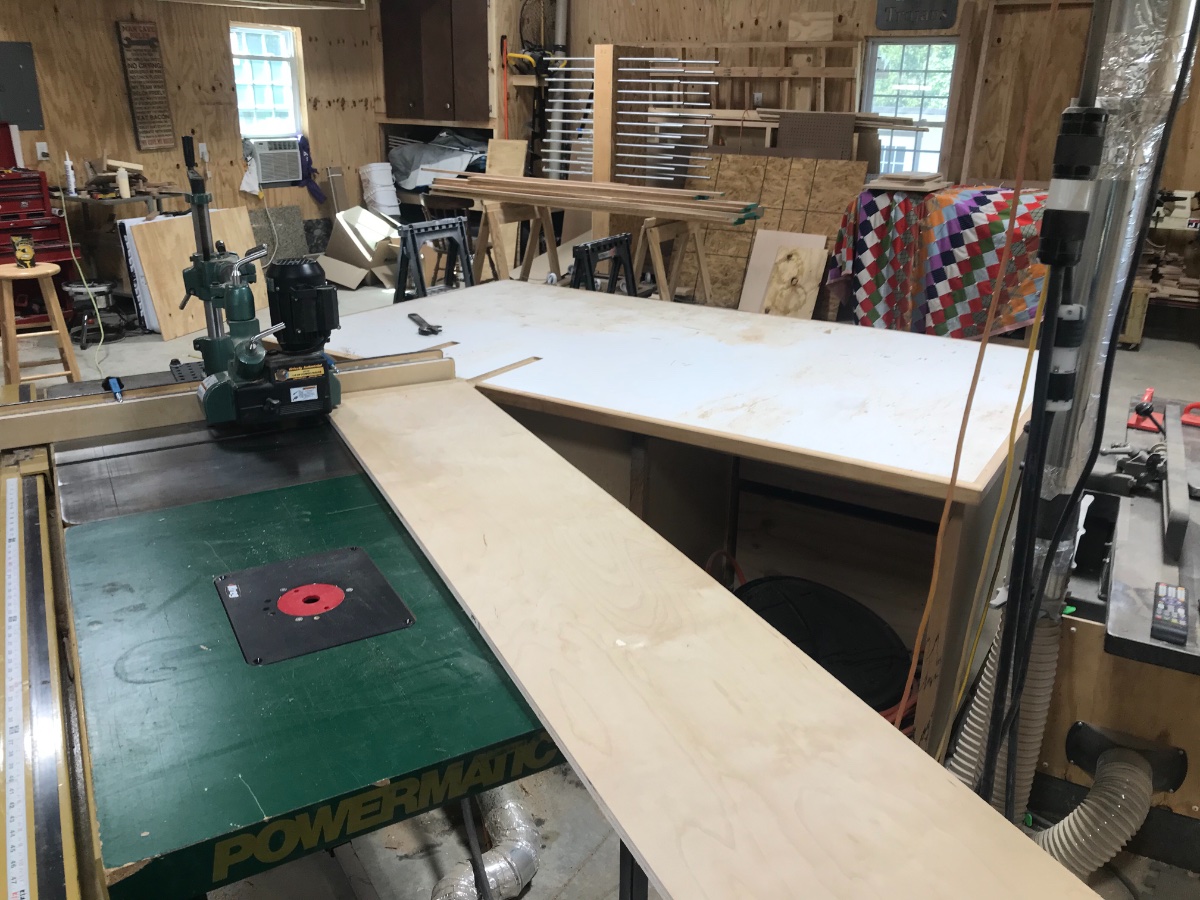
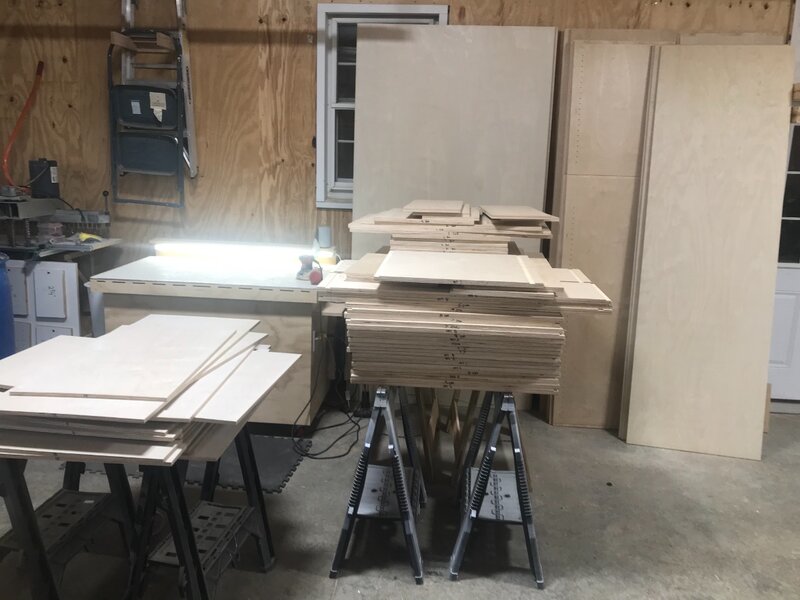
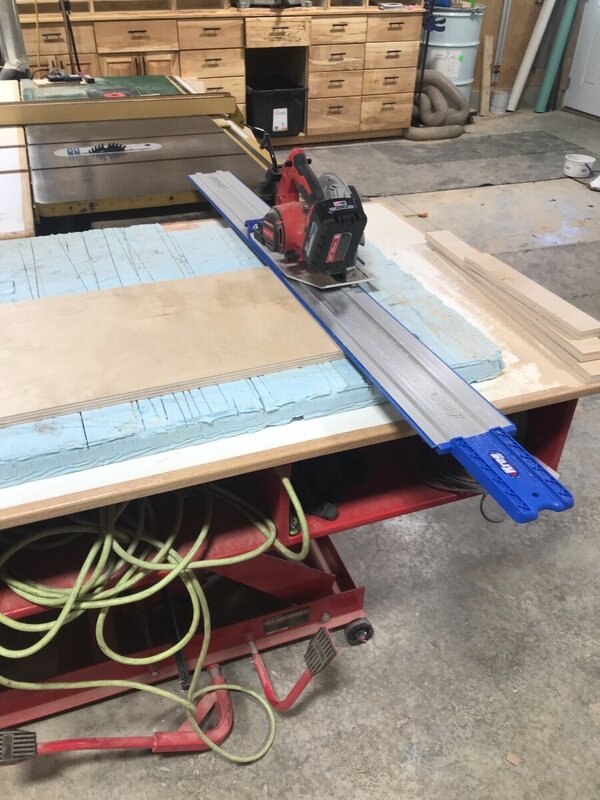
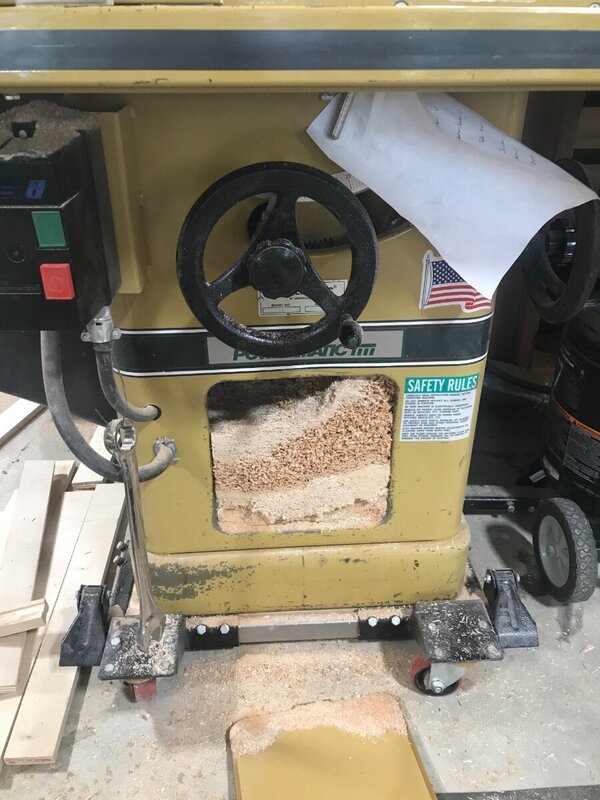
Plywood parts all cut to size, my neighbor bought the kreg rip cut track and had me try it out for him. Only made a handful of cuts with it, it worked......ok. Not over impressed but not thinking it was a complete waste of money. Should say all the 3/4 ply is cut to size. Haven’t started on the 1/2 which is the cabinet backs and drawer bottoms. Set the power feeder up to assist with the dados and rabbit cuts. Dust collection pipe was in the way for the taller cabinets, happy it’s on wheels to slide it back and gain the clearance. I didn’t get any pictures of the cabinet sides with the completed cuts in them but will show once the shelf holes are all in. Put the dado in the backs of the face frames as long as I had the stack set up. Ran into a little trouble with the power feeder wanting to shift. Did a quick wedge between the fence tube and the base which kept it from sliding. Am considering drilling a couple holes through the extension wing to bolt the base down. Not sure if I want to mess up my cast iron top tho. What would you guys do? With all the cutting on this project the tablesaw filled with dust. That has to be my biggest complaint about the saw. The dust collection is in the bottom of the cabinet and is not very effective.


-
It always makes a difference if you dont have to spend money on a shop project.
-
Gotcha, not sure how set you are on the plexi glass, if you did a solid panel door could hang things on the inside of it. Just throwing ideas at ya not trying to over analyze it.
-
Yeah I understand the eye level thing. As I get older and the belly grows its not as fun digging around at ground level. 🙂 Are you thinking a deeper drawer to hold the wrenches and other items or going to hang them somehow?
-
Does your current router table have a cabinet under it? Might be an option to use some space up.
-
For inset I would build them tight. Leaves you plenty of room to trim. You can still size them to your 1/16" under by increasing your rail and stile width. If you do that just remember to cut your stiles a longer to accommodate that extra rail width.
-
Sagulator.......going to have to google this one.
-
I think the 1/4 was a wise choice.
-
The grain during the ply shouldn’t make one bit of difference. That is a big shelf tho......using 1/4” pins or 5mm?