
Every purchase made through our Amazon Affiliate Page helps support this site


Bushwacked
-
Posts
1,605 -
Joined
-
Last visited
-
Days Won
98
Content Type
Profiles
Forums
Downloads
Gallery
Events
Store
Articles
Blogs
Posts posted by Bushwacked
-
-
you too Coop!!
-
 2
2
-
-
I brought this up awhile back on the old forums, but it did not make the cut over here ?
I am curious what you all are using in between finish coats. I am not sure what are good sponges to use that all my cans recommend. I normally have just been hand sanding with 320 to 400 grit paper between coats, which I am assuming there is a better way ... wanted to get yalls thoughts on it.
-
14 hours ago, Coop said:
Too little too late but you can register with BM as a contractor and the price goes WAY down per gallon. All you need is a tax id number of any sort. I swear by their paint.
going to need to get a tax ID number then somehow ? Then I can claim a company vehicle too when I purchase a new one
-
1 hour ago, Kev said:
1. Your respirator will answer that question for you. If you notice it's a little harder to breath through, that's a good sign. Most manufacturers usually suggest about 8 hours of use on most filters. IMO, that's conservative for liability reasons on their part. I'm usually comfortable with about 15 to 20 hours on my HEPA and OV filters. OV filters are easier to tell.. If you smell it, replace them.
2. Depends on the site. Many sites I go to don't get many OSHA visits because they spend the money to hire people like me. In the course of my daily activities though, this is one of the things that I'm looking for. Industrial setting is a little different. If 15 people take off their respirator and hang them up while they're at break, how the hell do they remember which one is theirs when they return? They don't have name tags...lol. You'd probably be shocked if I told you how many of these I've thrown in the trash because they were left out on a job site.
man that few hours, even with your 15-20? I am assuming people wearing a mask with P100's on them for dust are not changing their filters every other day if they are putting 6-8 days in. If this is the case, I need to change out mine too ? haha. That gets expensive.
Haha! If the refinery people are anything like the roughnecks ... not a shit was given.
32 minutes ago, Kev said:Does anyone feel this information should be expanded a little and added to the reference section?
I am all for learning, as this topic is somewhat new to me ... I know the basics, wear a mask, dont breath this crap in try to wear a mask as much as possible to protect your lungs. Although, gotta say, while I am cutting things on the tablesaw or mitersaw or really any of the big tools, I dont wear a mask. Now if I am cutting MDF, I will wear a mask as much as I remember to as that is nasty stuff.
-
2 hours ago, Kev said:
I have one.
They're awesome and do everything advertised very well!
With that said, they're not terribly user friendly unless you're using them a lot. I've had mine for a number of years and still have to break out the manual and watch YouTube to remember how.
this!! Love mine, but damn if it doesnt drive me crazy getting it set back up for use after some time away from it.
-
Amazing reply/info Kev!! Appreciate the thoroughness of it!! I haven’t actually stored my current mask in a sealed bag ... just normally blow it out when I’m ready to use it.
although it brings up a couple other questions ..
1) how do you know when your filters actually need to be replaced?
2) how many people do they actually catch with using the sealing bags?-
1
-
-
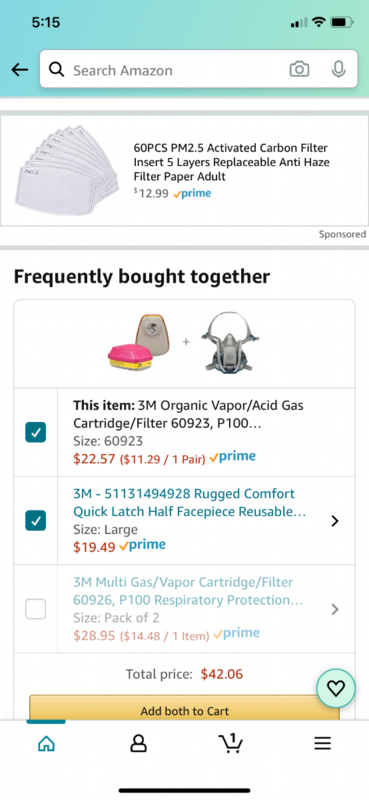
I am curious what y’all use while spraying finishes ... I need something, but not 100% sure what.
I was thinking this mask/filter combo??
-
4 minutes ago, Chet said:
When I originally did the cabinets I spent 6 months of days off making the cabinets and then took two weeks of vacation to tear out the old kitchen and put in the new stuff and get the kitchen operating again. You don't realize how much you use a kitchen sink until it's not there.
where did you store the build cabinets? I was thinking this would be my route, but free space is not that great so I would need to store somewhere in the house I guess until I get everything built and could rip out the old.
-
14 hours ago, Woodenskye (Bryan) said:
Drew, you may want to tell the wife it will take longer, then when you get it done faster you will get more brownie points.
Very wise words there ? ... going to have to remember that.
-
amazing work!! Corian is way better than the tile tops before ?
51 days eh? Thats quite the effort getting all this done. My wife has a redo of the kitchen cabinets on her list too! I will show her this and let her know this was 51 days and no big issues ... great way to level set its not a week project ?
-
2
-
 1
1
-
-
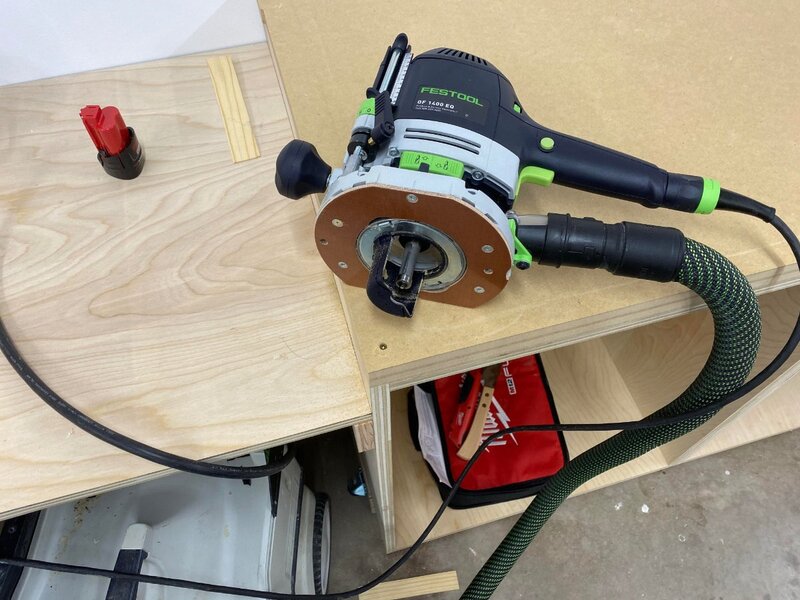
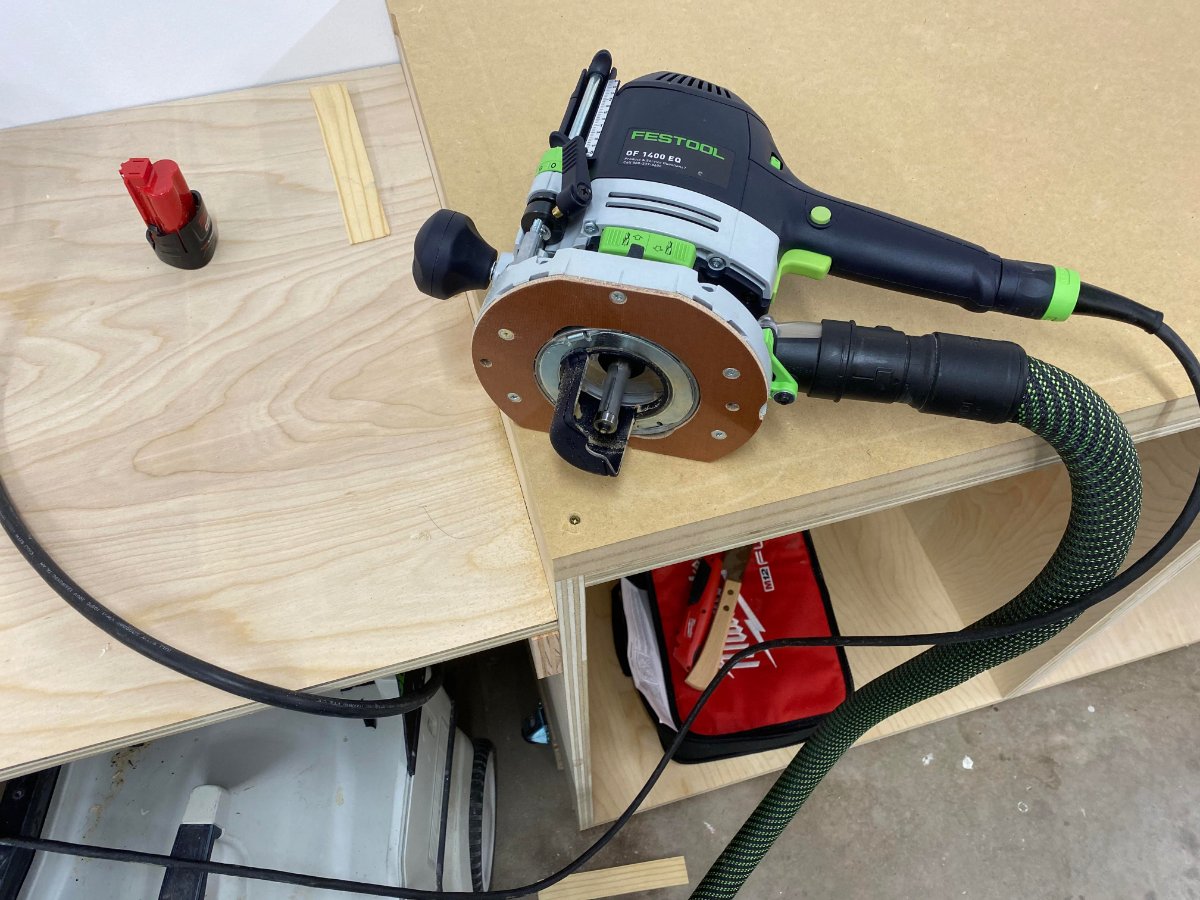
I dont have the red/black valve on mine ... is that an add on?
-
yes, hopefully they honor it and dont claim a whoopsy!
-
7 minutes ago, Coop said:
How did you decide to treat the boo boo?
not sure yet ... had my wifes brother and their kids come up this weekend so I had 0 time in the shop. For now, I have just put in the domino and glued and cut flush. Just wanted to get rid of the hole first .. I will take a look tomorrow and start thinking of what to do next.
-
2 minutes ago, Kev said:
Considering it's an inside piece in a climate controlled space, I would say it's fine. I will often times toss one coat of finish on stuff like that but, I don't know that it really helps. I certainly don't lose sleep if I didn't get a coat of finish in those areas!
gotcha ... then I wont work about it when I get there and just assemble then stain/finish as normal. Appreciate the 2nd opinion Kev!
-
1
-
-
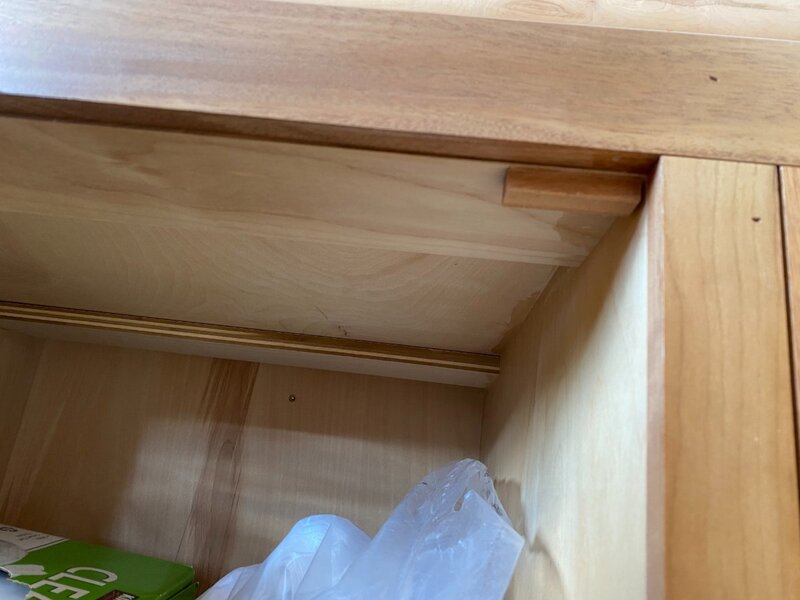
3 minutes ago, Kev said:
I must be missing something.. What "raw wood" would be left open by not pre-finishing?
The bottom of the top, if I dont prefinish, would be left with nothing since it will be screwed down to ply. Then about half of the apron would not be able to get any stain/finish from the ply and up. Is that OK?
-
9 minutes ago, Kev said:
Just my 2 worth!
If you're going to stain, I wouldn't bother with ARS.
If you're going to "pre-finish", just protect glue joints with blue tape.
So the only reason I am thinking I "should" prefinish is that if I do not, there will be a lot of raw wood left open to absorb moisture and all of that.
Am I wrong in thinking that? If I do not have to prefinish and could just install and then 1 last finish sanding and then stain/finish, that would be amazing.
-
just to prep for finishing ... I am curious on a couple things ..
1) For the top, do I just stain the top and sides, let dry then apply ARS to all of it? (top, bot and sides?)
2) For the aprons, I was going to finish those as well before installing, run a 3/4" piece of tape down the backs where I will install it to the ply, so I can add glue to it.
3) For the ply, Just throwing ARS on it like normal.
Once all that is done, then I spray everything with my GF high endurance?
Thoughts on that process of finishing this up once it gets ready?
-
testing ...
Maybe you are uploading too many at one time? Try 1 or 2?
-
1
-
-
I was debating on getting a 2nd gun .. I have the gravity feed one with mine, and was thinking of getting the bottom feed, whatever that is called. Mainly my thought process was I could really see if one works better than the other, then if they seem to be working about the same, use 1 for oil based things, then the other would be water based.
Not sure if that is the logic I should have using these, but it is what I was thinking of at least haha.
Now seeing this whip hose, I really may take a look at picking one of those up too. I have noticed in some cases my normal hose gets a little stiff for what I am trying to do or get to.
-
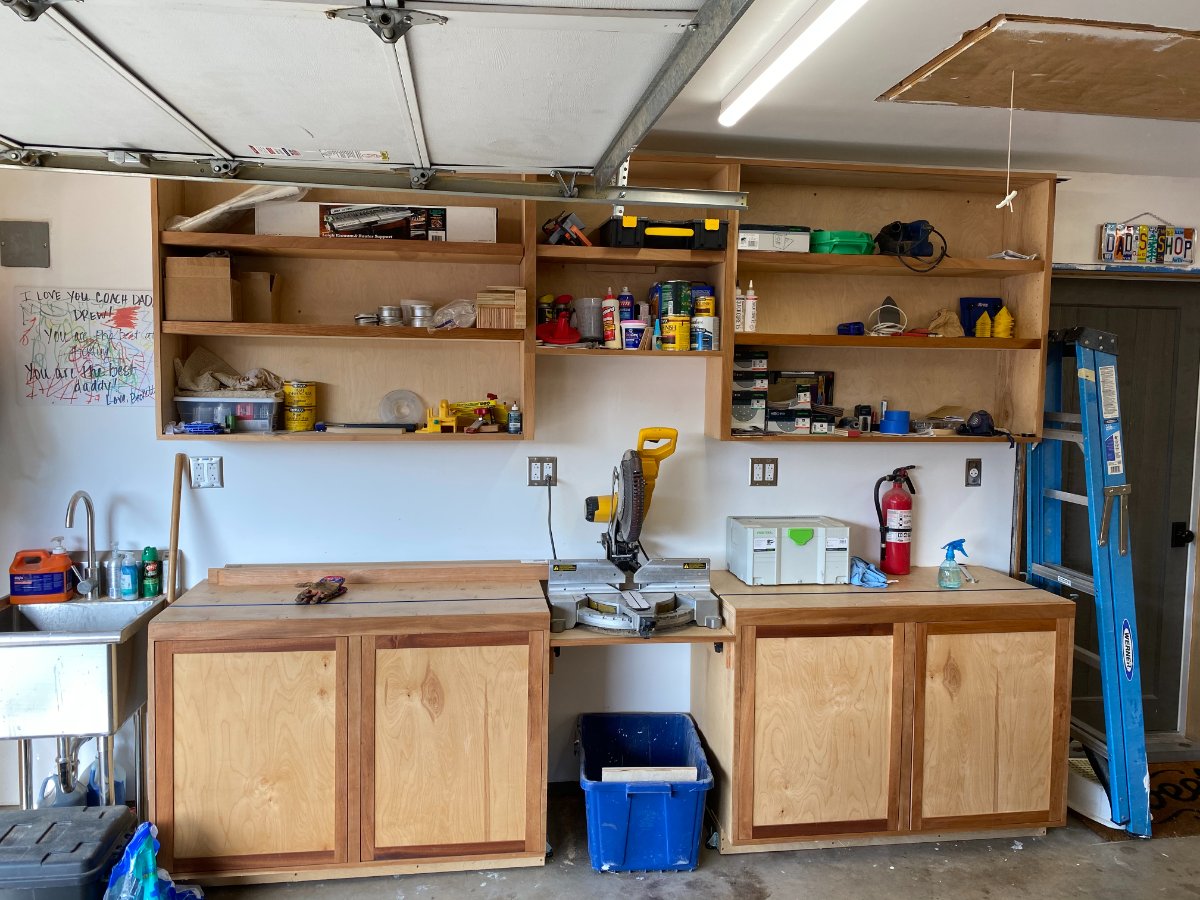
Think I figured out what I wanted for at least one of the side middle cabinets ... Should hold my Milwaukee drill and its attachments, 6 containers, mainly for screws and then a row of sandpaper boxes.
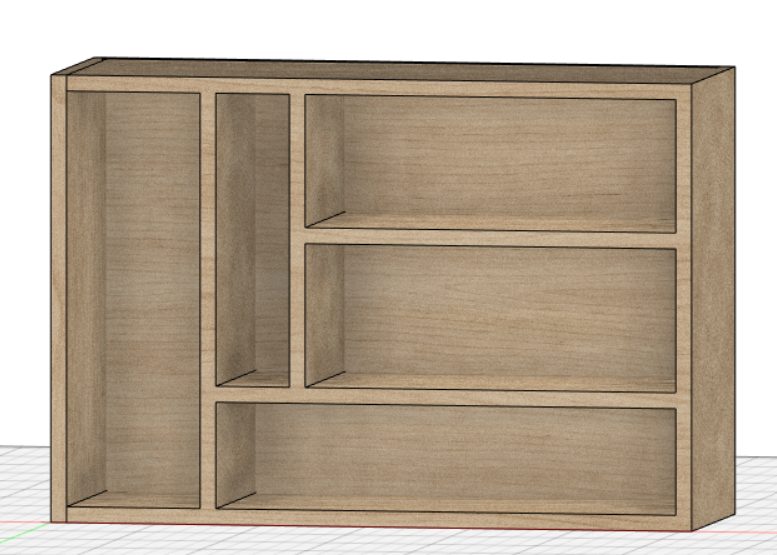
Also, added another shelf in the upper cabinets to help out with storage. Doors will be coming sometime soonish I hope. I think after my coffee table build I will wrap those up. Also, all the doors are now inset, just need pulls on them too.

Fancy door stops ?
-
6
-
-
3 hours ago, Kev said:
Which is why I brought up how easy it would be to build something similar to fit your saw.. When I get it, I'll try to remember to post good pics here so the rest can see it up close. This should help formulate the ideas to build to fit your own saw.
When does yours show up?
I like how you can add extra feet or whatever they are called. So you could have a dado setup and then like if you have other projects that have a lot of repeatable cuts you could set that up each time too and not lose your dado setting
-
9 minutes ago, Jamie said:
That is slick! Honestly I watched the video and was guessing a price I was shocked to see that it was only $210 I was thinking that the red gold would’ve been $350-400. Not that I’m going to get one, neat product though! Thanks for sharing!
hah! yes I was thinking the same ... it had to of been way more expensive and then was really surprised of the 'low' price tag
-
1
-
-
what a beating!! glad you got everything going again though.
-
1
-
-
This seems like a decent idea for repeatable cuts ... a lot of money to get it setup, but nonetheless I still think it is a solid idea if you are cutting something quite a bit, but also need to move the fence around for other cuts ...


Coffee Table For The Living Room
in Member Project Journals
Posted · Edited by Bushwacked
Got sidetracked with the holidays and #2020, we went ahead and put up christmas stuff already ?
Here everything is, it is finished ...
Aprons on and glued up
The biggest gap I had in all 4, I am pretty happy with that. I burnished it (I thihnk is the term) with a screw drivers length part (not sure what to call that .. the circle part not the tip) to round of an mesh everything together and could not tell after that.
2 coats of stain, went with the provincial stain for GF. Also, sand the legs lightly, and cleaned off with degreaser. Then painted with some canned spray paint from HD. I can find the brand if needed.
Installed in its place ... definitely a talking piece now haha. Now one of these years we will get rid of all the hand me down couches that the kids are slowly destroying and it will look/match a lot better in the room.
As for the whoopsy, I didnt have time to actually correct it as the wife wanted this completed. So I stuck with the domino patch and with the darker stain, you really cant see it unless you look. So it worked out pretty well. I was going to rip it out and redo, but I had orders stating otherwise ?
Finished dimensions ended up being 41 1/2 x 41 1/2 x 15"
Here is a couple quick shots of it .. you really cant see it unless you get as close as I did to take the pictures. You can also see the ~1/32 - 1/16" gap around as well ...