Every purchase made through our Amazon Affiliate Page helps support this site


Coop
-
Posts
3,517 -
Joined
-
Last visited
-
Days Won
140
Content Type
Profiles
Forums
Downloads
Gallery
Events
Store
Articles
Blogs
Everything posted by Coop
-
Problem resolved. The contractor brought in a new trim guy today and he said to “just hit the sheetrock where it it extends out to far, I do it all the time to compress it”. I gave him the casing pieces and he had them up and flush in 30 minutes. I bet he can’t fill a fire extinguisher though! ?
-
One of Doug Stowe’s books “ Basic Box Making” got me into woodworking. A rabbit hole I have truly enjoyed. Still have my first box.
-
One of the great things about this forum, people helping others! ?
-
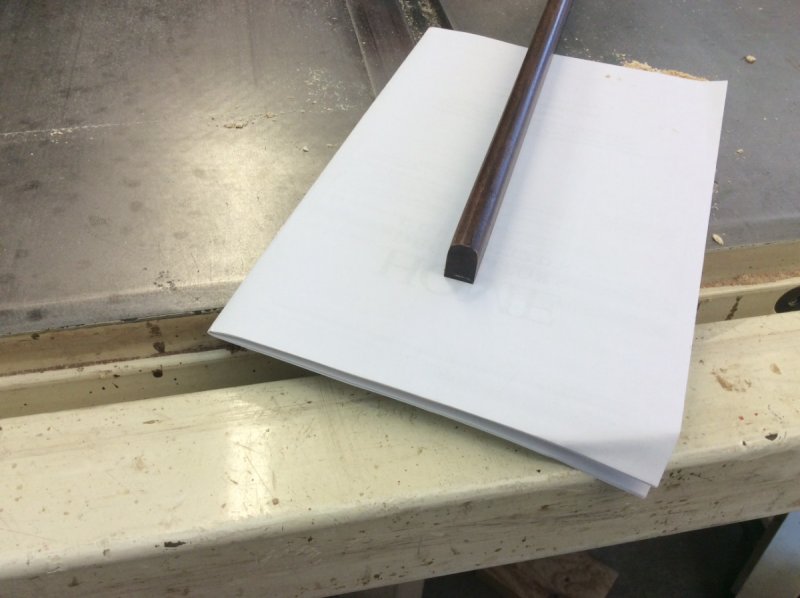
Larry and Jamie, I like your ideas as well. As the space between the casing and the jamb is uneven up and down the wall, a cover strip like pictured below, instead of a filler strip might look good. The pic shows a piece that I will be using to hold the glass panes in place.

-
So make the rabbet on the backside of the casing pieces so that the part of the board that rest against the sheetrock is thinner than the part that touches the jamb edge? Ooops, didn’t mean to attach this pic again but can’t delete it.
-
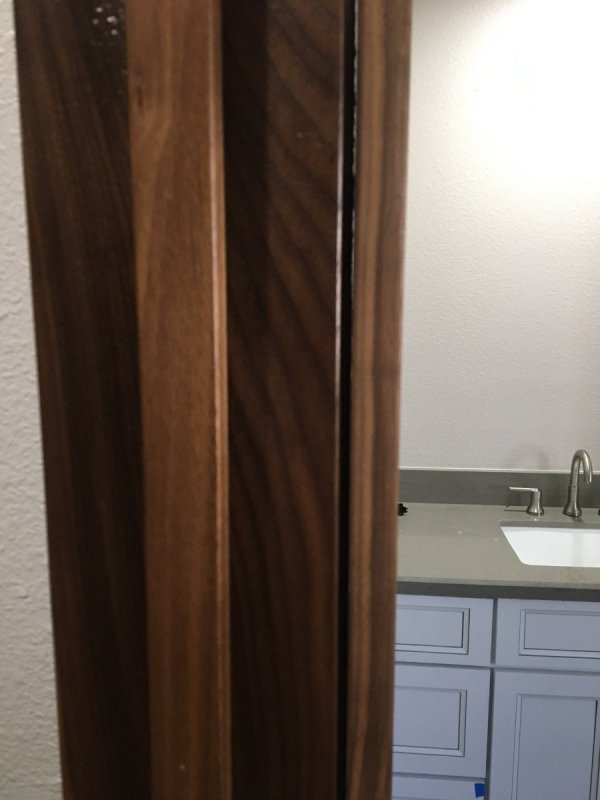
It would have to be something of what you are suggesting as the exposed side edges of the jamb have been softened so there is no longer a sharp edge to butt next to. I did make my own jamb and casing. Pictured is a piece of the casing on the right, held in place with a clamp in order to take the pic. The space between the jamb and casing is about 1/8”.

-
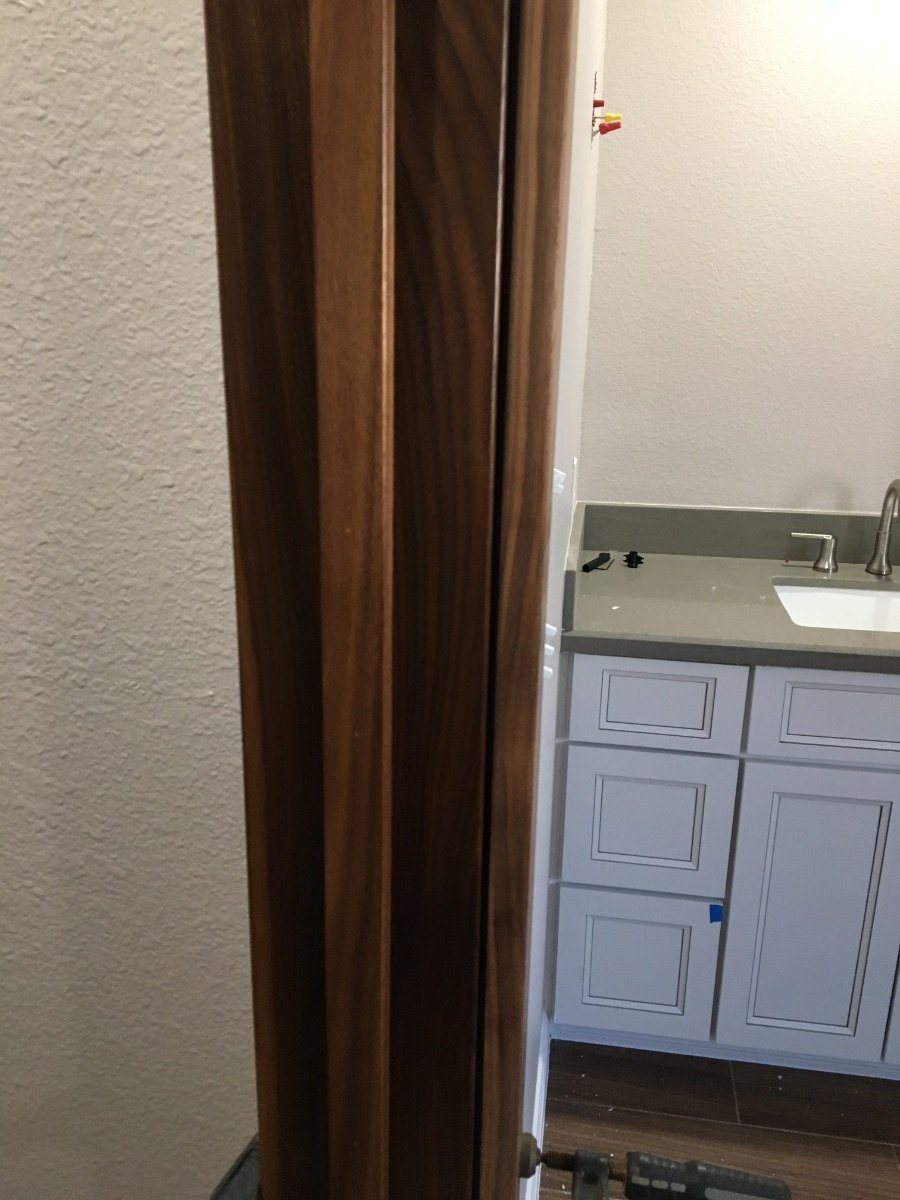
As I haven’t nailed the casing in place yet, I will get whoever shows up tomorrow to hold a piece in place so that I can get a pic. Basically there is a 1/8” gap between the door casing and the jamb itself. Had this been a painted operation, they would have filled this with caulk and painted over it but the whole door, jamb and casing are walnut.
-
Well, with a lot of waiting on sub contractors and many sleepless night's anticipating hanging the door, it is in place. Tom, on WTO connected me to a link that he wrote a few years ago on building and installing a door jamb and it was invaluable. Unfortunately, I read his article AFTER cutting the jamb boards to width. I cut them 4 1/2” k not thinking about construction grade lumber and A-hole sheetrock guys. Now I have a 1/8” gap between the jamb and the casing. Aside from shaving down the sheetrock, I may have to caulk using some special order colored caulk and not sure from the colors on my screen, how close the color will match. Anyone have any better ideas other than a magic wand?
-
I have the stacked version that fit in the miter slot of my bandsaw. Works great when re-sawing.
-

Review of Harvey MG-36 Miter Gauge compared to Incra 1000HD
Coop replied to pkinneb's topic in Shop Tools and Reviews
? -
Looking forward to the build. Hope you get home early as anticipated.
-
I don’t question his ability as an electrician as he seems quiet versed. I am however amazed that his 5-6 gallon shop vac is used as his dust collection system and is hard piped throughout his shop.
-
+1
-
Thanks Chet. The reason for asking is that I used my set to recess the screw heads on the sac fence of my new miter gauge and it left a lot to be desired. In my case, it is shop stuff and was not BB ply but I’m impressed.
-
My only social media is the morning paper.
-
Hey Honey, look what I just posted! You Rascal you! ?
-
That IS nice. Chet, just for the heck of it when you get a chance, drill into a decent piece of scrap ply and see what kind of results you get, please. Thanks
-
My Festool inventory is limited to the Df-500 Domino, ETS-150 and RAS 115 ( never used yet) and the CT 26 and they are all my favorites. When finished with each tool, the hose back into the allotted space above the vac and the cord back into the appropriate sustainer. Probably the only time I put something back in it’s place after I use. Speaks highly of my organizational skills! ?
-
Review of Harvey MG-36 Miter Gauge compared to Incra 1000HD
Coop replied to pkinneb's topic in Shop Tools and Reviews
+1 -
Review of Harvey MG-36 Miter Gauge compared to Incra 1000HD
Coop replied to pkinneb's topic in Shop Tools and Reviews
Jamie, you can easily side these by loosening the screws. -
Review of Harvey MG-36 Miter Gauge compared to Incra 1000HD
Coop replied to pkinneb's topic in Shop Tools and Reviews
I settled for two less than the recommended six due to the grinding. Glad to know the correct size Paul.

-
I really like the detail you put into this Chet! Thanks for sharing.
-
Review of Harvey MG-36 Miter Gauge compared to Incra 1000HD
Coop replied to pkinneb's topic in Shop Tools and Reviews
Nice! Now to find you some 1/4x20 square nuts and grind them down to fit the slots for your sacrificial zci fence. -
Probably to allow for the miter cuts? Had second thoughts but could not delete this.
-
Aside from the walnut I bought for my door jamb and trim, which was $10.25 bf, I haven’t bought any in a while. I thought you said it was dirt cheap and you couldn’t get rid of it by giving it away and paying the freight?