Every purchase made through our Amazon Affiliate Page helps support this site


Bushwacked
-
Posts
1,605 -
Joined
-
Last visited
-
Days Won
98
Content Type
Profiles
Forums
Downloads
Gallery
Events
Store
Articles
Blogs
Posts posted by Bushwacked
-
-
40 minutes ago, Kev said:
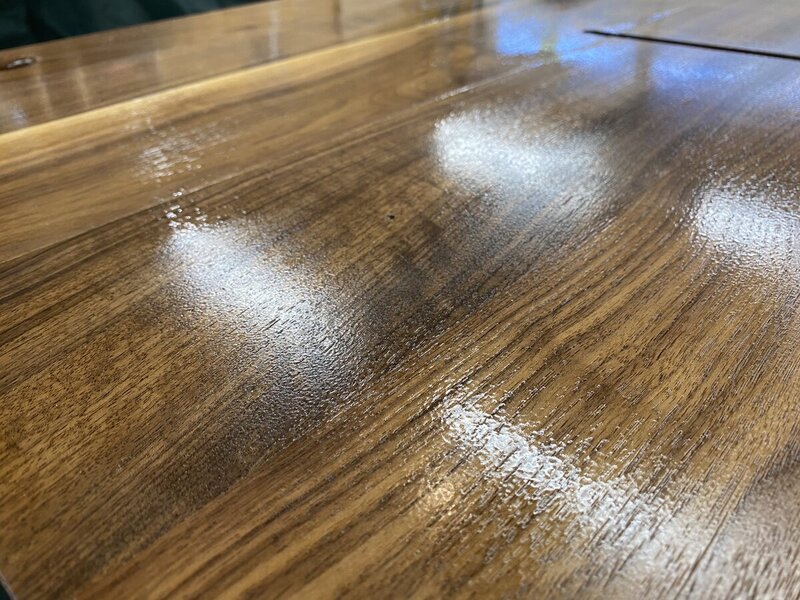
On horizontal surfaces, I look for a milky blue tinge to it. That’s a heavy coat but should be ready to block out in just a few hours.
I spray much lighter on vertical surfaces.
a little practice and getting to know the new toys and it will become pretty obvious.
From the sounds of it I am spraying probably what your vertical spray is. I have not got the milky blue look or even anything close for the table top. Although, I guess you can never go wrong with lighter coats, it will just take longer ... but could really screw it up with too heavy a coat from runs.
So far this Fuji is amazing! I have loved using it today for this. I thought it would be harder, but surprisingly very easy to use ... Now to just dial it in for the horizontal vs vertical. I think I am kinda close though, overall happy though with it.
-
Starting I spray now ... just put on first coat and it was amazing. Like 2 mins and done. Took about 15-20 mins last night by rag.
on the spray ... how do I know if I am outing enough on? I have the fluid control low but when I spray it, it looks wet for maybe 30 seconds o a min and then it’s pretty much dry to the touch. Is that about right in yalls experience ?
Ah forgot to also ask ... how long do y’all give I between coats?
-
5 hours ago, Kev said:
You live in California though, aren't they illegal? You rebel you ?
Time for an anonymous call to the authorities ?
-
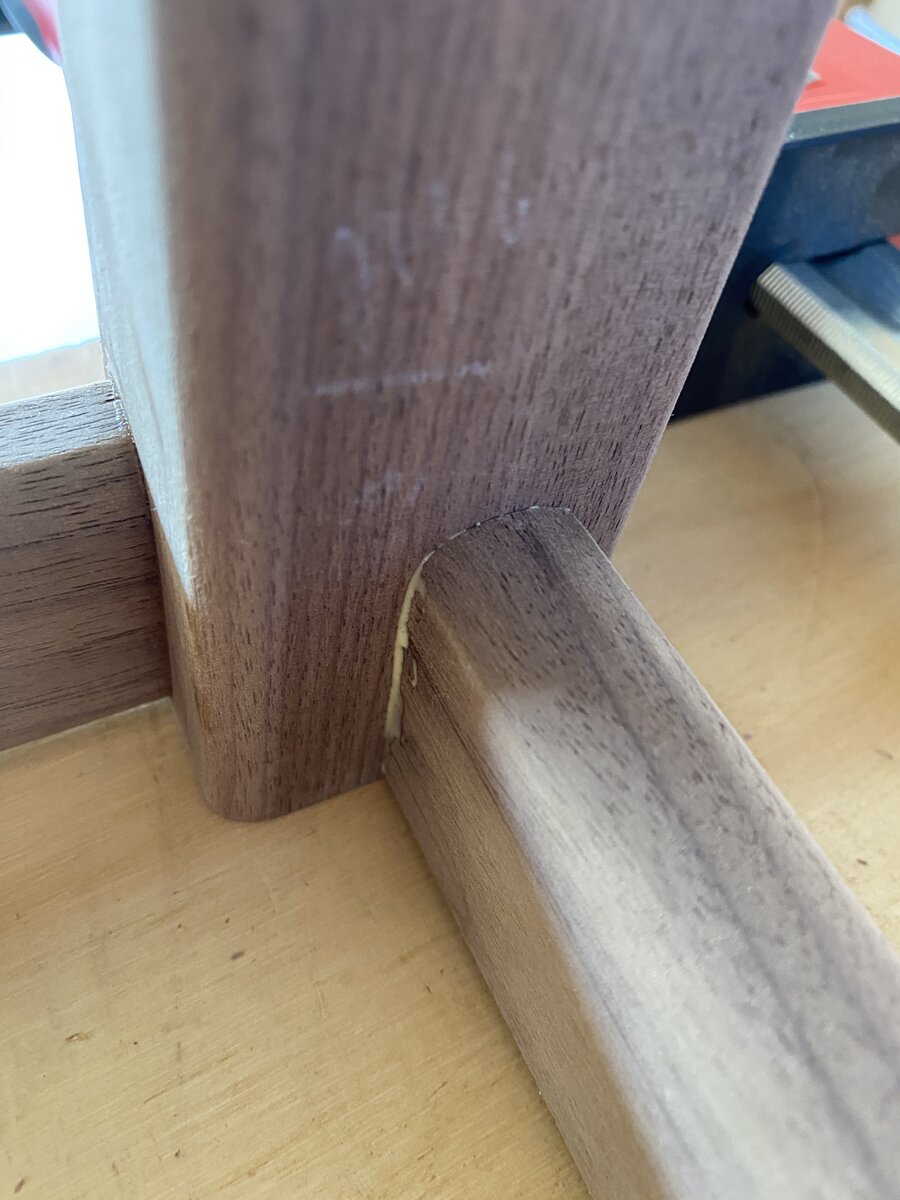
Also, a fun little trick I learned on cleaning up glue in really tiny spots ...
I use these brushes, I bought a couple hundred for really cheap at HF. So these little angle corners were a pain, so I grabbed an extra brush and ran it down the edges.

got the majority of it out and was happy with it. then I would just wipe the bristles off with my damp rag and do the next corner
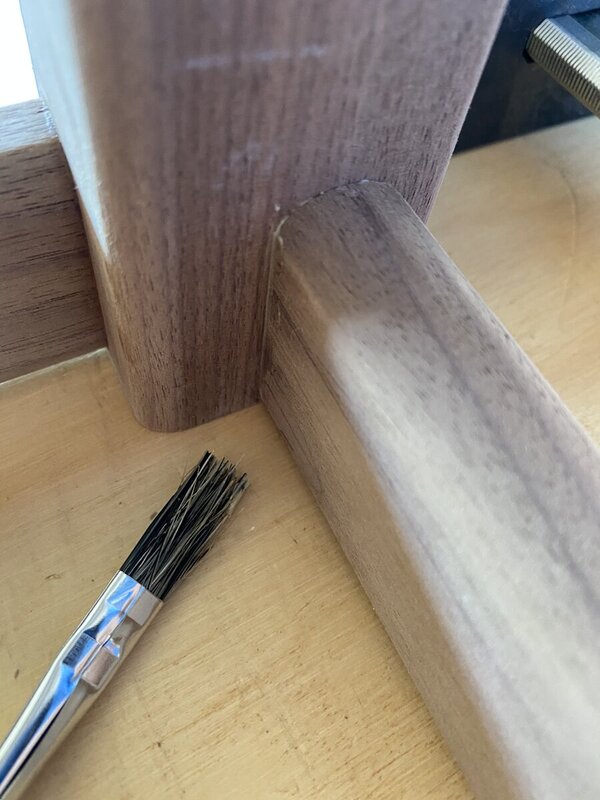
Just thought I would share in case someone out there struggles with the tight corners too.

-
 1
1
-
-
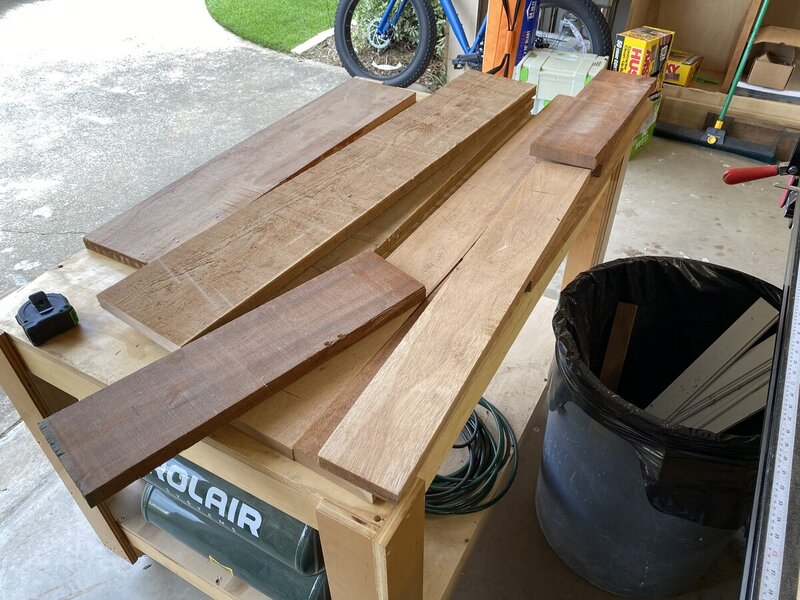
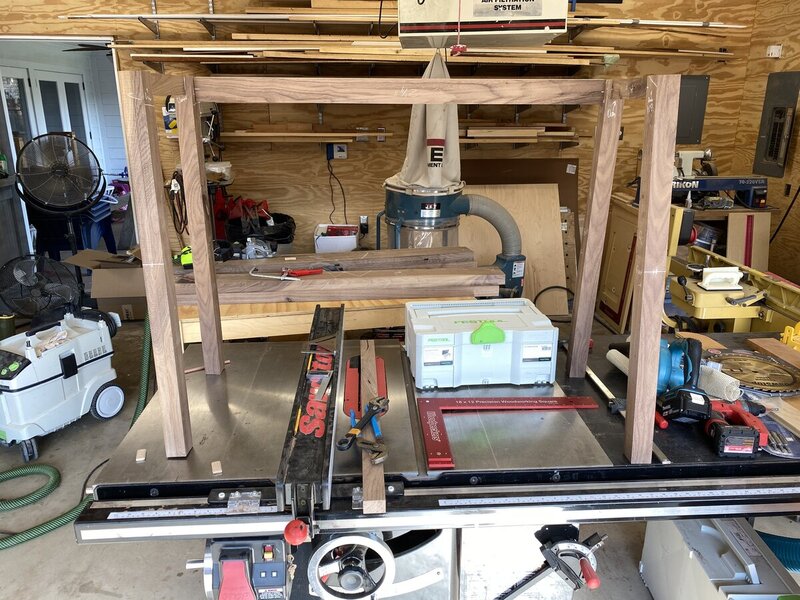
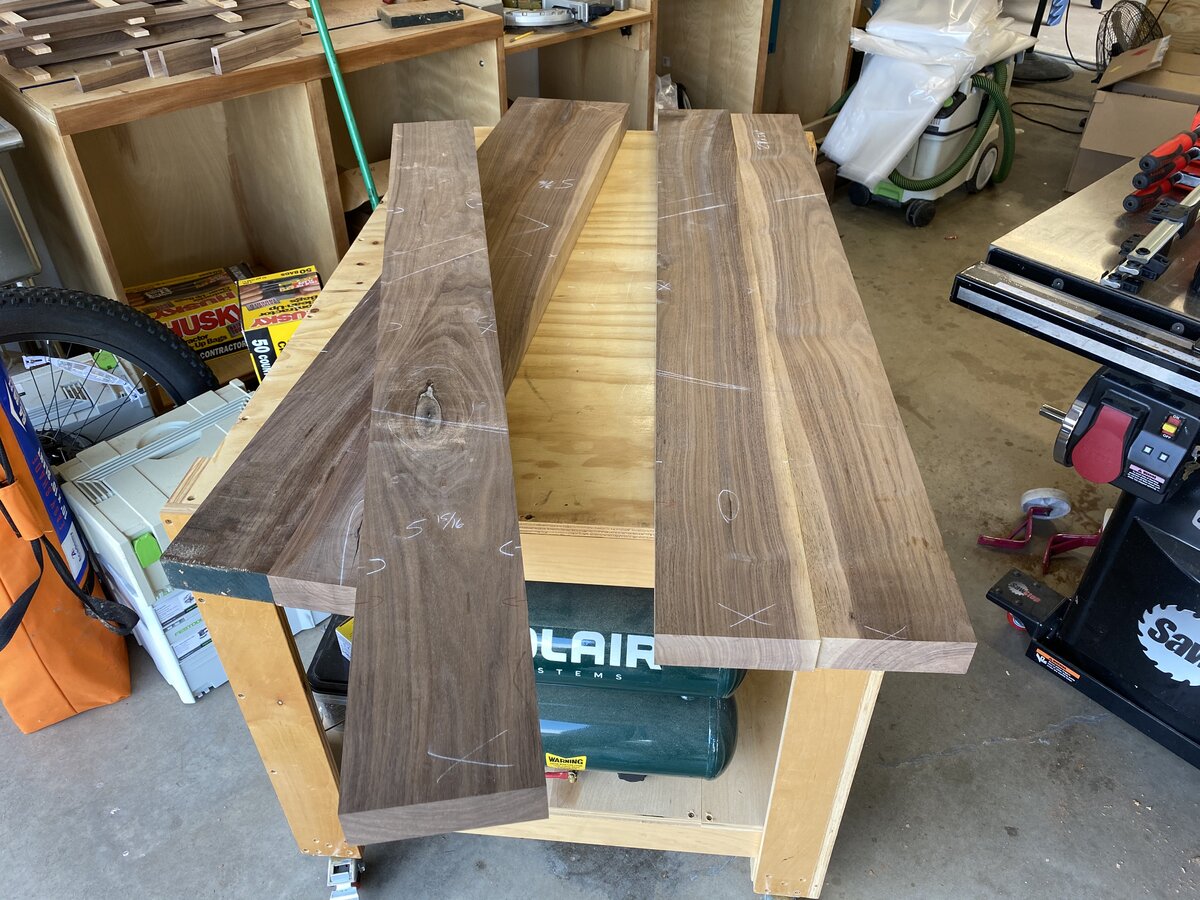
well got a good amount of work done today ...
started off with those 5* rips on the 3 pieces ...

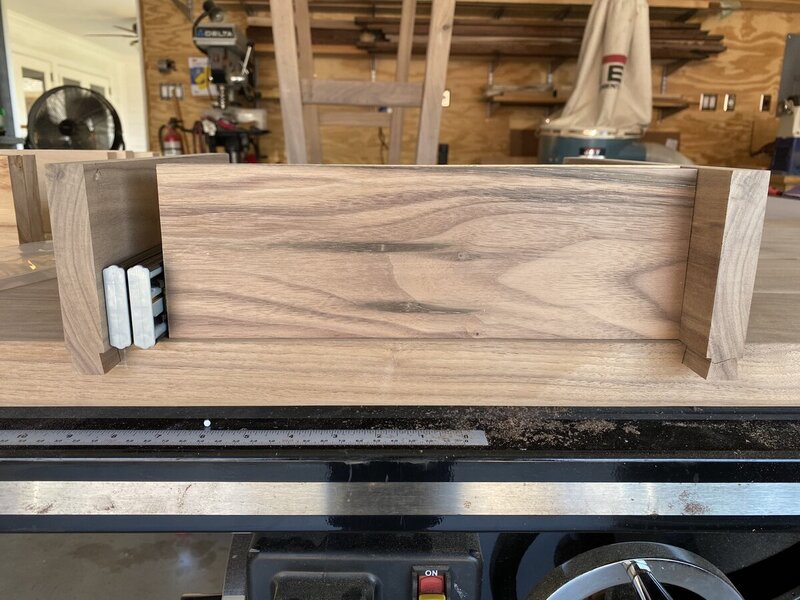
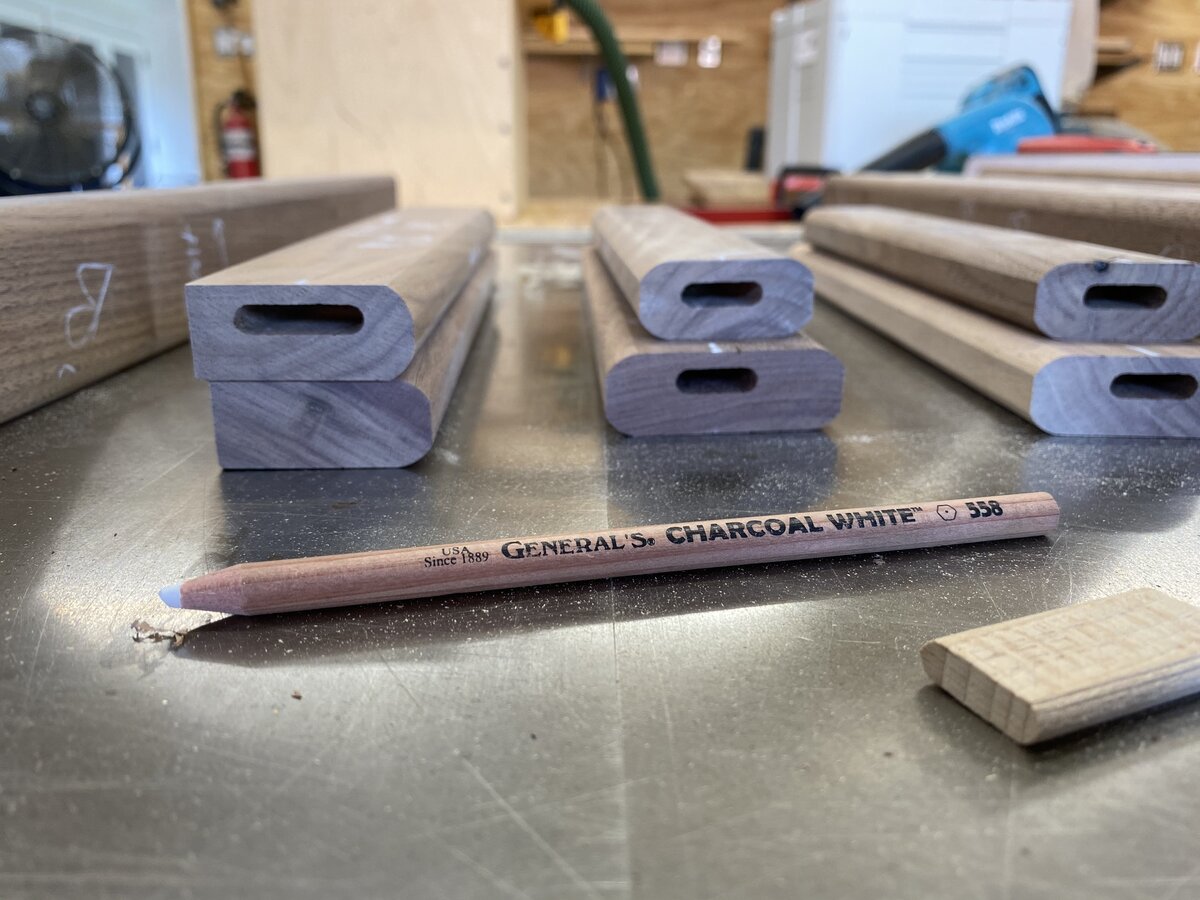
After that, cut the drawer parts out ... going to be 3 sides maple and front walnut, dovetailed together. everything seems to be fitting well. I decided on the soft close slides for this .
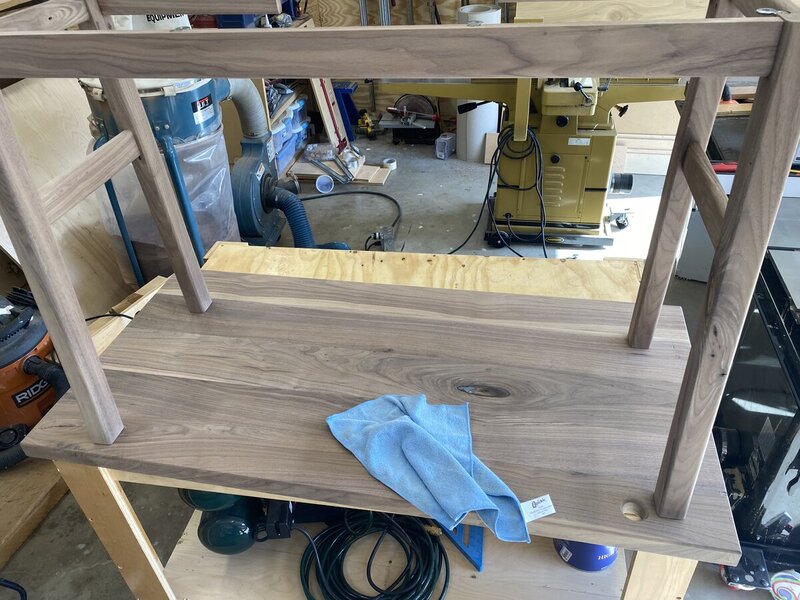
Went to cut out the dovetails on the leigh jig, and come to find out I dont have a 7/16 bushing for the router ... sooooo I ordered one and wont be here until Monday or so. so I said screw it, I want to use this desk this week while I am at home. Got it all cleaned up, even used my microfiber cloth to grab some extra dust ?
A fun quick look at whats its gonna be ...
Then garage prepped, and first coat of ARS applied. Will start spraying tomorrow. Tonight will be full of Fuji videos on how not to screw all this up ?
-
1
-
-
3 hours ago, Kev said:
That’s the stuff..
The sanding is so light that there isn’t too much on the surface. I usually just wipe with a clean cloth. You could vacuum if you have a soft head attachment but, the cloth usually works for me.
ok sounds good, thanks Kev!
2 hours ago, Chet said:Drew, if this is going to be your choice of top coat to spray get the gallon it will save you quite a bit of money in the long run.
After my final pre-finish sanding I vacuum everything, between coats I do like Kev and wipe it down with a clean cloth. I have a stack of small micro fiber towels and just to be anal about it I use a clean towel between each coat. When the job is done, I through them all in the washing machine and they are ready to go for the next time.
It might as well be for now as I dont know any better and from what Kev produces in those finishes, if I can get anywhere near that I will be very happy! I did go with the Gallon of it as I have a few other projects coming quick so it will get some use for sure.
LOL! that is pretty anal their Chet ? not saying that thought may not cross my mind in the future though haha ...
Ok, so now a dumb question of the day ? ...
How do yall go about getting it out of the gallon into the spray cup without making a massive mess. Assuming yall are pouring into a smaller, but bigger container than the cup then pouring into the cup or what?
-
1 hour ago, Kev said:
Kind of...
I do a wipe on (ARS) first. From there, I spray GF High Performance. I lay down coats until the piece has the desired look I want. Sometimes that 2 or 3 coats and sometimes it's 5 or 6 coats..
I do note dilute.
Yes, I block with 400 very lightly between coats just to knock off the nibs..
Thanks!!
https://www.woodcraft.com/products/hp-polyurethane-top-coat-satin-quartthat?
what do you use to make sure all the dust from the 400 is off before next spray? Just wipe down with cut up tshirts?
-
5 hours ago, Coop said:
Is the drawer already cut to final?
No. Have not started on the drawer yet... planning on doing that today after I get my angle cuts done.
also @Kev what is your finishing technique again? Wipe on first coat of ARS then spay X amount of times. Diluting each spray? Then sanding with 400 between coats? It’s been awhile since I read your post on that in the old forums.
-
26 minutes ago, Coop said:
Is everything still dry fit at this time? How will the drawer ride in it’s enclosure? Will the drawer have a false front on it? Right now we are seeing the end grain on the drawer sides.
Yes still dry fit until I get the 5* cut on those 3 pieces. Drawer I’m not sure yet .. either soft close slides or I’ll put a base on it and have the drawer ride on that.
-
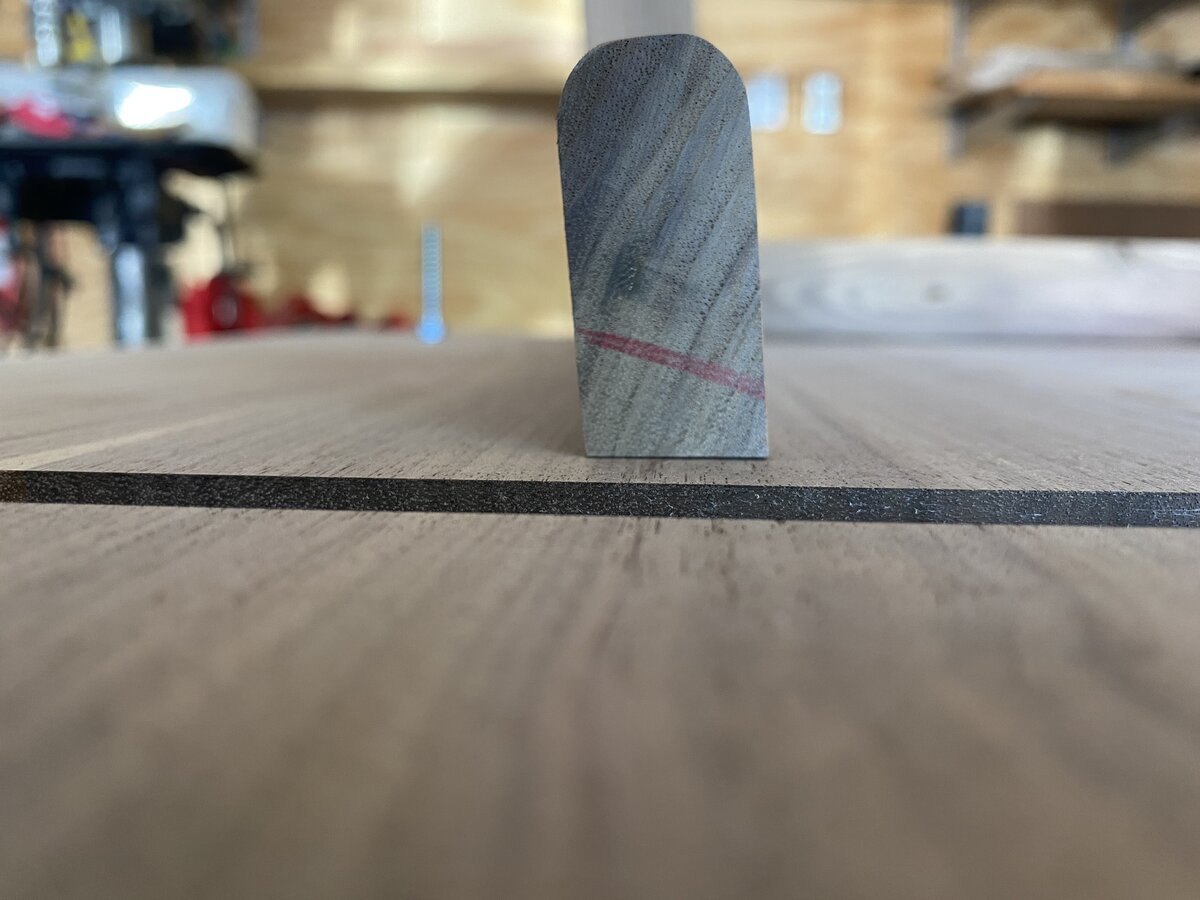
The rest of the update is here ... lots of hand sanding today. Rounded over the leg parts and I think they actually turned out pretty neat looking. The original kept 1 side square, but I figured why not just go for it and I was happy with the results!


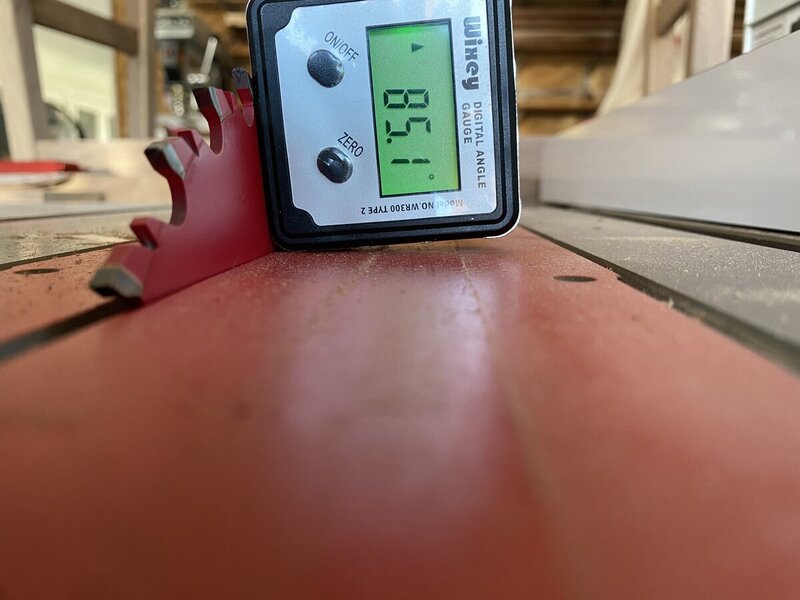
The last thing I need to do besides more sanding / drawer box / finish .. I need to cut the 3 apron pieces at 5* tomorrow, but my angle gauge broke a few months back and never replaced it. So need to go pick one of those up in the morning.
-
2
-
-
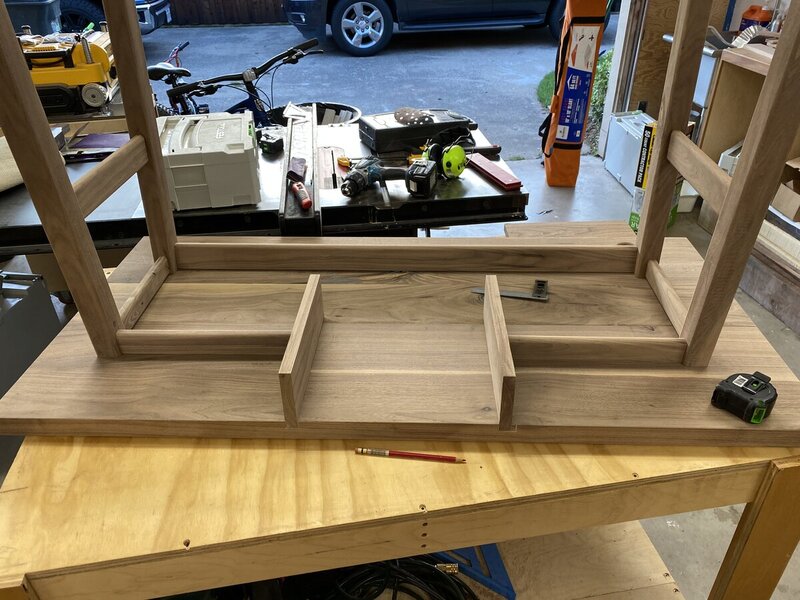
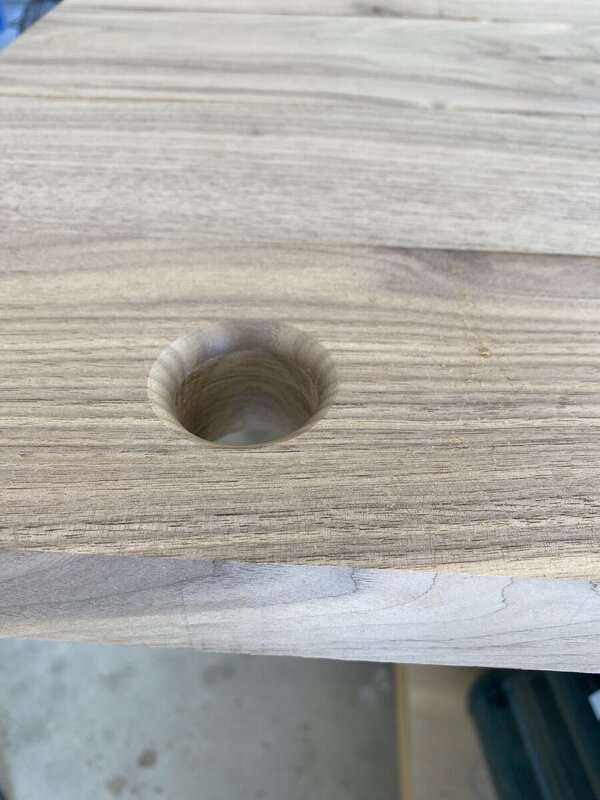
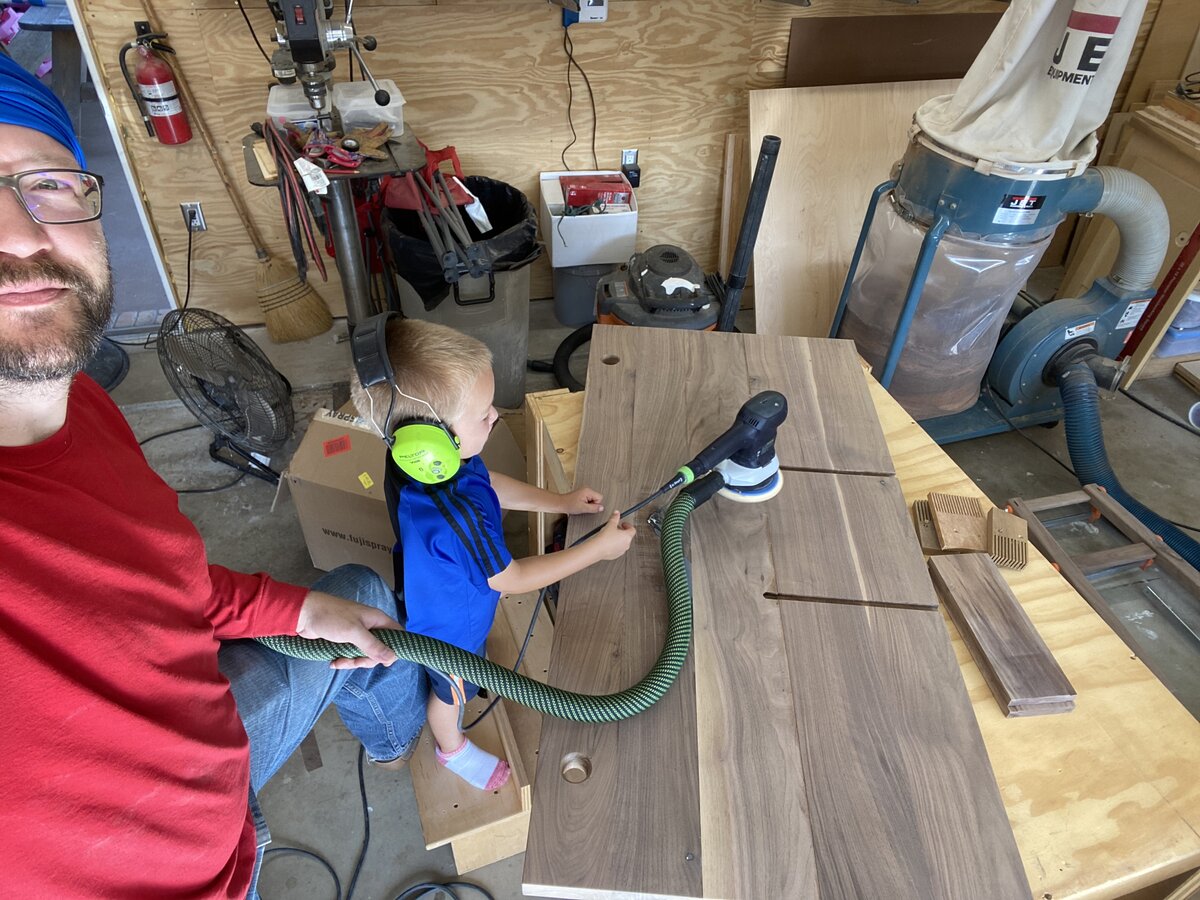
planning out my wire management ... wasnt a big fan of the long channel they had in their desk, plus it only lends it self nicely to laptop power cords. So I went with my own of 2 1 3/8" holes with a nice roundover on them in both corners.
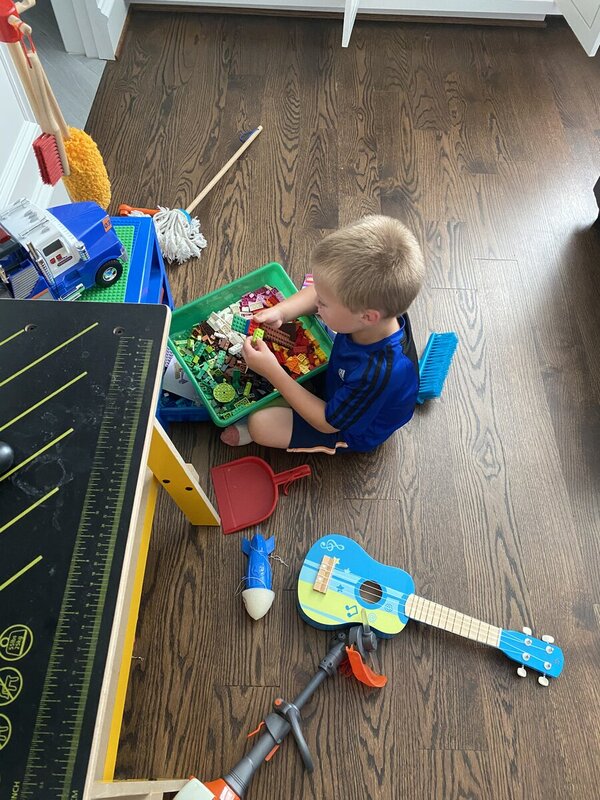
Then my little buddy got home from daycare and asked to help sand ... he always finds it so funny that the sander moves on its own. (dont worry, no tabletop bases for harmed in taking the photo :P)

I walked in for dinner, and saw him sitting down at his lego station ... asked him what he was doing ... "Daddy I am building my own desk to hold things" - damn near brought a tear to my eye! Maybe I am doing something right haha ?

-
5
-
-
11 hours ago, Woodenskye (Bryan) said:
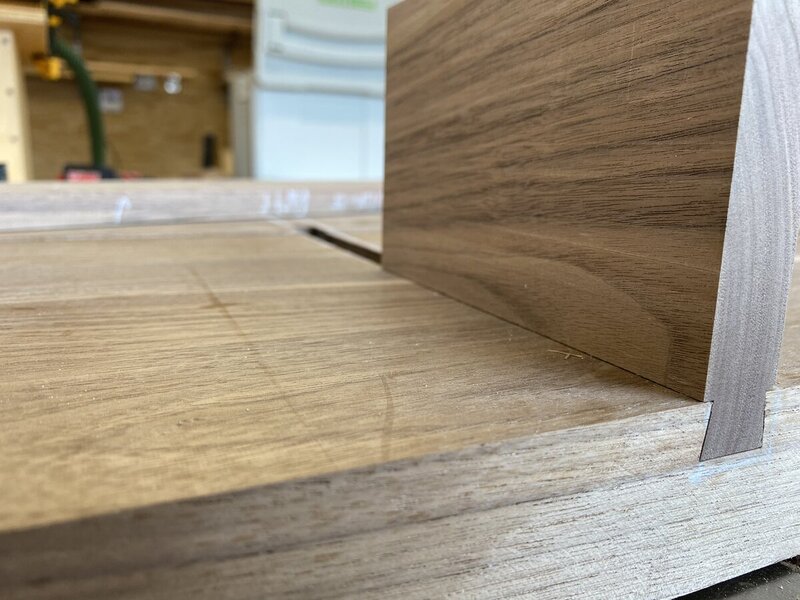
Great job! I would go with a round over. Did you use the LR32 to hog out some of the material for the sliding dovetail? If so that is an ingenious idea.
Well, I used the rail to give me a straight line ... not the flippers or anything like that. Although, I dont see why that wouldnt work and give you a precise distance each time. I would defintely give it a go if I needed to be more precise in my distance. For this though, just marked it off with my white pencil
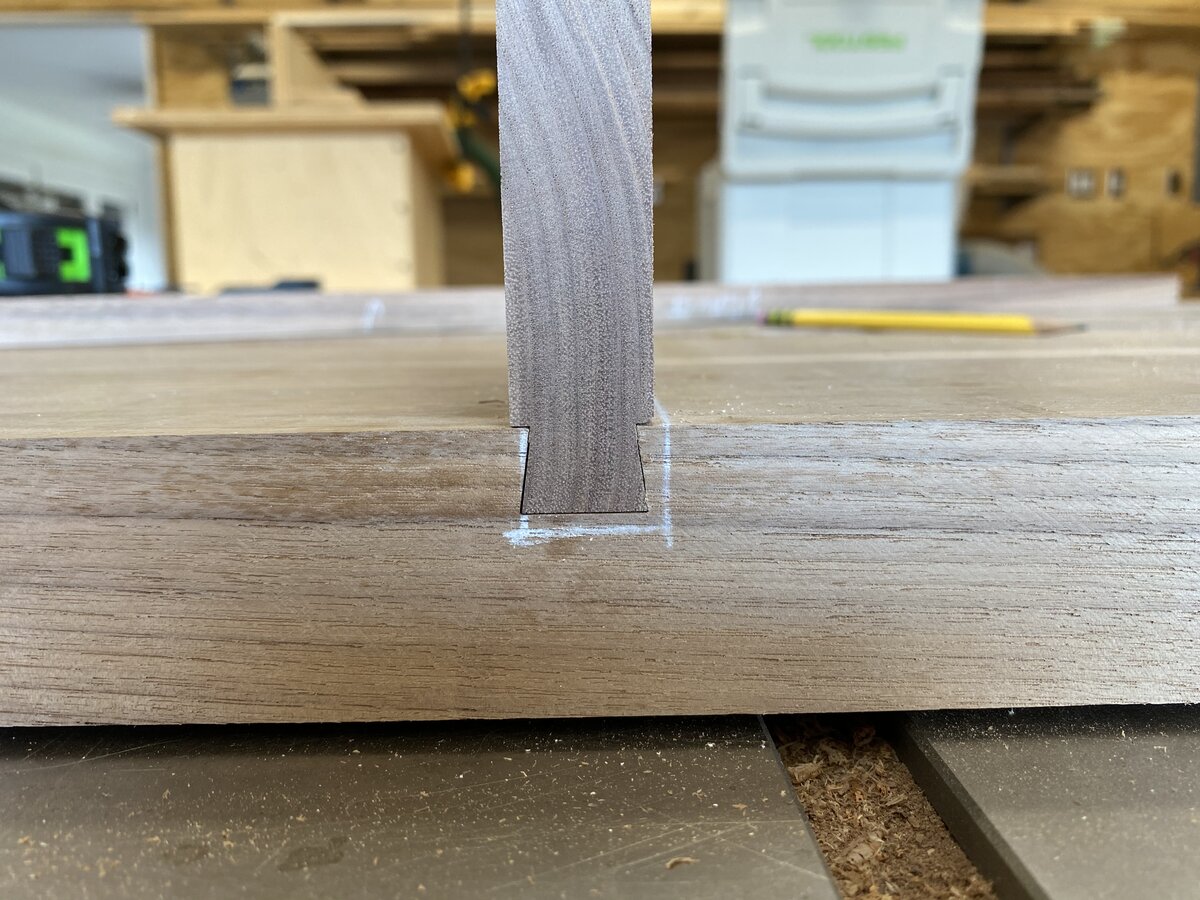
8 hours ago, Chet said:In you series of pictures were you are cutting the dovetails in the bottom of your desk, it looks like you still needed to finish surfacing that side of the top. Wouldn't cutting the dovetails first and then surfacing create an inconsistent depth of your dovetail?
I am assuming I just missed something because your dry fit in the last picture looks fine. ?
LOL! I never said I was an expert ... you are correct, I cut those while the base was still a little rough, the pics make it look way worse than it was. You are correct, I should have waited until it was further in the process. However the areas I was going over where at least flat for the router base to slide on so I didnt worry too much about it. Next time though, I will be waiting as it was little more nerve racking then it should have been.
-
Then on to see how it lays out and sanity check ...
Still need to cut the drawer front to size ...
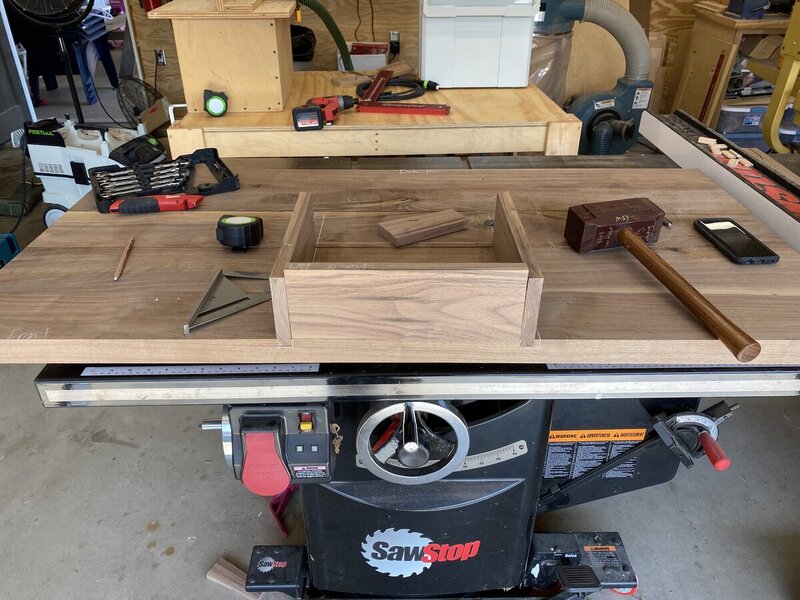
rough positioning ...

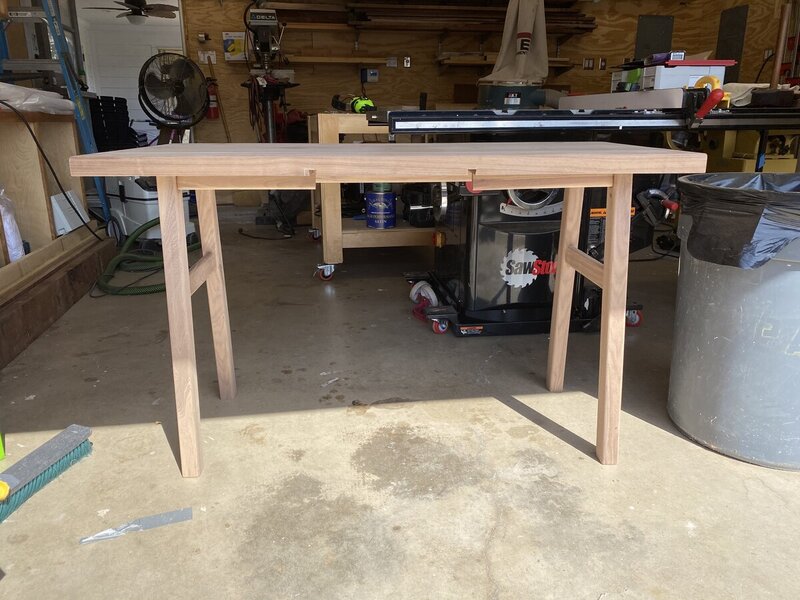
Then everything all tossed on there ... I think it is looking pretty good.
Today, hopefully is another good day. Just working on a the top a little more and then I should be able to also start rounding over the legs and see how they look.
As for the table top .. whats better? I chamfer or round over on the part when you rest your arms? I am thinking round over to match the leg look, but not sure ..
-
4
-
-
pretty productive day in the shop!
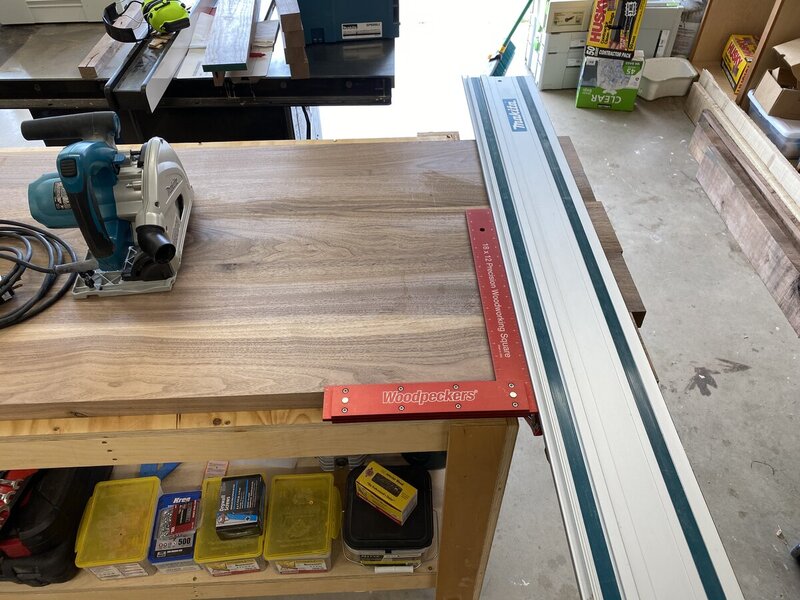
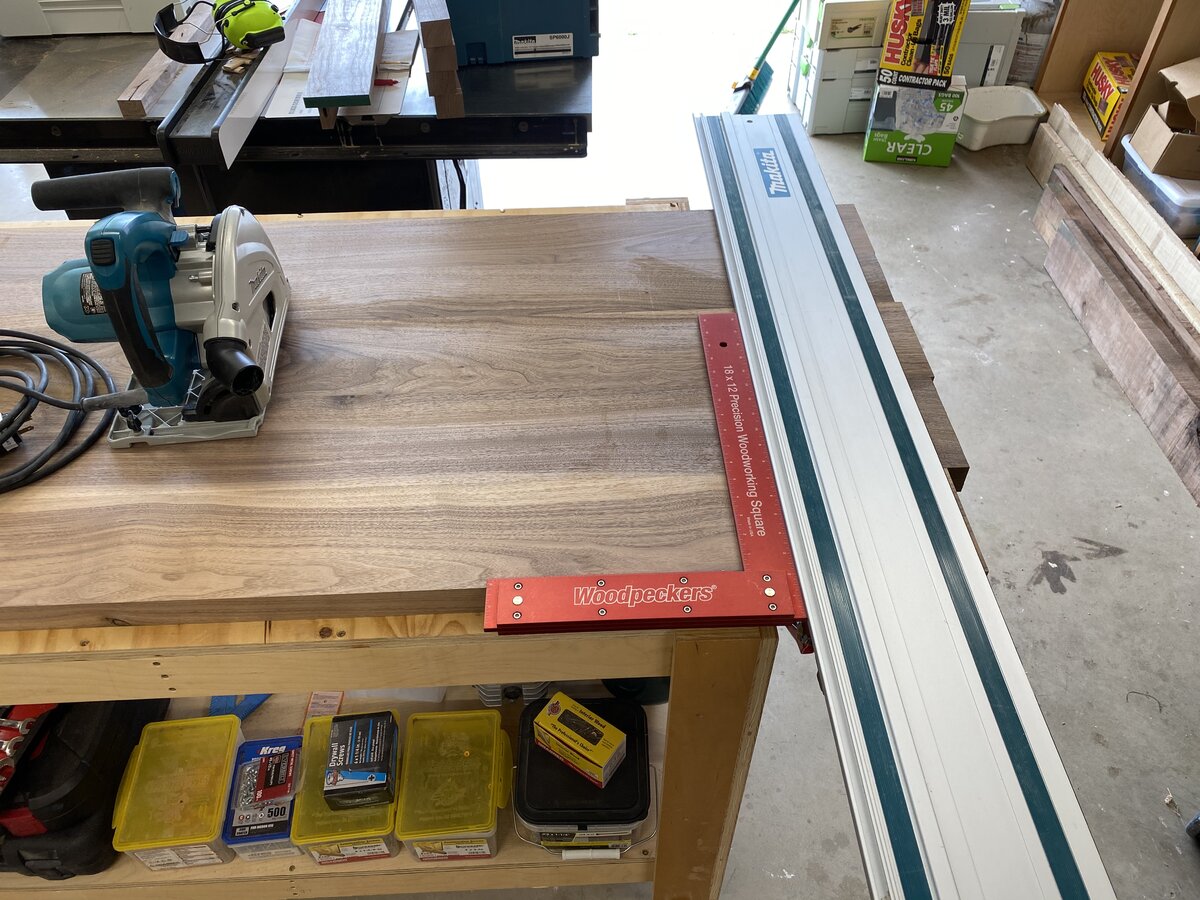
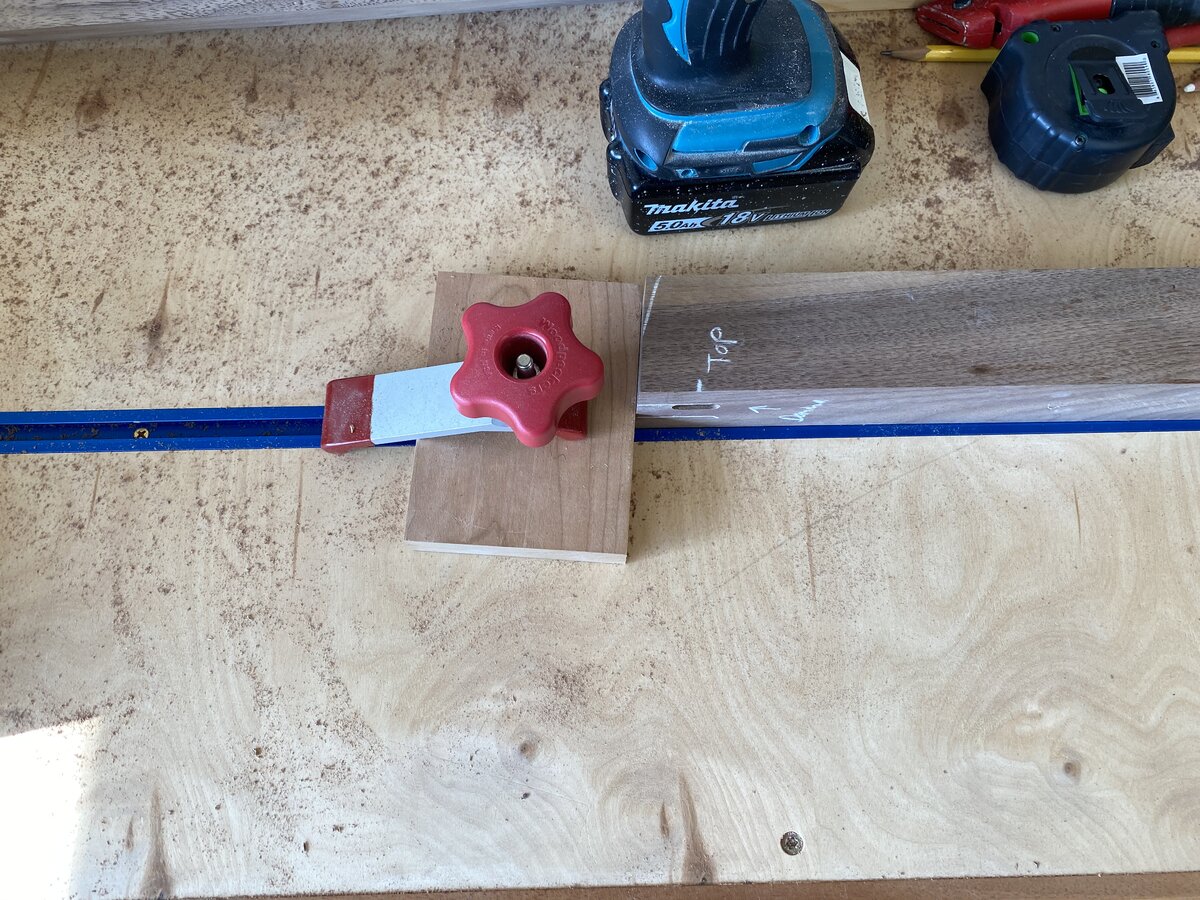
Got the final width cut out .. you know what they say, when you need a straight line, bright out the red! ... or maybe I am the only one who says that ?
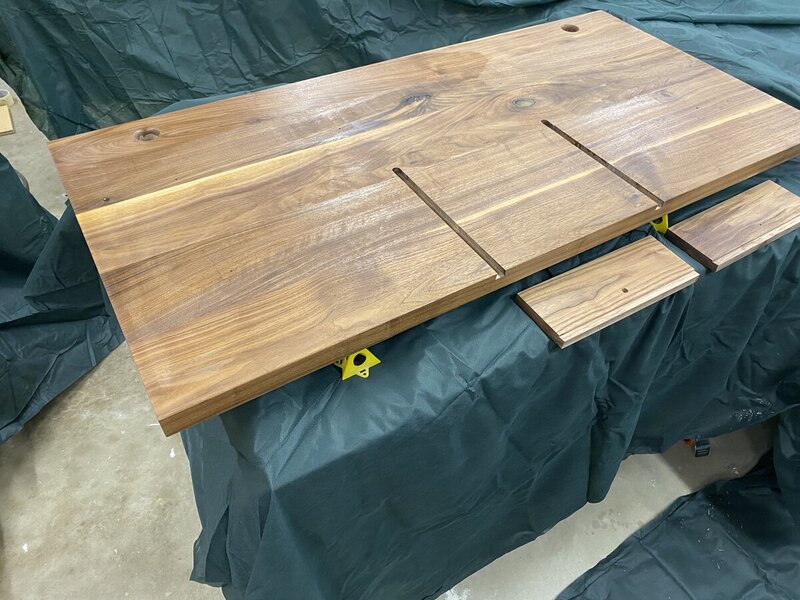
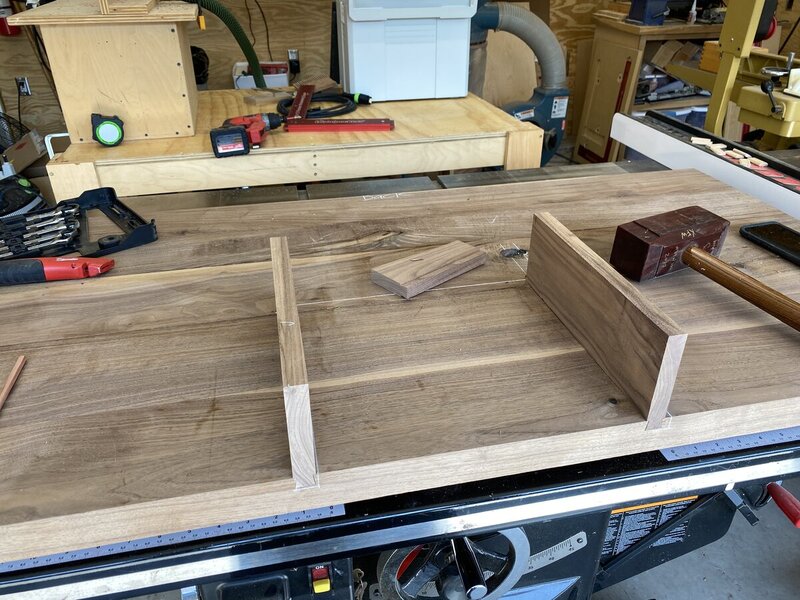
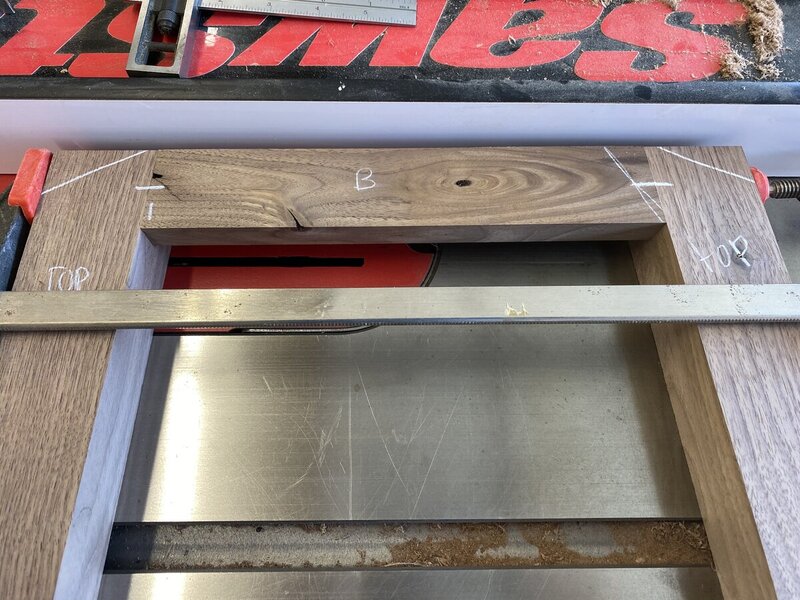
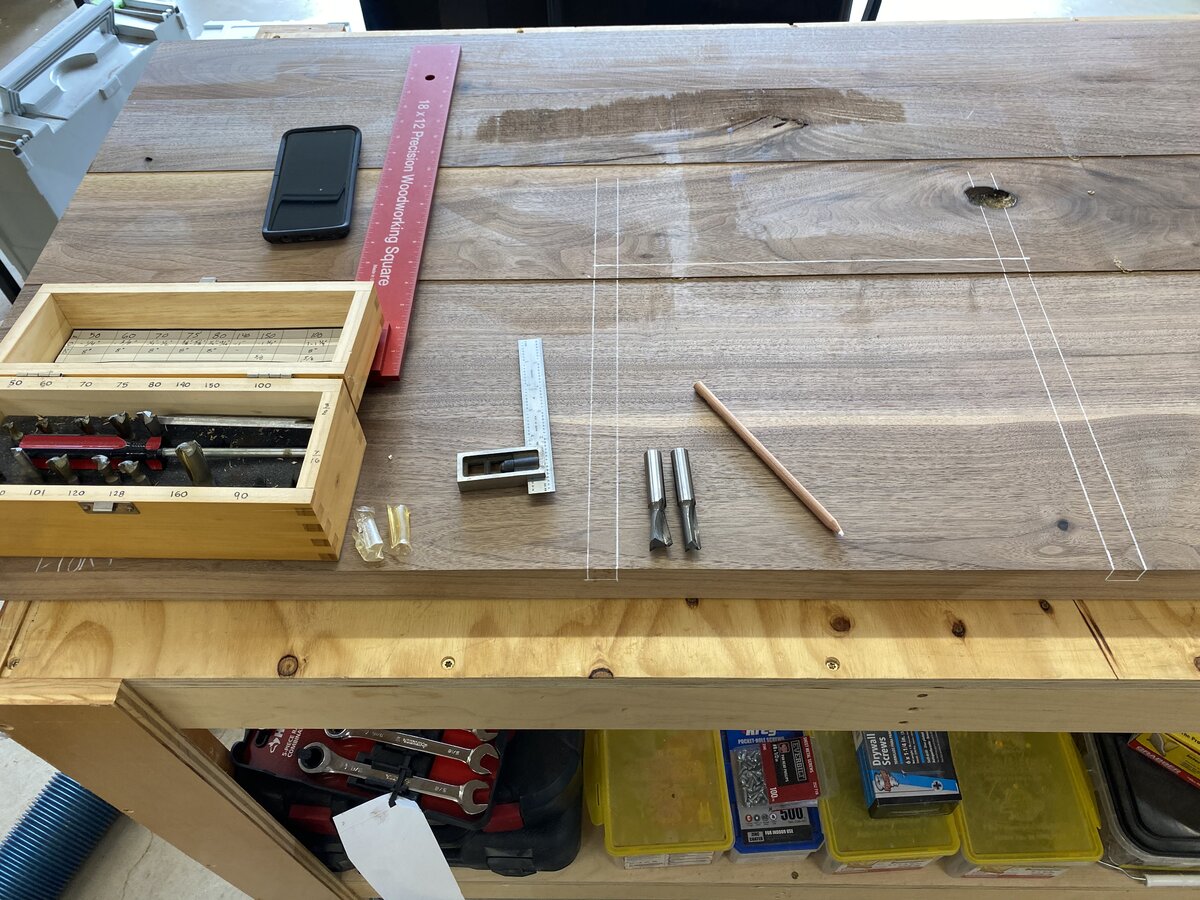
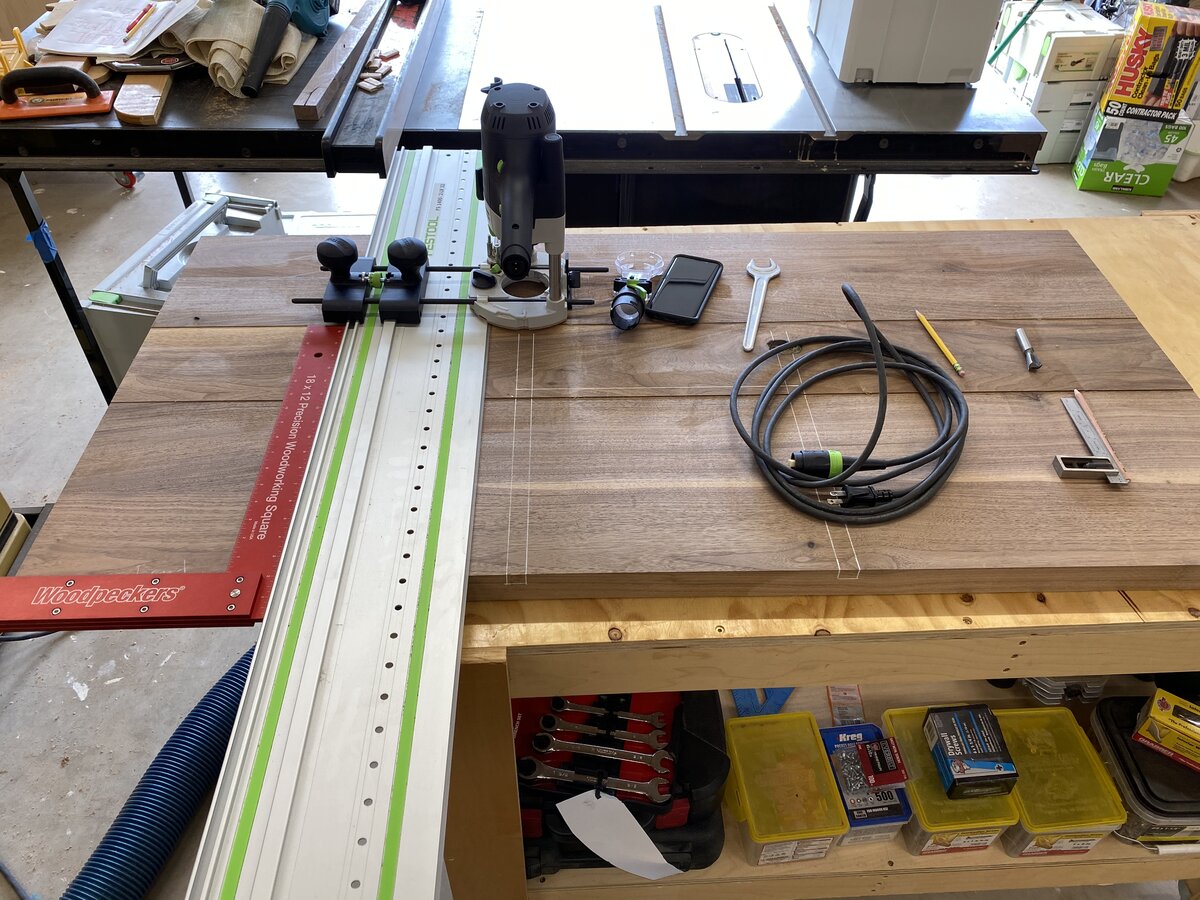
Worked on laying out the dovetails ...
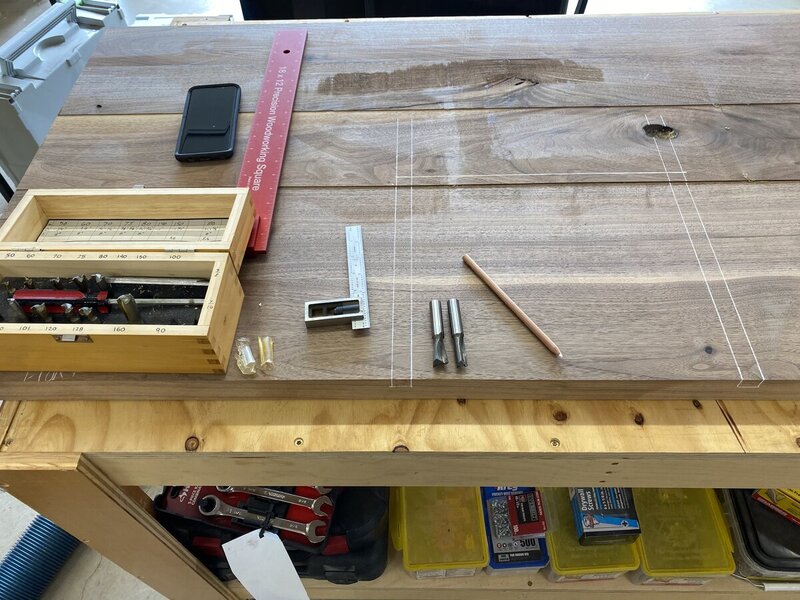

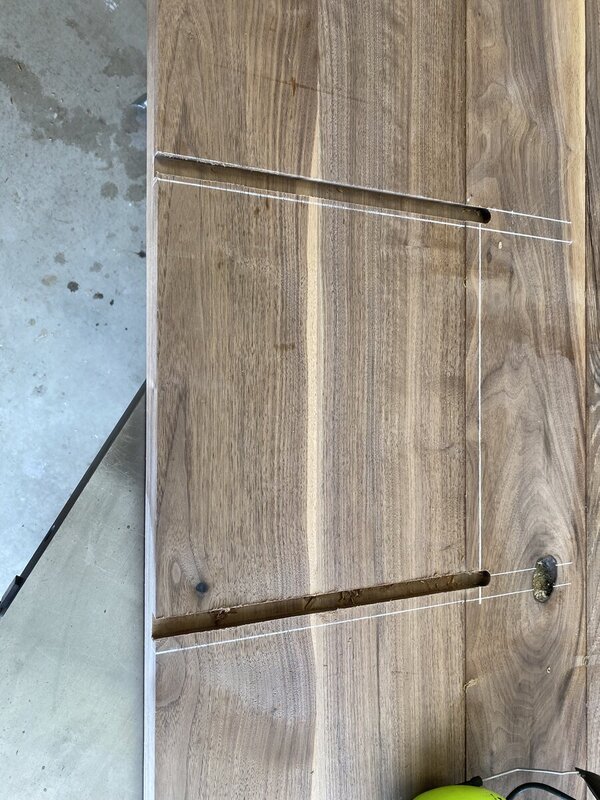
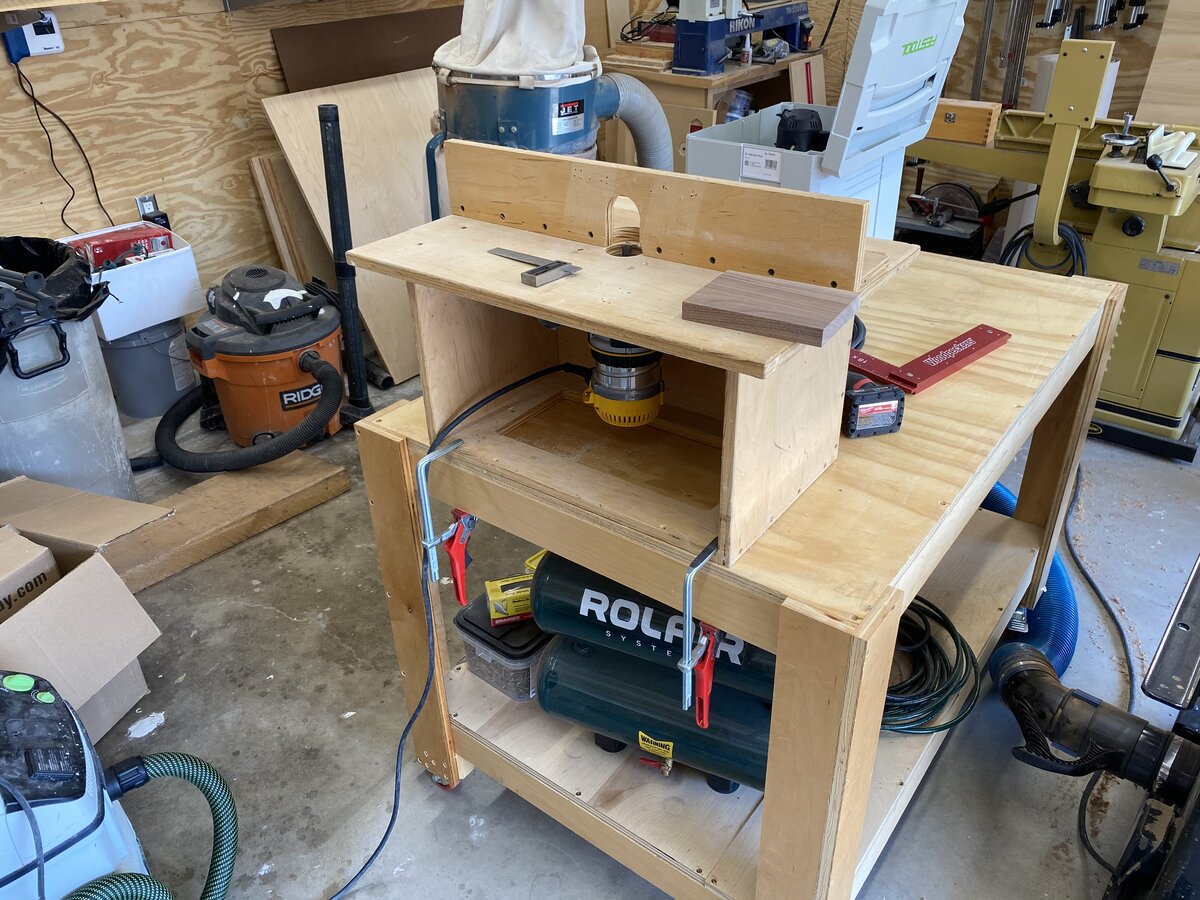
Busted out the sweet router table ... she wont be winning any beauty pageants, thats for sure haha

Worked on my test piece ... only 3 tries needed, I was completely shocked by that, I mentally prepared to be there for hours!

I think they came out pretty good for first time ever doing that ..
-
1
-
-
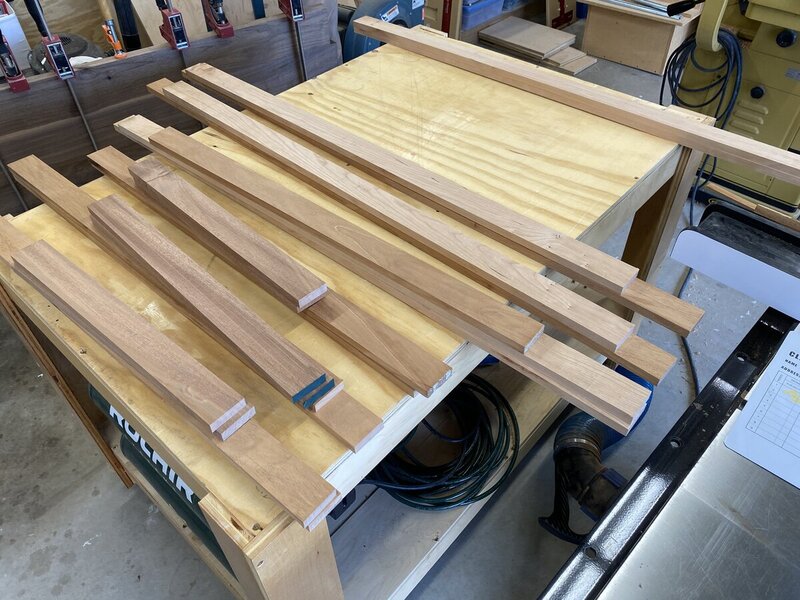
While the top was drying I need something else to start working on, so I chose the shop cabinet doors. Mainly because I see how much mess is getting in there while building the desk, so figured I would start this while I am waiting on the top and then slowly get this down over the next few days or so when I have breaks.
Got the rails/styles milled up and ready to go ... now just need to cut to length soon and cut out the door panels sometime too.
Lots of wood for some cabinet doors haha
-
4
-
-
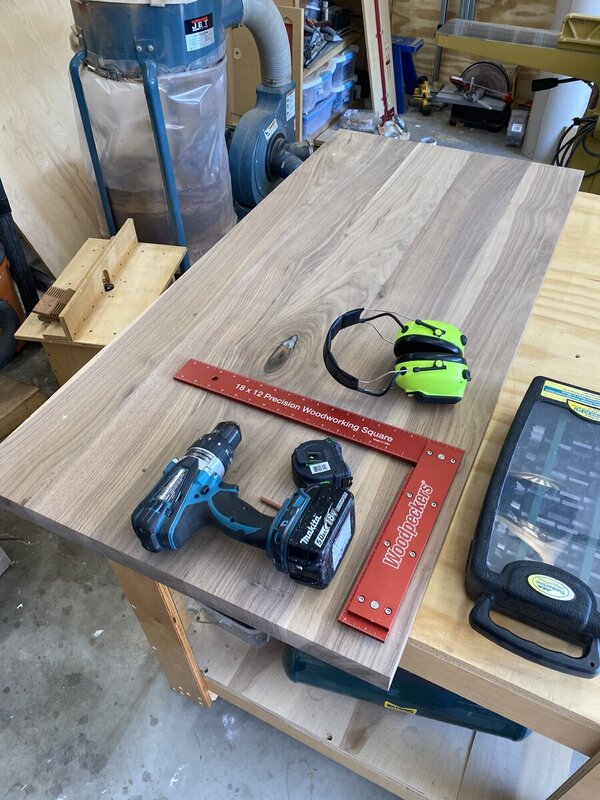
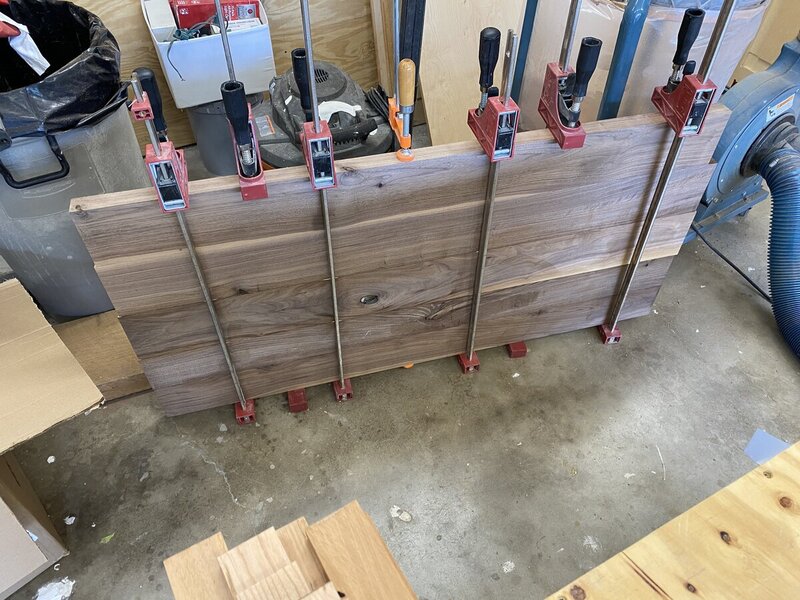
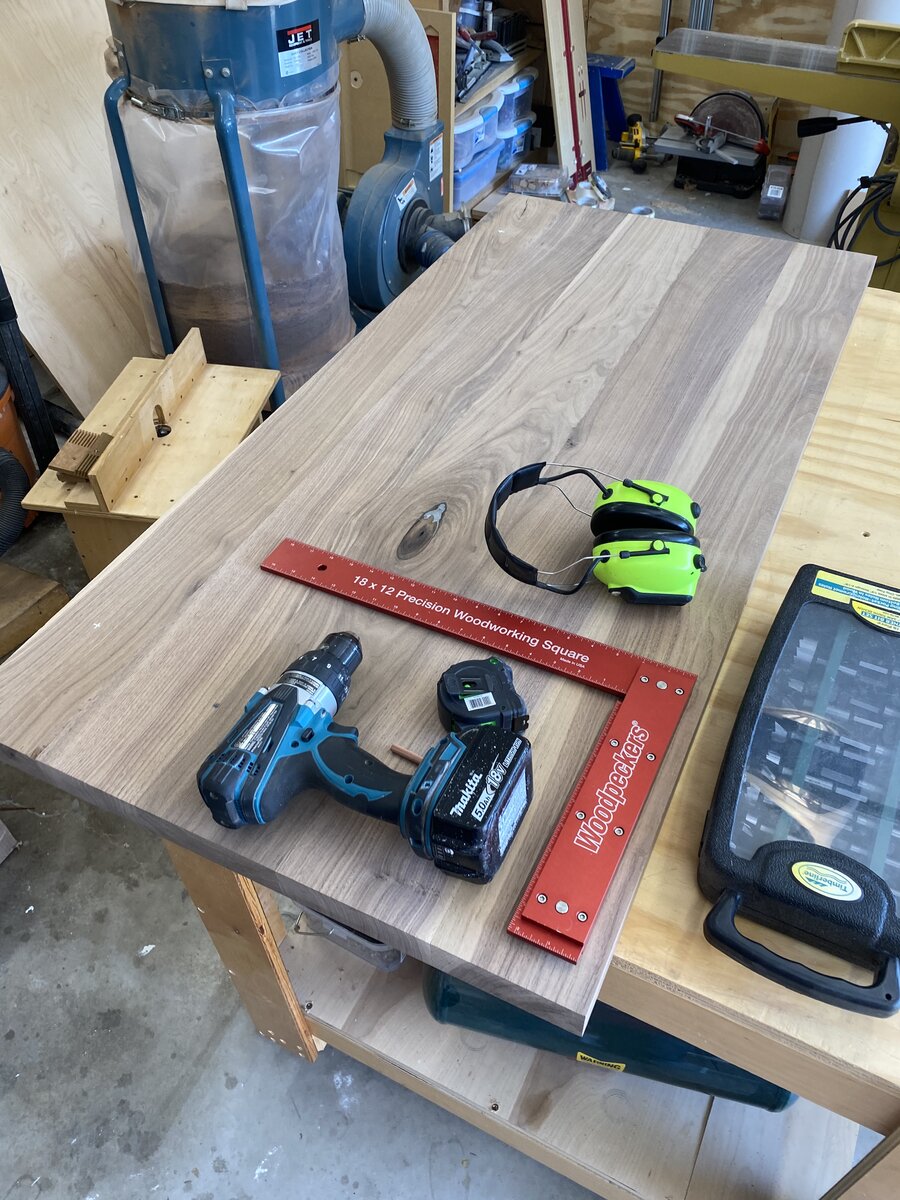
Got some work done this morning, got the top milled down to just shy of 1 5/8" thick.

Then got the whole thing glued up and set to the side until after my lunch break and 1 manager meeting I need to attend while on PTO.
-
2
-
-
4 hours ago, Chet said:
Wow, two Dominos in one family.
That is some nice progress Drew.
haha hes the pro, I am just the hobbyist. It is helpful though to have someone close in the family just in case crazy crap happens like this ?
-
8 hours ago, Coop said:
I stead of Bushwacked, we will from here on out call you LHT!
haha .. what is LHT?
-
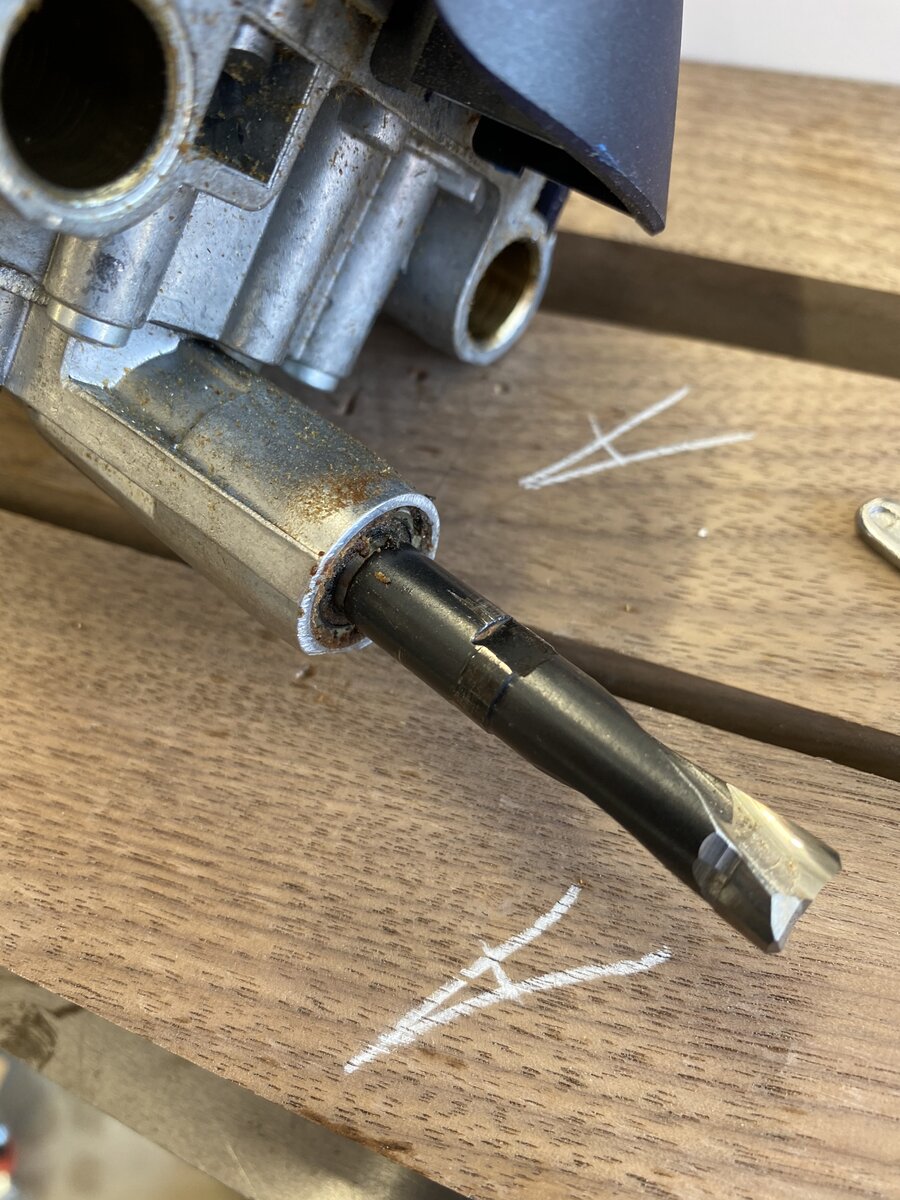
4 hours ago, Kev said:
Doesn’t that have reverse threads?
2 hours ago, Chet said:The way the picture shows the bit, if you put the wrench on to the left of the bit, you would push down to loosen.
1 hour ago, Coop said:I don’t remember if they are left hand threads or not and I loaned mine to my brother. BW, check the threads on your other bit.
19 minutes ago, Woodenskye (Bryan) said:Not to send traffic to a different place, but go to the FOG and ask about the threads and removing a stuck bit. I recently sold mine or I would go check.
Chet is right, the way he said it, however that is the way I was going and it was not budging. I did look into the FOG site while googling how to get it unstuck, but the few things I tried were not working from them and I didnt want to break it so I sent it back to Festool to get it taken care of.
However, called up the brother in law and got to barrow his, so I only had a couple hour stoppage today for that fiasco. Did make some more progress as well when I got back ..
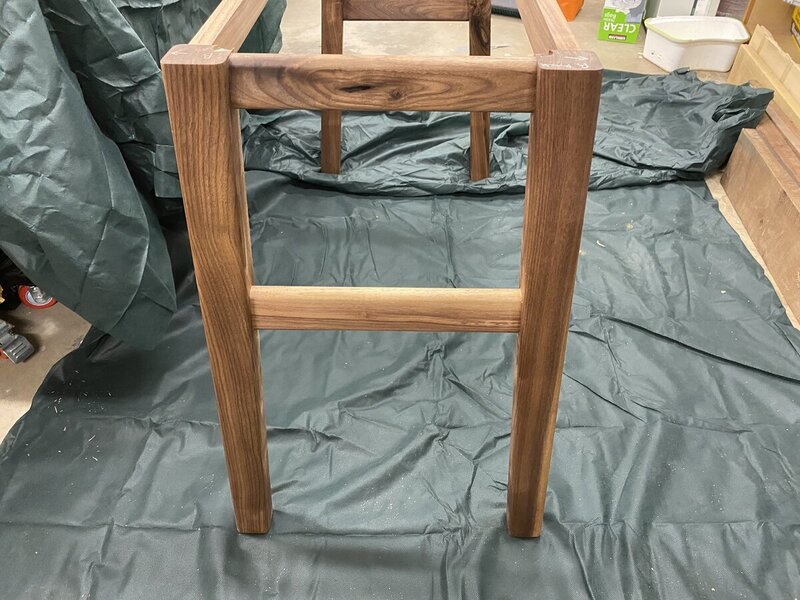
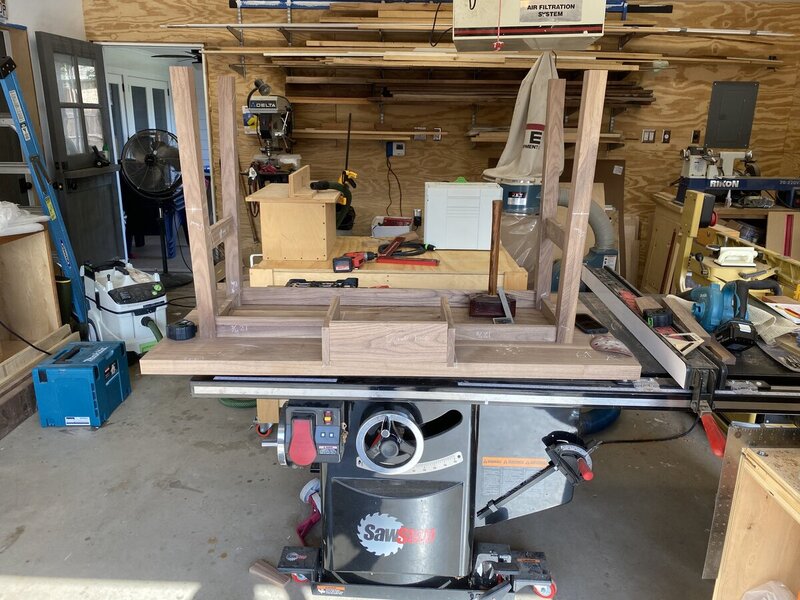
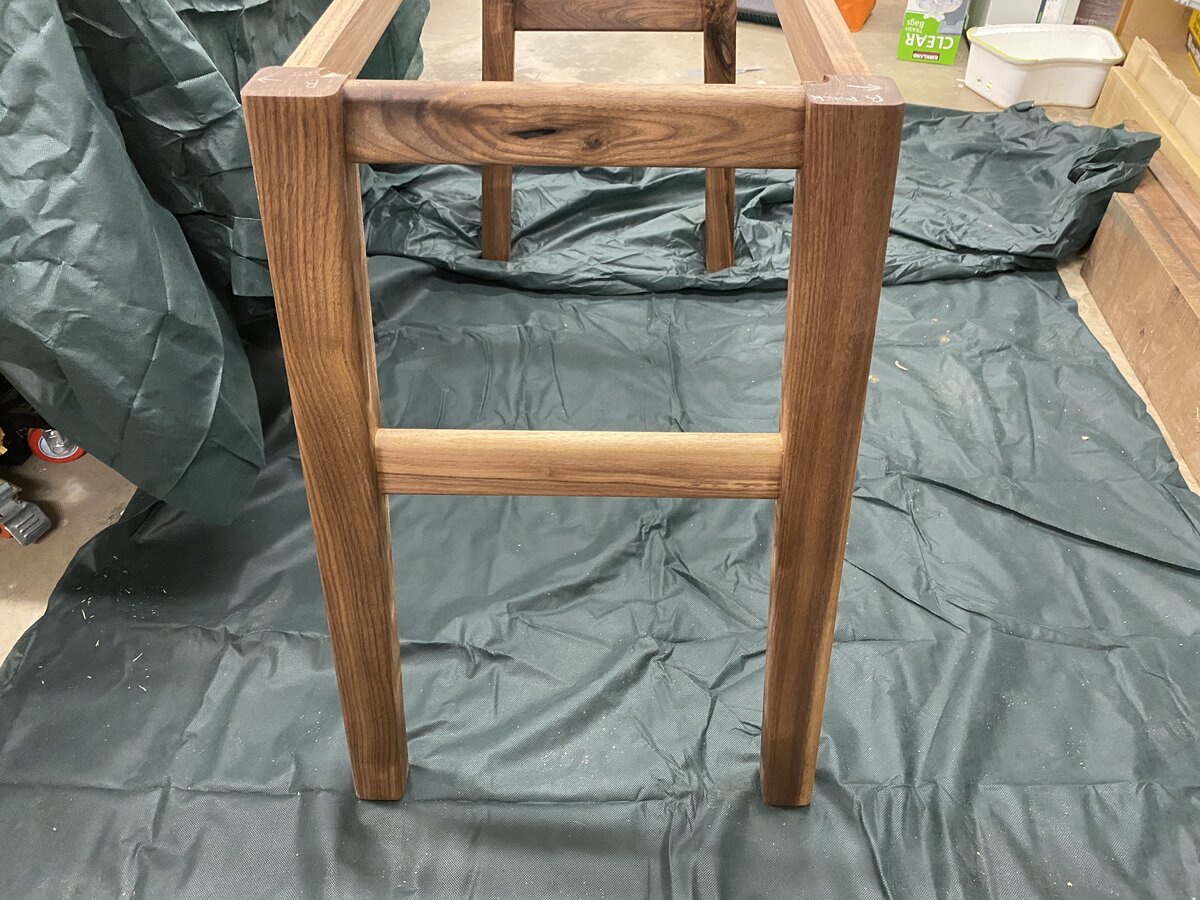
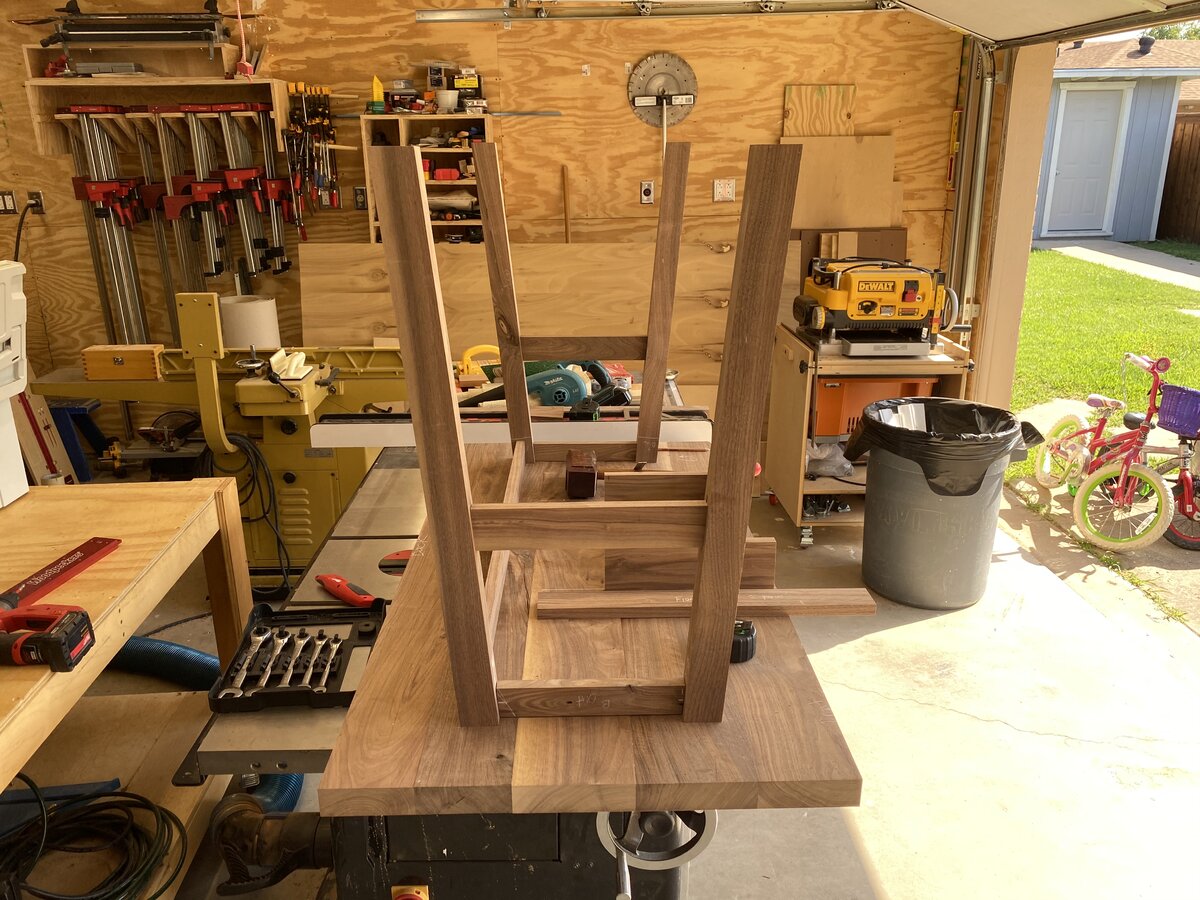
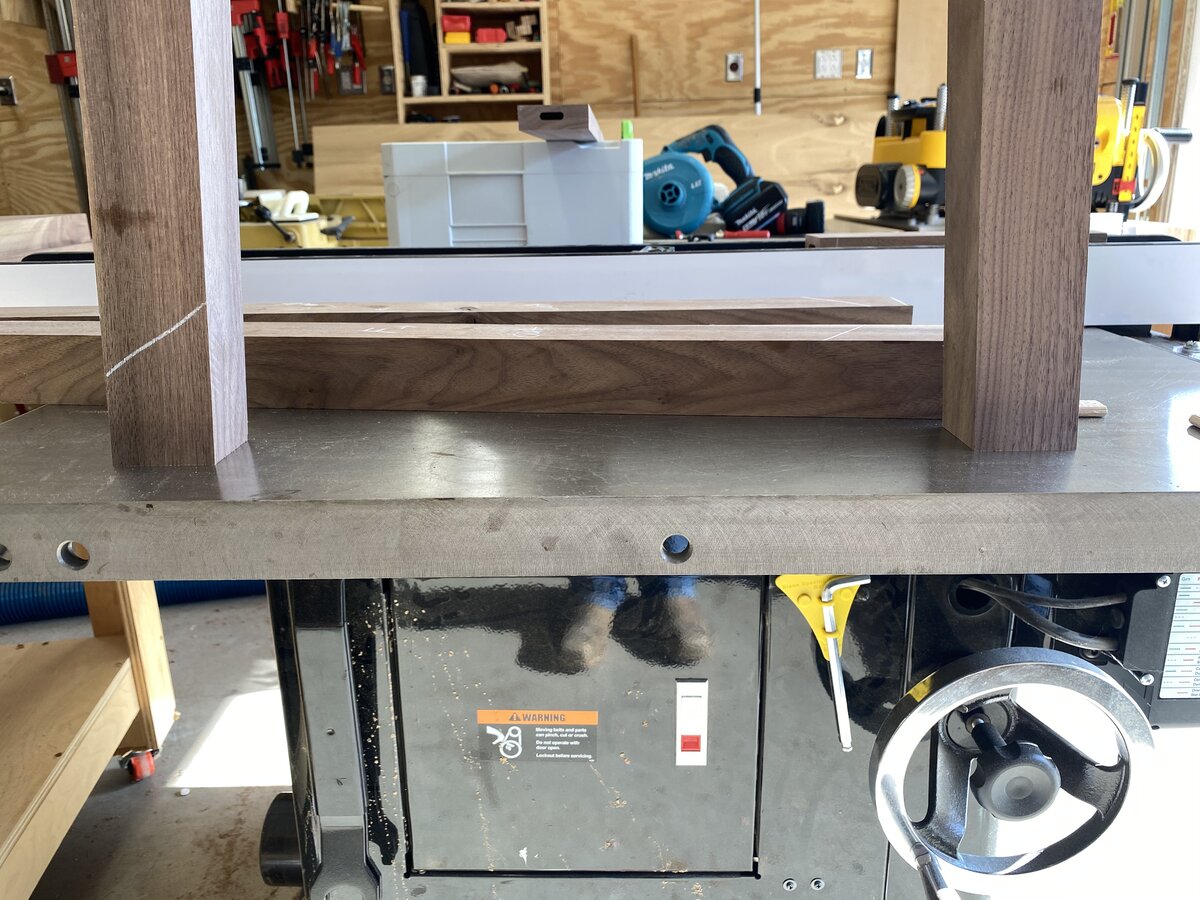
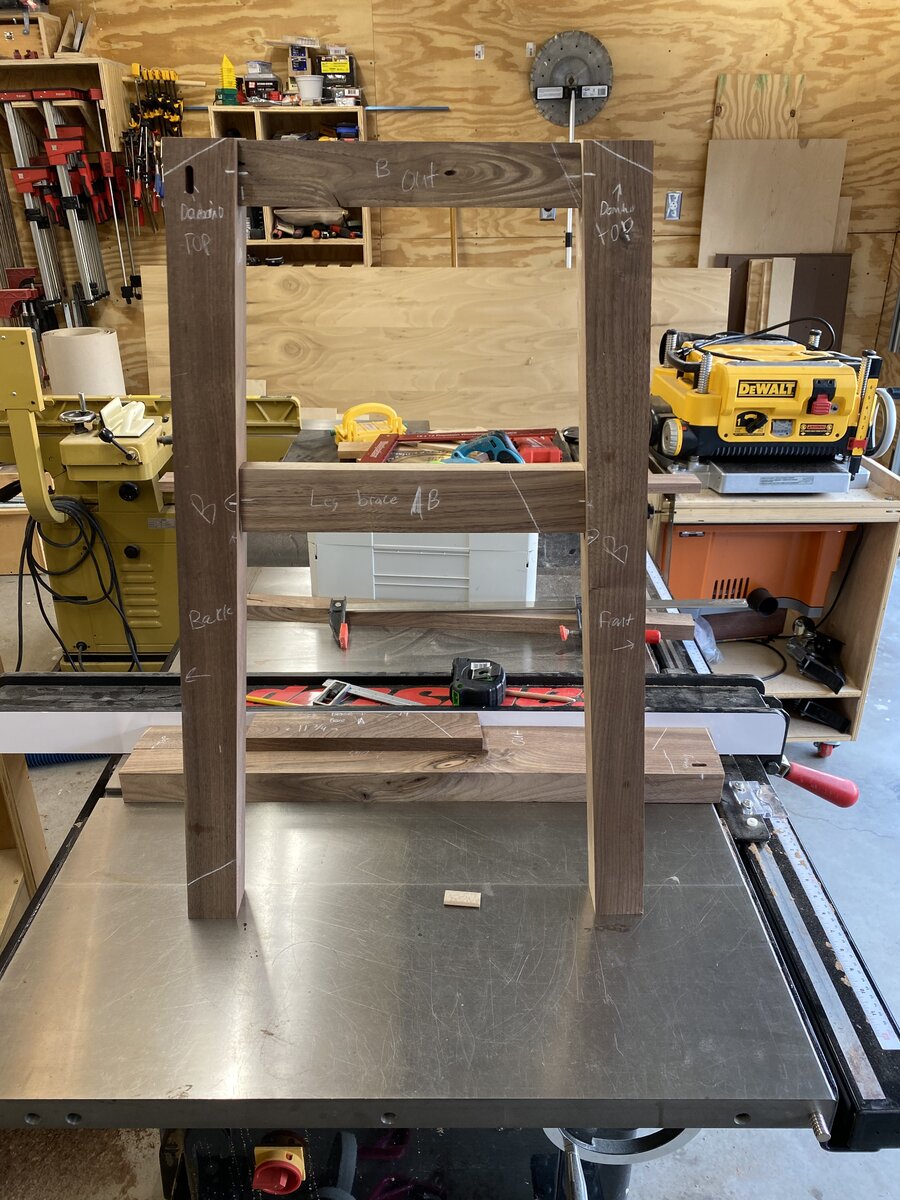
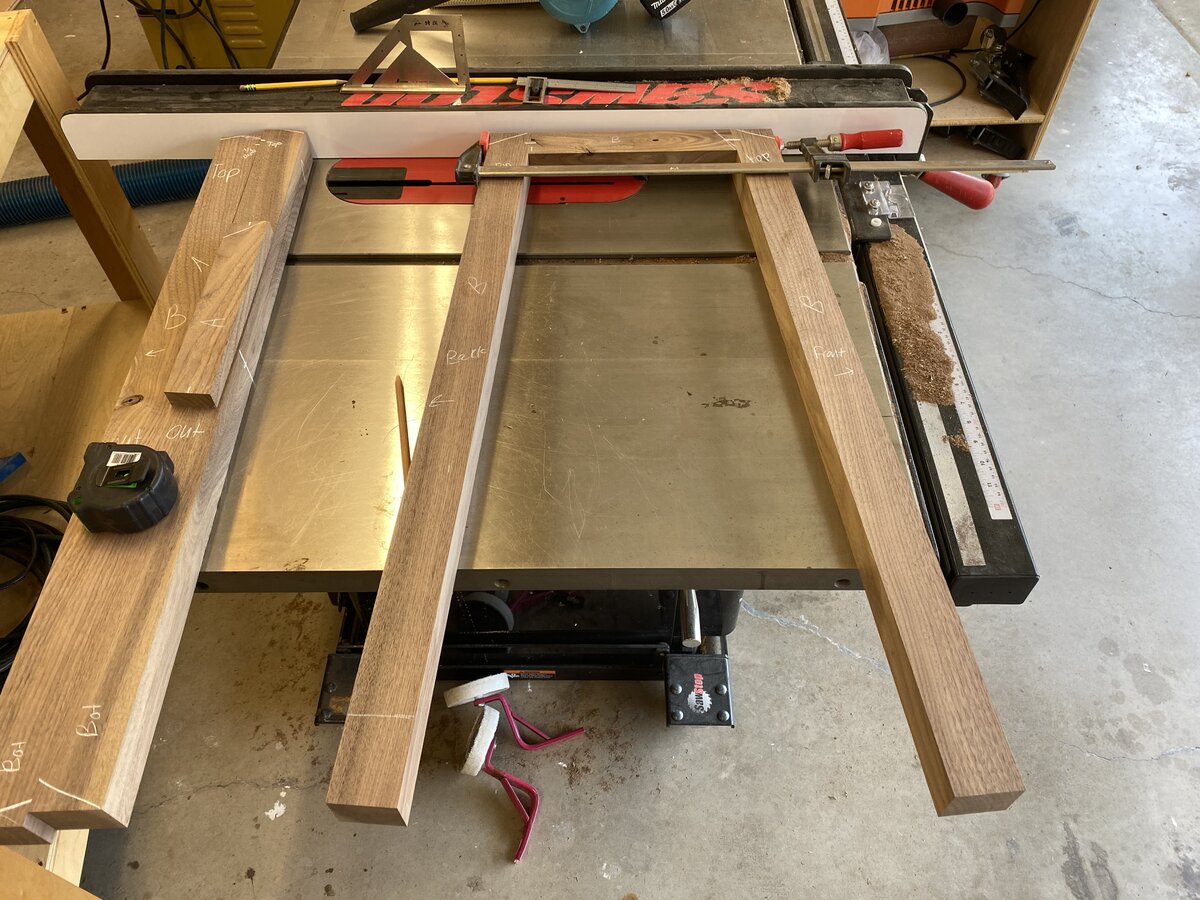
Got the legs cut and angled @5*, put it together and it was flat on the tablesaw!

Enjoying the mite saw area as this made it easy to measure once and get it right, then the 2nd leg on each was perfectly identical.

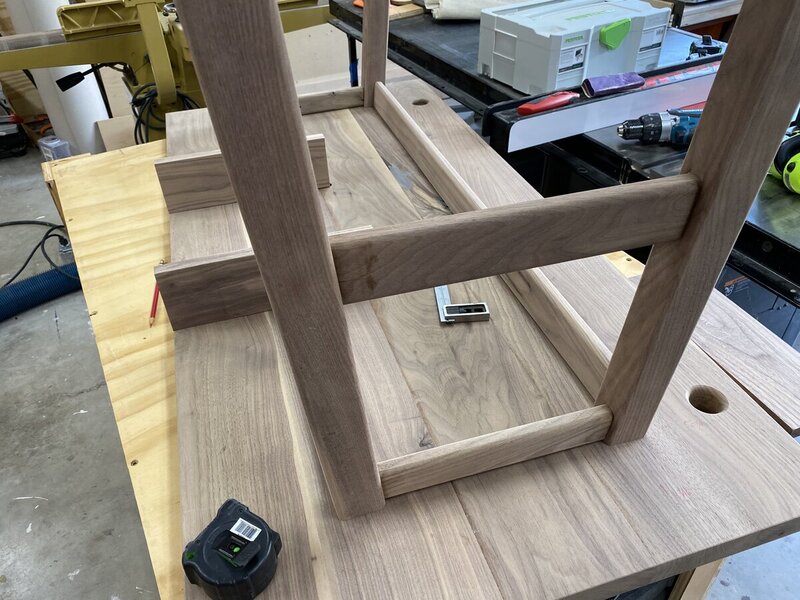
Dry fit for the entire leg .. I am thinking that middle brace should better once everything gets rounded over a little more like the original picture.
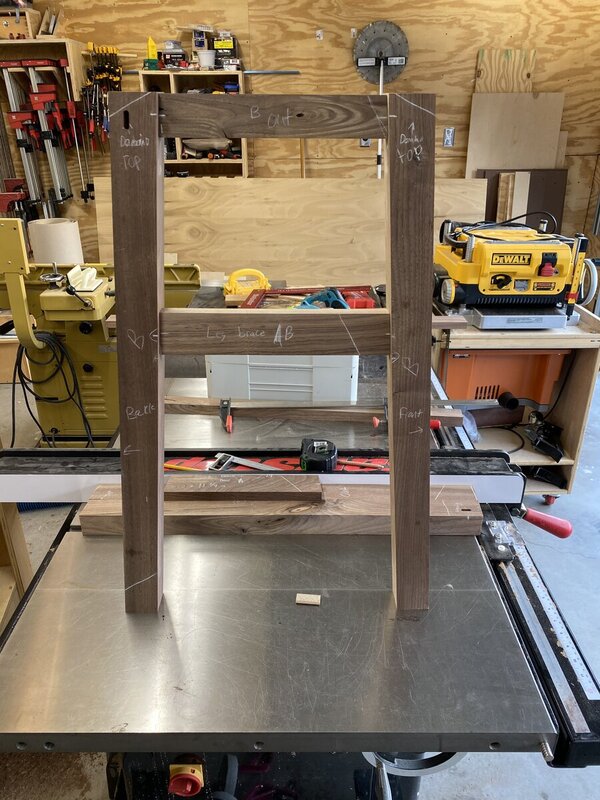
Had a quick test fit before the leg bottoms were cut and the leg braces were cut as well ... but I think it is looking pretty good so far.
Tomorrow, I am hoping to get the top glued together first thing to let that start drying, then while it is drying, start working on round over the legs. After that when the top is dry, hopefully will get going on the dovetail drawer design and see how that goes .. decided on that instead of just the stopped dado to give it a little more support and a little extra visual detail in it.
-
3
-
-
The day was going so well ...
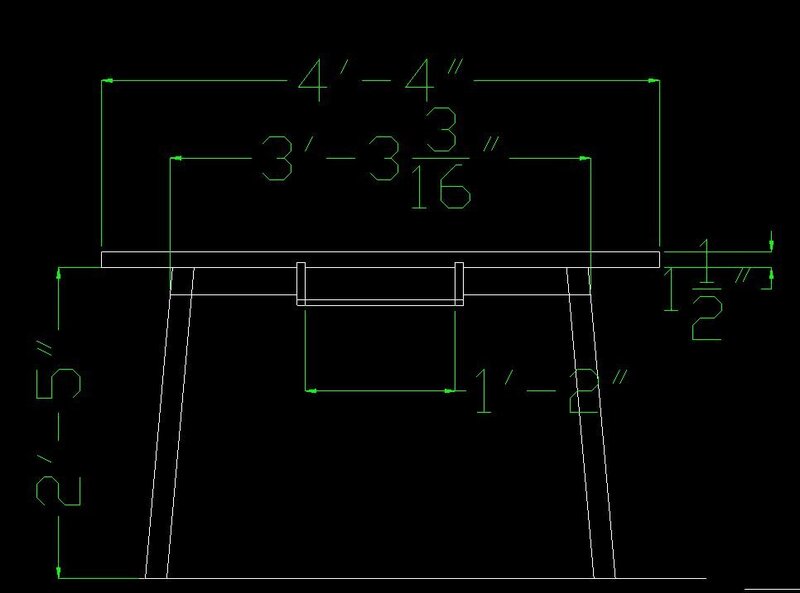
I got the legs cut out and rough sized on the length. The top angle cut and everything looking good. The cross brace will have a 1/2" inset so it does not sit flush.

Then apparently the last time I used my domino I didnt take out the bit and apparently used gorilla strength to tighten it. Guess who gets to send it back to festool now and wait. I just needed 4 dominoes in a #6 bit, the #10 bit is on there ... I did get the tabletop drilled out so I can at least keep that going until I am done with that part. However the legs wont be completed for a probably 2 more weeks with all the shipping times and stuff about to hit.

-
1 hour ago, Jamie said:
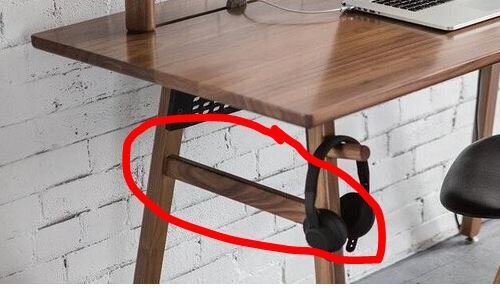
Also are your going to be adding the rail that is down from the top? Looks like it would add quite a bit of support to the legs.
for now I was just going with the apron approach ... for the rail, are you talking about the cable management piece or the one between the legs? If its the one between the legs, I was still considering it ... not 100% sure, but if it is needed, I will add it.
-
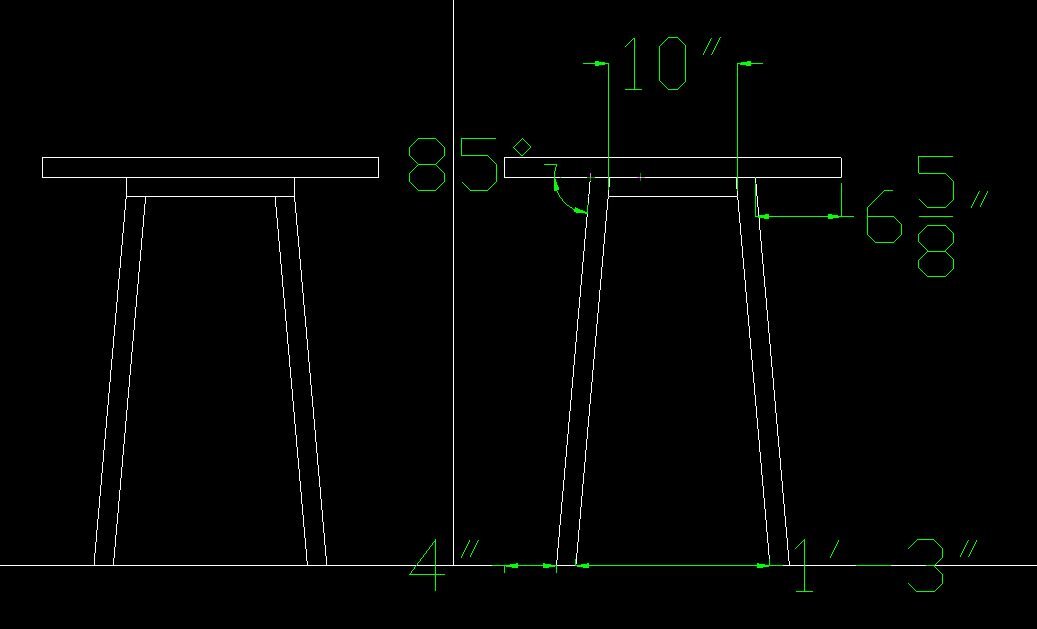
1 hour ago, Jamie said:
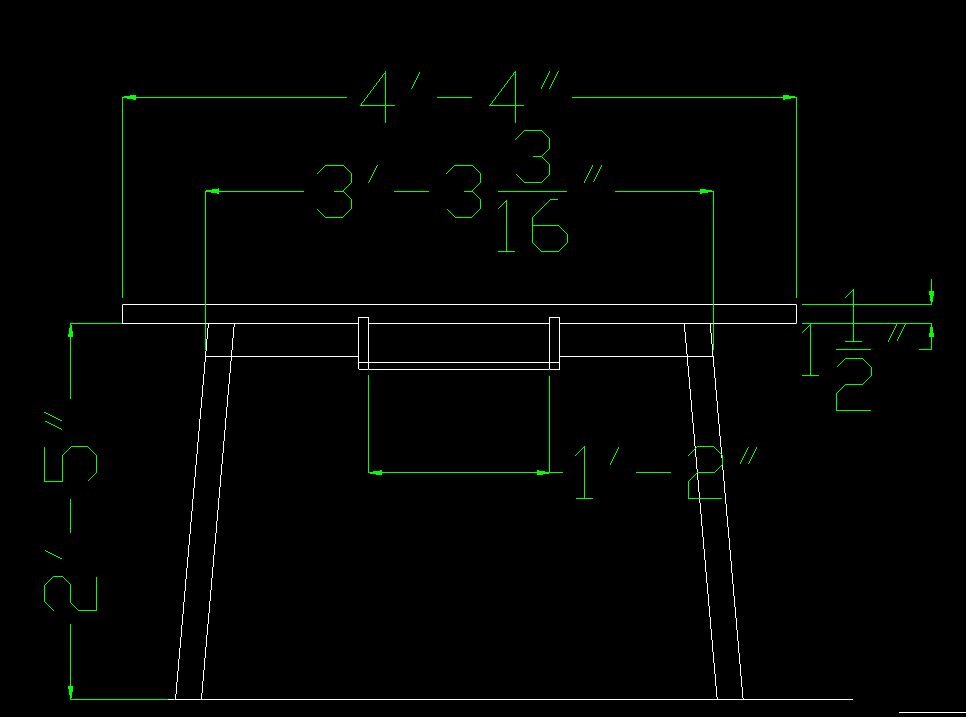
I like the look of the legs being wider. From the original picture it looks like the legs on it go out even farther. Not sure if its more angle than 5 degrees or they are spaced out wider. Going of that print....I think having the legs go all the way to the top would be a stronger joint.
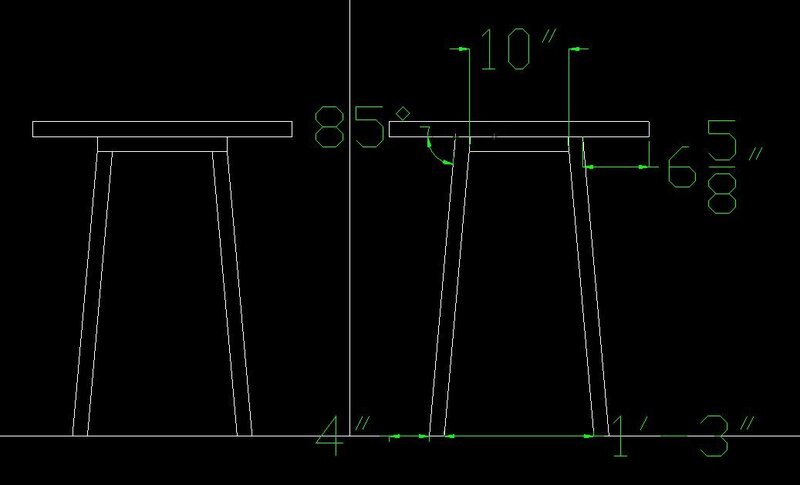
ya, it looks like it is more of an angle in the picture than the 5* I am working with.
As for drawer ... here is the leading contender: 14" wide drawer, 3 1/2" deep after the 1/2 dado in the top to hold the frame of the drawer. Then 1" off from drawer guides, then another 1" off from 1/2 box ... overall should be around 12" wide usable drawer ... if it all goes to plan ?
Now as far as connecting the front apron to the drawer frame ... Not sure if I should go domino or dowel. The dowel seems like the easier option as I have never done a "free range" domino like it going to be needed for this ... Is there a good video explaining that one?

-
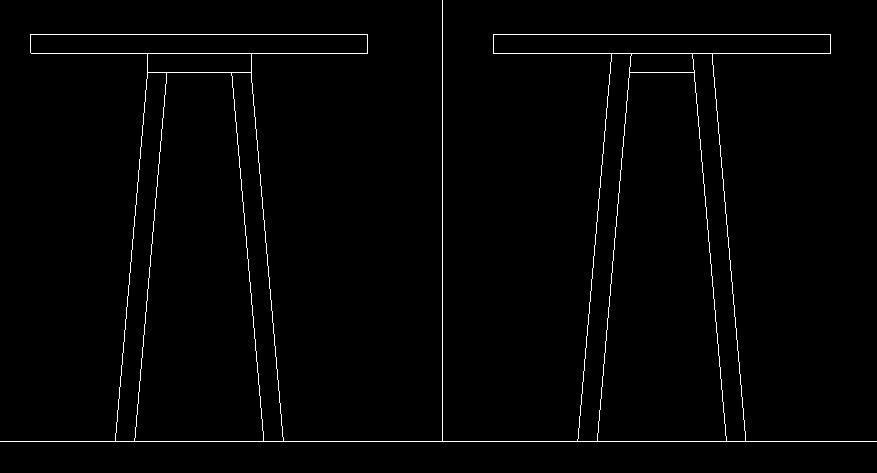
ok so building it out ... the right just ended up looking better overall to me. Here it is to size ..
-
working on legs ...

Is one design structurally better than the other? Going to have them wider though in the final build ... just working on angles and design at the moment. Going to shoot for about 4" back from the top at the bottom of the legs ..


My Office Desk, Finally
in Member Project Journals
Posted
Here is what it normally looks like after a coat at the moment .. Shiny, but not the milky blue tint to it ...