Every purchase made through our Amazon Affiliate Page helps support this site
Kev
-
Posts
6,323 -
Joined
-
Last visited
-
Days Won
583
Content Type
Profiles
Forums
Downloads
Gallery
Events
Store
Articles
Blogs
Everything posted by Kev
-
It pays to build relationships with your hardwood dealer!
-
Nope.. They only precautions I'd take is to epoxy the feet to prevent water absorption and I'd use epoxy for the glue up for the same reason.
-
I didn't ask to be honest.. He already reduces my bill by 10% over list on every purchase. He'll do 13% if I pay cash so he doesn't have the CC fees....lol
-
Yep, thinking outside your box paid off!
-
That's my only local dealer but, we have a great relationship! He's even sponsored a couple videos. African Mahogany and Sapele are regular sellers for them but, the Wenge and other exotics are pretty thin there!
-
Yea, I picked out the boards and my HW guy asked me to guess this price... I said $780... He said "brace yourself"......lol
-
Turned out great! I really like what you did with the drawer fronts!
-
I hope so...lol Tomorrow, I'll build the template for the top rails. As these are the most visible, I want to pick out the best pieces for those first. I'll then move through the lumber picking out appropriate parts that will be visible. What's left will become the legs with the best face forward. The side veneers will also be cut from a nice piece to ensure they look great as well.
-
Couldn't get the 16/4 and my wife wanted even bigger.. So, I'm going to laminate 3ea 8/4 boards together to get to around 20/4 (5" x 5") and veneer the sides to hide the glue lines.
-
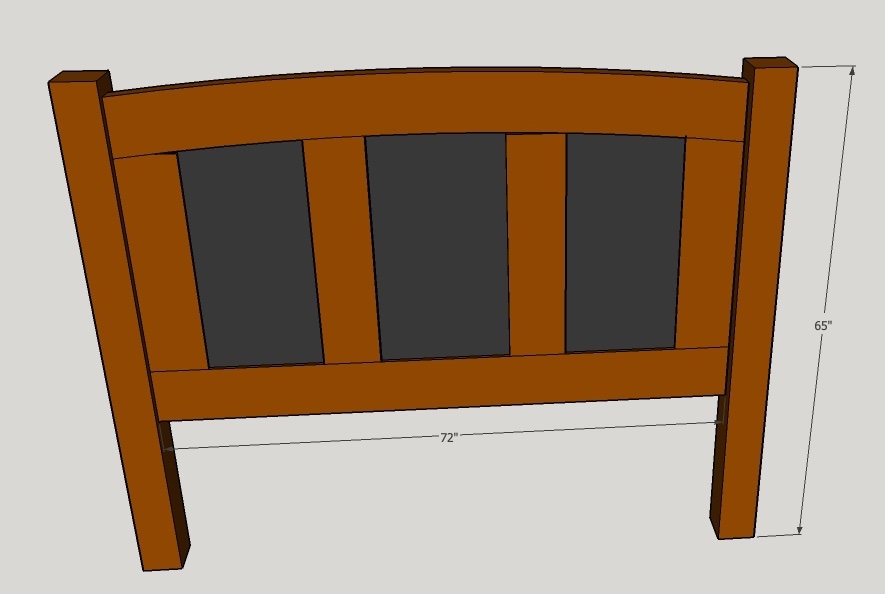
I think I can win on the finial front by adding the "live edge" to the tops of the rails.. I think once she sees it without them, she'll see my point of view. As I said, she really wanted more curve but, to pull that off, I'd need some monster material! By going with this design, I can get it out of a 9" board without laminating. I really didn't want to laminate because the grain match would be difficult and I didn't want a showing seam. Plus, if I did laminate to get a wider top rail then, I would need to also laminate to get all the other parts to match the width.. My scrap pile would be horrendous as well as my final bill at the lumber yard!
-
My wife bought off on the design with a couple minor changes.. 1. She wants the finials back on the top - I'm working on that one...lol 2. She wants the tops of the headboard and footboard to look live edge like I did on the desk. I actually think this will be a nice "blending" touch. Ultimately, she wanted a steeper top curve like the picture but, realizing that all of the main members would require a grain matching glue up and knowing the cost of this lumber, I think she realizes the difference between building a bed like this with cheap fir/pine slats vs African Mahogany/Wenge.. We just had to make some design changes to not require a second mortgage on the house!
-
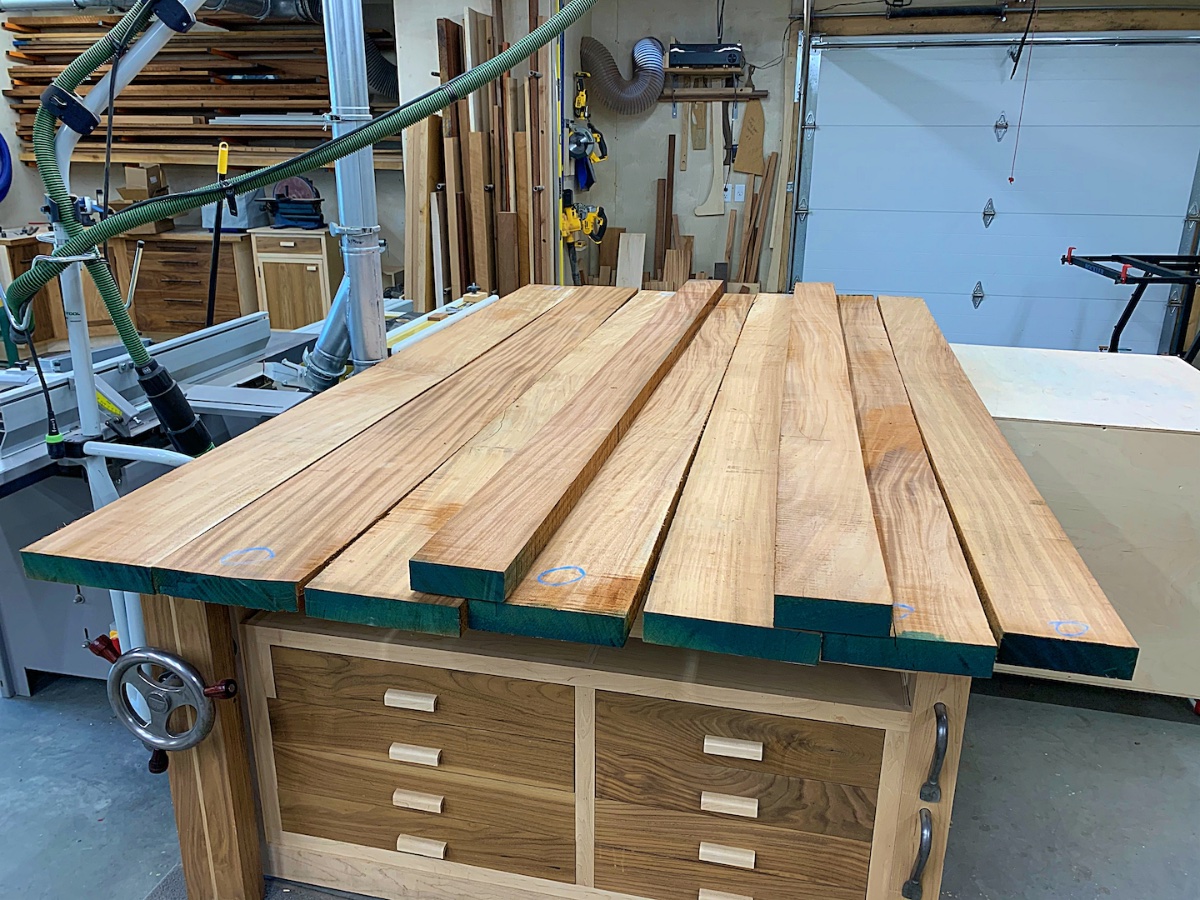
Well, it looks like this is now the current project! I picked up about 115 BF of African Mahogany this morning! I need to get my wife to approve lessening the curve on the top to allow me to pull off those upper rails from one board! I did a quick sketch up drawing to get the proportions right as well as figuring out the sizes of the verticals. And, here's what a grand gets you at my local HW dealer.. I know there's a bed in there someplace...lol. You'll notice the blue circles.. Those are reference for which end of the board the grain shows up best on. I like to do this with AM so the boards all get oriented the same direction to prevent what looks like mismatched boards.


-
I don't know a woodworker that isn't guilty of this!
-
I usually sign pieces in a place where it would probably survive a refinish..
-
Update: Sold
-
I have not tried it.. The reason why is that you only get one shot at having enough heat to make the brand. With the electric, if it's not hot enough when you apply it, you just hold it longer...lol
-
Wow.. Gotta think about that one...lol Wenge, Padauk, Bubinga, African Mahogany, Maple, White Oak, Walnut, and Red Gum if my memory serves me correctly...lol
-
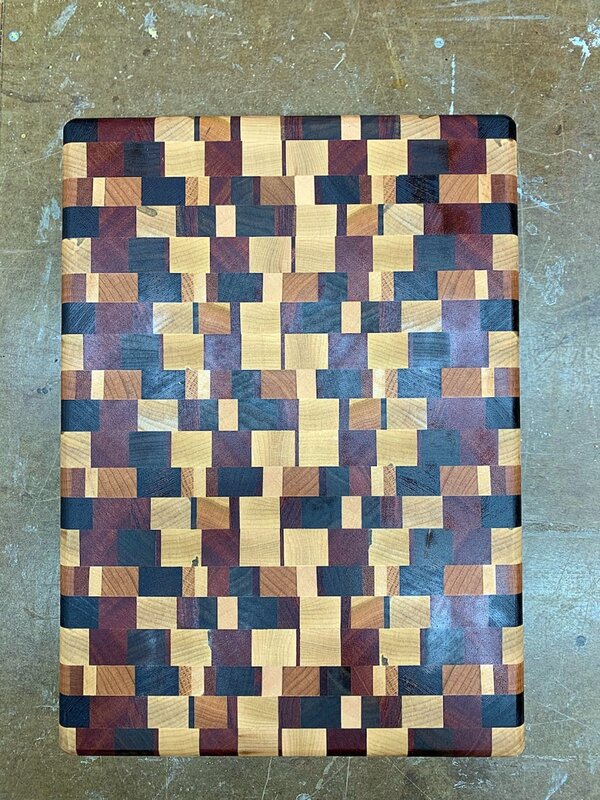
These all start out as slightly less than 1" boards randomly put together. When I get these small off cuts, I try to set them aside until there's enough to glue into a thin board. When I get 3 of these thin boards, I glue flatten them and then glue them together. From there, I set the TS fence to whatever the total thickness is and start cross cutting strips. I then alternate them and try to randomize the pattern as best I can and glue it up. They always come out looking cool and use up a bunch of scrap that would normally go on the fire.
-
Before I get going on the bed, I really needed to reduce some of the scrap so, another cutting board was in order. This is actually 3 cutting boards put together and then flipped to end grain for the "chaotic" look. Salad Bowl Finish - Size is about 10" x 14"
-
The learning curve on the one I have is to let it heat up for around 1/2 hour prior to use...lol
-
I've watched Ashley Harwood use the pen to sign freehand and it looks really nice!
-
I have the Rockler branding iron and I've never been that happy with it. It seems to take forever to heat up enough to do a fair job. My kids got it for me several years ago so, it doesn't have my actual logo on it so, thinking it might be time for an upgrade. Because of it's downsides, it doesn't see as much use as it should and I find myself signing pieces with a sharpie more than I use the iron. I'm also considering just going to a burning pen so, I'm curious if anyone is signing their pieces this way? If so, what equipment are you using?
-
WOW! 😬
-
Remember, big bits, slow speed! Congrats on the project!
-
All particulars are in the thread.. PM me your addy (I probably have it somewhere...lol) and I'll get it in the mail to you..