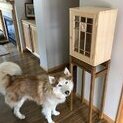
pkinneb Posted August 21, 2023 Share Posted August 21, 2023 Here a couple pics of my most recent projects Windsor chair Shave horse ...and a high vise 4 Quote Link to comment Share on other sites More sharing options...
Kev Posted August 21, 2023 Share Posted August 21, 2023 Very nice work! Interested in how you like the Hi-Vise? I attached mine to the bench differently and am not happy with it. I do have the option to mount it the was you did. Quote Link to comment Share on other sites More sharing options...
pkinneb Posted August 22, 2023 Author Share Posted August 22, 2023 3 hours ago, Kev said: Very nice work! Interested in how you like the Hi-Vise? I attached mine to the bench differently and am not happy with it. I do have the option to mount it the was you did. I haven't used it a ton but when I do I really like it! My eye's aren't what they once were so its nice getting the work up high. I find the tail vise version much easier, less cumbersome, and quicker then the bottom screw version I used at Greg Pennington's school. But the advantage of the screw version is you can mount it anywhere. 1 Quote Link to comment Share on other sites More sharing options...
Kev Posted August 22, 2023 Share Posted August 22, 2023 9 minutes ago, pkinneb said: I haven't used it a ton but when I do I really like it! My eye's aren't what they once were so its nice getting the work up high. I find the tail vise version much easier, less cumbersome, and quicker then the bottom screw version I used at Greg Pennington's school. But the advantage of the screw version is you can mount it anywhere. Thanks! I think I need to change mine up.. I don't use it because I just don't find it to be very stable.. 1 Quote Link to comment Share on other sites More sharing options...
Coop Posted August 22, 2023 Share Posted August 22, 2023 The chair is absolutely beautiful! Great job. 1 Quote Link to comment Share on other sites More sharing options...
Chet Posted August 22, 2023 Share Posted August 22, 2023 I, too like the chair. I remember the finish process you showed on the first chair and thought it was very interesting and the end result looks great. I don't have the patience to do all the hand work required on something like that so I am real impressed with people that do. 1 Quote "Do not spoil what you have by desiring what you have not; remember that what you now have was once among the things you only hoped for." - Epicurus Link to comment Share on other sites More sharing options...
pkinneb Posted August 22, 2023 Author Share Posted August 22, 2023 2 minutes ago, Chet said: I, too like the chair. I don't have the patience to do all the hand work required on something like that so I am real impressed with people that do. Thanks Chet! Actually you would be shocked how easy and cathartic making the chair is...painting it now that process is a PITA LOL Oh and I'm almost done with a chip carved cribbage board (in the finishing room as we speak) OMG the amount of time it takes to do that is unbelievable and I thought well if your doing one why not knock out a couple extra so I have two more to go. Not gonna lie once these three are complete I will probably never chip carve again 😲 3 Quote Link to comment Share on other sites More sharing options...
Coop Posted August 23, 2023 Share Posted August 23, 2023 Paul, will you be doing a short video demonstrating the use of the shave horse, I hope! 1 Quote Link to comment Share on other sites More sharing options...
pkinneb Posted August 23, 2023 Author Share Posted August 23, 2023 9 hours ago, Coop said: Paul, will you be doing a short video demonstrating the use of the shave horse, I hope! Coop, I certainly can but it will have to be later this year when I get my hands on some fresh cut wood. I lost a couple red oaks that I plan to use for chairs so once they come down, probably Nov, I can post something up. 1 Quote Link to comment Share on other sites More sharing options...
pkinneb Posted September 12, 2023 Author Share Posted September 12, 2023 Another urn...making to many of these the last couple of years... This one is for my mother in law we lost her on labor day 3 Quote Link to comment Share on other sites More sharing options...
pkinneb Posted September 12, 2023 Author Share Posted September 12, 2023 Another pic 2 1 Quote Link to comment Share on other sites More sharing options...
Coop Posted September 12, 2023 Share Posted September 12, 2023 Beautiful work Paul! I’m so sorry for your loss. 1 Quote Link to comment Share on other sites More sharing options...
Kev Posted September 12, 2023 Share Posted September 12, 2023 So sorry for your loss! Thoughts and prayers for the family! Beautiful work as always! 1 Quote Link to comment Share on other sites More sharing options...
pkinneb Posted September 12, 2023 Author Share Posted September 12, 2023 Thanks guys! From a wood working perspective pretty straight forward 1/16" ish shop sawn veneers for the top and bottom panels, sandwiched over 1/8" mdf. Previously I used wood guides and a hand held router to cut out for the cross this time I used my Shaper Origin. Instead of 15 min took me a couple hours but I learned about the machine and now will be able to do future ones in a few min. I also realized last night as I was posting the pics that I forgot to do the keys...oh well you guys won't tell anyone right LOL 2 Quote Link to comment Share on other sites More sharing options...
pkinneb Posted September 18, 2023 Author Share Posted September 18, 2023 Finally finished I chip carved cribbage board for my uncle that was for xmas 22 😲 Its been a tough 10 months around here but hope to get it delivered in the next week or so. Sapele and Basswood. Its an amy.makes.everything (Instagram) Design 3 Quote Link to comment Share on other sites More sharing options...
Kev Posted September 19, 2023 Share Posted September 19, 2023 Very cool! Can you walk us through the carving process? Quote Link to comment Share on other sites More sharing options...
pkinneb Posted September 20, 2023 Author Share Posted September 20, 2023 Honestly Kev its three basic cuts its just that its over and over and over LOL First step is to layout the pattern I was looking to match the pin holes without getting the box to big. Ultimately I ended up with 7/8" squares which are broken down to into 8 triangles. First row is the design, second I use the knife to make the three initial cuts for each triangle (center), then go back and remove each chip (bottom row). One of my biggest issues was my poor eyes I needed to use a magnifier and was only able to do 3 or 4 7/8" squares at at time before the stain got to me. I did take a one day class at our Woodcraft store and then just a fair amount of practice. You don't have to look to hard to see mistakes in these practice boards but I was getting better as I went. Here you can see the knifes I have. I preferred the one to the left (from mychipcarving.com )the best and keep a strop handy as a sharp knife is required. Also you see the eraser here I found that if I wasn't careful I could damage the piece using this to erase a line(s) that didn't get removed. I later used an eraser pencil and it worked much better. I also had issues with the chips on the very ends breaking out so I found using a jig like this solved that for me I made this one for my uncle after seeing it on amy.makes.everything Instagram page. Since I was making one I thought why not do three so I still have two more to go one for our game room and another for a gift. After that not sure I'll do much more chip carving but I always like learning new things so I do not regret the journey. 3 Quote Link to comment Share on other sites More sharing options...
Kev Posted September 20, 2023 Share Posted September 20, 2023 Super nice and great explanation! Cribbage is a fun game! It seems to be getting harder and harder to find people that play. 1 Quote Link to comment Share on other sites More sharing options...

Recommended Posts
Join the conversation
You can post now and register later. If you have an account, sign in now to post with your account.