
Every purchase made through our Amazon Affiliate Page helps support this site

Chet
-
Posts
2,280 -
Joined
-
Last visited
-
Days Won
93
Content Type
Profiles
Forums
Downloads
Gallery
Events
Store
Articles
Blogs
Posts posted by Chet
-
-
Submitted on the old forum by Chet
I built this box for my niece's new baby girl. The inside and outside are Wenge and the polka dots are maple. I kind of got the idea from one of the boxes that Matt Kenney did in his book 52 boxes in 52 weeks. I used box joints on the corners and the lid handle is also made from maple.


Follow up posts
1) That's pretty cool! I'll take 2 please!
2) Nice work Chet!
3) Excellent job!
4) Yea, I didn't date and sign it and it is now in Wales where she lives. I did write a nice two page letter (remember those) to her and the baby that gets left in the box.
5) I do remember letters. Those and actual phone calls other than robo dials.
-
Submitted on the old forum by RichardA
Here's a couple of pic's of Mr. Ken Cooper doing the inlay in the casket. He did this from the heart and my wife welcomed his participation.


Follow up posts
1) Awesome!
2) That's what it is.
3) This is what makes woodworkers special. Helping each other.
-
Submitted on the old forum by RichardA
A few members over there and here know of this project, and I'd prefer it not be brought into the open. Coop knows about this and is coming here this week to help me put the finishing touch on this very emotional project. My wife is dying and most of the Doctors involved believe she'll be lucky to reach 6 months, and the starting gun went off in the middle of July. That means Christmas or the New Year. I've given my life to this woman, and she's rock solid. And the only gift I have left for her is this.
Attachments:


Follow up posts
1) Rick, I can’t believe you’d let me come near this with a router that’s plugged in. Gonna be some shaky hands for sure. Thanks for the confidence.
2) Definitely has to be an emotional project but it is coming out beautifully Rick.
3) Rick, in what must be one of the most emotional times in your life, all I can say is what a beautiful tribute to the woman you love!
4) Truly awesome piece and for absolutely all the right reasons!
I was asked a couple years ago to build the memorial box for my nephew who was only an infant when he passed and it was the hardest project I've ever worked! I can't even fathom your thoughts and emotions working on this each time you go to the shop!
Your family shall remain in my thoughts and prayers and if there's anything at all I can do, don't hesitate to drop me a line!5) Coop flew up to Tennessee to add an inlay in a panel that's part of the casket I'm building for my wife. He done good. It's just a matter of some sanding and the finish, and I'll be nearly done with the bulk of this project. One of the questions asked about how I feel as I build this can be answered kinda easy. Though my wife isn't using it yet, I spend much time leaning over the casket and talking to her. There are more salty wet spots on the interior of this thing then when it rains. This has to be the hardest thing I've ever done, and at the same time the easiest thing I've ever done. This woman has held my heart for more than 20 years, There's not one thing I wouldn't do for her, not one.
6) That's true love brother!!!
7) For the record.. I hope you know that if it was possible, we would all be there to assist you with whatever you needed!
-
Some of you know I have been working on this for a couple of months so I thought I would drop the final pictures here for viewing.


Some of you know I have been working on this for a couple of months so I thought I would drop the final pictures here for viewing.
Follow up posts
1) Super nice work Chet! Having been in your home, that will be a very nice addition for sure! I'll bet it goes awesome with that new dining table!
2) Really came out great Chet! The pulls really make the piece pop, especially since this is arts and crafts furniture however, hopefully this doesn't come off like a jerk, but outside of this piece I wouldn't like them, cause they just look really chunky and not my taste.
3) Nope, not at all and I would tend to agree. I don't think I would use them out of context so to speak. and they are definitely chunky and heavy... I wouldn't want to drop one on my bare foot.
4) Sometimes things work on 1 piece and would be so out of place on another, guess that's why taste and design are so subjective.
5) Chet, beautiful job bud. To be completely honest, at first I thought that two drawer pulls per drawer were pretty overwhelming . I thought that it was taking away from the woodworking itself. But now, I couldn’t agree more with your choice!
6) You already have my take on this project. Well done.
-
Submitted on the old forum by Chet
This is a project from the past but I thought I would post it here just to see how posing photos worked and to add something to the section. I did this in cahoots with Kev, working together on both in my shop. Rockler's plans were a challenge and gluing up the top were a challenge but the end project was nice. Cherry and Walnut.


Follow up posts
1) Chet, that is a really great looking piece. And there’s the bookcase that you so graciously help me with on my build. I probably warted the heck out of you on that one?. And as an added extra, there was NO WAY to apply a finish to the book case by hand so convinced my wife that a Mini Mite was absolutely necessary for my hobby. Thanks for the twofer!
2) That project was a lot of fun and chewed up a lot of hours!
Mine is now prominently displayed in our living room! Although, when we built them, I didn't know where mine was going to live!3) Ours is in the living room also instead of a coffee table.
4) This is actually how mine sits in the living room.. Right up until I travel and take that blanket with me!

-
Submitted on the old forum by RichardA
Straight up trade..... Table for enough wood for my next project.
Attachments:


Follow up posts
1) Great looking table Richard! Nicely done!
2) That can be a great way to work. Build something, get paid in wood, build something with that wood, get paid in wood...
Thats a great looking table Rick3) Thanks guys. If I keep that up getting paid in wood, I'll run out of room in the bank.
4) If it keeps you going and keeps you having a little fun, all is good on that front.
5) Knowing you’re next project, you couldn’t be in a better position. Great looking table bud.
-
Submitted on the old forum by bushwacked
Been a looooong sloooooow process to get my garage where it has more than 2 outlets. Plus wrapping up a 5 year house reno that took all the time away from making the garage more functional.
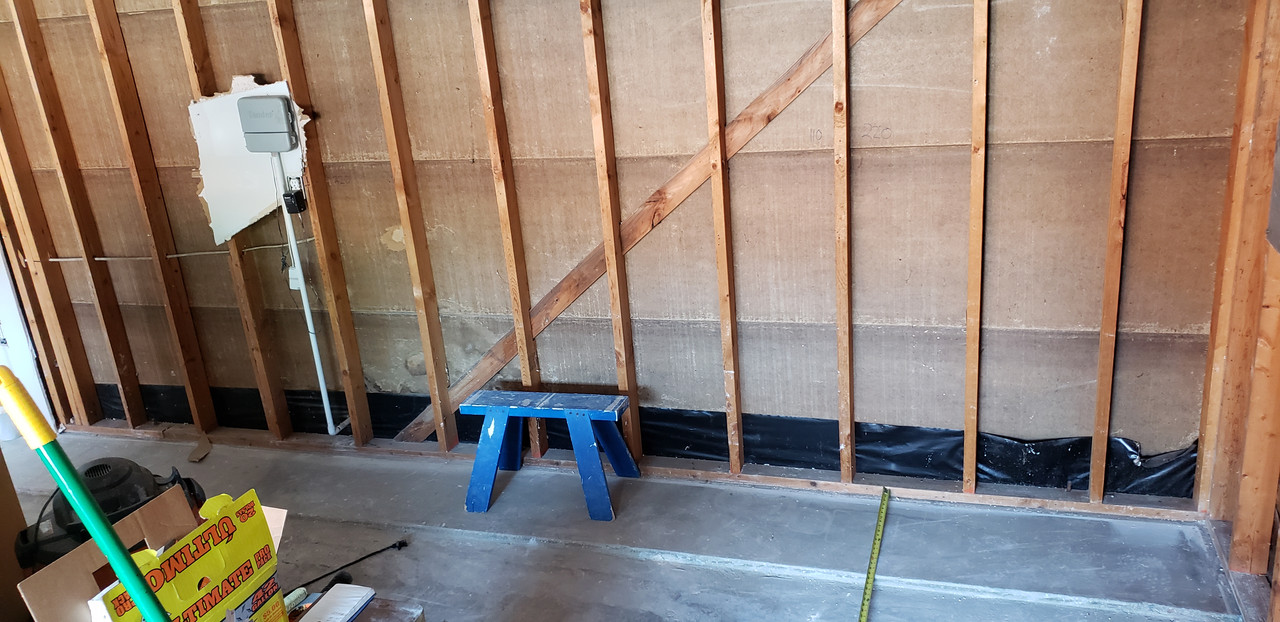
This is where I started ...


A lot of wasted space in there but was functional for holding 16' pieces of trim etc. Also cutting lots of 8' sheets of plywood. Now it starts to become more of a non remodel shop and more functioning furniture shop etc ....


Down goes the sheet rock! If you look at the 3rd pic, the ceiling was already coming down on its own. It fell down about 3-4' from the back wall and was the main reason I decided to redo all the walls. Figured while I struggled with trying to patch the ceiling, it would be easier to just take it all down and do the walls like I want them and fix the ceiling along the way.
Also in the 3rd/4th pic, there is a sub panel wired in by my brother in law ... it is a 100A panel so it should be plenty of power to everything I need without effecting the house stuff, or vice versa.

Than plan is to have 200v on the right and 120v on the left... about every 6' around the whole garage.Been a busy few days ... Insulated, redid the drywall on 1 wall and the ceiling. Also tested new lighting in 1 of the rows. 3/4 ply on the other 2 walls and then added a new lumber rack from the home depot storage section, the rubermaid stuff. Painting to come on the drywall wall and ceiling , dont think I will touch the ply for now. Due to holidays I lost my electrician to finish the back wall electrical outlets and the lights on the ceiling for awhile. It will give me time to rest and work on a few other projects though so all is good.


 Yes, I will have a air filter in there, I do have 1 ceiling outlet in the middle, but I think I may look into a couple more.
Wall painted and ceiling painted .. starting to move things around to test out locations. Still no clue where I really want anything yet. Even the tablesaw ... I am not 100% sold I like where it is since I have to open the garage door to make a cut. However convient it is for cutting long pieces or ply easily, just not sold on it yet. For now it will stay until I get more pieces put in place and see what kind of room I am working with after that.
Tested 1 set of 3 lights .. will have 3 sections total, for now and see how well that does. A lot of the stuff around the lathe on the floor is not mine, so just storing the extra tools from my brother in law there while he helps. So that should clear up in a few weeks as well.


Here is the new outfeed table built ...
I have not put anything on the bottom. Debating putting a shelf there as I am thinking I may add cabinets in there for storage, but not 100% sure what I want to do with that space yet, so I am not touching it so I dont limit my options in the coming months.


getting final coat and will be ready for now.
Still not sure what I want under it yet so leaving it a blank slate for now till I get some work done with it around to see what makes sense.

Still working through getting some organization stuff ... went after a clamp rack to get them off the ground and out of my way.


drawn up and a little quick math on the holders done ...

Everything cut up

quick little jig to cut the angles for the supports

The hardest part of the build was getting these attached ... it was a real pain in the ass by myself and not sure of any other way to do it. So there are a couple that are not level across as they slipped a little when trying to screw them in.

Hung up now on my south wall, not all the clamps in but the ones in the garage at least are on it. Will add the others later on.
Still thinking of how to add a few more different clamps to it. Like spring clamps and the the trigger clamps I have laying around too. Thinking of maybe a dowel coming out of each side about 10" or so to slide them on and off ... not sure what else I could do.Thanks! I went and got some dowel rod at HD and will be adding that to it as well in the next few days.
I like the k body, I like how they disperse more pressure than the regular F style with the small pad on them across the work piece .... now I dont know how much more of if it is actually better or not, but in my mind it is haha.
Another reason I want to love the saw from the front of the garage and why I'm really digging your mockup Kev ... About a foot from water
 Here is 3/4 dowel added to the side ... 2 should be plenty for now for my smaller clamps. Took about 5 mins and a home Depot dowel rod and got it done. Quick and simple ... not pretty though, but good thing it is just shop furniture.
 Worked on a drill charging station to help get those up and out of the way and some extra storage for some miscellaneous stuff ...

A quick little drawing to get an idea of what I need to do ...

Cut sheet ....

Cutting out the drill spots ... the new outfeed table and the old outfeed table kinda work well together, for now. Hoping to get the same type of cohesion when I finally get around to building an assembly table later on in the year hopefully. At least that is the though

Laying out some dado's


because we always seem to have a wonderful convo about changing out blades/dados I timed myself this time. Not going crazy fast or anything and just normal speed and switched from rip blade to 3/4" wide dado setup in 4:23 ... Not sure if that is slow or fast or normal time haha.

Everything together and installed next to the clamp rack. Should get some stuff loaded up and I will grab a pic once I get most of it up. Definitely not the the prettiest thing to look at but it should be very functional and do what it needs to do ... I hope haha
With the extremely gracious help of Kev and getting his thoughts on a layout for my garage... I have taken quite a few of his ideas to kinda get a starting point on where things should go ...

A few things on reading the drawing ...
- Overall garage is 20' x 19'
- The lower dotted line is the garage door when it is up, lowering the overall height of the 8'+ garage ceiling, plus something to think about when running DC lines
- The upper dotted lines:
- The top one is the 17" off the wall that the wood rack goes out, bottom row is about 4' 6" off the ground
- The bottom line, just below it, is 18 1/2" off the wall where there is a 2" raised section (not sure where you call it)
- These are a few reasons why the equipment, for now, is out away from the wall
- The dust collection is moved down a little further due to 2 electrical panels on the right wall and the sub panel ... Not 100% sure where it needs to go, but I will see once I get more room to play with out back there.
- The green tools are the ones I have now
- The pink tools/cabinets are the ones that I am planning on bringing into the shop
- The sink is already plumbed in and cant be moved
- The left wall door is the one into the house
- The top wall door is to the back yard
Now on the center tools ---
I moved the TS/Joiner/Outfeed over away form the miter station ... only reason for now was just to give the little kids more room to walk and not bang their heads on anything coming and going through there. It could get moved closer to the miter station once they get a few more years older if needed. I do like the idea of having 1 drop to handle those middle tools.
Things to come ---
Tools:
1) Bandsaw
- Hoping to pick up one by my Bday in May. Still debating on the Laguna 14BX vs Rikon 14" Pro vs Jet 15"
2) Router Table
- Will most likely build the cabinet and pick up a nice lift for it, most likely the Jessem.
3A) Drum Sander
- Definitely not using the stock stand for it. Will be for sure taking Kev's cabinet and maybe modifying it a little to what I need.
- Looking at the Supermax 19x38 since that seems to be the most agreed upon drum sander out there
3B) Dust Collector
- Looking into a better DC unit ... my Jet 1200 1 1/2 hp doesnt seem to be able to handle to the level I would like it. Right now is is running on a 4" 15' flex hose and still not doing that great. I would expect better with that short of a run.
- Thinking of possibly the Oneida Supercell
Building:
1A) Miter Station
1B) Assembly Table
- Not sure which one I need to build first yet ... neither are just must haves and I cant work without. However, I am thinking the miter station for the sole reason of more storage capabilities than the assembly table, even though that will have storage as well.Getting another item off the checklist ... I went with the fliptop for now so I could get the spindle sander off the floor.

Drew out a version to get an idea ...

Breaking everything down hopefully the last time on the huge outfeed/assembly table.


Starting to assemble the carcass.

Setup an ugly tenoning jig to cut out my pieces.

Drilling the holes in the 4 corners for the eye bolts and stuff ...

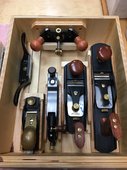
On a side note, if anyone is in the market for some forstner bits ... these things are amazing. Super sharp and forgot how much I liked them until this.

Center holes drilled for the pipe to rotate on.

Cutting out the eyebolt holes to slide around and lock ... I dont know what it would actually be called haha

Putting casters on and breaking out the new christmas gift! The 4in1 from Milwaukee is a sweet little tool. Plus saved quite a bit from getting the Festool.

First look on the casters and stand up. Spins just fine!

Here it is with everything attached! Super happy with it, and rotates just fine even with the weight difference.
2 things I did learn from this ... drilling the holes for the bar and then pushing it through the top really sucked. Not sure if my tolerances were too tight or what, but I was beating the crap out of it with a hammer to get it all the way through. Glad I got it through and to the other side and I can still spin it just fine. I think the holes were drilled just a tad out from 90* since I did it free hand. Next time, if there is one, I will be going to the drill press and doing it there.
The other thing is to look at the over all size of everything ... if you look closely in the picture you may notice the handle that raises/lowers it will not fit ? ... It is super quick and easy to take it off when I flip it so I am not too worried about it. I dont imagine I will be flipping it too much, so I am not too worried about it.
Lessons learned like always ...
Now next hopefully I can get the outfeed/assembly table out of the garage this weekend and work on getting the middle set of machines setup there.Got some good work in today, cleaned up enough to get a basic layout and at least the big stuff out of the way ...

Old cabinets broken down and ready to be stored until I can break them down a little more


Everything out of the cabinets and now crap is everywhere


working on the new layout trying new things out ...

Lots of cleaning to get around to, but it seems to slowly be coming together.
As far as the layout, some things are not in their forever homes, like the DC since I have not put all that in. So for now it is just hanging out by the big machines for now.
Drew this up for the north wall of the shop ... 10' overall length. Will have door on it, going most likely with inset doors. I have not decided on how many drawers yet or inside layout, will be thinking that through in the next few days now that I think I have the overall look/size done

Seem about right for the space?ok thanks tmize and Jamie! Will defintely be thinking more heavily on it in a months down the road when those projects start.
Now taking a stab at lighting ... I am thinking the below layout ... thoughts?

This is just the layout, then the next one is the one side by side with the tools to give you a better idea of where they would be hitting ..

Got some work done this weekend and wrapped up Monday ... we have light!!
woking on installing them ..


from the driveway...


that is with the garage up blocking 3 lights ...
now with all


not sure how much the pictures do it justice but there is not a dark spot in the garage now
they are 25” off each of the side walls and the the middle is centered between those 2.
so got some work done moving things around ...

Drill press and lathe kinda setup but still crap everywhere to move it haha. These cabinets will be amazingly helpful
So now that I’m moving on to the north wall ... a question for the masters
do I build cabinets that follow the slope of the garage or make them level from the highest point ... probably talking a 2” drop from start to finish

Well after putting everything in the middle ... needed some power to the machines. Started making an extension cord to go out there.

still need to wrap them and connect it all with wire nuts. Had to order the cover plate online as no one sales a double hole plate in store for some reason. Kinda annoying as the plate costs a few bucks and shipping is like 3 times that
Attachments:

Think I have finally come up with a design I like for the north wall cabinets .... Nothing new by any means haha, seems most people build it pretty close to this anyways.
I think I am not sure of is pull out drawers vs shelves ...

The question I have ... is to have the counter top raised a little or not and just have it double ply stacked like Kev.
If I go with the raised top to have those little cubies I will lose some cab height, as it is now with them it would be 36 1/4" height which seems a bit high ??
With the just double ply on there, it would knock it down to 35 1/2" or something like that .... havent done the math yet.

updated to this ...
14 - 5" Drawers
2 - 7 3/4" Drawers
2 - 12" Drawers
Seem like enough drawers? Too Many ... ?? Should I move it to 4 12" and 12 5" drawers which would get rid of the 7 3/4" drawers?getting the base knocked out ...
The outfeed table became the miter saw stand for this part. Man this is one of the better things I have built so far ... coming in very handy so far so it is working out like I was expecting. Future storage cabinet build inside it will make it even better, but that is in the future once I have cabinets and storage out of the way.


Getting everything put together on the outfeed table as well. I think struggling through using the miter saw and getting everything on it stood up so I can make cuts is the suffering payment to remind me how nice this will be once it is up and ready haha. Definitely makes slow work having to mess with it every time and not have a standard place to go to use it.

Built and laid out ...
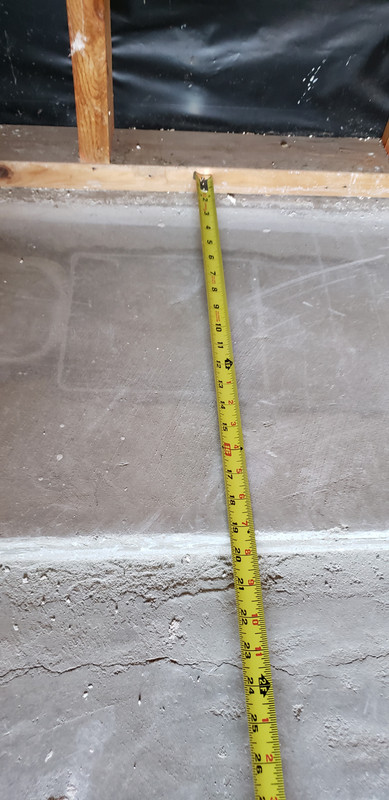
Now the distance from each end ...


All Shimmed up ...

Can see the slope in the floor and I ran out of shims haha ... it needed a lot more than I was expecting. Going to have to go get more, or pick up some T nuts and carriage bolts ... not sure yet what I am going to do. I was going with shims to just see how high the left side needed to be, but dont have a hot glue gun so not sure how to keep them there unless I pick up a glue gun.well people are hoarding toilet paper in these times ... I just hoard new tools .. dust justifying them by getting the festool before the price increase work. I am saving money

Should be able to start cutting out cabinets today a little later on and maybe even get some dado's run too .. we shall see.Coop your advice is always welcome!

Boring day today ... only had a little time in the shop after work, but I did get the cabinets broken down to final size. Tomorrow I hope to get the dados cut in them and maybe even put together. We shall see how work goes and how the kids are behaving.
Although, as I was having to move the outfeed around and move things out of the way and I got annoyed with the amount of crap still in the floor ... I gave in and put a shelf on the bottom of the outfeed table to start putting some of that stuff on there and just getting it out of the way. I had some left over 3/4 from the cabinets so I put it to use.

Now just to load it up tomorrow clean some things off the floor.
It was a rabbet kinda day in the shop ...

Sanity check on the bottom of the cabinets and a quick test fit

Love it when my match comes out right
The back will have a 1/2 piece that will fit in there.It was a rabbet kinda day in the shop ...
Sanity check on the bottom of the cabinets and a quick test fit
Love it when my match comes out right
The back will have a 1/2 piece that will fit in thereBeing without power so long ... This was so amazing to be able to do ... the small things! Just connecting a machine into a wall and no extension cord needed is an amazing thing haha

Got the cabinets finished with the back pieces and the miter saw stand on as well.

No I just need to shim up the wall and back cabinets to get them straight all the way down ... but that will have to wait until probably tomorrow ...
Attachments:
 Had a good day in the shop so far .. got the tops cut out and routed the edges so everything is flush ...

I know it was a lot of money!! But damn the dust control on this thing was amazing!!! Routed the 2 MDF tops and didnt see 1 spec of dust fly off. The dirtiest part was inside the attachment ...

Just look at all that nasty dust!!! haha
Now question for the pros ... How should I build out the face frames on this ..

The top is 1 thickness, the end sides are 3/4" and the middles of cabinets are 1 1/2"
How do I go about doing this and not making it look goofy?great day in the shop ... minus thinking I was milling up some cherry at first haha. Ended up being, I think, Sapele which at least will look good when it is finished and offer a nice look when done. Any thoughts on it? Sapele?


Put a cross piece on the miter area to cover the support sides and the base of it. I screwed it in so I could easily take it off if I ever need to adjust something with the miter saw...

After only about 12 cuts ... this place is a mess. Something coming decently soon will be some type of dust control there. Not sure what I want to do, as I have that wonder outlet that happened to be about 6 inches in the way haha.
I still need to route the lines on the station so I can have my 1 line stop block type setup and no fence. Dont think I need one .... yet. Will try the no fence route since I dont have one prepped anyways at the moment.
Now the next question is ... how do I finish the MDF? Same finish I will use on the cabinets?Sorry, being a little dense on this one ... Just to validate you are saying this:

I am thinking you are saying this, chamfer on the face frame and then another chamfer on the hard board behind it ?
or this
 Got the edges worked out ...

Now getting ready to route my tracks in ... ended up just going with regular ones ... however question ... Can these be cut at the miter saw to length? They are aluminum Kreg ones ... They are about 1-2" too long.
 Well this was fun to walk out to ... guess there was some stress happening in there when I cut it all the way with the t-track. Now I had to add like 6-8 more screws on each side. Kind of annoying but I guess I can live with it vs buying more ply to make it out of that.

Should be able to get some time to work on the sliding miter base that Kev mentioned earlier that he adds to his and his new miter station build ...Pictures are working again .. not sure what happened last night. They just wouldnt upload for some reason ...
Anyways ... here we go ...


Got all the cabinets started up ... laid in place , minus the little one that will go over the miter saw ...

Sadly, I have just learned that actually using these to lock the track down is actually an amazing thing. It does slow me down a few seconds but man it makes cutting less stressful! I am sold on them and will use them every time where possible.

Here they are with backs on and everything ... ready to be installed.

On a side, note ... I did finish the "Kev" lift for the miter saw and it made it real easy to get it level .. Dont mind the extra cuts in there, math won that day haha

On a side note #2 ... Do yall have any experience with any magnet door catches or anything like that? I am trying to look into something that I could put on this door/wall to keep it open. There is a hell of a draft and will slam it shut when the garage door is open if I dont block it with something for now ...
per coops suggestion ... picked these up
-
Submitted on the old forum by bushwacked
So with the garage remodel ongoing and this shelter in place stuff looking like it may be even longer like the end of May around here ... Got another project I am looking to start before I go back to work.
My sons closet ...

Some starting questions though to start prepping ...
1) Should I rip the carpet out of the closet and build a little 3-4" base in there that would but up to the inside of the walls? Then the carpet would be meeting it at the doorway area.
2) How much clearance should the open top area have from the ceiling?
3) Should I edge band the ply or just build face frames out of some type of contrast wood or just the same wood? If I edge band I need recommendations on tools.
From awhile back, I got some of them from what you used Kevin ...
- Fast Cap Speed Roller
- Quad Trimmer With Carbon Steel Blades
- Edge Banding Birch 3/4
- IronI dont really know one way or the other if I like the carpet in there. Although I am curious what the carpet looks like with that shelf already there. I need to rip all that out before I make the final decision I guess.I have never stretched carpet back out though and done all that .. not sure how hard or much of a pain that would be to do.
I have never done edge banding .. this might be the perfect time to learn though haha. I see in your video, it looks pretty straight forward though running the iron over it.
With the closet only being 22" deep, I am thinking 12" deep ?? The current ones in there are just shy of 12. Not sure on what depth of the middle section makes sense or how to judge ... so was kinda going off what was there.
Nothing too fancy ... basically:
2 - 10" drawers on bottom
4 - 7" drawers above it
The top open section is about 30" so I am still debating on what to put there, maybe open shelves (for now I have 1 shelf put in there) Not sure if I need more than 1, that may be too cramped. Or even go a little crazy and have a 4 cubby top part there ... not sure

-
Submitted on the old forum by Jamie
Started a new project for my aunt and uncle. They wanted a storage area for their grand daughters toys along with a table to sit behind their couch. My aunt is a high school principal and sent me some pictures of some plywood storage shelving units that she was thinking about getting. Asked me to build them one. I decided to change it up completely and make it more of a furniture type piece that will outlast the grand kids toy era. I searched for some ideas and actually found one that she liked and was surprised that it was actually one that came from wood smith shop so I had the plans for it. Well shouldn’t say plans but a idea. Building it a different size than the one they shown, but am taking many ideas from it.

drawing up plans is not my strong suit by I decided to give it a go. For some reason I make way more mistakes on paper than I do out in the shop. Really wish it was something I was better at and had more patience for.
picked up the red oak today after work. It always seems to be raining out when I get lumber. Wrapped it up cardboard and some empty feed sacks for the trip home. Got the lumber from a local lumber yard that doesn’t usually deal in hardwoods. Had them order it in yesterday for me and luckily they were getting a delivery today from their supplier. Wasn’t the cheapest red oak I have ever gotten but for the turn around time I can’t complain. Ordered 60bf at $3.60 a bf. skipped planed to 15/16” and straight edged.
Am making a face frame for the front and back of the table. Got them milled up and put together other than the center style. Decided to cut them a half in short. So will mill new ones up tomorrow night along with the end panels/frames. I don’t have mission style shaper cutters for the panels so will be making them on the table saw.

 Did get the plans all figured out at work today, with this virus thing kicking in around here we locked the doors to walk in traffic so had a little free time.
After I got home I got a few of the panels glued up, panel stile and rail parts rough cut along with the face frame part. Did realize that I do need to get more clamps. Currently I have 8 pipe clamps is all. Had my daughters out in the shop playing and have them convinced that daddy needs more clamps. We will have to see how Father’s Day turns out this year. The girls like to stay busy in the shop by taking scrap pieces and gluing them together with the occasional shape for me to cut for them.
This project is going to end up being pretty big. I thought it might be when I was drawing up the plans but didn’t realize how big it was till I glued up the top. I just ball-parked the bf from the plans in wood smith and added a few. Believe they called for 43 and I got 60. Raided my stock pile of red oak which was only a couple 8’ boards and am still going to be a little short. Am going to be taking the panels to the cabinet shop that I worked at to have them planed down. Don’t like to have to do that mostly because I like to do things myself but in this situation with the panels being 18-24” wide they are a little to big for my 13” planer and I would be at my drum sander for a week straight. It just makes more sense this go around. Am planing on when I get all the parts put together on taking them all back to his shop to run them through his wide belt sander. It is a pretty sweet machine which he didn’t have when I worked for him, but it has been 12 years since I worked there. It’s a 52” wide 3 head sander. I will try to snap some pictures of it when I’m there.
I should mention that those panels were glued up right off the table saw. One side was hit on the jointer and other off the saw.
Got the sofa table parts all completed. 95% of the woodwork is complete, taking the parts to a cabinet shop to be sanded. That sander does such a good job in a short period of time that I can’t go wrong.
Picked up the end panels from them on Friday and spent most of the day Saturday gluing the top and bottom panel along with the shelves. Machined all the stile and rails on the table saw. Went really well, forgot how much fun it is to to them on the saw vs the shaper. Only reason I did them on the saw is because I don’t have mission style cutters for the shaper.


got to try out the panel sled that I made last weekend, quick build that worked like it should’ve. Had to fill in the bottom on the end panel stiles with a little piece. Found a measuring mistake in the plans that required me to make a new panel for the center piece. Planed it down to thickness before gluing it up. Broke out the bisket cutter to line it all up.


All the parts ready to go
Attachments:

Before work i took the panels and parts to the cabinet shop, forgot how sweet the planer sander and wide belt sander are to use. It’s something taking 1/16 off per pass on a 24”+ panel. Doesn’t bog it down at all and didn’t fill my dust barrel. Only had time to snap one picture of the backside of the sander. Parts were coming quick.

After work I got the dados cut in the side panels and in the face frame that holds the bottom panel. Got the frame dry fitted and couldn’t of been happier with the fit.

That’s when stuff went wrong. Took the measurements right off the case and figured in some space for movement. Got it ripped down and went to cut it to length. Cut it 2 inches short. Idk what my deal has been with this project but it’s the 3rd time I’ve miss cut. Always on the short end. Must be the real life stress getting to me. Did invent a board stretcher tonight tho, took the off cut and glued it back on. Had a really good joint, filled the crack with glue and sanded. Am going to let it sit tonight and clean it up more tomorrow, slap some stain on it to see if it’s still useable.
Plan B might be to center it and put filler strips on both ends. Problem with it is wood movement.
Plan C is to go with plywood.


I really hope I can get the joint to blend in without much issue. After that event it took the wind out of my sails for the night.
Well the board stretcher worked well enough that I believe I will get away with my previous mistake. Not sure if I like the stain color of choice, but wasn’t my call on that.

With a little more sanding I think the cut line won’t be noticeable and where it’s located in the bottom corner of the cabinet helps out.
Got the center panel fitted and am happy how well it’s all fitting together. Thinking I will biscuit the center panel to the frame to keep it aligned during glue up. Also going to be putting a cleat to attach the top on both ends and on the center panel. On the back there will be a 1/4 ply back panel put on, will set it in a rabbit. Thinking all I have left is to size the top and shelves, rabbit in the back, shelf pin holes, and make some cleat material.
As it sits now.
Got the table all fit together, just have shelf holes, cut the back to fit, and a lot of sanding to do. Hoping to have it stained by tomorrow afternoon and get it sprayed on Sunday. Also have quite a bit of trim to spray for my neighbor.

was playing around with the stain some and discovered that this stain needs to be stirred up really well. Just shook it by hand without stirring and it’s really red. Gave it a good mix and it’s a color I can live with.


The sofa table all sanded up, shelf holes in and final details worked out
.

worked on getting it all stained while I sprayed some trim for my neighbor.
shop was filled to the max. He had quite a bit more than I thought he would. Had to move quite a bit of it around between coats to get it all in the building.


e had one door that I did for him as well. Neat little trick for finishing doors that my buddy thought me with the 2 dowels attached to some scrap, to flip the door just roll it over. Works super easy and makes the finishing process a lot quicker. Got 3 coats on all his stuff and started spraying the sofa table. Hope to get it all finished tonight.


More pics of the jig. It’s held to the top and bottom on the door with 3” screws with a washer, just eyeball center and away ya go.
After the long day Saturday in the shop, woke up ready to roll Sunday morning. Took 2 steps out of bed and was like uh oh, tweaked something in my back. Not uncommon for me, just made for a long day of laying on the floor, stretching and using bio freeze. Did finally feel well enough in the afternoon to get the case glued up. My next door neighbor who's trim I finished offered a hand. Boy was I glad he did. Tricky piece to get to all fit together at once. The extend glue sure helped to. I checked the clock when we started and had all the squeeze out cleaned up in 17 min.
After work tonight I got Courtney to help me get the center panel installed. Anther over site on my end was I thought it would be a good idea to put the 1/4 backs in to make the finishing easier. Which it did, just made clamping the center panel in that much harder. Should be able to get the top put on in the next few days and wrap this project up.
Attachments:


Project completed!
Attachments:


Aunt and uncle came and picked up the project today, they were super happy with it! I was bound and determined to only charge them for the materials, they didn’t agree with that and left me a pretty thick envelope. Which was not expected and super nice of them! Turns out I’m happy they did as about the same time they were leaving Courtney came to tell me that there was water all over the basement floor. Turns out the hot water heater sprung a leak. So I shut the water off to it and did only what I knew would help. Took Emmi fishing for a bit. Had amazing time with her sitting on the river bank, sun shining light breeze temp in the mid 50s, and fish biting like crazy! This time of year the red horse and black suckers are running up the rivers to spawn. They area boney fish that is only really good for pickling. We sat there about an hour and a half and had a pail full of fish. Figured we got about 40 of them.

Here is me holding the big one Emmi caught, she will do about everything on her own except put the worm on the hook and refuses to touch a fish. Pretty proud of this kid.
Will be getting the plumber out in the morning. -
Submitted on the old forum by Jamie
Had a great Saturday in the shop. Have a giant hole in my shop space that needs to be filled in with tool and hardware storage.

Decided to finally start on a miter saw station. After watching countless videos and snooping on the net I think I have what will best work for me. Got all the plywood worked up yesterday. They are going to be a frameless cabinet which I’m not used to building so I’m sure I’ll hit a few bumps along the way.

All the ply in my cart ready to go.

On the backside of my cart I have a place to crosscut sheets. Got the plans from stumpy nubs. Made a crosscut jig that works surprisingly well. Get very nice square cuts.
I like to use 1/8” deep dados and rabbits for aligning during assembly. Tons of edge banding to do. Got the edge band off Amazon and had plenty of glue on it but was pretty narrow so not much room for error.

Glad I had a downdraft table for all the sanding. Should maybe make an effort to clean it out more. Ended up getting 2 coats of lacquer applied before the end of the night.


Drawer slides showed up! Got one of the two cabinets put together and the second about half way. The slides I ordered off of Amazon, I’m not sold on them completely. Have ordered slides from them before and thought they were decent. Me being the cheap ass that I am decided to get the ones with screws. 6 screws is what they send along per set. 6 of the cheapest softest screws I have ever used. Slides seem to be ok. If they were going in my kitchen I’d send them back. Should have the second cabinet assembled tomorrow night and then need to start on toe kicks.


I like to put the drawer slides on the cabinet sides before I put them together. This project has reminded me why I don’t like to build frameless cabinets. Just a lot of messing around making sure everything comes out square.
it is exciting building this and I can really see the need for it and the miter saw fence. Hard to get the consistency in parts measuring and marking.

Thank you all for the kind words. Got back at it tonight. Bigger cabinet was giving me fits last night and thought about it all day at work. Decided to beef it up and add cleats to the back in the groves I had already had in place. Worked really well. I then took a different approach for the last divider piece by attaching cleats before putting it together. Wow! That made it go really smooth. Maybe it’s not the euro style cabinets that were the problem but my approach on assembly.

Moved onto the toe kicks from there. I made the same style as I did on my out feed table since it was quick easy and affective. I use 2x4 material, run them on edge over the jointer then rip the round edge off. Flip it around and rip off the edge on the jointed side. I then run the faces through the planner just to clean them up. I just put them on 16” centers and use some 3” screws to hold it all together. I like to build the toe kick separately from the cabinet just for ease of leveling. I don’t remember where I seen the idea of using t-nuts and carriage bolts as the levelers but it is cheap an easy!

had to mock it up before heading in for the night. Didn’t level it yet. Just wanted to see what it would look like.

am pretty happy with it! Will have to do some dust collection work as I need to get a hose to the right saw on its own gate. Going to use that around the bench and for my downdraft table. Haven’t decided if I’m going to run it behind the cabinet or go across the top. The cabinet is 24 in deep but I’m pretty sure the top will be at least 30-32. Reasons for that are for the dust collection hose and to have deeper upper cabinets.
Attachments:


Work has slowed down on the station, well maybe not the work but the amount of visible progress sure has. Spent most of the day Saturday and part of the day Sunday building and figuring out the fence system along with putting the top together. Edgebanded all edges with 3/4 maple. Like the look of it. I ran into problem after problem building the fence. I actually sat down and drew up what I had in mind, that never seems to work out for me. Not that I have an issue with math it’s taking the time to make sure it’s correct. For shop projects I feel I’m better off flying by the seat of my pants. To top it off on the main fence, left side of the saw, every Brad nail decided to follow the grain and blow chunks out of the top. Frustrating to say the least. I ended up leaving it as I was out of material and figured it will get beat up eventually.
I put the kreg miter saw system on tonight. Ordered the kit along with a 4’ piece of the track that I put to the left of the saw. Glad I did! Some of the joints grab just a touch when moving the slides. Nothing to annoying but enough that I’m glad I did it the way I did. The system is pretty easy to set up. They provide good instructions. I left my saw about 1/16 in front of the fence, my belief is that your piece really only needs to be square on your saw fences. I know that can stir up some controversial conversations, but I will occasionally cut rough lumber on the saw. With that little room I think it makes the saw safer.

Another thing I’m kicking around is a dust collection hood around the saw. Trying to come up with a design on it. Problem that I’m facing is the dust collection. Since mine comes in from the top with not much room to spare on the back I’m thinking a box with a hose coming through the top to attach to the dust port on the saw, along with an open 4” port as low as I can get it to the table top. Also need to get a line coming out of the right side of the saw with a hose for hooking to my down draft table and for cleaning up around the bench.
This might better explain my thinking

Started on the dust hood tonight, it’s more of a dust containment than a hood. Lots of trial and error to get this thing to hopefully work. Have to reconfigure some dust collection to hook it up. Haven’t got it trimmed out but thought I would share the progress. Neat little feature is the donut I cut to fit the saw and the hose.


Oh I should mention I did tape around the seams on the elbow and still have some caulking or weather stripping to add. Was hoping to get the drawers built this weekend but have some Christmas gifts and need to clean shop. Amazing how fast it becomes a total nightmare when doing a project like this.
So having some trouble hooking this up to the main system. I would really like it hard piped as much as I can. Problem is 6 months ago when I put the main pipe and drops in that they don’t quite line up with what I have a need for now.
?. As I was typing this I figured it out! You guys are so much help!
started by hard piping and it just didn’t lineup. Didn’t like the look of the pipe being angled like it was, so tried plan b which was use flex hose.

So got the hose wedged in and tried it. Lost quite a bit of suction. Thought about cutting the 6 inch pipe shorter and using a longer piece of flex hose Then had an idea smack me in the face! Why not just move the whole cabinet to the right a few inches and have it all line up? Boy did I feel pretty foolish for spending an hour trying to figure it out with such an easy solution.

So here is how it’s ending up. It works surprisingly well. Still get some dust sitting inside the hood but it is a lot better than what I have ever had for dust collection on a miter saw.
The pipe coming straight off the t is going to go under the bench in the opening between the wall and the top, coming out on the right side to have a hose hook up. Still have to seal the seams and screw everything together yet.
Got the shop somewhat cleaned up and started in on a lego table build.Got the kids LEGO table finished up over the weekend and started on the drawers for the mitersaw station tonight. Did a before and after shot of cutting the parts to see how well the dc is working. Can’t say I’m disappointed in it and also can’t say that I’m blown away by it. Guess the main thing is that it keeps the really fine dust from floating around the shop. One nice feature is that the hose can slide off the saw and suck up whatever mess is left.


Been a busy week around home and made some progress on the station. Wednesday night I snuck out to the shop after I got the kids to bed and got the drawer parts dovetailed. For some reason it took quite a bit of messing around with the setup of the jig to get a loose enough fit that the pins wouldn’t split. I think with plywood vs hardwood it doesn’t cut nearly as clean and can be fuzzy and make the fit tighter.


i also got the groove cut in the parts to accept the bottoms. Must mention again that the adjustable bench is really a pleasure to have. Was able to move it up so cutting the dovetails I wasn’t slouched over. Makes it easier on the back for sure.
Cut the drawer bottoms out of 1/2 ply. Mostly cleaned up a bunch of scrap cuts I had from the walls in my shop. Did end up cutting one new sheet up. Drawers went together really nicely and I dug through the fridge to find a new glue bottle. For some reason I’ve never gotten one that I like. Have a tightbond one with the wide tip that you have to squeeze the snot out of it it get glue out. Have been mentioning this issue to my wife and handed me this bottle.
Really made getting the glue into the tails a lot easier. A glue bottle is now on the shopping list. I did sand the bottoms and inside parts of the drawers quickly with the random orbit. Used my new ridgid sander and I must say the dust collection on it is surprisingly very good!

went together pretty fast. As soon as the last one was assembled I went right to cleaning them up. Used my disk-belt sander to do the bulk of the work. This tool I picked up at and auction this summer and don’t use it very often but it is handy to have. Went right from the sander back to the random orbit to knock off the edges.

Made a couple quick jigs for spacing the drawer slide on the boxes and got them all put in with no troubles at all. Very happy with the progress that I got tonight. What do you guys think for fronts? Was leaning towards more spalted maple but not sure if I have enough. Another thought was to use plywood. Would like to possibly cut handles in to the fronts to avoid getting snagged on drawer pulls
.


just brag a little too. Wife brought me a beer out as I was finishing up. ????
Attachments:


Did make some progress on the station today, limited shop time for me the last week or so with holidays, bowl games, fishing trips and weddings.
Got the dust collection pipe all buttoned up today and a piece of trim put on the hood. Got the cross pipe ran and still need to decide on a blast gate, maybe a floor sweep incorporated into it. For the time being it has about 20’ of 4” hose on it for shop clean up. Decided to go back and tape all the seems on the existing pipe. Got about halfway across the shop. Also sealed some of the blastgates up with some duct sealant.Finally got some shop time Sunday afternoon, started on milling up the drawer fronts. Was rough cutting them with the skill saw. Started with the m18 but it just didn’t have the power to deal with the maple. Had to break out the old craftsman to do the job. Saw is heavy as a tank but has endless power. The lumber I have i got at a deal of a price of $0.80 a bf. Its not kiln dried but has been air dried for a few years. Same stuff that I used on the table saw out feed table. Have ran into some issues with some wood movement on the raised panel drawer front. With the shop heated by a forced air heater that basically blows right at the outfeed table I guess I shouldn’t be surprised by it.
Ran into some issues while running the fronts through the planner. The dust collection in the planner kept plugging up. Opened the planner up at least 5 times during the operation. The material is at 1 1/16-1/8 so am removing a bunch of material. Filled the equivalent of a 55gal drum. Lucky I have a farmer close by that I can dump the barrel off at anytime. He appreciates it and every time he’s runs into me at the local tavern the beer is on him!
Increasing my search on a different jointer. Was thinking the jointer planner combo but lately have been thinking a 8” jointer and a separate 15” planner. Idk. Can never make up my mind.
This week is my last week of having to travel for work conferences, so hopefully I can get some more time in the shop after that.
Attachments:


Sprayer part showed up today, along with new planner blades and a flush trim saw. Weird. The planner blades actually fit my planner so guess they were a blessing.
Got the drawer fronts spayed with a few coats. Really like how the grain in them came to life. It’s a mixture of spalted, half cracked and rotten along with some quarter sawn maple (something I have never seen before). I didn’t spend a lot of time on making sure that they were perfect as being shop furniture and wet wood I’m a little concerned about them moving all over the place. Have them sized to be full overlay with an 1/8 gap give or take. Thought I’d share some of the variety that showed up.
Attachments:


Good tip on a few extra screws. Typically I’ll put 2 screws in a front then the handle bolt as well. I think with these even though they are getting attache$ to plywood drawers they will be getting at least 4 screws just to try to tame the twisting. I need to get a picture of the raised panel that shrunk out of control.
lol I’m thinking the more I work with this wood stack that it shoulda went to a heating source. Don’t know how good of shade tree that it was. My uncle cut up a bunch of maple throughout the years and had about 10k bf of it air dried for who knows how long in his shed. Gave it to me in trade for some planing. Can’t complain to much.
As you can see there was a little “shrinkage”
Attachments:


Got the drawer fronts on! Didn’t have much issue other than the top row being difficult to clam in place. With the bottom 3 rows I would just clamp and shoot a few brads from inside to hold the front in place to get some screws in. Ended up putting 4 screws in most of the fronts. Some of the twisted ones got six to try and straighten them some. The top row I held them in place and hit them with the 23gauge pinner. Nice thing with this maple being almost completely covered in defects is it’s easy to hide the pins.
I will add the doors after I complete the upper cabinets, so I can make them all at the same time. The door openings are right at about 24” was originally thinking 1 door for each but the way this maple likes to move I’m leaning more towards 4 doors total.
Attachments:

Knocked out a prototype pull today. Could batch them out and save a little time had about 20 min in it, so for that amount of time and it not being finished I think for 1$ each I might just buy them. Still undecided.
Started on the upper cabinets today as well. The left one is 30x64 and the right which is a little more challenging is 32x48. Have to admit this is one of the first times I ever have dry fit a cabinet, with it having a charging station and a few other built in storage plans I figured it would be a good idea. I like to finish all the parts before I assemble them, which I do think is a little easier than finishing a complete cabinet.
the start of it shown here, ended up putting another shelf in it below the center one that is there now. Will take some time to get this one to come together. Also making it a little undersized so if I do upgrade saws and have to move everything to make room I shouldn’t have to rebuild the cabinets.
Started getting door parts cut up last night. Without the jointer it was a little challenging, put a straight edge on the lumber with the homemade track saw. Didn’t work to bad. The osb has enough grip on it that a clamp isn’t needed.

The maple that I have is pretty twisted up so i was glad that the jointer showed up.
Have all the stiles and rails milled up and are ready to go to the shaper. Still need to get the panels worked up. Might have wide enough boards that glue ups might not be necessary.
Got all the door panels milled up tonight. Man did it take some time to get them all planed down. Didn’t want to overwork the dewalt planer so took around 1/32 a pass. Some of the panels are 11” and change so took my time with it. Only plugged the dust collection on the planner one time, did some looking at it and discovered an issue. A while back I had a knot tear free and get into the fan which melted some of the housing. Order some replacement parts for it today. Skip planned the wider panels to get them as flat as I could, luckily they were 1 1/8 thick to start. Got them to all come out flat.
 an the door stile and rails after that. Really enjoy the tenening jig that came with the shaper. Helps keep the fingers in place. With the stiles I swing the power feeder in and it makes quick work on running the parts. Almost goes to fast. Nothing more satisfying to me than seeing wood chips fly off a cutter head and go up the dust chute.
All in all it’s been a great couple of days in or evenings in the shop. All went well tonight except this little guy...
will have to make a new one. Nothing like 2 shaper setups for one part. ?
Had the dust barrel empty before I started milling door parts and have it plump full already. Crazy how fast 55 gal fills up.
Thank you guys from my better half for listening to me, she appreciates not having to hear me talk shop.
Attachments:

Got the panels machines and doors glued up after work today. The little black ball’s in the grove are space balls that compress to keep the panel tight in the frame. Am still trying to figure out my stile and rail cutters to dial in the perfect size panel. These are a little to free for my liking. Good thing it’s shop furniture.

the shop is getting pretty dusty with all the progress, should clean my filter bags out. Have gone about 150 gallons of dust since I last took them off and blew them out. Am thinking about buying a 20x60 bag to replace one of the smaller ones.

Am planning on spending tomorrow sanding and cleaning the doors up, hopefully get finish applied to them as well.
Upper cabinets finished applied, assembled and put into place. Just waiting on hinges to be delivered. Couldn’t resist putting a few tools in them. That shop organization project is gonna take quite a bit of time! Have a few more ideas for the miter saw station once I get the doors on I’ll see how it will work out.
Was pretty nice weather here today high of 35 so I opened up the doors and took the leaf blower to the shop. Had a cloud of dust rolling out.


Hinges showed up! Man was I excited to get the doors on, only to get all the hinges mounted to the doors before I figured out that I got the wrong ones.
These doors have really troubled me and I’m not at all thrilled on how they have turned out. They ended up smaller than I had figured them out to be. Believe that mistake was made in a combination of smaller mistakes. My rails ended up being 1/32 short, believe it was from the rub collar on the tongue cutter. Second was, I like to pass all 4 edges over the shaper with a straight cutter to clean up any saw marks or uneven joints on the top and bottoms. I typically take a 1/16 off which seems to give a clean cut. Thinking that cut was a solid 3/32 as the rails are a little undersized. Also when I shaped the rails I do the same as removing a 1/16 and believe that was strong as well. Which would also explain why my door panels were a sloppy fit. I’d like to blame some of it on the shaper fence as I noticed some flex in it. I’ve never been fond of the grizzly fence. I don’t think I can quite get the accuracy out of it that I was used to coming from the cabinet shop. He has a set of weaver shapers which are the ultimate system for making doors. I also am not happy with the panel cutter. To keep the whole profile you have to make your rail cut super deep which weakens the grove that holds the panel in. I’m leaning towards a new door panel cutter and style and rail cutters. Just overall disappointed in them and myself for assuming all was well.
Sorry for the rant just frustrated with the whole setup.
ok....on to fixing the issue. I’m pretty sure I can fix it with different overlay hinges. The doors and drawer fronts won’t line up perfectly and I guess I will be ok with that since it is shop furniture. Will be a good reminder as I move forward with other projects.
the real problem doesn’t show up till I tried to add the door to the right of these. The hinges I ordered somehow are full overlay, never took into consideration the middle doors. Have the hinges on the doors cranked all the way in and still can’t get the gap to close. Going to order 1/4 overlay hinges to try to resolve it. These European style cabinets are definitely not my specialty. From now on building with face frames!
On a better note, got asked and paid for it already to build another shaker candle stand table. Did get the leg blank and top glued up tonight. Have enough cherry on hand to complete it.
Also got the parts for the planner, got them put in and hoping that it fixes the dust collection issue on it. Old parts had quite the meltdown.
The doors are on! Not the best looking gaps but hey they open and close, slowly. These amazon special hinges will not be used on my kitchen cabinets someday. Not much adjustment, or should I say tricky to adjust. I’m sure these doors will move around a bit yet so didn’t fine toon them.

It is nice to see this project coming together. A few things that I want to do that are visible yet, fill in the gap to the right of the dust hood and complete the shelf. Thinking I’m going to put a false back between the upper cabinets to cover some of the piping. Might drill some shelf holes between the uppers to add some storage. Don’t really have anything to put in the space. Was thinking maybe making a small display of some of my grandfather’s tools. Have an old draw knife of his that I’d like to have visible.
still haven’t ordered any pulls. Trying to decide what I want. Did snap a picture of the one that I made.
Im leaning more towards boughten ones.
Also still have quite a bit of work to do in the drawers. Just getting everything in its place. As well I’m considering taking the right two doors off of the base cabinet and making drawers for that opening. Would be shallower drawers to hold my wrenches, sockets and things like that. Was thinking splitting the depth of the drawers that are right of the opening in half to get it to look right. Contemplating this as it is pretty prime space in the flow. Other option would be to buy a rolling box. Thoughts on this would be greatly appreciated.Haha! If you married her sister you are a better man than I, I definitely got the best one out of the clan. In our old place we/she painted the cabinets. Actually I think she started the project and after about 3 months of having no doors on the cabinets I ended up painting them. It was a fixer upper house that I purchased before Courtney came around. Was a nice little place on a small river. Paid 23k for the property. But sold it for a nice profit 7 years later. Basically had a project going at all times while we were there. About 2 months before we moved out I finished our bedroom project. Room came out pretty darn nice.


I did find some pictures of it. Bought the railing parts and just finished them and installed it. Where the tv hangs was a chimney that I took out and carried all the brick out in 5 gallon pails. Made all the trim, bought the doors. The back wall I built a stub wall just to hide electrical. The old house was plaster and lath walls that were all cracked up. Skim coated them and retextured. Wish I could find a before picture.
 Decided to fix an eye sore to me on the miter saw station. Decided as long as I was spraying some lacquer the other day I’d do a few ply parts to button this up.


Filled in the gap above and beside the saw to mostly hide the duct work. For some reason I didn’t like looking at the cluster I had going to the saw. Plus reaching over the hood to open the blast gate was a little stretch. Also if I was on the other end of the shop I couldn’t see if the blast gate was open or shut. Ran the planer a couple times with the gate open and dropped the suction enough to plug up the middle drop pipe. The planner is hooked to the third drop.
Am not completely done with this little upgrade but thought I would share some of the progress. Also added a little bit storage to the inside of the drill storage area. Just enough room for most common bits that I tend to grab.

Going to put a handle of some sort on the end of the stick coming from the blast gate. Also need to get some finish on the trim on the saw hood.
-
Submitted on the old forum by bushwacked
I was all set to steal/barrow your design completely Kev, however I stumbled upon this build below looking for ideas of what I could put in the cabinet for storage etc etc ...
Thoughts on the above? It is bigger than I was hoping, but may be a decent idea since I could roll it anywhere with its self contained "DC". Would the lack of suction from a DC hurt anything as far as leaving too much waste in the planer? The blower on that planer is amazing, so its the only reason I am giving this more of a thought ... -
Follow up posts
1) Really neat idea. Your daughter is precious!
2) Thank you very much! She is 2 and a handful! (To much like her mother)
3) Just like my two kids (2girl,7boy) always in the shop with me. My boy is getting good at planing and sawing boards to smaller boards. She just wants to color on everything and make it pink.
4) It’s awesome your kids are in the shop with you! My oldest used to color every piece of scrap that she could! I still have a few of them, am tempted to hang a few up for shop art. She just turned 7 a few weeks ago. She is a very good helper when it comes to cleaning the shop up some. Give her a dust collector hose and she is entertained for an hour!
5) Oh yea I have plenty of scrap art on the walls. On the door coming into the shop I have the kids height marked on the door frame jamb. Neither of mine like the cleaning that much but sure do like transplanting shavings all over the place
-
Submitted on the old forum by Jamie
Am waiting on drawer slides to show up before I can continue on with the miter saw stand so decided to knock this cabinet out. Had a base of a harbor freight dust collector sitting around so thought it would make a great base for the Kreg foreman. Pretty simple cabinet I drew up in my mind. Thought I could get away with using the dust collector base as the bottom but in the middle of the project decided it wouldn’t. Used 3/4 sanded pine plywood for the whole build. Got it from Home Depot for a really fair price, actually kinda impressed with it. Think it was 35$ a sheet. Flat and consistent. For shop furniture I think it looks pretty nice. Decided not to finish this one as lacquer makes such a mess for me.
The drawer is the dust collection for the Kreg jig. I cut a hole in the top of the cabinet and the dust falls straight through. The bottom might eventually have roll outs for Kreg screws and other jigs. For the moment I put a shelf in because I’m out of slides.

 lso my youngest daughter decided to come out and help me along. She likes to play in saw dust piles that she finds. Her mom likes to yell at me for her doing that. ?
Attachments:

-
Follow up posts
1) Wish my shop was half that clean! Does the power for your table saw and jointer run through the floor?
2) Thanks..
Yes, I had the outlets put in the floor for those machines. I still have a cabinet to build under the extension wing of the table saw to 'finish' that area. -
Submitted on the old forum by Kev
So, today's project was to finally set up the old OF table to match the new table saw. I promise if this saw goes the same way as the old one, I'm going to... Well, you know...
Anyway, I got the old slots filled in and the new ones cut..

I also did a bit of cleaning up of the shop today as I'm flying on Friday. Thought I'd grab a couple pics incase anyone spotted all the new stuff and had questions.. I took the pics from opposite corners of the shop so, the only thing you really don't see is my sheet good storage which hasn't changed..


-
Follow up posts
1) Well, the depth of your cabinets really depends on its intended use.
If you want full depth cabinets, it would be pretty simple to cut the bases to fit. Especially if building separate bases like I did on the miter station. I certainly don't see this being a show stopper for you, just a minor challenge to overcome!2) thanks Kev! I will take a stab at building the separate base and stacking on individual cabinet sections after that.
3) That's probably the way I'd do it.. Build the bases and get them level. From there, you can build whatever you want on top of them..
Give a shout if you're struggling, I'm always happy to help.4) I’m with Kev, build it to the depth you want and adjust the sides and toe kick to account for the unevenness, including the height of the countertop as you will be standing on the lower section.
-
Submitted on the old forum by bushwacked
Planning ahead because I'm not 100% sure on how to tackle this ...
Dimensions...
The step up is about 19" deep, with siding in place probably end up around 18-18 1/4
The step up is about 1 1/4" high
Should I shorten the depth of the cabinets to match the step up ... So 18" deep cabinets?
Assumptions:
I just factor the step up into the toekick height
There's some type of lifters for cabinets I would need to install on the front insides to keep them from rocking
Thoughts??
Thanks guys! -
Follow up posts
1) So I have a few projects underway as part of some shop changes I am making. So I am building a platform that is 25" X 72". I want to put a couple drawers in. Initially I thought I had 24" epoxy slides, but after looking I realize I only have 16" slides. I do have 26" ball bearing slides which actually measure 25 1/2", and I'm not going to buy more, so would you build out the front or would you notch out the back of the cabinet, which will basically not ever be seen?
2) Coop. I totally agree it is a really deep drawer, but with the limited space I have for storage, I'm certain I could use it, even if I divided into sections.
3) I’ve been making more and more of my drawers, regardless of the width or depth, that have a sliding tray on the top, except those that are real shallow or that house big tools like grinders, routers, etc.
4) I’ve been making more and more of my drawers, regardless of the width or depth, that have a sliding tray on the top, except those that are real shallow or that house big tools like grinders, routers, etc.
5) When I build mine, I will cut the groove in the sides and add pieces for the tray to rest on. We recently bought a new bedroom suite and I cut, glued and screwed strips for the tray to rest on for the drawers on the dresser. My wife claimed more drawers than me so I had to make the best of what she allotted me.
-
Follow up posts
1) That’s a helluva bench and neat video. Thanks for sharing.
2) Great bench! Thanks for the video.
3) Pretty gadget heavy but, as long as it works for your gadgets, you should be good to go!
Certainly, a lot of thought went into that design!4) I don’t have a track saw so guess that bench is out of my league. ? Like all the niches in this hobby I’m thinking his is building useful and creative jigs. I do like that 3D router thing he used to drill the holes for the drawer.
-
Submitted on the old forum by bushwacked
He has some pretty cool ideas for a workbench here ... Figured I'd share
-
Submitted on the old forum by woodenskye
So I have a few projects underway as part of some shop changes I am making. So I am building a platform that is 25" X 72". I want to put a couple drawers in. Initially I thought I had 24" epoxy slides, but after looking I realize I only have 16" slides. I do have 26" ball bearing slides which actually measure 25 1/2", and I'm not going to buy more, so would you build out the front or would you notch out the back of the cabinet, which will basically not ever be seen?
-
Follow up posts
1) I just got back from HD ... Bought these ... This work?
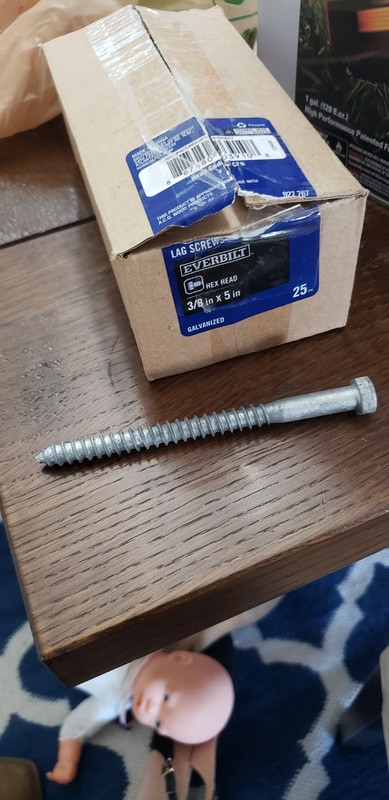
2) I would be afraid of the small head on the ones you picked up. Put any substantial weight on your lumber rack and the small heads could pull through. Thats the reason I recommended the construction lags. The heads on the lags are about 1/2 inch in diameter. The are designed to take big loads.
3) Some washers might help..
4)I got some washers as well to hopefully stop that from happening.. hopefully
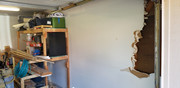
5) Got it hung up and the wood moved ...
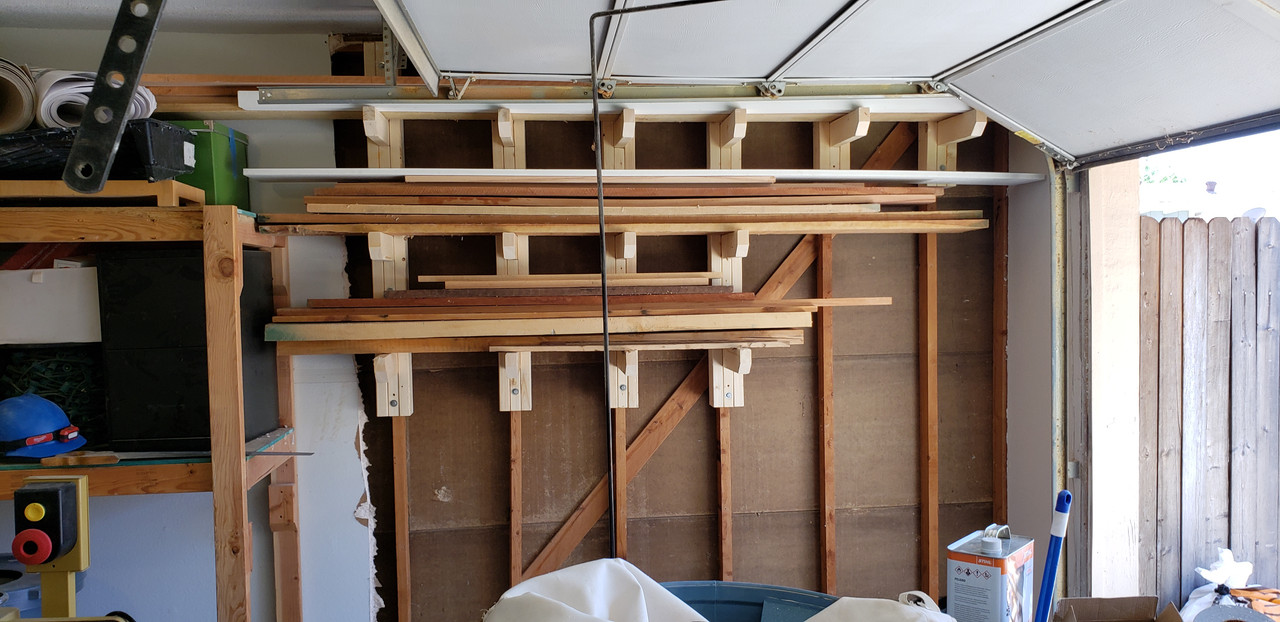
Cleared up a good deal of space as well...
So it's slowly coming along now getting it in shape to have a room to work again.
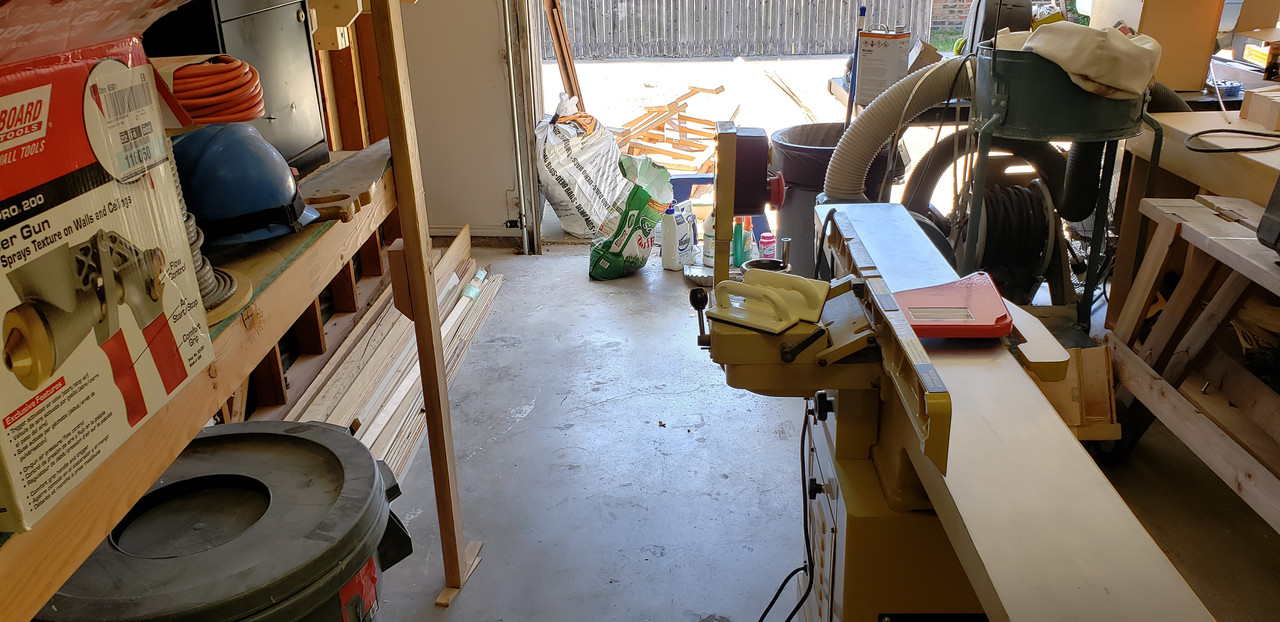
Next up is getting rid of the other storage shelf and clear up that whole wall so I can put my jointer and DC and hopefully soon my new bandsaw there. -
Submitted on the old forum by bushwacked
Went cheap and decided on 2x4s and had a mix of a few ideas I saw. No clue how much it will hold but I'm hoping it's got enough screws and glue to hold up haha.
Working on tearing down drywall and and will hang some wood siding to help making hang things easier.

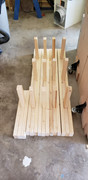
Had some extra 3 1/2" screws so each of the 4' sections got almost 40 each lol
Now I'm curious how to mount to the studs... Will screws work or will I need some more heavier duty mounting equipment? -
Follow up posts
1) The only LV tail vise I've played with is the inset. Can you post a couple pics?
2) I would but I have yet to figure out how to post pictures on here. I’m one of the few young ones that are not a wiz with this whole computer thing.
3) lol.. Use the "reply" option instead of the "quick reply" option.
Click on add attachment and select your files.
This site does limit you to 3 pictures per post.. I we grow enough, I'll pay and upgrade the site.4) I figured it out. I was on mobile view I switched to desktop an seen what you were talking about. Thanks
5) Nice looking bench! Looks like it's great to work at!
Can you post a link to the article? That would be the other half of the puzzle for me
6) Nice looking bench! Looks like it's great to work at!
Can you post a link to the article? That would be the other half of the puzzle for me
7) Here you go www.finewoodworking.com/membership/pdf/40986/011162050.pdf?fww_sid=NzE1NTRkNGYzNTM2NmMzNjQzNmI2NjY0Nzc3Mzc4NTE4NWY0NzQyODIyY2M2YTExNGQwZmUwZWExODlmMjRkM2RlOWN8MTUwNTI2NzAxMQ%3D%3D&fww_token=e0f513f3f95a6b32bc6d3144575a749e
It part of their members only site so it may not link right
Rustic Picture Frames
in Member Showcase
Posted
Submitted on the old forum by Kev
These really aren't my cup of tea but, happy wife, happy life.

The lumber is cedar that I pulled from some raised flower beds last summer an just hadn't gotten all burned yet..
Fitting for Western Montana I suppose.
Follow up posts
1) Like you, its not really anything I would go out of the way for, but considering the pictures they were for they don't look bad.
2) I agree, fitting for the area and for the prints. You’re a Woodworking machine as sleep must not be in your schedule!
3) Get my 8 every night!