
Every purchase made through our Amazon Affiliate Page helps support this site

Chet
-
Posts
2,280 -
Joined
-
Last visited
-
Days Won
93
Content Type
Profiles
Forums
Downloads
Gallery
Events
Store
Articles
Blogs
Posts posted by Chet
-
-
Submitted on the old forum by Coop
This may not be an accurate statement as I really don’t know how long I’ve had this roll but, my Scotch blue tape sure doesn’t have the holding power as 3M. It sticks to itself very well but sure doesn’t hold that well to bare wood. Anyone else have that problem?
Follow up posts
1) Yes Coop, but I always forget which brand is the better choice when at the store, then I curse myself with every use.
2) 3M has my vote. And you would think with today’s technology, that when you tear a piece off, an indicator arrow would appear telling you which direction you left off!
3) 3M is my vote as well. Messing with tape is on my list of things I hate
4) I'm not even sure what I have in the shop to be honest.. Just whatever was on the shelf at the big box store when I was out. However, I've never had any issues with it. Curious what you're doing with it that you really notice the difference? It's also possible I have the "good" stuff so, don't understand the "bad" stuff..
5) I was banding some 3/4” ply with some hardwood and was attempting to hold the strips in place while measuring for the next piece. The Scotch is called Edgelock and was perhaps made for it’s original intent of providing for a painter’s edge and not for holding two pieces of wood together.
6) I use green frog for most everything of importance generally. There is a true difference when it comes to blue tape
-
Submitted on the old forum by tmize
So on a whim today I started rearranging my shop today. I’m wanting to move my router table. It’s just a boush bench top model I built in to the end of counter that runs along the outside wall. So I got to thinking where does it fit in placement among other people’s shop. It’s not used much cope stick doors and edge treatments occasionally. Most I’ve seen have them on some kind of cart that rolls. Personally I’m the type that every tool stays in its spot. So where would you group it.
Follow up posts
1) I would suspect most will say, wherever best fits your workflow. For me, I added an extension to my table saw because it was convenient.
2) Mine's a stand alone set up that doesn't move.
Like you, I don't use mine all that often. I did want a significant indeed/outfeed for it but, I'm lucky in that I had the room for that.
I guess this is just one of those tools that fits in the "others" area of your shop. It's not really part of your work flow. Kind of like a belt/disc sander. Something you use more often than you realize but, not a tool that you really count on to get the job done.3) I had thought about put in router wing. The other thing is I’m about to pull the trigger on a bandsaw. So I started moving stuff around because I’ve never been happy with my table saw placement and now I think it’s found it’s happy home. An where the router table is now is far enough away that it may not interfere on big pieces.
4) Finding that shop configuration that genuinely works for you is sometimes the hardest part! The router table was something I was willing to walk a little further to get to when I needed it..
5) Extension wing of my table saw.
6) I currently dont have a router table in my shop. Did have one in my old table saw extension wing. I think on placement of tools is a priority of work flow and how often the tool gets used to have the easiest access. In my shop about half of the tools have to get moved to be used, granted the move is just a slide to the side to get the work piece to travel through.
7) So far I’ve left it in its original place I did take the out feed table I built on to off for so clearance issue now. So I’m going to leave it alone til I finish the project I’m on now and see it bothers me any
-
Submitted on the old forum by tmize
Two years ago almost exactly I drove off into using traditional joinery an handplanes. So I decided I wanted to a nice simple classic project. I was so proud when I finished it. At the time is was the nicest piece I had ever done. Over the past two years I had started seeing the flaws in from the large areas of tear out, poor fitting drawer and plane tracks in the top. Also my first attempt at hand cut half blind dovetail the fit was good even now the spacing tho was awful an to spaced out.
So the wife asked for another side table. To set the record straight this has been the table that refused to be built. Luckily I’m more stubborn than the material I’m working with. To name a few of the issues I cut one of the leg tampers wrong well to be honest I started cutting it the correct way a 3/4” into the cut I thought I was wrong. I stopped flipped it an finished the cut I was wrong. I choose to see if I could fix it before I would recut the mortises. I glued a piece on the grain matched an squared it back up. The repair turned out well where it meets up actually come out looking like curly portion of the wood. So that explains why the new one is a touch shorter than the original.
Some if my tenon shoulders aren’t great the tenon fit well. I still need a lil more practice of them but a 5” shoulder line is tough with chisels an hand saw. At least it is for me I look at it as a place to improve. Now the biggest improvements from this table from the last is the plane finish and dovetails. But enough talking here is some pics. I learn from y’all’s experience an criticism so the next will be even better


Follow up posts
1) Hey bud, I think you’ve come a long way, much further than I would have ventured. Great job!!
2) I think I have said this before but part of the journey in this hobby is getting better as we go and to challenge ourselves to develop new skills. I use hand tools to fine tune my work's fit and finish but I will tell you right now that I don't think I have the patiences to go all hand tools as you have. my hat is off to you tmize.
3) I think it's always interesting to build the same project twice with some time/projects in between!
I've built 2 large beds now. It would be a natural thought to say that the second one turned out better than the first. However, reality is (for me) that I like the first one better. Fewer mistakes most likely because I was going much slower finding my way through the build. Regardless, they both came out great and only I really know where the bodies are buried..4) Like you all said it’s the same details that makes a project better even if you are the only one that notices. Chet I’m not all hand tool but a lot of. Nearly all joinery an finish prep. I still not crazy enough to do all the grunt work by hand. I have a planer, table saw and bandsaw I do joint everything by hand tho. To me I make fewer mistakes doing it this way.
5) I think it is absolutely amazing that you do all that with hand tools! It would be an awesome table built with nothing but power tools, the fact that it was done with hand tools makes it all the more impressive. Great progress in your skills! Am jealous as all hell in your abilities!
-
Submitted on the hold forum by tmize
It’s not “fine” woodworking but I do a lot of diy household decor projects. To me woodworking can’t all be fine furniture a shop builds they just a part of it. I see a lot of people do picture frames but that’s about it. What I don’t see is other types of projects. I collect user grade hand planes my wife collects mass produced pottery from this one brand and she loves displaying around the house so I build a lot of shelves or display type pieces in between furniture or during them as the need arises. So anyone who cares to show off just random stuff you have built. To me woodworking can’t all be fine furniture a shop builds they just a part of it.


Follow up posts
1) Awesome stuff!
I think we all build stuff that fall into this category. I did the glove shelf last year as well as table lazy Susans and cutting boards. There was also the floating shelves from a couple years ago.
In the end, you still apply the same techniques as you would a piece of "fine furniture", it's just the piece serves more of a utility purpose.2) Exactly kev it’s these small utilitarian projects that rarely get shared that I was trying to bring light to. The practice squad never gets interviews or the trophy ceremony but they are what help to make first string so great.
3) Some good stuff there. I know that at least in my case this is the type of project that got me started on this expensive hobby.
4) Good work. Some of the most satisfying projects are the most utilitarian in my opinion.
5) Yes same here. Started with a napkin holder for the kitchen table. Just a small tray that I screwed together with wood I found at work. Thousands of dollars later I’m still building trays and stuff but without all the screws
6) The good part about projects like these is that I try and incorporate my fine Woodworking techniques into these for practice. The bad part is that it takes longer than it should. Great topic tmize.
7) Coop, did you use a normal mortise and tenon joint or a sliding dovetail when you attached the stripper pole to the floor?
8) Hell, at my age or any age, I only wish!
9) These projects is what it’s all about. Sense of pride where ever you look around your house. I think us woodworkers are wired a lil different than the average folk
10) I agree wholeheartedly with you Jamie. Use to be the man would live in the house he built by hand to the best of his abilities. The the house was his testament to his craftsmanship. Now of day us woodworker show our craftsmanship thru the furnishment thru out our home. I do dream of building my own house or day but I still will not do everything to build it. My wife couldn’t stand to wait that long to move in
11) Sweet so when I come around for a cuppa you have it sorted for a brew.
PS...Down here in NZ there are two types of wood workers. Builders and Joiners. Builders build houses and are for the most part that I have seen rough as fark. with the attitude that she'll be right because any imperfection is covered up.
Not the builders of yesterday back in the early part of last century when the builders then must have been part joiner.
Because now if you want a really well constructed house where the wood fits perfectly and is super well made. You need to employ both. Because a joiner is a fine woods craftsman. And neither can do the others job.
But as I am finding. Being a builder doesn't take a lot of skill. Its a lot like building a model airplane all you have to do is follow the plan and stick to the rules.
All the wood frames come pre built these days, so its just a matter of erecting them in the right order and Bobs your aunties live in lover.
So framers do the framing, the builder does the foundations and helps lay the concrete or rib raft floor, piles etc...Plumbers do the drainage, the glass people do the windows, sparkies do the wires, carpet layers the floor coverings, curtain hangers, painter/decorator, roofer the roof. Builders don't do much. Brickies do the walls if it has bricks, or some other crafts man does the outside wall covering. Oh and plasters or gib stoppers they come in and make the drywall all smooth.
A full on builder that does the lots is a thing of the past.12) “Bob’s your aunties live in lover”? Ok, translate!
13) Function first, beauty second. Look at Shaker. Function first, beauty second.
-
Submitted on the old forum by Puka
I know we have all built a green house or two before. But here is my first.A couple of pictures so far. I put the posts in a few years ago and then my project stalled. I brought some wood a couple of weeks ago to get things moving again.
 Before One wall framed up.The goal is hydroponics. Nutrient Film Technique. So flat pipes not round ones. using round pipes is called NOT NTF.
So anyway...what aren't I going to grow. Wacky Weed.
I intend to grow vegetables. The usual sort you get in the shops that cost an arm and half a leg.
Lettuce, beans, corgettes, tomatoes etc. . . Did this the other night. So that's bother sides now. Tomorrow being Saturday, I'm gonna go into ITM and pick up the rest of the wood to finish the framing. I have the cladding already so all that's just waiting for a frame so it can be screwed down to it.
Then it will be a matter of sorting out the vents along the top and the sides.I have some of those heat activated rams. So need to figure out how to mount them, they will go into the roof along the ridge.So when it gets hot they will all open and then when it cools off they will close while the side vents will be manual.Seriously sweating at the moment as we are in a DROUGHT. Haven't had a decent amount of rain since before November last year. [Not counting that down pour we had the other week in Taranaki] different part of the island to where I live. Wish we'd had that rain here.
Did this the other night. So that's bother sides now. Tomorrow being Saturday, I'm gonna go into ITM and pick up the rest of the wood to finish the framing. I have the cladding already so all that's just waiting for a frame so it can be screwed down to it.
Then it will be a matter of sorting out the vents along the top and the sides.I have some of those heat activated rams. So need to figure out how to mount them, they will go into the roof along the ridge.So when it gets hot they will all open and then when it cools off they will close while the side vents will be manual.Seriously sweating at the moment as we are in a DROUGHT. Haven't had a decent amount of rain since before November last year. [Not counting that down pour we had the other week in Taranaki] different part of the island to where I live. Wish we'd had that rain here.
Tomatoes get planted in November'ish. But as Kevin Said we're pretty much the opposite of you guys. -
Submitted on the old forum by Puka
A couple of years ago me and a buddy brought some land down country as a hunting block and place we can go to get away from it all. Since hunting was becoming a dirty word in public circles and access was drying up, we wanted our own so brought 220 odd acres of bush. The place is crawling with wild goats and pigs, with the odd wabbit and smattering of possums.
There was a pre made crib on site when we brought the place but I decided that when I was down there at the same time as my buddy then I needed my own place.
The maximum sized building that you can build here and not need a building consent is 10 sqm. So I have designed two 10 sqm buildings to make up my bush crib. One building for the bedroom and one for the kitchen and dining. The dunny will be a composting toilet in an outside court yard where i will have the shower and a cast iron bath tub set up over an open fire. The building is setup right beside a creek, which unfortunately only flows in the winter time. Drys up completely in the stinking hot summer. But I'll be building a deck right up to the edge of it anyway. The enclosure around the shower and the bath tub will have some big doors that will open and allow views up the valley.
The build so far is only foundations.
 I've progressed a wee bit passed this stage but as of yet haven't down loaded the pictures out of the surveillance cameras I have setup over looking the site. I've had to brace all the wood due to the fact that if I didn't the sun would twist all the wood into pretzels before I could get it braced in the build.


Some extra photos of the block and a photo of the aerial picture.
2nd pic across is where I'm building the crib, which is the first valley on the last pic, the 3rd pic across is looking down the 2nd valley on the last pic [or second down from the top], white dot on the left looking to the white dot on the right.
The first pic above is looking across the second valley from about mid way along the ridge between the 2nd and 3rd valleys.
Square area of the block is approximately 222 acres.ROADS . . . HIGHWAYS . . .what are these things you speak of?!?
Actually the Local Highway for the area is about 20k behind where the photo was taken. But if you were to look at it you'd probably just see a scungy local road in terms of the American highway system. The third photo has a road on it that will take you state highway 3 such that it is.Another pic looking across from one ridge to another. SELFIE. . .I remember when only loosers did selfies . . .which is why I feel like such a trend setter because back then it was the only way to get me and where I was in the same picture. Wasn't anyone else around the hold the damn camera.
 This is me looking back up the back valley. Like I'm way way way up the back valley, as you can see the bottom of valley gets really V shaped ad is only about a bout a metre wide in places. There is also a creek running down it.I'm back down on the land next week for the week so will take a bunch more work in progress pics. Hopefully by the end of the week it will be at a lock up stage. With a roof and stuff.Well my report for last week is that the first two days were stupid hot so I stayed home and sweated my ring out there instead of going there and doing the same thing. I went down late Monday afternoon and got things sorted to start early Tuesday.Tuesday dawned overcast and it drizzled all day which suited me fine since it wasn't hot. I managed to get up the four wall frames for the crib.Wednesday it Pissed down so i went for a walk around the property to change out batteries and down load footage off my game cameras. After a comfort stop I tripped and ended up falling bare arsed into a Tree Nettle bush so that curtailed that. After a couple of hours I started to feel the effect of the Nettle Toxin so I drove to the nearest Hospital Emergency Room to get myself checked out [Basically that was a waste of time, petrol and money]. While I did suffer 30 seconds of the most excruciating pain I have ever felt in the areas that came in contact with the Nettle and 2 days of mild pins and needles in the skin nerves of my entire body, not just my bum, and groin area. Not to mention huge welts for each nettle pin prick, the welts only lasted about an hour.I came to the conclusion that for it to be really bad for me I'd need to do a lot of rolling around in said Nettle Tree before the symptoms became life threatening. Check this link if your interested.Anyway that kinda screwed things up for awhile as I didn't get a lot of sleep thereafter.Thursday was fine but windy so had trouble building anything that required balancing to hold in place since the wind would blow it around, then the generator stopped working so the drop saw was cut from the equation. Bugger using the hand saw to cut everything.Friday I measured out, then dug and concreted in the 3 footings for the rear deck and roof support. Weather was over cast so not too hot. Also started my new plan to try and eradicate the Tree Nettle from the property. So went out and about with clippers and cut every one I could find at ground level so yeah! I managed to get the odd sting on hands and arms. Which wasn't quite as bad as getting my entire crotch covered in the stuff. But it was enough to kick start the pins and needles again so I figured that the Toxin from the previous event hadn't entirely been flushed from my system so I gave that up until me next visit.Saturday. . .not a cloud in the sky and stupid hot again. Silly me I went for a walk up the middle ridge, behind the main hut to collect a couple of cameras and their backup solar panel. Basically a 200m climb up a steep narrow ridge goat trail to the top of the main ridge. Got to the top and discovered I'd left my water back at the hut. I was not having a good time so I decided then and there that I was going to pack up and leave.So I did. . .arrived home about 6 hours later. Sometime between when I left Taranaki and when I got home in the Waikato the pins and needles feeling finally vanished. YAYEEEEE!
 The pic on the left shows the walls I did get erected, also shows the temporary deck at the front I got down so I could more easily walk around that side of the crib. I had to put joists down on the bearers that I'd bolted up last year.The pic on the right shows the three posts that I concreted in for the rear deck and what the roof support posts will sit on.Luckily I'd taken the time last year to nail support strips to all the tall posts out the front. Only the posts at each end had suffered any twisting and only a we bit. The ones between were still straight up and down with no rotational twisting.
 I put my phone against the eye piece on my spotting scope. I spied these guys across the valley on the neighbors place just below the top of the ridge about 900m away. This is 60 x magnification. I have a phone attachment somewhere to do this properly, but not with me at the time. Objective lens on the spotting scope is 100mm [that is the big lens at the opposite end you look through].Just add water. . . say about 6 and a half inches.Early Saturday morning NZ time we had a bit of a storm starting at around 6am, a bucket load of water fell in a vary short amount of time. Really big buckets.All that crap in the left picture came from the right photo. Luckily I wasn't parked further up the left end of the track. I had planned on coming out here Friday night but was delayed drilling holes in my steel brackets so came over Saturday after the storm. That little truck is my buddy's, it was he who discovered this little bit of slush, since when I arrived I got stuck into building my crib. I didn't come around to this valley till it was almost dark.
 Didn't actually get a lot done on the crib, rained on and off Saturday afternoon. I put another post in the ground with quick crete. Bolted the rear deck bearers to each each set of posts plus the new one and now ready for joists. Need to buy the deck wood before I install the joists. Finished framing out the door way. Finished framing the end wall diagonals. The sloping bits at the end that fill the gap under the rafters.
Discovered that my posts at the rear were 200mm too short so i was unable to lap joint and then bolt them to the piles. Which intern meant i was unable to do the rafters and purloins. Because to leave the roof hanging out 2 meters over the back wall in a high wind area without the pinning support underneath would have meant that the next time I showed up i would have found the roof somewhere up the valley. NOT ATTACHED TO THE CRIB ANYMORE.
While the rain was good in the fact that it filled all our empty tanks. It was crap in that it screwed up my weekend of building and weed spraying.
It did clean out the creek that my crib was built beside so i can't complain too much about that. So many of pros and cons.yip One road in, but my crib is not this far in. Its the valley before this one. The existing hut thats here is opposite these photos, which is where I stay while I build my place. Its where my buddy stays when hes down with his family. He's been doing all the work on the place so I have given it to him. -
Submitted on the old forum by Puka
A buddy commissioned me to build him a bed. Not sure if I've shown this or not but if I have here it is again. If not then . . . Plus my awesomely messy work shop. The bed corners could only be lifted with a hoist hence the ring bolts in the top of each one. JARA. There are like wooden concrete or steel. Damn things are stupid hard and heavy.


 So the four railway sleepers standing up against the shed were what i started with but as you can see once i started cutting slots the wood grain which was rather holey started falling apart. So I swapped them for the bigger posts. pic 3 and 4 shows the head board slab and the foot board slab. pic 5 is measuring the posts for the slab slots, pic 6 and 7 are cutting the slots. The last two pics are building and fitting the slats and centre board/hanger thingy.Follow uo posts
1) Damn! Those slabs look amazing! Great job!
How did you connect the slabs to the 4 posts?2) Really cool build. Hope your bud’s bedroom wasn’t upstairs!
3) I cut slots in the posts with a skill saw then used a chisel to cut out the waste, Chisels kept going blunt for some reason. I used an off cut that was the same width as the slab and the same length to get the slot the right width and height and dept etc...I then drilled a big arse hole through the post from the slot out to the other side. I assembled the posts and the slab using the hoist to keep the slab at the right height pushed them altogether then used a sharp rod and a hammer to mark the drill positions in the slab by running the rod through the posts and whacked the end with the hammer.
I drilled a hole into the slab through the end then drilled a much bigger hole at right angles in to this hole. Ran the rod into the wood and put a washer and a nut on it. Pushed the whole thing together and then put another washer and nut on the outside. Once tightened up the inside assembly was hidden inside the post while the outside was counter sunk into the post.
I attached the bits of wood that hold the slates the same way, chiselled out a slot then drilled and cut only a single hole and rod. The bed ends once the rod was trimmed and the nuts tightened were never undone. I did my back in a couple of time pissing about with this damn bed hence the reason I brought the hoist. Since I seem to do a lot of projects with wood that's as heavy as concrete. Those posts I could only just lift on my own if a did a squat, hugged them to my body and and straightened my legs like you do when u lift a post out of a hole. Gotta keep the back straight or its an instant week off work.
I gave the Macracarpa slabs a couple of coats of Cabots Spar Varnish which really pulled the grain detail out.
Anywho it was the biggest bitch of project I have ever done and will never do another using Jarra posts like that again.
I took the bed to his place where we used his hoist to unload it into his wood shed.
Told him where he could stick his bed and left him to it.
I probably should ask him if he ever got around to putting in his house.4) It might have been easier for him to just build a new house around the bed.
5) Maybe but he used full length square Jarra power poles as roof beams, needed a crane to lift them into place as they were incredibly heavy.
-
Submitted on the old forum by Kev
This one is done in Bubinga and cherry and finished with lacquer. Once again, the miter sled really paid off! The picture is the only picture that I have (or know of) of my mom as a young girl so, has a great deal of sentimental value..

Many more of these on the docket this weekend! I've been needing to do these for a long time!

Follow up posts
1) Very well done Kev, good combination of woods for the pic. Do you do your own matting?
2) Thanks! Matting is my wife's department and she usually get's that at the local Michaels..
3) Cranked out 3 more today from start to finish.. Long day but, that's mostly waiting for glue and finish to dry..

4) If I were to guess, walnut and cherry?
5) You would be spot on.. I was out of Cherry though so, used maple for the splines in these.. Yep.. Not even enough Cherry in the shop to make a few splines..
6) One of our employees likes to travel all over Texas and the Midwest taking pics of old buildings. I made this frame from walnut, simple with a chamfered outside edge. Although the dark wood and low quality phone camera would probably hide most open joints, using your jig left good tight ones.
7) That sled does an amazing job and really takes all the stress out of the build! I had a couple small issues with a couple of my frames so, started the investigation to find out where the issue was. I started with the sled and it was spot on. When I went to the table saw, I found mu blade was just a smidge off of 90. Made the correction and the remaining frames came out flawless.
Maybe the first issue with the new saw? I set it initially and hadn't changed the angle so, I'm not sure why it was off of 90? Of course, now I'm checking it often and locking that handle when not in use -
Submitted on the old forum by Kev
Didn't really need one but, it was a good way to put my accumulating scrap to good use. We will have some guests for Thanksgiving that are new to the area and that we haven't met.. Assuming they're good people, I'll probably just send it home with them..

Follow up post
1) I bet it will be much appreciated!
2) This could be a risky proposition. If they are complete a**holes, how do you politely kick them out. Hopefully you have a good meal and send them home with a nice board.
3) Everyone was put on notice that it would be an early evening.. I have to fly the following morning at 4:30am..
-
Submitted on the old forum by Kev
I didn't video this project and picture frames just don't do well on YouTube. Regardless, I thought these turned out pretty good and I wanted to show them off!

Here's a few with pictures in them..

Follow up posts
1) Dang!!! Those did! Did you just rabbit out the back inner side?
2) Yes, there's a rabbet on the back side. The insides have a cherry strip with a chamfer on it. By the time the rabbet and chamfer was cut, the cherry ended up being a very small detail but, a detail nonetheless. I'll also say that the miter sled that I made for doing picture frames made these really painless!
3) Great job, Kev! Man! I really need to make me a miter sled. I have several router bits that I bought years ago to make molding that have never been used. I also have a molding machine that could make great looking molding with the right knives. I just need to make myself build a miter sled so I can get very accurate cuts. Again - great job!
4) Thanks! I'm super happy with that sled and just can't imagine doing frames without it. To do 6 frames that quickly without fussing with the corners really takes a lot of stress out of the build!
5) Really nice Kev! Not blowing smoke but, I’ve used your miter sled on three occasions so far and am sold on it. You might want to post another link to it for Keggers and others. Did you Domino the corners on these as I don’t see any splines?
6) No domino, they have splines.. Cherry to match the small inner section.
Digging deep in the archives here for that video...lol
Also, there's a free set of plans on my website and, of course, I'm always here to answer questions.7) Very nicely done! That cherry accent makes them pop! Thanks for posting the link
-
Submitted on the old forum by Kev
First off, apologies! I forgot to snag pics before closing up the shop for the night so, will add them in the morning.
I'm sure most of you saw this build in WFC with Marc. I asked my neighbors and none of them wanted one. There's no way in hell my dogs are going to eat that close to each other so, I opted not to build this years project. I was happy to see them make their goal without my contribution!
Today, when my wife was home for lunch, we started going over our Christmas stuff to see what we were doing for who.. Low and behold, when she brought up the list for our oldest son and DIL, they had a raised dog feeder on their list.. If I'd of only known a few days sooner!
Anyway, I got after it today even though I don't have a table saw. I used the WW plans. I had some 8/4 and 4/4 scrap cherry that were just about the right size. Took me about 3 hours to have everything except cutting the holes for the dishes and finish. My wife will pick up the dishes tomorrow and then I'll cut the holes and finish..
Pictures to follow in tomorrow._____________
Here's a picture I took this morning.. Still needs the top mounted, edges treated, and the holes cut. Of course, some finish is in order as well.. Thinking about ARS followed by Lacquer on this one since it's got a month or so to off gas..

Here's the finished version.. All Cherry and finished with a coat of ARS followed up with lacquer.


Follow up posts
1) It’s a dog’s life! My wife’s niece asked me to make her one last year for their Mastiff with a food holder built in. Luckily I found out before building it that her favorite color was black and she intended to paint it so it was made from poplar.
2) What did you use to cut the holes?
3) Nothing, The dogs ate the appropriate sized hole!
4) Router on a trammel.. Marc actually does a pretty decent job describing it in the videos..
5) My dog (2yo lab)would just eat the holder. She loves chewing on wood. She gets wood from firewood stack in the back yard and will chew it to nothing in about a week
6) When the dogs come in the shop, the first place they go is the scrap bin to see if there's something in there for them. I've never had an issue with them chewing on something finished though.
7) Only thing finish she has ever chewed on finished was the drawer knob on my bench right after I’ve got done with it. Well that and my screen in porch but that’s a different story
Oh.. And as I was waiting for glue to dry on the dog feeder, I banged out one more Christmas gift that was on the list... Viewing middle out.. Bubinga, maple, and Sapele.. Also finished with ARS and Lacquer.

-
Submitted on the old Forum By Jamie
Made a couple of these to break up the shop furniture projects. The challenge for me was the sliding dovetail legs on the cylinder. First time I ever attempted them on a turning. Fun project!
Attachments:


Follow up posts
1) I'd say you nailed it! Very nice work Jamie!
2) Thanks! Only pictures I have of them. Didn’t realize how messy my shop was, Kinda embarrassing.
3) lol, we all have messy shops from time to time or all the time
4) Very nice good work
5) Cool project while learning something new.
6) Very well done and to keep him straight, Kev and Chet have no idea what a messy shop looks like but I can relate!
-
Submitted on the old forum by Kev
Christmas is sneaking up on us quickly! Thought I'd get a jump on the game today and bang out a dozen reindeer.. Thanks Mel for the templates!

Follow up posts
1) Nice herd! It may be sneaking up on us, but still way to early for Christmas talk.
2) In my local stores, I absolutely agree! Handmade gifts take a little longer tho..
3) I was planning to make some more reindeer for Christmas this year but my heart and mind isn't very motivated to make anything right now. Your reindeer look great!
4) I definitely found a few tricks to speed up the process which helped! Down to about 13 minutes per..
5) That's pretty fast. I've never timed mine. I'd like to make some large ones but I guess I'll have to wait until next year.
6) There were a couple tricks that really helped!
1. Using a forstner bit between the legs and horns.
2. Sanding at the spindle sander after cutting the side profile and before cutting the front profile.
3. Dipping for the finish rather than applying by hand.7) Thank you, Kev. Great ideas. I've used the forstner bit and it is a time saver. I've not thought of sanding after only cutting the side profile. No drip problems with the dipping method?
8) I did not have any drip issues with the dip method - ARS. I did set them on a piece of scrap for about an hour and then wipe off a couple heavy spots - mostly on the nose.
-
Submitted on the old forum by Kev
Had to knock one of these out for a relative.. Sapele and Wenge for this one with Padauk and Wenge splines.. I'll get pictures of the splines when the finish dries..

Much better picture and it's actually dry now... Also, trying a much larger picture format..

Here it is all finished up.. Being sent back to the owner tomorrow..

Follow up posts
1) Wife bought a print while in Tennessee and this would fit the bill. Nice!
2) Thanks Coop!
Pretty simple build! I do have a video.. I just rabbeted the dark back wood into the bottom of the sides. I glued these up before mitering the corners on the miter sled. Then, just glue up, sand, and apply finish.. You'll spend more time waiting for glue to cure than actual woodworking. Nice quick win!3) Thanks Kev and yeah, I’ve watched the video a couple of times and appreciate you having made it. It will definately be my guide!
4) That is cool! How did you attach the pic?
5) I used 1/2" spacers around the picture to hold in place while I turned it over and attached the picture from the back. In this case, the canvass has a pine frame so, all I had to do was pilot drill and put in screws.
6) My wife’s print is not on a frame. I guess dbl. back tape would do? With spacers in the back to extend it out some?
7) You don't really need to extend it out unless you want to. I'd have to see what you're mounting to offer any real suggestions..
I'm not a big fan of double stick tape for a permanent install. You might actually consider using conventional hanging hardware inside the frame..8) It’s just a flat as a fritter print, about 1/16 thick. I wonder if attaching it to a frame, painted black will do? I’ll have to play with it.
9) I'd attach something like that to ply or MDF that has the edges painted black then just attach that in the frame as I did..
10) Darn good idea. About how much room did you leave between the inside edge of the frame to the outside edge of the pic?
11) Sorry, just realized you said about 1/2”
12) Yep.. Design calls for 1/2" all the way around..
-
As you look through the journal threads you will notice that some only have the comments that the original poster made including any pictures they added as they went along. These journals do not contain any conversation or participation that was posted from other members. These are journals that were moved from the old forum to this forum and because of the size would have taken too much time and effort to move manually in their entirety.
-
 1
1
-
-
Submitted on the old forum by Kev
My wife asked for a cabinet similar to my router bit storage cabinet to store all the thread for her long arm quilting machine. So, made a quick project out of it and didn't film a thing..
Plywood case with HW trim and added a top and bottom just to dress it up a little. All the walnut is left over from the vanity project so, the only things I bought for this one were the hinges and 1/4" dowel.
Holds about 60 things of thread.. Whatever they're called..

Follow up posts
1) " Holds about 60 things of thread.. Whatever they're called.."
spool
/spo͞ol/
noun
a cylindrical device on which film, magnetic tape, thread, or other flexible materials can be wound;? -
Submitted on the old forum by Kev
Got the first couple gifts done.. Not really sure what I'm going to do this year but, these 2 were a given as I'd missed them in previous years..

Follow up posts
Man, those are fantastic. Your use of time amaze me!1)
-
Submitted on the old forum by Chet
I made this for my niece's new baby boy out of Wenge and Oak. I wanted to do something a little different for the lid handle... his name is Noah.


Follow up posts
1) Nicely done Chet! Looking at the pictures before reading made the handle look weird, after reading, makes it a great touch!
2) Looks really cool! Any concerns with the grain direction on the handle?
3) Yes, there is some concern but cutting it with the grain the other direction just looked like I didn't care. It is put on with dowels and I can get it off fairly easily with a flush cut saw, don't ask how I know this. It's not a high use item. I have been doing this for a while for new family babies. It comes with a little note saying that this is for storing "firsts" in the baby's life. Hospital bracelet when they come home, lock of hair from first hair cut, candle from first birthday cake, Bandaid from first scraped knee, first report card, first BAD report card, key to their first car along with first speeding ticket and so on.
4) That's awesome Chet!
5) By the way Kev, this is still some of that big 8/4 chunk you left behind and I still have a piece that is 5 inches wide and 6 feet long. I really think you over bought for that leg assembly on that live edge table.
6) lol.. As much as I played in your shop Chet, it was absolutely my pleasure!
7) great looking box and awesome idea there!
8) Chet, really nice build . I wish I had thought of that when my twin grandkids were born. Was the handle cut with a cnc?
9) I cut the handle on my bandsaw then refined it with my modeler's rasp, Dremel tool and sand paper. I kind of laughed at myself for spending over two hours on an "N".
10) It couldn’t have come out more perfect!
-
Submitted on the old forum by Kev
Had one to get done for a client..
Cherry and maple with a Padauk and walnut stripe..

Follow up posts
1) Simple, yet elegant!
2) Nice board Kev!
3) Thanks! As long as the client is happy!
4) Heres some of mine
Botryoides (Red wood) Pohutakawa (Dark Wood).
Made this for my mommy as a replacement for hers which fell apart after about 15 years or so.
This made from recycled Totara (came out of some boards pulled from a House demolition).
This one is made from Botryoides (Red wood) and the black wood is maybe Kilwa. The wood was cut from a shelf out of an old office desk.
5) Well done Puka! Where are you from?
6) WOT you do is go to the new member section and check the thread called Kia Ora.
All will be explained in there.
A few hints
I live on a small island (archipelago) in the South Pacific. . .
We're known for our small flightless birds that have these big long beaks.
National sports include cricket (which is seriously BORING unless its a 1 day 20 20 match, which is slightly less boring).
Rugby (which is a full contact ball sport where the players DON"T wear protective pads).
Rugby League and Seven's (which for a rugby game is actually not so boring.
And the chicks play Netball (also seriously boring).
Any game which is actually fun to watch is not a main stream sport so not worth the national TV chain's money to broad cast so its played only via pay per view on SKY.
Other less well known sports but still international with a few other countries include sheep shearing, Wood Chopping and Sailing (I think we currently have the Americas Cup).
We have Mountain Food festivals that have mountain oysters for sale, but only mountain men eat these and I am definitely not a mountain man. Though I do like mountain women.
Figured out where I'm from yet?
7) And I even read and responded to your bio! Getting old brings with it a new day. So you’re From Louisiana, eh? New Zealand is actually on my bucket list.
8) Very nice boards Puka. I typed that very same thing yesterday, but I guess I didn't hit reply after typing.
9) Louisiana I'm guessing is some place in the America's I'm not familiar with. Are you talking North America, Central America or South America? America is a big land running from Alaska down to Chile with many different peoples, food, music and wood.
New Zealand on the other hand is no where near that however we are quite close to this hot flat land called Australia. As for bucket lists. I have plastic, nylon and stainless steel buckets, big ones and small ones. Used for holding paint through to washing the car and feeding the chickens.
This is a small end grain cutting board made from European Spruce. The technical term for this type of timbre is called Dunn-age.
10) Louisiana is a state in the USA. It was purchased along a zillion other square miles from France in 1803 for little of nothing. Luckily for Texas, it was divided up into several other states. Darn nice folks and great cuisine. So I guess the timber got it’s name from Crocdile Dundee? Oh, darn neat looking cutting board!
-
Submitted on the old forum by Puka
My sister in(Out)Law is a Cross Train freak which means my little BRO is too (hesthe one who married her). Anyway she had a birthday celebration on Sunday and I decided that instead of forking out a stupidly silly sum of $300 odd I could build a jump box for whatever time it took me a few screws some glue and a sheet of 18mil ply.
Saturday I went to one of my local building supply stores and brought a couple of sheets of 18mil non structural non treated ply $120. The sheets were even straight, though one of them had a slight de-lamination at one end. Nothing a bit glue wouldn't fix, only because i couldn't be bothered unloading the wood from the cart and back onto the showroom floor.
When i got home i had to have a sit down and a hot cuppa and so forth because it was starting to get silly hot again and because i can. But after a while with the sun beating down on the ply i knew that i better get my A into G or the sun would Fark it so I got busy. Bonus was that my Dad showed up right about then to give me a hand, so we both got stuck in.
Not as easy as i thought building this box, cutting all the bits out was easy it was what came after that took the time. Saturday was doing the main sides. Sunday I did the jointing edges, the ends and the internal bracing. Plus the gluing and the final screw up (i love cordless power tools). I recently had to use an old fashioned screw driver to undo some screws and redo them, took me forever.
Loaded the (almost finished) box into the truck and drove it around to my parents place and presented it to my sister in law. Why is that some women when they get excited want to hit you? I might post anything else i make to her next time. Save on bruises.
After the shin dig i brought it back home, it sits on my work bench waiting for to be finished. Sanding and a coat or two of sealer or some such.
PS I used my Android phone as a pattern to trace around for the hand holds. This also allows their young kids ample room to post their toys through and loose them inside.
PSS. This is the explanation...when i get a chance I'll post the pictures i took while I built the box. NOT DOING ANOTHER BOX. This one sucked the big one.
PSSS. I'm going to have some lunch!
 The xtra deck space on this imported Ford is outstanding....
 As you can see. . .full size sheets.
 This is me in my new safety kit. Was getting tired of dust in my eyes.My old goggles used to ride up when as they sat on the nose of the old breathing regulator. The dust would drift up underneath.BUT NOT ANYMORE!Now i don't give a S h i t e nothing gets in except air.


 Marked the cut line with a couple of blade cuts about 3 mm apart.
 After the skill saw cut there was no up lift of the top lamination. Experiment worked.


 Getting ready to mark out the interlocking side joints.
 The plan
 mmmmmmmmmm Monkey Butt Powder.
 These took me ages to do, Sundays job.
 This is PUSS PUSS he's my supervisor. He comes in every now and then and checks over my work.
 The first end in place.
 Android hand holds. I love these clamps. . .
 Final Screw up.
 Ready to be presented to the Party Girl.Follow up posts
1) What's the box for?
2) There's these strange people that do this thing called exercise, they jump up on these boxes for some reason to stay fit. Lunatics, somebody should teach these whack jobs about the benefits of the 12 oz curl.
3) 12 oz curl.. I thought that's what exercising was? There's been some days I was feeling extremely buff and had one in each hand.. That always makes me sore the next morning though
4) I’ve been using one of these for years !
-
Submitted on the old forum by RichardA
Some of you may know that Ken Cooper "Coop" flew up to Tennessee and spent a couple of days working on a cross inlay for my wife's final gift. Here's a couple of shot's of the finished inlay.


Follow up posts
1) That turned out awesome! Very nice work to the both of you!
2) It is beautiful for sure.
3) Wow! That is an incredible addition.
4) Yup, Coop knocked it outa the park.
5) You’re too kind. As Rick already had the cross, we/ I was unable to use the bushing guide from Rockler. So I hogged out as much as possible width and depth wise with the router. Prior to, I outlined the cross with a marking knife and got close with the router in three passes. From there is was chipping away with Rick’s extremely sharp chisels. How he covered up my mistakes, I have no idea. Regardless, it was an honor to participate.
6) Rick, that curly cherry looks good and so does the sassafras.
7) Thanks to you my friend.
8) And Linda loves it “shiney”! Such a wonderful lady!
9) If you guys will, say a little prayer for Linda and Rick as it looks like this might be her resting place sooner than they thought. Thanks
10) Prayers on the way.
11) My heart breaks! So many prayers for you and your family!
12) I will definitely say some prayers. It is always tough to hear news like this. Rick and Linda have had more then they're share of challenges.
13) My wonderful wife, left for heaven at midnight the 18th/19th. If it wasn't for her, you guys might have read about me in bad newspaper coverage. 21 wonderful years.
14) If you need anything Rick, just shout! We're here for you.
15) Rick, my sincere condolences for your loss. Remember all the good times you and Linda had together.
16) I’m fortunate to have had the opportunity to meet her. Beautiful lady, inside and out. Our thoughts and prayers are with you Rick.
17) I'm so sorry for your loss,Rick. You will continue to be in my prayers.
18) Thank's guys. I'd like to show you the finished product, that was finished yesterday. How fitting. But I don't know how to do it without starting a new thread. The casket was made from Sassafras with the carved and inlayed top of curly Cherry. Well, I'll be damned. It showed me how. The third pic is plane shavings, mostly Sassafras, scattered around the inside edge, so Linda will have a wonderful scent all the way to heaven.


19) My prayers go out to you my friend and may you have peace in knowing Linda is whole again and without pain.
20) You guys are one hell of a bunch of good folks, I'm not sure what I'd do without all your kind words..
21) This may sound odd, considering relationships nowadays, But I can count on one hand the bad times we had over 21 years, and they were not serious enough for us to go to bed without a kiss. Damn sure strange for me, but it was easy to get use to.
22) Checking up on you Rick.. Knowing this is a rough time for you, how are you doing?
23) I'm doing, but it's tough.
24) Haven't heard from you over here in a while.. Doing ok bud?
25) I haven't been avoiding, truly. There's a ton of stuff that happens when you go from three incomes to one, that need dealing with. It's slow, but things are starting to look a little better. Your invite is still open, if you get near here. I may have a side job coming up. There's no guarantee yet. But I't come, because of the casket build I did for Linda. Get them fingers crossed, and Chet, don't cross your ankles.
25 Closest I'm going to get this year is New Orleans..
26) He doesn’t pay worth a flip but his beer is cold and his beans, sausage and rice are better -
Submitted on the old forum by Kev
Only bowl I was really interested in today

Cherry catch all bowl.. Table saw might be down but, the lathe still works!

Follow up posts
1) Nice job Kev! You video this?
2) I didn't.. Just killing some time between shovelings in the shop today.. It started off as a pieces of scrap 10/4 cherry left over from the bed build.
3) So what is the diameter and depth of this? Finish you used? Inquiring mind wants to know.
4) lol.. Diameter is about 10" and it's about 2" deep. Because I used a screw plate on the bottom, I needed to be mindful of the screw depth and checked it often. I probably could have gotten a little deeper but, it was time to shovel again
Finish is 3 coats of ARS and then. burnished out with shavings after the final coat cured..
5) I should also note that this off cut was from the end of the board that I had so, I had to deal with some checking that was there. In hindsight, I wish I would have cut it out of the middle of the board that I had to eliminate that issue.
6) Shoveling? You trying to get your garden ready too?
7) lol.. We got about 8" of snow.. It's just easier to stay on top of it..
New saw gets delivered Wednesday.. We may get a little more snow tonight but, I'll be a bit ahead of the game in ensuring the delivery truck can get to the shop!8) What’s better than a new professional shop than a new ts to go in it. Happy for ya bud!
9) Kev's driveway will be the cleanest place in Montana on Wednesday. I would be surprised if I don't see a tent set up on the porch Tuesday night!
10) Tent's already in place
Problem with removing all the snow is that it get's just warm enough in the sun to melt some of it and then it becomes ice.. Right now, I think If I were the driver, I would refuse delivery to the shop as there's a little slope in that drive way that could shift the truck into deeper snow.. We'll see how brave the driver is!
I have a back up plan though.. The driver can deliver to my garage and then I'll put it on my trailer and deliver to the shop.. Shipping order says it weighs about 700 pounds and is in 2 boxes..
11) Tape some 20's to a cutting board for the driver.
12) Not a bad idea.. Even did the milling for a couple cutting boards that I need to do but, couldn't cut them into strips as I didn't have a table saw...lol. Just too painful a process to cut them all at the band saw and then mill flat..
-
Submitted the old forum by Chet
Getting the new jig saw prompted me to want to build something storage wise so I can have it out and ready to use. So today I set out to build something to hold my drill, a driver and the saw. Its made out of birch ply and trimmed out with some cherry I dug out of the burn bucket. It also has three small drawers for who knows what. Tomorrow I will see what finishes I have and needs to be used up. The storage area for the saw has a slot down the center of the shelf so that I can slide it in without removing the blade.


Follow up posts
1) Small and compact, I like it! I like the mitered corners!
Almost looks like it needs a handle on the top so you can carry it with you.2) Really cool build Chet! I definately need to do something similiar.
3) Nice job Chet! Those small drawers should hold saw bits and jigsaw blades.
4)
Funny story... I had to get creative building the drawers. They are just some 1/4 ply. But when I went to cut the miters for the trim on the table saw I adjusted the fence to 45 on my table saw sled and inadvertently left a corner of the fence hanging of the blade side of the fence. It made contact with the blade and fired the brake. I have heard of guys doing this and I new I had to slide the fence over, I just messed up. So now I need a new brake and new cross cut blade.
So I used the bandsaw, router table, drum sander and spindle sander to make the drawers instead of doing everything on the table saw.5) I seem to remember coming close to that when I was there.. Difference would have been that it would have been my fault...lol
6) That’s a bitch! Must be a SawStop thingy? Glad you could re-coup.
7) Nobody can re-coop
? One last picture. Here it is in its final location, unless move it somewhere else someday. I sprayed three coats of blonde shellac, mainly because it needed to be used and it drys fast so I got three coats on in about an hour and a half. I have to be honest, I didn't make any effort to patch/hide/fix the brad nail holes on the trim, its just a box in the shop and at this point it wasn't a skill I felt the need to work on.

9) Love it! That works so awesome in your shop! Having been there, I know exactly where that's sitting and how it works in your flow! Pure awesome!
-
Submitted on the old forum by keggers
I have all of my reindeer made and sanded. Finish will be applied later today or tomorrow. I'm running out of time. I made them using walnut and cherry.I had a hard time finish sanding them since I have arthritis in my thumbs but remembered this morning that I have a sanding mop attachment for the drill press. That made the whole process easy as can be. I did launch the first one through the air so it's true - reindeer really do know how to fly!I'll try to get another picture after the finish is applied. Follow up posts
1) Now that's a herd! Looking awesome!
2) Thanks, Kev.
3) Yep, you have raised yourself a fine looking herd.
4) Nice work!
5) Great job keggers! Where’s the lonely doe?
6) Thanks! I think the doe is behind Santa's sleigh with Rudolph!
I just finished putting the final coat of finish on the reindeer. I made a mistake and used water based finish and of course it raised the grain. So, I had to hand sand each of the reindeer after all after the first coat. Hopefully, the grain will behave with the second coat because I don't think my poor thumbs can take much more sanding.
7) I did the same on mine this year.. Was a PITA but, lesson learned!
8) those are great looking? How long did it take to cut/sand and finish those?
One day I want to try these ... just not today haha9) I don't really know how long each one took me. It was a week long project that I worked on when I could. The sawing part doesn't take long at all - it's the sanding part that takes up your time. I used a spindle sander, belt sander, sanding mop, and hand sanding to get each one where I wanted. I sanded to 180 grit and then applied the finish - which raised the grain - and then lightly sanded with 400 grit between coats, making each one silky smooth.
Just a short follow up to the reindeer project. Everyone who received them really liked them. It's a simple project that is much appreciated by all who got them as gifts.
10) That's awesome! I put a red thumb tack in the nose of a couple this year and that was a big hit too! You can pick up the round ones at Walmart, they work the best.
11) I asked my wife if she wanted me to put a red nose on one of hers but she didn't want it. So......no red nose. My daughters said they were glad that they received reindeer as presents because they planned to steal their mother's. Peace was kept at my house.
12) Works well as you add to people's collection.. Tosses a little "twist" into the herd.
Bench Caddy
in Shop Tips and Techniques
Posted
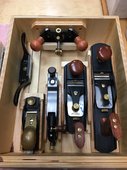
Submitted on the old forum by tmize
I’ll admit it I’m not the most organized person when I’m in the middle of a project. So I’m looking at building something to where when I’m at the bench working I have somewhere to safely lay my chisels,marking knives,gauges,squares and so on from rolling on to the floor. I already have a small tool rack mounted along the back of the bench for saws an plane screwdrivers. It gets in the way sometimes so I don’t want make it longer. These will just be as I need them so once the task is done I turn around and put them away in my tool cabinet behind me. Any ideas?
Follow up posts
1) I would think a tray with magnets would be an idea. The magnets will keep the tools in place so edges don't get damaged. Not knowing how far your tool cabinet is from the bench, you could load up what you need to eliminate going back and forth. You could also mount 1 of the magnetic strips, like people use for kitchen knives to the leg of you bench, this would keep them nearby and out of the way.
2) This is actually one of the reasons that I like the split top. I have it in a bench as well as my OF table which used to be my primary work location. Of course, I also have the tool wall behind the Roubo where everything has a home.
Assuming your question comes from a place where these thing don't work for you ore aren't feasible, how about a roll around cabinet dedicated to this type of storage? It could have a chisel rack, plane till, etc. and the drawer space would be great for fastener storage and other objects that you use on most projects?
3) Well this is more of a temp fix. I’m planning on building bench crafted classic Roubo this spring/summer. This should help some of my problem that my bench now is just under 6’. So when I’m doing joinery with my bench top moxon I run out of room on my top. My main handtool cabinet is directly behind me it’s a chest of drawer type and my hand saws are on the wall to the left of the bench. The plan is once I get the Roubo done it will replace the location my bench is now and the old one will go behind it along the wall and move the miter saw bench somewhere. So I’m a just need a box with some dividers in it to safely lay chisels off to the side to protect the edges. Like when I’m dovetailing I normally have 3 to 4 chisels an two marking gauges an knife an roll of green tape.
I’m in a basement shop an still have lil ones so I like having all my tools away in drawers or cabinets so I can control rust with silicone bags. By the way those bags work very well even in Alabama summers. In the 4 yrs we have been no rust on any tools in my cabinets.
4) I live in a fairly dry climate and still use those descent pouches. Just a little extra piece of mind!
Looking forward to watching the bench build! I highly recommend some storage in the lower area. I've built 3 of them with the lower storage and love it! Obviously, it can be designed to fit your needs..
5) I’ll definitely journal it. It the simple version of the split top. With leg vise an plane stop. It’s actually very similar construction to your sons bench.
6) Lots of opportunity for storage under it.. I like it though!
7) I can’t help you with ideas but you helped me with one. Where do you get the silicone pouches?
8 Here you go
www.amazon.com/Wisedry-Rechargeable-Desiccant-Microwave-Reactivated/dp/B0781BR7V7/ref=mp_s_a_1_19?keywords=safe+silicon+packets&qid=1575944890&sr=8-19
9) Yea I’ll will add some kind of storage under it. The only thing I don’t like about the bench I have now is I can’t use hold downs but in a few spots due to the cabinet base under it. I built it like a kitchen cabinet with a 2 1/2” thick top. It doesn’t move even under heavy planing.
10) tmize, thanks for the link. It says 2.2 lb. bags. Do you divide these into individual bags?
11) I can’t remember what sizes I have but if you will look in the info section it tells you the sq inches it will protect. I normally oversize the area I’m trying to cover. The reason I like these is about once a year you can throw it in the microwave and dry them back out and reuse them over an over. It comes with instruction also that tell you all about how.
www.amazon.com/Desiccant-Odorless-Non-Toxic-Moisture-Absorbing/dp/B07HRNRNM6/ref=mp_s_a_1_12?keywords=desiccant+packets&qid=1575947074&sprefix=desiccant&sr=8-12
These would be all you need in a normal drawer size 20”x20”
12) So, word to the wise.. Decide on your hold fasts before you design your storage as they can be different lengths and have different sized heads. When I built my Roubo, I had a couple of Rockler hold fasts and then switched to Gramercy. They do not fit nicely in the leg holes on the bench and it drives my OCD nuts!
13) Yea I’ll buy new hold fast before I drill holes in the top for sure
14) I might not have been clear.. More important to know what you're going to use before designing the under storage for clearance reasons..
15) It was clear as a bell. It just reminded me I need a good set of holdfast. I have the blue rockler set now an they are ok but I know their is better sets out there. Considering the bench I’m planning on building only has a leg vise I’ll need a good set of them.
Just to derail the topic more since it’s my thread I can do that. I’ve always heard the gramercy ones are great. Has anyone used the crucible ones bench crafted sales. Since I’m ordering bench hardware from them I thought about just getting the holdfast to. I maybe wrong but I think they are 1” holes tho?
16) I have 2 sets of the Gramercy ones and haven't tried the Crucible ones.. Interested to hear reviews!