Every purchase made through our Amazon Affiliate Page helps support this site
Kev
-
Posts
6,284 -
Joined
-
Last visited
-
Days Won
570
Content Type
Profiles
Forums
Downloads
Gallery
Events
Store
Articles
Blogs
Everything posted by Kev
-
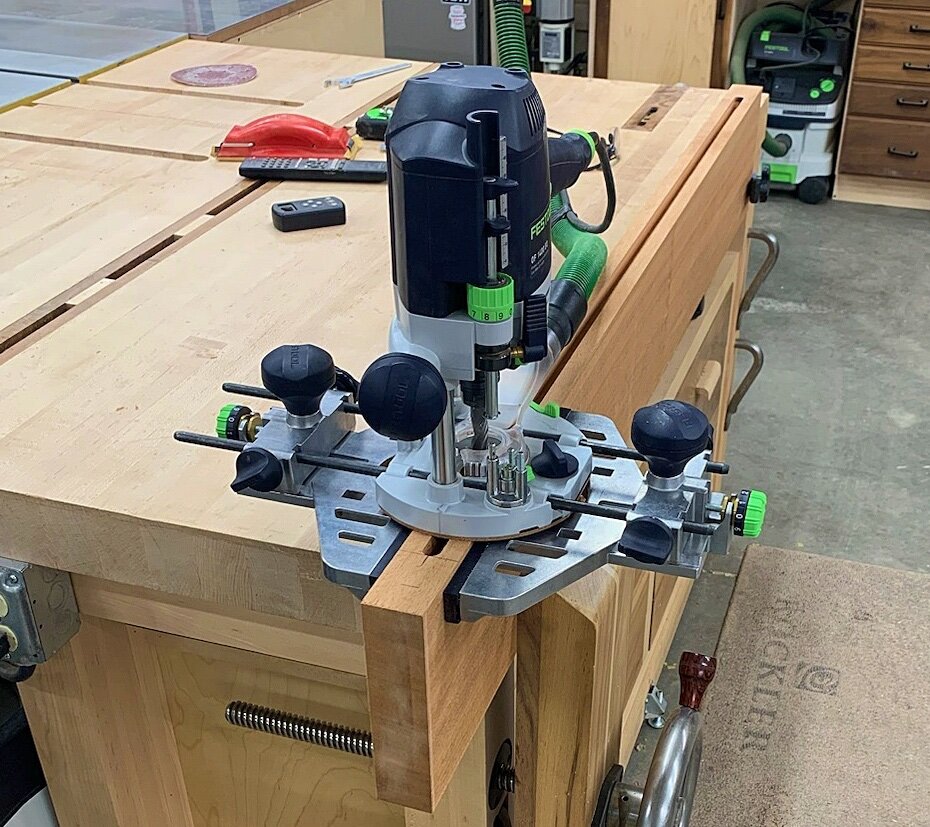
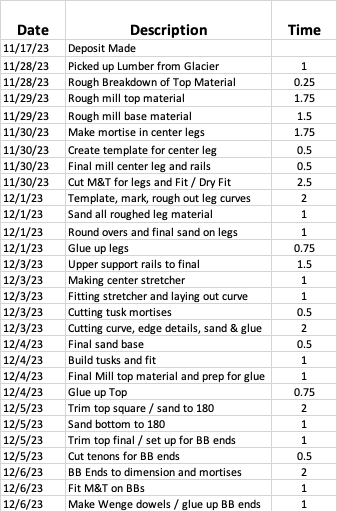
Got the top flipped over when my wife got home so, got a little more work in! Finished the milling on the BB ends, made the Wenge dowels (Lathe to rough and plate to finish diameter), and got it glued up.. Still a bit of sanding to do as I left that side just a smidge heavy.. Hopefully, I'll be starting to shape the top tomorrow in prep for finish! Total: 32.25 - About 10 hours left on the budget
-
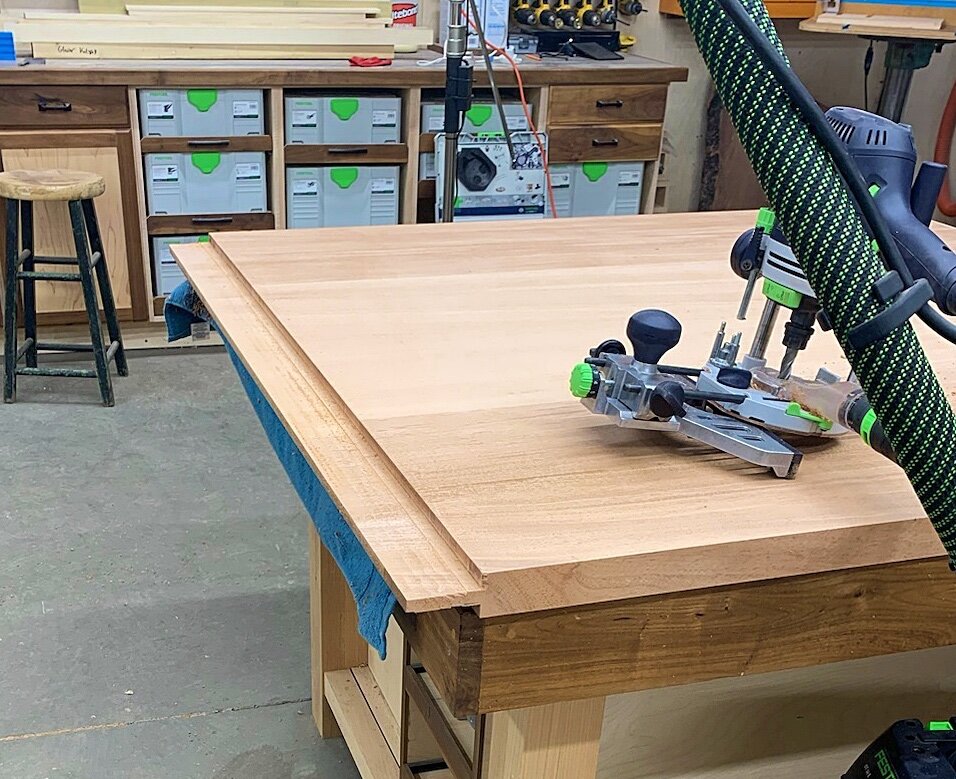
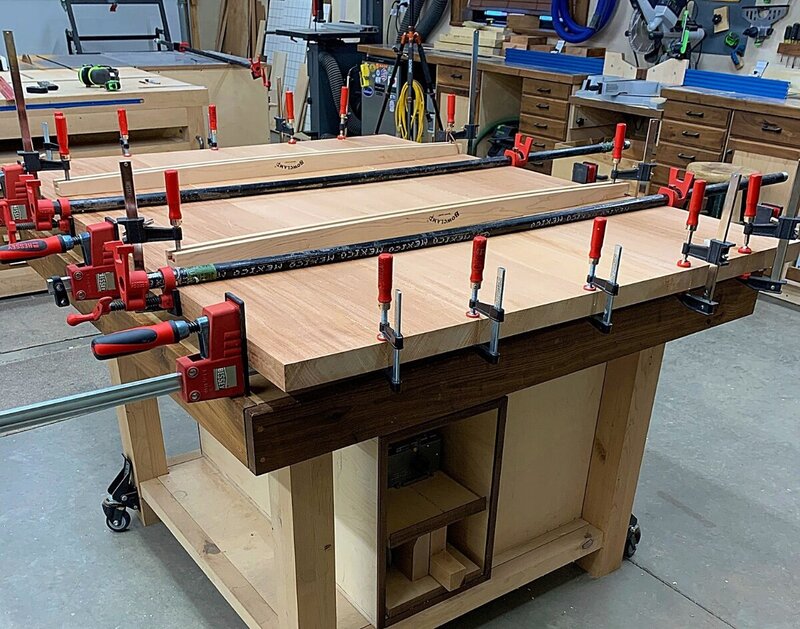
Got a nice early start today but, now I'm dead in the water until I can recruit some help to flip this beast over! Started by cutting the mortises in the breadboards.. This really maxed out my bit so, I took lots of smaller passes. Even with a 1/2" shanked bit, I just didn't want to over stress this Whitside spiral bit. Dual edge guides as usual. I trimmed the tenons and finally got the first dry fit.. This is the bottom and I'm really hoping the top looks just as good 😅 I cut these so that they're flush on the bottom and have a little extra on the top. I'll use the drum sander to dial them in. The table is also currently 3.5" longer than the design. I can trim these BBs down or leave it. I've tossed this out to the client to see if she wants the table a few inches longer. And, where things are at... Total: 31.25 hours.. About 11 hours left on the budget.

-
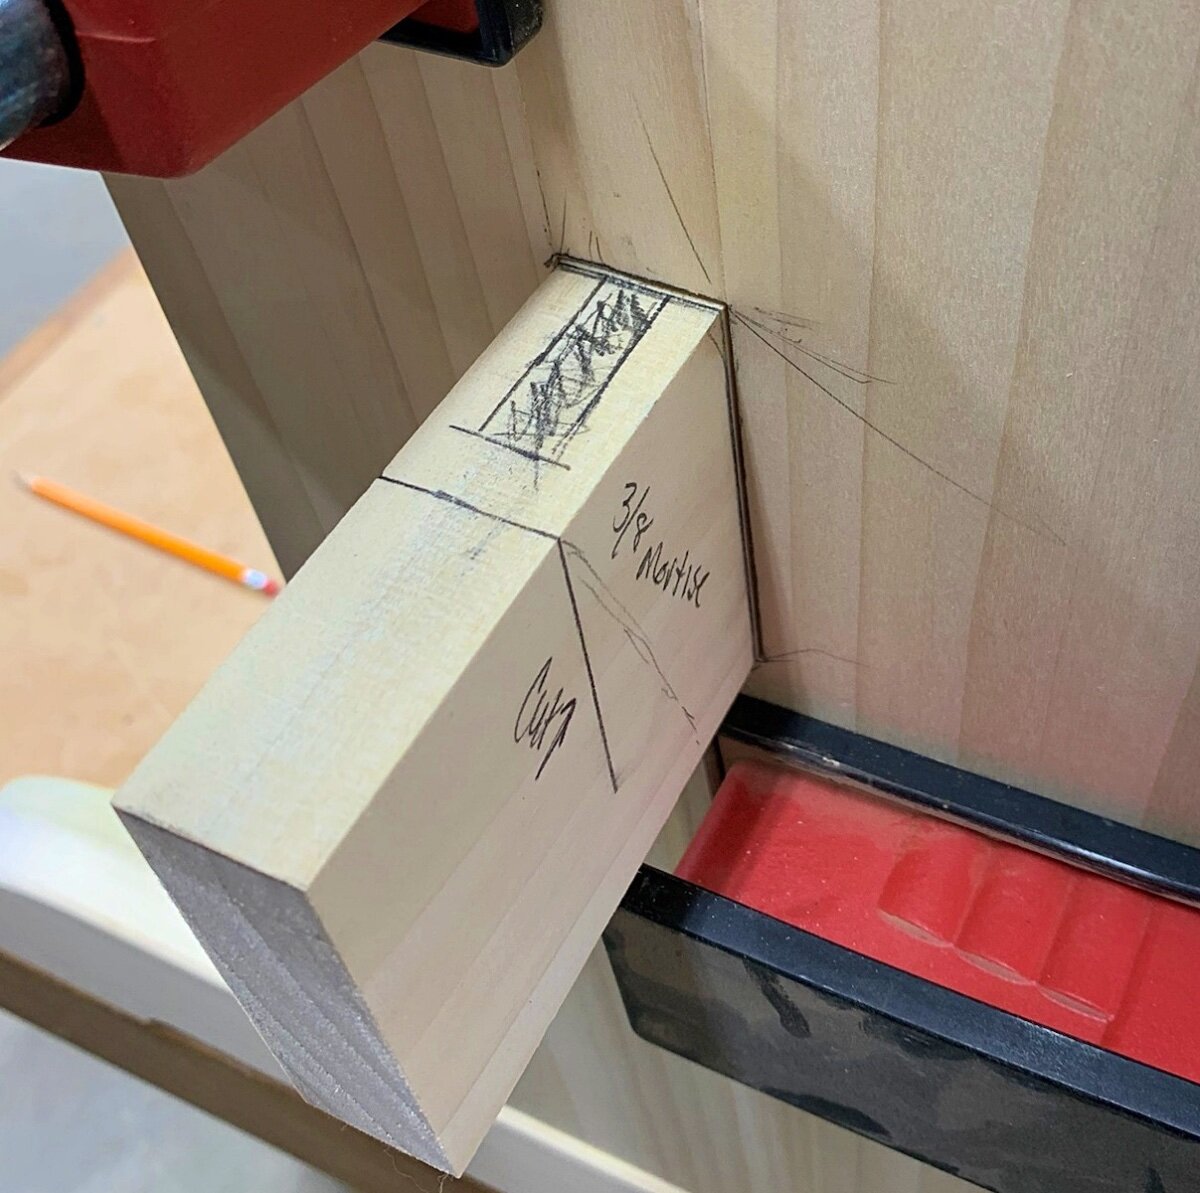
Fairly typical.. The BB ends will be 5 1/4" wide. I'll trim the ends of the tenons so that they're hidden inside the mortises. I made the tenons at 2 1/2" wide because that's the length of my longest 1/2" bit. They're 1/2" thick and centered on the top. I'll peg them in 3 or 4 locations.. I need to look at the layout and see how it looks.. The center pin and tongue will be glued with the outside ones being done as a draw bore and no glue. These will be installed from the top and done in Wenge since the client wants them to be seen. The only "tricky" part is that the client wants slightly curved edges on all 4 sides of the table top. So, I just have to be sure to remove enough of the tenon to leave enough meat on the BB to account for the curve and not expose a tenon. There's also a chamfer going on the underside to consider as well. Will just require some thought and planning before deciding how much tenon to cut back.
-
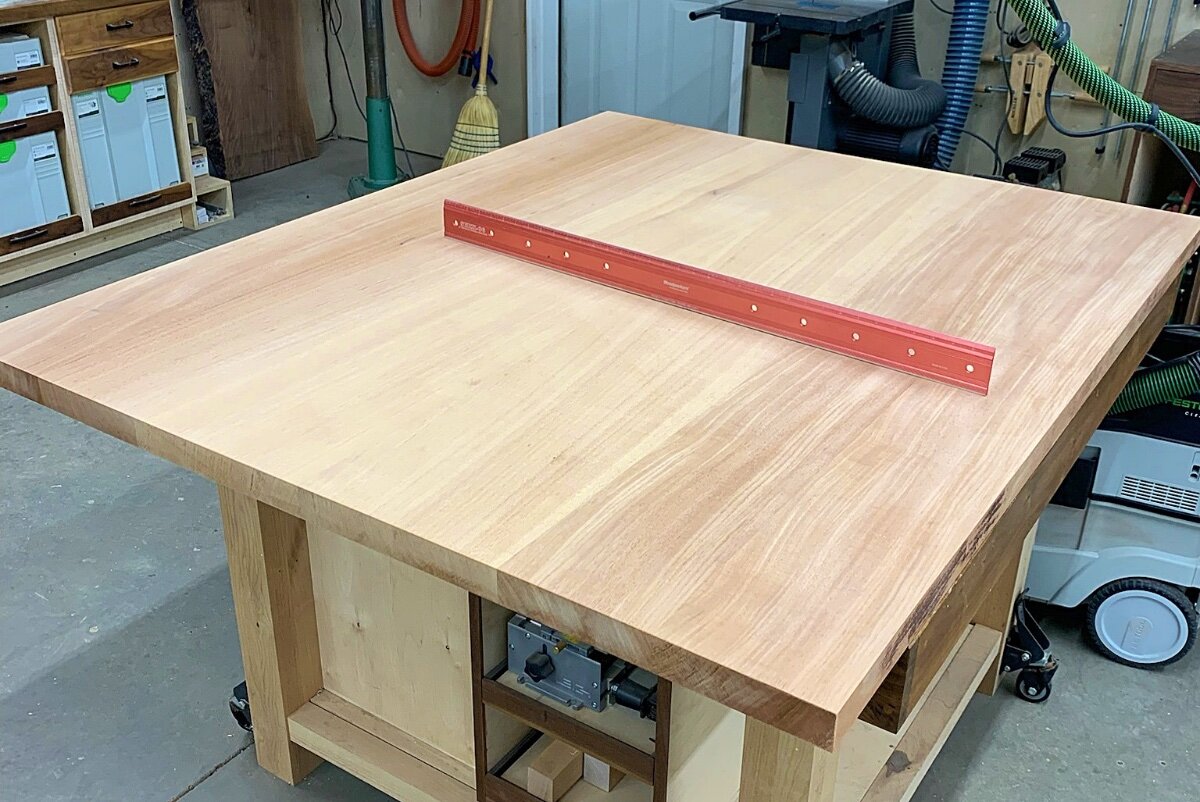
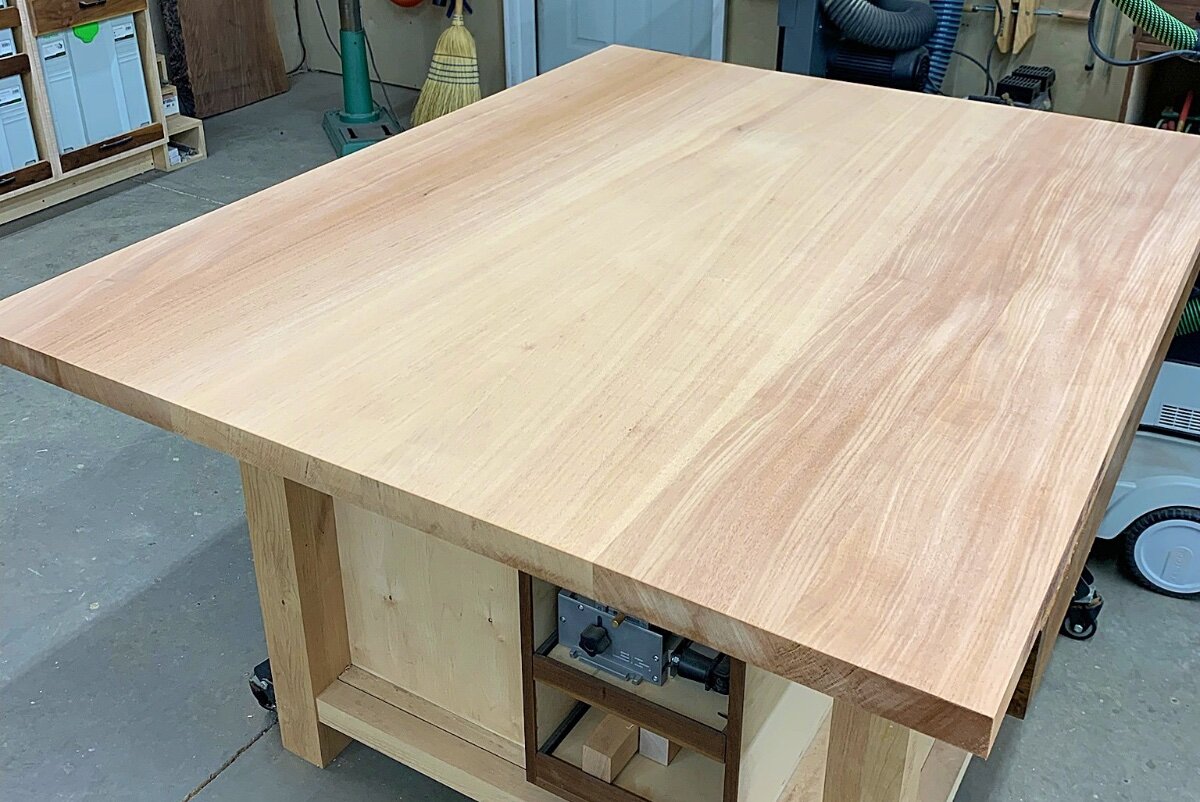
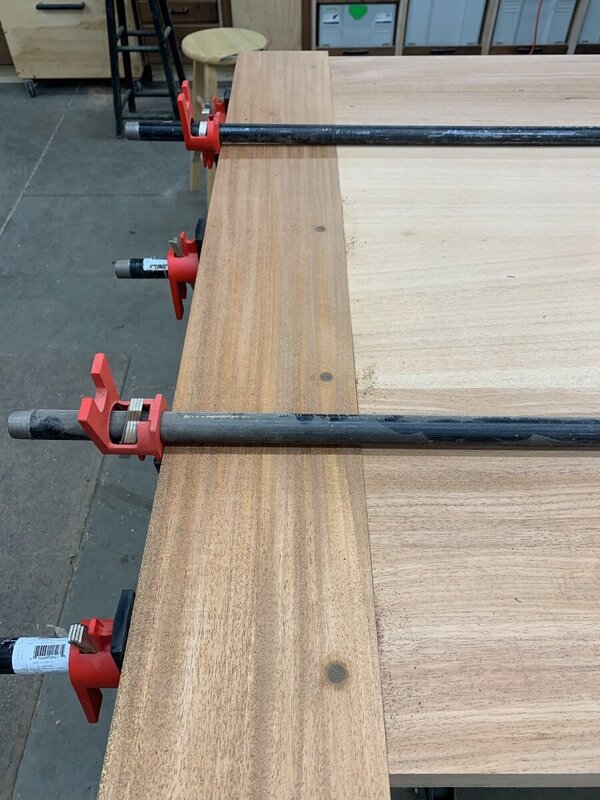
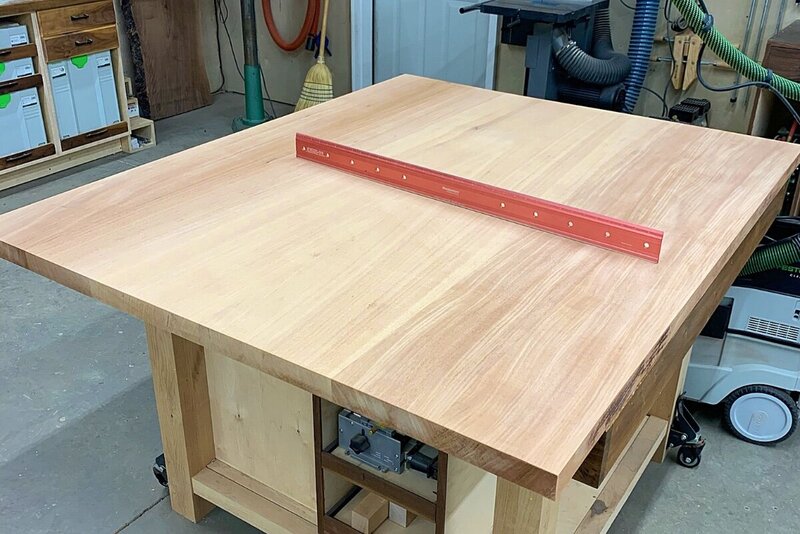
Well, more progress today although the bulk of the day was sanding! I got the tops out of clamps, marked them up, and just started sanding! Although this is the top, the bottom looks very much the same way.. After cutting the top to final size, I laid out and cut the tenons for the breadboard ends with a router and an edge guide.. I'm sure there will be some clean up needed but, I won't know for sure until I cut a test mortice and check it. Total: 28.25 hours - About 14 hours left on the budget.


-
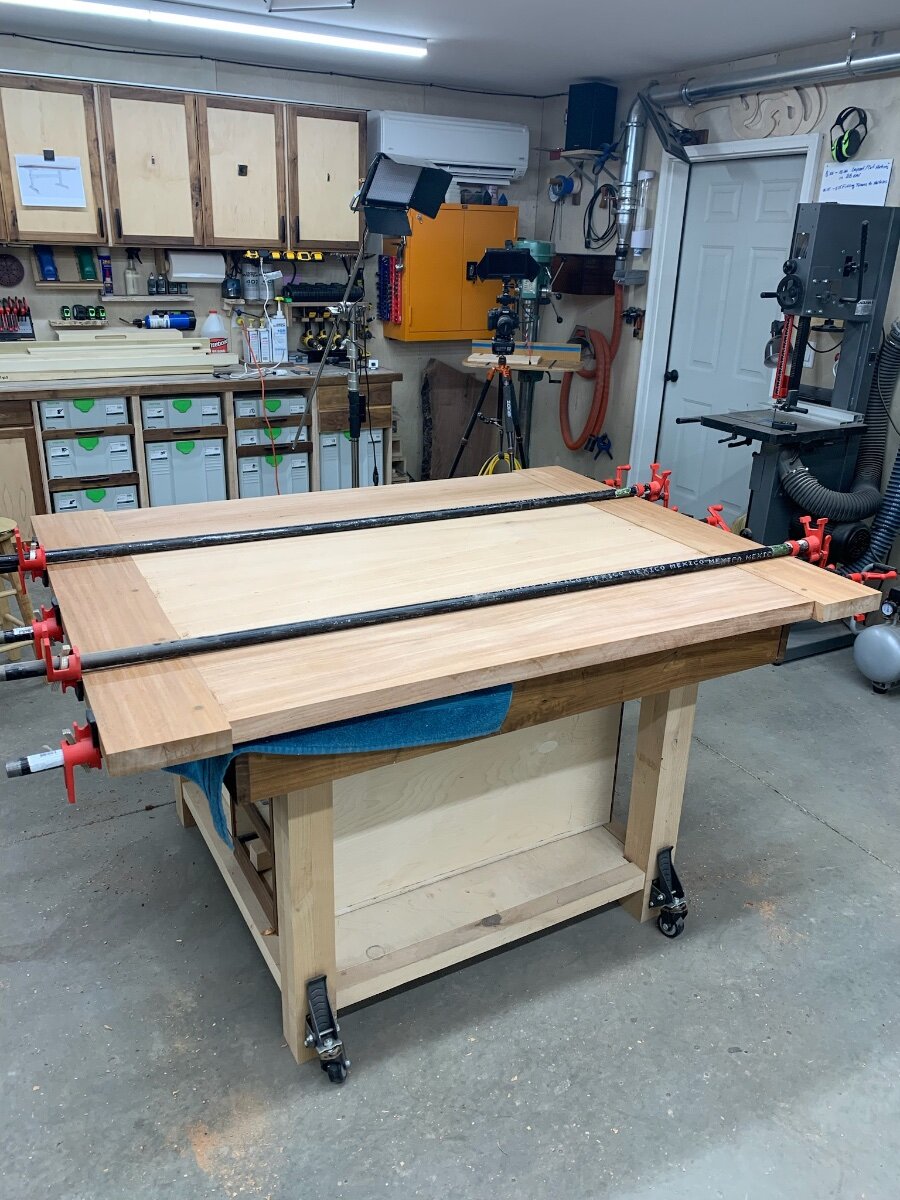
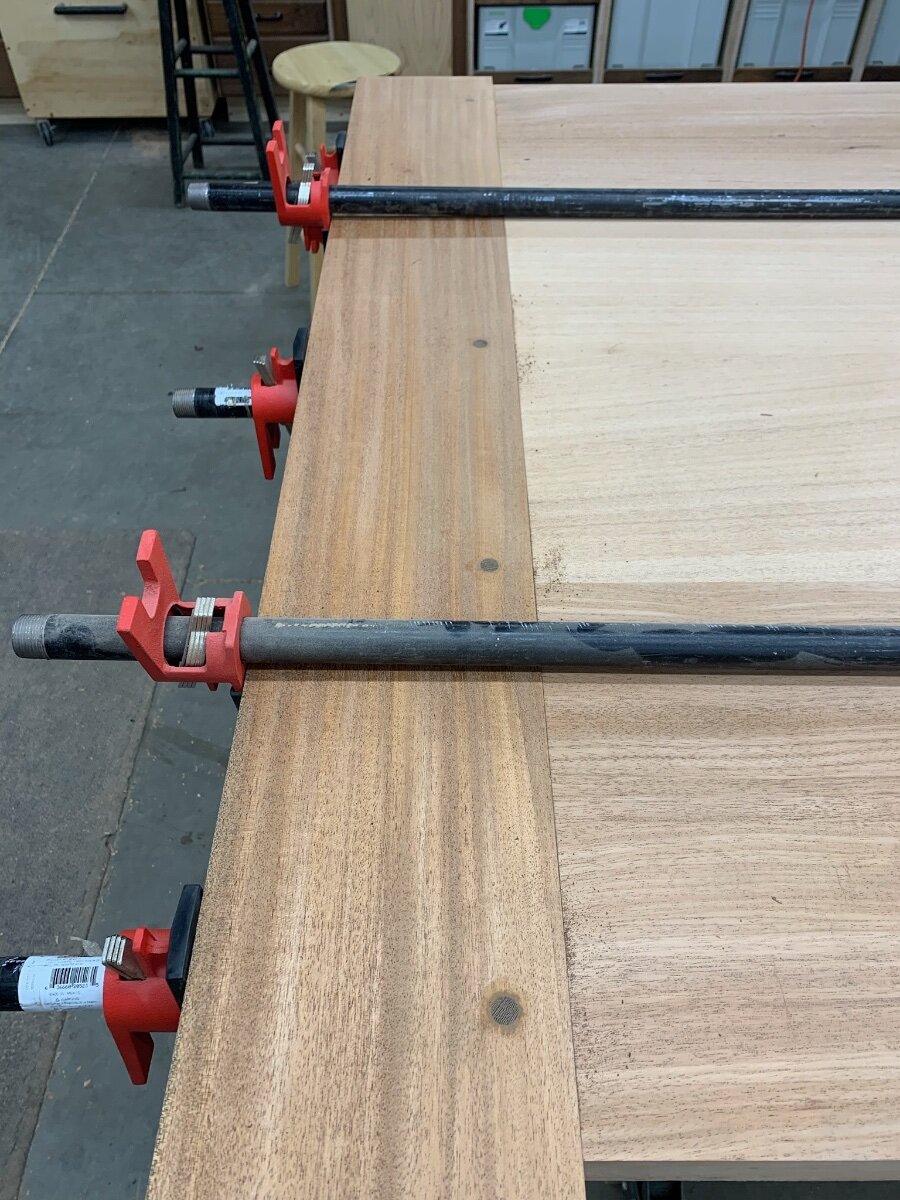
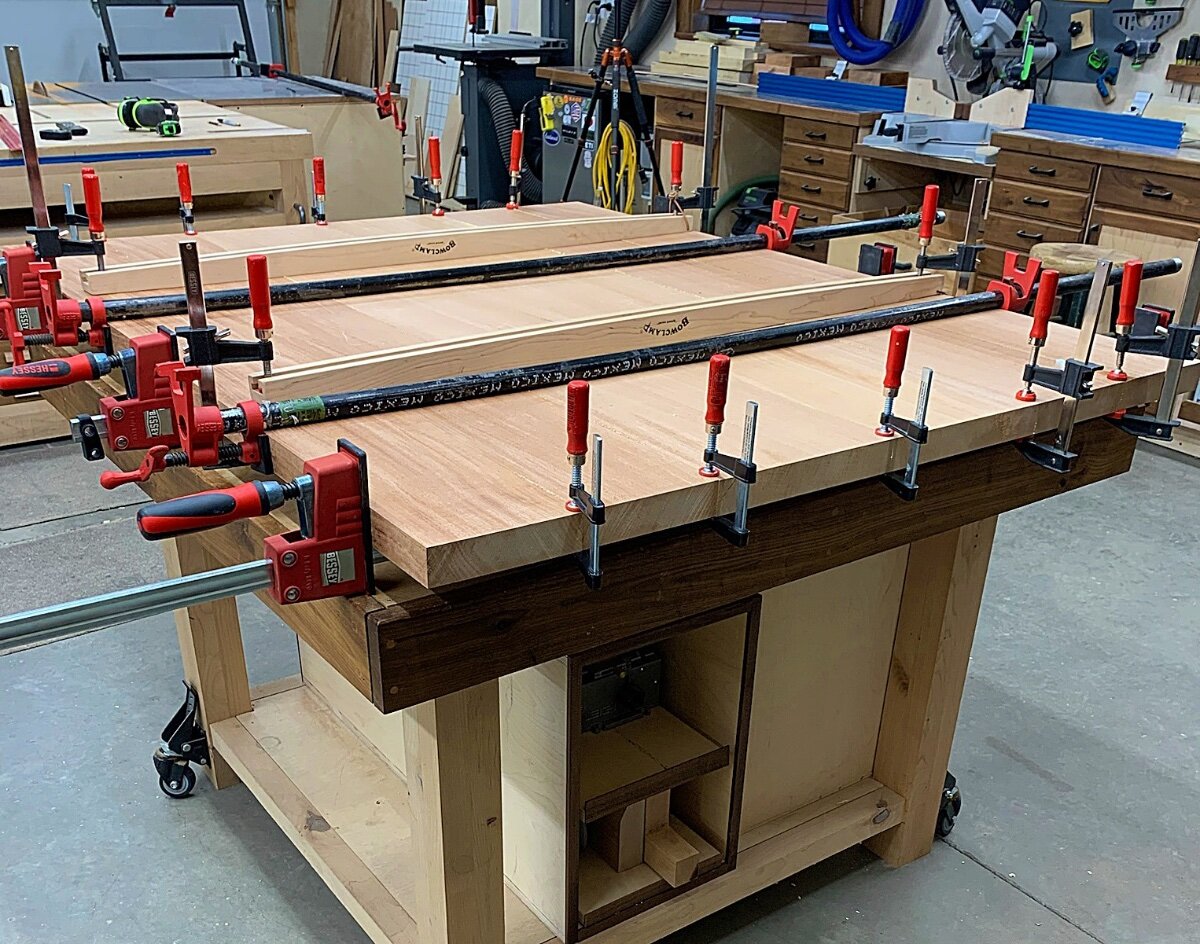
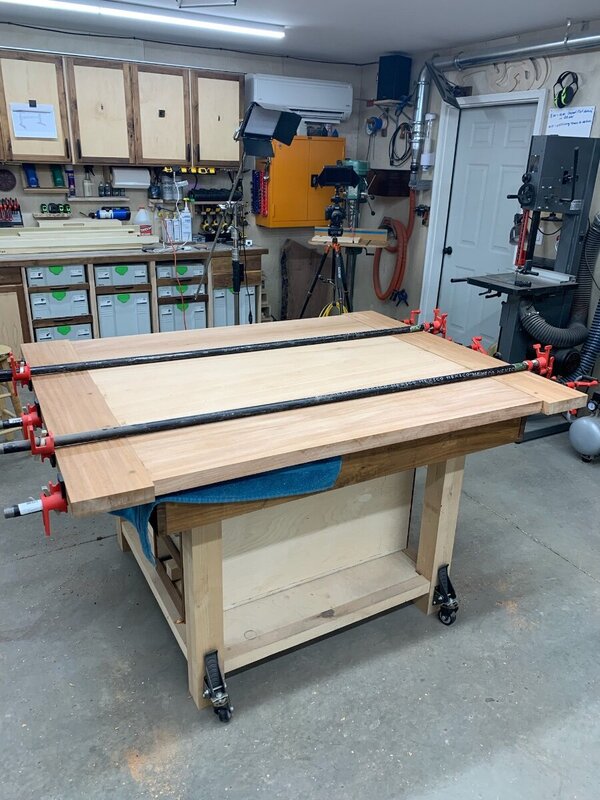
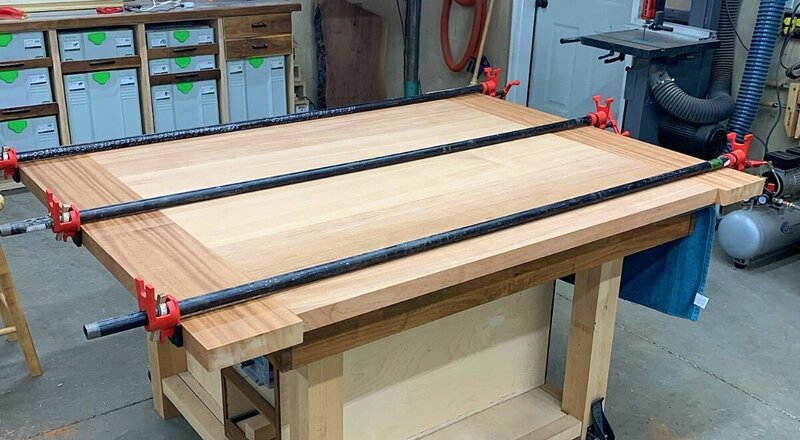
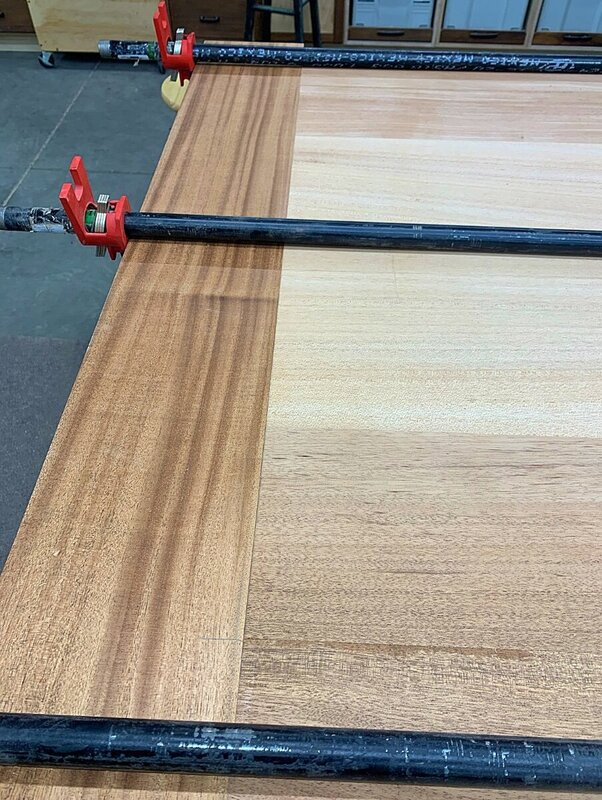
So, I've put the shaping option out to the client along with some suggestions to change the top of the tusk out a bit and she'd like a little time to think on it. Thanks @Woodenskye (Bryan) for the suggestion! With those done (for now) I moved towards getting the top glued up. I put the lumber back on the assembly table and aligned them per witness marks. I then applied a clamp so that I could use the track saw to get the top closer to final length. This made it a bit easier to final mill the top since the boards were a little shorter and lighter. So, top is still about 1.5 inches wider and longer than its final but, I did manage to glue it up.. For the most part, everything came together pretty nicely. There will still be lots of sanding I'm sure! Short day in the shop today! Either waiting on glue or client decisions but, I'll take it! Total: 23.75 hours. About 18.5 hours left to stay on budget.
-
I showed them to the client as well as my wife and then shortened them a bit.. I didn't add any additional shape to them but, I could..

-
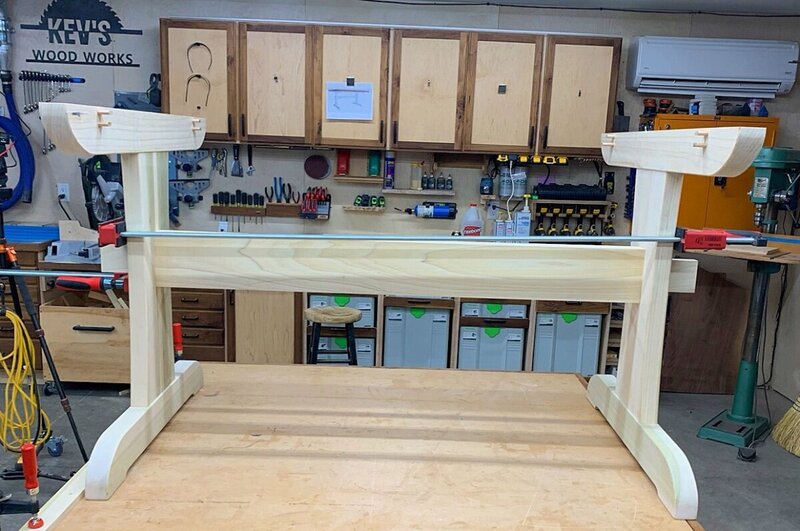
Looking for some opinions as I work on the Tusks this morning.. Obviously, I'll reach out to the client as well but, I think these are just a little too long on the top?


-
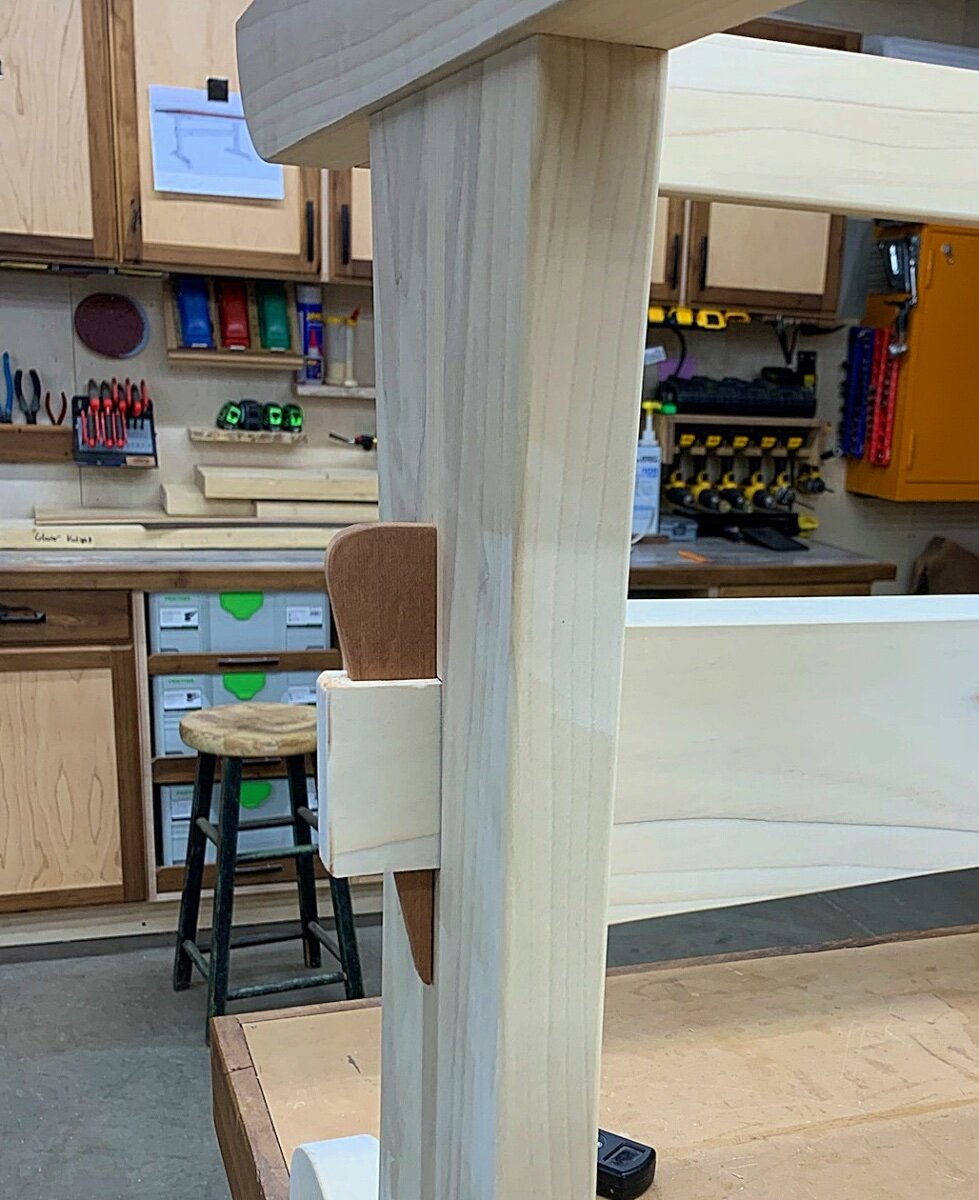
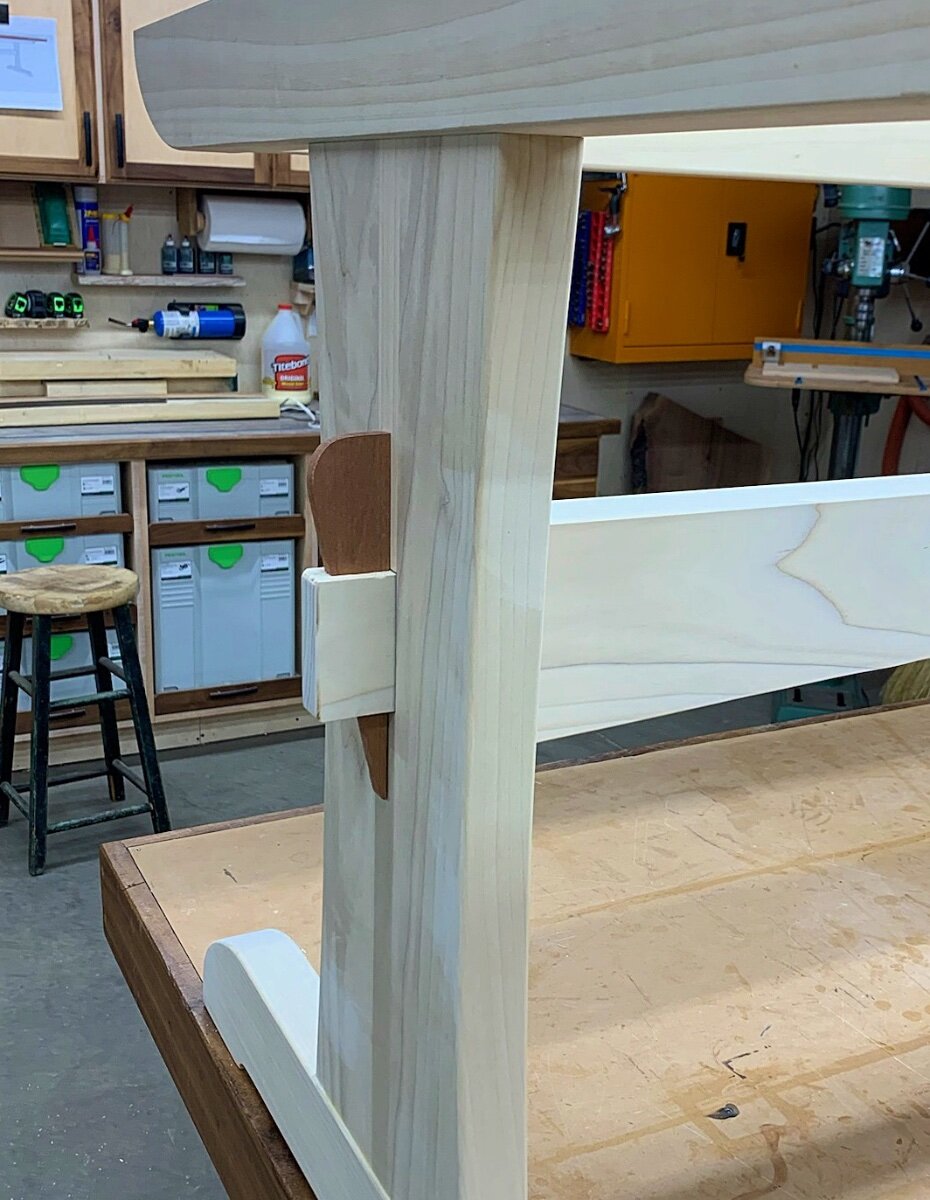
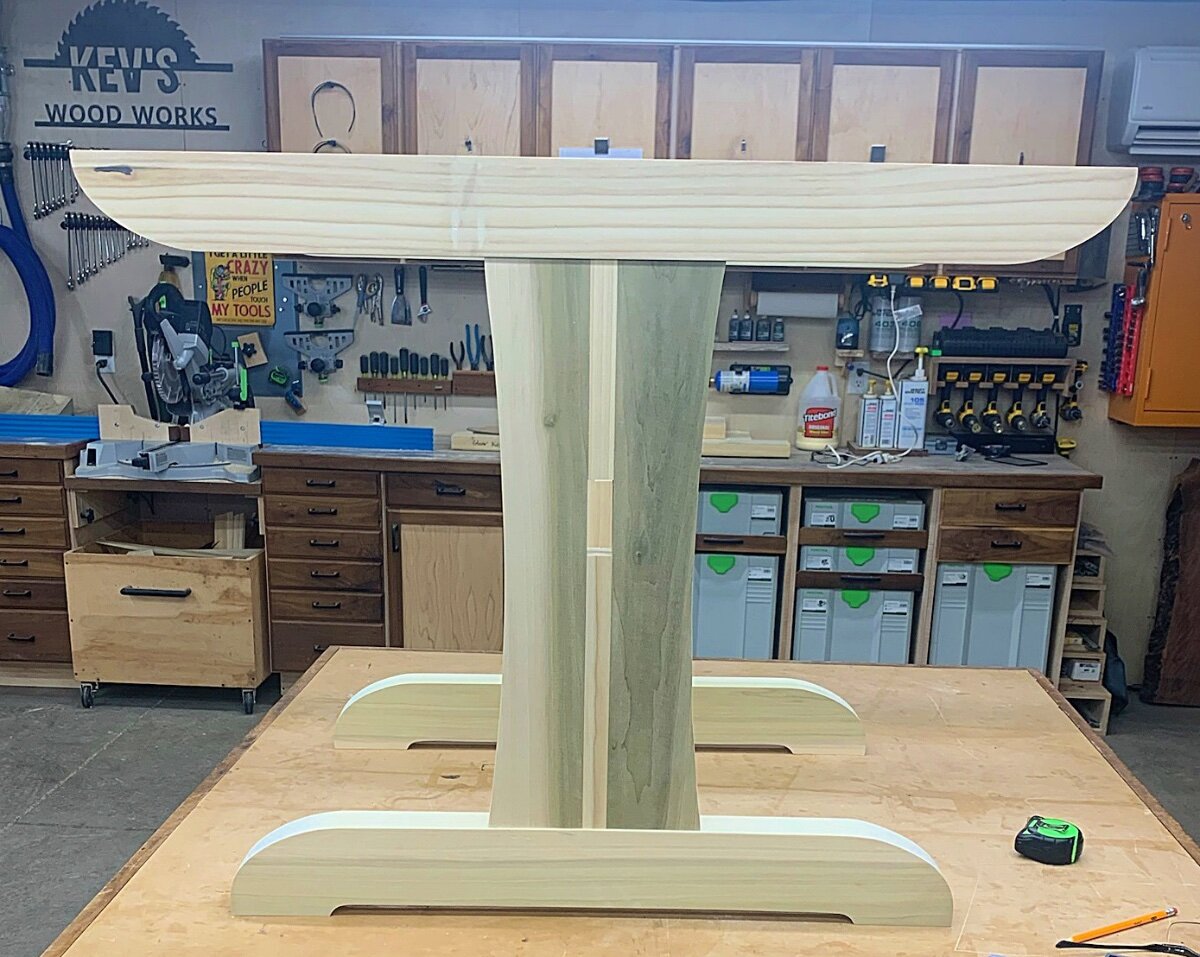
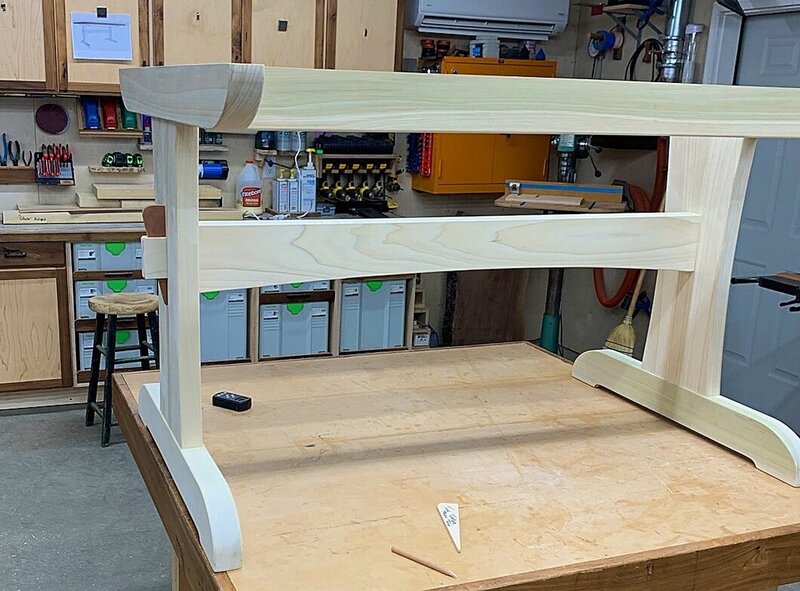
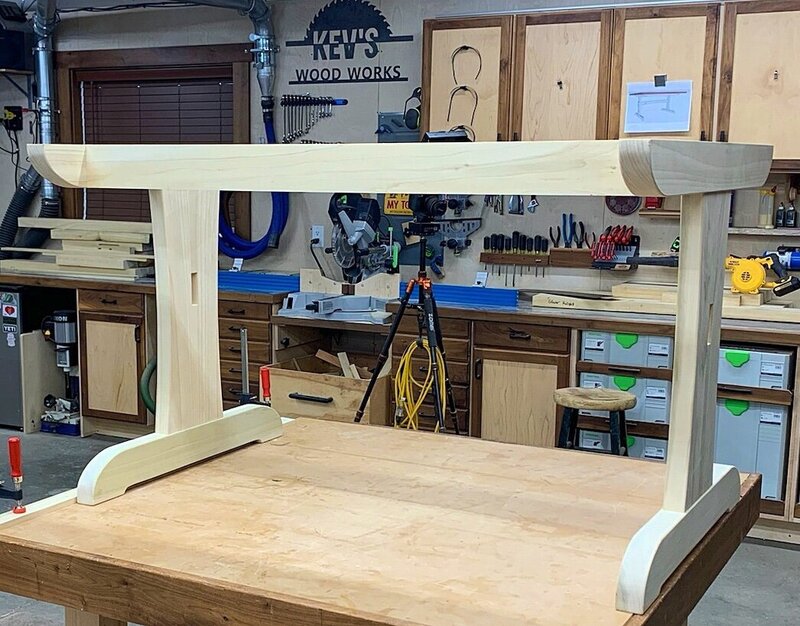
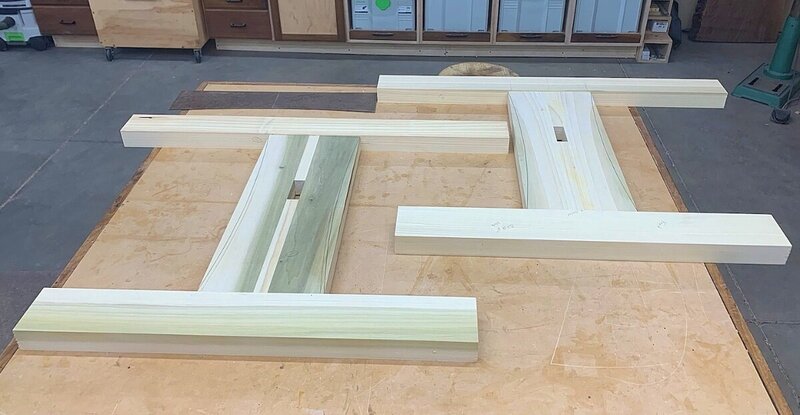
Back to the table today and another great day in the shop! Got a lot accomplished! I started off this morning with the Domino fitting the top rails.. I also had to do the final milling on these to get them to final size. Once those were fitting nicely, I was able to grab the final measurements for the center stretcher and get it final milled (Except length). I also cut the tenons which each were just a smidge different so, I had to final fit each on individually. I purposely left the tenons extra long so that I could have a good look at the dimensions I wanted for the tusks. I had noticed the difference in the size of the mortises when I was cutting the tenons on the stretcher so, wasn't a big deal to cut them a little larger and then fit then with the rabbeted block plane and some sanding. I was happy with how they came out.. Next up, I went to the Hollow Chisel Mortiser to cut the mortises for the tusks.. I didn't grab pictures of this but, if anyone really wants to see pictures, I did get it on video so, I can grab some still shots from there. I have to transfer the video material tonight anyway so, not really a big deal. Next, I cut the stretcher to final lengths and chamfered the ends as well as cut the curve. I also applied the rounders to all the pieces and did a bit more sanding. Then, it was off to final glue up! Previously, I had widened the centers of the legs a bit and decided the stretcher needed a little extra "beef" as well. Fortunately, I had left enough extra on it that I didn't have to mill a new piece. It's actually 1" wider than the design. And, that's where it will sit for the night! Time for some shop clean up and a fresh day tomorrow. I'll most likely build the tusks tomorrow and do any touch up sanding so that the base can go off to paint. So, here's where things are on the time.. Total: 20.5 hours. Still about 21 hours left on the clock to build the top and finish.. Should be in good shape.

-
I'll try to get by again next week sometime to help out.. Back to the Trestle table tomorrow..
-
I know she wants a bunch of other things but, there's a lot between wanting and actually ordering it.. As for her friends, who knows..
-
I haven't tried this little trick.. I use the domino a lot to create those small reveals.. I start with the most shallow one first and then deepen the domino to get the other.. I can see where this might come in handy from time to time though!
-
I don't think the African Mahogany has really too much to worry about with food contact.. It's essentially just a softer Sapele. I'll probably do a maple board with some African Mahogany strips for the cutting board. The Lazy Susan will probably be African Mahogany, maple, and Bubinga with a couple Wenge stripes.. Unless I totally decide to do something different when I get to the shop that day... 🤣
-
Things got a little more interesting when I closed up the shop tonight.. I sent this picture to the client after I pulled the legs out of clamps so she could see the progress.. She responded very quickly! Excited about the progress, she requested to add a cutting board and table lazy Susan to her order... Nothing like stacking up the work I suppose... 😂 Now I just have to figure out how to try and match the cutting board to the table since African Mahogany is probably a little soft for a cutting board..
-
Mortises were cut with the router and dual edge guide..
-
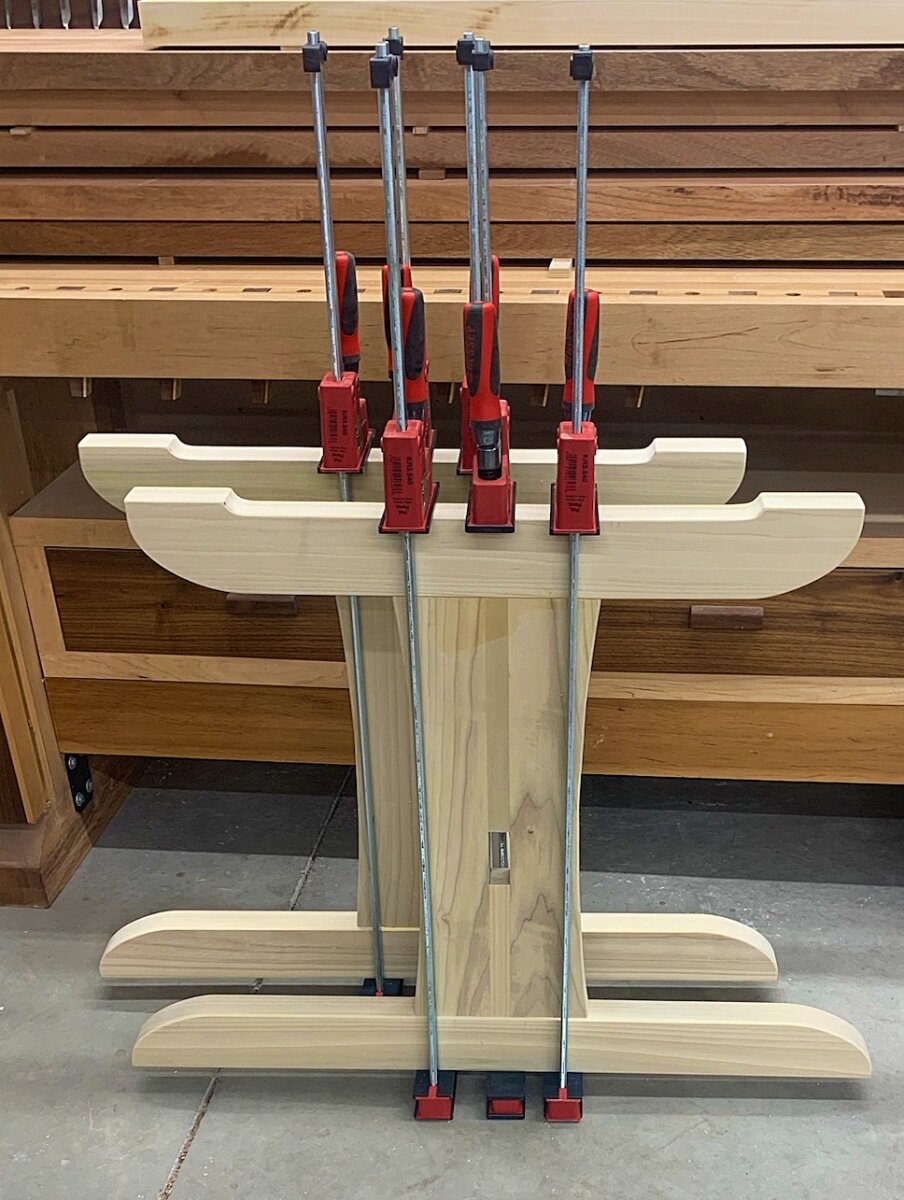
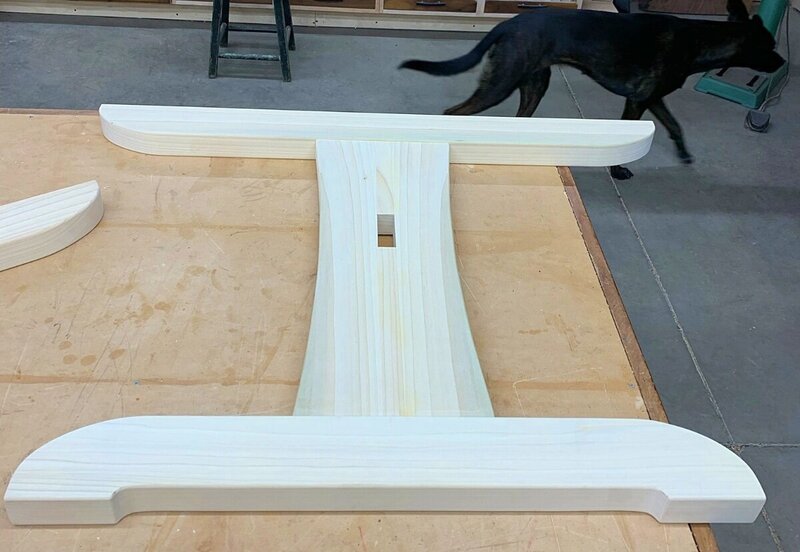
Another good day in the shop but, a shorter day. Had some errands and stuff to do today and we're having dinner guests. I got all the curves and and things cut in the leg pieces and put together for a dry fit to ensure everything would go together correctly. I did create a template to use to maintain symmetry from piece to piece. After what seemed like an eternity with the sander, I got all the round overs completed and then got to do some more sanding making sure all the rounds overs were correct. From there, I finally got the legs glued up and into clamps! I think I'm going to help @Ray Martin tomorrow so, probably not much progress on this but, I'm pretty happy with how smoothly things are going.. On that note, here's the progress report on the time.. Currently at 14.5 hours. I'm probably a little ahead at this point on time because everything has gone so well. Still a lot of work to do and 27 hours to get it done to stay on target with the quote.


-
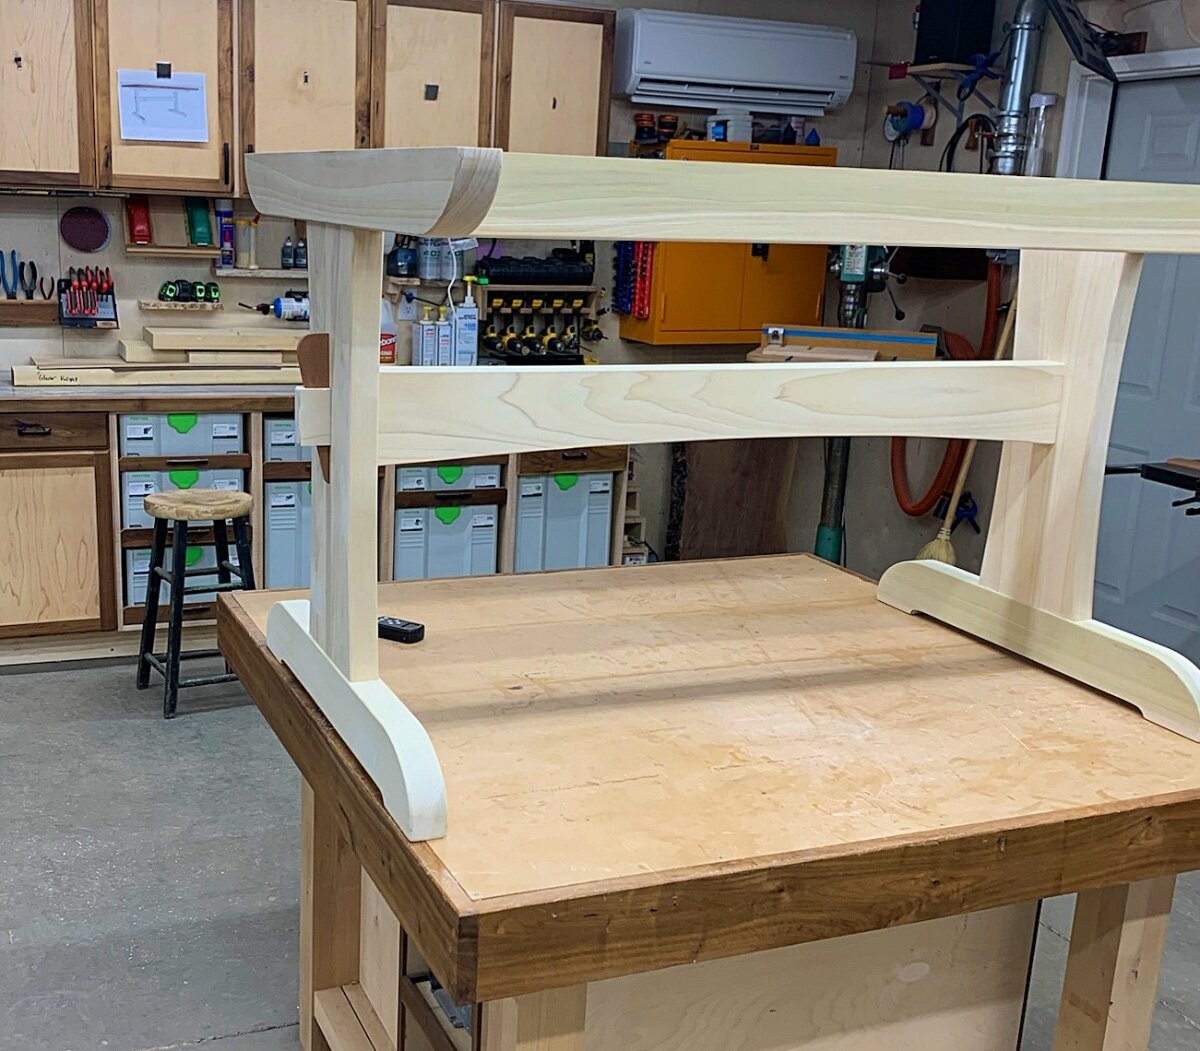
Pictures make it look like it's ready for paint! Looking forward to seeing it in person tomorrow!
-
Well, we just got the confirmation that this will finally be tied into the house next Friday (8th).. Looking forward to it! They're won't be any interruption for the forums.
-
She'll be able to unscrew the top but, that's as far as the breakdown would go..
-
It won't.. Although it looks like it will, because of the top rails for additional support this table will not break down.
-
I really only create drawings for shop use.. I don't usually include joinery because there's just too many ways it can be done. Many times, I don't know exactly what I'm going to do until I get there. Today is a prime example.. I could have easily broke out the domino for the legs on the trestle table but, I wanted to do it a little more traditional. Plus, I think the traditional M&T was a stronger option for that particular joint. I reserve the right to break out the domino on the upper rails though since that will simply be the faster option with no real down side.
-
I'm not doing the painting, the client is. However, I did supply several raw blocks of poplar today so that the client can create her own samples to decide what she likes. With that said, I did show her some painted pieces I've done that she was very happy with the look of. So, she's going down the General Finishes Milk Paint road and then I'll shoot the base afterwards with General Finishes High Performance. I'm looking forward to seeing her color choices for the base!
-
Yes, originally I thought the finish was going to be Rubio so that's what I quoted. However, the client wants the feel of Rubio but, the look of Potassium Dichromate. So, I'll be doing both finishes on the table top. I already had the Potassium Dichromate on hand as a tiny bit makes a lifetime's need of it so, didn't charge any extra for material. The cost will come with the labor.
-
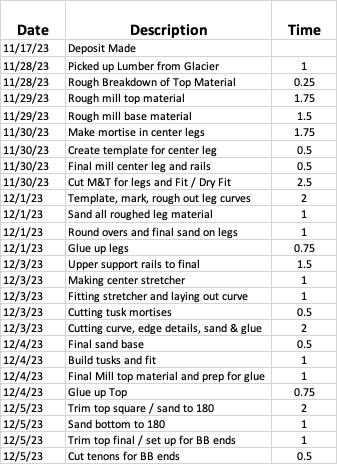
Another really good day in the shop! I final milled all of the leg pieces, got the mortises for the center stretcher done, and got the M&T joints done to be able to put the legs together. I also created a template to mark out for the curves in the side pieces and got them marked. Still a lot of work to do before gluing these up but I'm happy with the production for the day! So, where's the cost at? Currently sitting at 9.75 hours A little over 31 hours left to finish this project. Maybe the finish won't bite me as bad as I thought!
-
Nice! I do use a lot of spiral notebooks that have graph paper in them to sketch out some rough drawings.. I usually transfer them to sketchup but, not always.
-
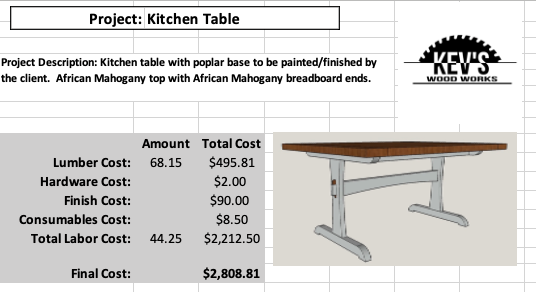
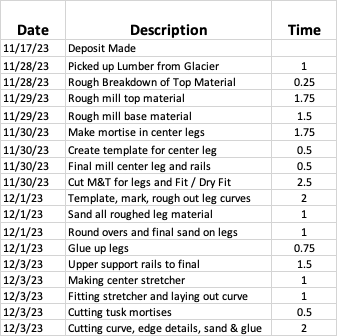
Ok.. Regardless of coming in under or over my bid, I'll try and take this step by step and explain myself along the way. Any question is fair and I'm happy to answer them.. For starters, the client is in a bit of a rough spot in life and also a distant neighbor. So, I lowered my hourly rate to try and help her out as well as generate some future business as she wants a lot more than just this table for her kitchen/dining area.. This is what my normal bid on this table would have been.. Because of what's mentioned above, I lowered my shop rate and here is the quote submitted to the client. I lowered my labor cost to $30.00 per hour. Since this is the actual quote given to the client, these are the numbers I'm trying to hit. If I missed anything, that's on me. If I totally underestimated something, that's on me. Barring change orders, this is the max that the client will be charged. I may have missed a bit on the finish but, we'll talk about that in a week or so when I get there. The client wanted a little different finish that I probably could have charged more for but, didn't. I'll go into detail when we get there. Lumber: To catch things up to where the project actually is.. I was able to cut a "cash" price with my local HW dealer so, lumber came in a little less than expected. Bid: $495..81 Actual: $416.25 Difference: $79.56 Assuming I don't need any additional lumber, this amount will come off of the final bill to the client.. Note: I do need an additional board of poplar for the center stretcher on the base because of my error. I just have to eat this, it was my error. This kind of stuff is captured on my quote sheet for the client to see in the end. Labor: Labor will be an ongoing increasing number as the project progresses but, I will try and update to real time numbers at the end of each day.. We're only in one day and only 4.5 hours of that was actually billable. This includes a reasonable time to pick up material at the HW dealer. I keep track on the white board in my shop and don't claim time that's not actually spent working on the project. This is transferred to my quote sheet so that everything is in one location and completely viewable to the client. I also keep track of deposits or changes here as well.. Here's what the list looks like so far. Total: 4.5hrs I didn't charge for consulting time today figuring out the board configuration for the top. She really didn't make any changes to what I had come up with so, was just conversing with the client time in the shop discussing the project. Bogs down the progress but, keeps the client happy. So, what's all that boil down to? There's $1192.50 left on the budget and a $79.56 refund due on lumber since I got a break. In other words, I need to find a way to complete this project for $1112.94 or about 37 hours of work including finish to stay on my quote. So far, I'm feeling like my quote is pretty accurate to what the final will be.. We'll see Note: This doesn't account for the finishing stuff mentioned above which will probably bite me a little but, shouldn't be too bad.