Every purchase made through our Amazon Affiliate Page helps support this site
Kev
-
Posts
6,284 -
Joined
-
Last visited
-
Days Won
570
Content Type
Profiles
Forums
Downloads
Gallery
Events
Store
Articles
Blogs
Everything posted by Kev
-
Welcome @MikeG! Looking forwards to seeing your work!
-
And, after I posted this I went to look to see who made the suggestion... Thanks @Olie! That stuck in my brain but, I couldn't remember who put it there!
-
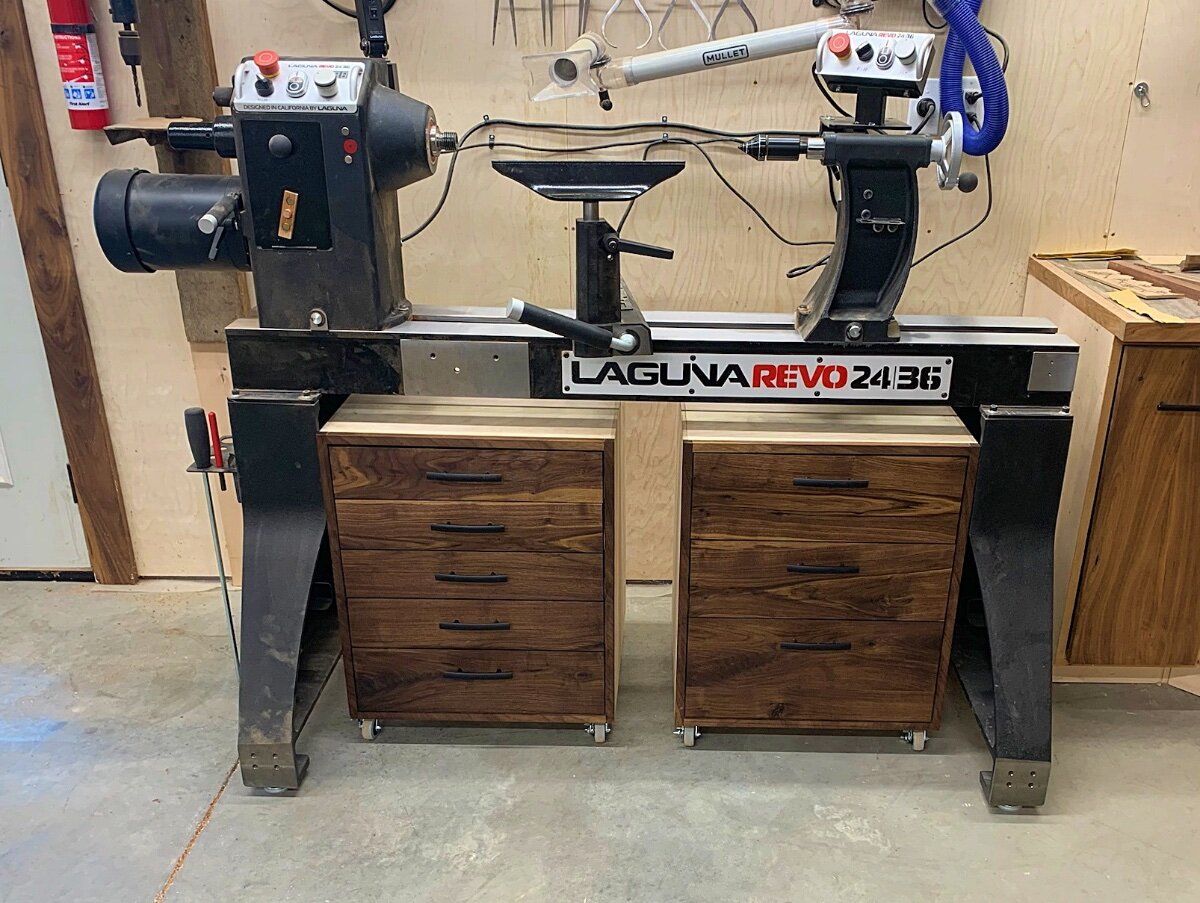
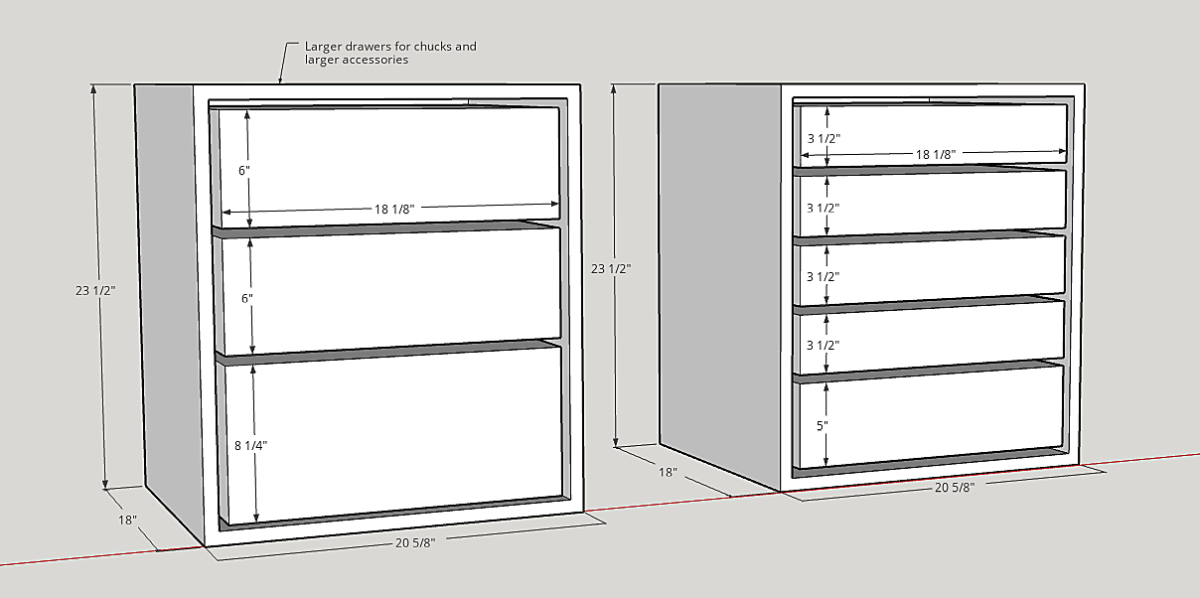
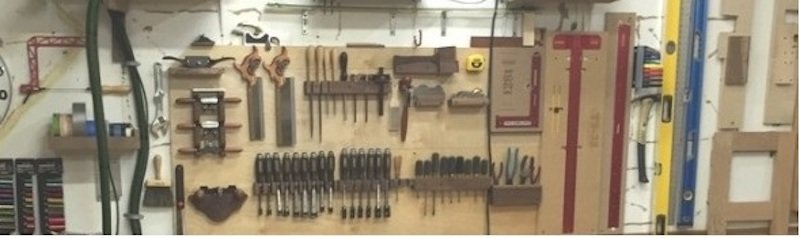
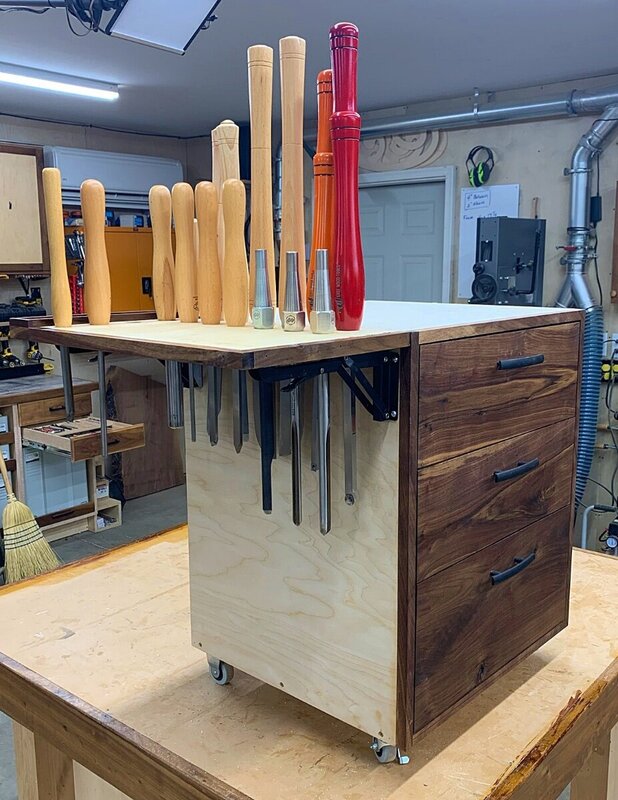
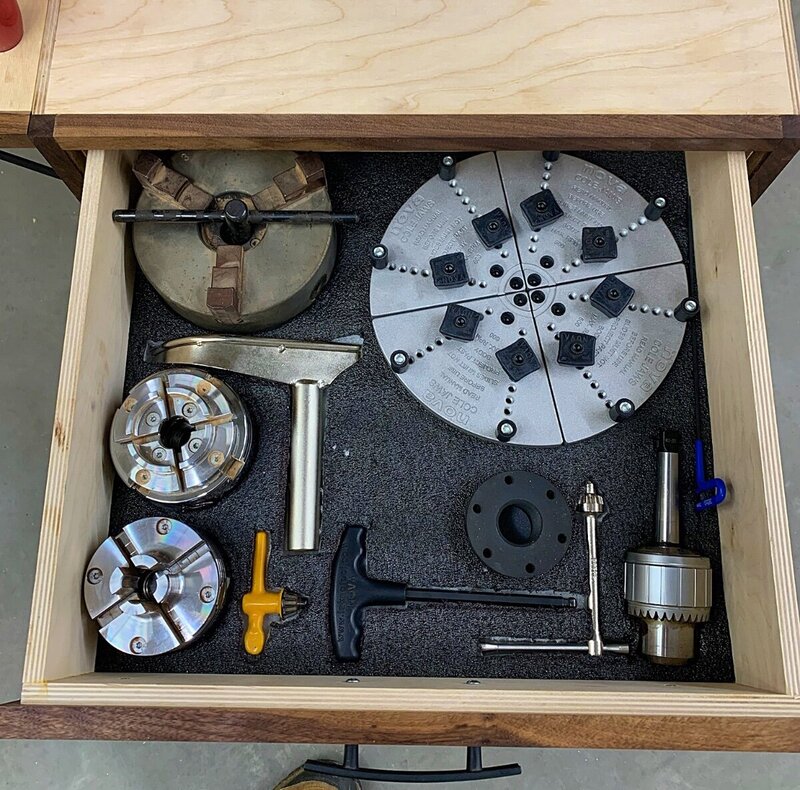
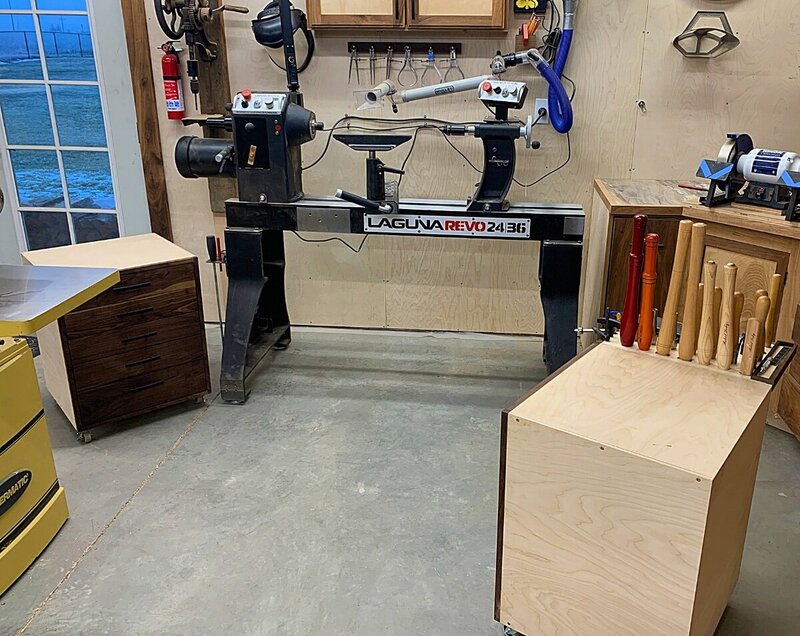
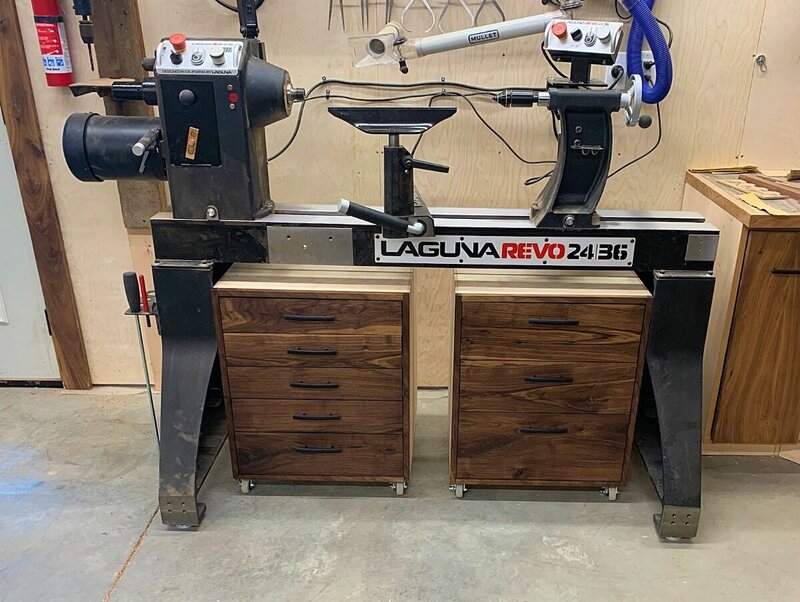
Well, the lathe cabinets are done until I get to run some projects and see what needs to change... Somewhere in the previous pages here, someone suggested the flip up shelf like I did on the laser cart. Unfortunately, as I type this, I can't go back and see but, it was the perfect solution! I ended up with a few inches between the carts so the flip up shelf worked perfectly! More horizontal surface with some room for growth as well! I also did a little drawer organization for the only drawer (out of 8.) that I knew what I wanted in there. The drawer directly below this one is exactly the same size so, if I add more chucks, I have the room for the growth.. And this is how I envisioned them being placed during use at the lathe..
-
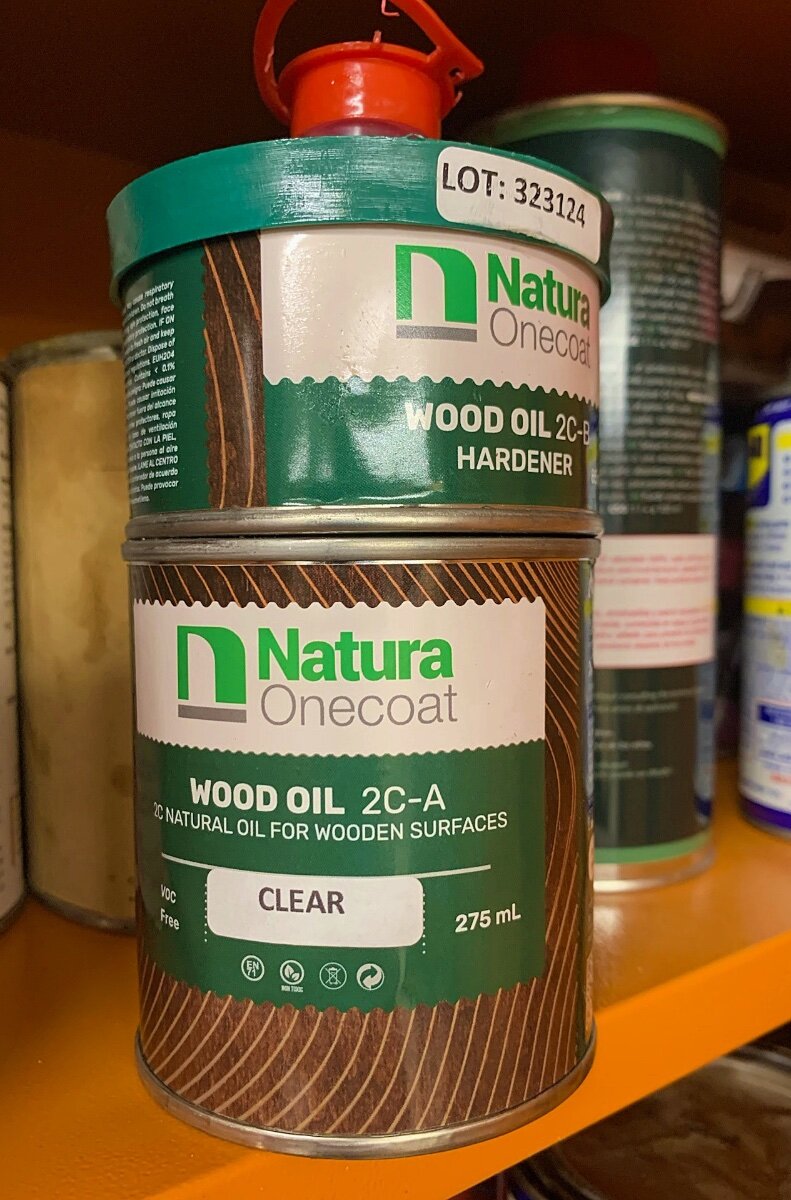
All the hard wax oils come in 2 parts but, the hardener isn't really required. Just takes longer to cure. Yes, extra gets tossed.. I mix small amounts and mix more as I need it. It's a quick mix. Once you try the hard wax oils, you'll have a hard time going back to another..
-
Thanks everyone for your help and contribution this year! May you all have a wonderful and safe 2024!
-
Got an early start this morning to get a few things done before we host tonight's activities.. Follow up on the Natura: For the most part is was cured to the touch.. There were still a few small spots that I could tell were not fully cured yet. So, to add to the comparison list, it doesn't cure quite as quickly as Rubio.. Anyway, here they are pushed under the lathe.. Still lots of organization and adding tops to do but, this is a good place to stop until I can get back to the HW dealer for some top material..
-
Got the drawers installed and fronts on today as well as a quick coat of finish.. Wanted to test another hard wax oil on some shop furniture so, I gave this one a go.. Supposedly the cheaper alternative to Rubio.. Initial Impressions: It's thick! A tad looser than Vasoline. A little goes a long way but, not as far as Rubio Definitely cheaper than Rubio (As of when I bought it) Covered nicely with good grain pop.. Looking forward to letting it sit and cure to see what it feels like compared to Rubio. I now shop furniture with 5 different hard wax oils on them so that I can see how they hold up over time.. Rubio, Osmo, GF Hard wax Oil, Fiddes, and Natura.

-
For those that are helping me with the video edit stuff, the private viewing room has the video posted.. It will only be there for about 24 hours though..
-
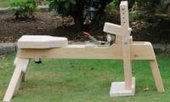
Turning is a whole new rabbet hole depending on what you want to turn. This one was pretty straight forward and simple. Additional tools used here a 4 jaw chuck and a drill chuck. Other than that, standard turning tools and some finish..
-
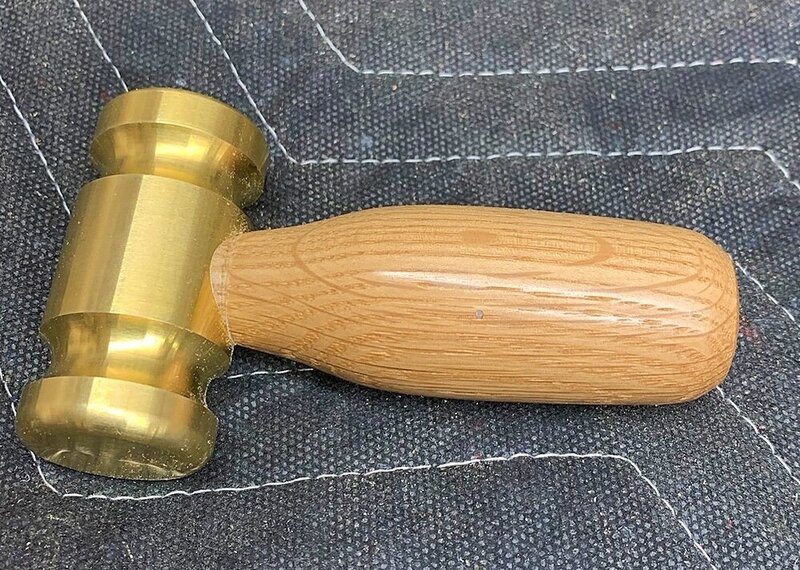
@Dick brought me a mallet head blank yesterday so, I wanted to turn a quick handle.. I really like my small one so, wanted to try another. White oak for this handle. Penn State has these heads at a very reasonable price! I ordered 2 just so I could pop a couple of these out as gifts if needed.
-
You're not kidding! This last trip was expensive!
-
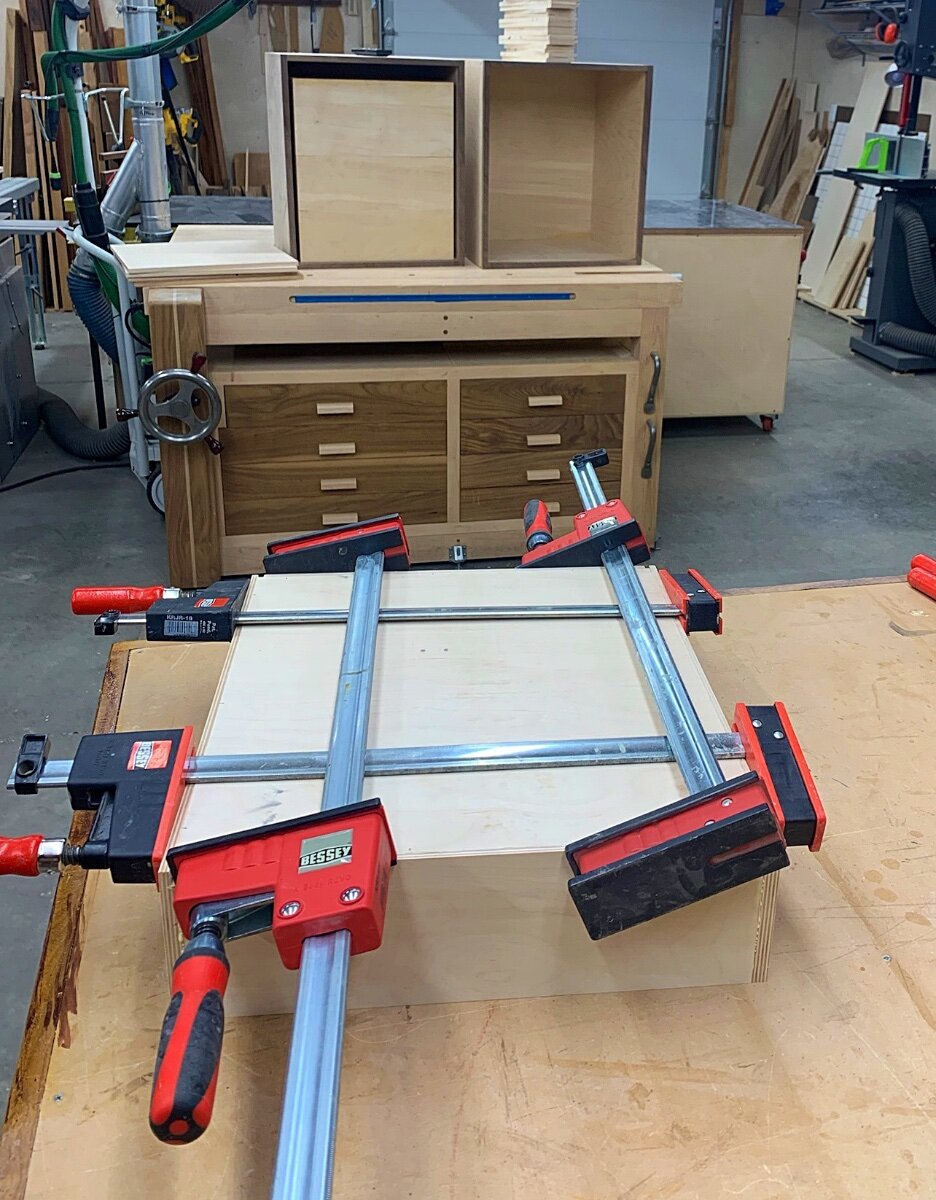
Managed to get a bit done on these today.. Unfortunately, I'm dead in the water until the drawer glides arrive.. I did manage to get all the screws installed in the drawers as well as a rough milling on all of the drawer front material plus one spare. I did have to do one glue up for a drawer front but, it's shop furniture.. I think I'll survive. Back to editing I guess...

-
Yes, the clamps come with them and they just slide on.
-
The ones with the black pads are the heavier duty K-Body clamps and the others are the shorter light duty parallels clamps.. Just a difference between the 2 models. I do believe that you can order them in a couple colors though if you want.
-
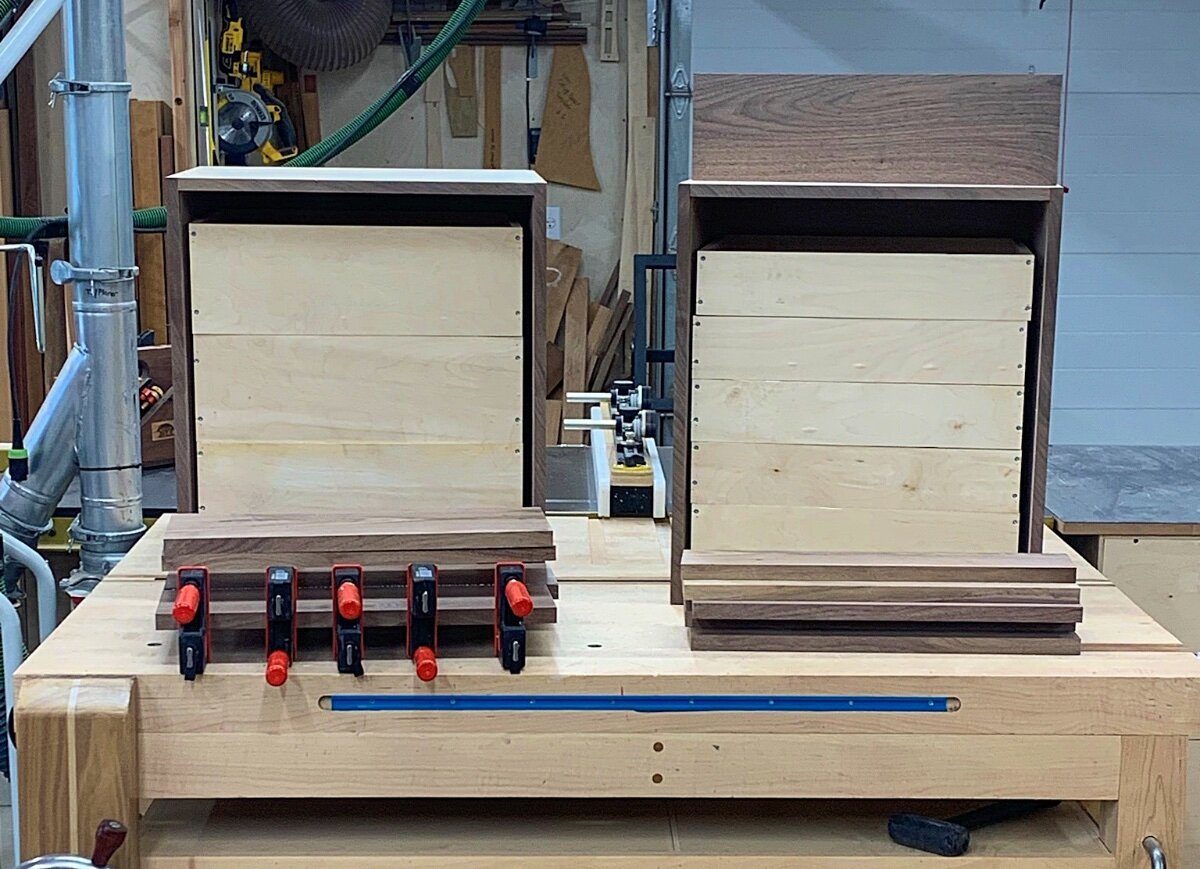
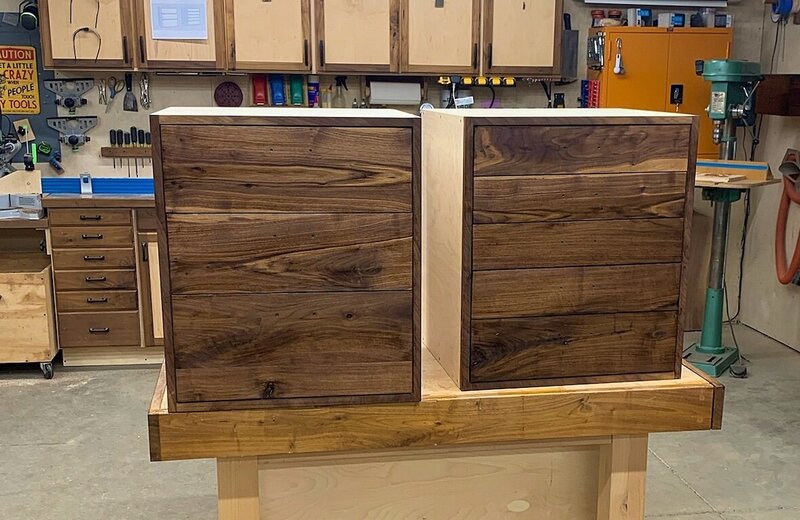
I did manage to get a little bit done on these.. I got the walnut trim added to the cabinets yesterday but, forgot to post the progress.. Today, I got all the drawer material cut, the bottoms rabbeted, and the drawer bottoms cut.. I also got 1/2 of the drawers glued and pin nailed together. I'll do the other half tomorrow and then add screws at the joints just for extra support..

-
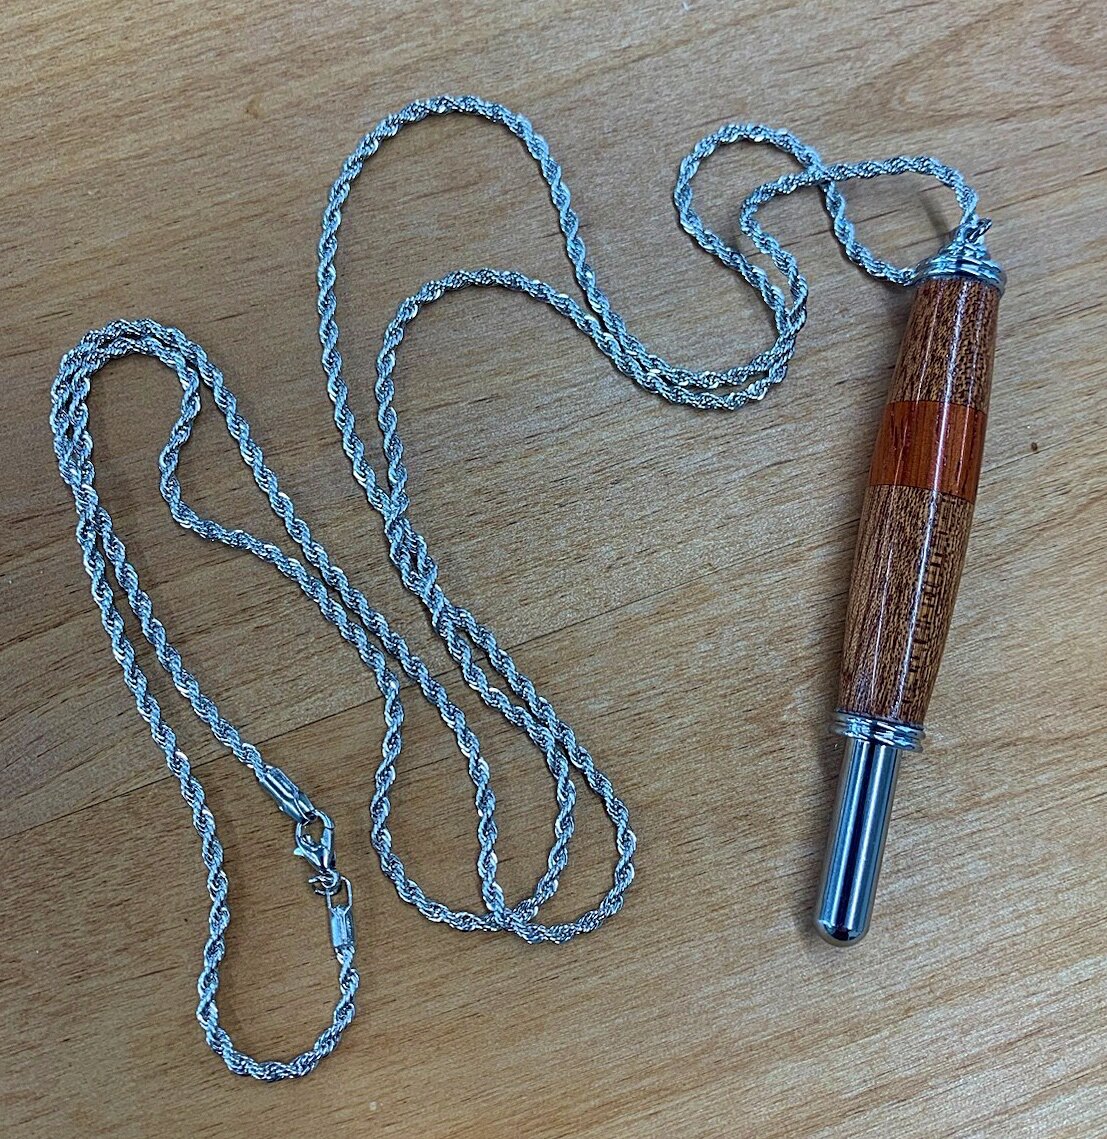
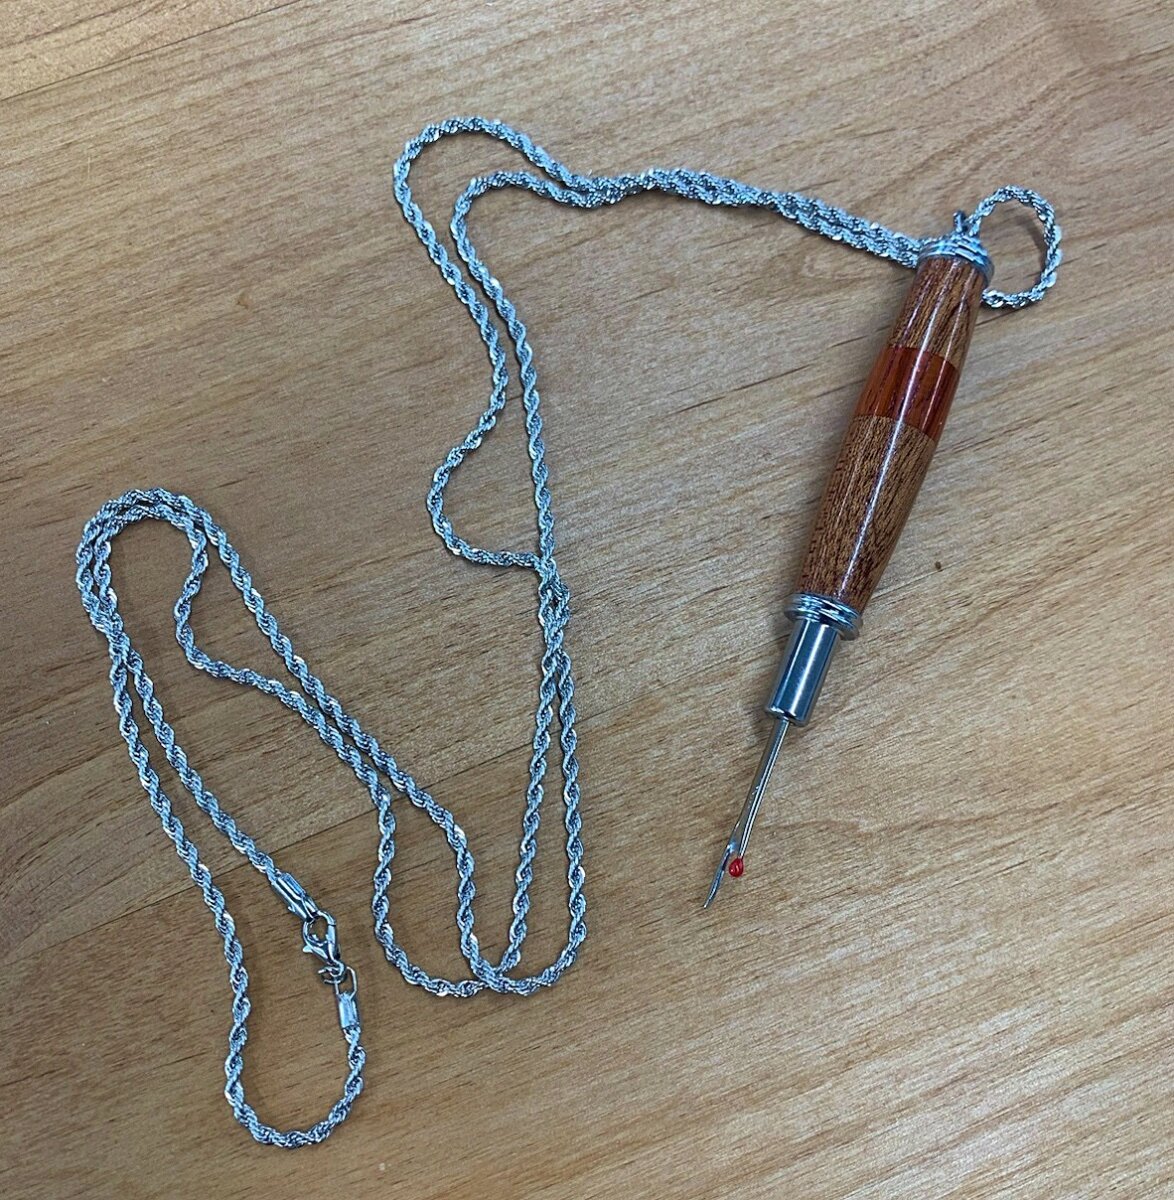
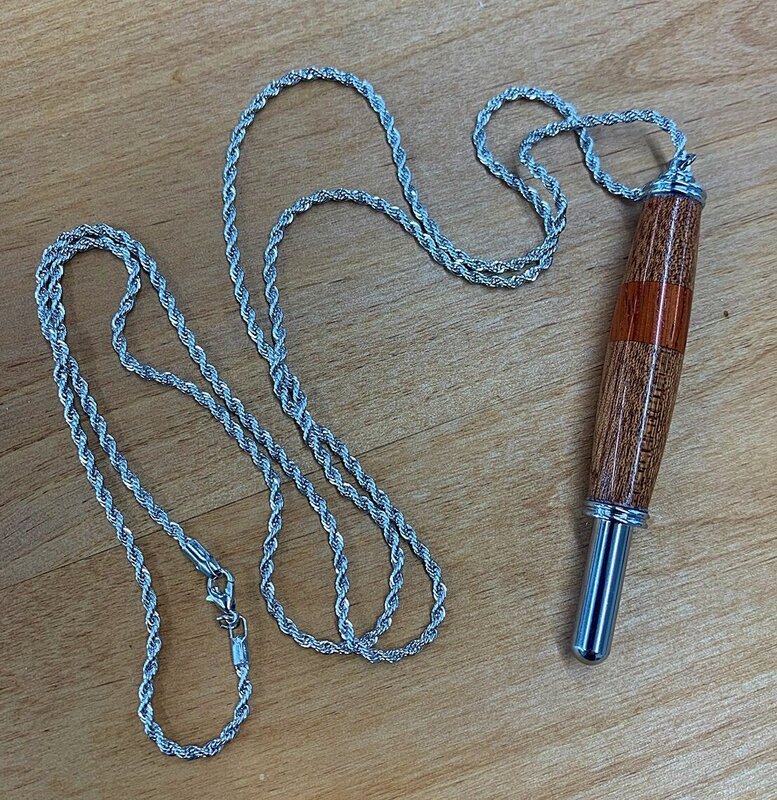
@Dick came back out today and gave me another lesson! This time it was making a seam ripper for my wife.. I learned a lot! Especially what tools and supplies I'm missing! 🤣 Anyway, super quick project and fun to do!

-
I used this on the laser cart and it works fine.. It's definitely an option for one or both of these carts.. I'll have a better understanding after having them in place for a few turnings to see how I want things arranged and organized..
-
I thought it would fit well in my wife's quilting room.. I might have to make a few of those for the craft fair next summer.. They're fairly quick to make and a great use of shot scrap..
-
Around that, yes.. I didn't even measure it.. Super simple and quick to do..
-
Not sure where I saw this but, it wasn't my idea.. Quick project that actually only took me a few hours. Everything is just surface glued and all scraps from the shop. Finish is rattle can lacquer.. Although I made a base for it, it could be hung as well. I suspect that's what my wife will want. My wife doesn't know it's in her quilting room yet 😙

-
To all, Thanks for a great year! I hope you have awesome holidays with friends, family, and loved ones! Looking forward to seeing everyone's shop additions as well!
-
Typically at the table saw but, I have cut them at the router table.
-
Had to fit under the lathe and have wheels..
-
Now that the table is out of the shop, I got back onto this project.. I knew the basic sizes for the 2 cabinets and got them put together after I delivered the table.. Just rabbits, glue, and screws.. It's shop furniture.. From there, I needed to jump into Sketchup and start thinking about drawer sizes and what I wanted where.. One cabinet will have 3 deeper drawers for chucks and larger accessories. The other cabinet will have 5 thinner drawers for smaller items like calipers, layout tools, etc.. Unfortunately, I needed this information before I could order the glides. I'll probably build the drawers and trim out the cabinets but, the glides won't be here until the 29th. These will both be on wheels so they can be rolled out when I'm using the lathe. I'll most likely add some more durable tops and some tool holding as well but, I'll tackle that when I get there. There's a lot of options out there and I feel like I've looked at them all but, until I do a lot more turning, I just don't know what I want and where I want it.


-
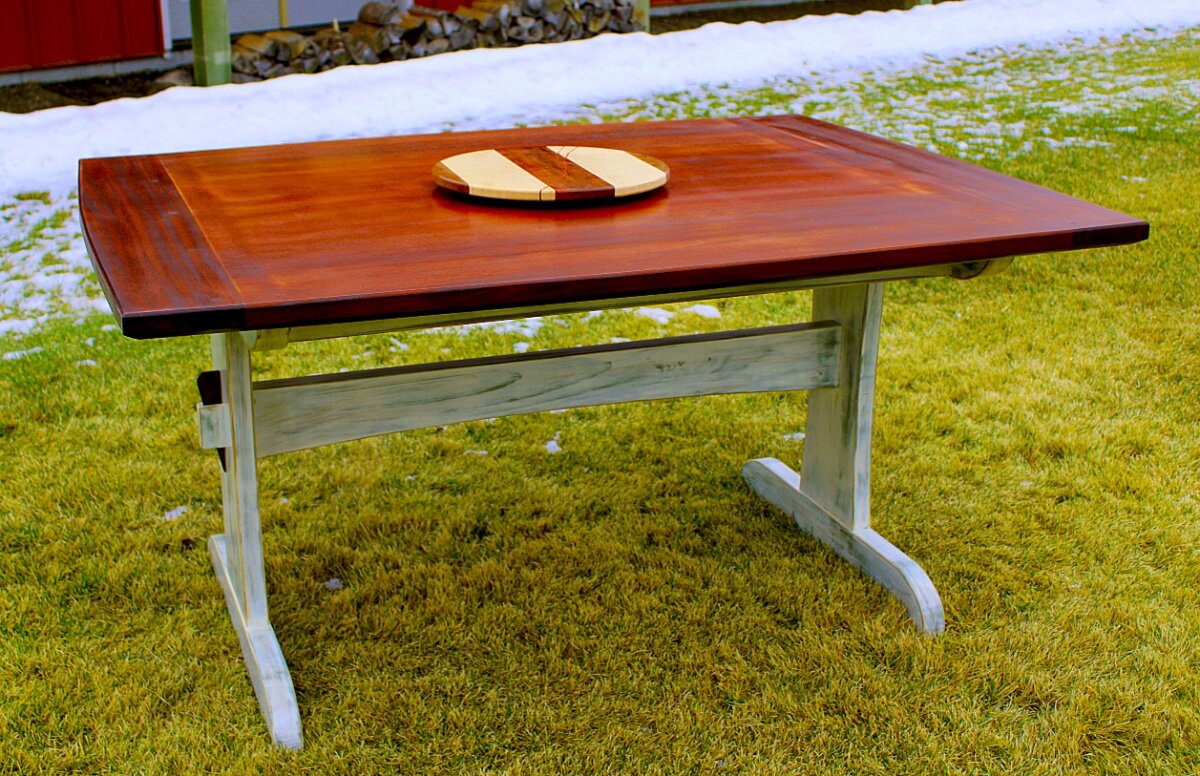
Well, the table is delivered and the client is happy! I did snag one outdoor picture as the snow was beginning to fall.. The glare was pretty brutal!