
Every purchase made through our Amazon Affiliate Page helps support this site

Chet
-
Posts
2,280 -
Joined
-
Last visited
-
Days Won
93
Content Type
Profiles
Forums
Downloads
Gallery
Events
Store
Articles
Blogs
Posts posted by Chet
-
-
15 hours ago, Jamie said:
Man the tracking they have on shipping these days is getting pretty accurate!
I have noticed on some amazon deliveries that they will tell you how many stops before they get to you, a long with an active map that shows where the driver is presently.
-
I thought you were getting the 14Bx with the brake.
-
1 hour ago, Woodenskye (Bryan) said:
Your price estimate just goes to show we woodworkers are a bit crazy. We are willing to pay 2-3x not including our time, for what it would cost to buy. Quality will be better of course.
The way I always think of it, We couldn't afford to buy the quality of furniture I have made for my house if we bought it on the open market. So actually we have nicer stuff for less money.
Kev, is this going to be a king bed?
-
That came out real nice Coop. Way nicer then the ones that show up on your Etsy link.
-
 1
1
-
-
48 minutes ago, Jamie said:
Problem I’m running into is there isn’t a drum sander of any brand available for purchase.
This isn't just drum sanders. A lot of power tools are in short supply, actually a lot of everything is back ordered. I just passed week four waiting for a garage door.
-
That's coming out real nice Jamie.
-
1
-
-
1 hour ago, Kev said:
What do you do to hold it in place?
Its just a snug fit in the miter slot.
-
 1
1
-
-
56 minutes ago, Coop said:
is there a rail under it that sits in the miter bar slot?
Yes.
-
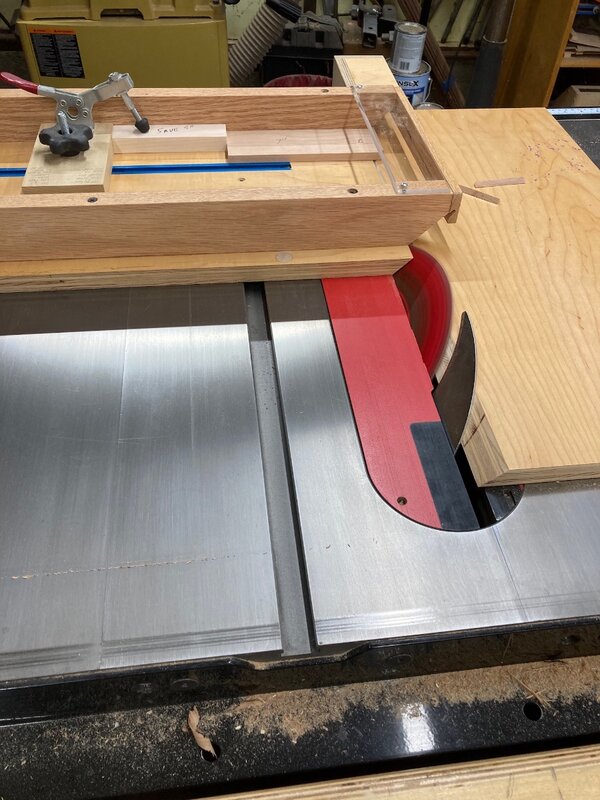
This is mine - it is totally dedicated to small parts and 45°, nothing else. Because when you are dealing the blade at 45° it is more exposed no matter what height I put a boxed blade guard on the back and a plexiglass piece across the business end on top, this way you can see your work but there is something there to keep your fingers from the blade.
There is a tee track and stop block with a hold down.
-
3
-
1
-
-
50 minutes ago, Woodenskye (Bryan) said:
@Chetnice job on the plaques.
Thank you.
-
I use one of these quite often Starrett Protractor Pretty handy and I think I have more then gotten my money's worth. Really helpful for baseboard on wonky wall corners. It gives you the angle for a single cut or two cuts.
-
1
-
-
Stupid things I remember from coaching softball for 20 years. The home plate has three 90° angles A,B & D in Bob's diagram and two 135° angles E & C according to the rule book description.
-
1
-
-
1 hour ago, Coop said:
you can trim the fronts down on all four sides and wrap the sides in a bead board that stood proud of the drawer front.
I am a fan of cock beading, I like the look but I think in this case with the other details and the recessed top drawer that it would get to looking too busy.
I think I am going to just ease th hedges so they aren't sharp to the touch and leave it at that.
-
1
-
-
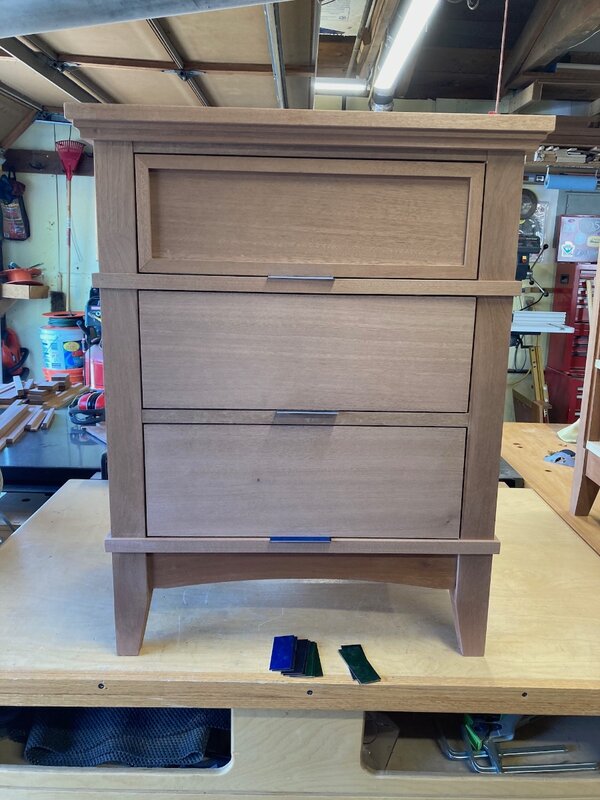
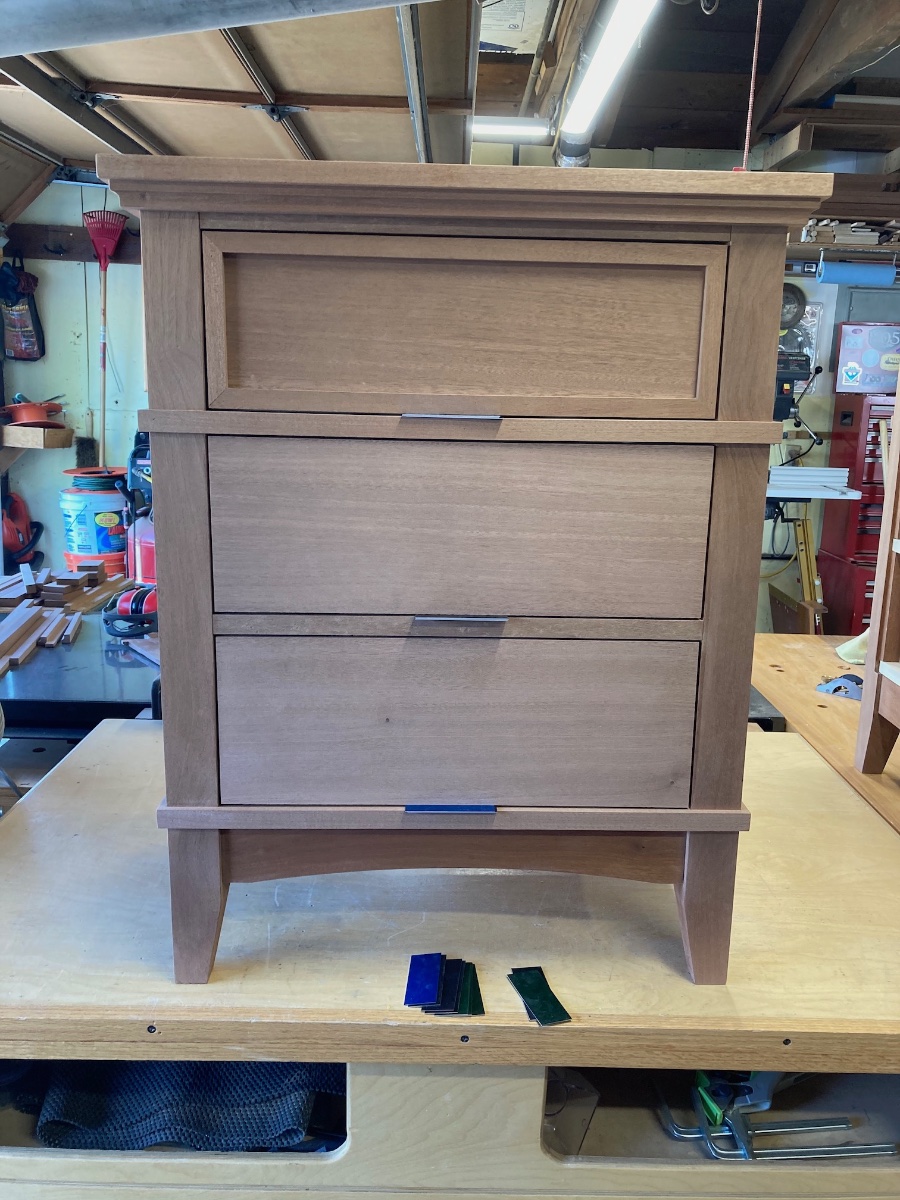
I work on getting the gapping on my drawer fronts. I was looking for about 1/16 all the way around and then I was going to do a real small chamfer on all four edges. But as it turns out I had too many thumbs on each hand today and managed to drop and ding the edges on three of the six drawer fronts on the edge of my work bench. 😟 The fibers were to damaged to steam out on two so I ended up having to have a gap that ended up being a heavy 3/32. Now I would be afraid that a chamfer would make the gaps look to big so I think I am going to be stuck with just easing the edges with some sand paper and calling it good.
This is what I have right now, nothing has been done to ease anything so far. Whats the group here think?
-
5
-
-
15 minutes ago, Kev said:
Might be a good individual write up for the reference section as it's damn good!
I will do that when I get a chance.
-
1
-
-
21 minutes ago, Coop said:
Consider doing all four corners
Thought about it a little bit but as these are nightstands we generally have a book or two laying on top and my bible is always on one corner so I need some flat surface area.
-
1
-
-
This is the one I use Enduro-VAR But it has gone way up in price, I may have to re-think this. I may end up going with High Performance.
-
How come you don't have the gallons of General Finishes High Performance and Endro-Var listed. Don't you use that stuff?
-
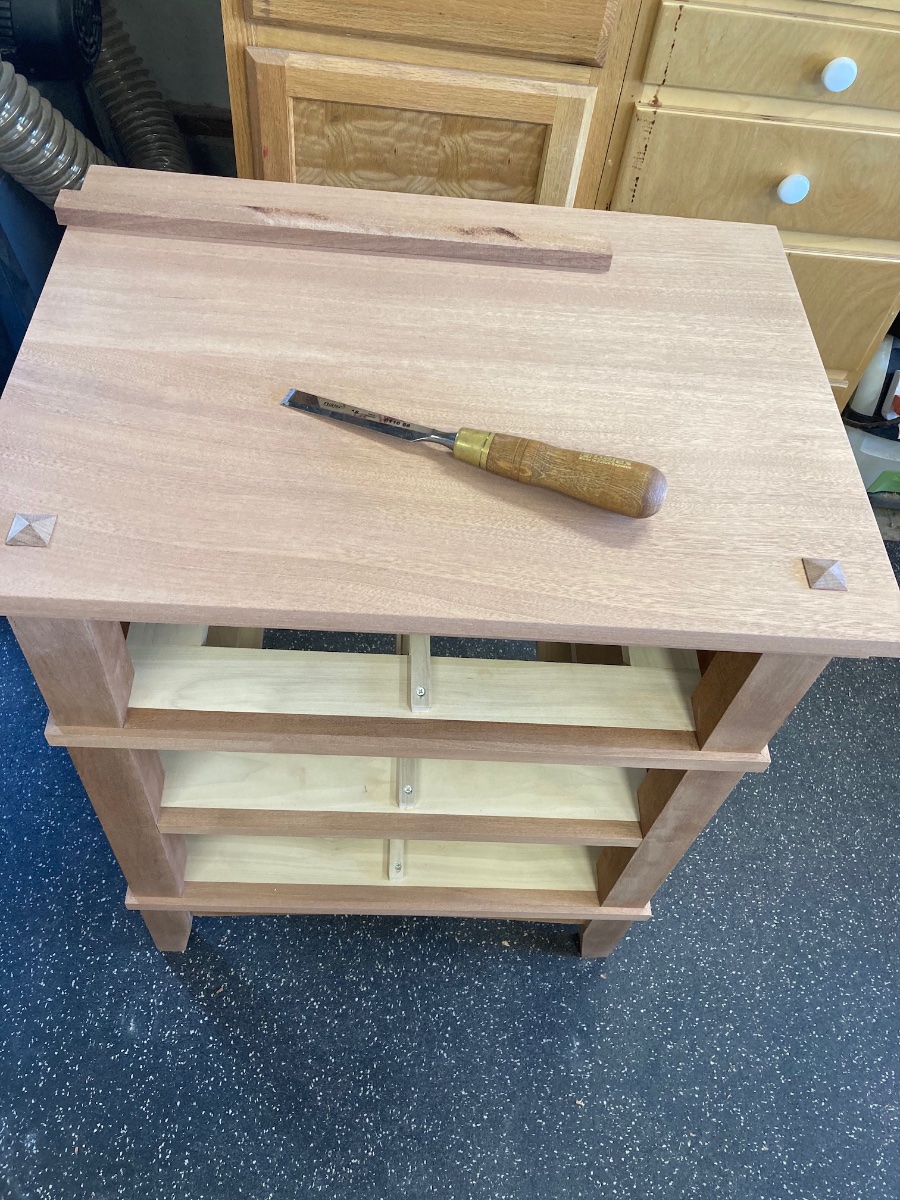
Not a lot to show today, I just finished up a lot of hand sanding. After that I did the pyramids of the faux through mortises.
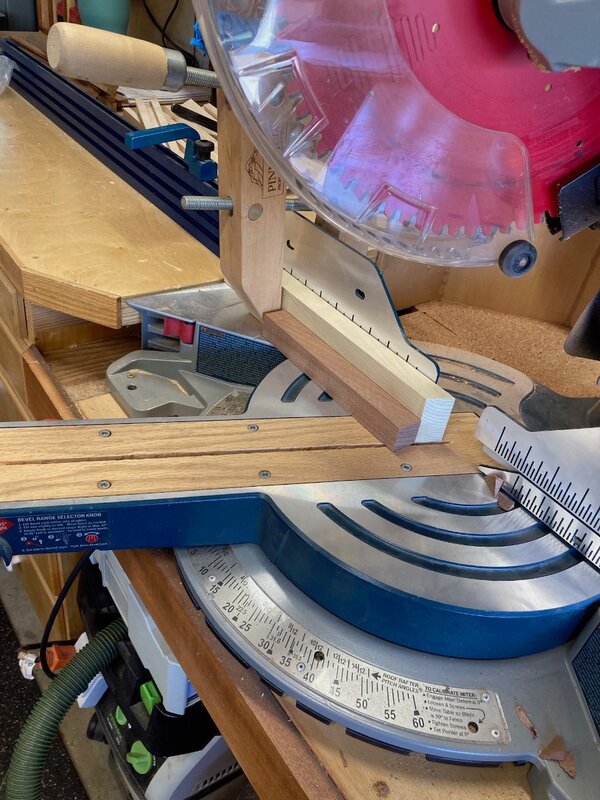
I didn't do a good job of documenting this process but I will try to explain. I have found that the downward cut on my miter saw seems to do a better job of this then cross cutting on the table saw. I don't know why but it does. I also think that it helps to have a Miter saw that doesn't have any real blade deflection and a saw that stays tuned up. I attach a scrap of wood to the fence on my miter saw, set the miter to 22.5° and make a cut. Then line up the inside edge of you stock with the outside edge of the cut you just made on you sacrificial piece. Then I used a screw clamp as a stop block. From here you simple make a cut, rotate the stock toward the fence make a cut and continue until you have done all four sides.
Then I take it to the table saw and using the miter gauge cut it a 1/4" long from the bottom edge of the pyramid.
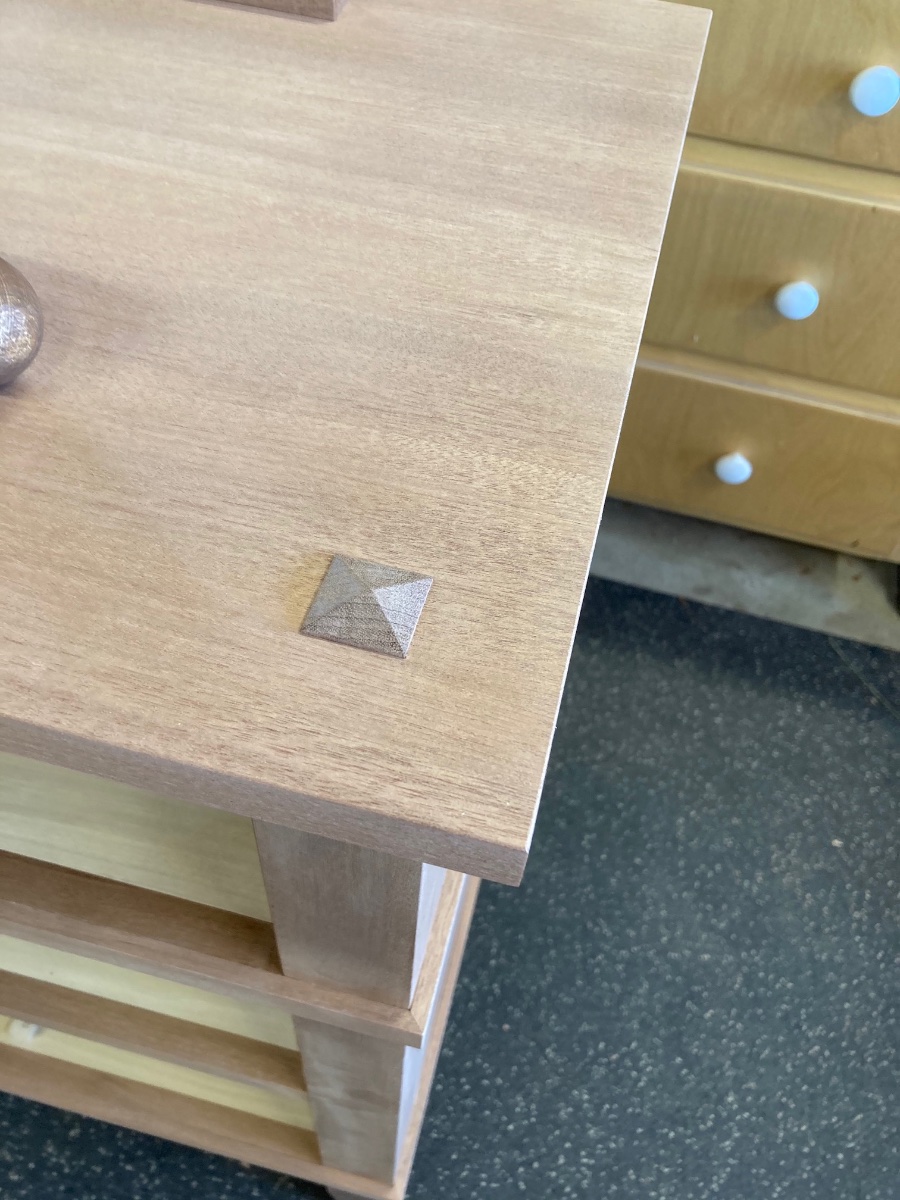
Here they are in place.

Closer view.

-
5
-
-
- You are getting some really nice colors in that top. I said it before and I think it got lost but I think it is a real plus that you left the sap wood alone, to many times people think you have to remove it. Well done.
-
1
-
Shouldn't be too hard to move with all the shortages in the supply lines right now.
-
Wow Bryan are you giving up the sanding stage on your projects? Are you going the hand plane route?
-
1 hour ago, Coop said:
1) why did you decide to do away with the thru tenons on the front of the legs as in the initial design?
On the nightstands that I am copying the thru tenons are fake and then to top it off there is no top apron either so that makes them just dumb. I drew them in because they where on the originals but never really planned to incorporate them.
1 hour ago, Coop said:2) the side panels are flush with the legs. Are they set and glued into rabbets or did you rabbet the panels to fit into grooves in the legs. Hope the terminology is correct?
They are edge grain to edge grain but I did put in a few small floating mortises just cuz.
1 hour ago, Coop said:3) the legs are proud of the aprons. How did you perform that? I went back thru this thread and zoomed into the pics but couldn’t pick these out.
The legs are 2 inches square the aprons are 3/4" and I just used floating tenons with mortises.
-
1
-
-
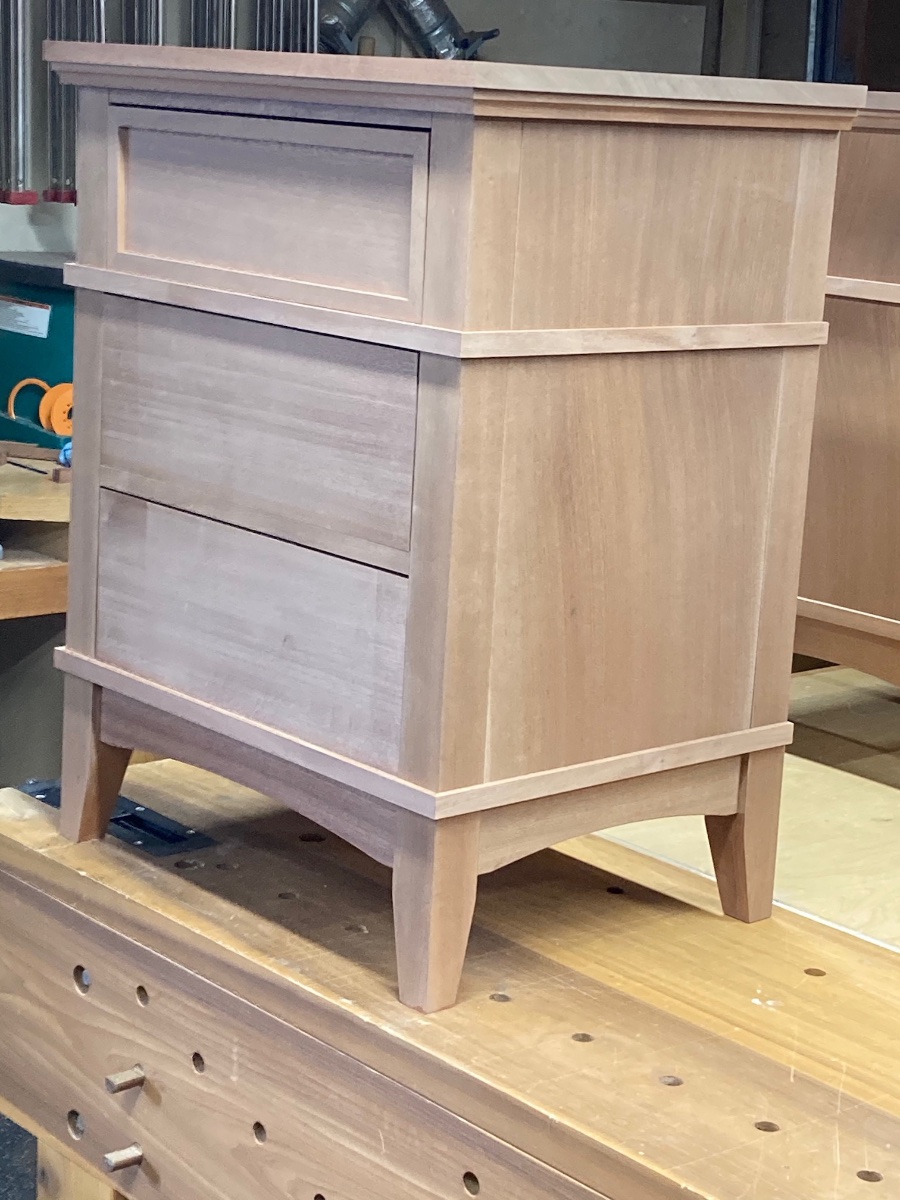
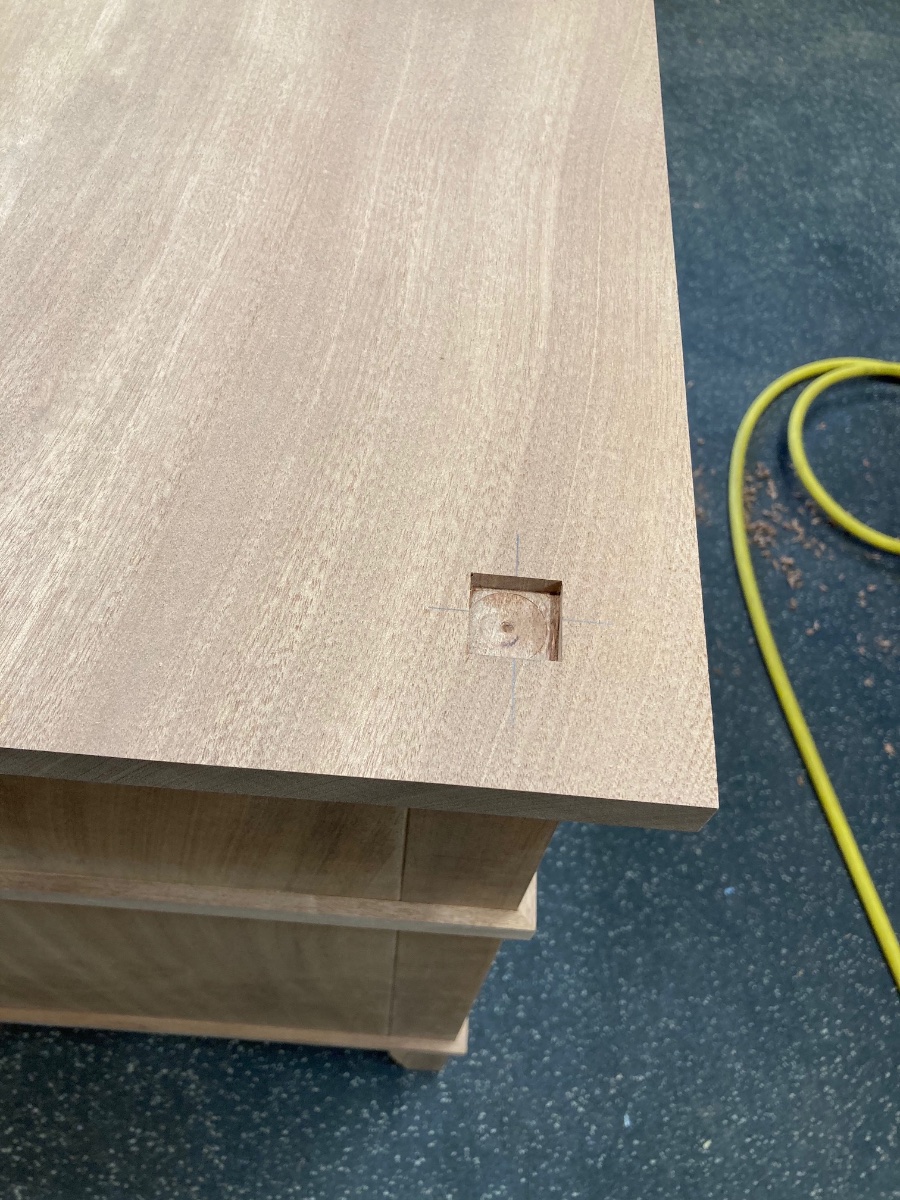
Next thing I did was get the top on and trimmed it out with some shop made molding and added a banding detail around the case at the base and below the top drawer.
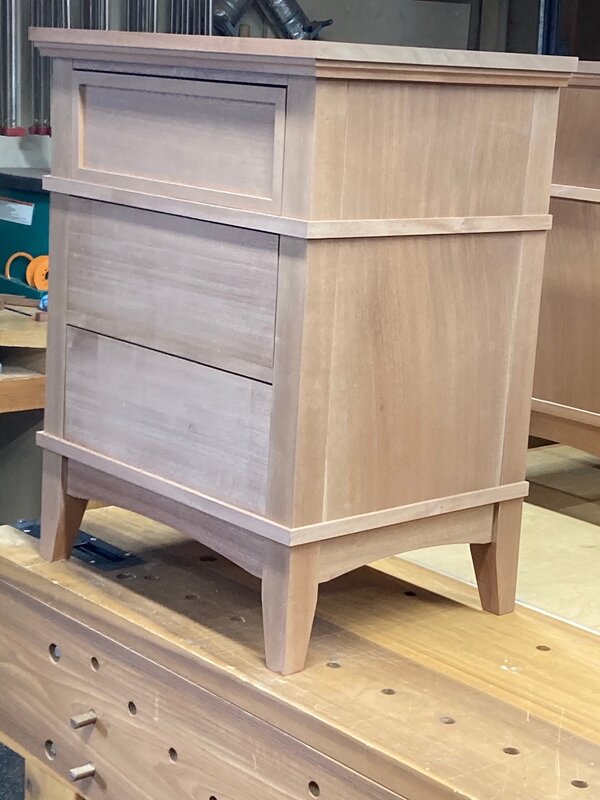
There is one other detail I am adding. I am doing a faux through tenon with a pyramid design on top on the from two legs.
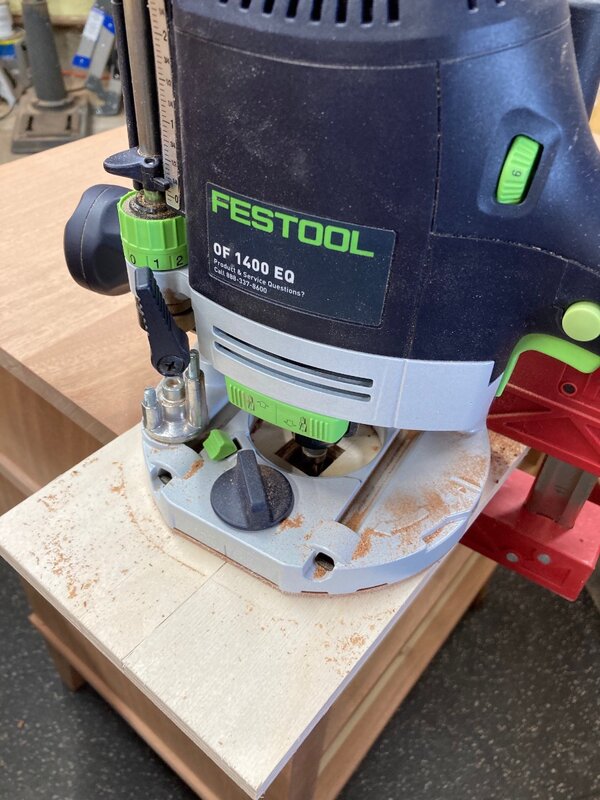
I removed most of the waste with a forstner bit.

Then I clamped my template and routed out the rest.
Then leaving the template in place, I cleaned up the corners with a chisel.
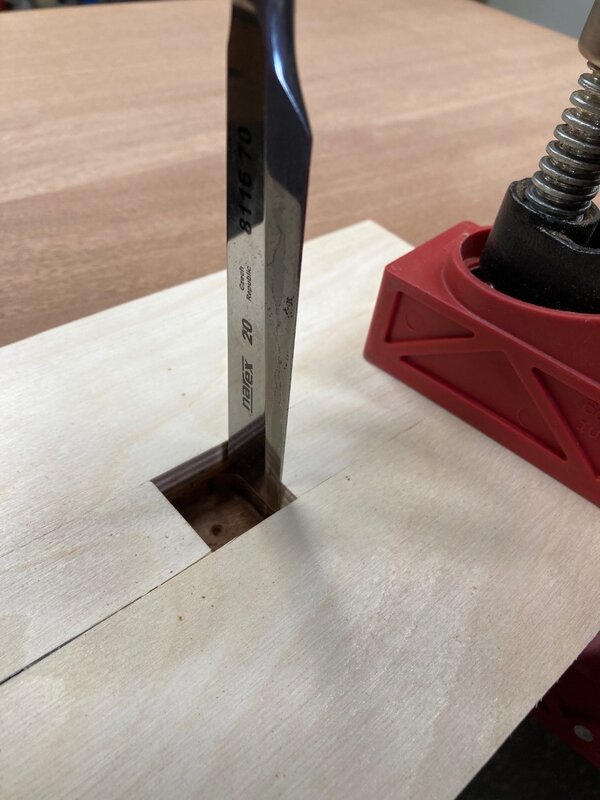
and it left me with this on the two front corners.
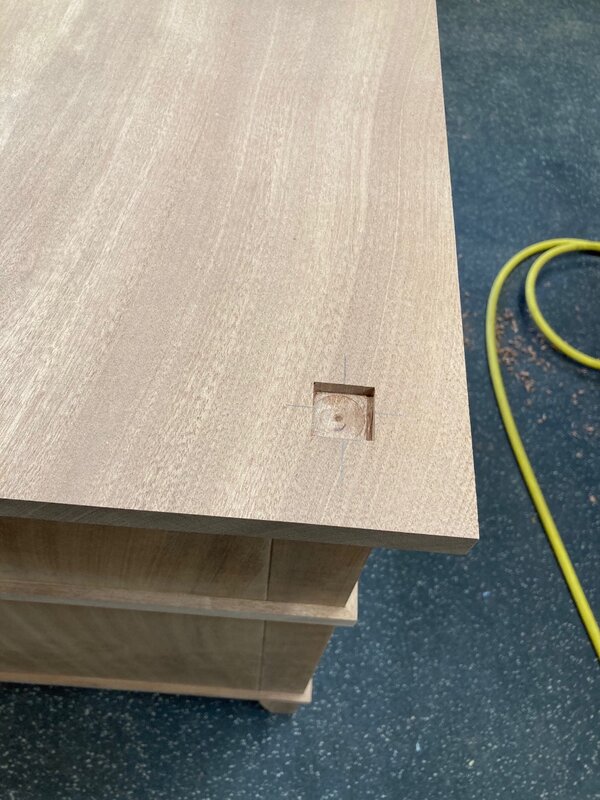
By this time in the day I didn't feel like tackling the pyramids so I finished the day by spending an hour and a half hand sanding all the details on one of the nightstands... fun stuff,🙄 Shoptalk Live podcast helped it go a little better.
-
6
-


Bandsaw
in Power Tools
Posted
I use the wood slicer blades from Highland Woodworking. They have served me well and they seem to get here pretty quickly considering they come from Georgia to California in four or five days. I have called them a couple of times and if I remember they can tell you overt the phone when you should get your order.
The 1412 takes 115" is the 14Bx the same?