Every purchase made through our Amazon Affiliate Page helps support this site
Kev
-
Posts
6,298 -
Joined
-
Last visited
-
Days Won
573
Content Type
Profiles
Forums
Downloads
Gallery
Events
Store
Articles
Blogs
Everything posted by Kev
-
Typically at the table saw but, I have cut them at the router table.
-
Had to fit under the lathe and have wheels..
-
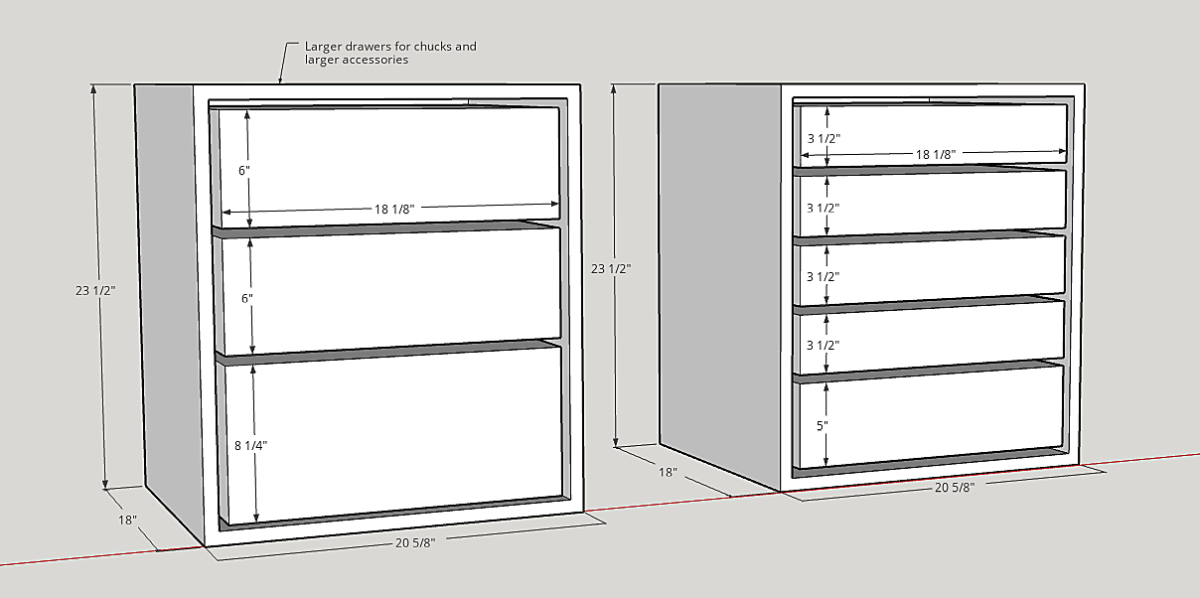
Now that the table is out of the shop, I got back onto this project.. I knew the basic sizes for the 2 cabinets and got them put together after I delivered the table.. Just rabbits, glue, and screws.. It's shop furniture.. From there, I needed to jump into Sketchup and start thinking about drawer sizes and what I wanted where.. One cabinet will have 3 deeper drawers for chucks and larger accessories. The other cabinet will have 5 thinner drawers for smaller items like calipers, layout tools, etc.. Unfortunately, I needed this information before I could order the glides. I'll probably build the drawers and trim out the cabinets but, the glides won't be here until the 29th. These will both be on wheels so they can be rolled out when I'm using the lathe. I'll most likely add some more durable tops and some tool holding as well but, I'll tackle that when I get there. There's a lot of options out there and I feel like I've looked at them all but, until I do a lot more turning, I just don't know what I want and where I want it.


-
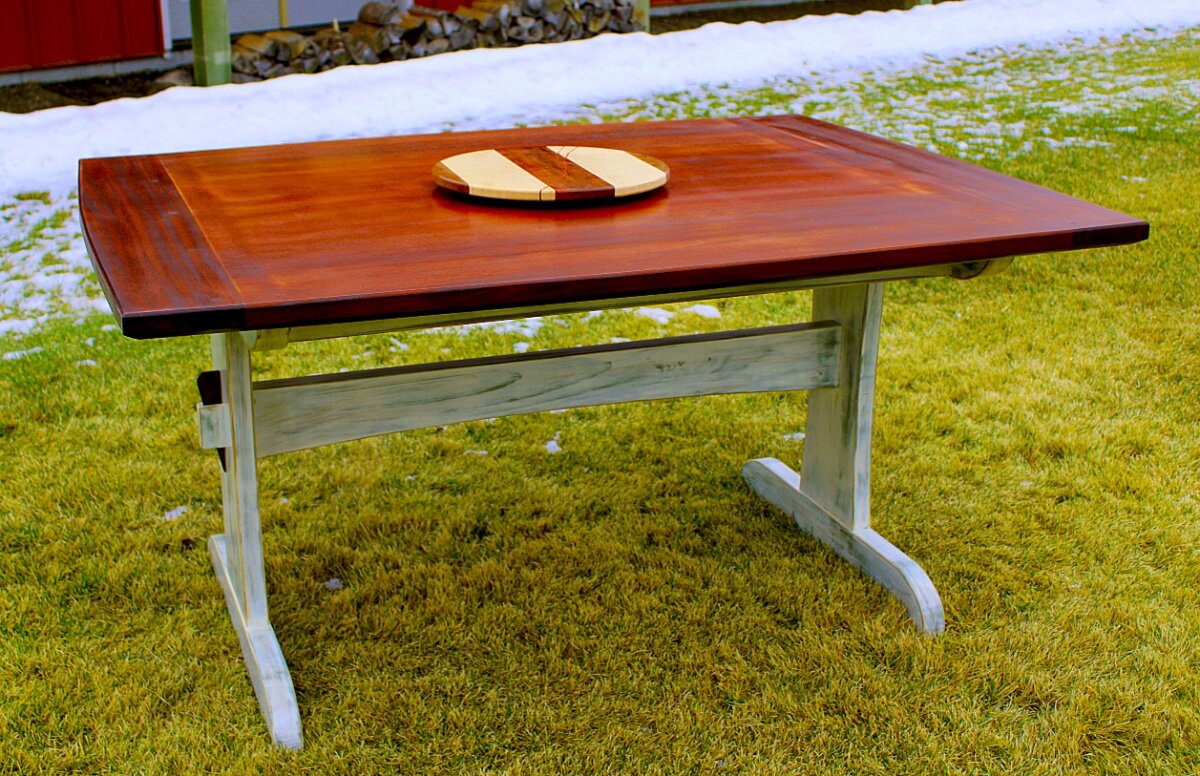
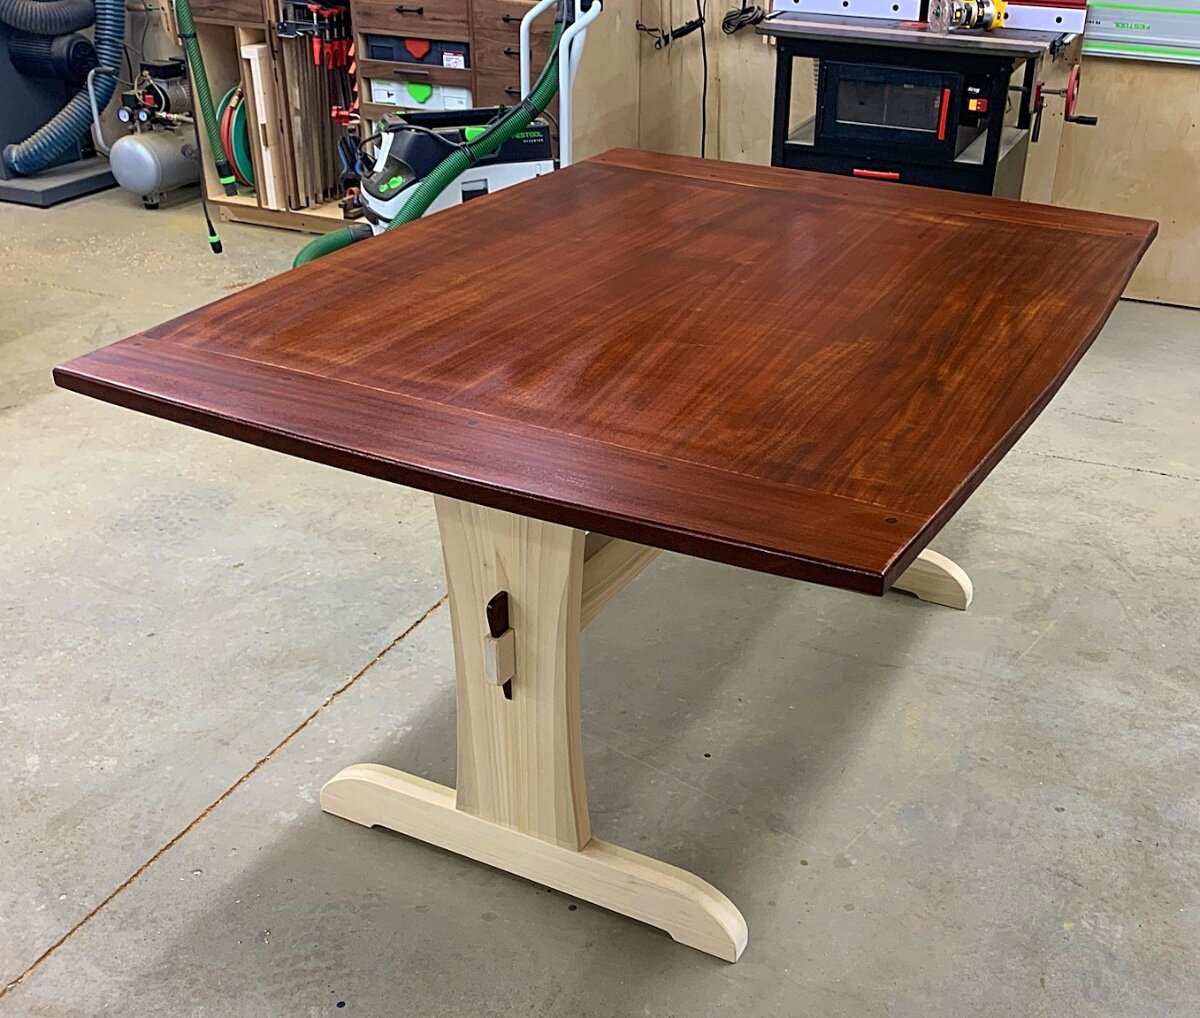
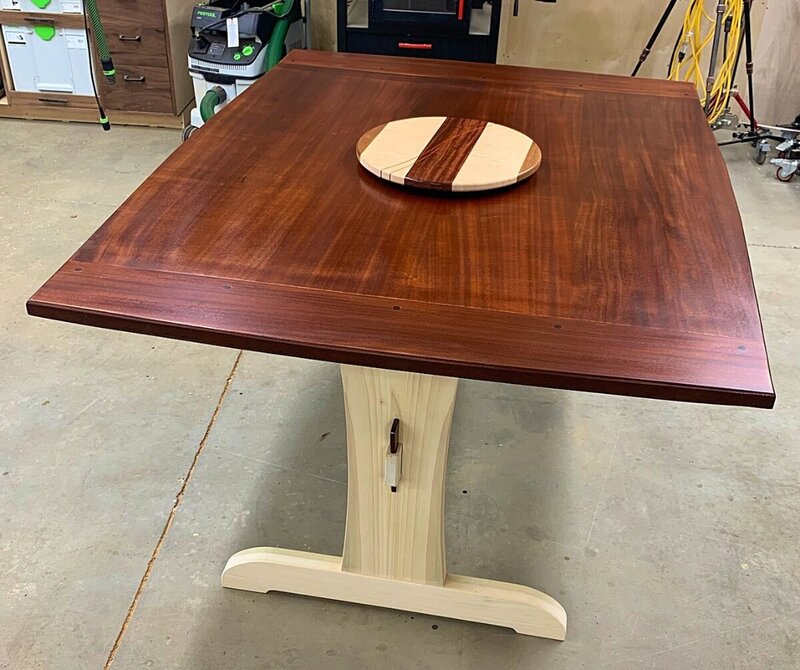
Well, the table is delivered and the client is happy! I did snag one outdoor picture as the snow was beginning to fall.. The glare was pretty brutal!

-
Unfortunately I don't have a backdrop big enough for a project this size.. I need to work on that! Table is done and will be delivered tomorrow.. And the extra goodies ordered along the way..
-
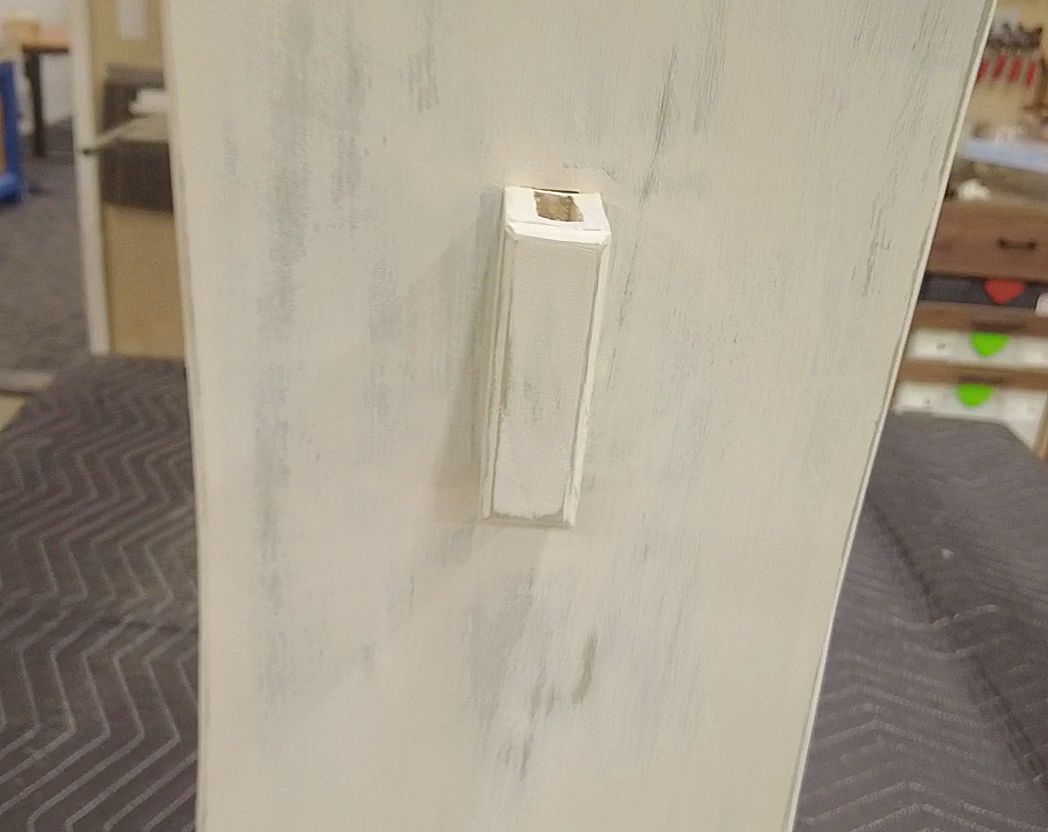
I did grab a closer picture of the tenon spot this morning so you could see the sand through process a little better.. Looking forward to seeing this with glaze and finish!

-
Good questions as usual! Future Finishes - Client was here most of the day doing this. I don't see this in my arsenal of finishes for client work. The tusks - These were finished at the same time and manner as the top so, that's what they will look like. Choices - I cut numerous blocks of poplar and sanded them for the client to practice finishing techniques and come up with the finish she wanted. Each time she would come with sample blocks to look at them with the tabletop, I would offer some suggestions.. Such as glaze, sanding through multiple layers, etc. I also provided her with some colors I had in the shop to play with until she found the look she wanted. So, the short answer is simply trial and error. My wife and I had done this on the coffee bar in our house so, it wasn't my first time doing it but, I'm certainly no expert!
-
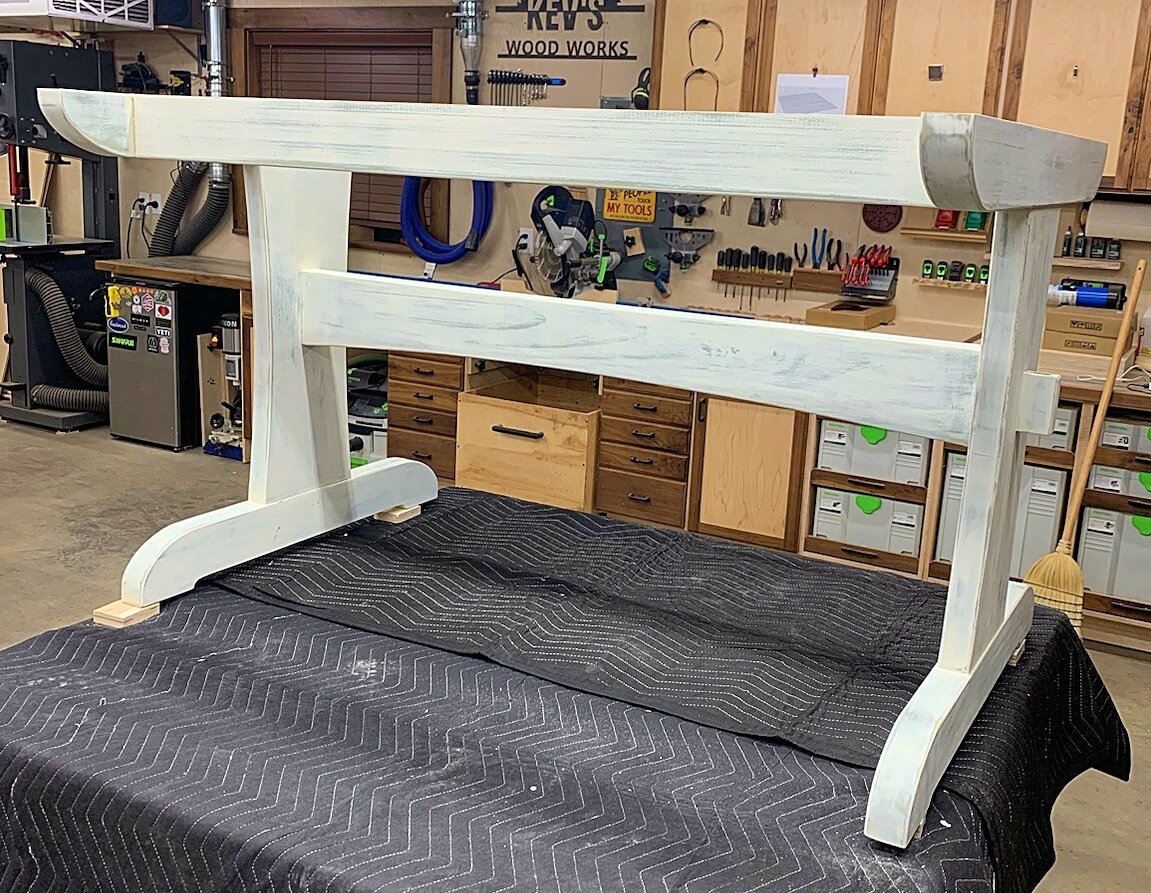
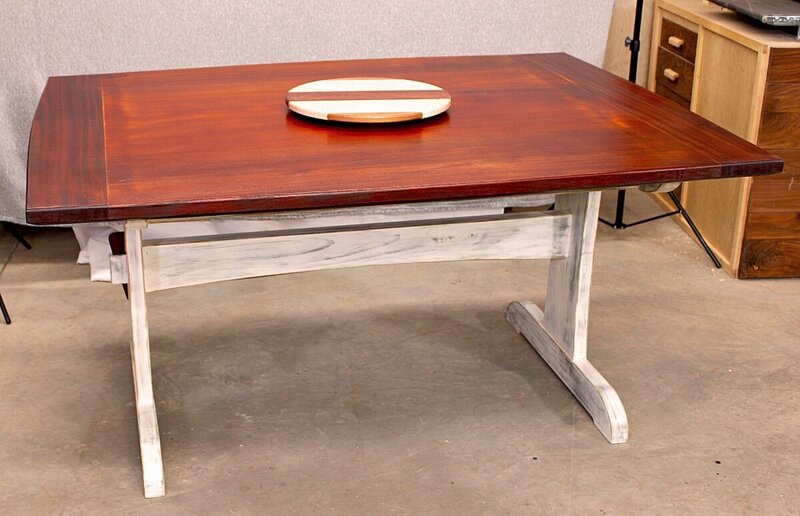
Well, the painting of the base started today! All General Finishes Milk Paint so far... Color selections and sequence is totally the clients but, so far it's looking pretty cool! Started with a base color of basil. Once that cured, a coat of antique white was applied. Once that cured, it was sanded back to create a more "antique" look. Tomorrow, we'll start the glazing process. Will start with VanDyke brown on all the large surface areas and a burnt umber on all the edges. These will be quickly wiped back so that they simply add some accents to what you see here. And the final will be General Finishes High Performance for a few coats to give it some protection and maintain the look.

-
Just the "note" piece that was a smaller font.. I managed to get it all up to the regular size.. I like the appendix idea.. I think I can get this one in but, I can see the benefit on larger plans... Trestle Table Plans.pdf
-
I did some work on the font sizes to see if I could clean it up a bit... Trestle Table Plans.pdf
-
Mine too.. I need to actually print it and see if I can make the picture a little smaller so that I have the writing room.. It's done automatically to keep the text contained in a specified area.. Thanks..
-
I do hope you take a look at the rough draft plans I posted and see what you think.. I don't expect them to be perfect as it's a rough draft but, looking for input.
-
Thanks! I'm getting a little mind numb looking at this so, just going to post it here so you guys can beat me up a little with the mistakes.. I'm sure I made a few.. PDF format was the smallest I could make it.. Let me know if you can't open it and I'll find another way.. Trestle Table Plans.pdf
-
I do the same on my shop drawings and they're usually handwritten.. I'm working on some rough plans now and may drop them here later so you can can take a look and offer suggestions or catch mistakes that I'm sure I made..
-
Question for the group, especially those that have ordered/bought plans in the past. I'm working on the plans for the Trestle Table and have all my pictures with dimensions, exploded views, etc. My question is do you prefer plans with some sort of description along the way or just plans with the dimensions? Obviously, there's video to go with them but, I also don't mind adding some narrative to the plans either. Just looking to make plans that people will actually use and enjoy.
-
So, anyone interested in the finish, here's the link.. https://www.woodturnerscatalog.com/p/40/2585/mylands-Melamine-Lacquer?term=mylands+melamine+lacquer&term=mylands melamine lacquer There's a lot of interesting stuff on their site for turning! Thanks @Dick for turning me on to this place!
-
The client showed up yesterday during the marathon turning session with more color samples for the base. As of this writing, it would seem that a decision on color has been made! Supposedly, they'll be getting it done this week so I can get this table out of my wife's quilting room where I put it to keep it safe.
-
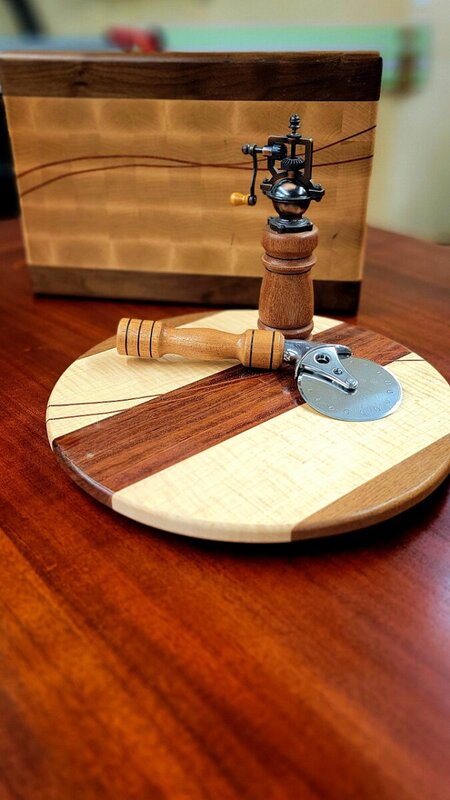
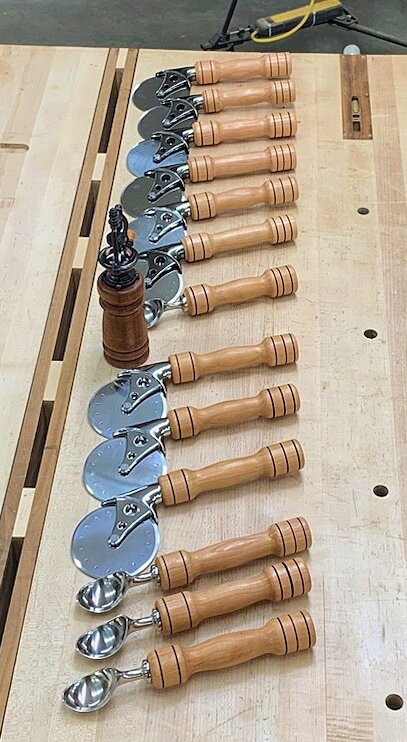
Yea, the scoops are always popular.. I was surprised at how popular the pizza cutters were as well.
-
@Ray Martin and I had a marathon day in the shop today getting all of our turnings done.. Was about 12 hours in total and I'm out of gas! Results were great though! @Dick turned me on to a new finish that worked absolutely awesome.. I'll dig up a link tomorrow and post the info..
-
Yea, you've pretty much gone where I'm thinking of going except for the tools behind the lathe and a little change to the left.. Between the cabinet, lights, and divider rack behind the lathe, there's just not a lot of room there. As well as @Coop pointed out, I do have a concern around leaning over a running lathe. Although I do understand that the you most likely have the lathe off when doing this. Like you, I have a custom cabinet to the right of the lathe, I'll post an updated picture tomorrow. The downside to my cabinet is that the horizontal surface is pretty filled up with sharpening equipment and because it's a corner cabinet, it's just a little too far from the actual working position of the lathe. I don't have anything other than the horizontal surfaces of my planer on the left. In fairness, I'm not sure if this "planer" space is being used because my shop cart (fill in for the space on the right) is full or if I genuinely want to place items there. Figuring out the left cabinet will be a work in progress through turning actual projects. The solution I'm considering is two smaller cabinets (2) on wheels that live under the lathe when not in use but, roll out to a comfortable working position when I'm working at the lathe. being smaller cabinets, I'll still have access to the corner cabinet on the right and won't be using my planer surfaces on the left. Currently, I'm envisioning the frequently grabbed turning tools and abrasives living on the right cabinet and the less frequently grabbed lathe chucks and finishes living on the left cabinet. I'm liking the idea of stepping up to the lathe and being somewhat surrounded by an array of cabinets that all house different components to working at the lathe where I'm not walking a bunch to get what I need/want. I suppose long term, I'll also have to dial in the dust collection as well as figure out how to shoot video at this location. @pkinneb I love your set up! I'll bet you enjoy some serious time there! Looks like you went to a little smaller lathe getting it a little closer to your cabinet on the right? I envy that proximity!
-
That's why I'm considering the 2 cabinets.. Both will be on wheels so, they'll have a home (same footprint as the large cabinet above) as well as the organization stuff needed. I'll just pull them out from under the lath when I want.
-
Coming back to this project finally now that I've had some time on the lathe and have a little better understanding of what I need and want. For starters, I think the cabinet I designed above would ultimately be too big and heavy. This would create a couple problems. When pulled out for use, it would block access to the bench area that I built that has a lot of drawer storage as well as my tool sharpening. If it's heavy and cumbersome, it probably won't get used as intended. One of the things that I've noticed from the last few turnings is that I end up pulling up my shop cart on the right side of me. This is where the tools get stored but, it get's cluttered in a hurry! The other thing that I've noticed is that my planer horizontal surfaces are also getting used which is to the left and behind the lathe.. So, I'm thinking 2 smaller cabinets on wheels that will be easier to roll out and place where I want/need them. Then, with a little bit of organization, perhaps it won't be a cluttered mess!
-
Finally cured up enough for a picture..
-
Possibly.. I've made the space available or she can take it home and paint..
-
Gave it a little buffing and located the top on the base this morning. With the exception of spraying the base after it's painted, this one is done for me!