Bushwacked Posted November 16, 2020 Share Posted November 16, 2020 very nice! Everything has a good spot now! Quote Link to comment Share on other sites More sharing options...
Kev Posted November 16, 2020 Share Posted November 16, 2020 On 11/11/2020 at 9:17 PM, Tmize said: Here is a few pics of proof to show I haven’t just been goofing off Quoting this to get all those beautiful pictures over to a fresh page! Super nice job! Quote Link to comment Share on other sites More sharing options...
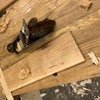
Tmize Posted November 16, 2020 Author Share Posted November 16, 2020 Well I got the back built finally. Just loosely screwed into place. Still have to plane them before painting. I think I had said earlier in this thread they would be T&G I got looking my planes an I didn’t have the tongue plane for the board thickness at 1/2”. So I did a shiplap panel with a nickel as a spacer between boards. I put a half round notch in one of my card scraper to match the profile of the beading plane. All my grooving type plane irons have a 15 degree back bevel on them to help with tear out. So i don’t have to worry as much about grain direction which is problem I run into mostly with drawers. Problem is at that high of a cutting angle it can leave the surface fuzzy which is better than tear out. So the scraping it brings it back to life. 2 Quote Link to comment Share on other sites More sharing options...
Kev Posted November 16, 2020 Share Posted November 16, 2020 That's really looking awesome! 1 Quote Link to comment Share on other sites More sharing options...
Jamie Posted November 16, 2020 Share Posted November 16, 2020 That is super impressive to do that by hand! looks great! 1 Quote Link to comment Share on other sites More sharing options...
Chet Posted November 17, 2020 Share Posted November 17, 2020 23 hours ago, Jamie said: That is super impressive to do that by hand! What he said!!! 1 Quote "Do not spoil what you have by desiring what you have not; remember that what you now have was once among the things you only hoped for." - Epicurus Link to comment Share on other sites More sharing options...
Woodenskye (Bryan) Posted November 17, 2020 Share Posted November 17, 2020 Really looking good. 1 Quote Link to comment Share on other sites More sharing options...
Tmize Posted December 1, 2020 Author Share Posted December 1, 2020 Just a quick update pic. Got one coat of poly on the top. 3 Quote Link to comment Share on other sites More sharing options...
Kev Posted December 1, 2020 Share Posted December 1, 2020 That turned out great! 1 Quote Link to comment Share on other sites More sharing options...
Jamie Posted December 1, 2020 Share Posted December 1, 2020 Looks sharp! 1 Quote Link to comment Share on other sites More sharing options...
Woodenskye (Bryan) Posted December 1, 2020 Share Posted December 1, 2020 Nice work! 1 Quote Link to comment Share on other sites More sharing options...
Chet Posted December 1, 2020 Share Posted December 1, 2020 For a simple bookcase it has some nice, clean details to it. 1 Quote "Do not spoil what you have by desiring what you have not; remember that what you now have was once among the things you only hoped for." - Epicurus Link to comment Share on other sites More sharing options...
Coop Posted December 2, 2020 Share Posted December 2, 2020 Nice job @Tmize. Would have liked it but I ran out of likes after 3. 2 Quote Link to comment Share on other sites More sharing options...
Kev Posted December 2, 2020 Share Posted December 2, 2020 1 hour ago, Coop said: Nice job @Tmize. Would have liked it but I ran out of likes after 3. That's not the limit... Are you kidding? 1 Quote Link to comment Share on other sites More sharing options...
Coop Posted December 2, 2020 Share Posted December 2, 2020 No sir 1 Quote Link to comment Share on other sites More sharing options...
Tmize Posted December 6, 2020 Author Share Posted December 6, 2020 Here is the final photos installed. I do have a question? I have a gap at the bottom right that is just enough to bug me maybe a 1/8”. Normally with built in casework I would run a piece of trim around the bottom to hide the uneven floor. I don’t think trim would look right in this situation. I thought about caulking it. We are replacing the floors in the next couple years so don’t know how I want to do this. I will remove the bookcase an run the new floors under it I may be able to shim that spot level when I do it. 2 Quote Link to comment Share on other sites More sharing options...
Kev Posted December 6, 2020 Share Posted December 6, 2020 Looks good! With the knowledge that you're replacing the floor, I think I would learn to live with it. Think of it as your reminder to do the floor ? 2 Quote Link to comment Share on other sites More sharing options...
Tmize Posted December 6, 2020 Author Share Posted December 6, 2020 Yea that’s what I was thinking anyway. Just fishing if anyone had a better idea on a way to hiding it since shoe mold wouldn’t like right. Quote Link to comment Share on other sites More sharing options...
Kev Posted December 6, 2020 Share Posted December 6, 2020 6 minutes ago, Tmize said: Yea that’s what I was thinking anyway. Just fishing if anyone had a better idea on a way to hiding it since shoe mold wouldn’t like right. If it really bugs you, cut a shim to fit and paint it to match the case.. 1 Quote Link to comment Share on other sites More sharing options...
Jamie Posted December 6, 2020 Share Posted December 6, 2020 (edited) At first I was thinking scribe it to the floor but with new flooring coming I’d live with it till then. Might have to scribe it at that point. I really like the look of edge profile on the top is it just a chamfer? Edited December 6, 2020 by Jamie Quote Link to comment Share on other sites More sharing options...
Coop Posted December 6, 2020 Share Posted December 6, 2020 Looks great. If you hadn’t called it to attention, only you would have noticed! 1 Quote Link to comment Share on other sites More sharing options...
Tmize Posted December 6, 2020 Author Share Posted December 6, 2020 11 hours ago, Jamie said: At first I was thinking scribe it to the floor but with new flooring coming I’d live with it till then. Might have to scribe it at that point. I really like the look of edge profile on the top is it just a chamfer? Yes just a chamfer on the table saw. Give a longer bevel than router bits 1 Quote Link to comment Share on other sites More sharing options...
Chet Posted December 6, 2020 Share Posted December 6, 2020 In looking at the first picture and if I am seeing it correct, it looks like your bottom apron in almost the center area is resting on a high spot in the floor causing gaps ant the end of the case between the case and floor. If it still sits that way after the new floor, I would think a little gentle hand planing of the apron would fix it. Quote "Do not spoil what you have by desiring what you have not; remember that what you now have was once among the things you only hoped for." - Epicurus Link to comment Share on other sites More sharing options...
Tmize Posted December 7, 2020 Author Share Posted December 7, 2020 6 hours ago, Chet said: In looking at the first picture and if I am seeing it correct, it looks like your bottom apron in almost the center area is resting on a high spot in the floor causing gaps ant the end of the case between the case and floor. If it still sits that way after the new floor, I would think a little gentle hand planing of the apron would fix it. Yes sir you are correct. If I had thought about it I should have put a curve in the bottom rails an that would have fixed that. Live an you learn. 2 Quote Link to comment Share on other sites More sharing options...

Recommended Posts
Join the conversation
You can post now and register later. If you have an account, sign in now to post with your account.