
Every purchase made through our Amazon Affiliate Page helps support this site


Bushwacked
-
Posts
1,605 -
Joined
-
Last visited
-
Days Won
98
Content Type
Profiles
Forums
Downloads
Gallery
Events
Store
Articles
Blogs
Posts posted by Bushwacked
-
-
great work there!
In all my video watching ... never did making my own tennons come across my mind! I think that would be a lot easier to do on bigger pieces like ours. I think if I would have thought of this, I would have gone that route instead of what I did.
I guess next time!
-
 1
1
-
-
very nice days work there!!
Is it so wide, just solely because the vise? Or did he want a monster?
-
gettin big!!
-
Thanks guys!
7 hours ago, Woodenskye (Bryan) said:Nice rendering, but I’m still confused (shocking right). Is this space open and seen? In 1 of the early photos there was a door, which if the door is always closed, I would paint and probably skip the wainscot, but with that said, if your now making this open and visible all the time you can disregard my previous statement.
So, yes there is a door on it, however with the kids, the door is almost never fully closed unless they are in there or I shut it at night. So it is normally somewhat open when people are here so that is why I am just putting a little more into it than some basic paint in the coat closet section.
-
Maybe something like this? Not sure on color, but maybe a nice blue help make it more "fun" in there
-
1
-
-
11 hours ago, Coop said:
Yep, that’s the one. I like the way he did the rabbet in the top of the baseboards and in the bottom of the chair rail to accept the wainscoting.
I was watching the big cabinet built in one .. noticed he does the same for the cabinets sitting on the desktop, he routes a grove in there and slides the cabinets in. Seems like a pretty cool alignment/install trick
-
3 hours ago, Kev said:
Well, you could really do just about anything you want.. Some low profile wainscoting would look nice on the entrance way. for the actual room, obviously a coat of paint would go a long way. Perhaps a little better bench with some actual cushions and some storage inside of it? Then, trim out that cubby with something other than ply and I think this room would look as good as it needs to.
Maybe ask what your kids want in there?
yes, definitely some paint! I was thinking of like a thinner version of what we have without chair rail moulding ... like 1/2 and 1/4 thick pieces to save as much room as possible.
As for the bench, I was thinking maybe even tearing that one out and maybe going even lower with it? Right now it is about 13" high, I was thinking maybe 7-8" high as a more low profile bench and giving adults more head room. You pretty much have to bend all the way over or slide on your knees to get out of the room anyways.
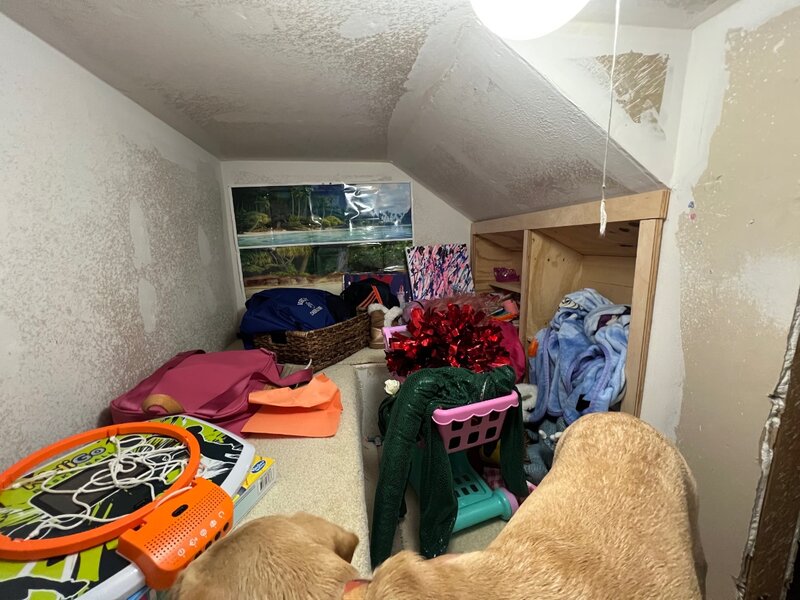
Yes, the cubby was going to be replaced with something nice. I put that in about 5 years ago maybe? Just to give them a quick book storage spot with scraps I had laying around.
I asked my kids ... they wanted something like the below coming out into our master since it shares walls haha
2 minutes ago, Coop said:BW, you made mention on here about a guy by the name of Bourbon Moth. I went to YouTube and the only video of his that I watched due to their lengths was “Decorative Casing”. The size of his was extreme due to the size of the room but, I think something along those lines would look good scaled down.
ooooh, will check it out. Is it the casing for his office with the massive built ins? I saw that one and was thinking about that type of look just scaled way down.
-
1
-
-
Wanted to pick your brains on this …
I am wanting to get some ideas on how y’all would tackle this design wise …
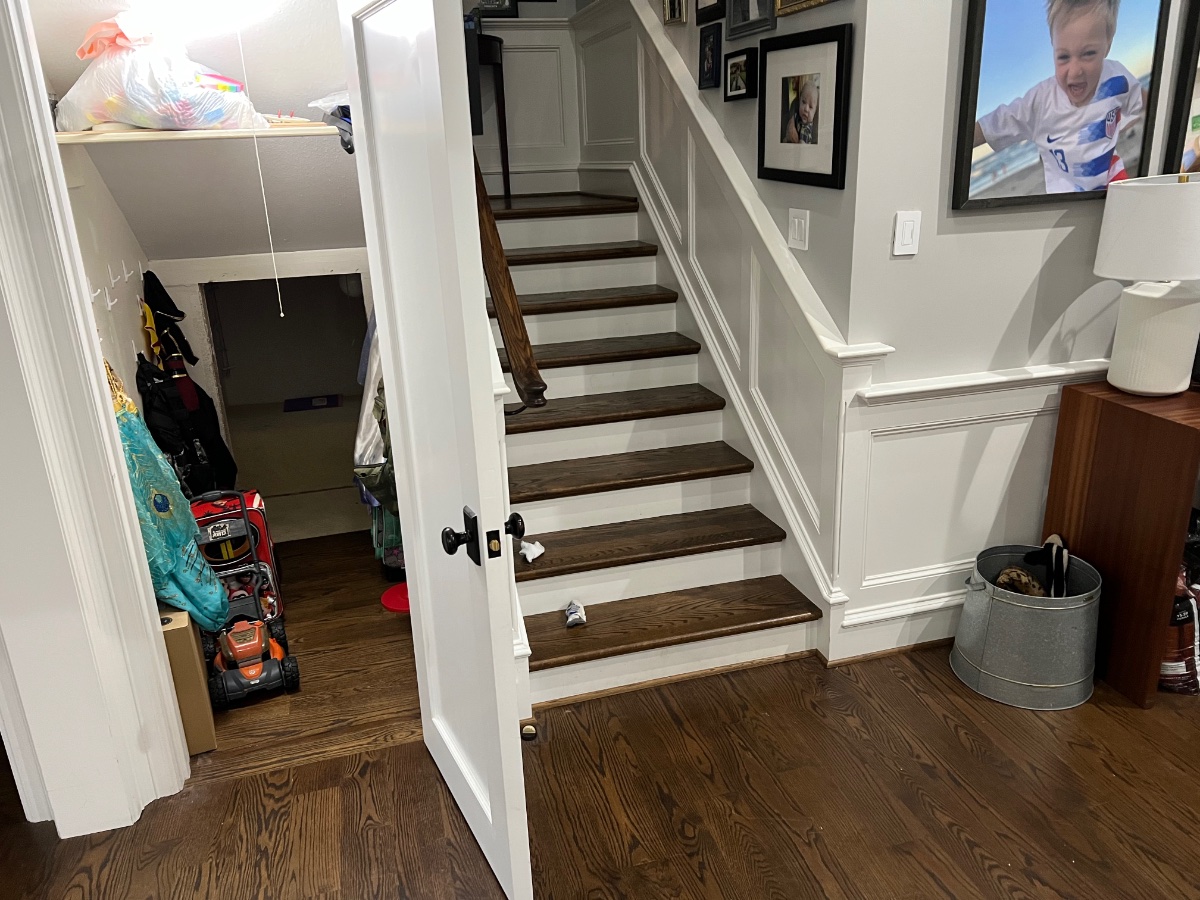
Here is how the rest of the house is with the wainscoting… I don’t think a direct match would work in there as chair rail sticks out too much. So maybe some basic wainscoting and a look of separation for different kids areas to store stuff? I would want to try and keep sports bags in here and extras like that. No real need for a true coat closet per say with a bar across the front.

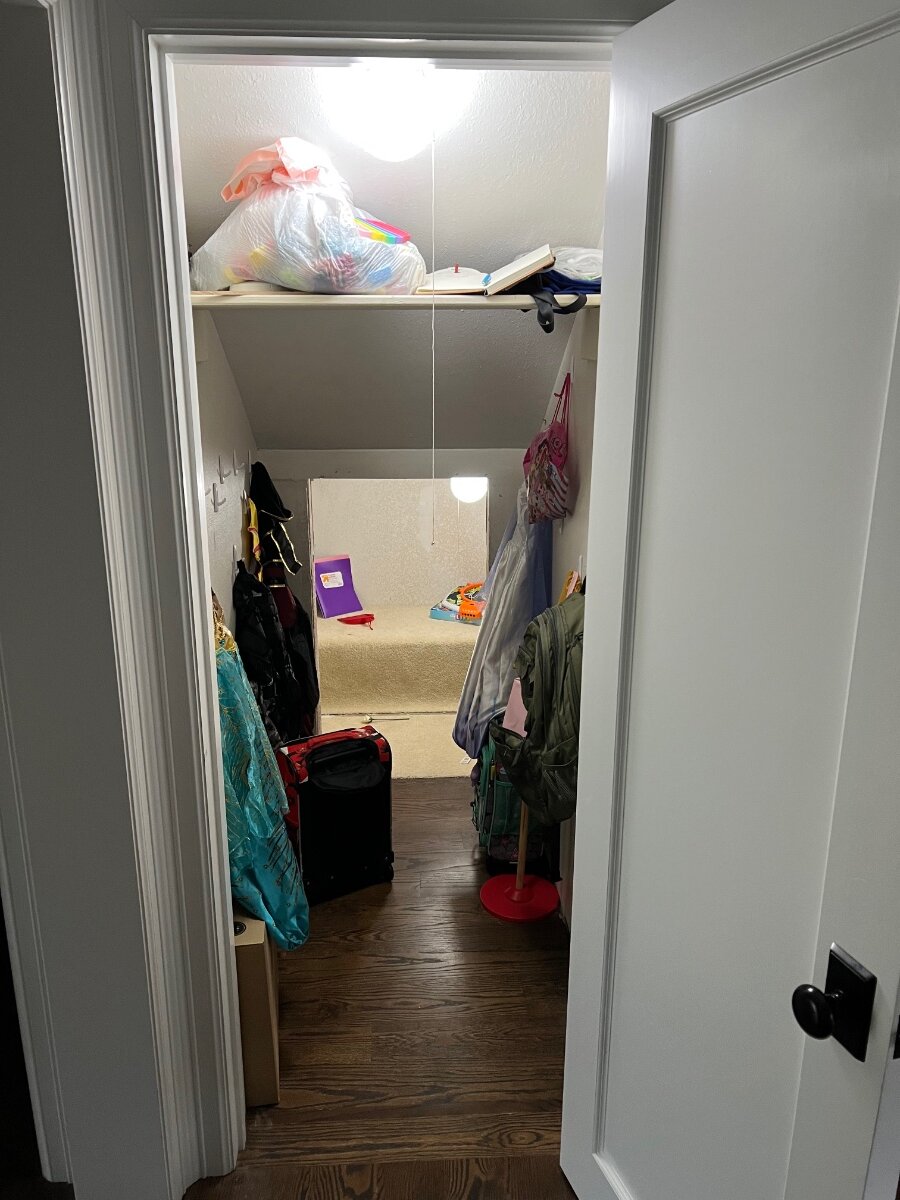
now here’s the inside of it. Only thing we have done is put the wood floors down in the first half. It’s got this random shelf …

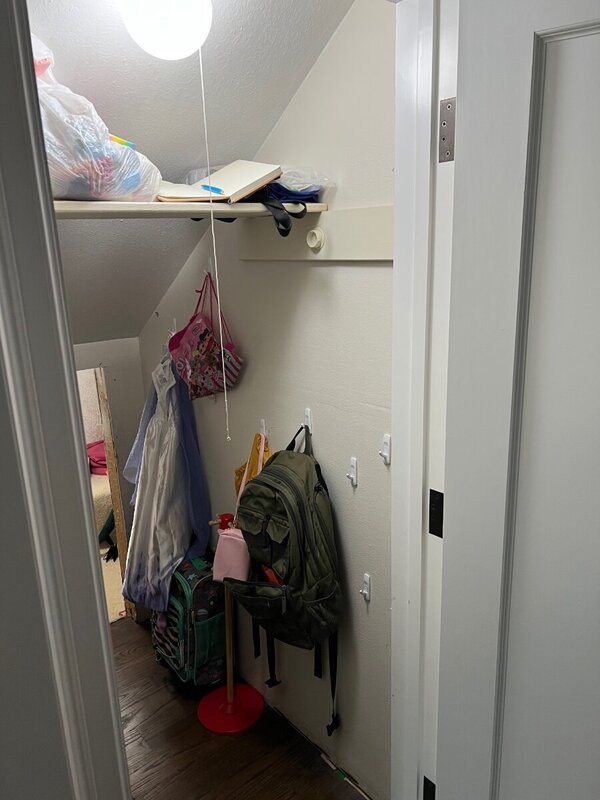
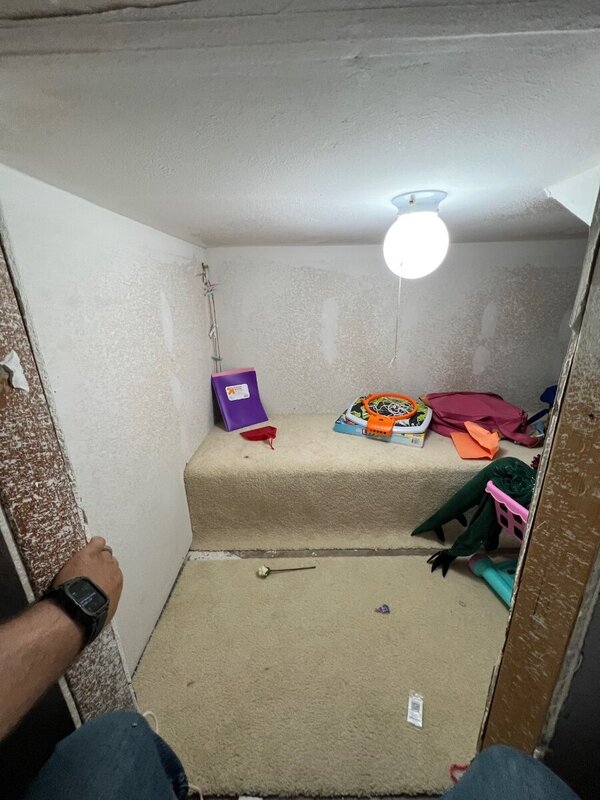
here is the inside … the previous owners just had the builder toss some carpet on the bench and floor. It’s not actually connected to anything or held in place. I mean it’s fine as it’s the tornado shelter for the house that my kids have turned into a little hide and go seek place and a “fort” of sorts
-
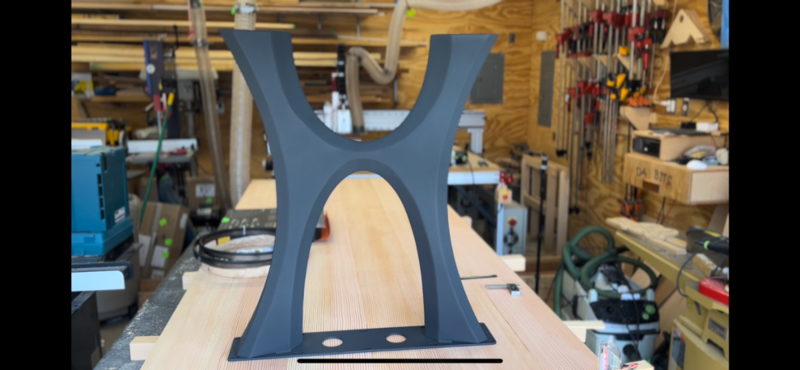
Also legs showed up … so had to throw one on and see
-
1
-
-
had a change of design here ... really wasnt happy with the tenons for the BB ends as it was tough keeping everything aligned properly. After thinking about it and measuring and trying to come up with a solution ... I gave up on the BB ends. Chopped them off this morning and ordered 2 x 32" C Channel pieces that I will toss into the bottom instead.
-
1
-
-
What does AM go for per BF up there?
-
oooo thats a great choice there! Cant wait to see the combo together!
-
12 minutes ago, Coop said:
BS. Fair's fair. I would prob have bought one anyway. Send me cost and shipping.
Coop send me cost, send Kev shipping

-
 1
1
-
-
if Coop is not on standby ready to come in at a moments notice, I dont feel at ease with this

-
2
-
-
this will be a lot of fun to watch! How much video do you think you will be getting from this?
-
5 hours ago, Coop said:
Here ya go.
You know, when you mentioned this I was thinking I was going to just hate it ... now that I have seen it, its actually not bad looking at all and I might actually work that into some future designs.
-
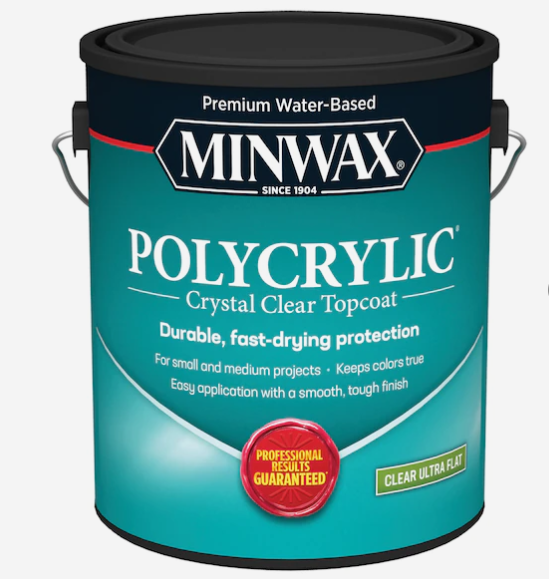
On 5/13/2022 at 10:19 PM, Coop said:
I realize this is a little late in the game but perhaps there is experience? I will be making a piece from maple and would like to keep it as light/non-yellowing as possible. Will the Osmo give me the results that I’m looking for? What is the sheen?
may be kinda late here as well ... sorry Coop, but I used Minwax ultraflat on that white oak countertop I built ... could hardly tell there was even a finish on it
-
1
-
-
10 hours ago, Coop said:
I built Marc’s blanket chest build several years ago and his ends were flush on top and they extended a tad past the edges and it’s a good look. A couple of years ago I built an end table and the ends were proud of the top and bottom and they looked sharp as well. I haven’t decided yet how I will do mine on this project. Thanks for the link.
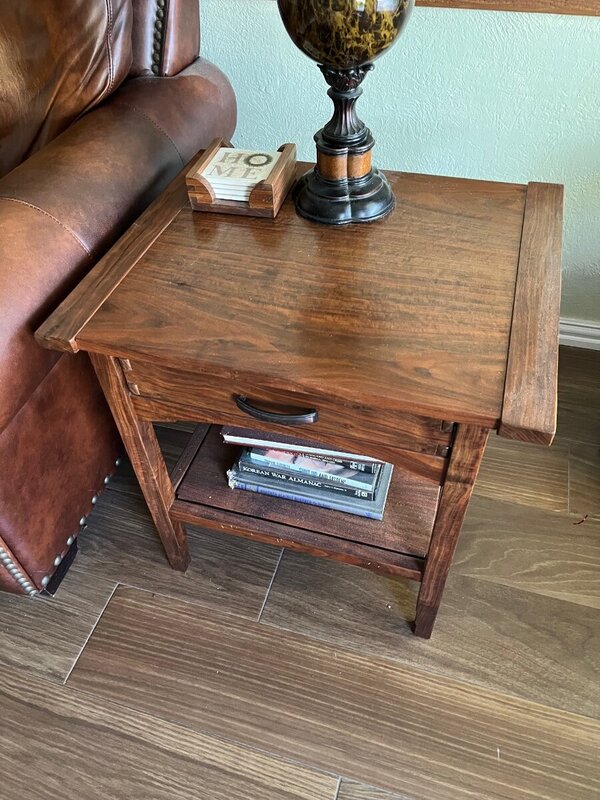
so you made BB's that were a tad thicker than the top? I am not sure I have ever seen that before ... do you have a pic?
-
2 hours ago, Coop said:
Looks great so far. In the end, will the bb end be thicker than the top?
Which Marc’s video are you watching?No the BB ends were milled at the same time so they will be the same thickness, however I do kinda like how he leaves just a touch oversized on the ends to help with expansion and contraction.
I attacked it backwards from how he did it for 2 reasons ... I had to order an edge guide, it shipped from EU, however it was half price so I dont mind waiting ... 50 is way better than 100. Then I cant really use the dado to sneak up on a nice fit anyways so just a #4 once I get the mortises cut to sneak up on the fit. With something this big, not sure if it matters how to achieve the snug fit ??
watching this one ...
-
1
-
-
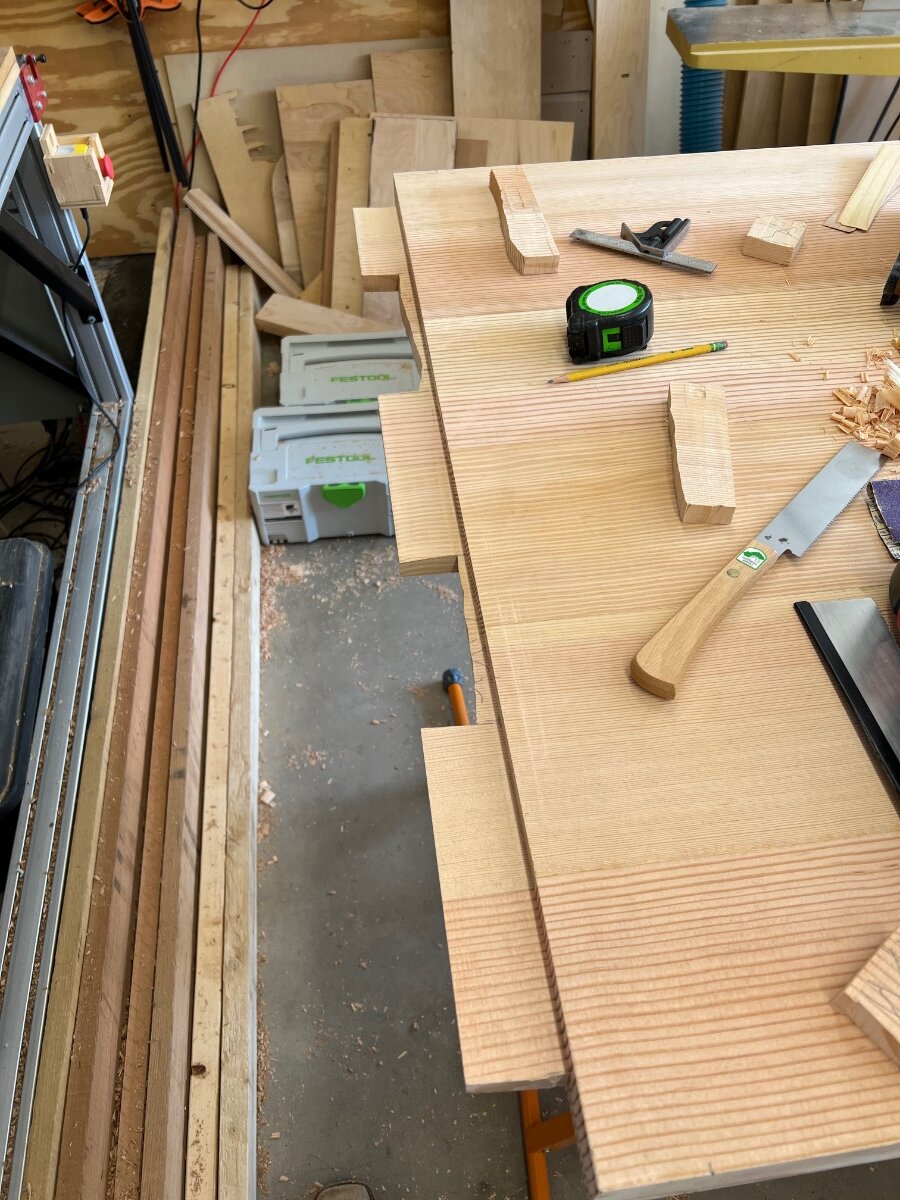
Started on breadboards … this kinda kicked my butt today on how to support the router on the very ends haha.
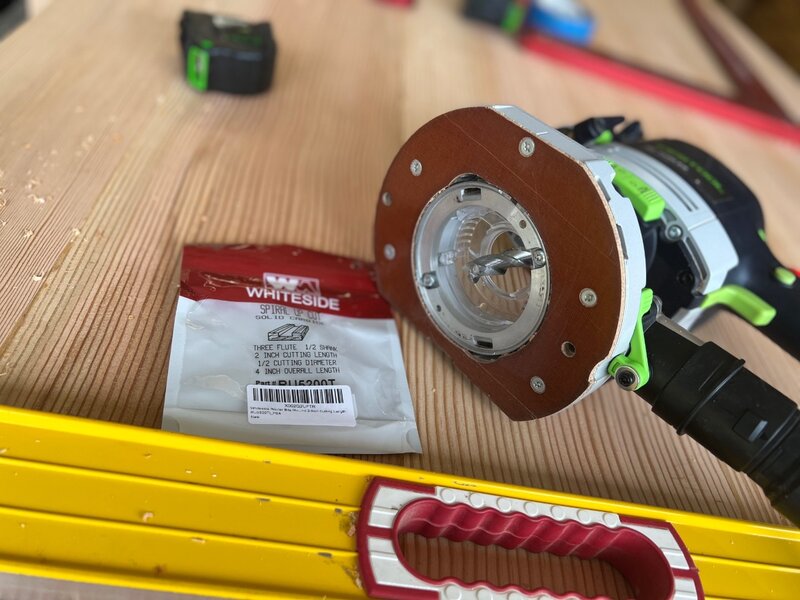
got my massive bit in and ready to go ..
marked and ready to cut …
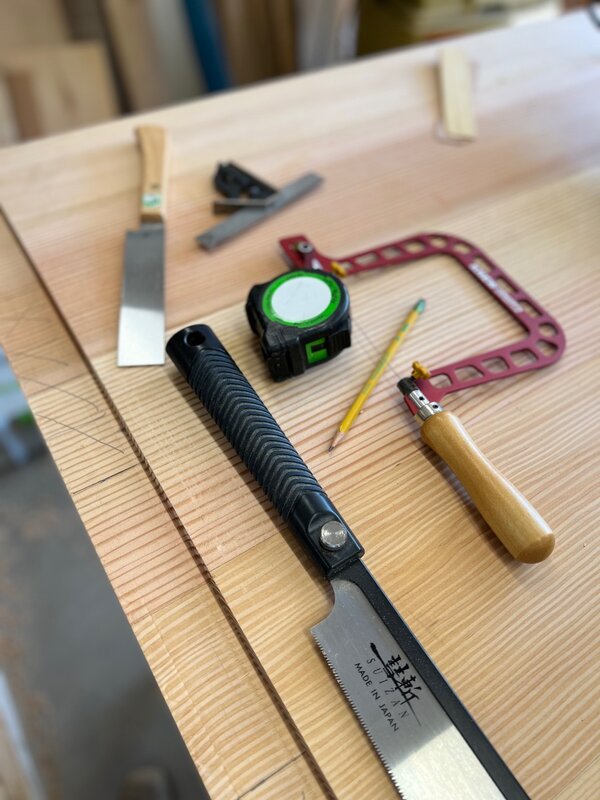

now time to go watch Marks video a few more times before I start the mortises.
I left the tenons a tad thicker so I can plane down to a nice snug fit … hopefully it works out like I planned haha
-
3
-
-
9 hours ago, Woodenskye (Bryan) said:
Coop, good work! Can you give a little insight on the jig, just not seeing how you use.
I came for the same knowledge haha
-
awesome! glad to see you back in the shop.
-
1
-
-
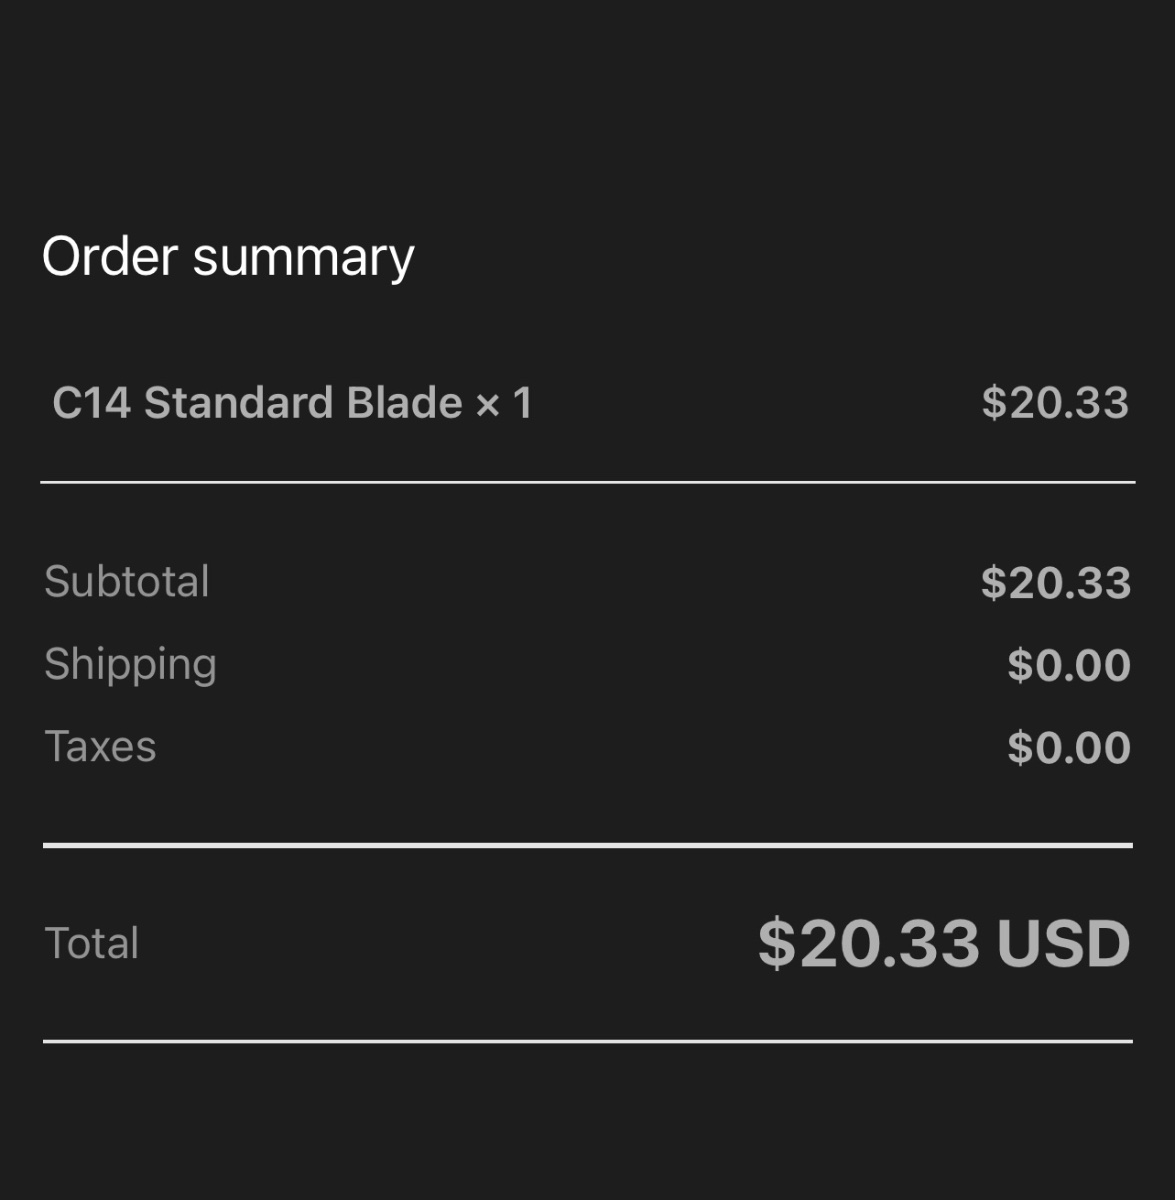
LOL!! it crossed my mind for the emotional stress of not having a bandsaw at the moment 🙂
-
Invoice for the blade …
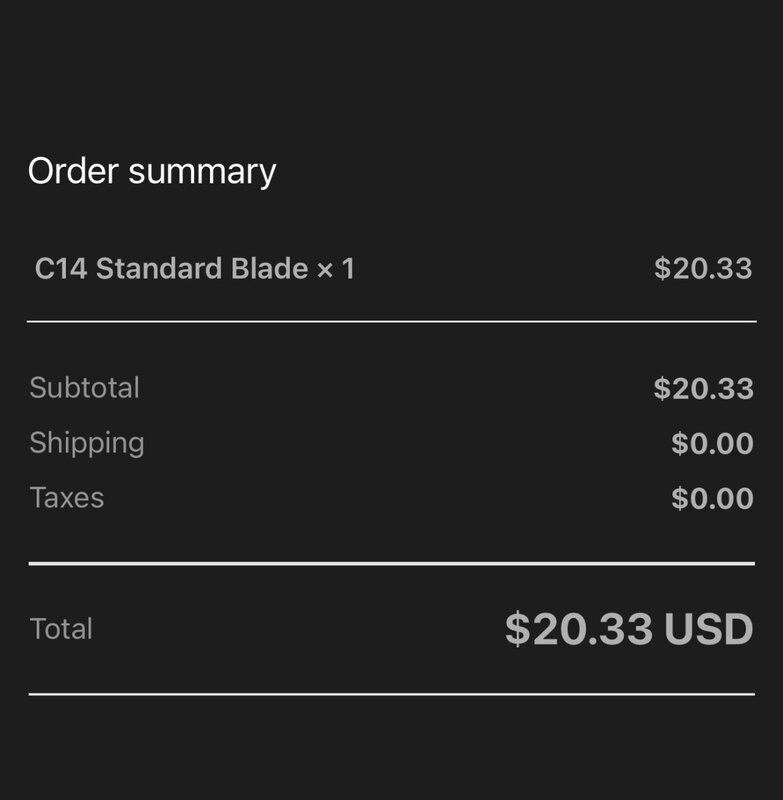
gotta say the Harvey support has been amazing! I’ve had 9 email replies (18 total messages back and forth) since Monday. Super friendly too.


Tell me I’m crazy??
in General Discussion
Posted
I was sitting in my shop the other day just kinda annoyed at the clutter of trying to get to the drill presss/bandsaw/and planer … the though cross my mind of potentially getting rid of of the mitersaw station and lower cabinets. Keeping the upper cabinets. The lower cabinets take up quite a bit of room, but actually do not store all that much. Mainly has most of my systainers in the 2 right ones, then my HVLP in the middle left and random crap in far left.
I would build a rolling stand for the mitersaw and use the indeed/outfeed support stands if needed. Then tuck away when not in use on by the wall. Can put the planer up next to it too. then I could also move the bandsaw over there.
Use the wall for some storage too. Where it fits. Then would need to build out storage solutions finally under the CnC which I would finally be able to use the side of it now with the space. Then storage in the outfeed/workbench area.
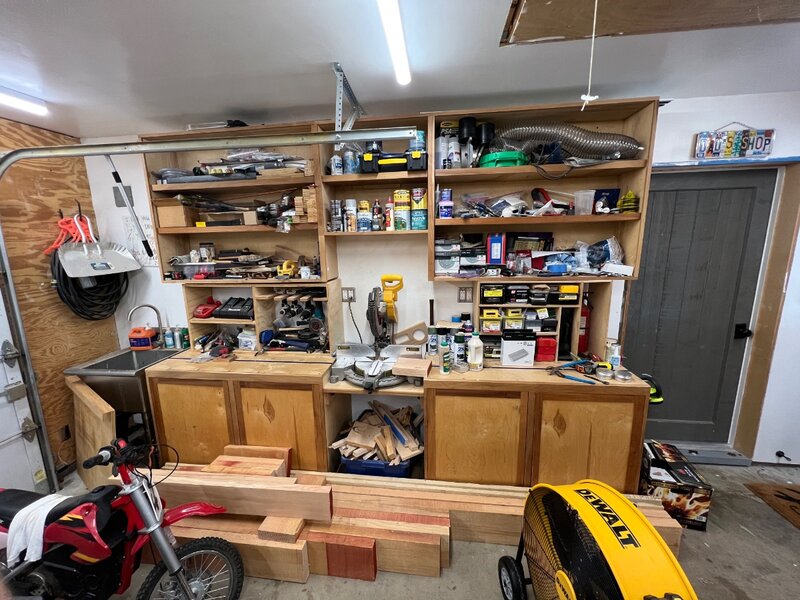
crazy??