Every purchase made through our Amazon Affiliate Page helps support this site


RxR Sawdust Station
-
Posts
277 -
Joined
-
Last visited
-
Days Won
5
Content Type
Profiles
Forums
Downloads
Gallery
Events
Store
Articles
Blogs
Everything posted by RxR Sawdust Station
-

Axiom Stratus Air Cleaner/Air Filtration....
RxR Sawdust Station replied to RxR Sawdust Station's topic in Power Tools
1) Thank you, that's what I suspected (odd I couldn't find the info anywhere). At this point I am only at the boiled linseed oil and mineral spirits level of experience. Neither of which was on a "woodworking" project. I took what I learned about them and applied them to some old wood handles knives I've had for a very long time and needed some attention. Worked great. 2) Thank you. That explains it perfectly. It did read like it was pulled from somewhere else and dropped in. 3) I agree with you on the opinions on the matter. When I started to reignite my interest in woodworking and after researching the topic I knew I wanted to filter the air. At that time I was not aware of the low air filtration units. I have pondered what you describe - putting a ceiling mounted unit lower to the work being done. I only became aware of it as a consumer product when Powermatic came out with their PM1250 Micro Dust Air Filtration System version. I was intrigued by the concept. I look forward to seeing how you approach the subject! I had not considered removing dust particles in the air prior to applying finish to a project. I haven't gotten that far yet ? Makes perfect sense! Thank you for this information as well! Thank you, Kev! ?, RR -
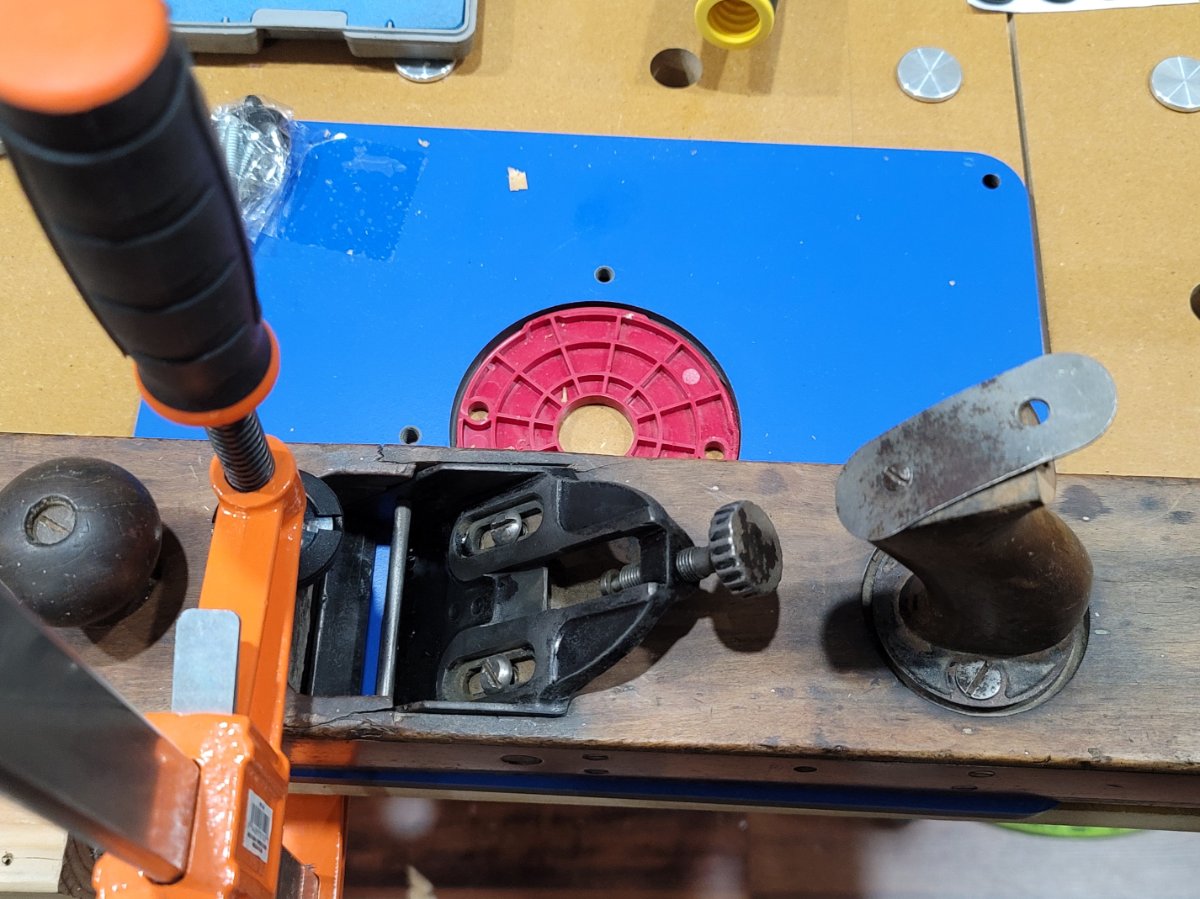
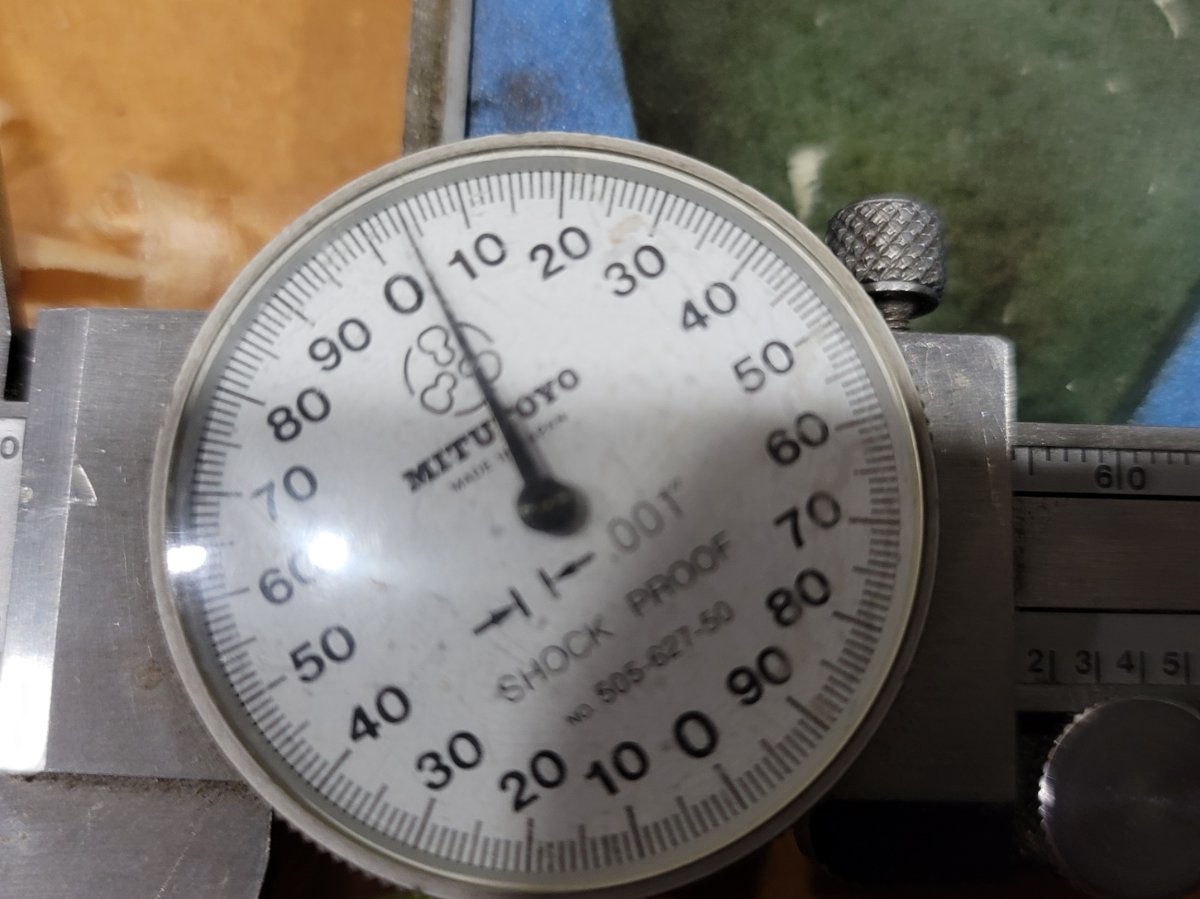
Well, I had not intended to open this bag but, down the rabbit hole I went (I actually have some things I 'need' to do) ?. The self-setting iron assembly was not flat across its width in relation to the sole. I tried and tried to get it to lay flat across the sole. Using the only real reference plane I have (at the moment), a Kreg router plate, I clamped them all together and the same condition remains - its not flat across the sole. It's going to need some attention. I 'might' try something like a router sled setup to mill the sole flat and square to its sides. I also noted the sole rocks from corner-to-corner. The sole needs attention. **on the list ?** ?, RR

-
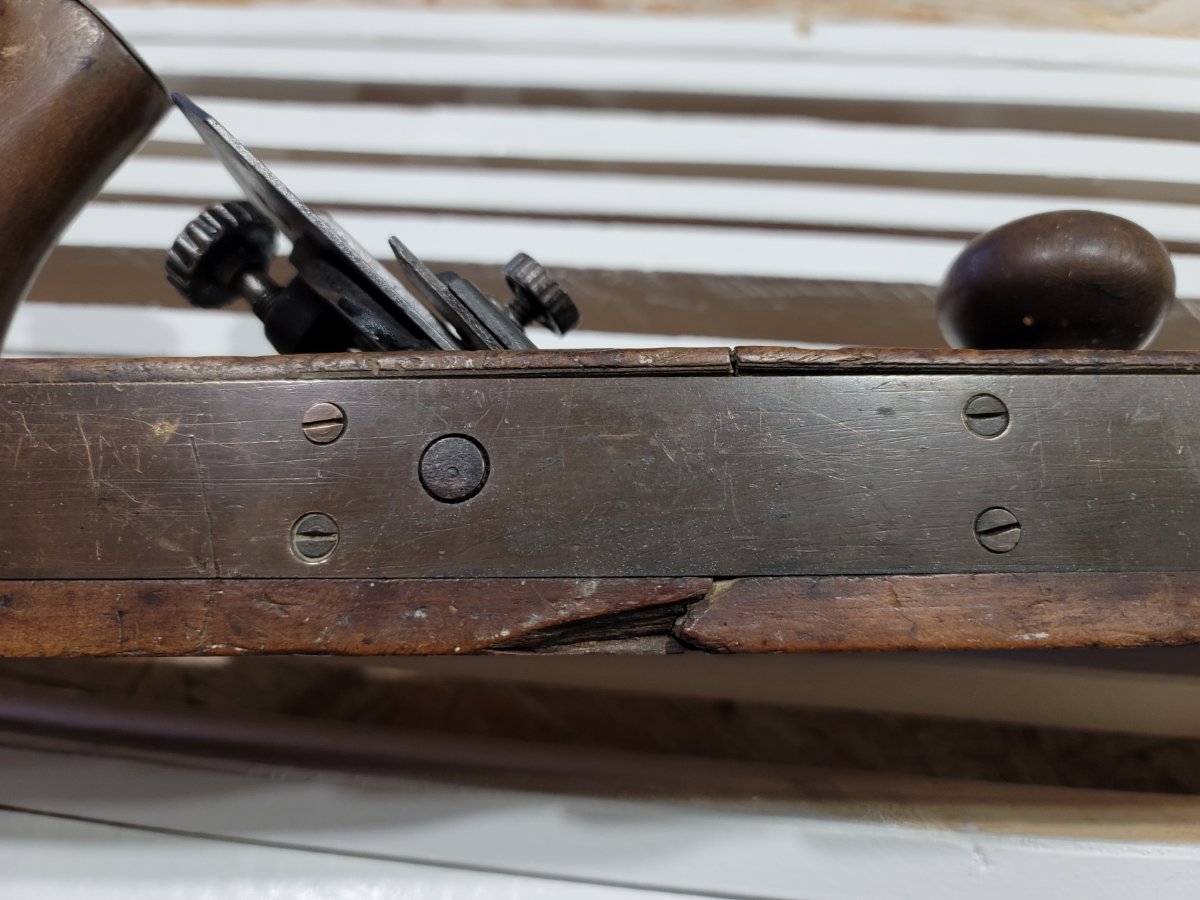
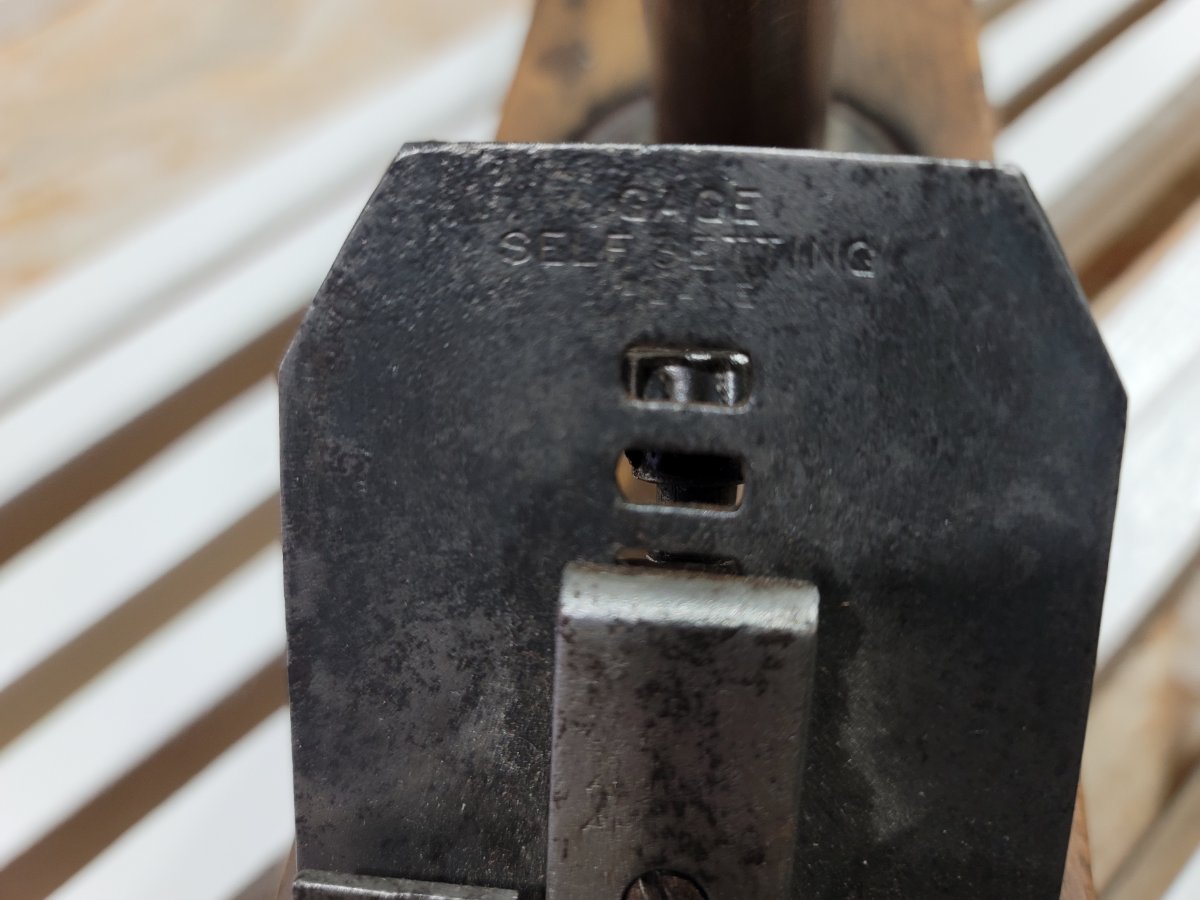
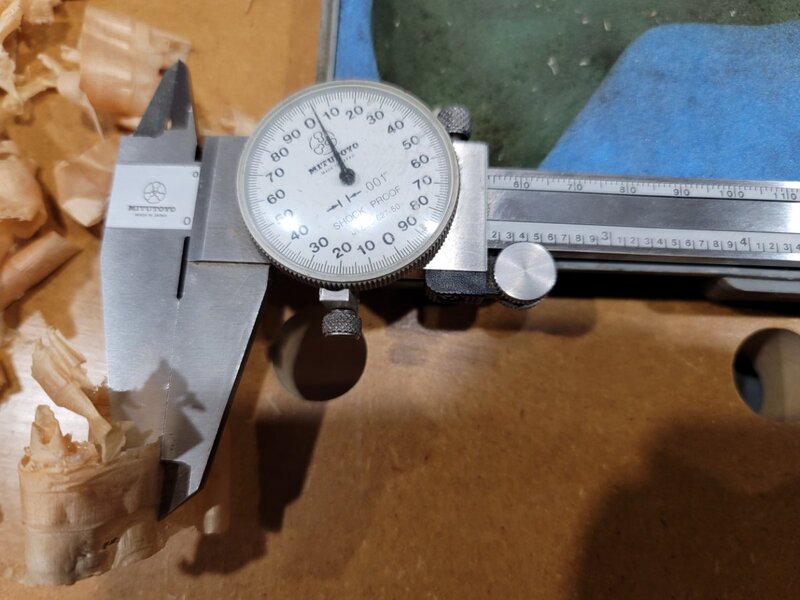
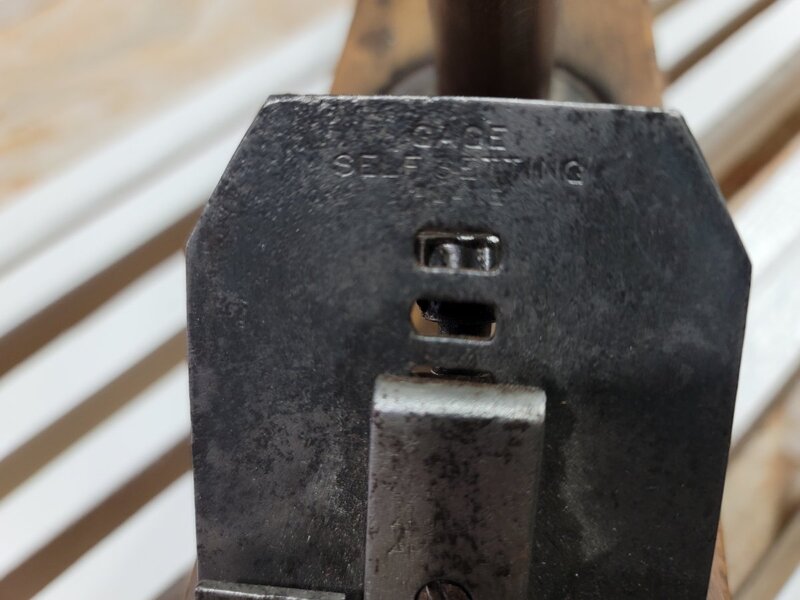
I just did a quick setup and cut (when I say a quick setup - I adjusted the wheel until the iron made contact with the wood I was testing it on) with the Gage Self-Setting Jointer plane and it pulled a .004 shaving without even trying. I wasn't trying to create a thin shaving. It is a bit awkward adjusting the iron though, it's difficult to get my fingers down there to turn the wheel. It seems a bit buried, to this novice's sense of things. The cap iron/chip breaker looks to fit very well. And, to this novice's sense of hand planes, this wooden body hand plane looks to be unique in the way the sole can be flattened separate from the self-setting iron assembly. You can simply back off that assembly by loosening two screws under the cap iron and iron, flatten the sole and bring the iron assembly back to flush with the sole. I have not checked this one for flatness. I will. For those interested, I was of course ?, here is a video showing what I just described. ? tip - Old Sneelock's Workshop. **Oh, my tote is broken exactly how Mr. Sneelock's is ?** ?, RR

-
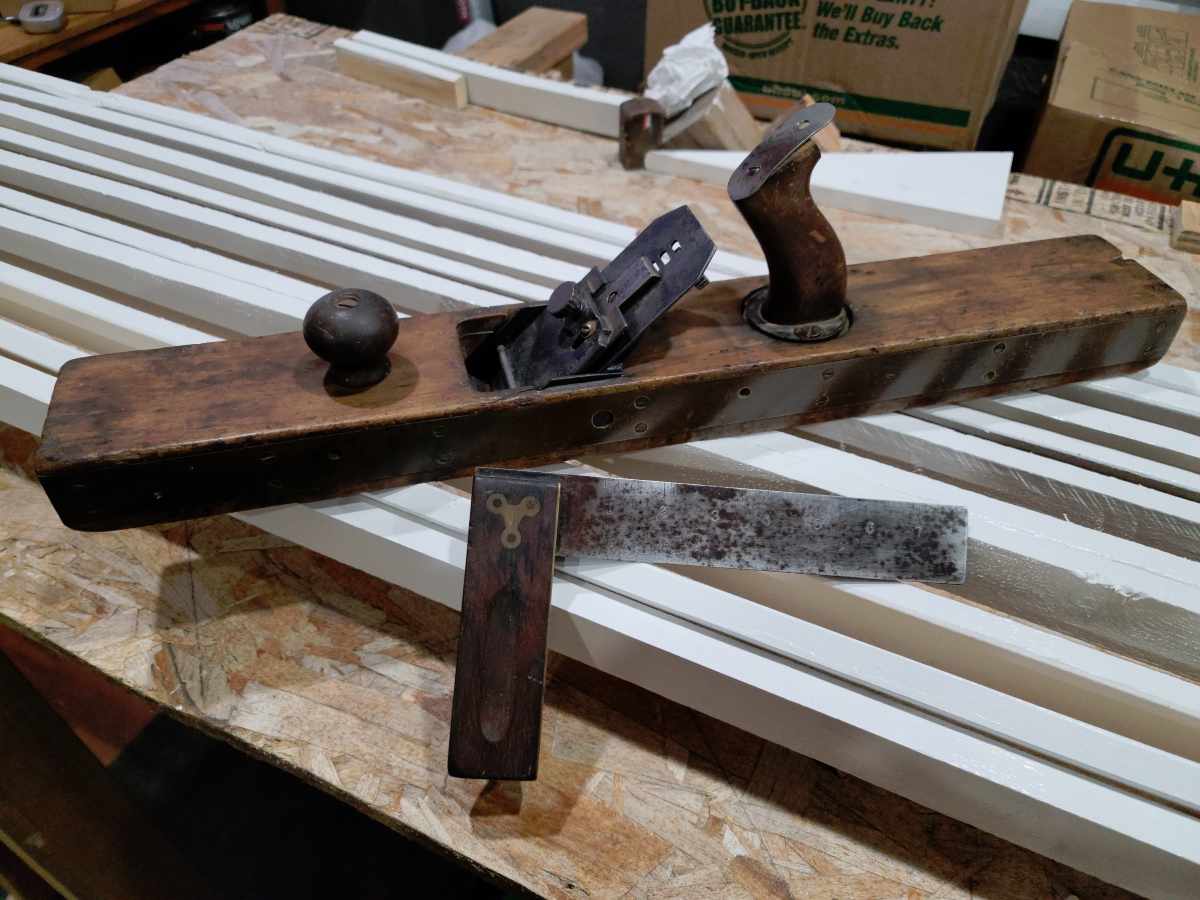
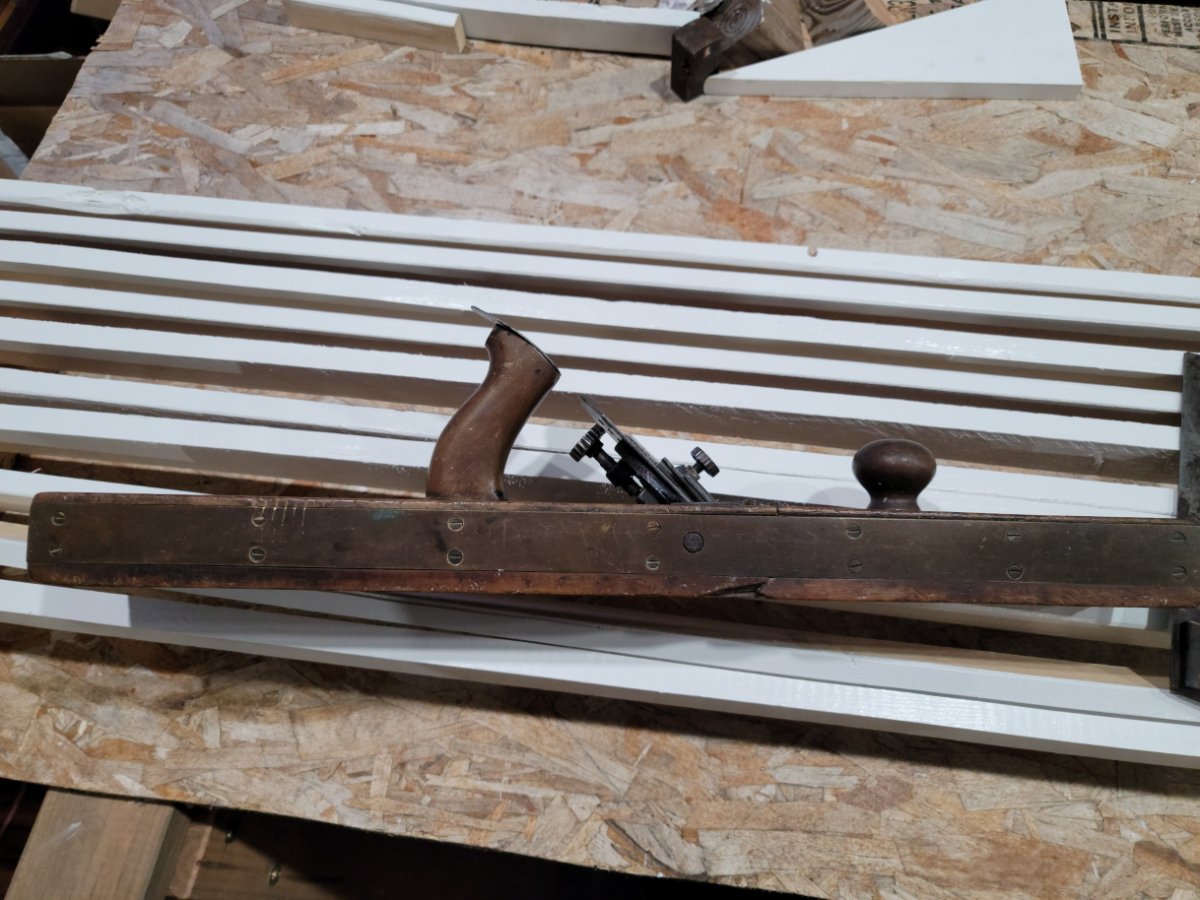
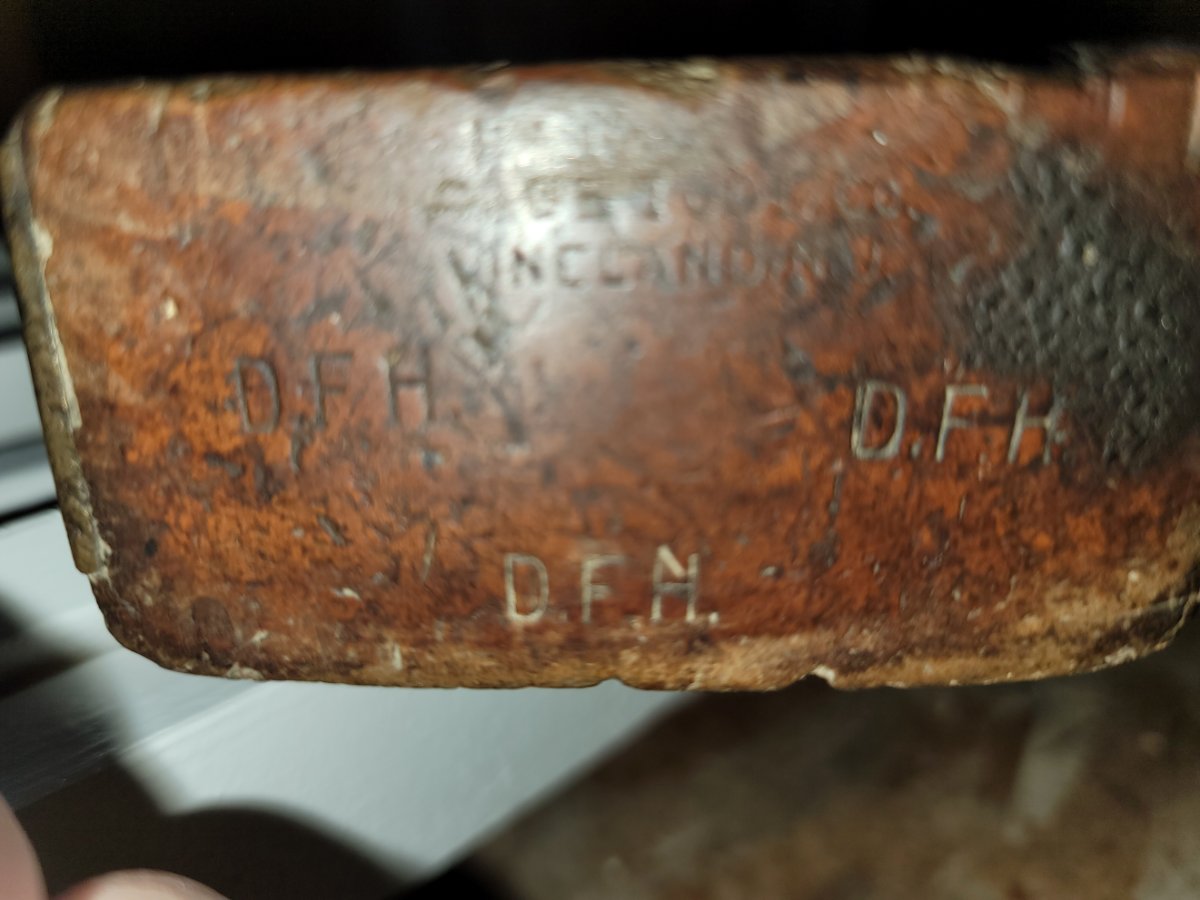
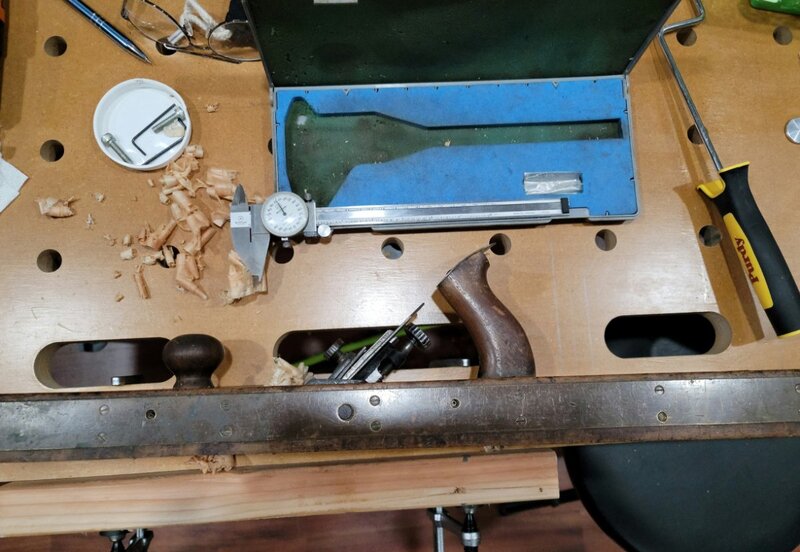
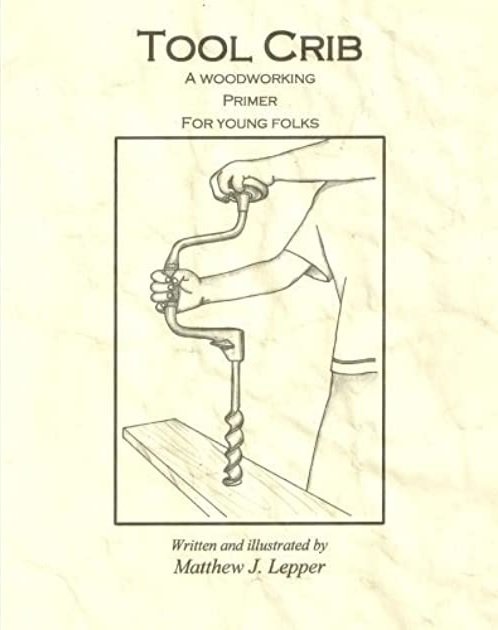
I met and purchased a couple of tools from the Author of Tool Crib: A woodworking primer for young folks - Matthew J. Lepper the other day. I had no idea who he was when I saw some great looking hand planes on Craigslist or Facebook - I don't remember which now. The ad had two hand planes in it, this one or one just like it and a smaller block plane. I had asked the attendant If I could get a discount on the plane I did buy. She called the consignee and coincidentally, he was on his way in to the second hand consignment store (real deal, living what he writes ?) I was in. We happened to start talking about #Woodworking, go figure ?. We both talked about our opinions of the seemingly necessary evil of what we do (what I aspire to do ?) and how we express it on varied social media (Facebook etc.) - I'll tell you my opinion, I'll leave Mr. Lepper to tell you his ? - it's damned evil! A necessary evil, sadly. I asked if he used #YouTube. I was hoping to coax a few names out of him that I 'might' be familiar with. Right off the top he says #StumpyNubs and #MattCremona! Gold, Jerry! ? I've been watching the ads for several days waiting for a scheduled trip to that town so I could go at least look at them hoping to buy at least one of them. They're beautiful (they're on his IG thetoolengraver among many other examples). I thought the engraving was as antique as the tools are - they're that good! He told me he did the engraving. Wow! Man, that guy can carve (engrave)! ???. While I was looking around his booth, not knowing it was his booth at that point, I also saw this Stanley Try Square and this Gage Self-Setting Jointer Plane (24"). The self-setting mechanics intrigued me and that was before Mr. Lepper schooled me ?. Now I know the how's and why's ? While I was shopping but before I knew he was going to be there I had decided on this plane & square for sure and maybe one of the engraved planes. The carved planes were not in my in budget (I went there expecting to spend X $) this trip ?. The Gage jointer plane was labeled "inlaid" brass. At first I thought, that's pretty cool. Then I got to looking closer and it's a repair. The solid brass plates are on both sides of the plane - full length. It is inlaid ??. It gives it that much more character, imo. Above is the markings on the fore-end. I'm assuming D.F.M are the prior owner's initials (I don't know that for sure). Here's the blade markings. I don't know what the Gage plane is worth. It was priced at $45. While it may be worth that, I really don't know...I had to try and negotiate it (that's why I had the attendant on the phone him), because ?. I paid $40 for the plane and $9 for the Try Square...happy to do it! It was within my self imposed budget. And, I do plan to put it to to work. I have a #7 jointer plane but it has a chip broken out of its mouth. I think this one should be more trustworthy than that one. When I got back to the Schoolhouse I checked the Try Square for square. It's not. It tries to be square but fails ? ?. I did try and check it for square at the shop (Freakin' Antiquin'), while I was at the counter negotiating the price. The counter had a rolled front edge so was not suitable to checking for square. I'll try and rehab it at a later date. I have my Brown and Sharpe machinist squares I trust. I hope you find this post as enjoyable as I did living it. Pretty neat story, imo. Buying second hand hand tools from a person that espouses (and Authored a book on) buying second hand hand tools ?? He was an authentically nice fellow, too! ?, RR


-
Hi ?, I'm just wondering IF anyone here is using the Axiom Stratus Air Cleaner/Air Filtration or know anyone that is? https://www.axiomstratus.com/shop/ As I've mentioned, I will be living in my Woodshop (at least for a while. hopefully, just for a while) ?. As I've mentioned, I'm taking every practical precaution as I practically can. I've sold one my worst dust offenders, my table saw, and replaced it with what is purported to be the best wood cutting, dust collecting system I'm aware of (new to this Woodworking game in the 21st Century), the Festool system. I just ordered a general purpose dust collection adapter kit for my miter saw to use with with Festool gear. I used my miter saw the other day and noticed (I was pretty sure of before using it) that it's not compatible with the Festool dust extractor. We'll see how that works out. Now, at present, I have no Air Filtration System....and, now, I'm glad I haven't bought one at this point. I also, at this point have not been cutting wood to the degree I intend to. The ceilings in this 1924 brick schoolhouse are approximately 11.5 feet off the floor (that may change an inch or two one way or the other once I figure out what it is going to take to close those gaps). Therefore, it is not suggested a person even put their air filtration up that high for a number of reasons - just one being regular maintenance of air filtration systems. I just watched a @StumpyNubs video regarding the Axiom Stratus and for all the reasons he, and others, have stated, ceiling mounted air filtration systems are not the best solution for situations such as mine. One other reason he and others have mentioned is that ceiling mounted air filtration drags the dust right past your face as it attempts to get to the air filtration system. The Axiom Stratus pulls the dust down away from the woodworkers face - seems a no-brainer. So, I'm looking for experiences or opinions on this system. I have to buy something. I still have to save a few more pennies to purchase any air filtration system. In the interim, I've been doing my due diligence in researching my options. The price difference between a ceiling mounted unit and the Stratus mobile unit are negligible in the overall scheme of things. One other question I have directly related to the Axiom Stratus is what is the Charcoal Filter for? What shop problem is it intended to address? Is it for neutralizing chemicals - paints or solvents or welding fumes? I know what charcoal filters are generally used for. I have looked for an answer to that question and I don't seem to find it on my own. **One last thing: I have looked at several of these threads and noticed a curious method of 'continuation' that I don't have a firm grasp on. It seems to me, without knowing or understanding, a member starts a thread then comes back and adds to it with information gathered from somewhere else. What is that all about? (now that I needed to reference what I'm trying to describe - the precise wording that is being used - it seems this server migration has not restored those threads that included them)** Thanks in advance for any assistance or guidance or even just looking in on the thread! ?, RR

-
That's a Roger! Thank you! Regards, RR
-
We can post into threads and create threads without their being lost (as I read mentioned)? **New guy who's not going anywhere** Regards, RR
-
Thanks, Bushwacked!
-
*poem - Doh! ?
-
Veterans Day 2020 - Remember, It Is The Warfighter. Be thankful. It is the Warfighter, not the minister Who has given us freedom of religion. It is the Warfighter, not the reporter Who has given us freedom of press. It is the Warfighter, not the poet Who has given us freedom of speech. It is the Warfighter, not the campus organizer Who has given us freedom to protest. It is the Warfighter, not the lawyer Who has given us the right to a fair trial. It is the Warfighter, not the politician Who has given us the right to vote. It is the Warfighter who salutes the flag, Who serves beneath the flag, And whose coffin is draped by the flag, Who allows the protester to burn the flag. RRSJ adaptation of Charles M. Province peom. A heartfelt salute to those who serve and those who support them. ?, RR
-
Happy Marine Corps 245th Birthday?
RxR Sawdust Station replied to RxR Sawdust Station's topic in General Discussion
*tips ?* Thank you, T. It was my honor to serve. -
Hi ?, Are we allowed to recognize my Marine Corps 245th Birthday? I bought one of these in honor of the day... The best design I think I've ever seen. Happy Marine Corps 245th Birthday, everyone! You're welcome! ?? For the record, I don't play the "my branch is better than your branch" game. I love all of our Warfighters! Ours and our Allies. I can't thank them enough, even though I try with every service member or veteran I meet. **I've been doing it since well before 9/11** ?, RR

-
Thanks, Coop...that's nice of you to say! I certainly will, thank you! ?, RR
-
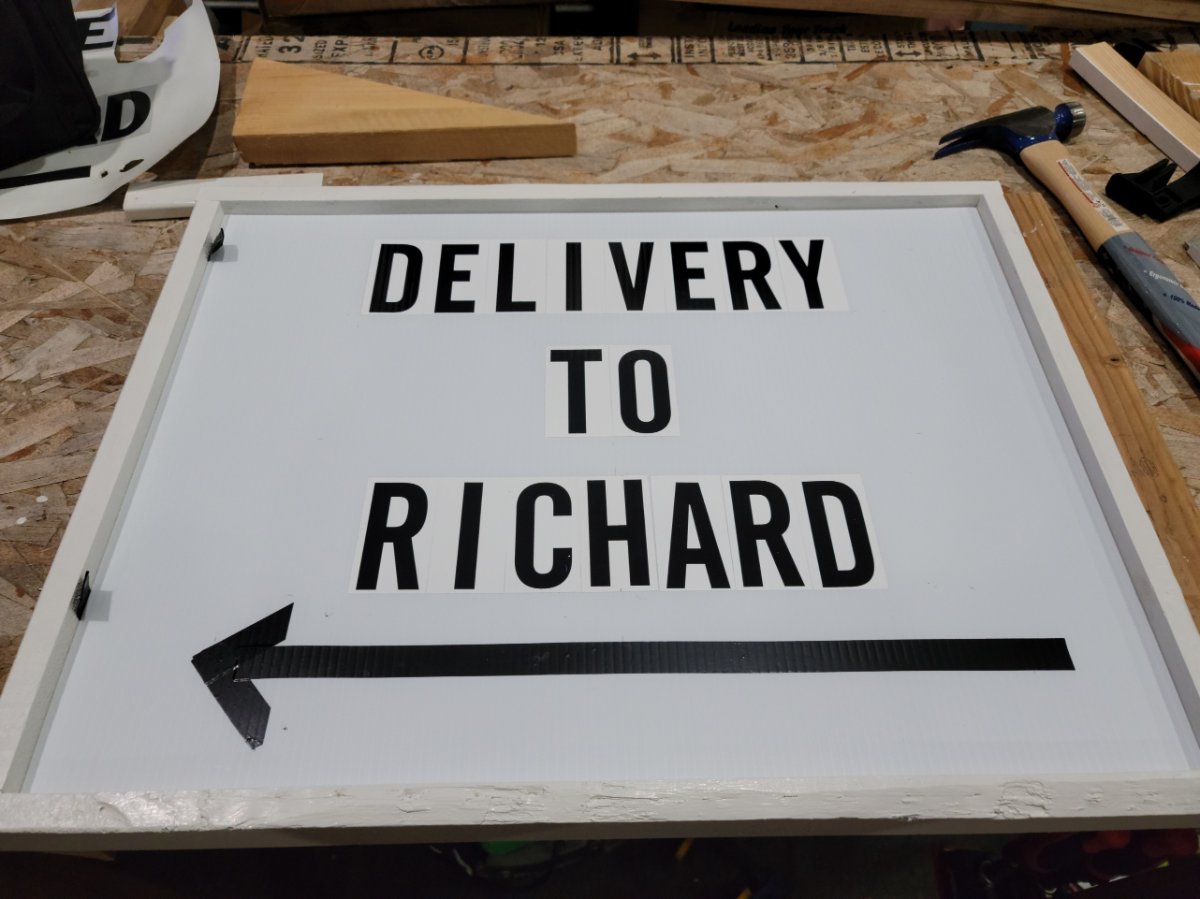
Well, this is done. I can move on to the other non-woodworking tasks that need done around here ? ?. I left the lifting tabs on it because I haven't adhered the sign to the sign board. I have multiple tube of adhesives here but none are opened tubes. I don't want to open a tube just for 3 or 4 dabs of adhesive. I'll try and pick up a small squeeze tube of something. I do have an open squeeze tube of Shoe Goo I'm thinking about trying. I think it would work in this instance. I found some 12" red arrows I'm thinking about using. That's the direction I'm now leaning toward. ?, RR

-
Ummm, could we all contribute to the collage, Coop? I have a great crotch shot (shielded crotch shot - I'm not an animal! ? ) from my recent CTO PCI (aggressive angiogram type of technique/procedure). It's got great rich colors - mostly red (or various shades of red - dried and not so dried ?). Would that fit your intended design palette? *color wheel for all you whippersnappers!* Good luck on the build - both the door and the construction of its intended installation location! ?. RR
-
Not nearly enough ?s here! Very well done, Coop! It's beautiful! *for a crippled!* ? **I built my saw horses 4 inches taller than the plans called for for that very reason. We are co-planer crippleds! ?** Also, very well done to the rest on the assists and information and the encouragement ?! Solid! ?, RR
-
Every post and comment deserved a ?. I ran out ? Well done, T and commenters! (oh, I own a Kreg Pocket Hole Jig, too! ? I only came across it the other day. It had been MIA for a while now. And, I ordered and just received today 3 new packs of #2 Kreg Square Drives (6 and 3 inch) ? They have their place in any shop and home ?) ?, RR
-
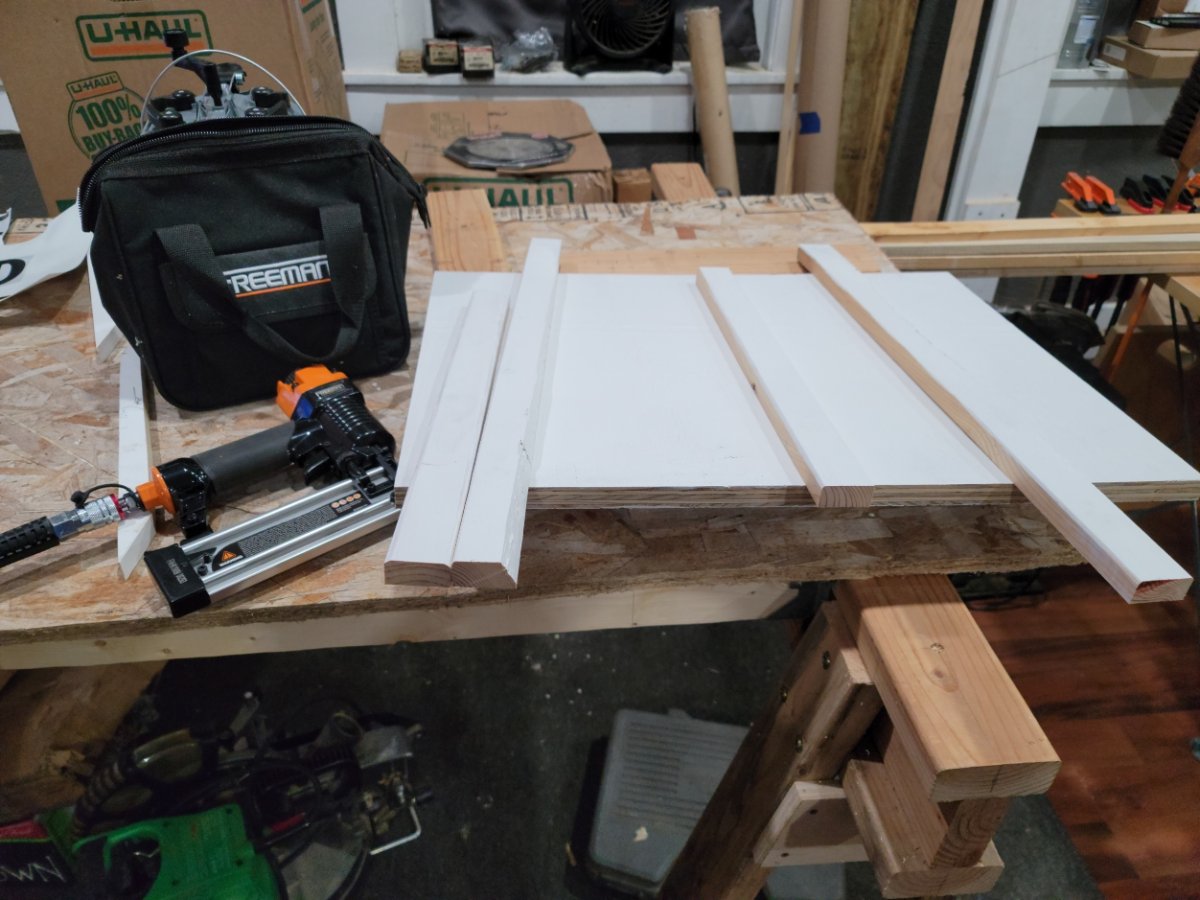
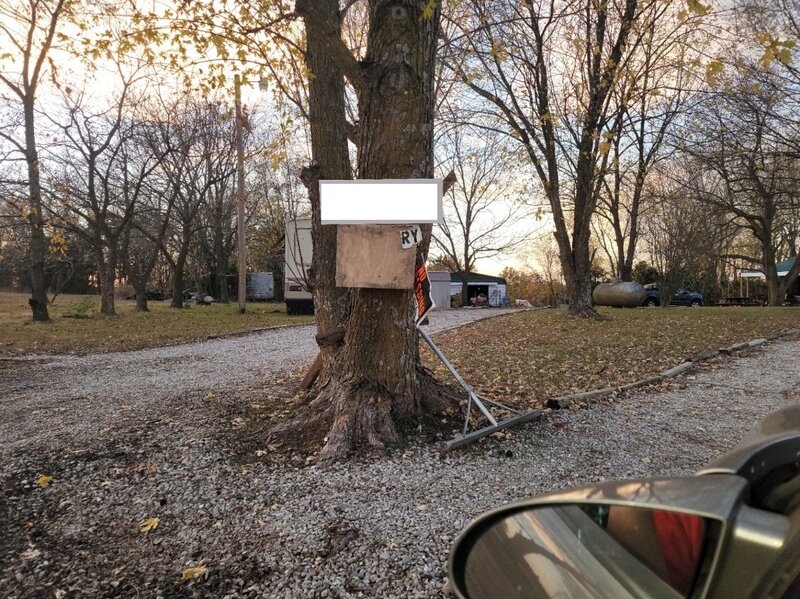
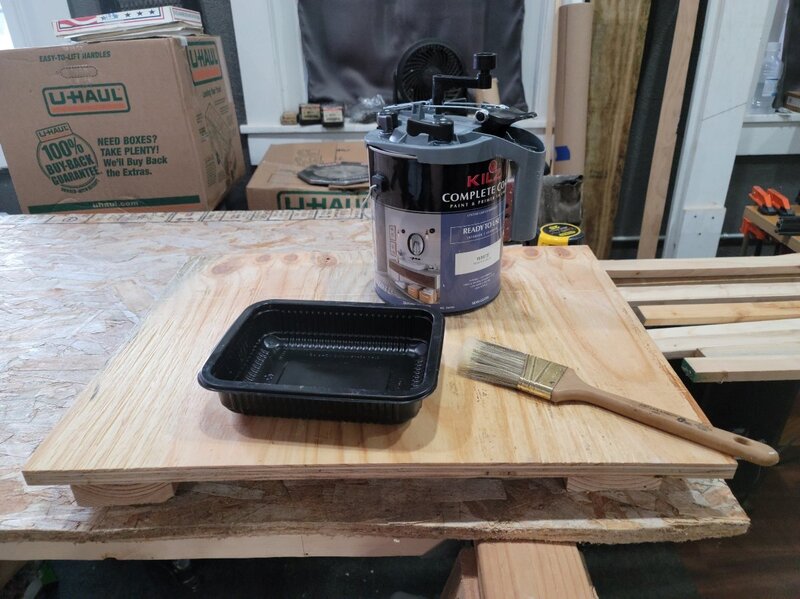
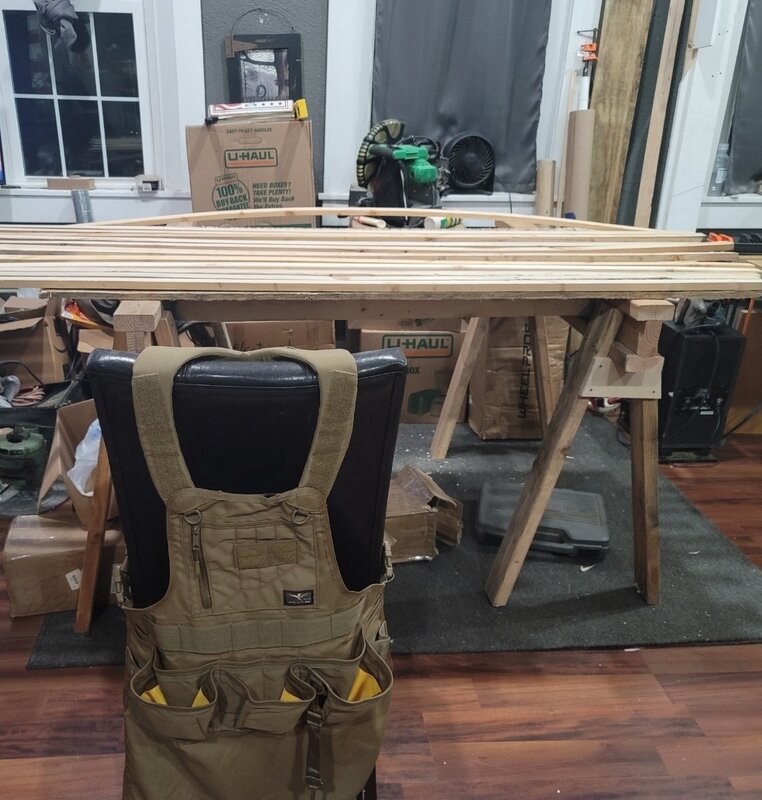
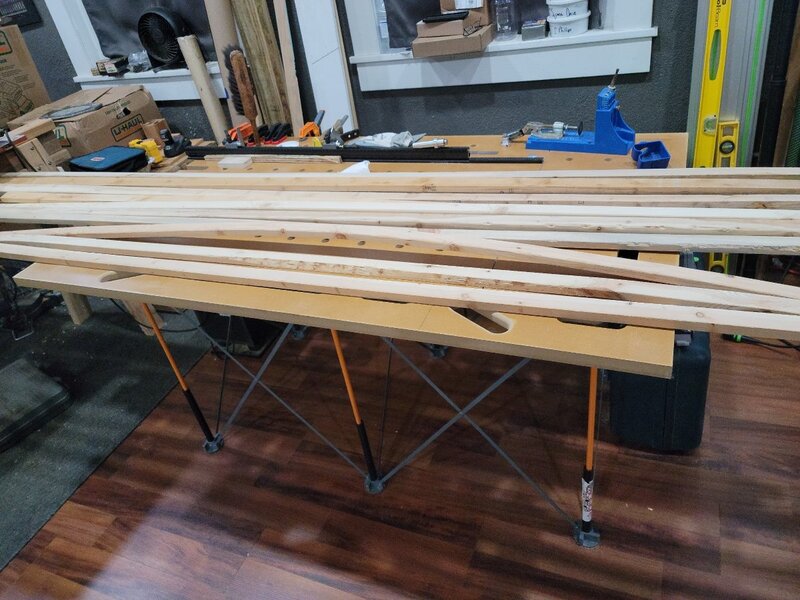
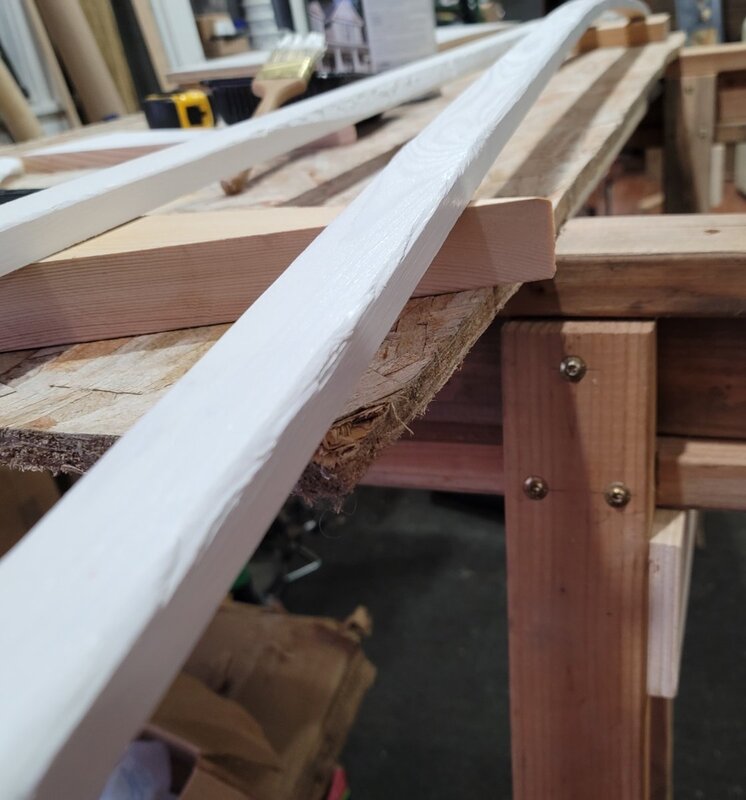
Wonky Delivery! ? I started on the window insulation trim and this task jumped up on the priority list. I realize it isn't much but, I have to keep the landlord happy ?. A while back, when I first started getting deliveries here, it was suggested I devise a way that my deliveries arrive at my domicile and not the main house. I threw something together. It's lasted more than a year even though nothing about it was protected. This one is different. One thing is the same, they were both made from horribly disfigured wood. This sign board (3/4" plywood) is badly warped. The 1x2 trim is even worse. In the pictures I tried to show these two pieces of trim but the form of each doesn't really come across in pictures. Well, the one is obvious. The other is less so but it has huge hunks removed from it...like forklift fork damage. I painted all sides on this material, the edge of the plywood and trim after gluing. At least two coats. Oh, that #Rockler #MixingMate has been on that can of paint for 6+ months and it has maintained a viable product - the paint is still good. A few minutes spinning the built-in mixing blade and it looked as good as it did when it was new. This was a test of the product. It has passed the test thus far. I would certainly purchase another one if (when) the need arises. I still have to mount the board then adhere the poster board (that plastic sign material they use for political signs and such - not sure what it is called). The first image is where the old sign was (and where my brother's address is posted that I edited out), a tree where the driveway forks. The material and the MixingMate. Then the wonky trim. Then the wonky trim cut to length and glued and pin nailed in place. Then laying out the letters and adhering them in place. I haven't decided how I'm going to attach the poster board (for lack of another term), but I think I'm going to use a few dabs of silicone sealant in case it needs to be replaced...which I don't anticipate. Even though the materials used here were less than desirable in most situations, this assemblage is 100% improved over the first one! ? I used tape tabs on the edge of the poster board for a test fit and still be able to remove it. I want to mount the new sign board to the tree, then attach the poster board to it. *if and when I find a manufactured arrow I'll replace this electric tape arrow I made* Make it a great week, folks! On a final note; I'm organizing a material buy and transportation of the fascia wood and thinking about buying a "Bakers Scaffold" for working on the ceiling trim (IF I can find an amazing deal on Craigslist or Facebook (IF I remain on FB, that is! ? )) (unless I can come up with some other way in between that time). ?, RR


-
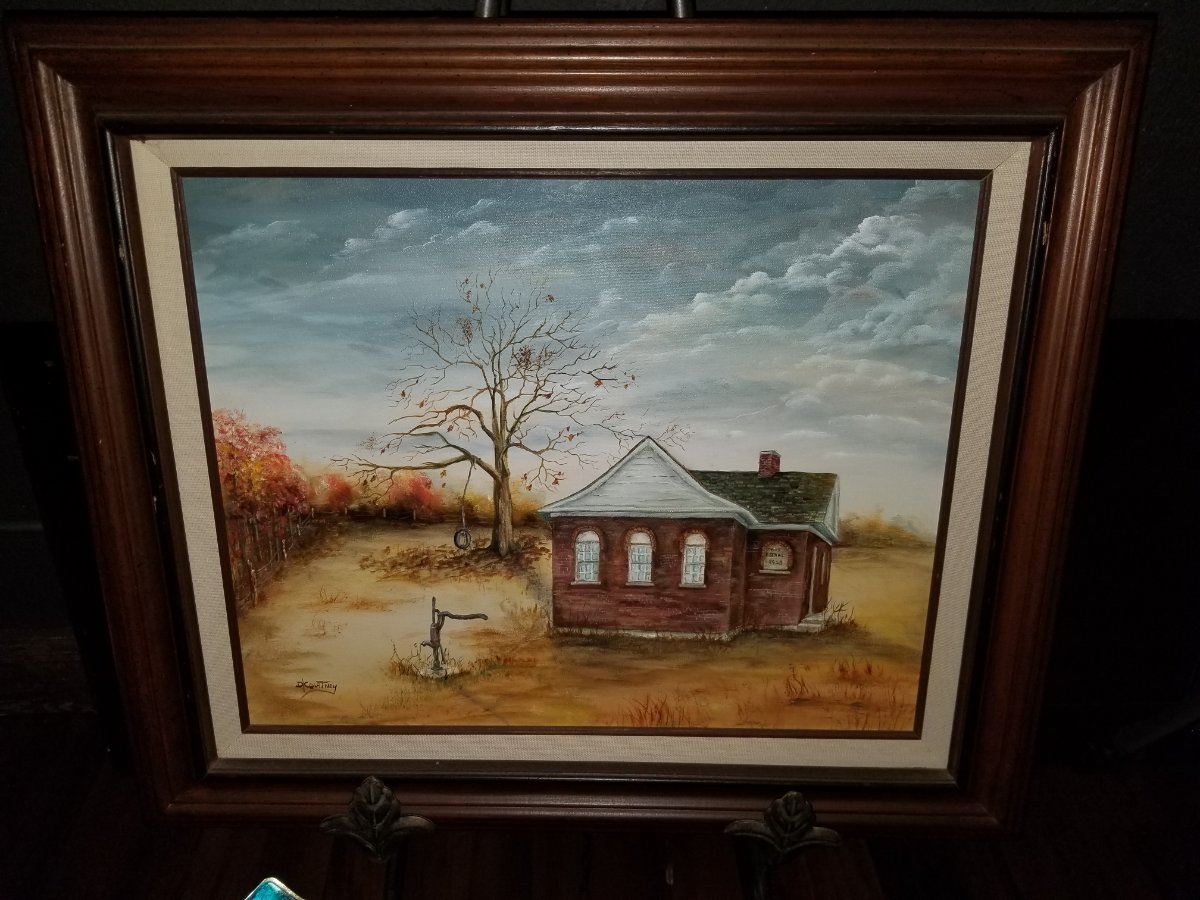
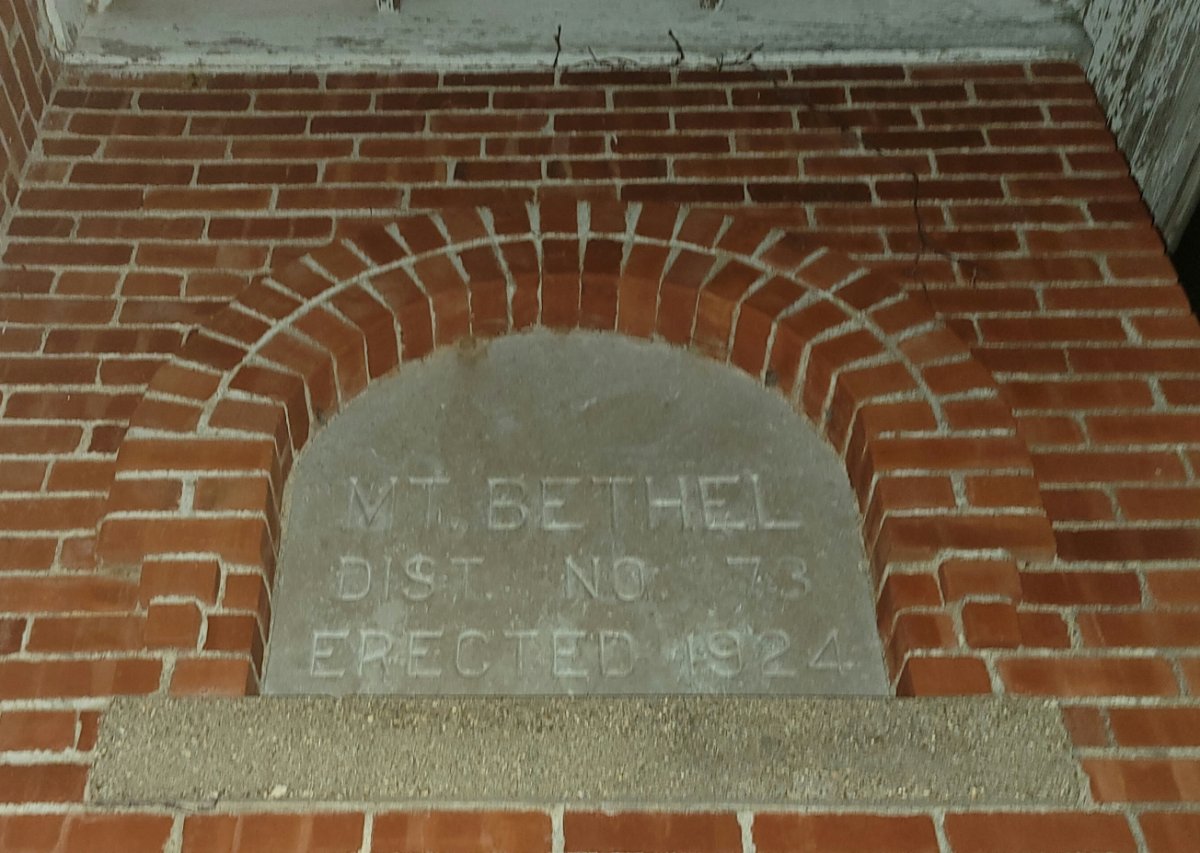
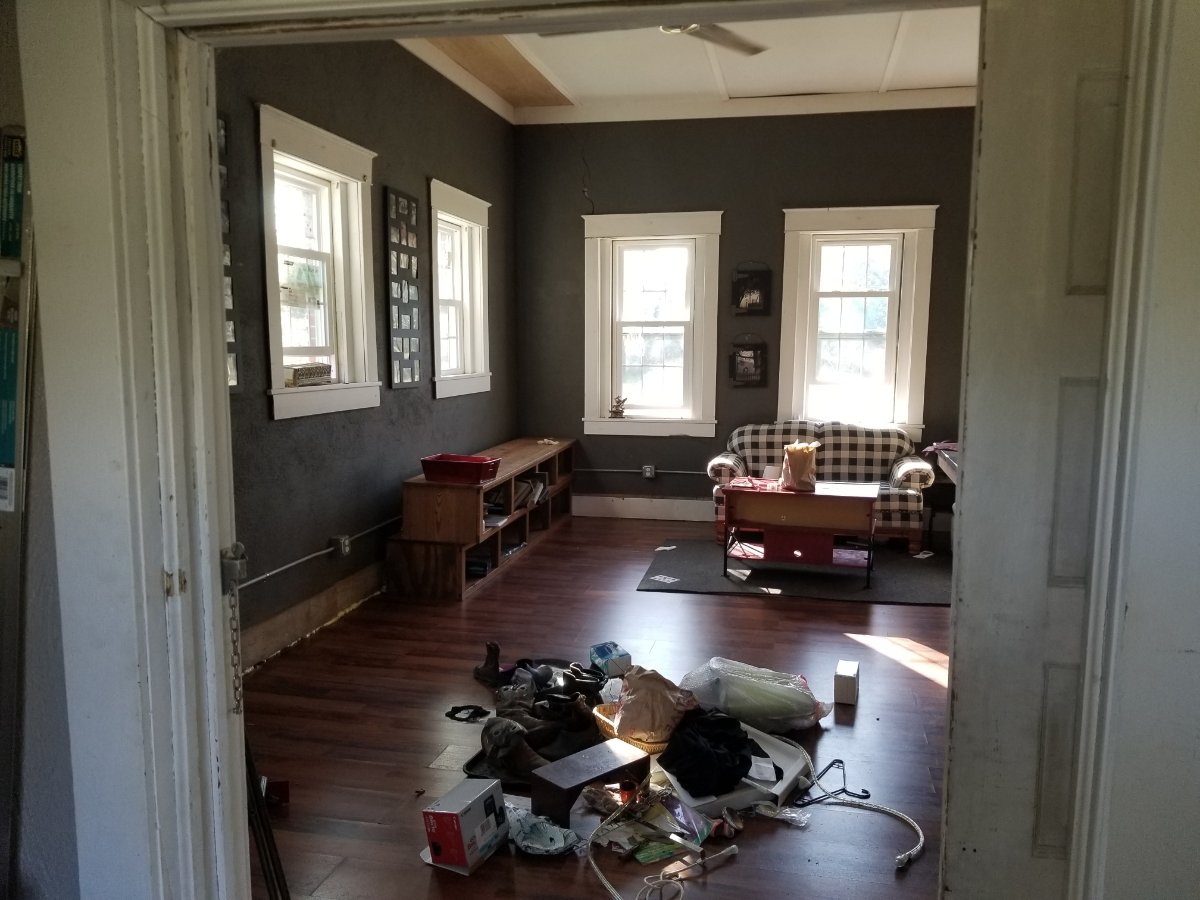
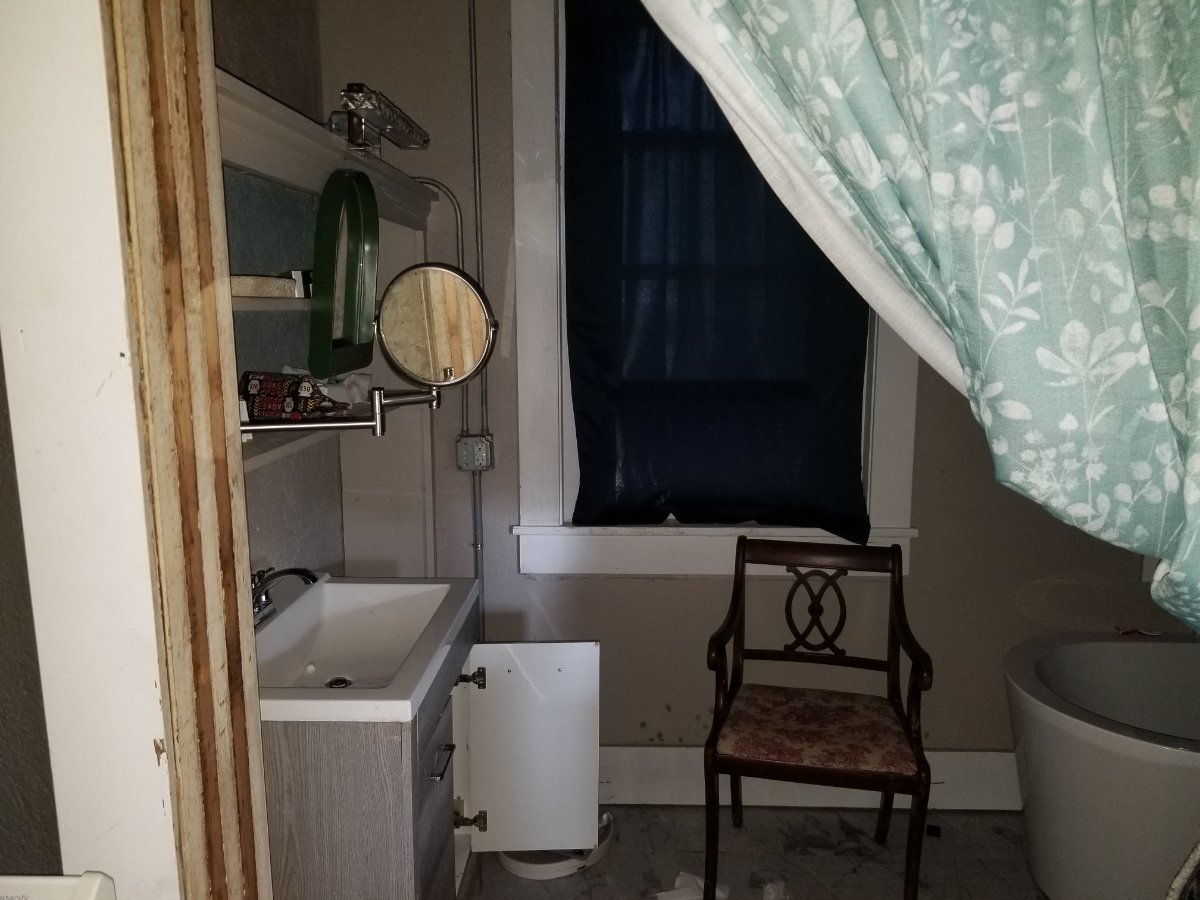
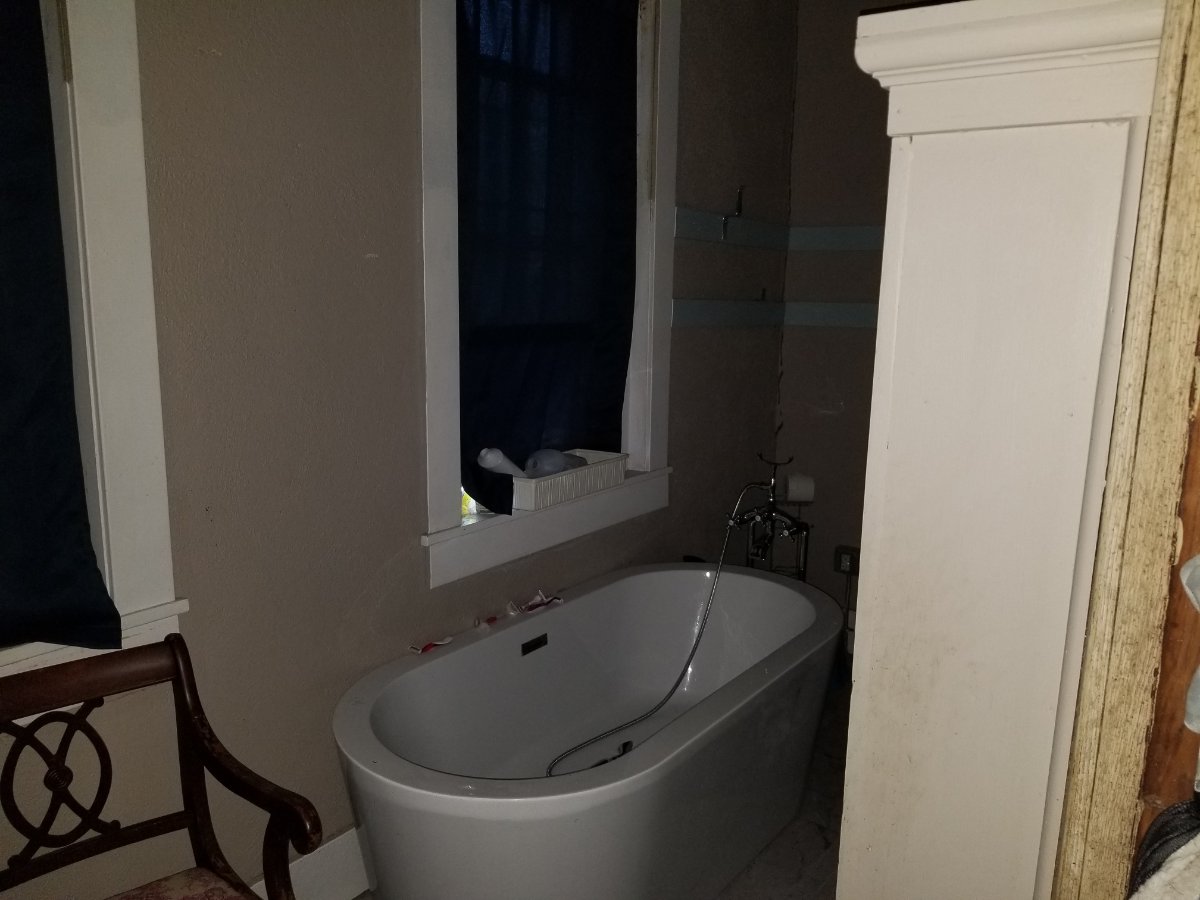
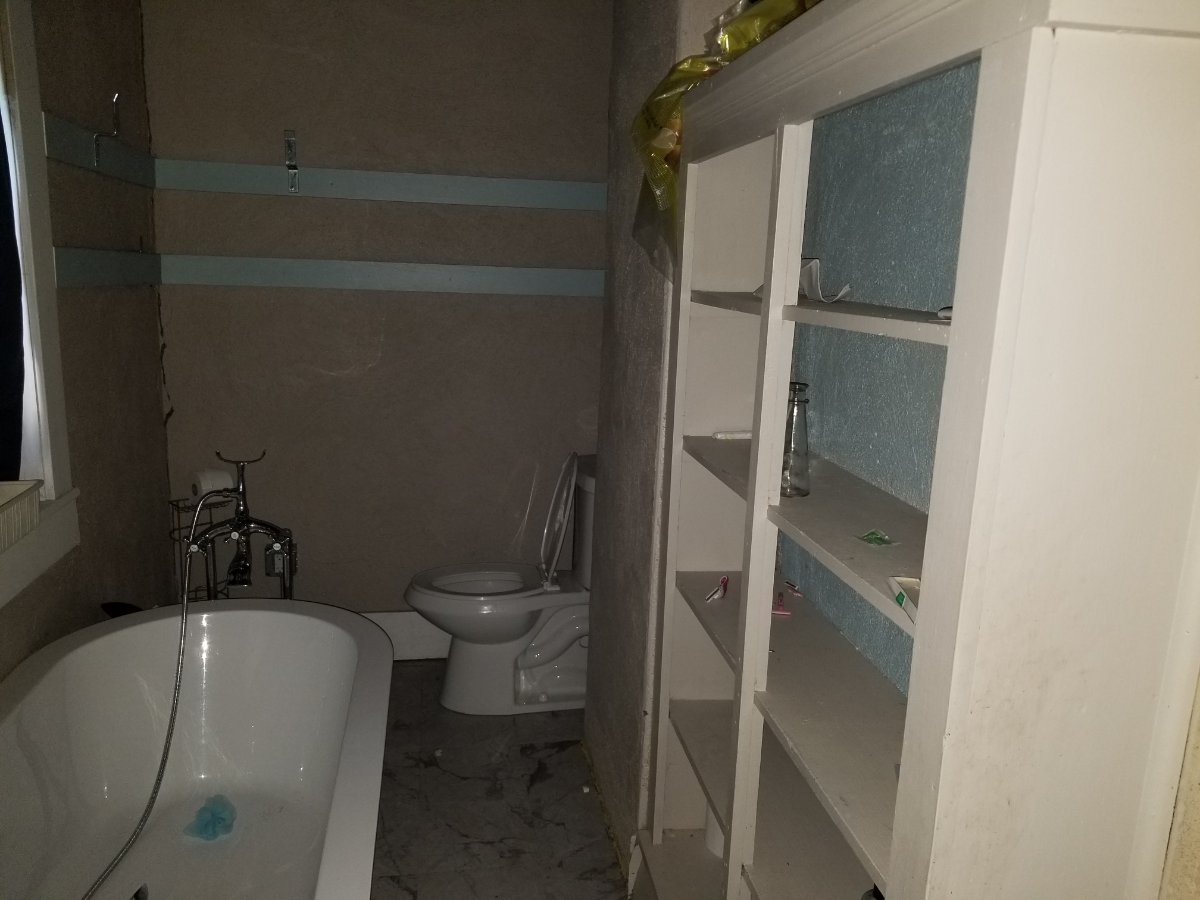
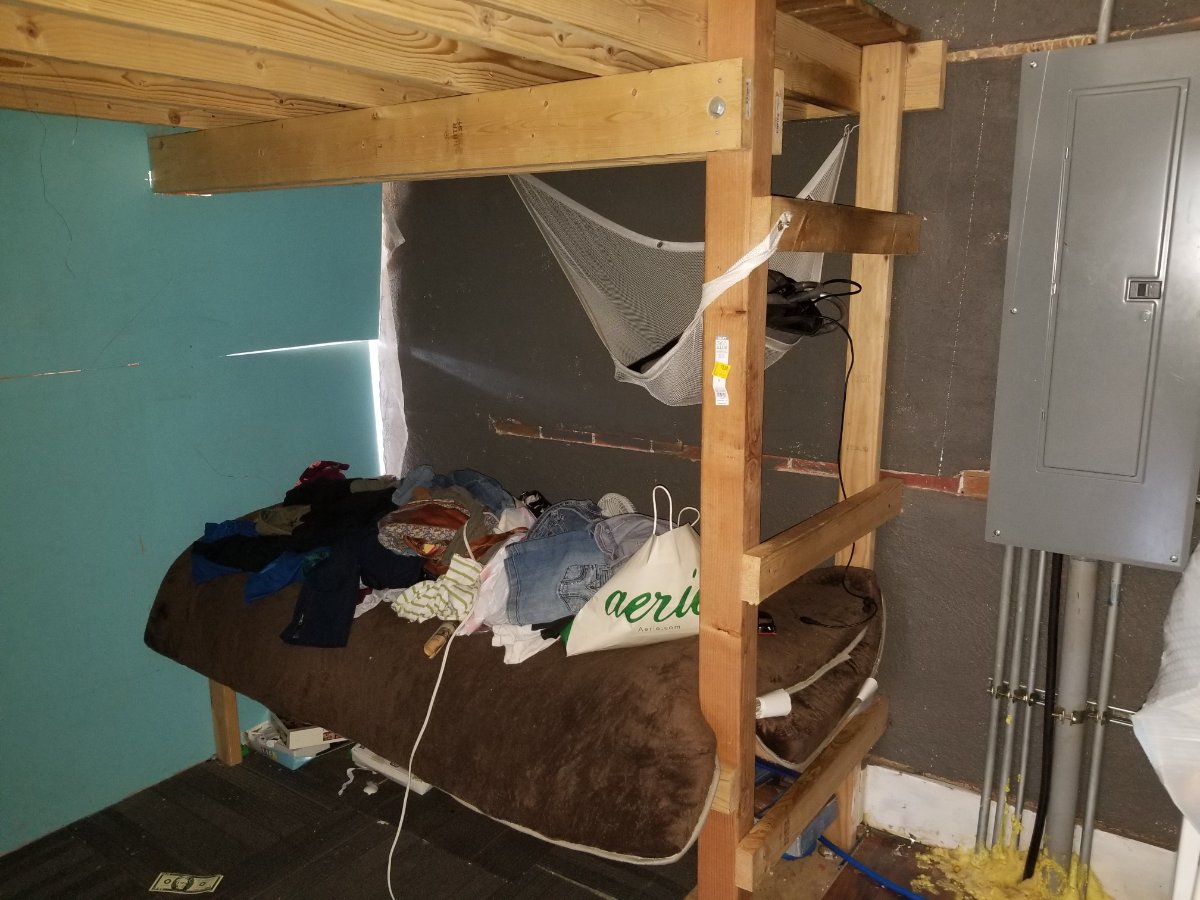
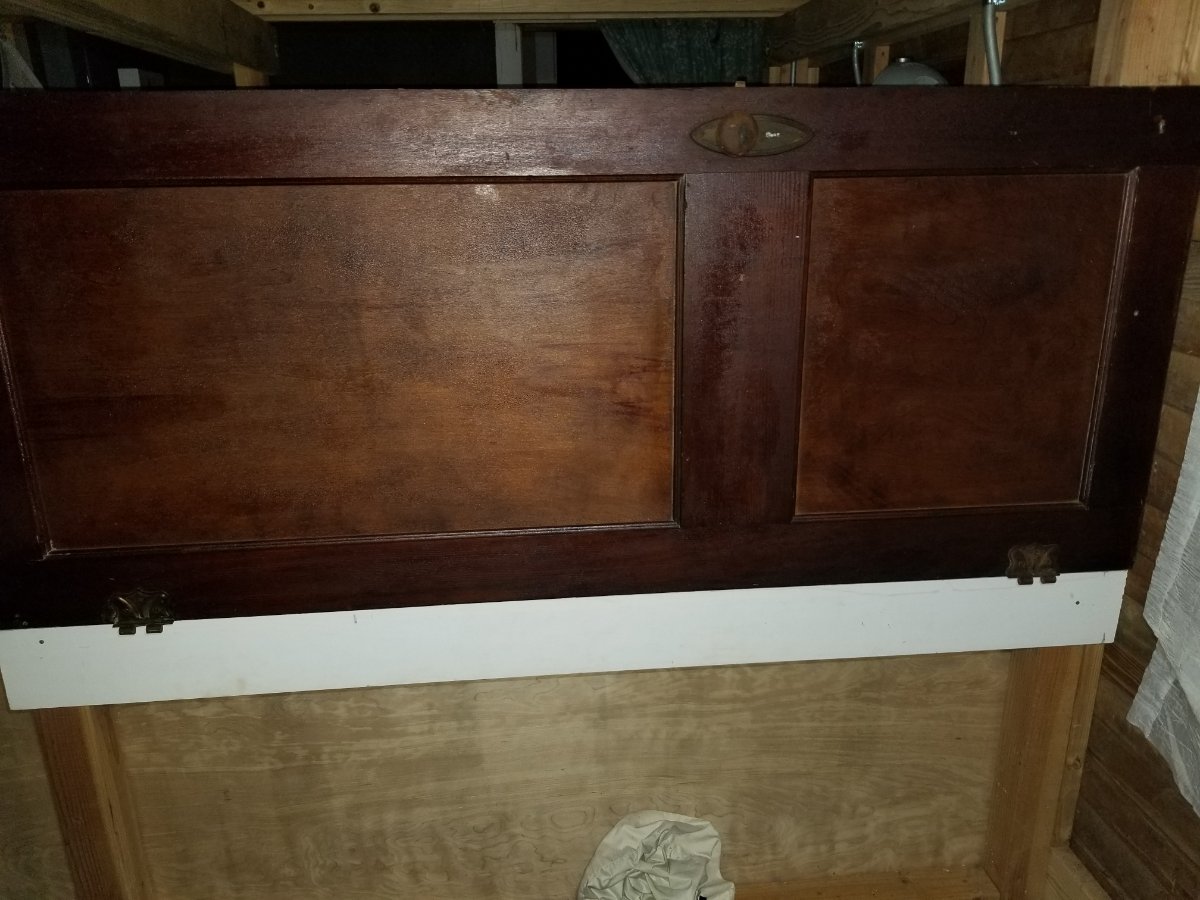
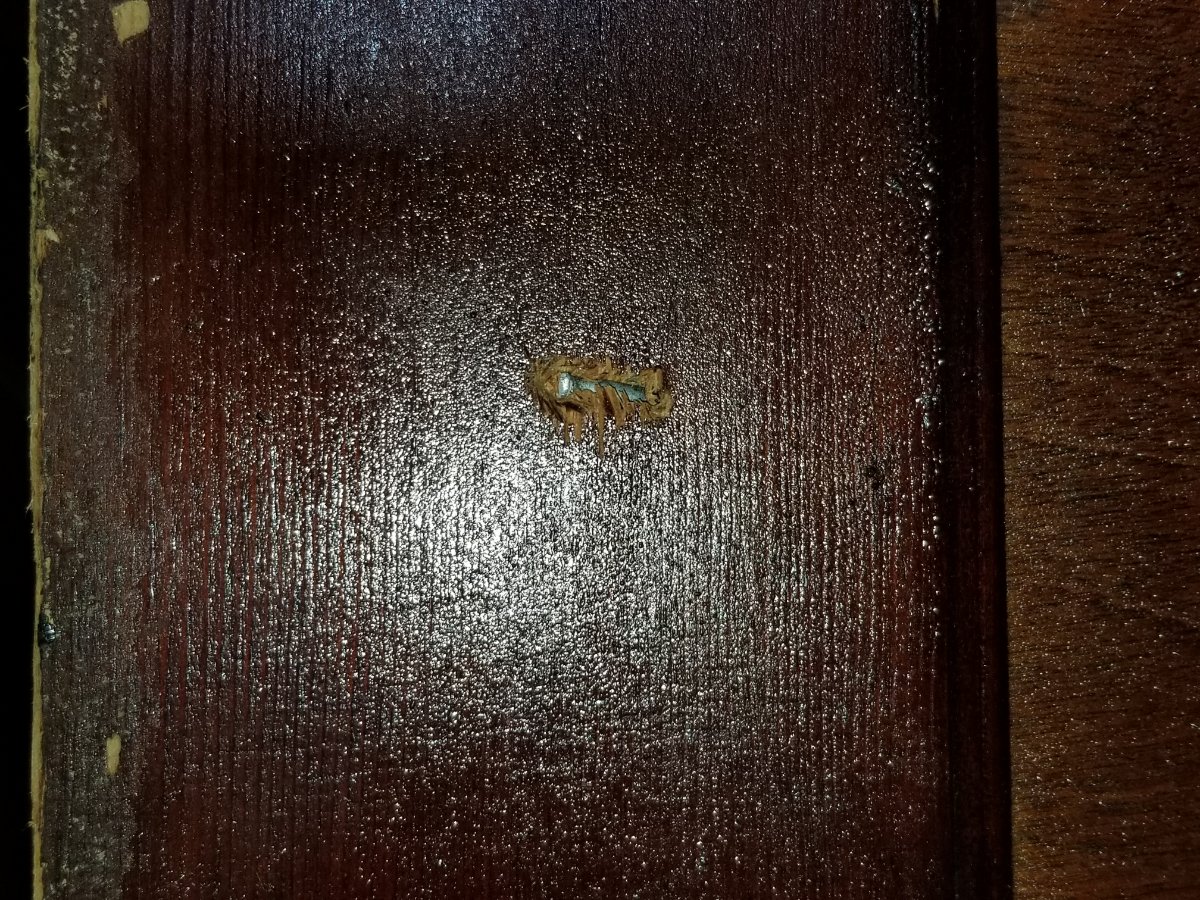
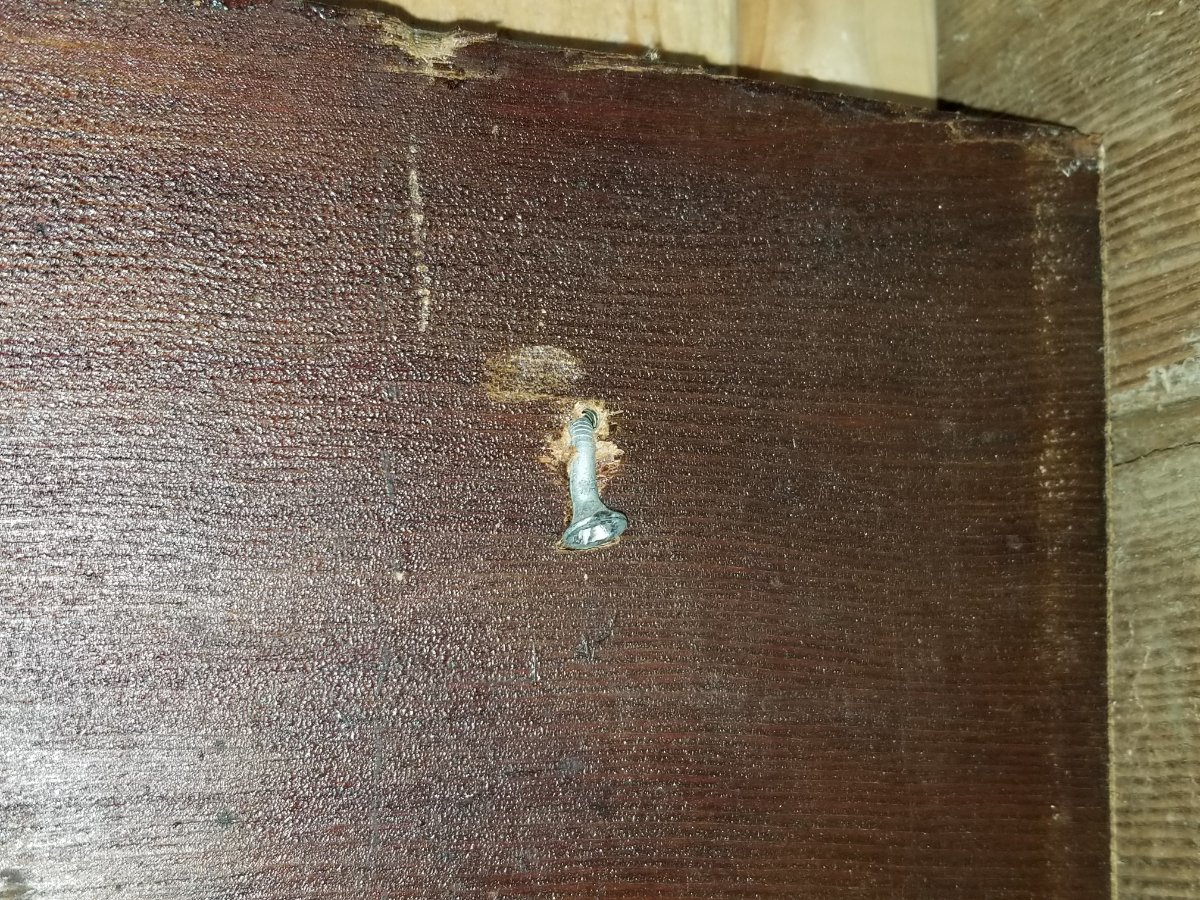
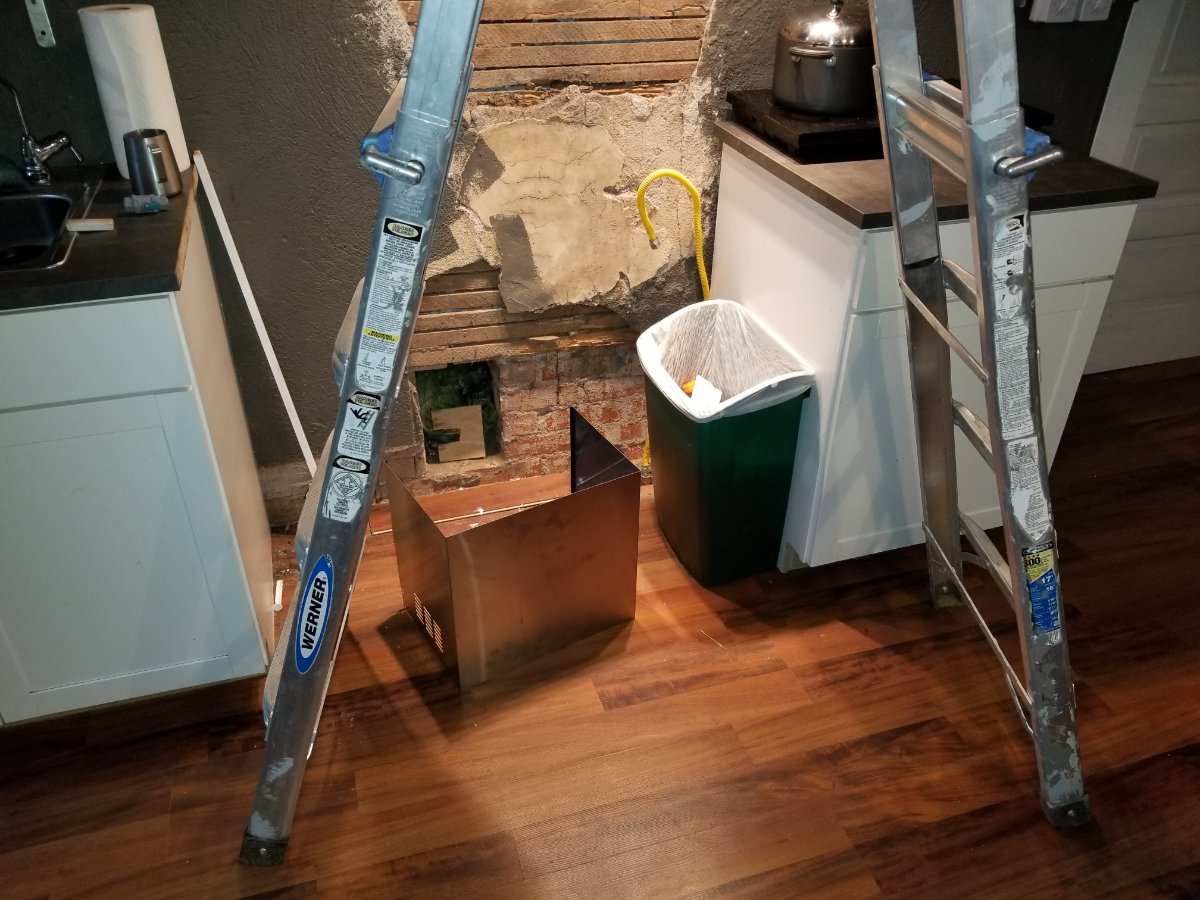
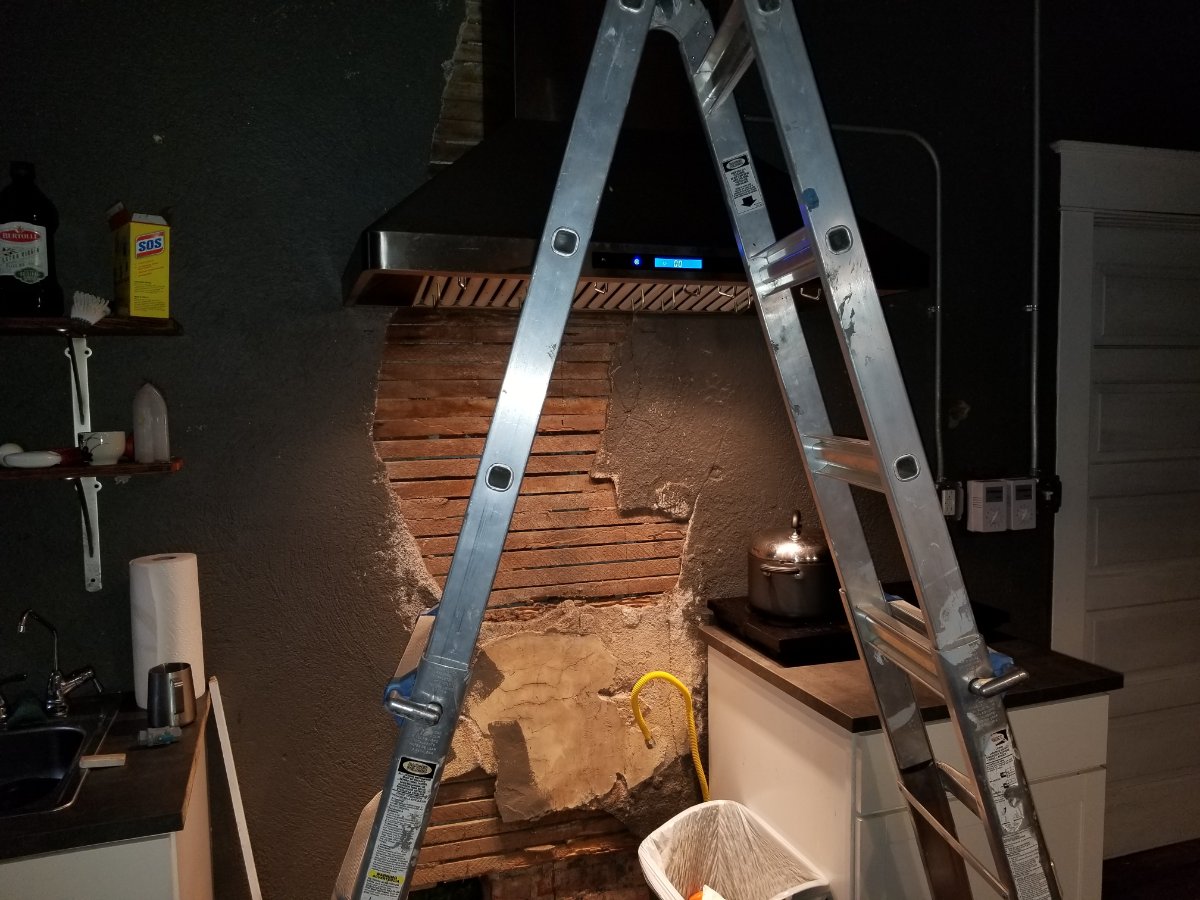
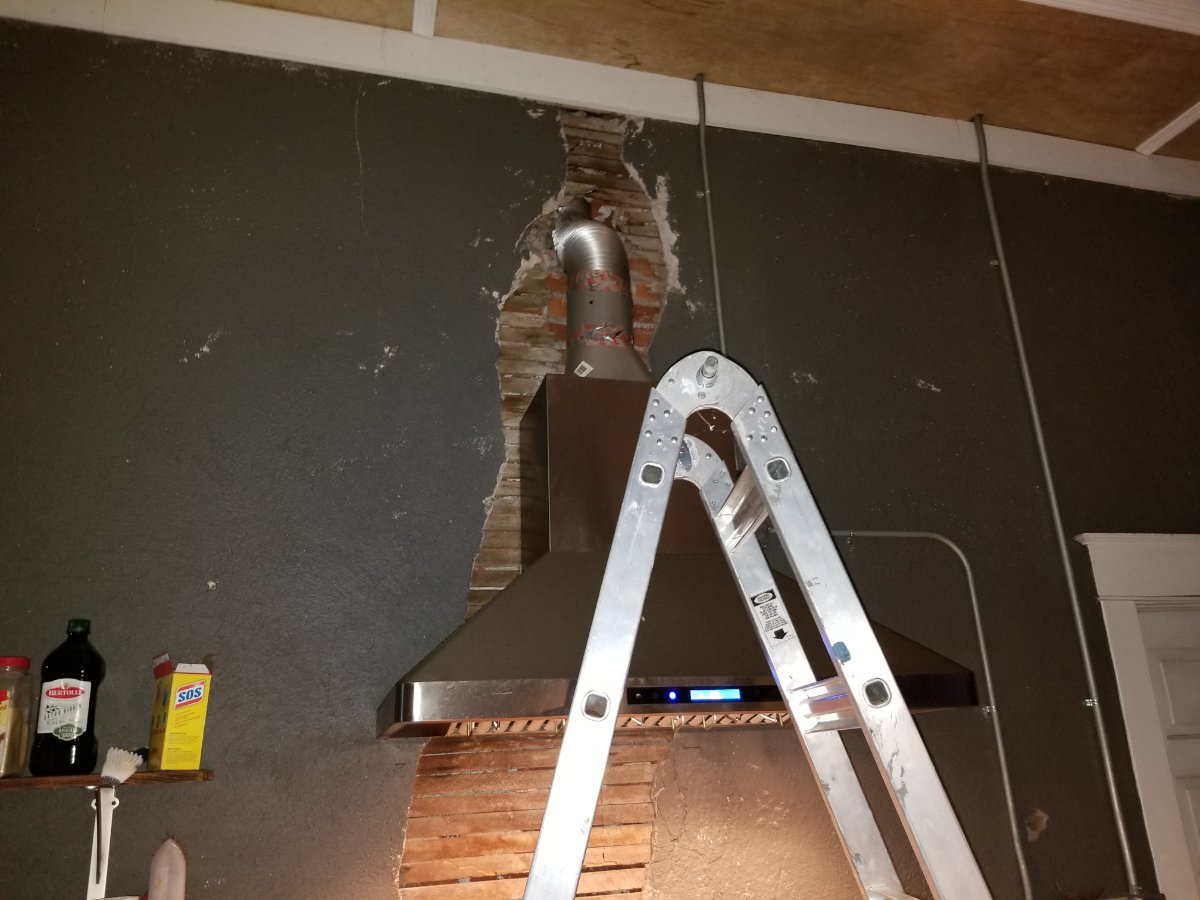
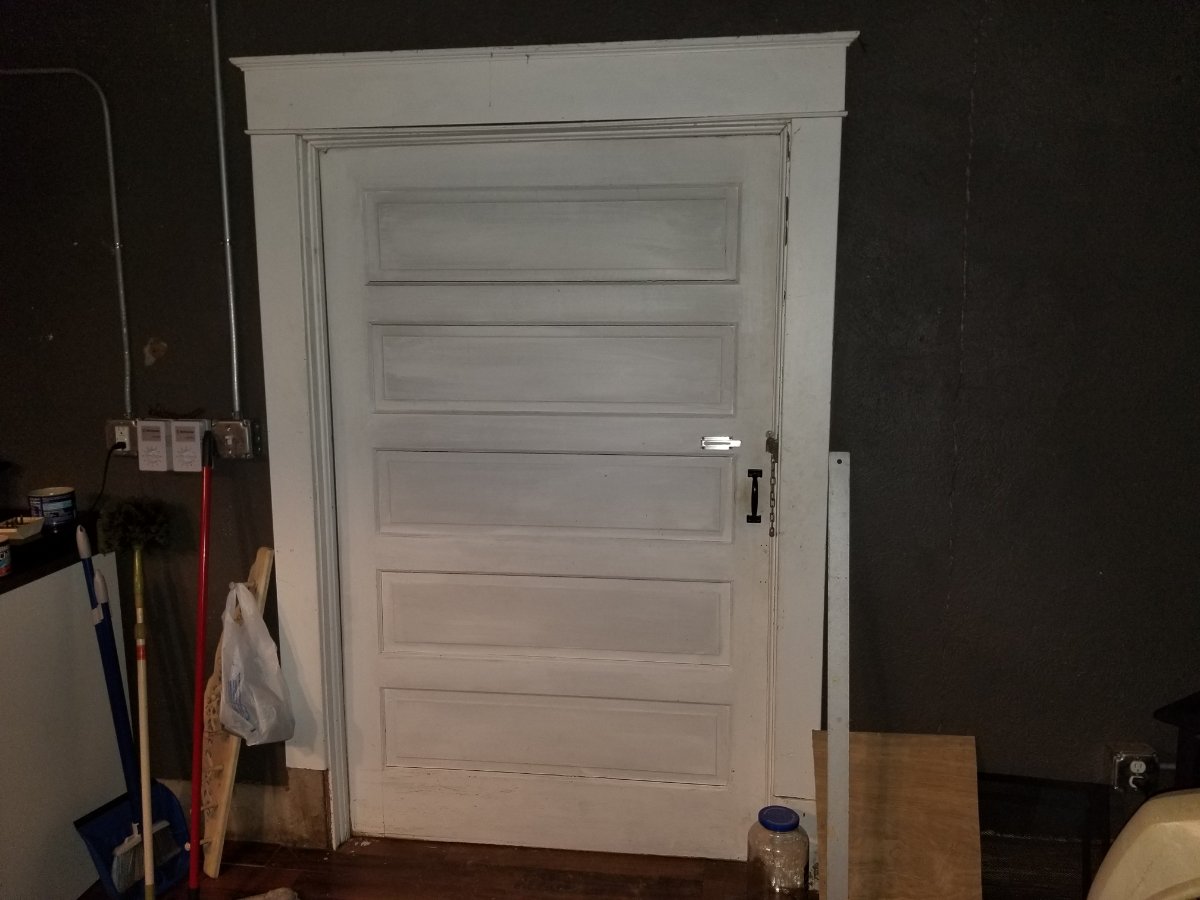
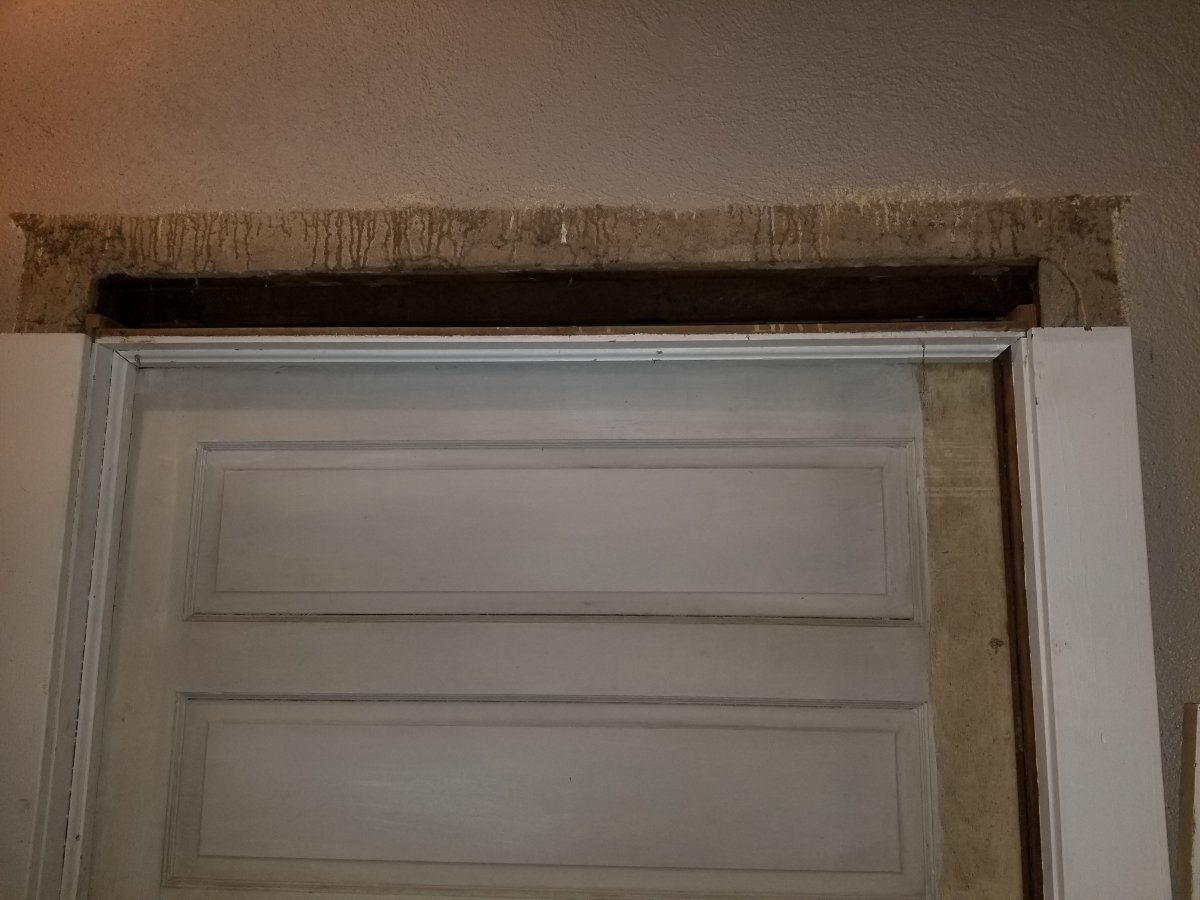
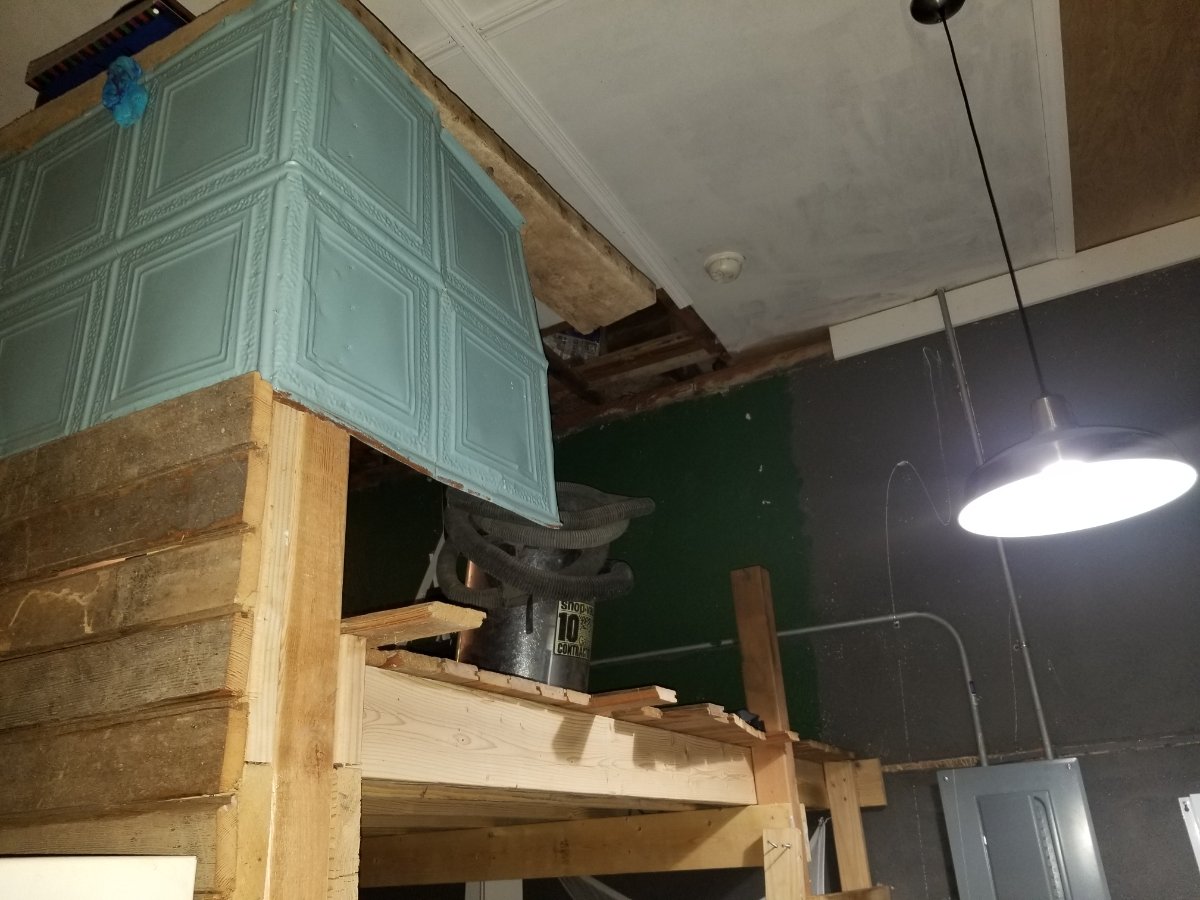
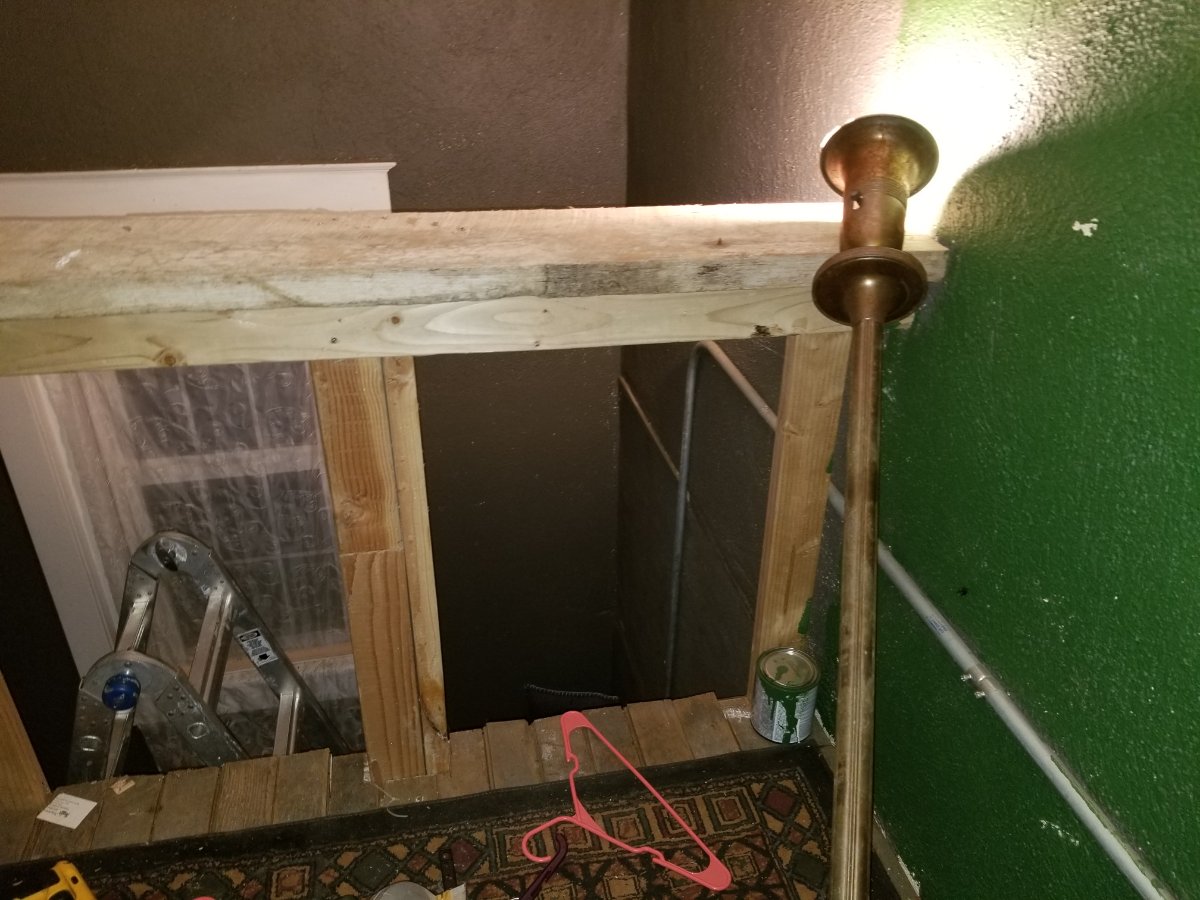
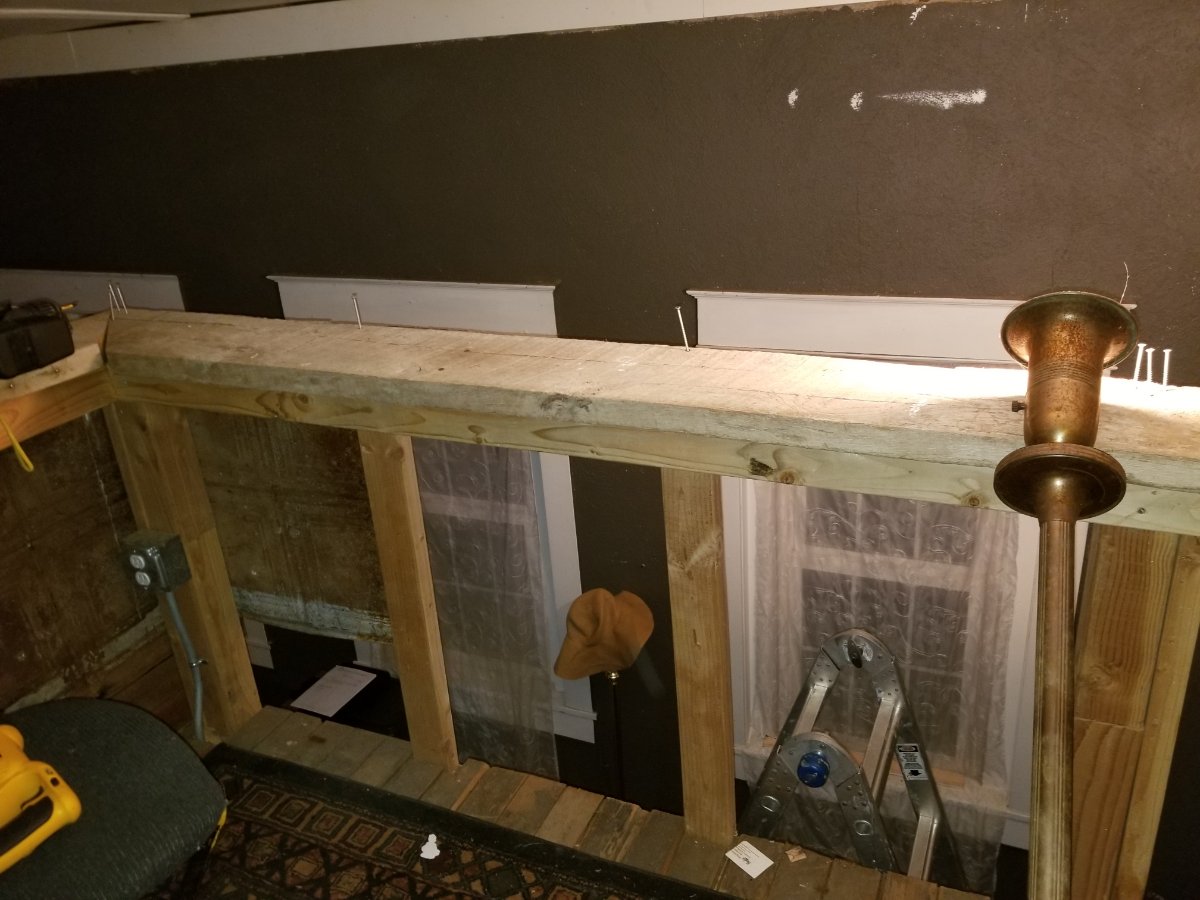
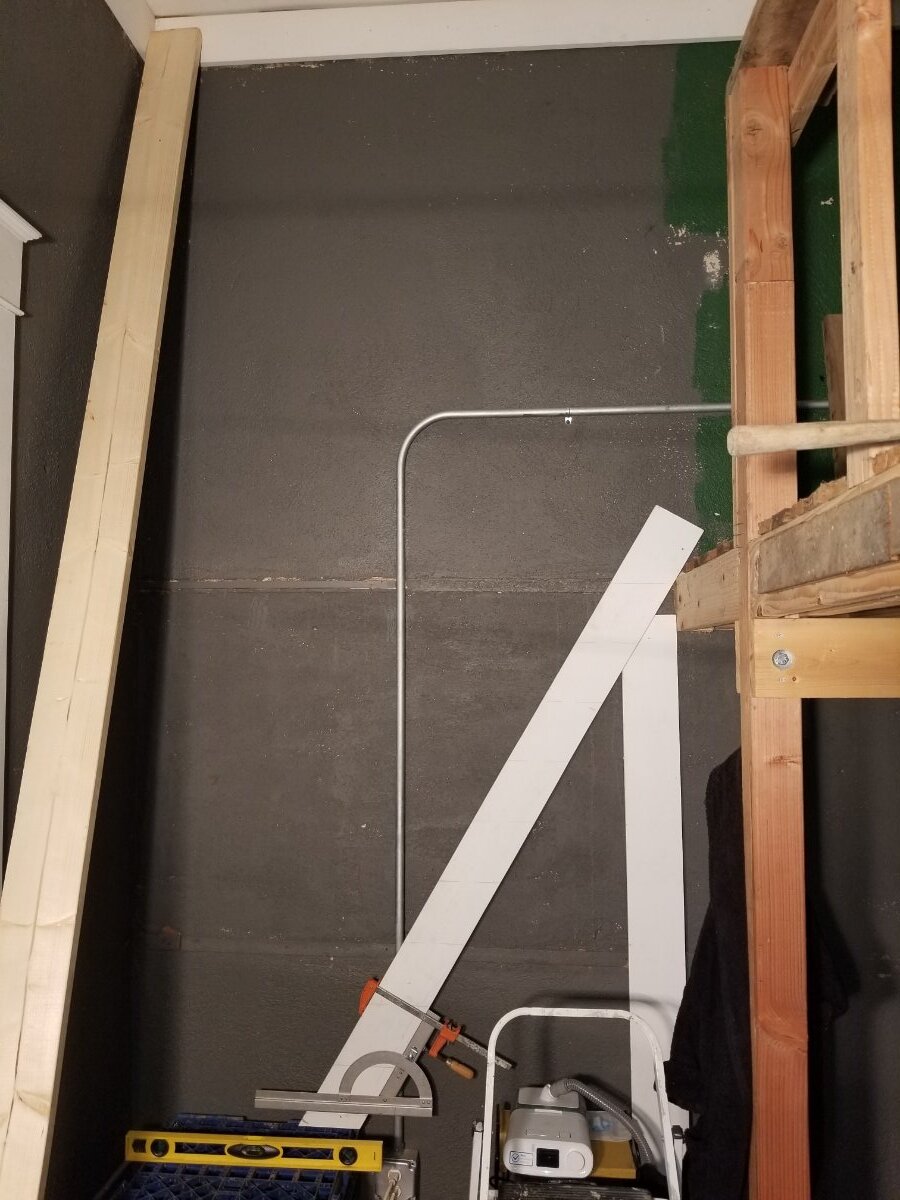
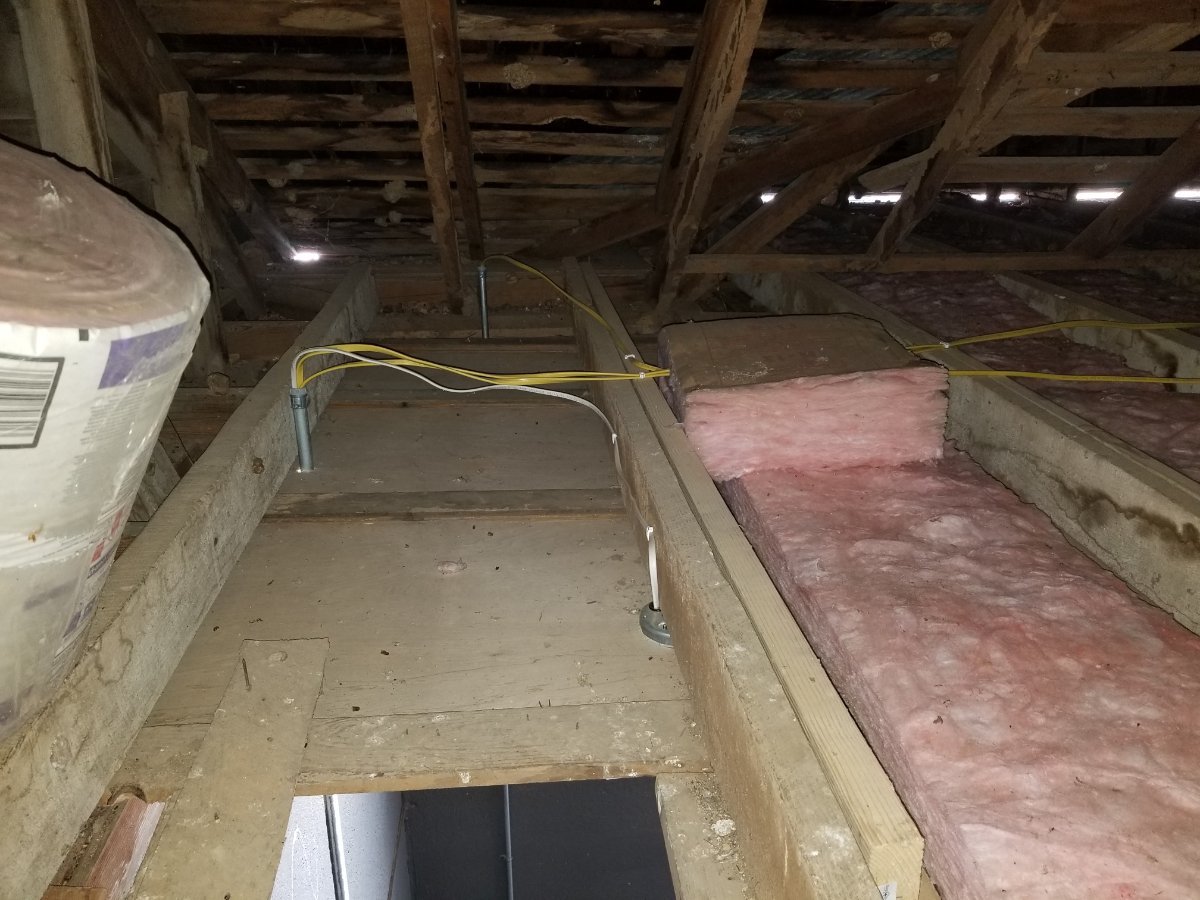
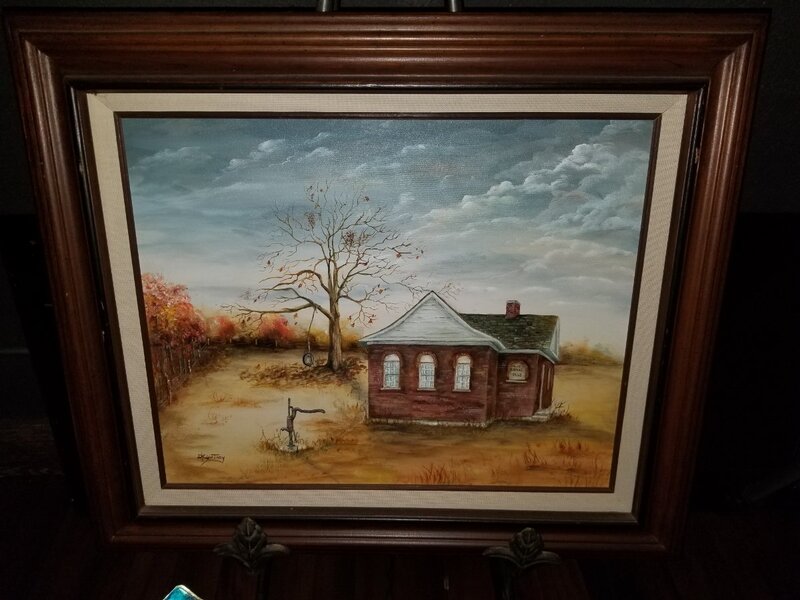
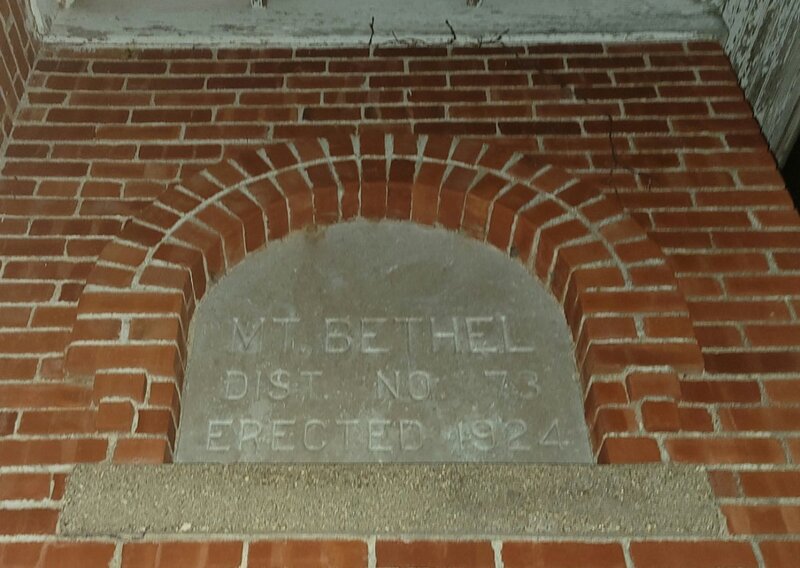
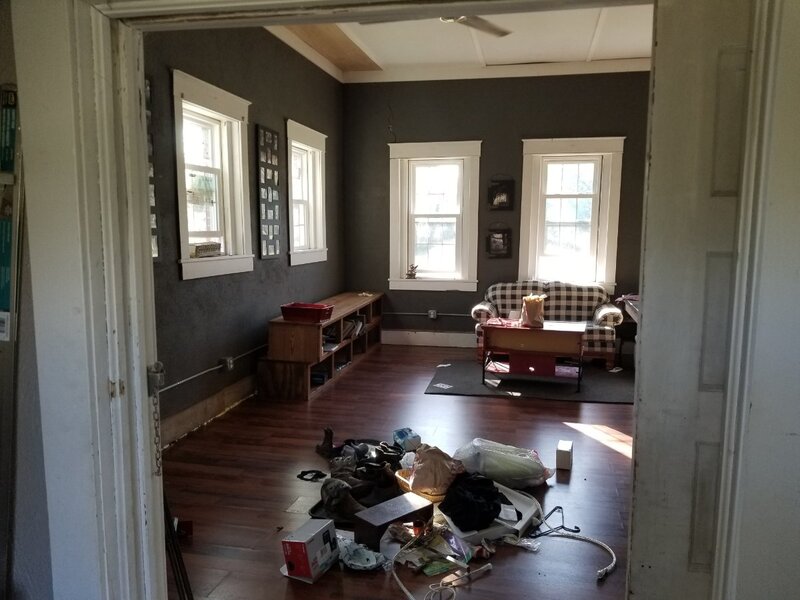
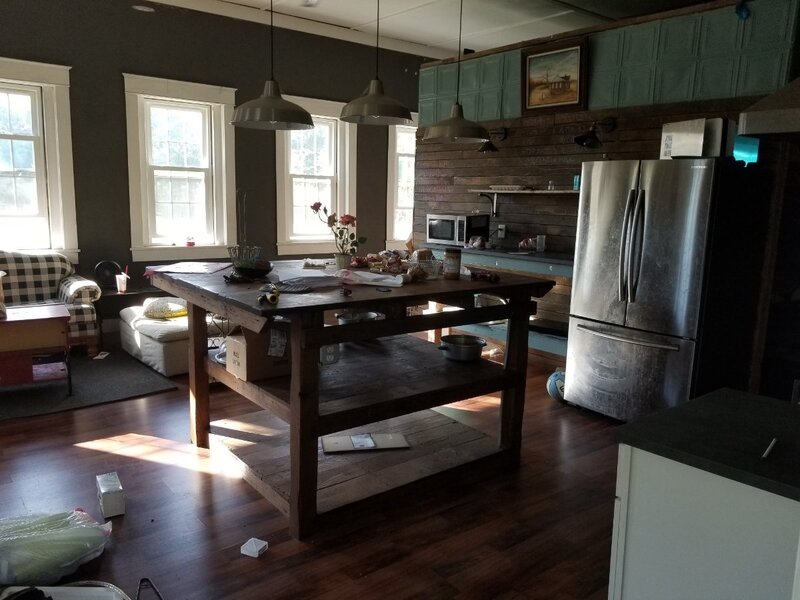
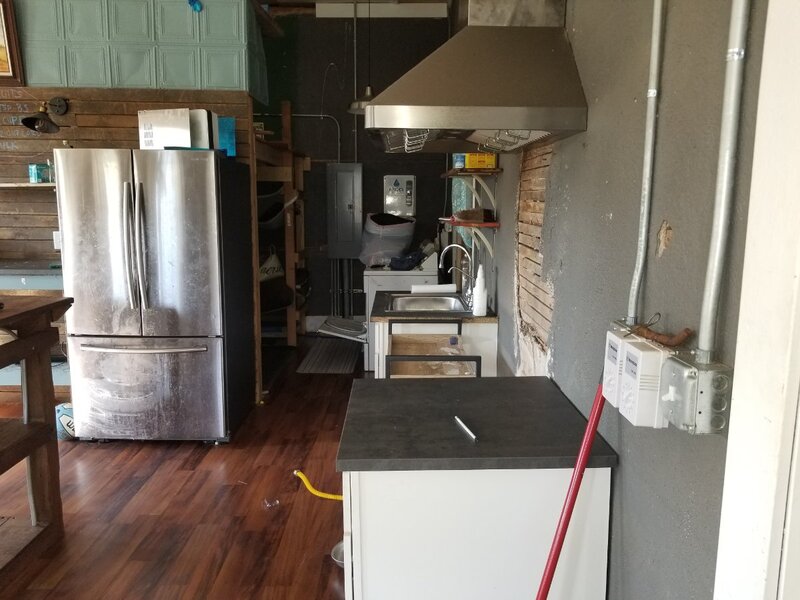
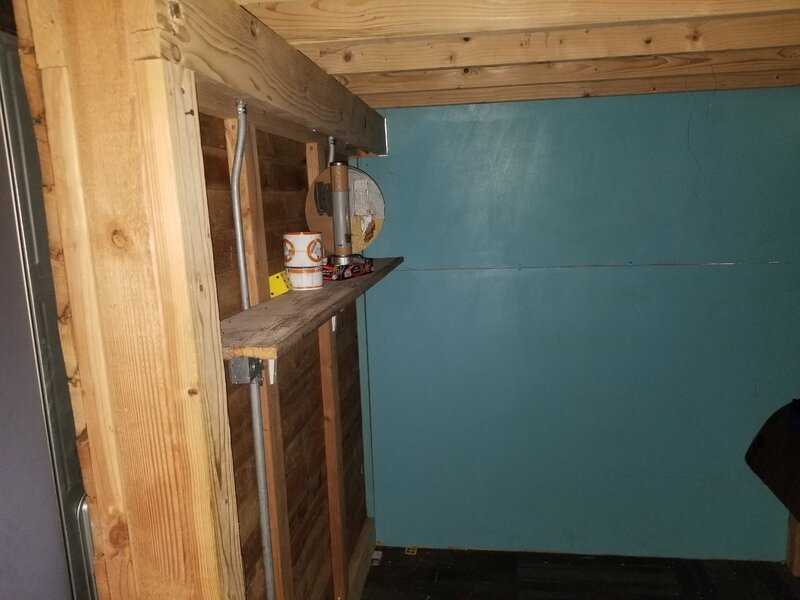
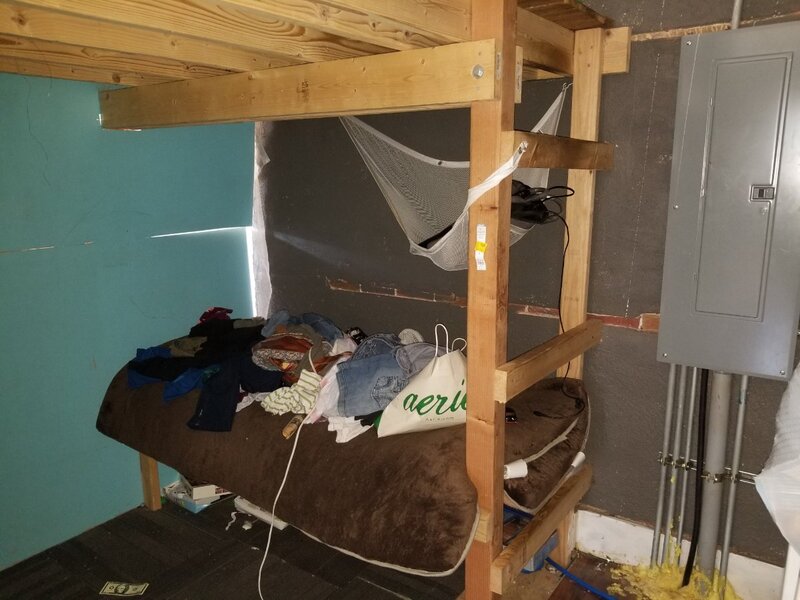
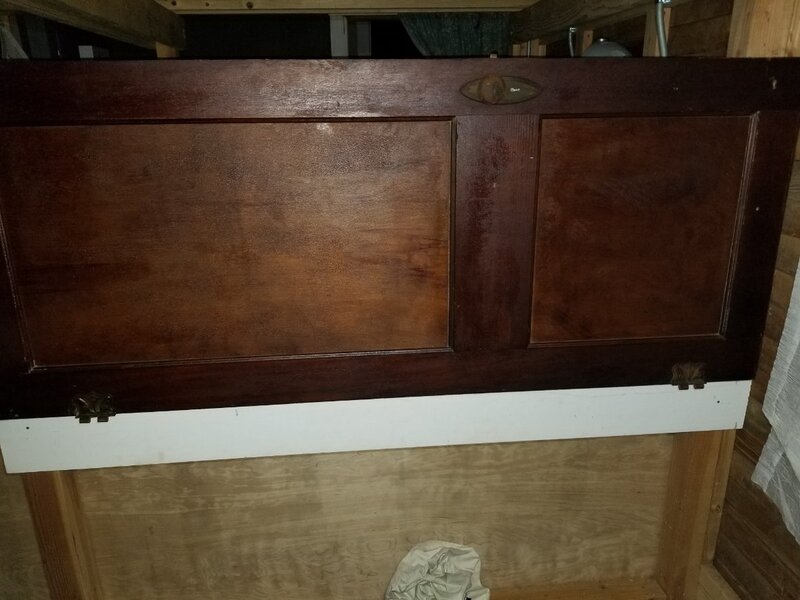
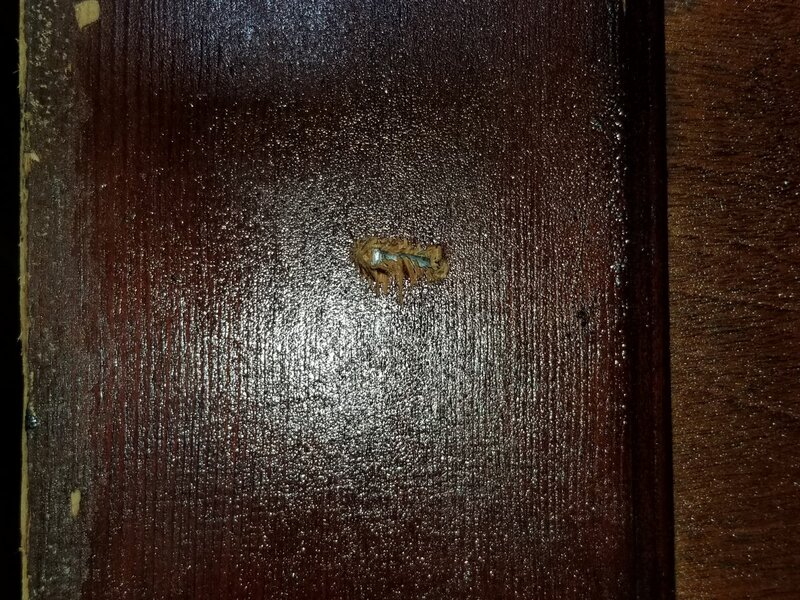
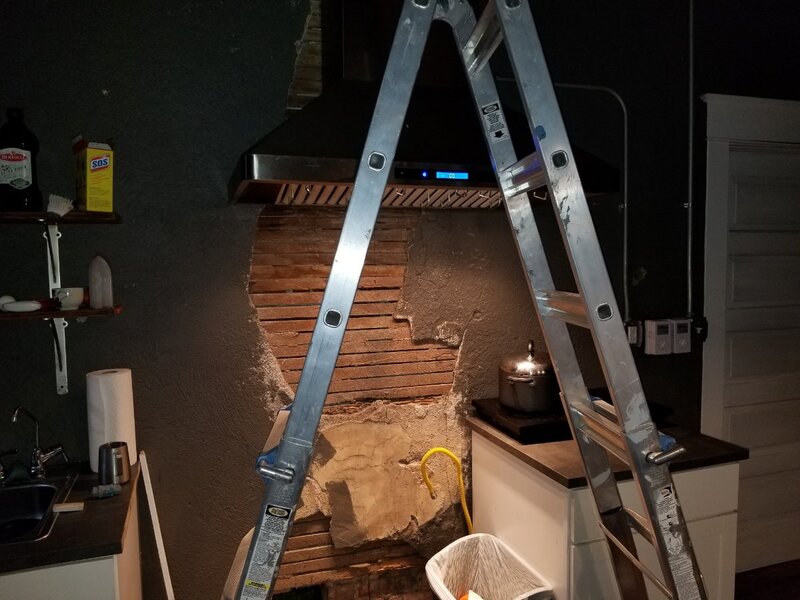
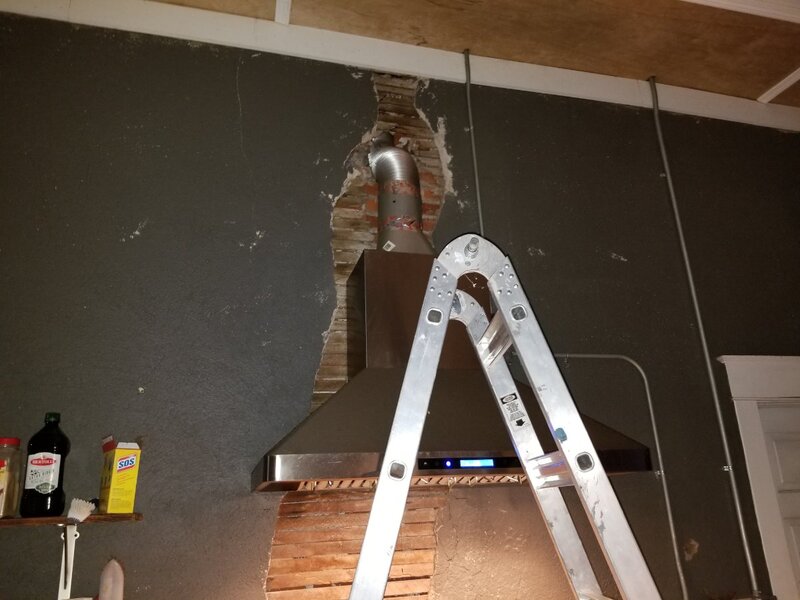
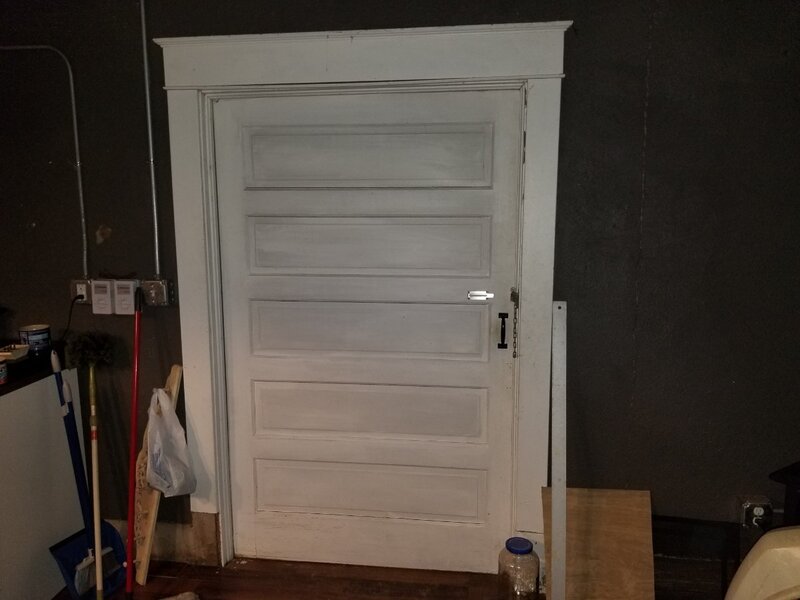
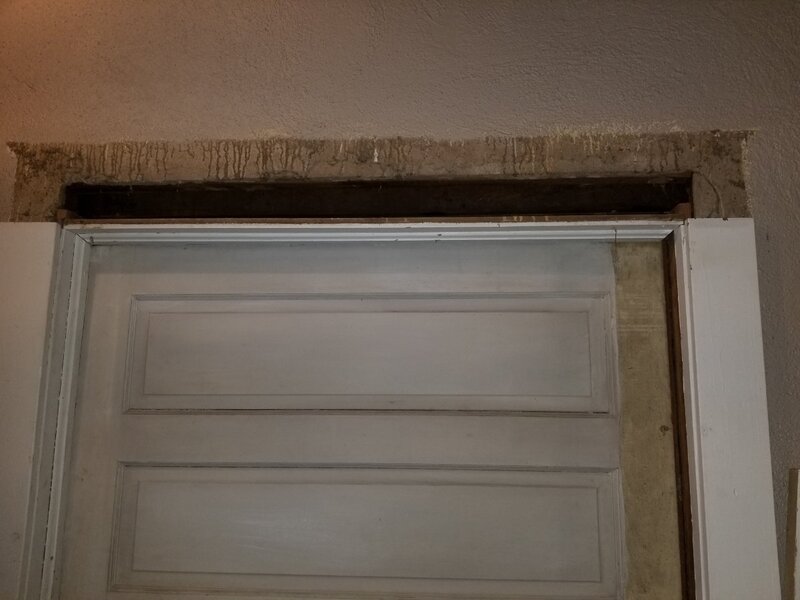
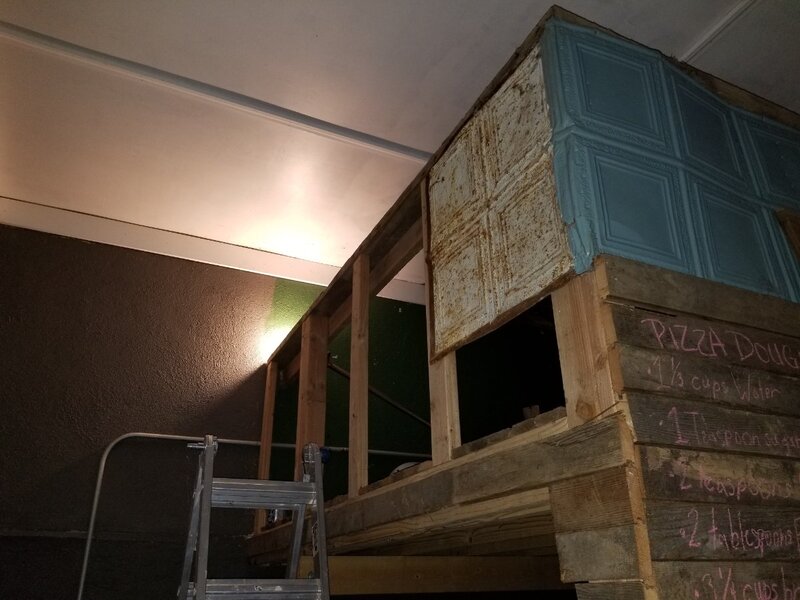
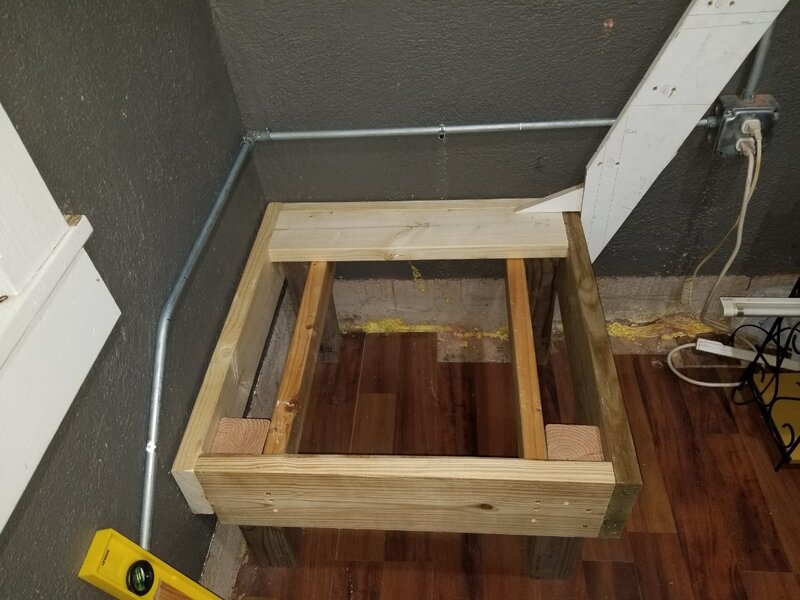
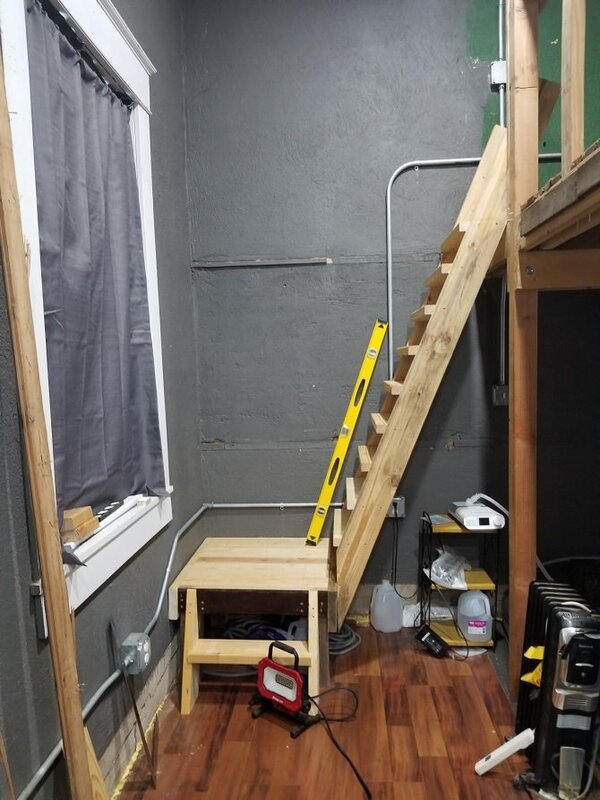
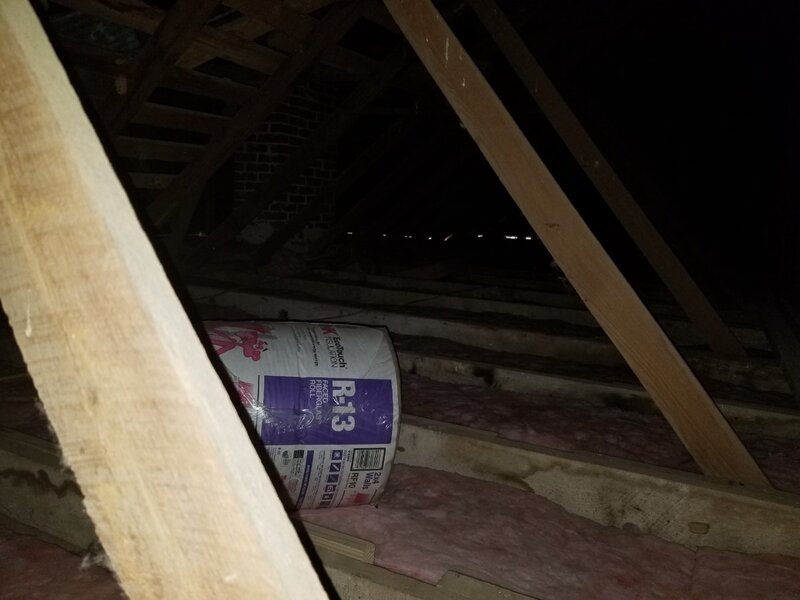
I wasn't sure where to put this so I'll put it here and see if it gets moved ? It's more construction than it is "Woodworking", so to speak. As mentioned in my introduction post, I intended to drop a Shed-to-Shop building. I still do plan to do that but a few things have prevented getting it done up to this point in time. This is a tour of the 1924 Brick Schoolhouse I live in (it's on my brother's property - 19 acres in Mid-Missouri West). This first pictures are how I received it after my niece moved out. Note the painting up on the loft partition wall. First [copied from introduction thread] "when a neighbor saw my niece rehabbing the place she gave this painting to my niece. It is an old painting done a long time ago by that neighbors Aunt. That well head is still on the property, although the concrete pad is different now...the pad is larger than what is in the painting. That tree is still there, too!" The plaque I mentioned in my introduction thread is posted here. Next are the pictures when I first walked in to take up residence here, from the foyer (4 foot wide pocket door to right in first image. *it was dragging at this time* *also note the gaps in between the ceiling panel and the trim. I tried to nail it down from the top and it won't nail down. I think I'm going to have to move the trim up that distance* These next pictures are clockwise from the first image. She had a huge island built. My plans are to reduce its size while leaving an overhang like a dine-at counter. Also, this is where I'd like to put the kitchen sink. *that refrigerator went to my brothers house* This is where the kitchen sink is now, staring at a solid wall. Also, you can see here the damaged lath & stucco. When I first saw the place, before the work had even started on it, I thought it would make a great feature to retain to tell the history of the schoolhouse. I'm still leaning in that direction. I just can't figure out how best to stabilize it. And, that's also the reason I plan to build stand-alone kitchen cabinets and not rely on this wall to hang the uppers from. Back in the shadowed area, behind the refrigerator is a 2x4 sort of ladder that was used to access the loft. Nothing wrong in a pinch but, the rungs were spaced widely apart for some reason. Next is what was once a "Cloak Room" that is now the bathroom. The shelves you see are original to the structure. I'd like to move that sink to the wall with the window (it will fit there as far as height) and restore the original shelving. There is at least one board I found being used as a shelf that I know came from the bathroom shelving to the left as you enter enter the bathroom. In this doorway you also see the remains of the second 4 foot pocket door. It was ruined and beyond use. I want to rebuild it and reinstall it. The original is outside here I can use a pattern. Note there the shelving on the right. It's original. Also note, my niece bathed and didn't shower. There is no shower curtain. I have to get a shower curtain of some sort up there. I really want to make a bentwood shower curtain rod. We'll see. Next is the wall behind the refrigerator, in the partitioned area used by my niece's son, a young person. That shelve is the one I found that came from the bathroom. My niece's son's bunk bed and better shows the loft access. That service panel and its conduits for it will be boxed in at some point. This is the antique I mentioned with the bottom trimmed off. It was on the other side of the blue luan you see in the previous picture and used as a partition. I tried my best to remove it without damaging it BUT, there were two screws that was attaching it to the loft support post and both were nailed over. Next is where my niece had her commercial sized propane range. But, this really just to show you the damaged lath & stucco wall that I'd really like to keep as a feature but it may not be feasible. That rectangular opening is the chimney clean-out. Note there that the electrical conduit that was installed must have been installed before the exhaust hood was mounted as it is exterior to the chase which also prevented the installed of the upper section of the chase. I had the conduit moved to within the chase and will install the upper portion when I can. Going back to the foyer doorway, the 4 foot pocket door. This is from the inside look out toward the foyer and the front door. Then where I removed the trim to figure out what was going on that was causing it to drag across the floor when trying to open or close it. All it took was turning one adjustment screw on the trolley setup. I did have to take it apart this far to fully see what exactly was happening. I still have the trim off until I can figure out how to better stabilize the track that's deep in the wall. *It 'may' have to wait until I decide to remove the lath & stucco to access it better* This is looking up at the loft standing next to the refrigerator. Then the other end of the loft where the Modified Ship's Ladder went. The front of the wall and this end was covered by the remaining portions of the original 1924 tin ceiling that was painted blue. Oh, the chalk writing on this was what remained of the original tongue and groove flooring. It is also used as the flooring in the loft. This handrail was one of the salvageable original flooring joists. Super heavy per foot. I was surprised how heavy this small section was when I cut it out so the Modified Ship's Ladder. This was also about the time I realized the conduit was in the way of properly installing the ship's ladder. Next is when I first started trying to figure out how to fit the Modified Ship's Ladder, brainstorming and prototyping, working out the angles and dimension. That white board was laying around here when I moved it. It's what was used at the ceiling trim. It came in handy as a prototyping material. Those markings on it are my lines working out the angles where it would connect with the landing and the angle of the treads. Those screw holes is where I did have short 2x4 scraps screwed to it to see how the rise and run was going to work out. That is the base structure that is the landing. Then where I'm at now. The wood the lower stringer is attached to is the cut-off end of that antique door. It's the reason I thought about not painting the assembly. But, I'm fairly certain I'm going to paint the rest of it because I can see now that it could get pretty dirty. I want to make it easy to clean if one was so inclined. The above is probably not what you were expecting as a "Project". But, before I can get to the actual "woodworking" projects I have a few really important things to complete around here before those projects can get started. This, bellow, is one of those things. Those gaps in the ceiling panels in previous images along with what you see here are the those things. The insulation they put in is 15 inch batt insulation in 24 inch bays ?. Also note the daylight coming in to the attic. That's NOT supposed to be like that! ? The fascia is rotted away or missing entirely. AND, I have plans to put a Air Conditioning Heat Pump in here, the "cassette" type. The only good place I can think to install one is in the center of the main space, so I have to get that done before I can insulate UNLESS I spray foam the underside of the roof, which I am contemplating. I was watching Guildbrook Farm's video yesterday which made me aware of a MrCool product that might work here as well. It's the MrCool Universal 2 & 3 Ton DIY Central AC & Heat Pump Split System with 35 Feet Precharged Quick Connect Lineset. That's it for now. :wave:, RR


-
That's a roger. Thank you! RR
-
Cool. Thank you. How were the mobile users able to correct the problem? Regards, RR
-
Good morning, Kev, I'm using a Dell Inspirion Desktop PC with Windows 10 installed. Regards, RR
-
I have searched the site using a few different search terms and I can't find it. How do I properly orient a picture I'm posting? They are properly oriented before I attach them, they're properly oriented in the preview once they are attached, then I hit the "Submit Reply" button and they're not oriented properly within the post. Example is a couple of pictures in my New Members post. One picture I tried and tried to orient it properly and it just wouldn't take. I don't need someone to hold my hand, I just need the corner to look in, IF one exists ? I have tried on my own to find it. In fact, I put this post here because I didn't know where else to put it ? Thanks in advance! Regards, Richard
-
Greetings from this aspiring Woodworker!
RxR Sawdust Station replied to RxR Sawdust Station's topic in New Members
I suspect they were double doors original, too ... considering the potential traffic of kids going in an out. I can see that in my mind. Oh, the "cloak room" (now the bathroom) is behind those two windows to the right of the doorway. It's about 6' x 14' (from memory). I have considered front door materials, too. More important than any of that is that I want it to look original to the structure. Oak or Mahogany would hold up pretty good here, I think....with proper maintenance paid to them. It's on the East side of the building so it shouldn't see direct weather anyway, typically. Not like a doorway that sees North, West or Southern weather. -
?