Every purchase made through our Amazon Affiliate Page helps support this site

Tmize
-
Posts
1,430 -
Joined
-
Last visited
-
Days Won
26
Content Type
Profiles
Forums
Downloads
Gallery
Events
Store
Articles
Blogs
Everything posted by Tmize
-
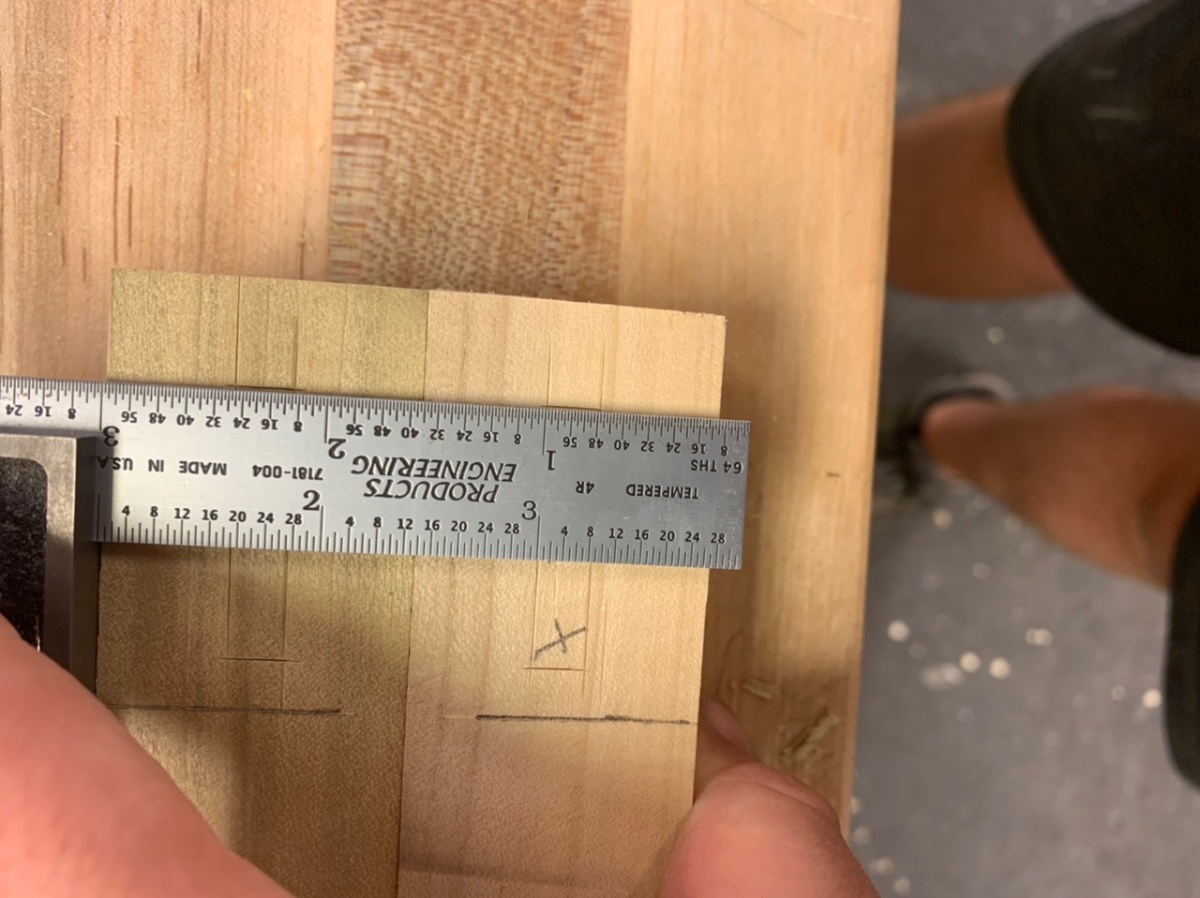
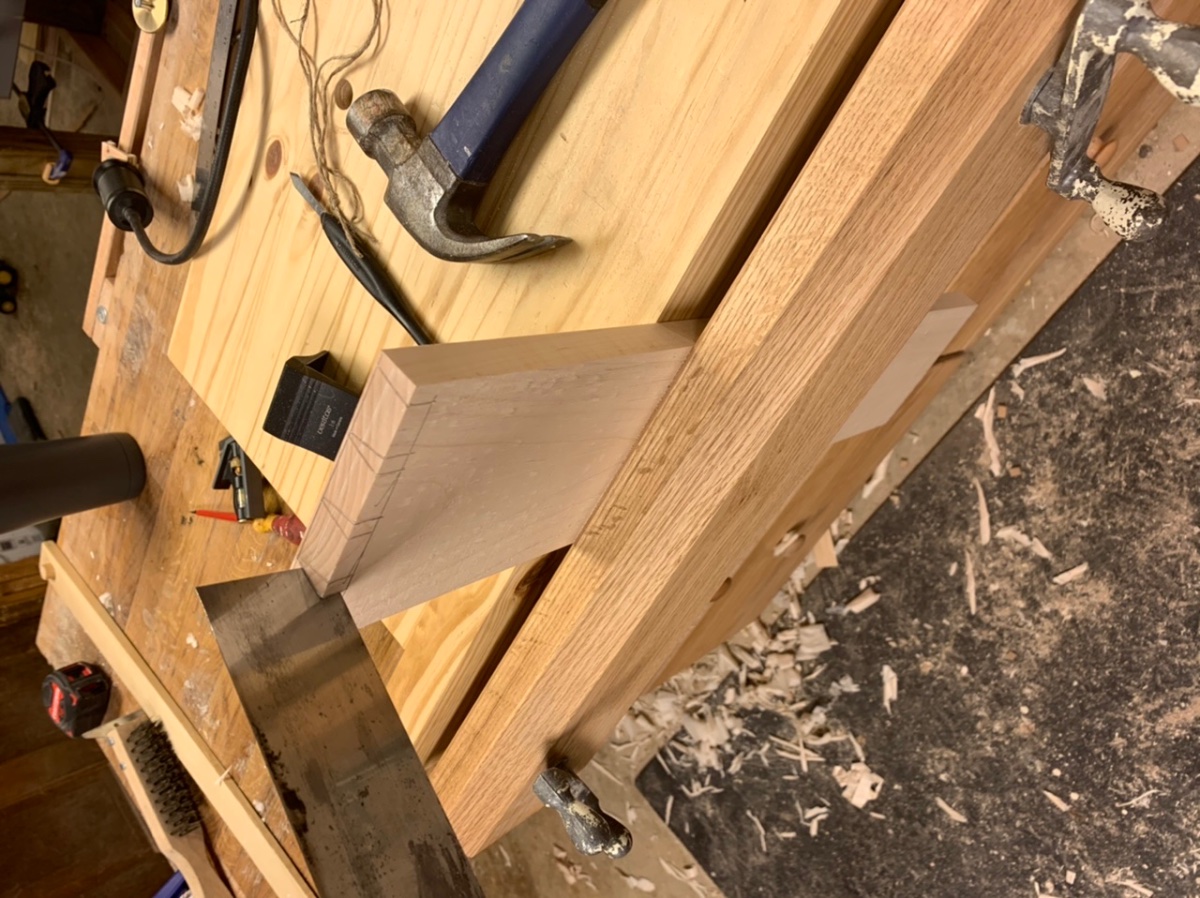
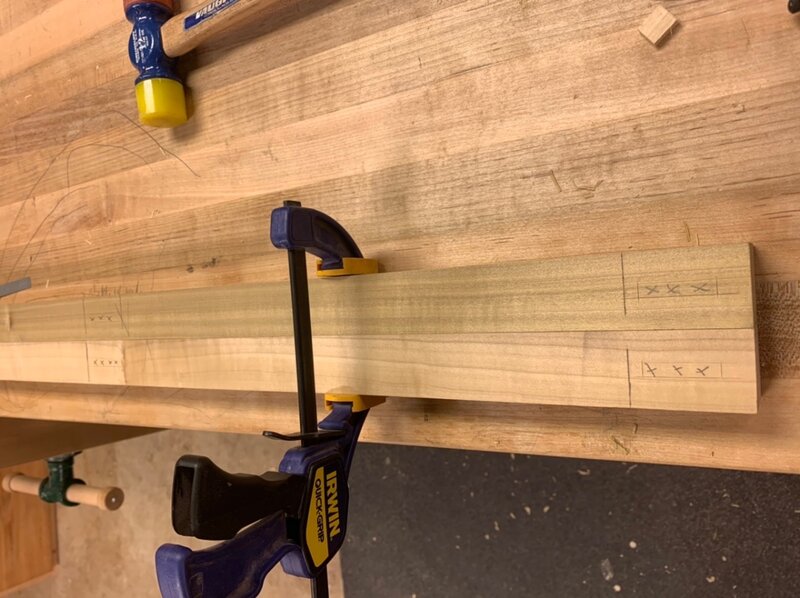
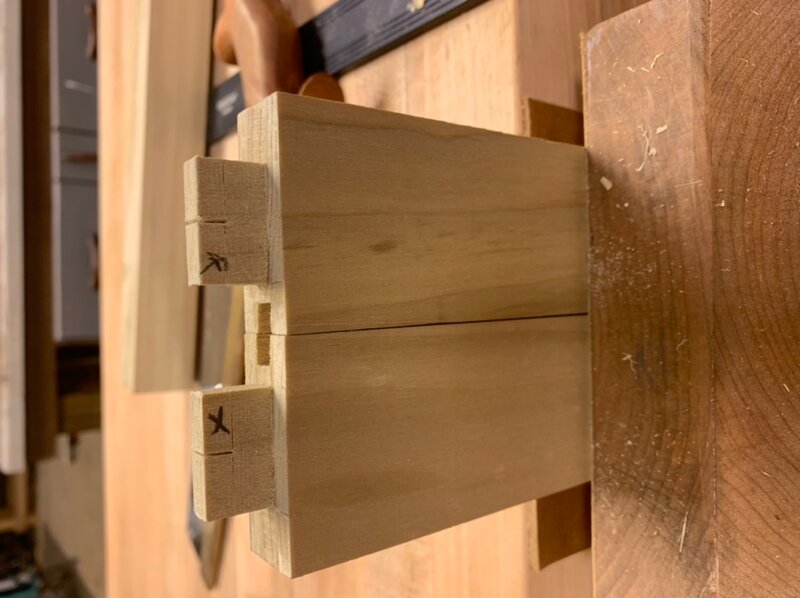
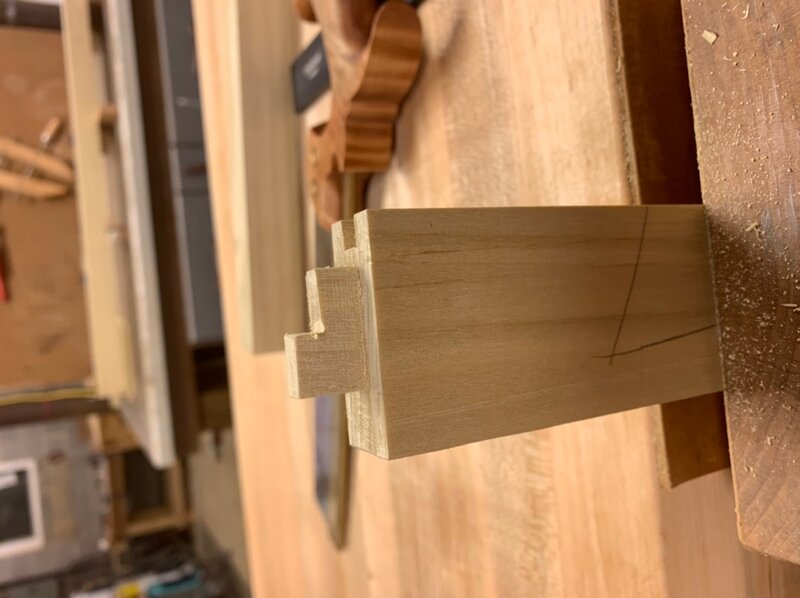
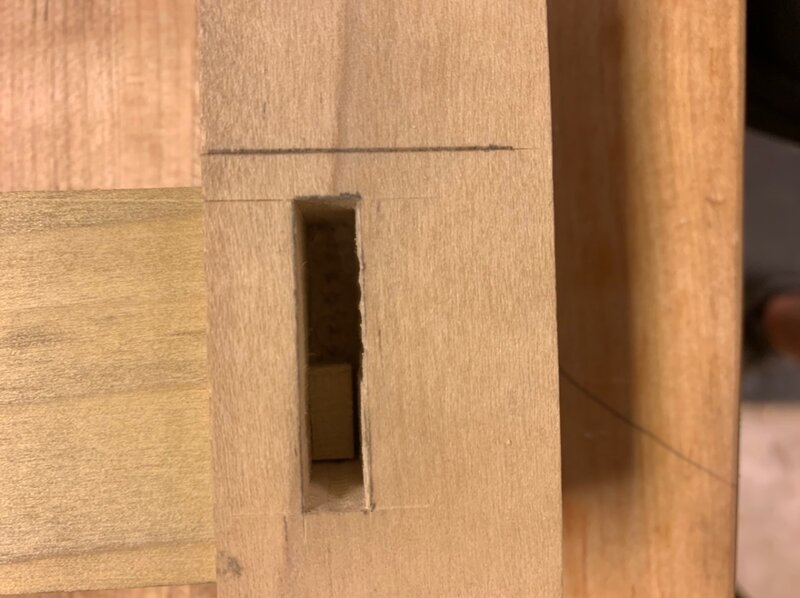
So now that the mortiser is back up an running. I carved out a few hours tonite to get started on the frame work. I really don’t have much of a sketch on this one. I’ve been back a forth on the design on this one. It started out as a dovetailed case but I didn’t like it once I got started on it so I scrapped that design. It is having to fit in a very exact place of dead space behind back door. It just happens to be just deep enough for books. The ends will be frame an panel into 1 1/2” legs. Will have to long rails along the front with matching rails along the back. These will support the shelves. So I created a story stick of all the mortise location for the rails a side panels. I laid out one leg off of the story stick then transferred it to the matching leg. The front rail have a deep mortise about 1 1/16” deep I draw bore into the leg. On the back legs I set the rails in a good bit. That ended up causing my two mortises to cross. I notched the tenon so they can cross each other inside the leg.

-
Split Top Workbench (Not really a Roubo)
Tmize replied to Woodenskye (Bryan)'s topic in Member Project Journals
What kind of Moxon vise? I built mine into a small work surface behind it. Work good for chiseling after cut out the waste.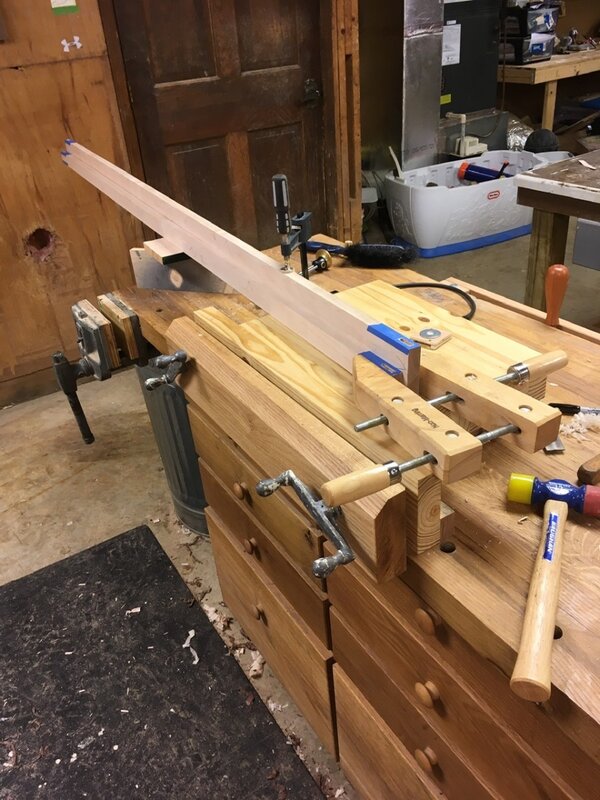

-
Well I got the new chisel in this week. They very solidly built. The mill marks was very faint some I started out on my 1200 grit stone an worked up to my 8000 grit. Very quickly maybe 20 seconds an had a nice polish. Now did it just blow me away in performance well no. I could tell that it was thicker metal construction so that may mean that they will hold up longer than stock
-
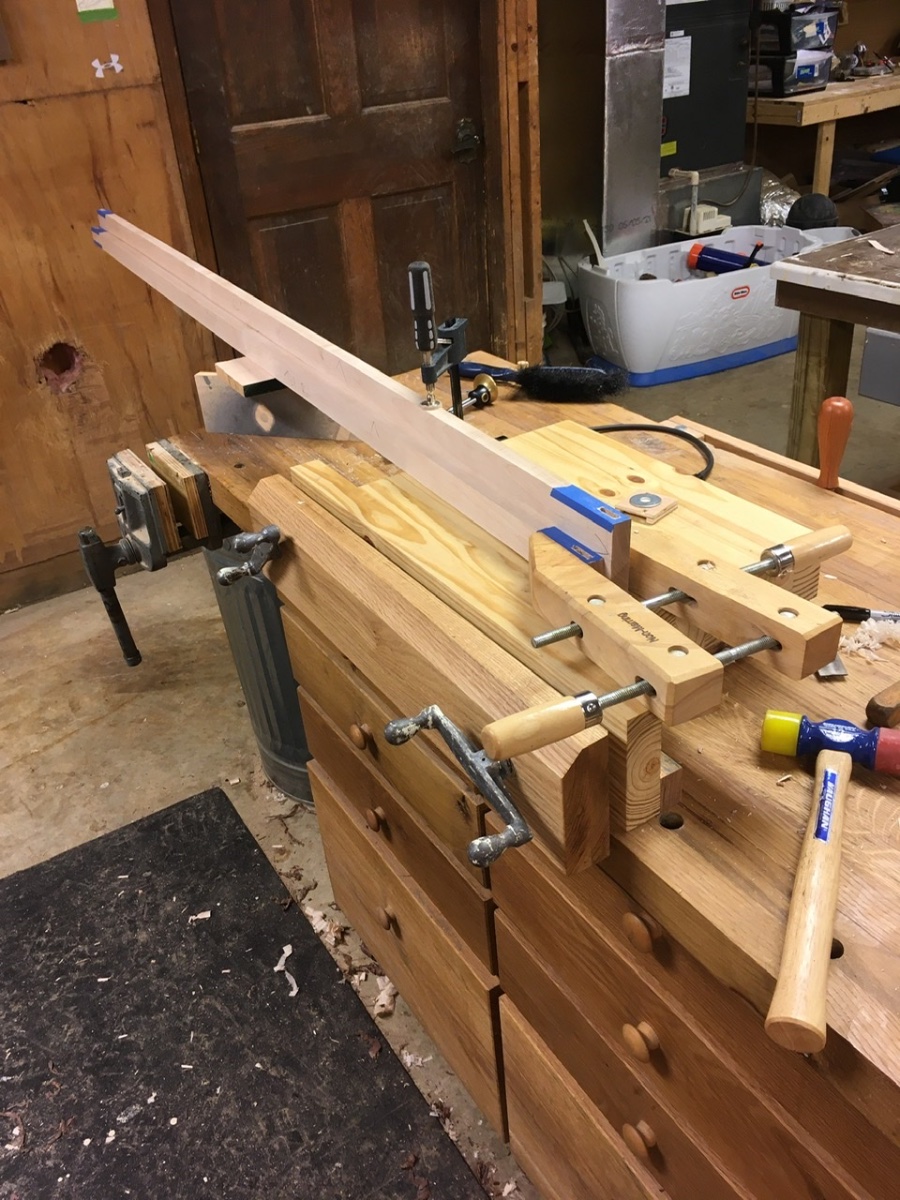
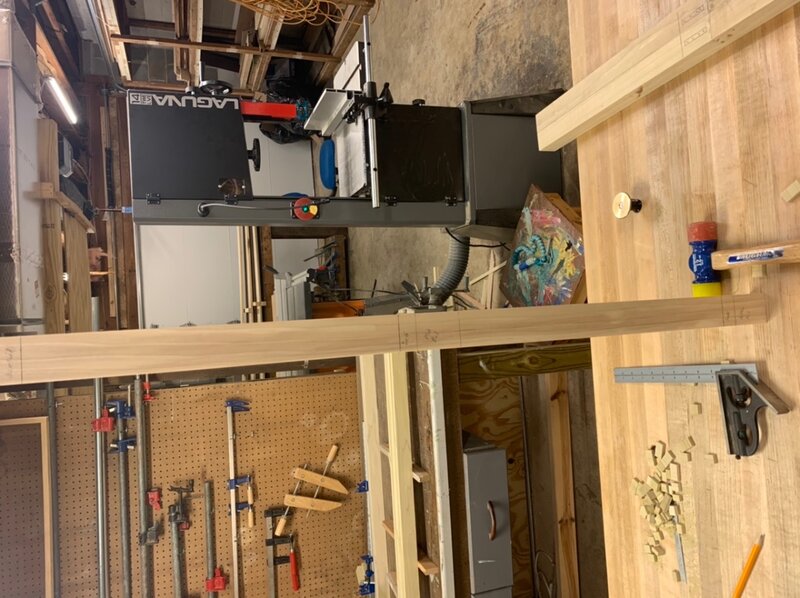
I made a support for cutting long pieces. I was cutting some rails for the bookcase at 56” worked well. Next I found some 1/2” flat steel laying around I think I’m going to replicate the factory hold downs that are missing

-
Chet I bought it more on a cool factor an always wanted one. Now will I use for every cut hell no. I set it up for trim cuts an like picture frame mitres. I can see myself moving up to buy vintage power tools an restoring them. Going to have to get a bigger shop first tho
-
Split Top Workbench (Not really a Roubo)
Tmize replied to Woodenskye (Bryan)'s topic in Member Project Journals
I could see the little dremel vise come in handy from time to time. How sturdy is it? -
I’m fresh out after this one ?.
-
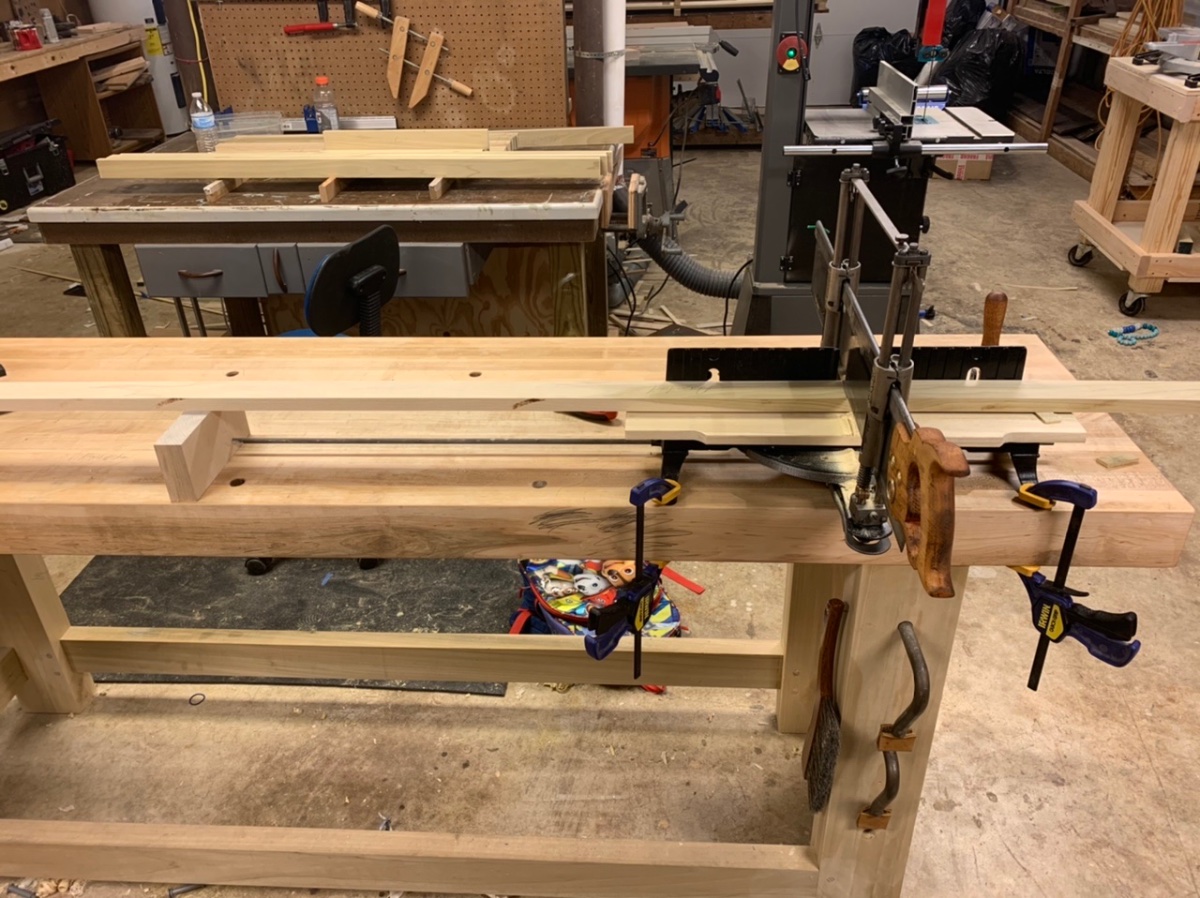
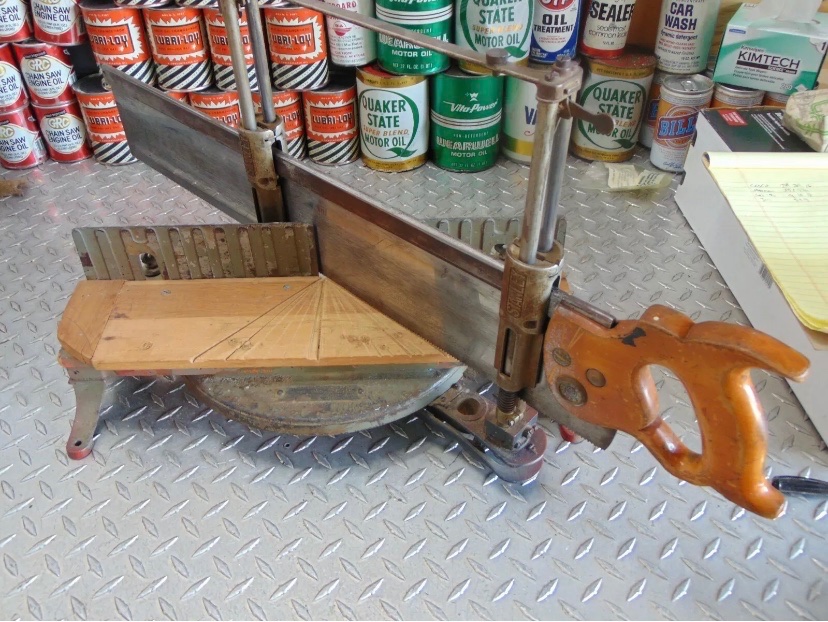
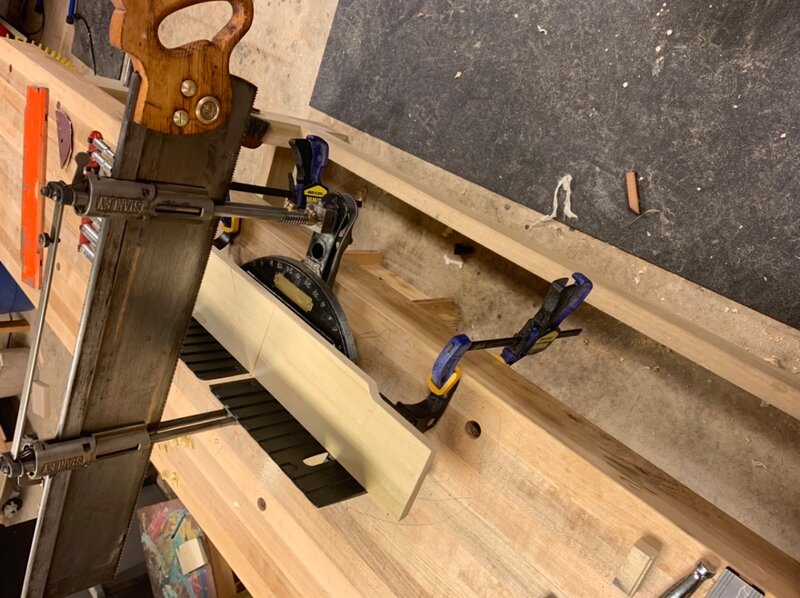
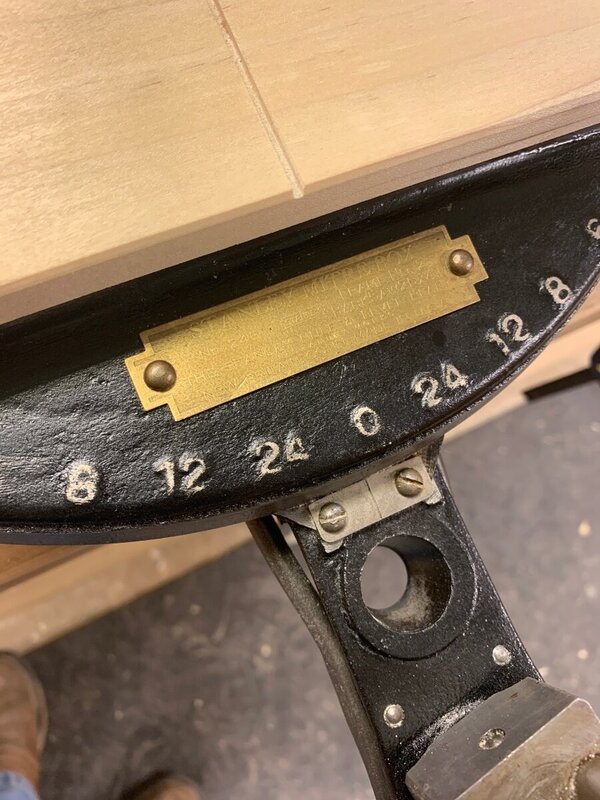
My newest toy it is a Stanley 246 mitre box saw. Hard to date these I’m think 30’s to 40’s. It was I fairly decent shape when I got it. Dropped it piece by piece in vinegar an salt bath an stripped all the old paint an cleaned up the rust. Couple coats of automotive enamel paint. Assemble an oil an grease all the moving parts. Wow did I not realize how parts these thing had lots of set screws an springs. It’s a 26” saw at 11ppi filed at 25 degrees of fleam for a super smooth cut off the saw. I enjoy restoring old tool a lot. One of the cool things I learned about this saw you will see in the last photo. The large numbers on the top of the base was put there back when most carpenter didn’t have much over a 6th grade education. So they wouldn’t have learned any geometry. The numbers are for how many corners the box would have. 4 corners is 45 degrees 8 corners 22 1/2 degrees an so on. So I normally keep a eBay find off in a corner when I’m just goofing off waiting on a woodworking project


-
Split Top Workbench (Not really a Roubo)
Tmize replied to Woodenskye (Bryan)'s topic in Member Project Journals
That reminds me next shop organization run I do I need to redo my all my old bench drawers now that they are relocated -
It wasn’t me unless I forgot a brilliant idea I do that all the time ??. Chet had the veneer idea.
-
Split Top Workbench (Not really a Roubo)
Tmize replied to Woodenskye (Bryan)'s topic in Member Project Journals
Great job on the bench. Now it’s time to build something on it. Thought about what is going in all those drawers? -
Wow it looks fancy now test edit
-
The chisel shanks are different sizes depending on the size of the machine. So I believe mine is a 5/8 diameter.
-
Been there done that ?. Just never know when it will change course an always heads to skin
-
Not that I could find
-
I like soft maple so much better an is fairly tough stuff. I think the drawer boxes would look great if you did curly cherry all hand cut dovetailed together?
-
I do hope this one will be a good one if not I’ll buy a bunch of the cheap ones at $15 a piece to keep on hand. It a low bookcase to go in behind our back door. Small enough dead space to squeeze it in there an be functional. It will match all the rest of the stuff I’ve been building lately. It’s all frame an panel with a ship lap backboard.
-
When I did my back porch screen door I glued it all up then ran a bearing guided rabbeting bit around the back side of the opening. Then I just squared up with a chisel. To me that was easier than doing a bunch of stopped rabbet.
-
Good work there coop. That is going to be a very nice door. What kind material are you using for the loose tenon walnut?
-
So I finally got some time this afternoon to get in the shop. Between work an family stuff I haven’t had any free time for shop much less stop in here much. So I got some wood milled started getting joinery laid out went over to my new HCM an knocked out the first mortise then about half way thru the second one an the drill bit snaps. Well crap just have 30 more to go ?. Well I wasn’t feeling all into it to start bashing out them all with my mortise chisel. That an it would throw my layout out a lil since I use my marking gauge straight from the HC bit. So I went to online to Lee Valley I remembered they carried HCM chisels. Holy cow I bite the bullet an bought the premium 1/4” since that is the size I use the most. But $50 for one bit is a lot. I could have gotten the economy one but it just kept running thru my head breaking it again. These bit better come just damn perfect out of the pack just minor honing. I’ll let y’all know how it goes in a week
-
Ok I was thinking the door would be smaller like 26” tall x 14” wide. Nice choices
-
That will be a big project I’m looking forward to it. With the under mount slides will you need divider between all the drawers to mount the hardware to? The doors on the upper pieces will you use normal butt hinges? I think knife hinges would be cool add on an you could produce a video only on the install of them
-
Now I’ve never done it but from what I’ve seen on cockbeading. Is bring the drawer to final fit to the opening then rabbet all the way around the front then recess the bead into rabbet. You can adjust the bead thickness before glueing it to it for perfect fit
-
It’s always been high around here but is getting worse. I bought a bunch of popular an soft maple at the start of summer. That will get me thru the next few projects. Then I’ve got a bunch of laundry cabinets to build. Hopefully I can wait out the higher prices before starting our walnut bedroom suite next spring. 4/4 #2 common walnut is going for $12 bdft last I checked early summer?
-
That looks great coop. Very nice design. Why didn’t you journal the build?