Every purchase made through our Amazon Affiliate Page helps support this site

Tmize
-
Posts
1,430 -
Joined
-
Last visited
-
Days Won
26
Content Type
Profiles
Forums
Downloads
Gallery
Events
Store
Articles
Blogs
Everything posted by Tmize
-
Wow that is amazing looking door. That needs to be a front door not just a master bathroom door.
-
I don’t know on mine the dust would just pile up on top of my guides then fall to the floor.
-
I couldn’t ask for a better saw. I used the Snodgrass method to set it up an haven’t had a minute of drift an smooth cut straight out of the box.
-
I’ve seen the big fancy Italian bandsaw have this feature already built into them with two different ports.
-
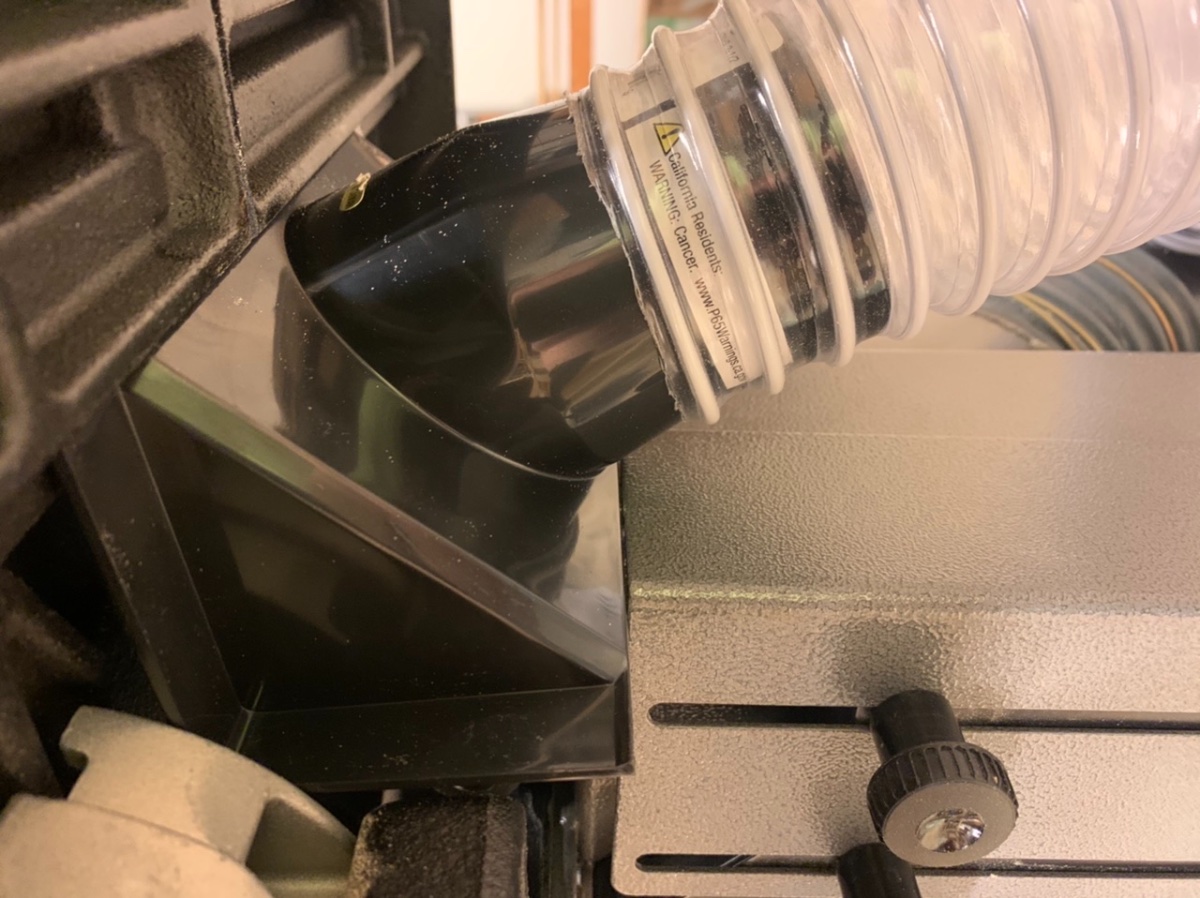
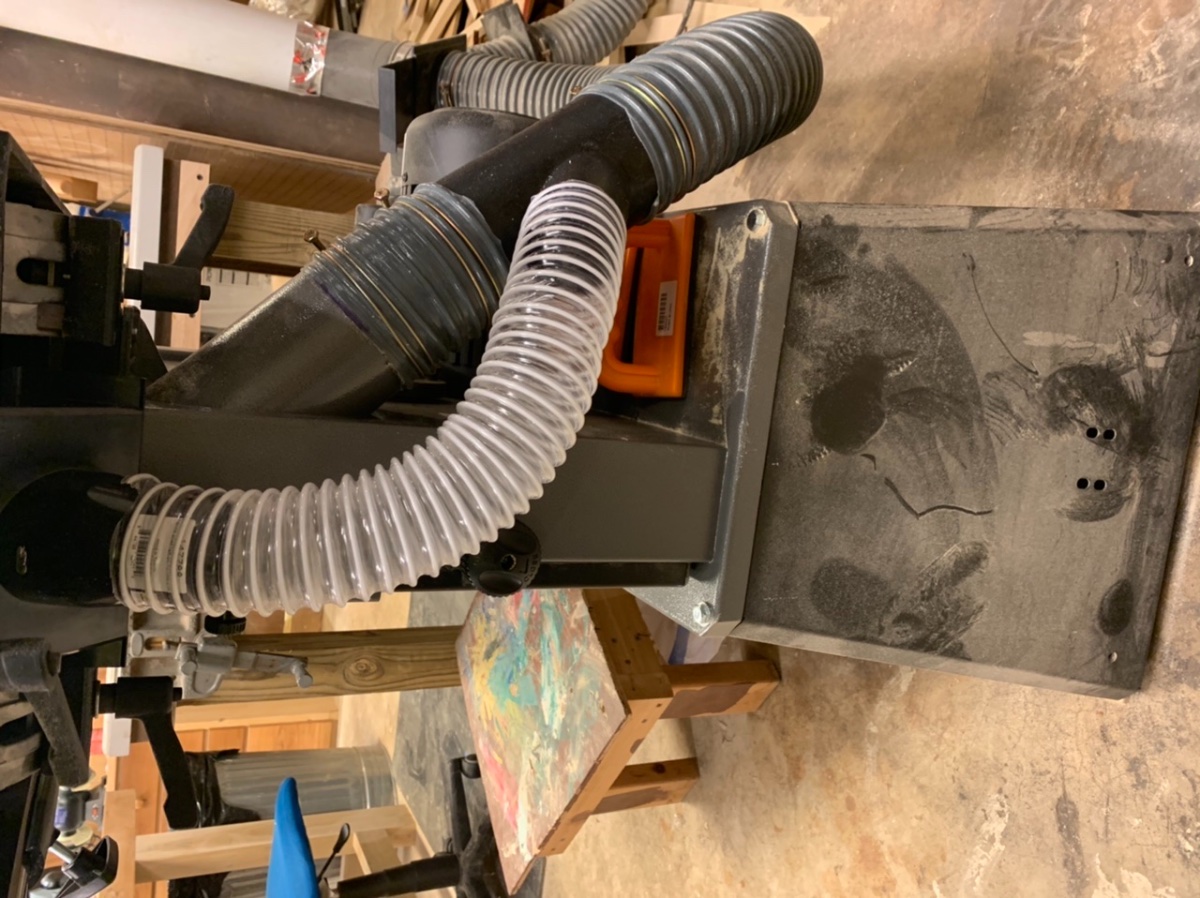
Mine doesn’t have a brush against the blade. It does have one on the lower wheel. The factory port does a great job of keeping the lower wheel compartment clean a dust free. It needed collection up closer to the throat plate help dust from piling up there an the table top.
-
So do we relabel this thread December 3rd now?
-
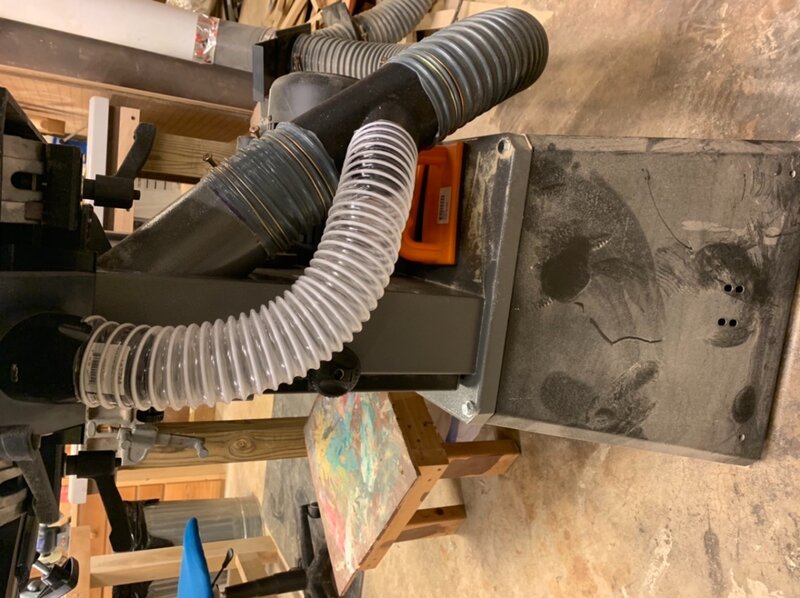
So I have my Laguna 14/12 bandsaw now for almost a year now. For the first couple months it had no dust collection at all. Then finally got around to hooking it up to the factory 4” port on the side of the machine. An that worked adequate as long I didn’t try an cut anything other 2” thick. Any time I would try an resaw or cut anything thicker dust would go everywhere including all over the table. So I suffered thru it or procrastinated doing anything about it. So I google some images under the table bandsaw DC. I got a few decent ideas. So I ordered some 2 1/2 hose an a 4” to 2 1/2” y pipe an found this cool router table collector. It fit like a glove under the table. It slides right into a recess in the casting. The blade guard on the body slides up an pinches it in place. I had bought some magnets just in case but I don’t think I will need them.

-
Been occupied by other project around the shop an new tools. Kinda lost interest also but I’ll will be returning to this one soon.
-
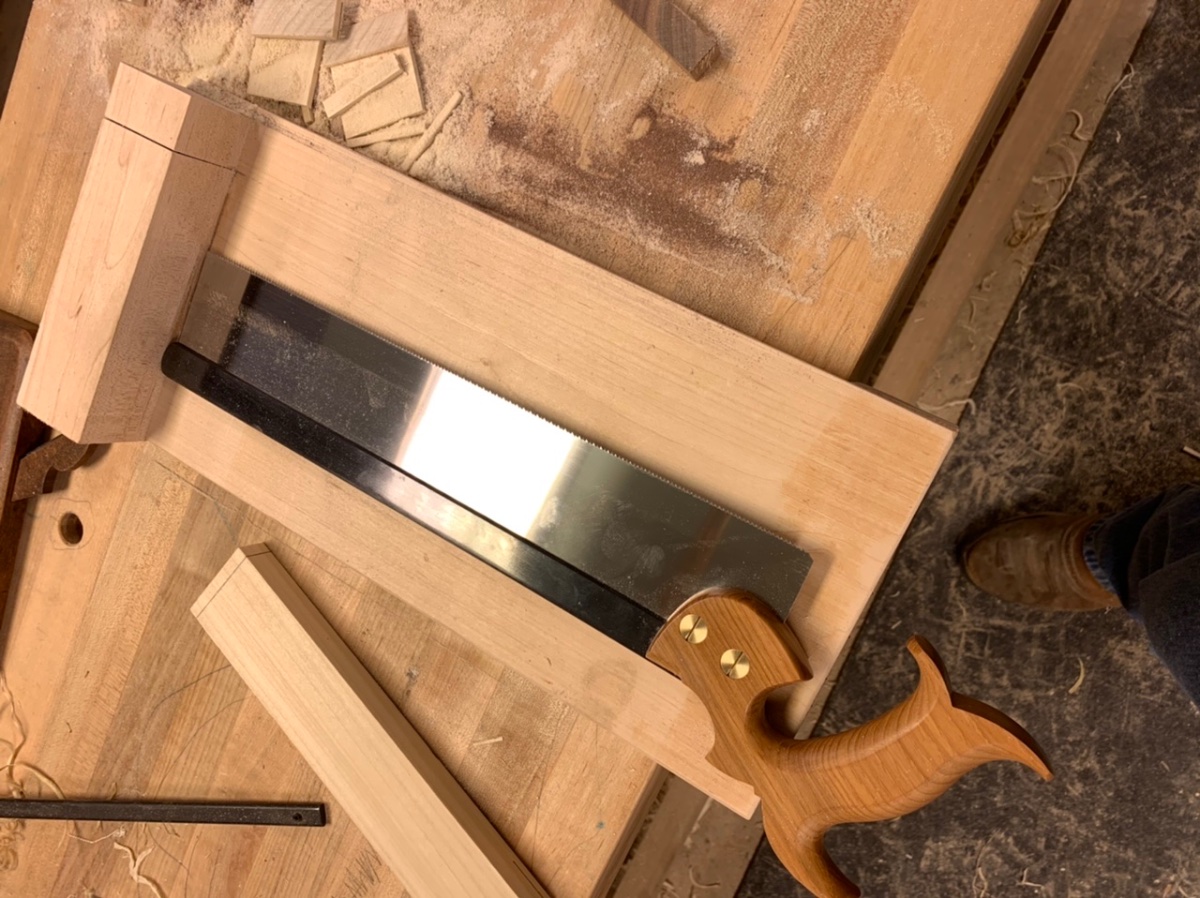
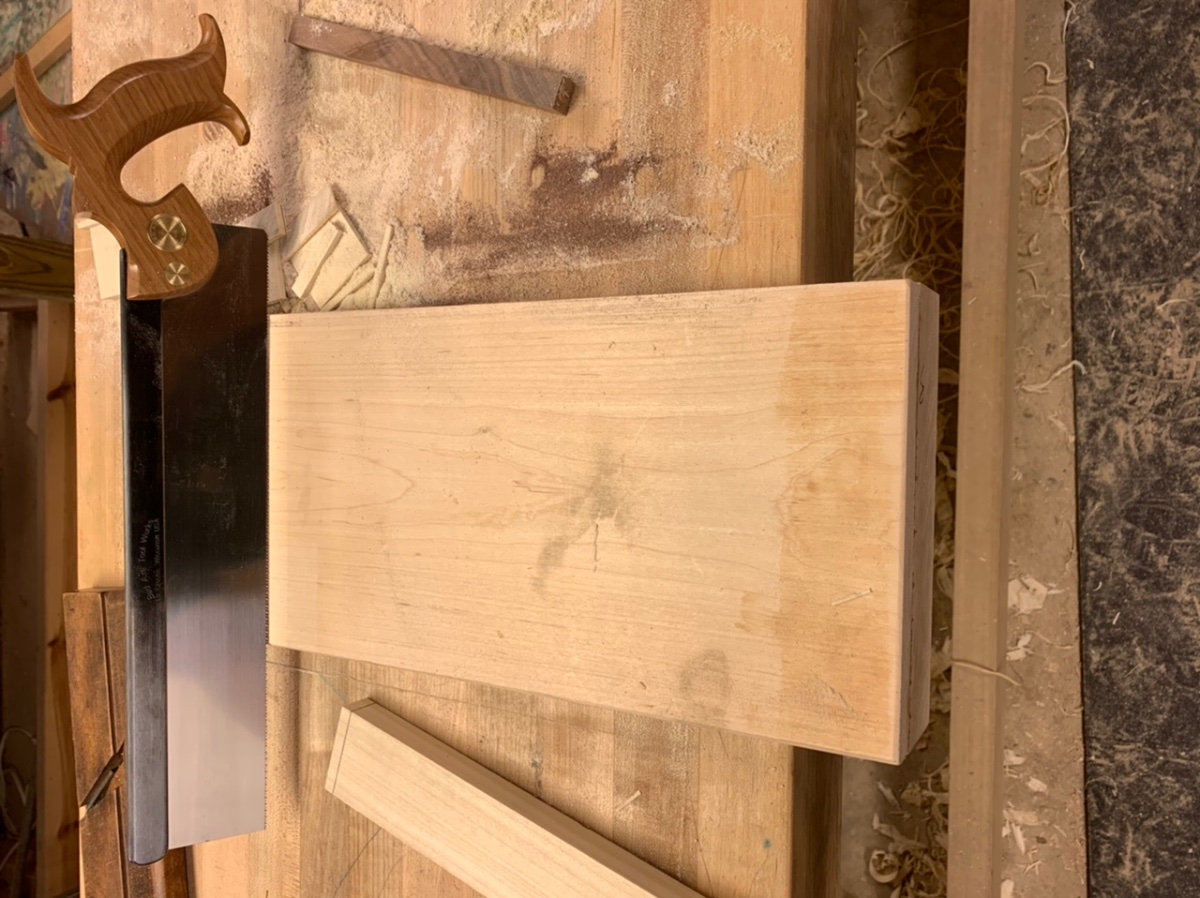
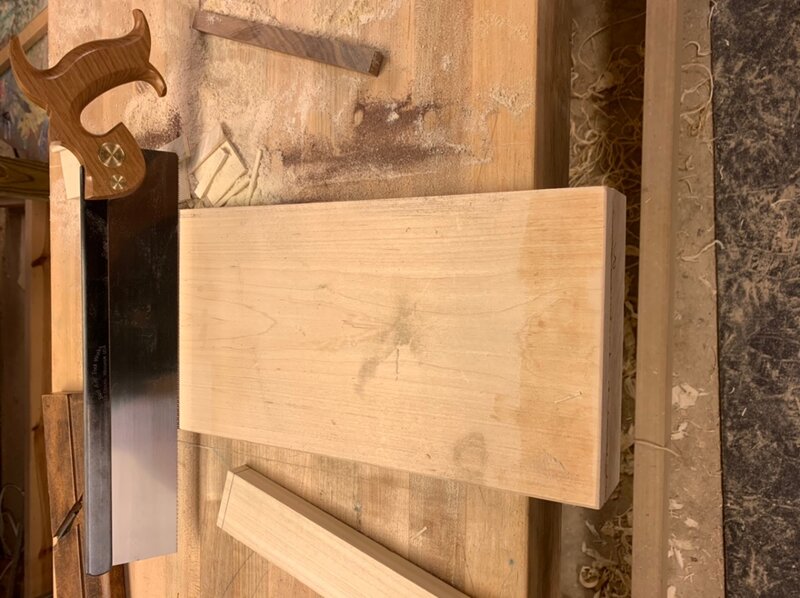
So I’ve just about cut up ever piece of scrap in my shop the past few days. Also I rehabbed the two saws I got off eBay to compare the BA against. One saw is 12” saw I filed it my normal rip configuration 5 degree of rake an 5 degree of fleam an 13ppi. The second saw is 14” filed true crosscut 15 degree rake 20 degree of fleam 12ppi. The Bad axe is 14” filed hybrid by their site is 10 degree of rake an 17 degree of fleam. So far I can say for sure the BA is the smoothest starting saw I have ever used in rip or cross cutting. Speed of cut is also very close to to the same performance as the saw set up to do the operation. In the rip test I chose a 2” wide piece of red oak with a base line at 1 1/2” deep cut. The BA did this in 5 strokes. The rip saw did it in 5 strokes also. The crosscut was 9 strokes respectively. All left a nice cheek surface on the board. The crosscut test I went with a 4” wide 3/4 thick piece of soft maple. The BA did good smooth start very easy to stay on the line. The surface left behind was much better than the rip tooth at about the same speed of cut. The crosscut left the best end grain surface an the fastest but not by much if any. I post some pics later. So what are my thoughts the BA holds it on in every way. Where it really shines is the smoothness of starting the cut. The saw requires a very little touch almost effortless it glides thru like it is on rails. What that does mean for the user I honestly think anyone will be able to start on a line with ease. The hardest part or learning curve with hand sawing is getting a saw to start an cut to your line. This saw will almost do that on its own. Now is the hybrid pattern the best results for every type cut well no. Now if I hadn’t done it right next to a saw set up for the task I don’t think I could tell any difference. I would recommend this saw to anyone including a sawing newbie. So much worth the wait. PS If anyone knows how he gets a saw sharpened to cut so effortlessly an still cut super fast I wanna know!!!!
-
Dang I should have tried that. I normally just take the easy way out when it comes to dealing with any kind of CS. An just don’t contact them most of the time it’s not worth getting even madder about the problem. ?♂️
-
Remember a few months ago the same thing happened to mine. Our discussion on it is over in power tool section. I had not cut a whole lot with mine before it broke maybe 20 or so.
-
Welcome to the forum
-
Great job looks way better than the first pic. The tapers add to the piece just to let you know it’s not just a factory piece
-
It came in the mail today. This is a big saw I’ve got a couple 12” saw so I didn’t think much about going to a 14”. Man this thing is huge holding it against my LN. I do have to say that it is very nimble for its size. With the few cuts I’ve made with it so far the extra length really helps it want to cut straight. Now cutting plumb is taking so getting use to the weight helps it fly thru the cut but the smallest grip pressure throws it off vertically. Luckily it’s to the waste side for me. The horns on the handle fit perfectly to my hand. The handle is thinner than me LN but the hump an middle of the handle fair bit wider than the LN tenon saw. It’s very comfortable in the hand I think that is what makes it so responsive in the cut. Now this is the sharpest saw I have ever cut with so smooth you can’t even tell it’s cutting before you know it. The saw to the right of the BA is a LN tenon saw 10ppi 12” beast of a saw. The BA dwarfs it in size an weight. So far I’m very happy only regret is not doing the walnut upgraded handle?. More work to do with this saw to come.


-
That turned out great. I was wrong about the beveled drawer fronts I nice detail to the piece.
-
No it just goes to show that you must be careful what an how you say something. You never know what others maybe going thru at that time. Even in passing jest
-
I’m sorry if the comment come off brute that wasn’t my line of thinking. I don’t want to imagine that kind of pain an loss they are going thru. You are correct it is just a saw I was just relaying a change in shipping status.
-
Just bouncing ideas around with shop time being slow right.
-
Exactly my thoughts make a test sample an try it out. I’ll have this great idea in my head then when I get to the real thing I don’t like it.
-
Making progress looks great
-
How much of a bevel? A sharp bevel maybe only come like a 1/8” sharp bevel would be interesting. Now just my opinion but with as many drawers along the front of this dresser I think it would distract to much from the clean lines you have in the pieces now. An with you grain matching across the whole front an the curved top rail the bevels would take away from that to JMHO. Just an idea what do you think since you have some extra thickness. Could you resaw the front to book match to rows of drawer front in pairs down the case. That would probably put the web frames slightly proud of the drawers. That would give it a apothecary chest look to it tho.
-
Well I got the email today the saw is finished and will ship out Tuesday. My patience had wore thin the last few days. I started ebay shopping for more saw to refurbish to kill the time well now it is here. So guess I’ll put the eBay finds up on a shelf for awhile as I give the BA an good test run
-
I need to get me or make a dowel plate that reminds me
-
I like the doweled drawers simple but still shows craftsmanship.
-
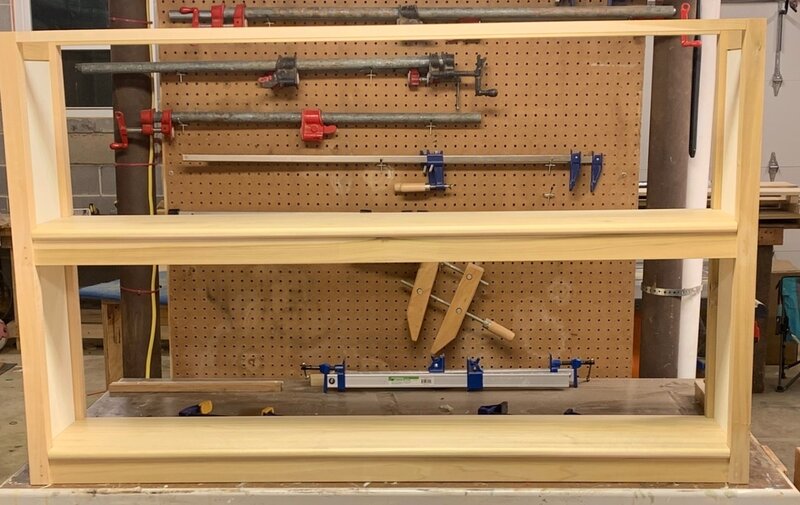
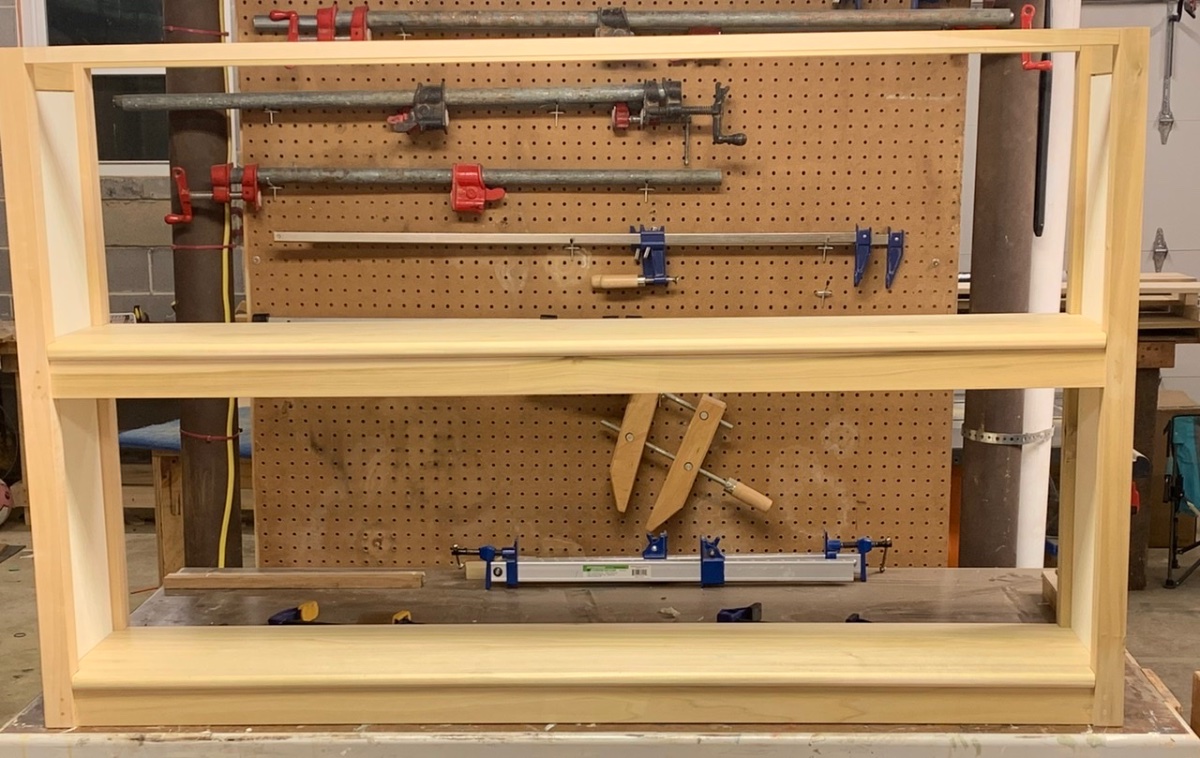
It’s been a minute since I updated this thread. I have really worked on the bookcase much. Been doing a few other projects around the shop. Built a couple shop drawers an some drawer organizer. I did work on the shelves a today. I got them notched to fit in the case. Not as close of a fit as I would like but the layers of paint should narrow them down some. I will finish the shelves separate of the case to ease with the painting. They will be joined the the rails they are sitting on with pocket screws( yes I do own one?). Got a few touch up spots to hit then painting?. I will probably start the beaded t&g back panel between paint coats.