Every purchase made through our Amazon Affiliate Page helps support this site

Tmize
-
Posts
1,430 -
Joined
-
Last visited
-
Days Won
26
Content Type
Profiles
Forums
Downloads
Gallery
Events
Store
Articles
Blogs
Everything posted by Tmize
-
Nothing worse than waiting on tools. You coming along good the dry fit looks great.
-
I basically do something close to that now. I use my Mdf out feed table stack the dado stack on it an run a scrap next to it. I may try that tho I’ve got some 1/2” rod at work I could use.
-
I thought the dado part was cool. That an being able to slide it down an keep your setting. To bad they don’t make it for my rigid table saw. I don’t see me buying a powermatic or a saw stop ever so guess I’m out. Though I’ve always struggled a lil with sizing my dado stack perfect.
-
Nah he has plenty of time ?
-
Gator sounds familiar
-
Sounds like they must have gotten better. The last set I bought was 10 years or more ago an they were crap. I don’t remember the brand but it was whatever was being advertised a bunch at the time.
-
 Thats my bad the last pic you showed is correct. I got turned around on the first pics.
 -
The Narex are good chisels. Considering how much use you have had with them I wouldn’t spend a great deal of money on a set. For the money they are the best dollar for dollar. You can step up to their premium line for not much more money. They are much better handle shape an fit an finish. Sharpening is extra expensive when first starting out. The way I started out with a cheap Chinese double sided diamond stone. It was 600 grit on one side 1200 on the other. It worked good for awhile. Now for a more permanent starter I would do a Norton two sided water stone. Will last longer an better quality polish. To finish off go to a hobby store a buy a cheap piece of leather scrap an some green honing compound. Yes flatten the back an polish it up to the same level as the bevel. The narex chisels come with some kind of coating like plastic on the blade it sucks to try a remove. I still have most of it still on my set I have. Also many people have experienced the edge to crumble easily the first couple sharpening but goes away after 3-4 sharpening. From what I’m told it is the heat treating they do to the steel.
-
It’s backwards flip the blade around the chipbreaker should go on the flat back of the blade. The bevel of the blade an the bevel of the chipbreaker should by angled toward each other
-
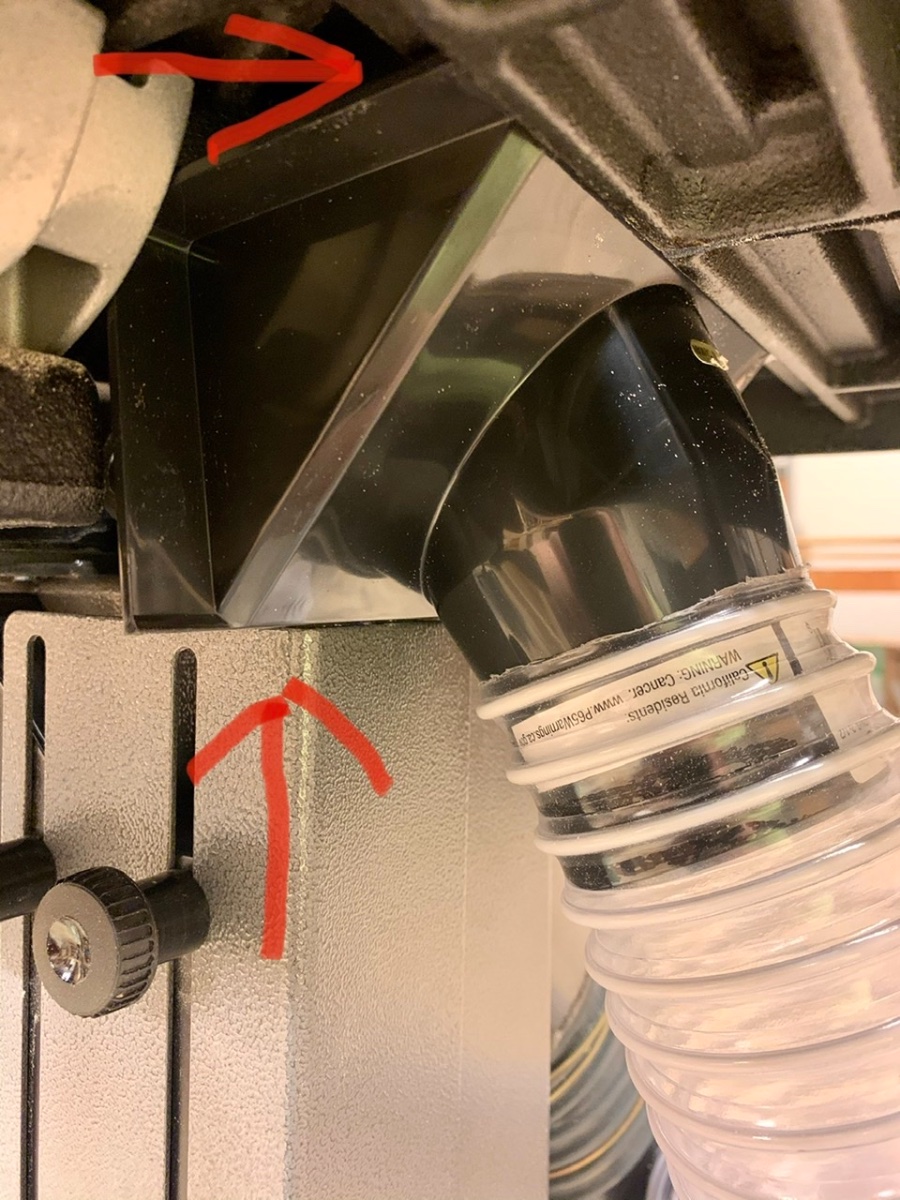
I love my basement shop in the heating an cooling dept. I just cut a vent into the main duct passing thru ?. That an Alabama doesn’t really get cold so I’d say the coldest my gets is around 60.
-
Axiom Stratus Air Cleaner/Air Filtration....
Tmize replied to RxR Sawdust Station's topic in Power Tools
Jack leg is a old common name we still use in the south for what most call DIY now. Basically with out any basic training or knowledge on something to make it work an performs the function needed at that time. Not always with safety an longevity in mind. -
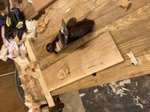
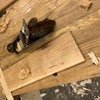
Try out this link for readjust the carriage insert in the plane. https://workingbyhand.wordpress.com/tag/gage/ You may need to flatten the plane wooden body first. You do not need to get it perfectly flat just so it has no rock. If you are pulling that thin of a shaving as is it will not take much work. By the length of the plane it’s a trying plane. In normal use .004 is as fine of a shaving that it should ever take. My jointer/trying planes are set up to take a shaving between the thickness of a piece of notebook paper .005 to card stock .01 in thickness. When you you get thickness thinner than that you are just trying to hard on a plane that long to get the board any flatter. The board will move more than those tolerances over the course of a few hours. The reason you see people taking half a thousandth shavings is either trying to remove tear out or playing around/ showing off. If you want to learn to control the tear out even in a long plane learn to use the chip breaker. By setting very close to the edge even on that thickness of shavings will help. There is a lot of good info out very on the subject. David Weaver was a big pusher of the subject many years ago. An also a video done by some scientists in Japan. It shows up close photos of the testing at different sets of the chipbreaker to blade. Most will tell you it is only good if you are taking fine finish cuts but I’ve had some good luck on my medium duty planes also using this technique. ps. Just a warning I really like planes so if you get me started I will compete with you on long winded posts ?
-
Axiom Stratus Air Cleaner/Air Filtration....
Tmize replied to RxR Sawdust Station's topic in Power Tools
I have a jack leg air filtration. I have couple 20” box fans with a low micron filter around the shop hanging from the ceiling around my fine dust makers. I keep them running on high all the time. Does a good job of keeping at least the dust I can see non existent. Now do I think this is best well no. But is a cheap option til you save up for the correct thing. -
Me either I better get started I’m slow
-
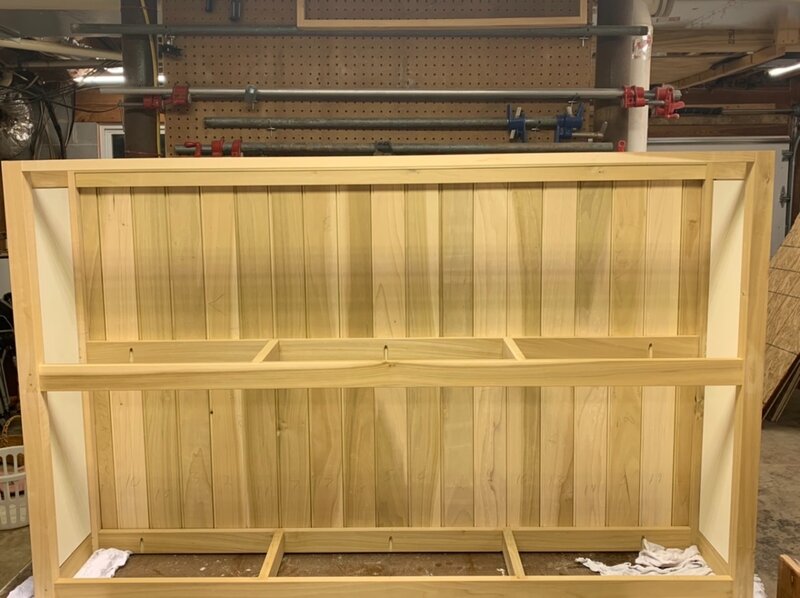
It’s been a interesting build. It’s turned out great.
-
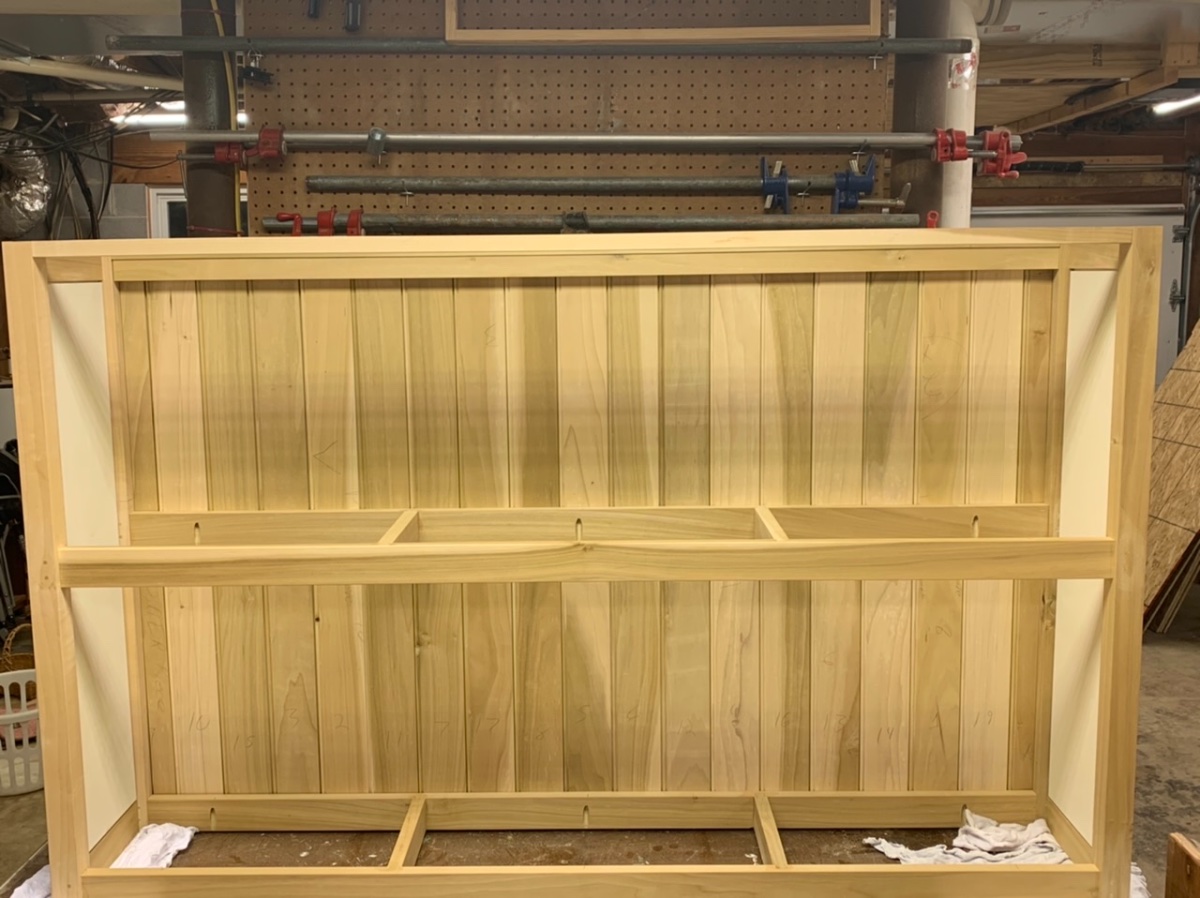
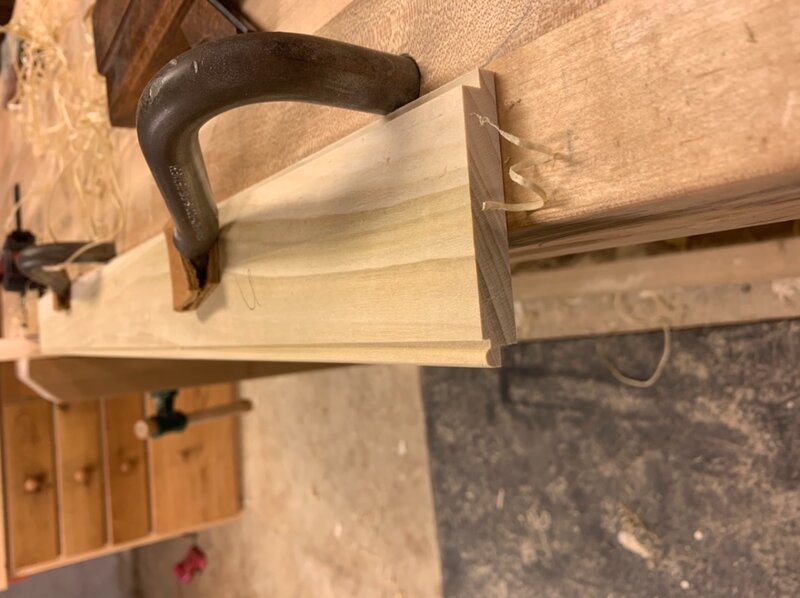
Well I got the back built finally. Just loosely screwed into place. Still have to plane them before painting. I think I had said earlier in this thread they would be T&G I got looking my planes an I didn’t have the tongue plane for the board thickness at 1/2”. So I did a shiplap panel with a nickel as a spacer between boards. I put a half round notch in one of my card scraper to match the profile of the beading plane. All my grooving type plane irons have a 15 degree back bevel on them to help with tear out. So i don’t have to worry as much about grain direction which is problem I run into mostly with drawers. Problem is at that high of a cutting angle it can leave the surface fuzzy which is better than tear out. So the scraping it brings it back to life.

-
Here is a few pics of proof to show I haven’t just been goofing off
-
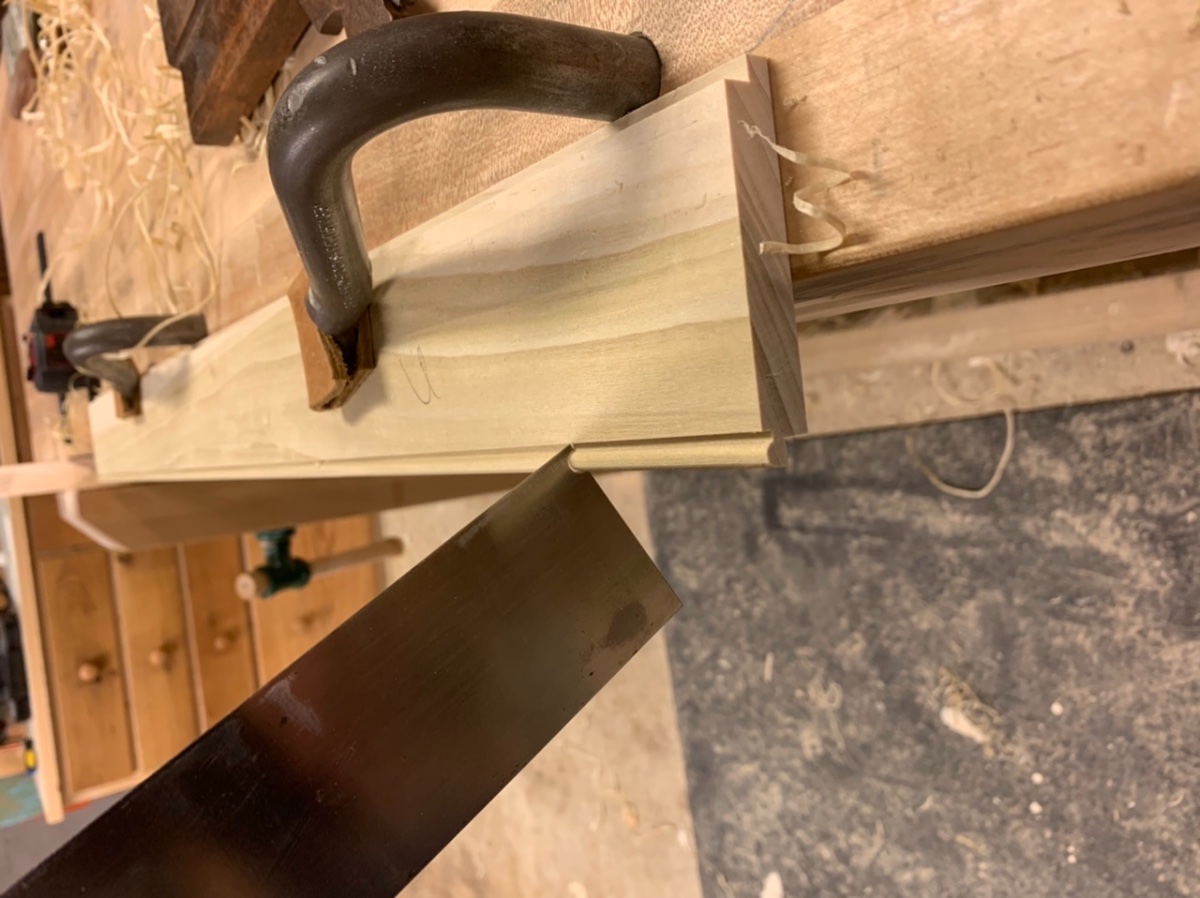
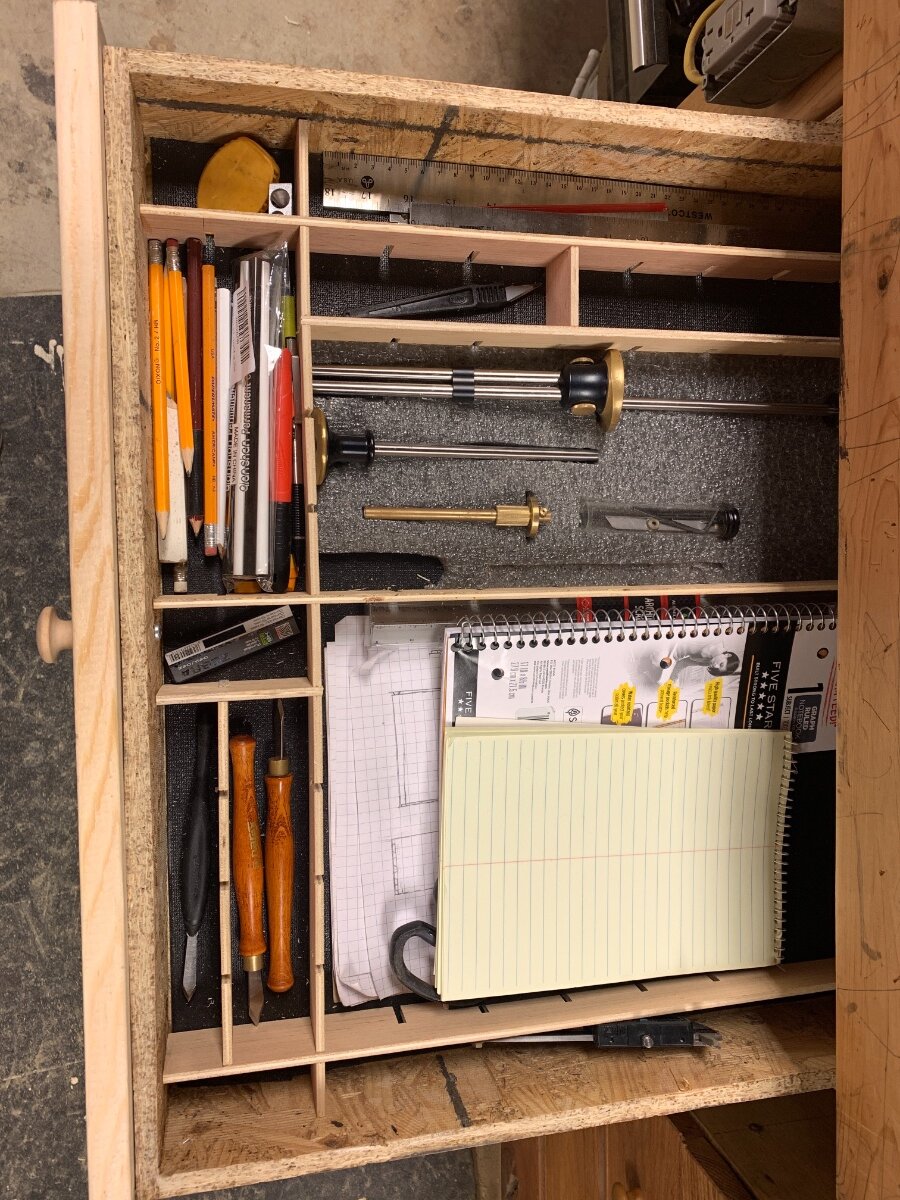
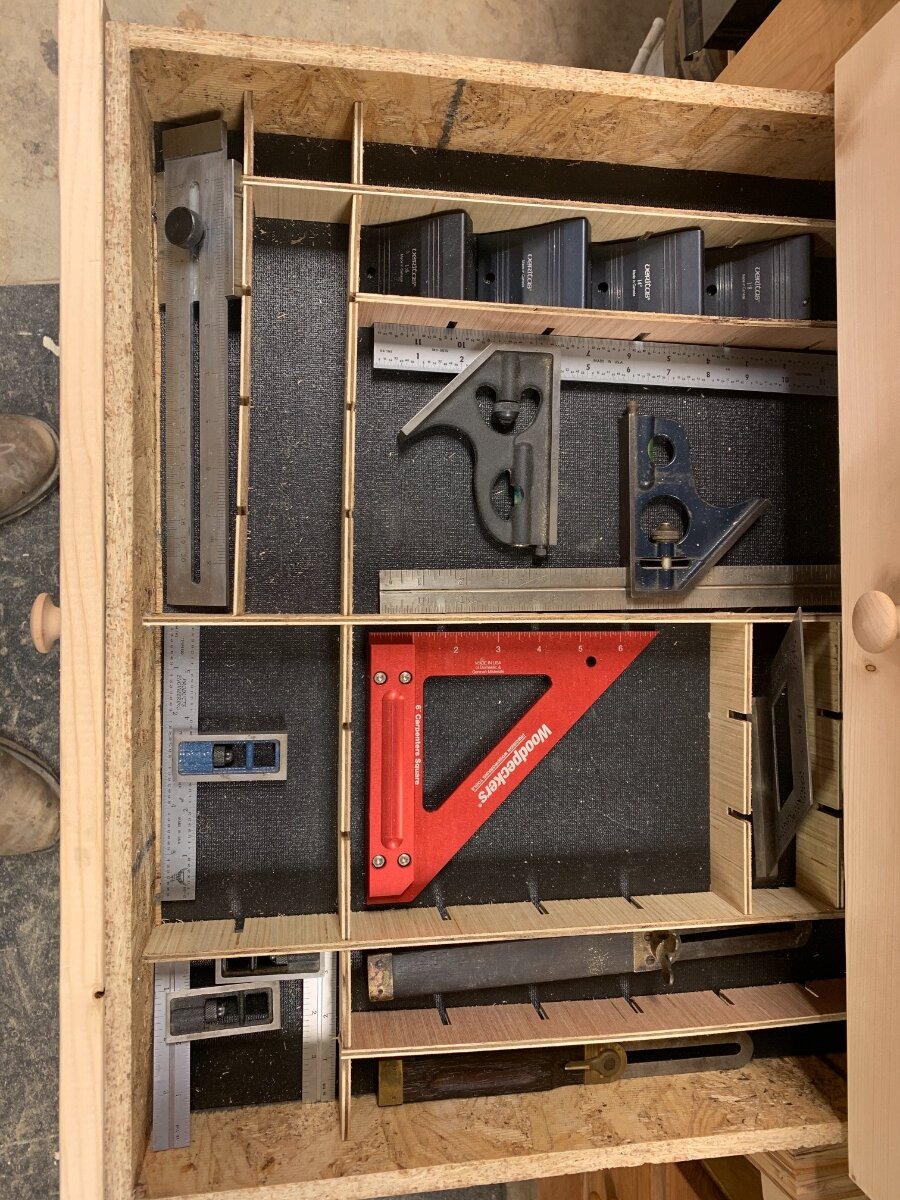
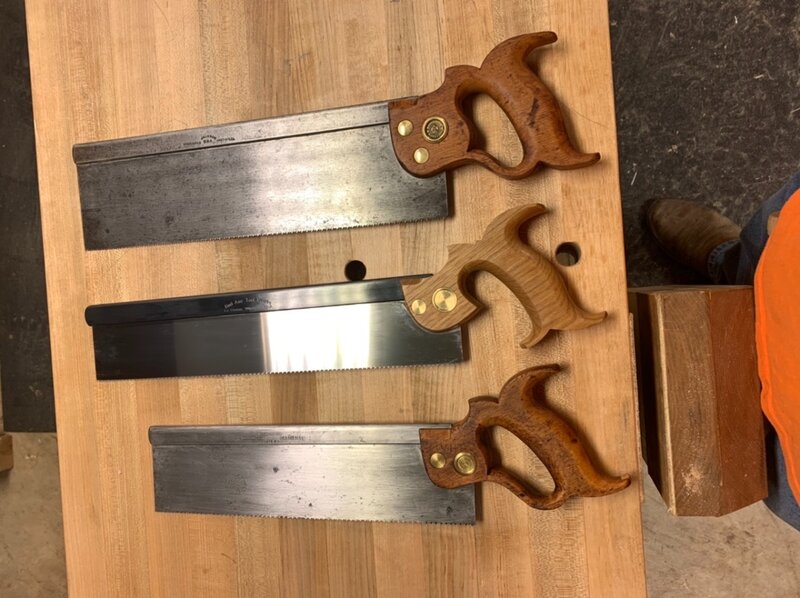
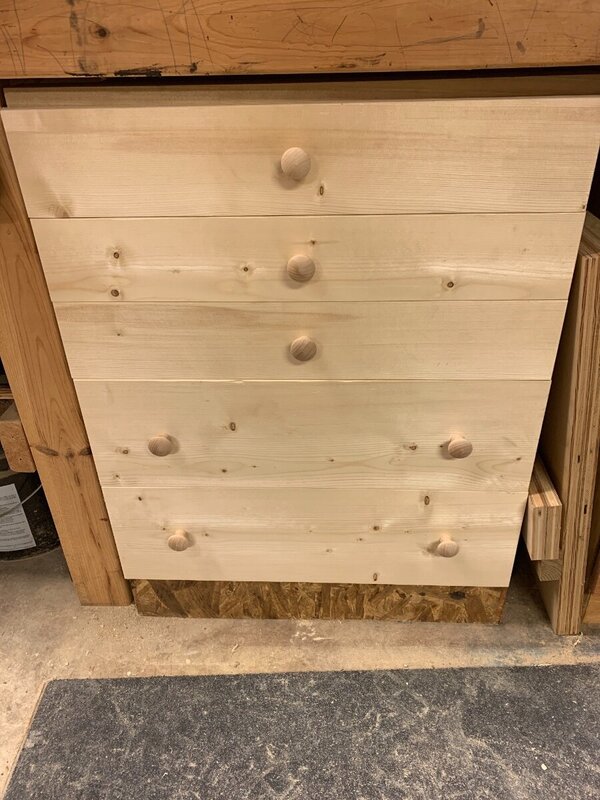
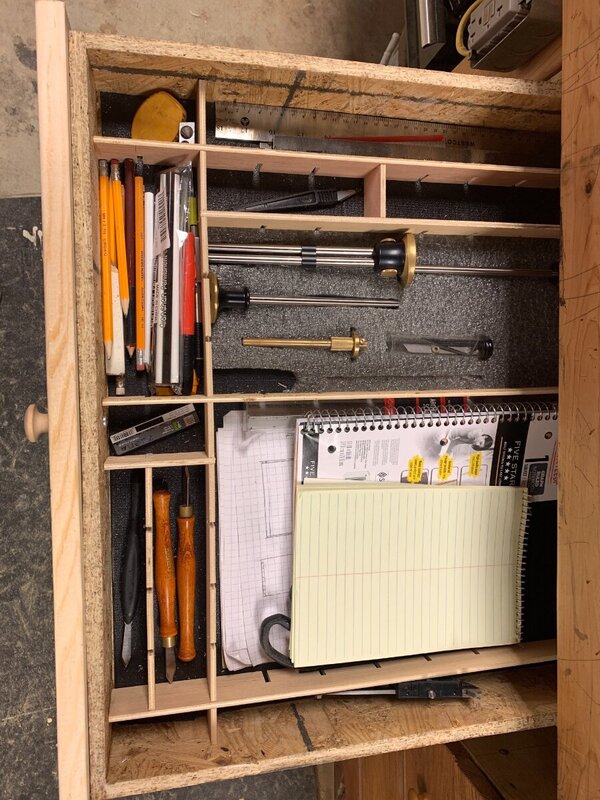
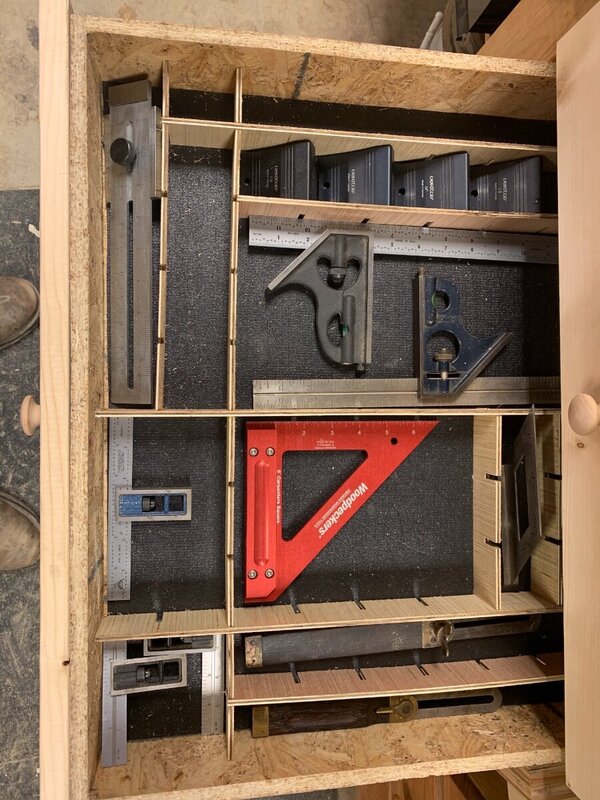
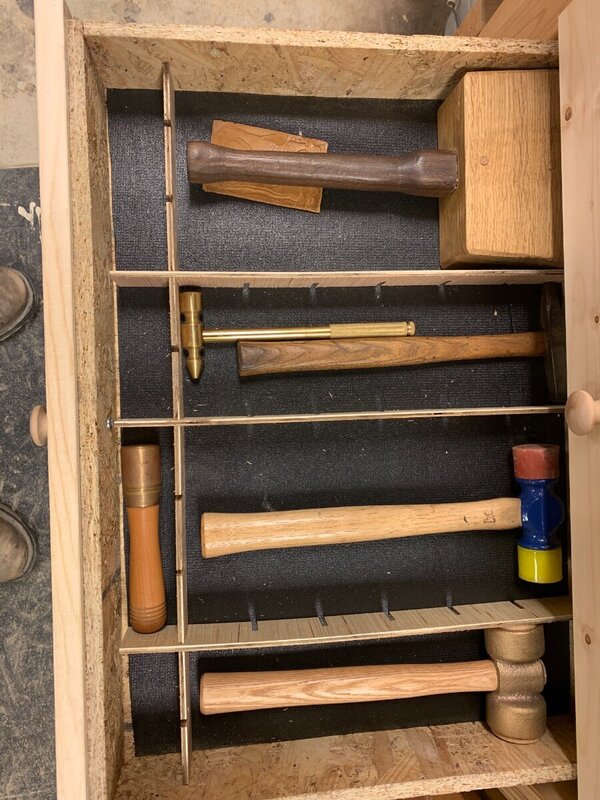
Well new old tools refurbished two back saws. My bad axe carcass saw came in also. Built a shop cabinet to hold more tools. Rearrange placement of some thing in drawer around the bench. Made so cheap drawer organizer an put down some anti rust mats in the bottom of all the drawers that hold metal tools. Lots of small little things to keep me busy.
-
Happy Marine Corps 245th Birthday?
Tmize replied to RxR Sawdust Station's topic in General Discussion
Happy birthday an thank you all -
I had planned on using magnets to hold it in place. So far I haven’t had to use them. It is just wedged between a web in the cast iron table an the adjustable blade guard.
-
I bought the same blade when I got the saw from woodcraft. It’s a fine blade I ran it for a little bit it’s my spare now.
-
Yes an no with it not being fastener down I can adjust it when I tilt the table by sliding the blade guard down to hold it. Now I haven’t tested this theory yet.
-
I normally just pick thru scrap pile also. On my bench build a few months ago. I built a set of heavy duty cauls for the top glue up. I used slotted unistrut an 3/8” all thread to squeeze down with jamb nuts an ratchet to adjust the pressure.
-
I actually broke my 1/2” the other night. It scared the hell out of me. I was re-sawing a log I had been drying. Pushed it a little to hard. So I’m replacing that one an figured I would add a couple blades to the order.
-
What brand an size width an tooth count does everyone use. I’ve been using highland woodworking woodslicers blades in 3/4” an 1/2”. These blades are designed for straight cuts an re-sawing. I really like these blades for what I do an leave a clean surface. What they don’t do is allow me to cut any kind of curve. I don’t think I’ll be doing any scroll work or anything. I would like to do curves on furniture rails or bandsaw boxes an I want to try the little reindeer this year. I figured i would need a couple different sizes or would a 1/4” do it all?